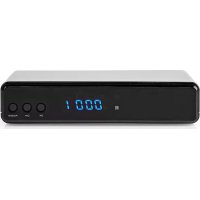
DVBS2265BK - Receiver NEDIS - Free user manual and instructions
Find the device manual for free DVBS2265BK NEDIS in PDF.



| Product type | DVB-S satellite receiver |
| Brand | Nedis |
| Model | DVBS2265BK |
| Power supply | 12 V DC 1 A power adapter, input 100-240 V~50/60 Hz |
| Power consumption | Max. 12 W |
| Tuner | 950-2150 MHz, 75 Ω impedance, input level -65 ~ -25 dBm |
| Demodulation | QPSK/8PSK, FEC 1/2 ~ 9/10 |
| Connectors | LNB input (F), HDMI, mini-AV (CVBS+G/D), USB 2.0, LAN, RS-232, DC IN |
| Video formats | PAL, NTSC, 720p, 1080i/p, 480i/p, 576i/p |
| Video codecs | MPEG-1, MPEG-2, MPEG-4/H.264, H.265 |
| Audio codecs | MPEG-1 layers 1-3, MPEG-2, AAC, HE-AAC, stereo |
| Aspect ratio | 4:3, 16:9 |
| Main features | DVB-S digital TV reception, USB recording and playback, electronic program guide (EPG), teletext, favorites list, blind/full search |
| Remote control | Infrared with numeric keys, navigation, volume, mute, etc. |
| Front display | LED channel number display |
| Protection | Double insulation, do not open, do not expose to water or heat |
| Maintenance | Clean with a soft dry cloth, no cleaning products |
| Operating temperature | Indoor use only, avoid heat sources |
Frequently Asked Questions - DVBS2265BK NEDIS
User questions about DVBS2265BK NEDIS
0 question about this device. Answer the ones you know or ask your own.
Ask a new question about this device
Download the instructions for your Receiver in PDF format for free! Find your manual DVBS2265BK - NEDIS and take your electronic device back in hand. On this page are published all the documents necessary for the use of your device. DVBS2265BK by NEDIS.
USER MANUAL DVBS2265BK NEDIS
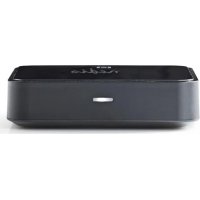
Receives signals up to 1080P
DVBS2265BK

EN Quick start guide 6
DE Kurzanleitung 11
For more information see the extended manual online:ned.is/dvbs2265bk
Intended use
- The Nedis DVB-S Set Top Box allows you to view DVB-S Digital Television broadcasts on your TV and is exclusively meant for this purpose.
- The product is intended for indoor use only.
- Any modification of the product may have consequences for safety, warranty and proper functioning.
Parts list
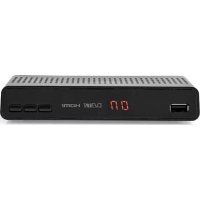
Front Panel [see image A]
| ① LED display Channel number indicator. |
| ② Change channel button Channel down. |
| ③ Change channel button Channel up. |
| ④ Power button Set Top box on/off switch. |
Rear panel [see Image B]
| ① LNB IN Satellite dish cable connection. |
| ② USB port USB flash drive connection (record / play video files). |
| ③ HDMI OUT Digital connection (TV or AV-receiver). |
| ④ AV Analogue mini AV socket (CVBS+L/R) |
| ⑤ RS-232 Serial port for firmware upgrade. |
| ⑥ LAN Ethernet cable connection (home network). |
| ⑦ DC IN Mains adapter connection. |
Remote control [see image C]
① Switch on or switch to standby mode.
② Function keys
③Fast Rewind.
Fast Forward.
⑤ Start or pause playback.
⑥ Stop playing or recording.
⑦ Displays Teletext information.
⑧ Select Subtitle language.
⑨ Open main menu.
⑩ Navigation.
⑪ Navigation.
⑫ Electronic Program Guide.
Volume+ button
(14)Volume- button
15 Go to a specific time within media playback.
⑥ Mutes and restores audio.
⑰ Skip to previous.
⑱ Skip to next.
Toggles Repeat in playback mode or Select Satellite.
20 Shortcut to Record Manager.
21 Selects Audio Mode or Language.
② Switch to the previously viewed channel.
Switch to the previously viewed channel.
② 3 Shows description of current program.
24 Set or confirm.
When not in menus or settings, OK opens the channels list.
②5 Navigation.
②6 Navigation.
(27) Exits current menu or returns to previous menu.
28 Channel up.
⑨ Channel down.
③ Shows Favorites Menu.
③1 Record current program.
③ 2 Select channel or setting.
③ Toggles TV and Radio.
Safety
Safety instructions
WARNING
- Only use the product as described in this manual.
- Make sure that the product can dissipate its heat.
-Do not block ventilation openings and make sure that there is enough space around the product.
-Do not use near radiators, stoves and other heat-producing apparatus, such as amplifiers.
-Do not use in hot environments.
- Do not expose the product to direct sunlight, naked flames or heat.
- Do not expose the product to water or moisture.
-Do not use liquids on or near the product.
-Avoid splashing and dripping.
-
Do not attempt to directly connect to a mains power outlet. This will permanently damage the set top box and may result in serious injury or death.
-
Do not use extension cables to connect a flash drive to avoid read/write errors and interference.
-
This product is powered through a polarizing power plug in some markets. Do not use the set top box if the power plug does not fit your mains wall outlet and consult a local electrician.
-
Make sure the electrical cord is out of the way and does not bend near the connections. Do not pinch the cord, do not walk over it and do not place heavy objects onto the cord.
-
This product contains no user-serviceable parts. Do not open the product.
-
Have the product serviced by qualified service personnel when: -The product has been damaged in any way, especially the power cord or plug.
-
The product does not operate normally.
-
Liquid has been spilled or objects have fallen into the product.
-
The product has been dropped.
-
Do not use a damaged product.
-Replace a damaged or defective product immediately.
-
Disconnect the product from the power outlet and other equipment if problems occur.
-
Disconnect the product from the power outlet during lightning storms or before prolonged periods of disuse.
-
Only clean the set top box with a soft clean cloth.
-Do not use cleaning agents.
Safety symbols on the product

This symbol means risk of electric shock when not adhering to the instructions in this manual.

This symbol means that important operating and maintenance instructions are given in this manual.

The product incorporates double insulation between hazardous mains voltage and user accessible parts. When servicing, use only identical replacement parts.
Also refer to the information on the bottom of the enclosure for electrical and safety information before installing or operating the product..
Installation
Connect the product [see image D]
CAUTION
- Make sure that the voltage of your mains wall outlet matches the voltage required by the adapter.
- Disconnect all devices from mains before making any connections.
- Connect power of all your devices last.
Setup
- Turn on the product by pressing A (4)/C①.
- Make sure your TV is switched to the right input channel.
The first time you switch on the set top box, the Main Menu will appear.
- Follow the instructions on screen to change the Language and Country/Region and confirm with C②4.
- Choose the video settings and confirm.
This will take you back to the main menu.
- Use C11 and C25 to select the satellite and its properties.
- Press C② to enter the satellite search menu.
- Select the satellite to be searched.
- Choose which channels to scan for.
FTA stands for Free To Air.
- If you choose No, all channels will be scanned.
- Choose which type of channels will be scanned.
TV and Radio
- Only TV
- Only Radio
-
Select scan mode.
-
Blind
Full -
Select "Search" and press C24.
- After confirming, a list of available channels is made.
You are now ready to watch TV.
All settings you make can be edited by going to the menu with C⑨.
Navigate through the menu with C⑩⑪②5②6.
Password
- For some settings a password is required.
- The default password is 0000.
Specifications
| Tuner Frequency range | 950 - 2150 MHz | |
| Input impedance 75Ω unbalanced | ||
| Signal input level -65 ~ -25 dBm | ||
| Symbol rate 2 - 45 Mbps | ||
| LNB Power 13/18 V, max 500 mA | ||
| Demodulation Demodulator QPSK/8PSK | ||
| FEC 1/2,2/3,3/4,5/6,7/8,8/9,9/10 | ||
| Connections LNB IN F connector | ||
| AV Mini AV socket (CVBS+L/R) | ||
| HDMI | HDMI | |
| DC IN 12 V | DC 12 V, 1 A mains adapter | |
| IR | Remote control sensor | |
| USB | Connect USB 2.0 flash drive | |
| RS-232 | For software upgrade | |
| LAN | Connect to the internet | |
| Power | AC adapter | AC 100 - 240 V ~ 50 / 60 Hz |
| Power consumption | Max 12 W | |
| Display | Standards | PAL/NTSC |
| Resolution PAL, NTSC, 720p, 1080i/p, ,480i/p 576i/p | ||
| Decoding Aspect Ratio | 4:3, 16:9 | |
| Video MPEG1. MPEG2, | MPEG4/H.265 | |
| Audio MPEG1 Layer 1-3, MPEG2,AAC, HEAAC, Right - Left- Stereo | ||
| Compliance DVB-S ESI/EN 300421 DVB-T2 | ||
DE Kurzanleitung
DVB-S Set-Top-Box DVBS2265BK
- Receives signals up to 1080P
- Intended use
- Parts list
- Front Panel [see image A]
- Rear panel [see Image B]
- Remote control [see image C]
- Safety
- Safety instructions
- WARNING
- Safety symbols on the product
- Installation
- Connect the product [see image D]
- CAUTION
- Setup
- Password
- DE Kurzanleitung
- DVB-S Set-Top-Box DVBS2265BK
Brand : NEDIS
Model : DVBS2265BK
Category : Receiver