PKMA 20Li A1 - Coffee machine PARKSIDE - Free user manual and instructions
Find the device manual for free PKMA 20Li A1 PARKSIDE in PDF.

User questions about PKMA 20Li A1 PARKSIDE
0 question about this device. Answer the ones you know or ask your own.
Ask a new question about this device
Download the instructions for your Coffee machine in PDF format for free! Find your manual PKMA 20Li A1 - PARKSIDE and take your electronic device back in hand. On this page are published all the documents necessary for the use of your device. PKMA 20Li A1 by PARKSIDE.
USER MANUAL PKMA 20Li A1 PARKSIDE
text_image
PDF ONLINE www.lidi-service.com

natural_image
Exterior view of a black Parkside portable coffee maker with visible branding and handle (no text or symbols on device body)Akku-Kaff eemaschine / Cordless Coff ee Machine / Machine à café sans fi l PKMA 20-Li A1
DE AT CH
Akku-Kaff eemaschine
Cordless Coff ee Machine
Translation of the original instructions
NL BE
Accu-koffi emachine
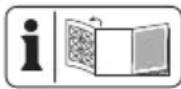
Before reading, unfold the page containing the illustrations and familiarise yourself with all functions of the device.
FR BE
GB / MT Translation of the original instructions Page
Service-Center......14
Importeur 14
Intended purpose......17
General description......18
Extent of the delivery 18
Overview....18
Functional description....18
Technical data....18
Charging time 19
Safety instructions......20
Symbols and icons 20
General safety instructions.... 20
Special safety instructions for coffee makers 21
Operation 22
Inserting/removingthe rechargeable battery 22
Charge level indicator 22
Initial start-up....22
Brewing 22
Overheating protection 23
Cleaning / maintenance .....23
General cleaning and maintenance work....23
Cleaning after every use 24
Removing deposits within the device..24
Maintenance 24
Storage / transport......24
Disposal and protection of the environment....25
Guarantee 25
Repair Service....26
Service-Center......26
Importer 26
Replacement parts/accessories...27
Troubleshooting 28
Translation of the original EC declaration of conformity .....157
Exploded drawing ......169
Introduction
Congratulations on the purchase of your new device. With it, you have chosen a high quality product.
During production, this equipment has been checked for quality and subjected to a final inspection. The functionality of your equipment is therefore guaranteed. In some cases, residual amounts of water may be present on or in the device. This is not a flaw or a defect and is no cause for concern.

The operating instructions constitute part of this product. They contain important information on safety, use and disposal. Before using the product, familiarise yourself with all of the operating and safety instructions. Use the product only as described and for the applications specified. Keep this manual safely and in the event that the product is passed on, hand over all documents to the third party.
Intended purpose
The device is intended for brewing ground coffee and coffee pods in residential applications. The machine is intended to be used by do-it-yourselfers. This equipment is not suitable for commercial use. Commercial use will invalidate the guarantee.
Any other use that is not explicitly approved in these instructions may result in damage to the equipment and represent a serious danger to the user. Use of the device in the rain or a damp environment is prohibited. The manufacturer is not liable for damage which is caused through inappropriate use or incorrect operation.
The device is part of the Parkside X 20 V TEAM series and can be operated using Parkside X 20 V TEAM series
batteries. The batteries may only be charged using chargers from the Parkside X 20 V TEAM series.
General description
The illustrations are on the front and back fold-out page.
Extent of the delivery
Carefully unpack the appliance and check that it is complete:
- Cordless Coffee Machine
- Coffee cup with lid
- Filter holder with filter
- Coffee pod holder
- Measuring spoon
- Instruction Manual

The measuring spoon is stowed in the water tank fl ap on delivery. See illustration B top right.

Battery and charger are not included.
Dispose of the packaging material properly.
Overview

1 Water tank fl ap
2 Bow-type handle
3 Water tank bow-type handle
4 Water tank overflow opening
5 Water tank
6 Coffee fi lter insert
7 Cup holder
8 Filter holder
9 Coffee pod holder
10 Coffee cup
11 Coffee cup lid
12 Guide rails for brewing chamber
13 On-off switch
14 Power indicator
15 Measuring spoon
16 Filter holder cover

17 Rechargeable battery
18 Charge level indicator soft button
19 Charge status display for rechargeable battery
20 Release button for rechargeable battery
21 Guide rails for rechargeable battery
Functional description
The cordless coffee maker features a fi lter ho- der and a coffee pod holder. It is equipped with a powerful heating unit, robust plastic housing and a carrying handle. The device is also fi tted with an automatic cut-off in the event of too little water or overheating.
Please refer to the descriptions below for information on how the operating elements work.
Technical data
Cordless Coffee
Machine....PKMA 20-Li A1
Motor voltage U....20 V=
Protection class ....III
Protection type IPXO
Weight
(without battery and charger) ..... 1.4 kg
Water tank volume....240 ml
Water level
marking .. 120ml, 160ml, 200ml, 240ml
Coffee cup volume ....240 ml
Usable coffee pod type....∅ 60mm
Dimensions (L x W x H)
(without battery)...253 × 141 × 227 mm
Heating time
4 Ah battery for 240 ml..approx. 6 min.
Battery run time
2 Ah battery ....up to 2 cups (150 ml each)
4 Ah battery ....up to 4 cups (150 ml each)
8 Ah battery ....up to 8 cups (150 ml each)
Temperature..... max. 50 °C
Charging process....4-40 °C
Operation....-20 - 50 °C
Storage....0-45 °C
Charging time
The device is part of the Parkside X 20 V TEAM series and can be operated with batteries of the Parkside X 20 V TEAM series.
Batteries of the Parkside X 20 V TEAM series may only be charged using chargers of the Parkside X 20 V TEAM series.
We recommend that you operate this appliance with the following batteries only:
PAP 20 A1, PAP 20 A3, PAP 20 B1, PAP 20 B3
We recommend charging these batteries with the following chargers:
PDSLG 20 A1, PLG 20 A1, PLG 20 A3
An up-to-date list of battery compatibility can be found at: www.lidl.de/akku
| Charging time (min) | PAP 20 A1 PAP 20 B1 | PAP 20 A2 | PAP 20 A3 PAP 20 B3 | Smart PAPS 204 A1 | Smart PAPS 208 A1 |
| PLG 20 A1 PLG 20 A4 PLG 20 C1 | 60 90 | 120 120 210 | |||
| PLG 20 A2 45 | 60 80 80 165 | ||||
| PLG 20 A3 PLG 20 C3 | 35 45 | 60 50 120 | |||
| PDSLG 20 A1 | 35 45 | 60 50 120 | |||
| Smart PLGS 2012 A1 | 35 40 | 40 40 | 50 |
Safety instructions
This section describes the basic safety rules when working with the cordless coffee maker.
Symbols and icons
Symbols on the appliance:

This device is suitable for coming into contact with food-stuffs.
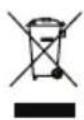
Electrical appliances must not be disposed of with the domestic waste.

Read the instruction manual carefully.

Hot surfaces!
There is a danger of burns!

On-off switch

Power indicator
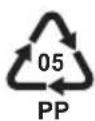
Dispose of polypropylene components properly.

This device is part of the Parkside
X 20 V TEAM series.
Symbols in the manual:

Warning symbols with information on damage and injury prevention.

Instruction symbols with information on preventing damage.

Help symbols with information on improving tool handling.
General safety instructions

IMPORTANT READ THE OPERATING INST- RUCTIONS CAREFULLY. STORE THE OPERATING INSTRU- TIONS FOR LATER REFERRAL.

This device may cause serious injury if used improperly. To avoid personal injury and damage to property, read and comply with the following safety instructions and familiarise yourself with all control elements.
Preparation:
- Read the operating instructions carefully.
- This device can be used by children aged 8 years and up as well as individuals with reduced physical, sensory or mental abilities or a lack of experience and knowledge if they are supervised or have been instructed in the safe use of the device and understand the resulting hazards. Children must never play with the device. Cleaning and user maintenance must not be carried out by children unless they are 8 years of age or older and supervised.
- The device must be kept out of reach from children younger than 8 years old.
• The surfaces of the device can
become hot during operation. Do not touch any hot surfaces. There is a risk of burns!
- Do not submerge the device and battery in water or other liquids under any circumstances. This can cause a fire or electric shocks.
- Allow the device and battery to cool down before removing or attaching parts, or cleaning or storage.
- Do not place the device on or near to hot surfaces.
• Always turn the device off before removing the battery. - Only use the device to brew coffee.
- The water tank lid must not be opened during the brewing cycle. There is a risk of burns!
- Do not remove the filter holder or coffee pod holder during operation under any circumstances. This can lead to burns.
- All maintenance and repair work must only be performed by an authorised customer service centre.
- Remove the battery from the device before storing or carrying out any work on the device. This preventive safety measure reduces the risk of the device being switched on unintentionally.
- Replace worn or damaged information signs immediately.
- Do not use any accessories that are not recommended by PARKSIDE. This can result in electric shock or fi re.

Observe the safety information and notes on charging and proper use as shown in the instruc-
tion manual for your bat- tery and charger from the Parkside X 20 V Team se- ries. A detailed description of the charging process and further information can be found in the separ- rate operating instructions.
Special safety instructions for coffee makers

Observe the following instructions to avoid the risk of scalding:
- Do not remove the fi lter holder/coffee pod holder during the brewing cycle. There is a danger of burns from the hot steam.
- Please be aware that hot coffee may drip from the underside of the fi lter holder/ coffee pod holder even after the brewing cycle is complete.
- Wait at least 5 minutes after the brewing cycle ends before removing the fi lter holder/coffee pod holder.
- If you wish to start another brewing cycle, wait at least 5 minutes before re-filling the device with water. Otherwise steam and hot water may flow out and cause scalding.
- Do not touch the plate on the underside of the device during or directly after brewing.
- Do not use any liquid other than water for brewing.
- Always use cold water for brewing. Hot water increases the drip speed and leads to overfl owing of the filter holder/coffee pod holder.
- The maximum water tank volume totals 240 ml. Do not pour too much water into the water tank (B 5). Excessive water may run out of the overflow opening (B 4).
- Do not allow water to stay in the tank for longer than 24 hours.
GB MT
• After use, the surfaces of the heating element may contain residual heat. There is a risk of burns.
Operation
B Inserting/removing the rechargeable battery
- To insert the battery (17) into the device, push the battery (17) along the guide rails (21) into the device. You will hear it click into place.
- To remove the battery (17) from the device, press the release button (20) on the battery (17) and pull the battery (17) out.
B Charge level indicator
The battery charge status indicator (19) shows the charge status of the battery (17).
The charge level of the battery (17) is indicated by illumination of the corresponding LED light. To see this, press the soft button (18) on the battery charge level indicator (19).
3 LEDs illuminated (red, orange and green): Battery charged
2 LEDs illuminated (red and orange):
Battery partially charged
1 LED illuminated (red):
Battery needs to be charged
Low battery voltage:
If the remaining battery capacity is too low, the device will not work. The power indicator (A 14) fi rst fl ashes quickly as in brewing mode and then changes to a slow fl ash. Remove the battery (17) from the device and charge it.
Initial start-up
If you are using the device for the first time or if it has been in storage for a long time, perform the following steps:
- Remove all packing material from the device.
- Clean the device housing and wash all removable parts (see section "Cleaning after every use").
- To remove any residues from the device, pour 240 ml fresh water into the water tank (A 5) and boil the water without coffee grounds/coffee pod in the filter (A 8/9) until the water tank (A 5) is empty. Repeat the same process at least twice. (See the section "Brewing" for information on brewing)
B Brewing
To reduce the risk of scalding, observe the section "Special safety instructions for coffee makers"
- Open the flap of the water tank (1) and remove the water tank (5) using the bow-type handle (3).
- Pour in the desired volume of fresh, cold water into the water tank (5) and slide the water tank into the device until it clicks into place.
| Type | Recommended volume of water |
| Coffee grounds (6.5 g *) | 160 ml |
| Coffee pod (60 mm type) | 120 ml |
* Corresponds to the volume of the supplied measuring spoon (15).
- Close the water tank flap (1).
- Remove the fi lter holder/coffee pod holder (8/9) by pulling it forwards out of the guide rail (12).
- Observe the following procedures depending on the type of coffee:
Coffee grounds:
Open the cover of the fi Iter holder (16). Remove the coffee fi Iter insert (6) from the fi Iter holder (8) using the bow-type handle. Insert the desired amount of coffee grounds into the coffee fi Iter insert (6). Replace the coffee fi Iter insert (6) in the right position using the bow-type handle and close the fi Iter holder cover (16).

Only use the enclosed coffee fi lter insert for brewing (6). The appliance is not designed for use with paper fi liters.
Coffee pod:
Place a coffee pod into the coffee pod holder (9).
- Make sure that the fl at surface of the coffee pod is facing up when placing it.
- Do not use torn coffee pods.
-
Do not insert more than one coffee pod at a time. This would result in overfl owing hot water.
-
Hold the fi liter holder/coffee pod holder (8/9) by its handle and insert it into the device guide rails (12) with the fi lling opening pointing upwards. If the fi liter holder/coffee pod holder cannot be properly inserted into the compartment, check whether the coffee fi liter holder (6) or coffee pad is properly inserted.
-
Place the lid (11) onto the coffee cup (10) and place the cup onto the cup holder (7).
-
Press the on-off button (13). The power indicator (14) fl ashes and brewing begins.

If the power indicator (14) fl ashes fi rst quickly and then slowly, the battery is empty and must be charged.
- Once the brewing cycle is complete, the device will switch off automatically and the power indicator (14) will go out. Press the on-off button (13) if you want to cancel the brewing cycle.
- Dispose of the coffee grounds and used coffee pods properly.

If the fi lter holder/coffee pod holder (8/9) overfl ows du-ring the brewing cycle, this can be caused by various factors. In this event, observe the information in the "Trou-bleshooting" section
Overheating protection
If the device does not start, the battery (B 17) or device is overheated. In this event, allow the battery (B 17) and device to cool down before re-pressing the on-off button (A 13).
Cleaning / maintenance

Have any work that is not described in these instructions performed by an authorised customer service centre. Only use original parts.
General cleaning and maintenance work

Do not spray down the device with water. There is a risk of electric shock.
GB MT
- Do not submerge the device in water under any circumstances.
- Never use petrol, benzene, thinner, alcohol or the like to clean plastic parts. Such agents can cause discolouration, deformation or cracking.
- Let the device cool down before removing dirt, dust, oil, grease, etc. with a clean cloth.
- Do not use abrasive cleaners or abrasive pads.
- Do not wipe the inside of the device with a cloth; fl uff may be left behind.
• Take proper care of your device so that it will serve you well for years to come. - Thoroughly clean the device after every use to maintain the quality of coffee produced.
- Check the covers and protective devices for damage and correct fi t. Replace these if necessary.
B Cleaning after every use
- Remove the battery (17) from the device and allow the device to cool down.
- Wipe the case with a soft cloth dam-pened with soapy water.
- Remove the water tank (5), fi lter holder (8), coffee fi lter insert (6), coffee pod holder (9), coffee cup (10), coffee cup lid (11) and measuring spoon (15) from the device. Wash the parts in hot, soapy water, and then rinse them with hot water.
- Allow the device and all parts to fully dry.

Do not allow water to stay in the tank for longer than 24 hours.
B Removing deposits within the device
Limescale builds up in the internal pipes as a result of using the device. Limescale deposits hinder the flow of water and thus extend the drip time. If the drip time has increased, clean the internal pipes with citric acid.
- Remove the water tank (5) and pour in 240 ml of water.
- Add 5 g of commercial citric acid to the water and stir it.
- Slide the water tank (5) into the device.
- Remove the fi Iter holder/coffee pod holder (8/9) from the device.
- Place the coffee cup (10) onto the cup holder (7).
- Press the on-off button (13).
- Once the drip process is complete, remove the water tank (5) and coffee cup and rinse them with water.
- Pour in 240 ml of water into the water tank (5) and slide the water tank (5) into the device.
- Place the coffee cup (10) onto the cup holder (7).
- Press the on-off button (13) and wait until the drip process is complete. Repeat this step several times if you taste or smell citric acid.
If necessary, repeat the steps listed above.
Maintenance
The device is maintenance free.
Storage / transport
- Use the bow-type handle (B 2) when carrying the device. Be careful not to trap your fingers when you close the handle.
- To avoid fire or burns, allow the device to cool completely before carrying or storing it.
- The supplied measuring spoon (B 15) can be stored on the reverse side of the water tank flap (B 1).
Slide the end of the spoon into the hooks for storage.
- Store the device:
- in a dry location,
- out of the reach of children.
- Remove the rechargeable battery from the device before storing the device for a long period of time (winter storage).
Disposal and protection of the environment
Remove the rechargeable battery before disposing of the device!
The device, accessories and packaging should be properly recycled.
Instruction on how to dispose of the rechargeable battery can be found in the separate instruction manual for your battery and charger.
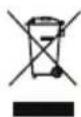
Electrical appliances must not be disposed of with the domestic waste.
- Return the unit to a recycling centre.
- Defective units returned to us will be disposed of for free.
Guarantee
Dear Customer,
This equipment is provided with a 3-year guarantee from the date of purchase. In case of defects, you have statutory rights against the seller of the product.
These statutory rights are not restricted by our guarantee presented below.
Terms of Guarantee
The term of the guarantee begins on the date of purchase. Please retain the original receipt. This document is required as proof of purchase.
If a material or manufacturing defect occurs within three years of the date of purchase of this product, we will repair or replace at our choice the product for you free of charge. This guarantee requires the defective equipment and proof of purchase to be presented within the three-year period with a brief written description of what constitutes the defect and when it occurred.
If the defect is covered by our guarantee, you will receive either the repaired product or a new product. No new guarantee period begins on repair or replacement of the product.
Guarantee Period and Statutory Claims for Defects
The guarantee period is not extended by the guarantee service. This also applies for replaced or repaired parts. Any damages and defects already present at the time of purchase must be reported immediately after unpacking. Repairs arising after expiry of the guarantee period are chargeable.
Guarantee Cover
The equipment has been carefully produced in accordance with strict quality guidelines and conscientiously checked prior to delivery.
The guarantee applies for all material and manufacturing defects. This guarantee does not extend to cover product parts that are subject to normal wear and may therefore be considered as wearing parts (e.g. coffee filter insert) or to cover damage to breakable parts (e.g. button).
This guarantee shall be invalid if the product has been damaged, used incorrectly or not maintained. Precise adherence to all of
the instructions specified in the operating manual is required for proper use of the product. Intended uses and actions against which the operating manual advises or warns must be categorically avoided. The product is designed only for private and not commercial use. The guarantee will be invalidated in case of misuse or improper handling, use of force, or interventions not undertaken by our authorised service branch.
Processing in Case of Guarantee
To ensure efficient handling of your query, please follow the directions below:
- Please have the receipt and item number (IAN 385573_2107) ready as proof of purchase for all enquiries.
- Please find the item number on the rating plate.
- Should functional errors or other defects occur, please initially contact the service department specified below by telephone or by e-mail. You will then receive further information on the processing of your complaint.
- After consultation with our customer service, a product recorded as defective can be sent postage paid to the service address communicated to you, with the proof of purchase (receipt) and specification of what constitutes the defect and when it occurred. In order to avoid acceptance problems and additional costs, please be sure to use only the address communicated to you. Ensure that the consignment is not sent carriage forward or by bulky goods, express or other special freight. Please send the equipment inc. all accessories supplied at the time of purchase and ensure adequate, safe transport packaging.
Repair Service
For a charge, repairs not covered by the guarantee can be carried out by our service branch, which will be happy to issue a cost estimate for you.
We can handle only equipment that has been sent with adequate packaging and postage.
Attention: Please send your equipment to our service branch in clean condition and with an indication of the defect.
Equipment sent carriage forward or by bulky goods, express or other special freight will not be accepted.
We will dispose of your defective devices free of charge when you send them to us.
Service-Center
GB Service Great Britain Tel.: 0800 4047 657
E-Mail: grizzly@lidl.co.uk
IAN 385573_2107
MT ServiceMalta Tel.: 80062230
E-Mail: grizzly@lidl.com.mt
IAN 385573_2107
Importer
Please note that the following address is not a service address. Please initially contact the service centre specified above.
Replacement parts/accessories
Spare parts and accessories can be obtained at www.grizzlytools.shop
If you have issues ordering, please use the contact form.
If you have any other questions, contact the "Service-Center" (see page 26).
Item Exploded Drawing ...... Description ......Product No.
1......Measuring spoon......91106060
2-7 Water tank 91106061
9......Water tank lid 91106062
36 - 37 ......Coffee filter insert......91106063
38....Filter holder....91106064
39....Coffee pod holder....91106065
40....Cup lid....91106066
41....Cup....91106067
Troubleshooting
| Problem Possible cause Troubleshooting | ||
| Machine does not start | Battery (B 17) is empty or not inserted | Check the charge level, and have repairs carried out by a qualified electrician, if necessary |
| Battery (B 17) overheated | Allow battery (B 17) to cool down | |
| Device overheated Allow device to cool down | ||
| Water tank empty Fill water tank | ||
| Heating element defective Repair by Service Centre | ||
| Pump defective Repair by Service Centre | ||
| Water leaking | Water tank overfi lled | Only fi ll the water tank (5) to the maximum permitted fi ll level |
| Filter holder/ coffee pod holder (8/9) overfl owing. | Coffee fi Iter insert (6) blocked or pod inserted incorrectly | Clean the coffee fi Iter insert (6) or insert the pad correctly |
| Grind too fi ne | Use coffee grounds with a coarser grind | |
| Too much ground coffee has been used in the coffee fi Iter insert (6) | Use fewer coffee grounds | |
| Too much water used | Adhere to the recommended water volume (see section “Brew-ing”). Reduce if necessary | |
Sommaire
Introduction ......29
Protection anti-surchauffe......36
Nettoyage / entretien ......36
Stockage / Transport ......37
Service Réparations ....41
Service-Center....41
Importateur 41
Protection anti-surchauffe
Stockage / Transport
Opberging / transport ......52
Verwerking en milieubescherming....52
Garantie 52
Reparatieservice ....54
Service-Center....54
Importeur 54
Reserveonderdelen/accessoires..54
Storingen oplossen......55
1 led brandt (rood):
Opberging / transport
Service-Center......67
Importer 67
Service-Center....78
Dovozce....78
Service-Center......89
Dovozca....89
Náhradné diely /
Príslušenstvo .....90
Vyhládávaniechýb .....91
Opbevaring / transport
Service-Center....114
Importador 114
Service-Center......127
Importatore ....127
Pooblaščeni serviser:
Tel.: 01 888 92 73
E-Mail: grizzly@lidl.si
(Birotehnika, Hodošček Renata s.p., Lendavska ULICA 23, 9000 Murska Sobota)
Garancijski list
| GBMT | Translation of the original EC declaration of conformity |
| We hereby confirm that the Cordless Coffee Machine series PKMA 20-Li A1 serial number 000001 - 097000complies with the following relevant EU regulations as amended: | |
| 2014/35/EU • 2014/30/EU • 2011/65/EU* & (EU) 2015/863 | |
| complies with the following provision as amended: | |
| EU 2020/1245 | |
| In order to guarantee consistency, the following harmonised standards as well as national standards and stipulations have been applied: | |
| EN 60335-1:2012/A2:2019 • EN 60335-2-15:2016/A11:2018 • EN 62233:2008 EN 55014-1:2017 • EN 55014-2:2015 • EN IEC 63000:2018 | |
| This declaration of conformity (21)** is issued under the sole responsibility of the manufacturer: | |
| CE Grizzly Tools GmbH & Co. KG Stockstädter Straße 20 63762 Großostheim, Germany 25.01.2022 | Christian Frank Documentation Representative |
* The object of the declaration described above satisfies the provisions of Directive 2011/65/EU of the European Parliament and the Council of 8 June 2011 on limiting the use of certain harmful substances in electrical and electronic appliances.
** The last two digits of the year in which the CE marking was affixed.
text_image
Exploded view diagram of a portable electronic device with numbered parts and internal componentsGRIZZLY TOOLS GMBH & CO. KG
text_image
FSC www.fsc.org MIX Paper from responsible sources FSC® C150223
text_image
FSC www.fsc.org MIXTE Papier issu de sources responsables FSC® C150223IAN 385573_2107