UN460WDZ - Hedge trimmers MAKITA - Free user manual and instructions
Find the device manual for free UN460WDZ MAKITA in PDF.
User questions about UN460WDZ MAKITA
0 question about this device. Answer the ones you know or ask your own.
Ask a new question about this device
Download the instructions for your Hedge trimmers in PDF format for free! Find your manual UN460WDZ - MAKITA and take your electronic device back in hand. On this page are published all the documents necessary for the use of your device. UN460WDZ by MAKITA.
USER MANUAL UN460WDZ MAKITA
- Due to our continuing program of research and development, the specifications herein are subject to change without notice.
- Specifications may differ from country to country.
1: Weight without any accessories or battery cartridge(s)
2: The weight may differ depending on the attachment(s), including the battery cartridge. The lightest and heaviest combinations, according to EPTA-Procedure 01/2014, are shown in the table.
Applicable battery cartridge and charger
| Battery cartridge BL1016 / BL1021B / BL1041B | |
| Charger DC10SA / DC10SB / DC10WC / DC10WD / DC18RE |
Some of the battery cartridges and chargers listed above may not be available depending on your region of residence.

WARNING: Only use the battery cartridges and chargers listed above. Use of any other battery cartridges and chargers may cause injury and/or fire.
Symbols
The followings show the symbols which may be used for the equipment. Be sure that you understand their meaning before use.


Read instruction manual.
Do not expose to moisture.


Wear a helmet, goggles and ear protection.

DANGER - Keep hands away from blade.
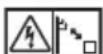
Beware of electrical lines, risk of electrical shock.
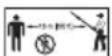
Keep distance at least 15m

Do not expose to rain.

Ni-MH Li-ion
Only for EU countries
Due to the presence of hazardous components in the equipment, waste electrical and electronic equipment, accumulators and batteries may have a negative impact on the environment and human health.
Do not dispose of electrical and electronic appliances or batteries with household waste!
In accordance with the European Directive on waste electrical and electronic equipment and on accumulators and batteries and waste accumulators and batteries, as well as their adaptation to national law, waste electrical equipment, batteries and accumulators should be stored separately and delivered to a separate collection point for municipal waste, operating in accordance with the regulations on environmental protection.
This is indicated by the symbol of the crossed-out wheeled bin placed on the equipment.

Guaranteed sound power level according to EU Outdoor Noise Directive.

Sound power level according to Australia NSW Noise Control Regulation.
Intended use
The tool is intended for trimming hedges.
Noise
The typical A-weighted noise level determined according to EN62841-4-2:
| Sound pressure level Guaranteed sound | power level | Measured sound power level | ||
| LpA (dB(A)) Uncertainty K | (dB(A)) L | wA (dB(A)) L | wA (dB(A)) Uncertainty K | (dB(A)) |
| 71 3 88 85 2.7 | ||||
NOTE: The declared noise emission value(s) has been measured in accordance with a standard test method and may be used for comparing one tool with another.
NOTE: The declared noise emission value(s) may also be used in a preliminary assessment of exposure.
WARNING: Wear ear protection.
WARNING: The noise emission during actual use of the power tool can differ from the declared value(s) depending on the ways in which the tool is used especially what kind of workpiece is processed.
WARNING: Be sure to identify safety measures to protect the operator that are based on an estimation of exposure in the actual conditions of use (taking account of all parts of the operating cycle such as the times when the tool is switched off and when it is running idle in addition to the trigger time).
Vibration
The vibration total value (tri-axial vector sum) determined according to EN62841-4-2:
| Left hand (Front grip) Right hand (Rear grip) | |||
| ah(m/s2) Uncertainty | K (m/s 2) | ah(m/s2) Uncertainty | K (m/s 2) |
| 2.5 m/s2or less 1.5 2.5 m/s | 2 or less 1.5 | ||
NOTE: The declared vibration total value(s) has been measured in accordance with a standard test method and may be used for comparing one tool with another.
NOTE: The declared vibration total value(s) may also be used in a preliminary assessment of exposure.
WARNING: The vibration emission during actual use of the power tool can differ from the declared value(s) depending on the ways in which the tool is used especially what kind of workpiece is processed.
WARNING: Be sure to identify safety measures to protect the operator that are based on an estimation of exposure in the actual conditions of use (taking account of all parts of the operating cycle such as the times when the tool is switched off and when it is running idle in addition to the trigger time).
Declarations of Conformity
For European countries only
The Declarations of conformity are included in Annex A to this instruction manual.
SAFETYWARNINGS
General power tool safety warnings
WARNING Read all safety warnings, instructions, illustrations and specifications provided with this power tool. Failure to follow all instructions listed below may result in electric shock, fire and/or serious injury.
Save all warnings and instructions for future reference.
The term "power tool" in the warnings refers to your mains-operated (corded) power tool or battery-operated (cordless) power tool.
Cordless pole hedge trimmer safety warnings
Cordless hedge trimmer safety warnings:
- Do not use the hedge trimmer in bad weather conditions, especially when there is a risk of lightning. This decreases the risk of being struck by lightning.
- Keep all power cords and cables away from cutting area. Power cords or cables may be hidden in hedges or bushes and can be accidentally cut by the blade.
- Wear ear protection. Adequate protective equipment will reduce the risk of hearing loss.
- Hold the hedge trimmer by insulated gripping surfaces only, because the blade may contact hidden wiring. Blades contacting a "live" wire may make exposed metal parts of the hedge trimmer "live" and could give the operator an electric shock.
-
Keep all parts of the body away from the blade. Do not remove cut material or hold material to be cut when blades are moving. Blades continue to move after the switch is turned off. A moment of inattention while operating the hedge trimmer may result in serious personal injury.
-
When clearing jammed material or servicing the hedge trimmer, make sure all power switches are off and the battery pack is removed or disconnected. Unexpected actuation of the hedge trimmer while clearing jammed material or servicing may result in serious personal injury.
- Carry the hedge trimmer by the handle with the blade stopped and taking care not to operate any power switch. Proper carrying of the hedge trimmer will decrease the risk of inadvertent starting and resultant personal injury from the blades.
- When transporting or storing the hedge trimmer, always use the blade cover. Proper handling of the hedge trimmer will decrease the risk of personal injury from the blades.
Cordless pole hedge trimmer safety warnings:
- Always use head protection when operating the pole hedge trimmer overhead. Falling debris can result in serious personal injury.
- Always use two hands when operating the pole hedge trimmer. Hold the pole hedge trimmer with both hands to avoid loss of control.
- To reduce the risk of electrocution, never use the pole hedge trimmer near any electrical power lines. Contact with or use near power lines may cause serious injury or electric shock resulting in death.
Additional safety warnings
Preparation
- THIS HEDGE TRIMMER CAN CAUSE SERIOUS INJURIES. Read the instructions carefully for the correct handling, preparation, maintenance, starting and stopping of the tool. Become familiar with all controls and the proper use of the tool.
- Check the hedges and bushes for foreign objects, such as wire fences or hidden wiring before operating the tool.
- The tool must not be used by children or young persons under 18 years of age. Young persons over 16 years of age may be exempted from this restriction if they are undergoing training under the supervision of an expert.
- In the event of an emergency, switch off the tool and remove the battery cartridge immediately.
- DANGER - Keep hands away from blade. Contact with blade will result in serious personal injury.
- First-time users should have an experienced user show them how to use the tool.
- Before operation, examine the work area for wire fences, stones, or other solid objects. They can damage the blades.
-
Use the tool only if you are in good physical condition. If you are tired, your attention will be reduced. Be especially careful at the end of a working day. Perform all work calmly and carefully. The user is responsible for all damages to third parties.
-
Before starting work, check to make sure that the tool is in good and safe working order. Ensure guards are fitted properly. The tool must not be used unless fully assembled.
- Avoid dangerous environment. Don't use the tool in damp or wet locations or expose it to rain. Water entering the tool will increase the risk of electric shock.
Personal protective equipment
- Work gloves of stout leather are part of the basic equipment of the tool and must always be worn when working with it. Also wear sturdy shoes with anti-skid soles.
- Wear ear protection such as ear muffs to prevent hearing loss.
- Wear protective goggles, safety helmet and protective gloves to protect yourself from flying debris or falling objects.
- When touching blades or adjusting the blade angle, wear protective gloves. Blades can cut bare hands severely.
Operation
- Always use two hands to operate the tool. Using one hand could cause loss of control and result in serious personal injury.
- While operating the tool, always ensure that the operating position is safe and secure. Overreaching with the tool, particularly from a ladder, is extremely dangerous. Do not work from anything wobbly or infirm.
- Do not simultaneously wear multiple belt harnesses and/or shoulder harnesses when operating the tool.
- During operation, keep bystanders or animals at least 15m away from the tool. Stop the tool as soon as someone approaches.
-
If cutting tool strikes any object or the tool starts making unusual noise or vibration, switch off the tool and remove the battery cartridge immediately and allow the tool to stop. And then take the following steps:
-
inspect for damage
-
check for, and tighten, any loose parts
have any damaged parts replaced or repaired with genuine spare parts. -
Only use the tool for its intended purpose. Do not use the tool for any other purpose.
-
Switch off the tool and remove the battery cartridge before:
-
cleaning or when clearing a blockage,
- checking, carrying out maintenance or working on the tool,
- adjusting the working position of the shear blades,
-
leaving the tool unattended.
-
Ensure that the tool is correctly located in a designated working position before starting the tool.
- Do not operate the tool with a damaged or excessively worn shear blades.
-
Always be aware of your surroundings and stay alert for possible hazards of which you may not be aware due to the noise of the tool.
-
Be careful not to accidentally contact a metal fence or other hard objects during operation. The blade will break and may cause serious injury.
- Avoid unintentional starting. Do not carry the tool when the battery cartridge is installed and with finger on the switch. Make sure that the switch is off when installing the battery cartridge.
- Do not grasp the exposed cutting blades or cutting edges when picking up or holding the tool.
- Do not force the tool. It will do the job better and with less likelihood of a risk of injury at the rate for which it was designed.
- Do not use the tool in the rain or in wet or very damp conditions. The electric motor is not waterproof.
- Hold the tool firmly when using the tool.
- Do not operate the tool at no-load unnecessarily.
- Before checking the shear blades, taking care of faults, or removing foreign objects caught in the shear blades, always switch off the tool and remove the battery cartridge.
- Never point the shear blades to yourself or others.
- If the blades stop moving due to the stuck of foreign objects between the blades during operation, switch off the tool and remove the battery cartridge, and then remove the foreign objects using tools such as pliers. Removing the foreign objects by hand may cause an injury for the reason that the blades may move in reaction to removing the foreign objects.
- When attaching or removing the blade cover, be careful not to injure your hands.
Electrical and battery safety
- Avoid dangerous environment. Don't use the tool in damp or wet locations or expose it to rain. Water entering the tool will increase the risk of electric shock.
- Do not dispose of the battery(ies) in a fire. The cell may explode. Check with local codes for possible special disposal instructions.
- Do not open or mutilate the battery(ies). Released electrolyte is corrosive and may cause damage to the eyes or skin. It may be toxic if swallowed.
- Do not charge battery in rain, or in wet locations.
- Do not charge the battery outdoors.
- Do not handle charger, including charger plug, and charger terminals with wet hands.
Maintenance and storage
- When the tool is stopped for servicing, inspection or storage, switch off the tool and remove the battery cartridge, and make sure all moving parts have come to a stop. Allow the tool to cool before making any inspections, adjustment, etc.
-
Always allow the tool to cool down before storing.
-
When not in use, attach the blade cover to the tool and store the tool indoors in dry, and high locked-up place, out of reach of children.
- Maintain the tool with care. Keep cutting edge sharp and clean for best performance and to reduce the risk of injury. Follow instructions for lubricating and changing accessories. Keep grips dry, clean, and free from oil and grease.
- Check damaged parts. Before further use of the tool, any part which is damaged should be carefully checked to determine that it will operate properly and perform its intended function. Check for alignment of moving parts, binding of moving parts, breakage of parts, mounting and any other condition that may affect its operation. A guard or other part that is damaged should be properly repaired or replaced by your authorized service center.
- Use genuine spare parts only.
- When moving the tool to another location, including during work, always remove the battery cartridge and put the blade cover on the shear blades. Never carry or transport the tool with the blades running. Never grasp the blades with your hands.
- Clean the tool and especially the shear blades after use, and before putting the tool into storage for extended periods. Lightly oil the shear blades and put on the blade cover.
- Do not dispose of the battery(ies) in a fire. The cell may explode. Check with local codes for possible special disposal instructions.
- Do not open or mutilate the battery(ies). Released electrolyte is corrosive and may cause damage to the eyes or skin. It may be toxic if swallowed.
- Do not charge battery in rain, or in wet locations.
SAVE THESE INSTRUCTIONS.
WARNING: DO NOT let comfort or familiarity with product (gained from repeated use) replace strict adherence to safety rules for the subject product. MISUSE or failure to follow the safety rules stated in this instruction manual may cause serious personal injury.
Important safety instructions for battery cartridge
- Before using battery cartridge, read all instructions and cautionary markings on (1) battery charger, (2) battery, and (3) product using battery.
- Do not disassemble or tamper with the battery cartridge. It may result in a fire, excessive heat, or explosion.
-
If operating time has become excessively shorter, stop operating immediately. It may result in a risk of overheating, possible burns and even an explosion.
-
If electrolyte gets into your eyes, rinse them out with clear water and seek medical attention right away. It may result in loss of your eyesight.
- Do not short the battery cartridge:
(1) Do not touch the terminals with any conductive material.
(2) Avoid storing battery cartridge in a container with other metal objects such as nails, coins, etc.
(3) Do not expose battery cartridge to water or rain.
A battery short can cause a large current flow, overheating, possible burns and even a breakdown.
- Do not store and use the tool and battery cartridge in locations where the temperature may reach or exceed 50^ (122°F).
- Do not incinerate the battery cartridge even if it is severely damaged or is completely worn out. The battery cartridge can explode in a fire.
- Do not nail, cut, crush, throw, drop the battery cartridge, or hit against a hard object to the battery cartridge. Such conduct may result in a fire, excessive heat, or explosion.
- Do not use a damaged battery.
- The contained lithium-ion batteries are subject to the Dangerous Goods Legislation requirements.
For commercial transports e.g. by third parties, forwarding agents, special requirement on packaging and labeling must be observed.
For preparation of the item being shipped, consulting an expert for hazardous material is required. Please also observe possibly more detailed national regulations.
Tape or mask off open contacts and pack up the battery in such a manner that it cannot move around in the packaging.
- When disposing the battery cartridge, remove it from the tool and dispose of it in a safe place. Follow your local regulations relating to disposal of battery.
-
Use the batteries only with the products specified by Makita. Installing the batteries to non-compliant products may result in a fire, excessive heat, explosion, or leak of electrolyte.
-
If the tool is not used for a long period of time, the battery must be removed from the tool.
- During and after use, the battery cartridge may take on heat which can cause burns or low temperature burns. Pay attention to the handling of hot battery cartridges.
- Do not touch the terminal of the tool immediately after use as it may get hot enough to cause burns.
- Do not allow chips, dust, or soil stuck into the terminals, holes, and grooves of the battery cartridge. It may cause heating, catching fire, burst and malfunction of the tool or battery cartridge, resulting in burns or personal injury.
-
Unless the tool supports the use near high-voltage electrical power lines, do not use the battery cartridge near high-voltage electrical power lines. It may result in a malfunction or breakdown of the tool or battery cartridge.
-
Keep the battery away from children.
SAVE THESE INSTRUCTIONS.
CAUTION: Only use genuine Makita batteries. Use of non-genuine Makita batteries, or batteries that have been altered, may result in the battery bursting causing fires, personal injury and damage. It will also void the Makita warranty for the Makita tool and charger.
Tips for maintaining maximum battery life
- Charge the battery cartridge before completely discharged. Always stop tool operation and charge the battery cartridge when you notice less tool power.
- Never recharge a fully charged battery cartridge. Overcharging shortens the battery service life.
- Charge the battery cartridge with room temperature at 10^ - 40^ (50°F - 104°F). Let a hot battery cartridge cool down before charging it.
- When not using the battery cartridge, remove it from the tool or the charger.
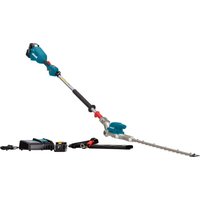
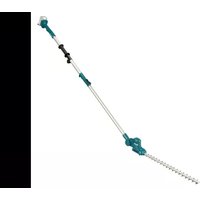
PARTS DESCRIPTION
Fig.1
| 1 | Head | 2 | Angle adjustment button | 3 | Lock-lever | 4 | Thumb nut |
| 5 | Front grip | 6 | Rear grip | 7 | Battery cartridge | 8 | Switch trigger |
| 9 | Lock-off button | 10 | Shear blades | - | - | - | - |
FUNCTIONAL DESCRIPTION
CAUTION: Always be sure that the tool is switched off and the battery cartridge is removed before adjusting or checking function on the tool.
Installing or removing battery cartridge
CAUTION: Always switch off the tool before installing or removing of the battery cartridge.
CAUTION: Hold the tool and the battery cartridge firmly when installing or removing battery cartridge. Failure to hold the tool and the battery cartridge firmly may cause them to slip off your hands and result in damage to the tool and battery cartridge and a personal injury.
Fig.2: 1. Red indicator 2. Button 3. Battery cartridge
To remove the battery cartridge, slide it from the tool while sliding the button on the front of the cartridge.
To install the battery cartridge, align the tongue on the battery cartridge with the groove in the housing and slip it into place. Insert it all the way until it locks in place with a little click. If you can see the red indicator as shown in the figure, it is not locked completely.
CAUTION: Always install the battery cartridge fully until the red indicator cannot be seen. If not, it may accidentally fall out of the tool, causing injury to you or someone around you.
CAUTION: Do not install the battery cartridge forcibly. If the cartridge does not slide in easily, it is not being inserted correctly.
Indicating the remaining battery capacity
Only for battery cartridges with the indicator
Fig.3: 1. Indicator lamps 2. Check button
Press the check button on the battery cartridge to indicate the remaining battery capacity. The indicator lamps light up for a few seconds.
| Indicator lamps Remaining | capacity | |
| Lighted Off | ||
| 75% to 100% | ||
| 50% to 75% | ||
| 25% to 50% | ||
| 0% to 25% | ||
NOTE: Depending on the conditions of use and the ambient temperature, the indication may differ slightly from the actual capacity.
Tool / battery protection system
The tool is equipped with a tool/battery protection system. This system automatically cuts off power to the motor to extend tool and battery life. The tool will automatically stop during operation if the tool or battery is placed under one of the following conditions:
Overloaded:
The tool is operated in a manner that causes it to draw an abnormally high current. In this situation, turn the tool off and stop the application that caused the tool to become overloaded. Then turn the tool on to restart. If the tool does not start, the battery is overheated. In this situation, let the battery cool before turning the tool on again.
Low battery voltage:
The remaining battery capacity is too low and the tool will not operate. If you turn the tool on, the motor runs again but stops soon. In this situation, remove and recharge the battery.
Switch action
WARNING: Before installing the battery cartridge into the tool, always check to see that the switch trigger actuates properly and returns to the "OFF" position when released.
WARNING: For your safety, this tool is equipped with the lock-off button which prevents the tool from unintended starting. Never use the tool if it starts when you pull the switch trigger without pressing the lock-off button. Ask your local Makita Service Center for repairs.
WARNING: Never disable the lock function or tape down the lock-off button.
NOTICE: Do not pull the switch trigger forcibly without pressing the lock-off button. The switch may break.
Fig.4: 1. Lock-off button 2. Switch trigger
To prevent the switch trigger from being accidentally pulled, a lock-off button is provided. To start the tool, press the lock-off button and pull the switch trigger. Release the switch trigger to stop. The lockoff button can be pressed from either the right or left side.
Adjusting the cutting angle
CAUTION: Always be sure that the tool is switched off before folding or unfolding the head.
CAUTION: When folding the head for carrying the tool or after using the tool, be sure to attach the blade cover before folding the head.
CAUTION: When folding the head, be careful not to pinch your fingers between the head and the tool body.
The angle of the head can be adjusted in 10 steps. To change the angle of the head, follow the steps below.
-
Hold the head and the tool body as shown in the figure.
Fig.5: 1. Head 2. Angle adjustment button -
Adjust the angle of the head while holding down the angle adjustment button, and then release the angle adjustment button.
-
Move the head slightly until it is locked with a click.
NOTE: Make sure that the head is securely locked before operating the tool.
Adjusting the pipe length
CAUTION: Always be sure that the tool is switched off before adjusting the pipe length.
CAUTION: When adjusting the pipe length, be sure to attach the blade cover before adjusting the pipe length.
CAUTION: When adjusting the pipe length, be careful not to pinch your fingers.
CAUTION: Make sure that the lock-lever is locked securely.
CAUTION: When adjusting the pipe length, lay the tool on its side. If you stand the tool upright, the head will come down suddenly, which may cause an injury.
Loosen the lock-lever, then adjust the length of the pipe, and then lock the lock-lever.
Fig.6: 1. Lock-lever
Adjusting the front grip position
CAUTION: Always be sure that the tool is switched off before adjusting the position of the front grip.
CAUTION: When adjusting the position of the front grip, be careful not to pinch your fingers.
CAUTION: Make sure that the thumb nut is tightened securely.
CAUTION: Do not move the front grip beyond the arrow mark.
To adjust the position of the front grip, loosen the thumb nut by turning it counterclockwise, then adjust the position of the front grip, and then tighten the thumb nut by turning it clockwise.
Fig.7: 1. Thumb nut 2. Arrow mark
ASSEMBLY
CAUTION: Always be sure that the tool is switched off and the battery cartridge is removed before carrying out any work on the tool.
CAUTION: When replacing the shear blades, always wear gloves so that your hands do not directly contact the blades.
Installing or removing the shear blades
CAUTION: Attach the blade cover before removing or installing the shear blades.
NOTICE: When replacing the shear blades, do not wipe off grease from the gear and crank.
NOTE: Before installing or removing the shear blades, unfold the head of the tool so that the head is straight to the tool body
- Place the tool upside down.
- Remove 4 screws with a screwdriver and remove the shear blades.
Fig.8: 1. Screw
- Remove the crank from the shear blades.
Fig.9: 1. Crank
NOTE: The crank may remain in the tool.
- Prepare the crank and new shear blades.
Fig.10: 1. Crank 2. Shear blades - Remove the blade cover, and then attach it to the new shear blades.
- Apply a small amount of grease to the periphery of the crank. Attach the washer, gear, and the crank to the pin in order.
Fig.11: 1. Crank 2. Gear 3. Washer 4. Pin
- Adjust the crank so that the 2 small holes on the crank are lined up on the alignment line as shown in the figure.
Fig.12: 1. Alignment line 2. Small hole - Slide the shear blades so that the hole on the guide plate is positioned at the center of the rings of blades.
Fig.13: 1. Guide plate - Insert the screw removed in step 2 into the hole on the shear blades through the hole on the blade cover.
▶ Fig.14: 1. Hole - Attach the shear blades to the tool, and then tighten 3 screws with the screwdriver.
Fig.15: 1. Screw - Remove the screw inserted into the hole on the shear blades in step 9, and then tighten it to fix the shear blades.
NOTICE: If the shear blades do not operate properly, the blades are not engaging the crank properly. Remove the blades and install them again.
NOTICE: If the parts other than the shear blades such as the crank are worn out, ask Makita Authorized Service Centers for parts replacement or repairs.
Installing or removing the chip receiver
Optional accessory
CAUTION: When installing or removing the chip receiver, always wear gloves so that your hands do not directly contact the shear blades.
CAUTION: Attach the blade cover before installing or removing the chip receiver.
The chip receiver gathers discarded leaves and makes clean-up afterward much easier. It can be installed on either side of the tool.
- Align the holes on the chip receiver with the nuts on the shear blades.
Fig.16: 1.Nut -
Hook the claws of the chip receiver to the groove on the shear blades.
Fig.17: 1. Claw 2. Groove -
Press the levers on the chip receiver, and then hook the claws on the other side to the groove on the shear blades.
Fig.18: 1.Lever
To remove the chip receiver, press the levers to release the claws.
Fig.19: 1. Lever
NOTICE: Never try to remove the chip receiver by an excessive force with its claws locked in the grooves of the shear blades.
OPERATION
Operating the tool
WARNING: Do not use the tool near any electrical power lines. Contacting with power lines or using the tool near power lines may cause serious injury or electric shock resulting in death.
WARNING: Keep hands away from shear blades.
WARNING: Be extremely careful to maintain control of the tool at all times. Do not allow the tool to be deflected toward you or anyone in the work vicinity. Failure to keep control of the tool could result in serious injury to the bystander and the operator.
CAUTION: Avoid operating the tool in very hot weather as much as practicable. When operating the tool, be careful of your physical condition.
CAUTION: Be careful not to accidentally contact a metal fence or other hard objects while trimming. The shear blades may break and cause an injury.
CAUTION: Be careful not to allow the shear blades to contact the ground. The tool may recoil and cause an injury.
CAUTION: Overreaching with a hedge trimmer, particularly from a ladder, is extremely dangerous. Do not work while standing on anything wobbly or infirm.
NOTICE: Do not attempt to cut branches thicker than 10mm in diameter with the tool. Cut branches to 10cm lower than the cutting height using branch cutters before using the tool.
Fig.20: (1) Cutting height (2) 10cm
NOTICE: Do not cut down dead trees or similar hard objects. Doing so may damage the tool.
NOTICE: Do not trim the grass or weeds while using the shear blades. The shear blades may become tangled in the grass or weeds.
Hold the tool with both hands by holding the front grip and the rear grip.
Fig.21: 1. Front grip 2. Rear grip
Pull the switch trigger while pressing the lock-off button, and then move the tool forward.
Fig.22
For basic operation, tilt the shear blades toward the trimming direction and move it calmly and slowly at the speed rate of 3 to 4 seconds per meter.
Fig.23
To cut a hedge side evenly, cut from the bottom to top.
Fig.24
When trimming to make a round shape (trimming boxwood or rhododendron, etc.), trim from the root to the top for a beautiful finish.
Fig.25
If the chip receiver is attached to the shear blades, it gathers discarded leaves and makes clean-up afterward much easier.
Fig.26
MAINTENANCE
CAUTION: Always be sure that the tool is switched off and the battery cartridge is removed before attempting to perform inspection or maintenance.
CAUTION: When inspecting or maintaining the tool, always put the tool down. Assembling or adjusting the tool in an upright position may result in serious injury.
To maintain product SAFETY and RELIABILITY, repairs, any other maintenance or adjustment should be performed by Makita Authorized or Factory Service Centers, always using Makita replacement parts.
Cleaning the tool
Clean the tool by wiping off dust with a dry cloth or one dipped in soapy water and wrung out.
NOTICE: Never use gasoline, benzine, thinner, alcohol or the like. Discoloration, deformation or cracks may result.
Shear blade maintenance
Before the operation or once per hour during operation, apply low-viscosity oil (machine oil, or spray-type lubricating oil) to the shear blades.
Fig.27
After operation, remove dust from both sides of the shear blades with a wired brush, wipe it off with a cloth and then apply low-viscosity oil (machine oil, or spray-type lubricating oil) to the shear blades.
Fig.28
NOTICE: Do not wash the shear blades in water. Doing so may cause rust or damage to the tool.
NOTICE: Dirt and corrosion cause excessive blade friction and shorten the operating time per battery charge.
Storage
Attach the blade cover to the shear blades so that the blades are not exposed. Store the tool out of the reach of children. Store the tool in a place not exposed to moisture or rain.
TROUBLESHOOTING
Before asking for repairs, conduct your own inspection first. If you find a problem that is not explained in the manual, do not attempt to dismantle the tool. Instead, ask Makita Authorized Service Centers, always using Makita replacement parts for repairs.
| State of abnormality Probable cause | (malfunction) Remedy | |
| Motor does not run. Battery cartridge is | not installed. Install the battery cartridge. | |
| Battery problem (under voltage) Recharge | Recharge the battery. If recharging is not effective, replace battery. | |
| The drive system does not work correctly. | Ask your local authorized service center for repair. | |
| Motor stops running after a little use, or motor does not run. | Battery's charge level is low. Recharge | the battery. If recharging is not effective, replace battery. |
| Overheating. Stop using of tool to allow it | to cool down. | |
| Tool does not reach maximum RPM. | battery is installed improperly. | Install the battery cartridge as described in this manual. |
| Battery power is dropping. Recharge the battery. | the battery. If recharging is not effective, replace battery. | |
| The drive system does not work correctly. | Ask your local authorized service center for repair. | |
| Shear blades do not move: → stop the machine immediately! | Inappropriate angle of shear blades. Make sure that the head is properly fixed in the operational angle. | |
| Foreign objects are caught between the shear blades. | Switch off the tool and remove the battery cartridge, and then remove the foreign objects using tools such as pliers. | |
| The drive system does not work correctly. | Ask your local authorized service center for repair. | |
| Abnormal vibration: → stop the machine immediately! | Shear blades are broken, bent or worn. Replace the shear blades. | |
| The drive system does not work correctly. | Ask your local authorized service center for repair. | |
| Shear blades and motor cannot stop: → Remove the battery immediately! | Electric malfunction. Remove the battery | and ask your local authorized service center for repair. |
OPTIONAL ACCESSORIES
CAUTION: These accessories or attachments are recommended for use with your Makita tool specified in this manual. The use of any other accessories or attachments might present a risk of injury to persons. Only use accessory or attachment for its stated purpose.
If you need any assistance for more details regarding these accessories, ask your local Makita Service Center.
Shear blade assembly
Chip receiver
Grease vessel
- Makita genuine battery and charger
NOTE: Some items in the list may be included in the tool package as standard accessories. They may differ from country to country.
SPECIFICATIONS
ACCESSIONS EN OPTION
VEILIGHEIDSWAARSCHUWINGEN
OPTIONELE ACCESSOIRES
Móvo yia xwpe ts Eupwnns
OiAnwosicuupoppwocntepiaaavovtai oto
Papaptnma A oTo npov i p i i o o8nyiWv.
IPOEIAOIOIHSEIEA ΣΦΑΛΕΙΑΣ
EvikéπpoeiodoToinoeic aσφαλεiag yia to nεktpiko εpyaεio
A PPOEI OIOIH 1aIaOte oIc TIOE IOTIOINOEi aOpaaleiac, ONYIEc, EIKOVoypaoNEIG KAI TPoDIAYPAPcE TOU TApexovTai ME auto To nKTPIko EPyALIO. H mtnpnon Oawv Tuv oyviw vTou avaypaoVtai KatWtepw MTopei va kataanEi e NkTPOITANGia, TUPKayia h/Kai Ooapap Tpaumatio.
UαTe oεC TIG POeioToin-σεiKai TIG OByεS YIA μελoVTIKπapaTouπn.
TIC TPOEIDOTIOINoEiO, O oPoC «NkETPIKO EpyAeio» aVapepetai OE NkETPIKO EpyAeio Tou TpoPooTeiTai aTo TnV Kupia Taopoxn NkETPIKOU pUaTOc (E NkTPIKO KAawio) n OE NkETPIKO EpyAeio Tou TpoPooTeiTai aTo MTTatapia (XwpiNkETPIKO Kaawio).
PpOeIOToIInoEIG aOΦaλEiaC yIA TO φOpntó KovTapopoAaIδo μTOpVTOUpaC
PnoeioToiroeis aovaiiaa yia to oopnto yaiai npovtoupa:
- Mny xpnoiouoieTo yaiidI uTOpVtOupa 0e aoxnue KApikeo uovhke, EIDIA otav utapxikivooKepauuvw.Auto i ve Tov kivuo va xuttnthei atro kepuvo.
- Na Kpatae ola Ta nEeKtpiKa KaWdi Ka ta Oupmuata paia aTn Tnv Tepioxkotnc.Ta nEeKtpiKa KaWdi n Ta OupmuTa mTopei va Eivai KpuuEv aTic mTovUpeC n Touc hauvouc Ka i va KOTouv kata laOoc aTIO na
3.Φopate wtoaotniéc.O eTTapknc TTPOOTATEUTIKoc Tov Kivduvo aTwAiaac Tns akonc. - Kpatate To yalidi mTOpVToupac movo aTIO TIC MOWMEVC ETIAPVEc LABNC ETEIDn I Ama uTopei va kavei Etnaipn ME TO KpumuEvo KAWDIO. ZEPiTTOWe nTApns Tov LAmuV ME nAektpofo KaWdo, MTOpei ta EKTEeiEv aEtaAikc Eapntmuata Tou yALIOU mTOpVToupac va Kataotouv Ta ibia nAektpofopa Kai va Tpoka- Aeouv NAEktpoTAnxiO tO xepiOTn.
- ATOUaKpuVETo aTa uepn Tou oWuatoC aTOn λaM.Nv aPaiEITE TO KOpEvO uIKo KaI mNv Kpatate To uAIKO TPOG KOTn 0tav OIAeK KIVouVTaOI aLaeS ouvXicouv va KIOUVtaI eTaN tN vATeVpyoToinan Tou dAkoTTN.Mia OTiYmN aTPOSeJiac kata n thdiapKEIA xeiipoiou Tou paIbIoU MTOPVTOpac mTOpEi va TpokaEeI ooapo TPOOWTIKO TpaUaTIOU.
- Otav kaθapiετe μπλokapiσενο uλίοή πρayματοποειτε σέρβις ΟΟ γαλίδι μπορντούρας, vα βεβαιώνεστε σόλοι Πδιακόπτες λειούργιας εἰναι σβησοι και Μασετα μπατapiών ἐχει αφαίρεθείη αποσυνδεθεί. H απρόσμενη ενργοτοίŋη του γαλίδιου μπορντούρας κατατov kaθapiσότου μπλokapiσενου uλίού έτοσρβις μπορείνα ἐχεί ως αποτέλεσμα σοβapó προωπικό τραματισό.
- Metapepete To yaiidipuropvoupa c ano tn a n t n laa oTAPATnEvn kai TPOeXETe va mny eoeTe Tov biakottn N eitoupyia c Eeitoupyia.H Owtn metapopau Tou yaiidiou mtopyoupac 0e iwoe1 Tov Kivduvo aEanntc evapnc kai Tov Etakolouo TPOOWTIKo TpaumaTIOAOTI C AaeC
- KaTaNtetaopnTnV aToNkeuOn Tou 100 uO uOvTOUpG, va TOnoTeIe TavTo KALUMaAuw. Oawotos XeiiooC Tou 100uO uTOpVTOUpG 0 eIWcEi To KIVDuvO TTPOWNIKOU TpaUATIOU aTTOIg
PnoeioiOioeis aoaaleiaoc yia to oopnto Kovatpoaaloo nopvtoupc:
- Na xnpoiouoite πavta TPOOtaia Kepa- AIO kata tn λeitoupyia tou kovtapoaalidou mTropvtoopa c ano uos. H TTwon 0paoumuatuv mTiopei va exei wc aIOTeAeogma oBapo TPOOW-TIKO Tpaumaio.
- Na xpoiooioite nav ta duo xepia otav xnoiopoioite to kovtapoyalido mTOpVTOUpac. Na kpatate to kovtapoyalido mTOpVTOUpac kai ta duo xepia yia va aTPOEUYETAI n aTWOEA i EALyXou.
- Ia va aeioeToV KIOUVO nAeKtpoIaIac, mN XpnoiopoIOIEITE TOTe To KovTapOpaIIO O TOpVToupc KovTa OE OTIOEOnTote nAeKtpiKcys pauEs. H eTAPn E NAEKTPKeC ypaue c n npon KovTa aetc uTpe i va TpokaAeoi oBapop Taupatmo n AektpoIaNxiia e aTOTe- LsmaTov havato.
PpOoTeEc PPOEIOToINoEIC aOpaAeiaC
Ppoetoumaia
- AYTO TO ΨΑΑΙΟ ΜΝΟΝΤΟΥΡΑΣ MΝΟPEΙ Α ΠΚΑΚΑΕΣΕΙ ΣΟΒΑρΟΥ ΣΤΡΑΜΙΣΜΟΥ Σιαβάστε τις Εθηγίες προεκτικά για το σωτό Κειρισό, προετοιμασία, συντήρηση, εκκίνηση και διακοπή του εργαλείου. Eξοικειωθείτε μέ ὄλα τα εχεριστήρια και τη σωτή χρήση του εργαλείου.
- ELeyxTe Touc PpaxTe aTROaMVOUc KAI Touc ThauvoUs YIA EVA AVtKeiEvA,OTWsOupMaTIVouc PpaxTe n KpumuEva KaawDi, TPIV ΘeTe OE AIToupyia To epyaEio.
- To o p v t o u p a c p e x p n o i - o t o i e i t a i o a i d i a k a e o u c k a t w t w 18 v. Egaipouvtai aTIO auty Tnv aTAYopeuON OI
veoi avw twv 16 ETW TOU EKTIAIDeUovtai UTO TNV
ETIIBEAEN EIOIKOU. - Σε περπτωη επειγούας ανάγκης, απενεργοῦποίσε μέσως το εργαλείο Kαι αφαίρεστην κασετα μπαταρίων.
- KINAYNOs - Na biatnpite Ta xepia oac paekip aTTo n Ama. H eTn ae Tn Ama tha exi Wc aTtoTeAeOma ooapo TPOoWtIKo Tpaumaio.
- Oooi xpnoiopoioouv to epyaia yia npwtn oopa 0a pnte i va zntnoov aro evav eptiepo xphotn va touc dEiEi TWC vao xpnoi- moTIOIOOuv to epyaiaio.
- PIV T N LEIOTUPOYIA, EEGTAOte av UNTAPXOUV OUPMATVOI PpaxTEc, NTpeC n aALAA OTpeca AVTKEiMEVA OTNV TEPIOxN EPyAOiAc. MTOpei va TPOKALEoouv ZnuiA OTiL Auec.
-
Na xpoiopoioite to yaibi mTropvToupac movo av Bpiokeote e Kaan oomegaikn kataoan. Av eioe koupaouevoi, n poooxn oac 0a evai eiwovn. Pooee Te iiaitepa kata to teao tsnpac epyaiaac. Eteaeote oec ts epyaiec me npemia kai ppooxn. O xpnoTng eivai uteuhovo yia oec tic nmuic e ae aa atoua.
-
Piv EKIVNE OEIOAONOTE EPYAOIA, LEVTE YIA VA BEBaiWBeITE OT TO PAALIBI Bpioketai SE KAAN KAI OAPAAH KATAOATN EPYAOIAC BeBaiWBeITE OTI OITPOPOULAKTINPECS EIVAI TOTOTETNVEA OWTA.To PAALIDI MTOPVToupacg EV PPETEVA XPNOIOTIOINei AV EV EIVAI PAnPwG OUVAPULOyNUEo.
- Na aTPOEUYETa EIKIVDuvA TEPiBaALovTa. Mn xPNOIOTOEITE TO Epyaleio OE uypaevo n Uypo Xwpo Oute va To EKHTETe OTN BpOxH. H eioooc vepou oTo Epyaleio mTOpei va auGnoTei Tov Kivduvo npokAnonc NkEkpotnAnxiac.
PpOoTIKOc PPOoTaTeUkOc EoTIAoIoc
- Ta yavia epyaiaac ao avektiko depaa noteauv eooc tou baoikou eoianmuou tou paioiu npovupac kpiptie navtva va opiouvatkata nvy epyaiae auto. Etnionsc, va oopate staepa nantooutiae avtioiaohtikcs oalec.
2.Φopate TPOoTATEUTIKA autiwv,OTWc wTOaO TIOEcs, yia va aTnOTpeyET nV aTwAeia TNS aKoNs OAS. - Φοράτε προστατευτικά γυλία, κράνος ασφα-λείας και προστατευτικά γάντια γία συ προστατεύσετε TOV εAUDΟ σας από τα ανΤIKEμενΑ ΠΟΥ ΕΚΤΟξεύονται έπερτουν.
- Otav ayyiEte Iaues n puOuIeTe Tn ywvia Iauc, va oopate TTPOoTATEUTIKA YAVTiA. OI Iauec mTopouv va kouov oOapa Ta yuva Xepia.
Aeioupyia
- Na xpnoiopoioite navta kai ta duo xepia yia va the tete o ae itoupyia to epyaieio. Av xpnoi- moTIOINoTe eva xepi, mTOpEi va Tpokknei aTTW- AEAyXou kai va exei wC aTOTeAeOma oobapo TPOoWTIKo Tpaumatuo.
- Evw aeitoupyeite to epyaieio, va egaospaaiizete Tavta otn theon aeitoupyiaegivai aopaaing kai aopaaiopeyn. Eivai egaipetikae tnikivduvo va TeVTwveote evw xpoioutoieTe to epya IIO, iOIA otav piokeote enavw oe kala. Mny epyaceote evw otkeote enavw o,tonote aotaec n aouvao.
- Mny opate tauroxpova nolaaanlouc iavteg zwng n/ka iavtec wou evw aeitoupyeite to epyaieio.
- KaTaN diapkeia TcIeIToupyiac, oI napeuPioKoEvoi n Ta Zwa PpEeI va Tnapaevouv Toulambdaotov 15 metpaakpi aTO epyaleio. Na diakotte Tn IeIToupyia Tou epyaleiou moic katoioC nnoiCiEi.
-
Av TO KOTTIKO epyaaleio xUTnosei OTIOOBnTote AVtkeievo n To epyaaleio apxioe i va TAPayei aouvnto To 6pufo n dovnon, oBnote aeoosr To epyaaleio kai Byalte nV KAeTa μTATapiwv, kai apnoTe To epyaaleio va akivnttointhei. Kai e Ta Tpayatotoinote ta akOautheta βnata:
-
EITIEWpnoTe yia znmuia
-
λέγεξτη για χαλαρά μέρη και σφίξτε τα ανάλογα
avTKaOtnote n EITIOKEuOte TUXOV KATEOTpauméva EApTnμata μE yvnoia avtaaakTiká. -
Na xρησιμοποίeTo εργαλείο μόνo γιαTo Evδδειγμενο σκοτό tou.Mnv xρησιμοποίeTo εργαλείo για οτοιονδήποτε αλλο σκοτό.
- ATEVEpyoToinote To epyaIeio kai aqapieote Tyn kaetmaTatapiwv TpiV:
Tov kaθαρiσo n Tpiv kaθαρiσετe kατοια εμπλοκή, - Ελέγεξε, Εκτέλεοετε Σουντήροη ἡ Εκτέλεσετε εργαοίες ΠΟτο εργαλεύ,
puoioeTe Tn eoon epyaiaoc Twv aawkoupeutikoou, - aΦnoεTE To εργαλείο χωπις επιπηροση.
- Béβaiωθeite oTI to εpyλεio exi totoθeɪnθeɪσωτa σTην καθομισένη θεοη εpyασίας πριν Tŋv εκκivnɔn tou εpyλεiou.
- Mny aeitoupyeite To epyaiaioe KATEOTpaumpevec n utepboaika aopaeves aues KOUPEUTIKOU.
- Na yywpiEe Tov TepiBaalovTa Xwpo kai va eioaote OE EtoIounta YIA TIOAVOc KIVuvouc TOU MTOpei VA mV yywpiEe TAOYW TOU BOpuBou Tou Epyaleiou.
- KaTaNtLeitoupyia, TPOOExTe va mnu EpEi To EpyaIeio e Ie aqn n e taaIko paxtn n aAa oKAp avtkeiEv.aH aau Ta aTaei Ka u TOpE i va Tpokaloei ObaP o Tpaupatioo.
- Na aTROEUYETN aEaNTN EKKIVNON TO epyaieiou. Mny mepetoe T epyaiao otav n kaetaaataapiw eivai totoeetnevni kai pe To daktuO tO biaokntn. Na 8eaWveote oI o biaokntnc eivai aBnotoc otav tototheite Tnv kaotaaatapiw.
- Mny TIAVETE TIGKTEGEIEVEG Aauec KOITnS n Ta KOTTIKA Akpa otav ONGKWETe n Kpatate To epyaEio.
- Mny aokite duvaun oTo epyaiao To epyaieo 0a npaymuottoinoei nTv epyaia kautepa kai u E iikpotepn tiavotnta yia kivduvo tpaumoiou oTo puOyia tov oio oxediactnke.
- Mn xpoiouoie To epyaio 0tn Bpoxn n oE bpeyeves n tolu vwnec ouvneKcTo nektpiko potep ev ivai aiabpoxo.
- KpatnoTe To epyaIeio OToaOepa otav xpnoiopoTIOIETe To epyaIeio.
- Mn ΘETETO epyaleio oE aeitoupyia xwpic qoptio otav auto dev evival atapaintto.
- PIV EAYEETIc Auec KOUPEUTIKOu, DIOPW- OTEmu bAaBn n aepoeTe EVA uIAK Tou Tiaotnkav OTIC Auec KOUPEUTIKOu, VA oNvETe TAVTA TO epyaleio kai va ByacTe TNV KAeTa mTataipiWv.
- Mny OtppeTe TOTe TIs auec KOUpeutikou PPOs TO MEPOS OaC n PPOs TouaAALouc.
-
Av oi a e Otaapntoouv va KIOUVTai ETEIDN KOaIgovEvaavTKIEiEvvaETAUWAAuW KA tAnLAEIOUPyia,OBnoteToEPyaAeioKAI aPaeoteTNV KaOeTAaTAPiWv,ETa aPaepeTe To Evo AVtkeIevo XpnoIOpOTIoVTOc KAIOEpyAeio,OTWCIA TeVOn H aqaipoeon TwV EevwavtkeIeVwV EToXepiMTOpeVA TPOKaAeoi Tpaumato,ETEOHoiAAeC MTOpei VA KIVNOUV OE avTIDpaON Tc aPaeocns Tuv Eevw AVtKEIeVWv.
-
Otav ppoapate n aqaipite TO kaumu a auw, Tpoexete va mnu Tpaupatiee Ta xepia oac.
NEPIΓPAΦH EAPTHMATΩN
Eik.1