Napo LA120125 - Humidifier LANAFORM - Free user manual and instructions
Find the device manual for free Napo LA120125 LANAFORM in PDF.

User questions about Napo LA120125 LANAFORM
0 question about this device. Answer the ones you know or ask your own.
Ask a new question about this device
Download the instructions for your Humidifier in PDF format for free! Find your manual Napo LA120125 - LANAFORM and take your electronic device back in hand. On this page are published all the documents necessary for the use of your device. Napo LA120125 by LANAFORM.
USER MANUAL Napo LA120125 LANAFORM
natural_image
White LANAFORM air purifier with digital display and control buttons (no visible text or symbols on device body)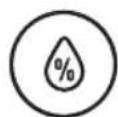
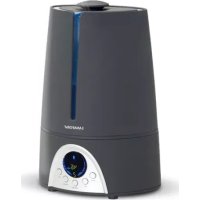
HUMIDITY SETTING
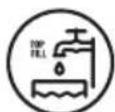
TOP FILLING

TIMER FUNCTION (1-12H)
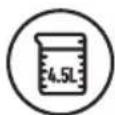
4.5L CAPACITY
natural_image
White plastic electronic device casing with labeled ports (no text or symbols visible)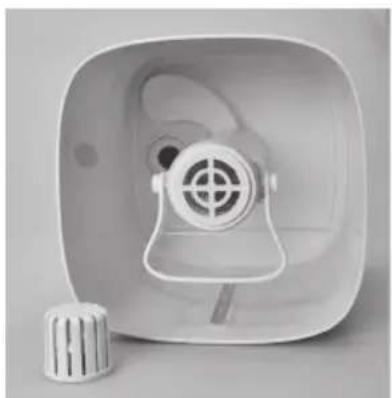
natural_image
White plastic air purifier with ventilation slots and a circular vent (no text or symbols visible)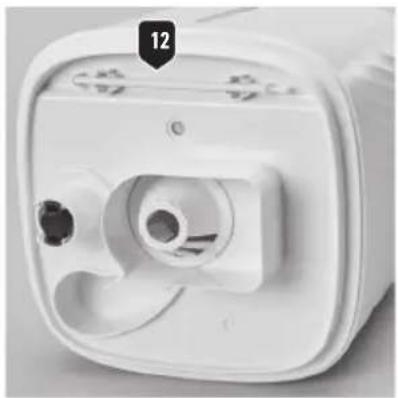
natural_image
Close-up of a white electronic device with a circular vent and ports, labeled with number 12 (no text or symbols on the device itself)2

natural_image
Simple gray circular icon with a power button symbol and a label '1' (no text or numbers present)
natural_image
Simple analog clock face with hour and minute hands, no numbers or text visible
natural_image
Simple icon of a sun with rays inside a circle, next to a black number 2 (no text or symbols on the sun or circle)
text_image
% 5
natural_image
Simple line drawing of three parallel wavy lines inside a circle, next to a black number 3 (no text or symbols on the lines)
natural_image
Simple line drawing of a circular fan or impeller with a central hub and six blades, next to a black arrow labeled '6' (no text or symbols on the fan itself)ENGLISH
INTRODUCTION
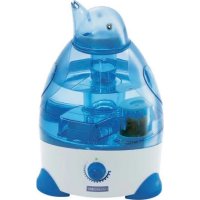
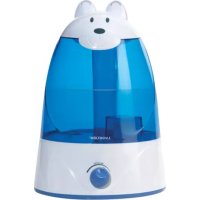
Thank you for choosing the NAPO cool and warm mist humidifier by LANAFORM. The NAPOhumidifier helps you restore a proper humidity level and eliminate the discomfort associated with dry air. The ventilation system diffuses water in the form of cool or warm mist, thus providing the level of humidity required. This vapour takes the form of a mist released from a diffusion nozzle.
The photographs and other images of the product in this manual and on the packaging are as accurate as possible, but do not claim to be a perfect reproduction of the product.
▲ PLEASE READ ALL THE INSTRUCTIONS BEFORE USING YOUR HUMIDIFIER, ESPECIALLY THIS BASIC SAFETY INFORMATION:
- This device is not intended for use by people, including children, with reduced physical, sensory or mental capabilities, or people with a lack of experience or knowledge, unless someone responsible for their safety can supervise or instruct them beforehand on how to use the device. Children should be supervised to make sure they do not play with the device.
- Use this device only according to the instructions given in this manual.
- Check that your mains voltage is the same as that of your device.
• Always place the NAPO humidifier on a hard, flat and horizontal surface. Keep it away from walls and heat sources such as stoves, radiators, etc. - Please note: If it is not placed on a horizontal surface, the device may not work properly.
- Do not connect or disconnect the mains plug of the device with wet hands.
- If the power cable is damaged, it must be replaced by a similar cable available from the supplier or the supplier's after-sales department.
- Do not leave the device exposed to direct sunlight.
- Fill the reservoir with fresh, distilled or demineralised water.
- Do not take the device apart either as a whole or even its base unit.
- Do not switch on the device when there is no water in the reservoir.
- Do not shake the device. This could cause the water to spill over into the base unit and prevent the device from working.
-
Never touch the water or components when the unit is running.
-
If there is an unusual smell when the device is being used as described in this manual, switch off the device, unplug it and have it examined by the supplier or the supplier's after-sales department.
- Do not pour hot water, i.e. water with a temperature above 40^ , into the reservoir.
- Unplug the device before cleaning it or removing the reservoir.
- Do not wash the entire unit with water and do not immerse it in water. Consult the cleaning instructions in this manual.
- Never scrape the transducer with a hard tool. The NAPO humidifier must be cleaned regularly. To do this, consult the cleaning instructions in this manual and follow them.
- If it falls into water, unplug it immediately before retrieving it.
- Electrical appliances should never be left unattended when connected. Unplug it when you are not using it.
- Keep the power cable away from hot surfaces.
- Never use this appliance in a room in which aerosols (sprays) are used or where oxygen is administered.
- Do not put items of clothing or towels on top of the device. If the nozzle is obstructed, this may cause the device to malfunction.
- When moving the device, lift it up by the base and not by the water reservoir.
- Do not use the humidifier if the air in the room is already sufficiently humid (relative humidity of at least 50%). The ideal relative humidity level for human comfort is in fact between 40% and 60%. Excess humidity manifests itself in condensation on cold surfaces or on cold walls in the room. To measure the room's humidity correctly, use a hygrometer available in most specialist shops and hypermarkets.
- The NAPO humidifier is designed for indoor and domestic use only.
COMPONENTS OF THE DEVICE 1
(1) Diffuser sprinkler tip
(2) Reservoir cover
(3) Ring seal
(4) Handle
(5) Water reservoir
(6) Exhaust vent
(7) Base
(8) Tray for essential oil
(9) Air inlet
(10) Transducer
(11) Heat resistor
(12) Cleaning brush
DEVICE DISPLAY 2
(1) ON/OFF
(2) Atmospheric light & Night mode
(3) Warning function
(4) Timer
(5) Humidity level control
(6) Emission intensity
INSTRUCTIONS FOR USE
Features
• Cool and warm mist humidifier
- LCD touch screen
• Automatic detection and display of ambient relative humidity
- Capacity for programming desired humidity level
- Timer: 12 hours with programming in 1-hour stages
• 3 levels of vapour emission intensity: high, low, medium
• 3 light modes: changing colour, fixed colour, no light
- Night mode
- Reservoir capacity 4,51
• Maximum flow rate of cool mist: 300ml/hr (cool mist) and 400ml/hr (warm mist)
• Automatic shutoff when the reservoir is empty
- Quiet operation (≤35dB)
Differences between
warm mist and cool mist
Young children
Make the use of cool mist your preference as it does not cause burns if the device is dropped or overturns.
Maintenance
The device diffusing cool mist needs to be cleaned more regularly than a device diffusing warm mist. In fact, when warm mist is produced, the water is heated through a heat resistor, thus removing a large quantity of bacteria. Since the NAPO offers both these functions, it will be very important to refer to the care instructions in this manual.
Room in which the humidifier will be installed
The cool mist will provide a touch of freshness in a sweltering, dry and badly ventilated room. Warm mist will itself help reheat the air in a cold room.
Electricity consumption
The warm mist function uses more energy because it has to heat the water.
Preparation ▲ 1
1 Place the NAPO humidifier in the room half an hour before turning it on so that it can adjust to room temperature.
2 Make sure it is always placed on a hard, flat and horizontal surface. Keep it slightly away from walls and heat sources such as stoves, radiators, etc.
3 Make sure the device is clean before starting to use it.
4 Remove the reservoir lid (1). Then pour fresh, preferably demineralised water into the reservoir (5). Replace the cover.
5 Make sure your hands are completely dry when connecting (and disconnecting) the device.
6 The humidifier is now working.
Instructions for use ▲ 2
1) Switching the device on and off:
- Press the ON/OFF button (1) to switch on the device. Its default mode is cool mist, at average emission intensity and the LED screen displays the current humidity level of the ambient air. ① the LED screen displays the humidity level between 30 and 80%. If it displays "LO", the humidity level of the ambient air is less than 30%. If it displays "HI", the humidity level of the ambient air is more than 80%.
- To turn the device off, press the button again. All the functions will stop, except the fan, which will continue to run for 15 seconds.
① if the reservoir is empty, the device emits a sound signal and a red light indicator will light up on the ON/OFF button. The LED screen will also display "E1". The device does not emit any more mist: fill the reservoir so that it runs normally again.
2) Select a light or night mode:
- When the device is on, it does not emit an atmospheric light by default.
- Press the button that selects the light mode a first time (2): the light is activated and automatically changes colour.
- Press it a second time and the colour will be set.
-
Press it a third time and the LED screen will display "SP" for 5 seconds. The device will go into night mode.
-
All the lights are off unless the mode indicates otherwise (note that if the warm mist is activated, the button indicator (3) will stay on for 5 seconds).
- The device will run for 8 hours – 3 hours at medium intensity, then 5 hours at low intensity.
- The humidity level is checked at 60% and the device will stop running when the ambient air reaches this level and resumes when the rate drops.
- Press a fourth time: the device disconnects from the night mode and resumes its previous emission intensity.
3) Select the heating function:
- When the device is on, press the heating function button (3) to set it going. When this function is active, a heating resistor heats up the water in the base to counteract the bacteria and creates a warm mist.
- Press the button again to turn the heating function off.
① the heating function is independent of all the other functions and modes. It can therefore be activated and deactivated at any time.
▲ never touch the heating resistor (Fig.1, point 11) before it has cooled down! In the event of accidental burns, consult a doctor!
4) Adjust the timer:
When the device is on, press the button repeatedly that sets the timer (4) to set the device going for 1 to 12 hours. The LED screen will display the time selected or "CO" for continuous for 5 seconds.
5) Adjusting the humidity level:
When the device is on, press the button that sets the humidity level (5) repeatedly to set the automatic humidity control going at the level required from 40 to 75% in increments of 5%. The LED screen will display the level selected or "CO" for "by default" for 5 seconds. We recommend a level of humidity between approximately 40 and 60%. The device will stop running when the ambient air reaches the required level and resumes when this rate drops.
6) Adjusting the emission intensity:
- When the device is on, it emits mist at a medium intensity.
-
Press the button for selecting the emission intensity (6) once: the device will emit mist at the highest intensity intensity.
-
Press a second time and the device will emit mist at the lowest.
- Press a third time and the device will emit mist at medium intensity.
A
- Only use fresh, distilled or demineralised water to avoid any malfunction.
- Do not pour water into the diffuser sprinkler tip (Fig. 1, point 1) in order to avoid any malfunction and risk of fire.
- The reservoir must be kept clean. Please refer to the cleaning instructions below.
▲ EVEN THOUGH THERE IS A SAFETY DEVICE THAT STOPS THE TRANSDUCER FROM WORKING, DO NOT LEAVE THE DEVICE CONNECTED WHEN YOU ARE NOT USING IT.
Diffusing essential oils
To diffuse essential oils, push the essential oil tray (Fig. 1, point 8) so that you can remove it. Pour 3 drops onto the pad inside. Make sure that the oil does not touch any other part of the device as this may damage the materials.
▲ Additional information about the use of essential oils
• Before using essential oils, please check the harmful effects that use of these products may have on your health.
- Always choose quality essential oils that are pure, 100% natural and intended for diffusion. Use them in moderation and with care. Follow the instructions and warnings stated on the packaging of the essential oils, making sure in particular that:
- Pregnant women, people with epilepsy, asthmatics and people who suffer from allergies, those with heart problems or serious illnesses should not use essential oils.
- Essential oils should be used only for periods not exceeding 10 minutes in the room of a baby (under 3 years old) and only when the baby is not actually in the room.
• Make sure that children and minors do not play with or use the device.
- Just a few drops (3 to 4 drops at most) of essential oils are sufficient to ensure that the device works properly and the scent is diffused. Excessive use of essential oils could damage the device.
- Make sure you pour water into the reservoir first before adding the drops of essential oils.
- Lanaform cannot be held liable in the event of accidental damage resulting from any use contrary to the instructions given in these instructions for use.
MAINTENANCE AND STORAGE
If the water contains too much calcium and magnesium, it may deposit a "white powder" in the device. If this foam is deposited on the transducer (Fig. 1, point 10), this means that the device will not work properly.
▲ do not use products containing bleach to clean the device. Use only washing-up liquid or vinegar!
▲ do not touch the heating resistor (Fig.1, point 11) before it has cooled down! In the event of accidental burns, consult a doctor!
Maintenance
We recommend:
1 Using fresh, distilled or demineralised water each time it is used.
2 Cleaning the reservoir every 2 days and cleaning the transducer every week.
3 Changing the water in the reservoir every 2 days.
4 Cleaning the device (see explanations below) and making sure that all its parts are completely dry when it is not in use.
To clean the transducer (Fig. 1, point 10):
1 Put 2 to 5 drops of vinegar on its surface and leave them there for 2 to 5 minutes.
2 Brush the foam off the surface with a soft brush (Fig. 1, point 12): Do not use a hard tool to scrape the surface.
3 Do not use soap, solvent or spray cleaner to clean the transducer.
To clean the reservoir (Fig. 1, point 5) and the lid (Fig. 1, point 2):
1 Remove the ring seal (Fig. 1, point 3) of the lid.
2 Clean the reservoir, the lid and the ring with water using a soft cloth and vinegar if there are any foam or limescale deposits on the inside.
3 Rinse the reservoir in clean water.
To clean the mist emission sprinkler tip (Fig. 1, point 1):
1 Clean this with a brush or damp cloth.
2 Rinse with clean water.
To clean the base (Fig. 1, point 7):
1 Clean it with a little water and possibly a little vinegar using a brush or soft tissue.
2 Do not use soap, solvent or spray cleaner to clean the base.
▲ do not immerse the base in water and do not allow water to enter the air inlet (Fig. 1, point 9) and the exhaust vent (Fig. 1, point 6)!
Storage
▲ always switch the device off, unplug it and empty it before transporting it.
Having cleaned and dried the device, store it in a dry, cool place out of the reach of children.
BREAKDOWNS AND REMEDIES
In the event of a malfunction under normal conditions of use, please refer to the following list:
😊 No mist.
⑦ If there is no light.
😊 Check that the device is connected and that there is no mains fault.
⑦ The water level in the reservoir is too low.
😊 Add water to the reservoir.
⑦ Water is leaking from the reservoir.
😊 Check that the reservoir is in the right position.
⑦ The temperature of the unit is too low.
😊 Place the unit in a room at room temperature for half an hour prior to use.
😊 Mist has an unusual smell.
⑦ The water has been standing in the reservoir for too long.
😊 Clean the reservoir and pour fresh, distilled or demineralised water into it.
😊 Low intensity.
② Too much/too little water in the reservoir.
😊 Empty water out of the reservoir or add water to it.
⑦ Sediment on the transducer.
😊 Clean the transducer.
⑦ The water is too cold.
😊 Use water that is at room temperature.
⑦ The water is not clean.
😊 Clean the reservoir and pour fresh, distilled or demineralised water into it.
TECHNICAL DATA
Reference: LA120125
Power supply: 220-240V\~, 50-60Hz
Consumption: 30W (cool mist), 90W (warm mist)
Reservoir capacity: 4.5l
Maximum emission rate: 300ml/hr (cool mist) and 400ml/hr (warm mist)
Dimensions: 195(L)*195(W)*319(H) mm

ADVICE ON WASTE DISPOSAL
The packaging consists entirely of environmentally-friendly materials that can be taken to your local waste sorting centre to be used as secondary materials. Cardboard can be placed in a paper collection container. Packing film must be taken to your local sorting and recycling centre.
When you are no longer using the device, dispose of it in an environmentally responsible manner and in compliance with the statutory requirements.
LIMITED WARRANTY
LANAFORM guarantees that this product will be free from any material and workmanship defects for a period of two years from the date it was purchased, other than as specified below.
The LANAFORM warranty does not cover damage caused by normal wear and tear on this product. In addition, the warranty on this LANAFORM product does not cover damage caused as a result of any abusive, inappropriate or incorrect use, accident, attachment of any unauthorised accessory, modification of the product or any other situation of whatever kind, beyond the control of LANAFORM.
LANAFORM shall not be held liable for any type of incidental, consequential or special damage.
Any implied warranties of the product's fitness for purpose are limited to a period of two years from the original purchase date on presentation of a copy of the proof of purchase.
Upon receipt, LANAFORM will repair or replace your device, as appropriate, and return it to you. The warranty may only be used at the LANAFORM Service Centre. Any maintenance and repair work carried out on this product by any person other than the LANAFORM Service Centre will invalidate this warranty.
FRANÇAIS
INTRODUCTION
MANUFACTURER & IMPORTER
LANAFORM SA
POSTAL ADDRESS