PAAS 20Li B1 - Battery charger PARKSIDE - Free user manual and instructions
Find the device manual for free PAAS 20Li B1 PARKSIDE in PDF.
User questions about PAAS 20Li B1 PARKSIDE
0 question about this device. Answer the ones you know or ask your own.
Ask a new question about this device
Download the instructions for your Battery charger in PDF format for free! Find your manual PAAS 20Li B1 - PARKSIDE and take your electronic device back in hand. On this page are published all the documents necessary for the use of your device. PAAS 20Li B1 by PARKSIDE.
USER MANUAL PAAS 20Li B1 PARKSIDE
text_image
QR code image with a central logo, likely linking to a digital resource or website.PDF ONLINE
parkside-diy.com
OWIM GmbH & Co. KG
Stiftsbergstraße 1
74167 Neckarsulm
GERMANY
Model No.: HG08983
Version: 07/2025
IAN 505122_2501
8
20 V / 4,5 A AKKU-SCHNELLLADEGERÄT / 20V / 4.5A FAST BATTERY CHARGER / 20 V / 4,5 A CHARGEUR RAPIDE DE BATTERIE PLG 20 C3
DE AT CH
20 V / 4,5 A ÄKKU- SCHNELLLADEGERÄT PLG 20 C3
Assembly, operating and safety instructions
FR BE
20 V / 4,5 A CHARGEUR RAPIDE DE BATTERIE PLG 20 C3
text_image
Technical diagram of a mobile phone chassis with labeled components including front panel, rear panel, and internal wiring.B
text_image
6 4in/102mmnatural_image
Silhouette of a person sorting trash into a bin (no text or symbols)natural_image
Simple line drawing of a trash bin with crossed lines indicating no waste or discharge (no text or symbols)Gerät entsorgen
text_image
QR code image containing encoded data, with a central logo or watermark symbolPDF ONLINE
parkside-diy.com
Service

Service Deutschland
Tel.: 0800 5435 111
E-Mail:owim@lidl.de

Service Österreich
Tel.:0800292726
E-Mail:owim@lidl.at

Service Schweiz
Tel.:0800562153
E-Mail:owim@lidl.ch
Warnings and symbols used .. Page 37
Introduction..... Page 39
Intended use..... Page 40
Scope of delivery ..... Page 40
Parts description..... Page 40
Technical data..... Page 41
Safety notes ...... Page 43
Operation..... Page 47
Charging the battery pack .. Page 47
Charging status ..... Page 48
Wall mounting..... Page 49
Cleaning and care .... Page 51
Disposal..... Page 52
Simplified EU declaration
of conformity. . . . . . . . . . . . . . . . . . . . . . . . . . . . . . . . . . . . . . . . . . . . . . . . . . . . . . . . . . . . . . . . . . . . . . . . . . . . . . . . . . . 55
Warranty Page 55
Warranty claim procedure... Page 57
Service ...... Page 59
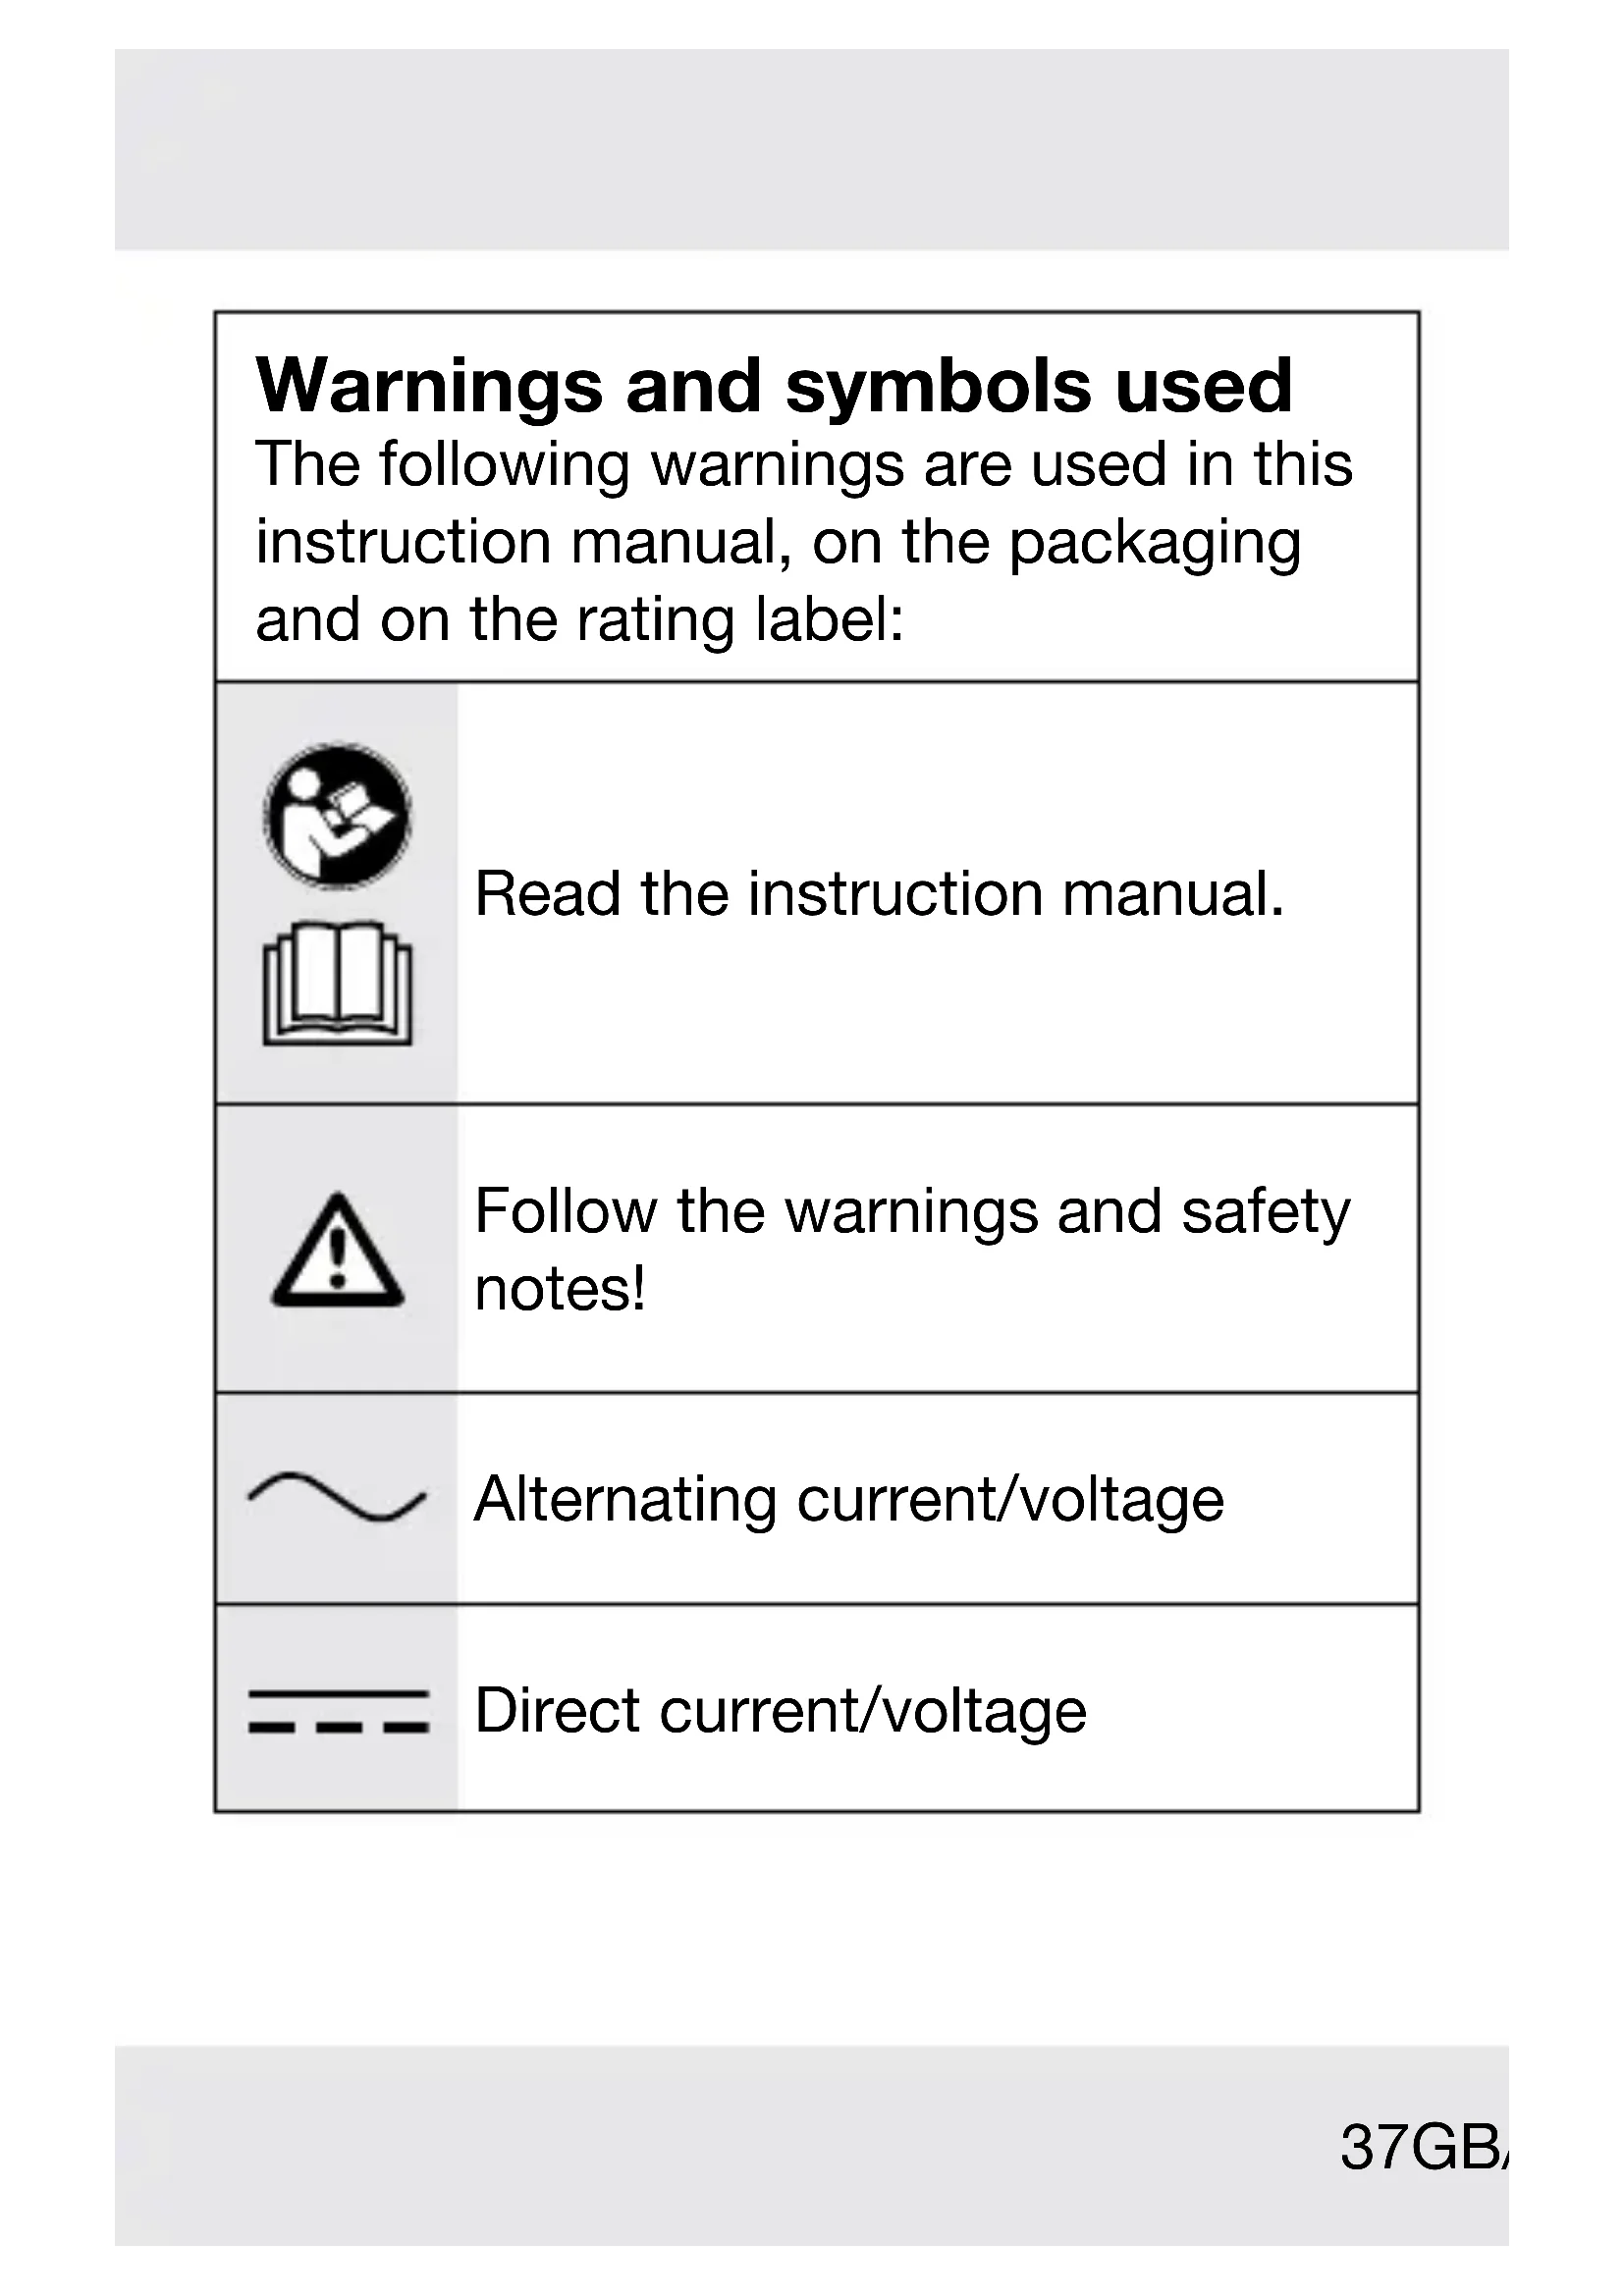
| Warnings and symbols usedThe following warnings are used in this instruction manual, on the packaging and on the rating label: | |
  | Read the instruction manual. |
 | Follow the warnings and safety notes! |
 | Alternating current/voltage |
 | Direct current/voltage |
 | Protection class II (double insulation) |
 | Use in dry indoor rooms only. |
 | Fuse |
 | This symbol in combination with the word “Info” provides additional useful information. |
| [ZDSG] | Safety-relevant information and other notesInstructions for use |
20V / 4.5A FAST BATTERY CHARGER
● Introduction
We congratulate you on the purchase of your new product. You have chosen a high quality product. The instructions for use are part of the product. They contain important information concerning safety, use and disposal. Before using the product, please familiarise yourself with all of the safety information and instructions for use. Only use the product as described and for the specified applications. If you pass the product on to anyone else, please ensure that you also pass on all the documentation with it.
Intended use
This product is exclusively intended for charging Parkside 20 V batteries of X 20 V Team series.
The product is not intended for commercial use. Any other usage or modification of the product is deemed to be improper and carries a significant risk of accidents. The manufacturer accepts no responsibility for damage(s) attributable to misuse.
Scope of delivery
1 Fast battery charger
1 Instruction manual
Parts description
1 Battery pack*
2 Mains cord with mains plug
3 Charger
4 Charging control LED – Red
5 Charging control LED – Green
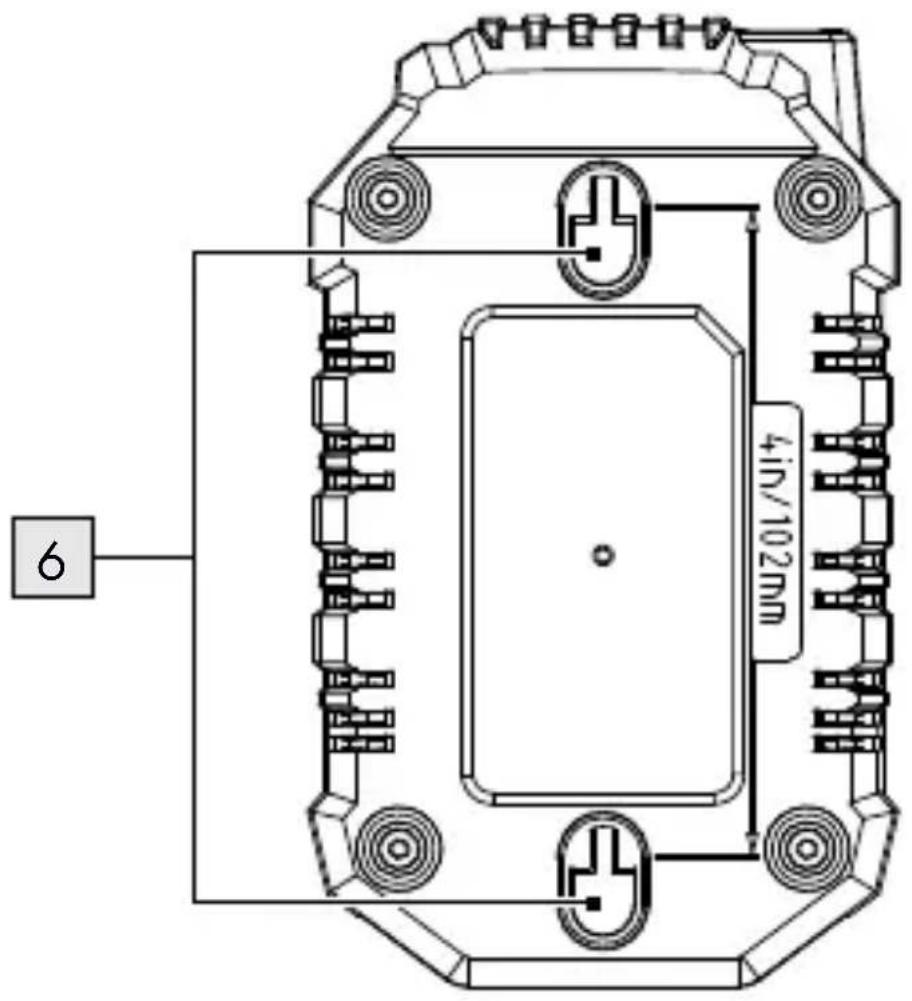
6 Mounting holes (underside)
* Battery pack not included
- Technical data
Charger: PLG 20 C3
Input:
Rated voltage: 230–240 V\~
Rated frequency: 50 Hz
Rated power
consumption: 120 W
Fuse (internal): 3.15 A
T3.15A
Output:
Rated voltage: 21.5 V
Rated current: 4.5 A
| Battery pack type* Charging time | |
| PAP 20 B1, 2.0 Ah 35 minutes | |
| PAP 20 B3, PAPS 204 A1 / B1, 4.0 Ah | 60 minutes |
| PAPS 208 A1, 8.0 Ah 120 minutes | |
NOTE: The actual charging time may be slightly different from the above stated depending on the ambient temperature and the condition of the battery pack. The information is subject to change without prior notice.
Protection class:
II/☐ (double insulation)
* Battery pack not included
Customers can order compatible replacement batteries and chargers from Lidl online shops for the following countries:
Germany (lidl.de), France (lidl.fr), Belgium (lidl.be), Czech Republic (lidl.cz), Netherlands (lidl.nl), Poland (lidl.pl), Slovakia (lidl.sk), Spain (lidl.es)
Customers from all other countries can order from www.optimex-shop.com.
Net weight: 0.395 kg
Recommended ambient temperature:
While charging: +4 to +40 °C
During operation: +4 to +40 °C
During storage: +20 to +26 °C

Safety notes
This product can be used by children aged from 8 years and above and
persons with reduced physical, sensory or mental capabilities or lack of experience and knowledge if they have been given supervision or instruction concerning use of the product in a safe way and understand the hazards involved.
Children shall not play with the product. Cleaning and user maintenance shall not be made by children without supervision.
- Do not charge regular or non-rechargeable batteries. Disregarding this instruction is hazardous.
If the mains cord is damaged, it must be replaced by the manufacturer, its service agent or similarly qualified persons in order to avoid a hazard.
■ Protect the electrical parts against moisture.
Do not immerse such parts in water or other liquids to avoid electrical
shock. Never hold the product under running water. Pay attention to the instructions provided for cleaning, maintenance and repair.
The product is suitable for indoor use only.
⚠️ATTENTION! This product is only designed for charging following battery pack types:
| Parkside 20 Vbattery pack | ||
| PAP 20 B1 | 2 Ah | 5 cells |
| PAP 20 B3 | 4 Ah | 10 cells |
| PAPS 204A1/B1 | 4 Ah | 5 cells |
| PAPS 208A1 8 Ah | 10 cells | |
Operation
● Charging the battery pack
i INFO:
The battery pa1 may be charged at any time without reducing its service life.
Interrupting the charging process does not damage the battery pack.
- Charge the battery pack 1 before use when it is at medium or low charging level.
- Insert the battery pack into the charger 3.
- Connect the mains plug 2 to a socket-outlet.
- When the battery pack is fully charged, remove the battery pack from the charger. Disconnect the mains plug from the socket-outlet.
● Charging status
The charging control LEDs (green 5 and red 4) indicate the status of the charger 3 and the battery pack 1 (Fig. A):
| LED Status | |
| Red LED lights up | Battery pack charging |
| Green LED lights up | Battery pack fully charged |
| Green and red LED flash | Battery pack defective |
| Red LED flashes | Battery pack 1 too cold or too warm |
| Green LED lights up (without battery pack) | Charger 3 ready for use |

Wall mounting

WARNING! RISK OF INJURY AND DAMAGE!
When drilling, be careful not to damage any supply lines. Use suitable search devices to find these or consult an installation plan for guidance.
- Contact with electrical cables can lead to electric shock and fire. Contact with a gas pipe can result in an explosion. Damage to a water pipe can lead to property damage and electric shock.
i INFO:
The charg 3 can be used either free-standing or mounted on the wall.
- Drill 2 holes in the wall with a spacing of 102 mm.
- Insert dowels into the drilled holes.
- Screw round-head screws (screw head diameter: 6–8 mm) into the dowels.
Leave the screw head protruding with a distance of approx. 10 mm from the wall.
- Hang the charger 3 onto the screws using the mounting holes 6 located on the underside of the charger (Fig. B).
The charging control LEDs 4/5 must be located at the bottom when the charger is mounted on the wall.
● Cleaning and care
NOTICE! RISK OF DAMAGE!
Do not use chemical, alkaline, abrasive or other aggressive detergents or disinfectants to clean this product as they might be harmful to its surfaces.
■ Never allow fluids to get into the product.
i INFO:
■ Regular and proper cleaning will help ensure safe use and prolong the service life of the product.
□ Keep the product clean, dry and free from oil or grease. Remove debris from it after each use and before storage.
□ Clean the product with a dry cloth. Use a soft brush for areas that are hard to reach.
□ Always keep the vents clear. Clean the air vents after every use with a cloth and soft brush.
● Disposal
The packaging is made of environmentally friendly materials, which may be disposed of through your local recycling facilities.
text_image
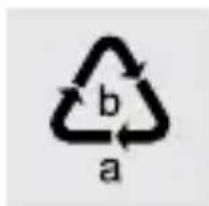
b aObserve the marking of the packaging materials for waste separation, which are marked with abbreviations (a) and numbers (b) with following meaning: 1–7: plastics/20–22: paper and fibreboard/80–98: composite materials.
Product:

The product incl. accessories, manual and packaging materials are recyclable and are subject to extended producer responsibility.
Dispose them separately, following the illustrated Info-tri (sorting information), for better waste treatment.
The Triman logo is valid in France only.

natural_image
Silhouette of a person disposing of trash into a bin (no text or symbols)Contact your local refuse disposal authority for more details of how to dispose of your wornout product.

natural_image
Simple line drawing of a trash bin with crossed lines indicating no waste or discharge (no text or symbols)To help protect the environment, please dispose of the product properly when it has reached the end of its useful life and not in the household waste. Information on collection points and their opening hours can be obtained from your local authority.
● Simplified EU declaration of conformity

CE mark indicates conformity with relevant EU directives applicable for this product.
● Warranty
The product has been manufactured to strict quality guidelines and meticulously examined before delivery. In the event of material or manufacturing defects you have legal rights against the retailer of this product. Your legal rights are not limited in any way by our warranty detailed below.
The warranty for this product is 3 years from the date of purchase. The warranty period begins on the date of purchase. Keep the original sales receipt in a safe location as this document is required as proof of purchase.
Any damage or defects already present at the time of purchase must be reported without delay after unpacking the product.
Should the product show any fault in materials or manufacture within 3 years from the date of purchase, we will repair or replace it – at our choice – free of charge to you. The warranty period is not extended as a result of a claim being granted. This also applies to replaced and repaired parts.
This warranty becomes void if the product has been damaged, or used or maintained improperly.
The warranty covers material or manufacturing defects.
● Warranty claim procedure
So that your request can be processed quickly, please observe the following instructions:
For all inquiries, please have the receipt and item number (e.g., IAN 505122_2501) ready as proof of purchase.
The article number can be taken from the identification label on the product, engraving on the product, the front cover of your manual (at the bottom left), or the sticker on the back or bottom of the product.
If malfunctions or other defects arise, first contact the service department indicated below by phone or email.
You can then send a product recorded as defective to the communicated service address postage-free, making sure to enclose proof of purchase (receipt) and information on the details of the defect and when it occurred.
You can download and view this and numerous other manuals at parkside-diy.com. This QR code takes you directly to parkside-diy.com. Choose your country and use the search screen to search for the operating instructions. Entering the item number (IAN) 505122_2501 takes you to the operating instructions for your item.

text_image
QR code image containing encoded data, with a central logo or watermark symbolPDF ONLINE
parkside-diy.com

Service

Service Great Britain
Tel.:08000569216
E-Mail:owim@lidl.co.uk

Service Ireland
Tel.:1800200736
E-Mail:owim@lidl.ie
Avertissements et
chemical
Recycling symbol with labels a and b, indicating two cycles of recyclingnatural_image
Silhouette of a person throwing trash into a bin (no text or symbols)natural_image
Symbol of a trash bin crossed out by a horizontal line, representing waste sorting or disposal (no text or numbers present)natural_image
Silhouette of a person sorting trash into a bin (no text or symbols)natural_image
Simple line drawing of a trash bin with crossed lines indicating no waste or plastic (no text or symbols)text_image
QR code image containing encoded data, with a central logo or watermark symbolPDF ONLINE
parkside-diy.com

Service

Service Nederland
Tel.:08000225537
E-Mail:owim@lidl.nl

Service België
Tel.:080071011
Tel.:80023970(Luxemburg)
E-Mail:owim@lidl.be
natural_image
Silhouette of a person throwing trash into a bin (no text or symbols)natural_image
Simple line drawing of a trash bin with crossed lines indicating no waste or discharge (no text or symbols)natural_image
Simple icon of a person disposing of trash into a bin (no text or symbols)natural_image
Simple line drawing of a trash can with crossed lines indicating no waste or discharge (no text or symbols)natural_image
Silhouette of a person disposing of trash into a bin (no text or symbols)natural_image
Simple line drawing of a trash can with crossed lines indicating no waste or discharge (no text or symbols)text_image
QR code image containing encoded data, with a central logo or watermark symbolPDF ONLINE
parkside-diy.com

Servis

Servis Slovensko
Tel.: 0800 008158
E-pošta: owim@lidl.sk
Indicaciones de
text_image
FR + Open Recyclenatural_image
Silhouette of a person sorting trash into a bin (no text or symbols)natural_image
Simple line drawing of a trash bin with crossed lines indicating no waste or plastic (no text or symbols)text_image
QR code image containing encoded data, with a central logo or watermark symbolPDF ONLINE
parkside-diy.com

Asistencia

text_image
FR + Open Booknatural_image
Silhouette of a person throwing trash into a bin (no text or symbols)natural_image
Simple line drawing of a trash bin with crossed lines indicating no waste or discharge (no text or symbols)text_image
QR code image containing encoded data, with a central logo or watermark symbolPDF ONLINE
parkside-diy.com

Service

Service Danmark
Tel.:80253972
E-Mail: owim@lidl.dk
natural_image
Silhouette of a person throwing trash into a bin (no text or symbols)natural_image
Simple line drawing of a trash bin with crossed lines indicating no waste or plastic (no text or symbols)text_image
QR code image containing encoded data, with a central logo or watermark symbolPDF ONLINE
parkside-diy.com

Assistenza

Assistenza Italia
Tel.:800790789
E-Mail:owim@lidl.it