
ION Charles i7 - Robot vacuum Niceboy - Free user manual and instructions
Find the device manual for free ION Charles i7 Niceboy in PDF.
| Product type | Robot vacuum |
| Brand | Niceboy |
| Model | ION Charles i7 |
| Rated voltage | DC 14.8 V |
| Power | 30 W |
| Battery capacity | Li-ion 2600 mAh |
| Runtime | 120 minutes |
| Full charge time | 300 minutes (5 hours) |
| Dustbin volume | 0.6 L |
| Remote control method | Infrared (remote control) and mobile app |
| Connectivity | Wi-Fi 2.4 GHz / 5 GHz |
| Wi-Fi bands | 2.4 - 2.5 GHz ; 5.15 - 5.875 GHz ; 5.925 - 7.125 GHz |
| Adapter input | 100-240 V ~ 50/60 Hz |
| Adapter output | 19 V / 0.6 A |
| Remote control transmission distance | Less than 5 m |
| Cleaning modes | Spot, edge, DOCK (auto return) |
| Suction power adjustment | 3 modes: Strong, Standard, Low |
| Mopping function | Yes, with water tank and cloth |
| Package contents | Robot vacuum, charging base, remote control, adapter, 4 side brushes, 2 HEPA filters, cleaning brush, magnetic strip, water tank, instruction manual |
| Safety instructions | Do not use by children under 8 years, remove cables and small objects, avoid wet surfaces, use on indoor floors only |
| Recommended maintenance | Regularly clean dustbin, HEPA filter, side brushes, water tank, sensors and charging contacts |
Frequently Asked Questions - ION Charles i7 Niceboy
User questions about ION Charles i7 Niceboy
0 question about this device. Answer the ones you know or ask your own.
Ask a new question about this device
Download the instructions for your Robot vacuum in PDF format for free! Find your manual ION Charles i7 - Niceboy and take your electronic device back in hand. On this page are published all the documents necessary for the use of your device. ION Charles i7 by Niceboy.
USER MANUAL ION Charles i7 Niceboy
User Manual / Robotic Vacuum
CZ SK EN DE HU HR PL SL RO RU FR
Obsah
Bacteria DC 3 V (AAA)
- ......Safety Instructions
- .Precautions
- Product Introduction
- Operation Instructions
4.1.... Charging operation
4.2.... Turn on machine
4.3.... Controller
4.4.... Roller brush
4.5.... Water tank
5.......APP Connection
6. .........Maintenance
6.1.... Dust box
6.2....Water tank
6.3.... Side brushes
6.4.... Other assembly
- .........Trouble Shooting
- Packing List
- Parameter
- FAQ
1. Safety Instructions
Please read the manual carefully before using the product and keep this instruction for reference.
- Products cannot be used by children under 8 years of age. If they need to use it, please do so under the supervision of an adult. Please do not let children ride on the product
- Problems that may arise with vacuum cleaner should be fixed or removed as early as possible.
- Remove the power cords and small items on the floor to prevent the product from being blocked during the cleaning process.
- Fold the edge of the carpet to the underside of the carpet, and keep hanging curtains, tablecloths, etc from touching the ground.
- If there is a staircase, in the apartment test the product first to see if it can detect the edge of that area without falling.
- Protective barriers should be installed at the edge of stairs to prevent the product from falling. Make sure that the protective equipment can not cause personal injury.
- Please follow the manual in the instructions to use the product. Use only accessories recommended or sold by the manufacturer.
- Ensure that the power supply voltage meets the voltage indicated on the charging base.
- Use only in indoor home environments. Do not use in outdoor, commercial or industrial locations.
- Use only original rechargeable batteries and charging docks that are recommended by the manufacturer.
- Do not use non-re-chargeable batteries. For battery specifications, please refer to" Technical Data".
- Ensure that dust boxes and filter materials are installed before using products.
- Use of the product in an environment with open flames or fragile items is prohibited.
- Do not use the product in extreme heat (above 104^ F) or very cold (below -41^ F).
- Keep your hair, clothes, fingers and other body parts away from the opened and operating parts of the product.
- Do not use the product on wet or watery ground.
- Avoid any items such as follows:
-Stones, waste paper.
- Flammable materials such as toner, or toner for printers or copies.
Cigarettes, matches, ash, or other items that may cause a fire.
- Do not place items at the suction outlet. Do not use products when suction is blocked. Clean dust, cotton wool, hair, etc. at the suction port to ensure smooth air circulation at the suction port.
- Use the power cord carefully to avoid damage. Do not use the power cord to drag or pull the product and the product charging stand.
- Do not use the power cord as a handle.
- Do not clamp the power cord into the door seam.
- Do not pull the power cord at sharp corners and corners.
- Do not use the product if the power cord, power outlet or charging stand are damaged.
- Do not use the product when it is not working properly due to dropping, damage, outdoor use or water ingress. To avoid injury, the product should be repaired by the manufacturer or its after-sales service.
- Turn off the product switch before cleaning and maintaining the product.
2. Precautions
Please read the following guidelines before using the Cleaner
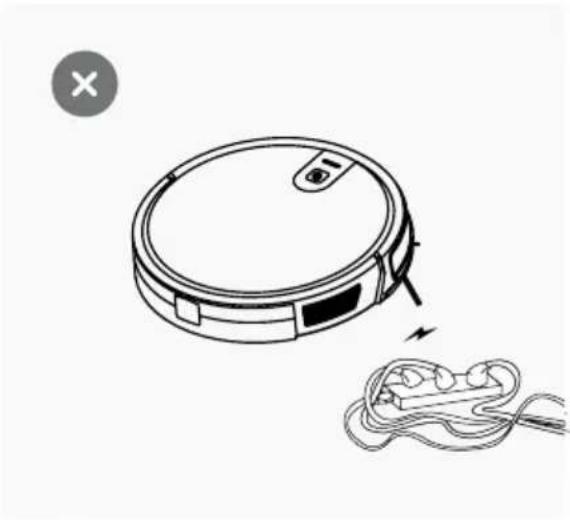
1. Power lines and other debris scattered on the ground that may trip up product must be removed.
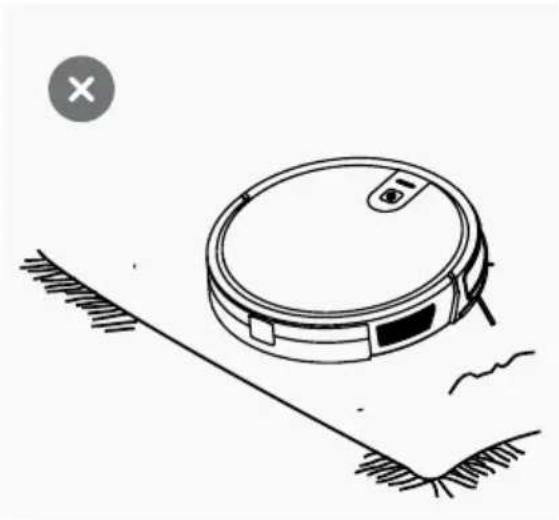
2. Please roll the carpet tassels or work on short-hair rugs.
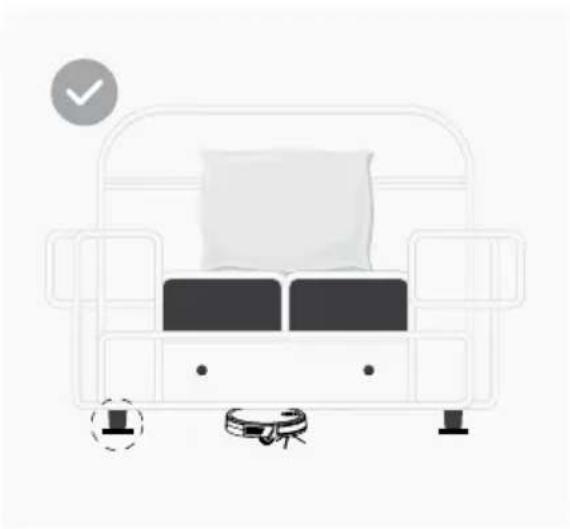
3. A gap of less than 8cm on the bottom of the furniture may catch the product. If you need to clean it, please remove the furniture.
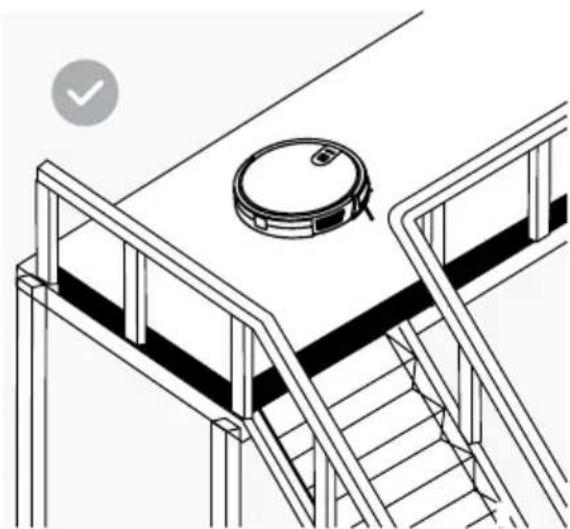
4. A guardrail should be placed at the edge of the duplex to ensure safe operation of the product.
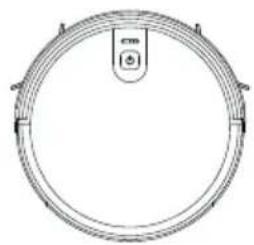
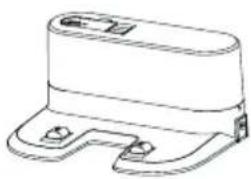
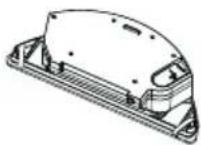
3. Product Introduction
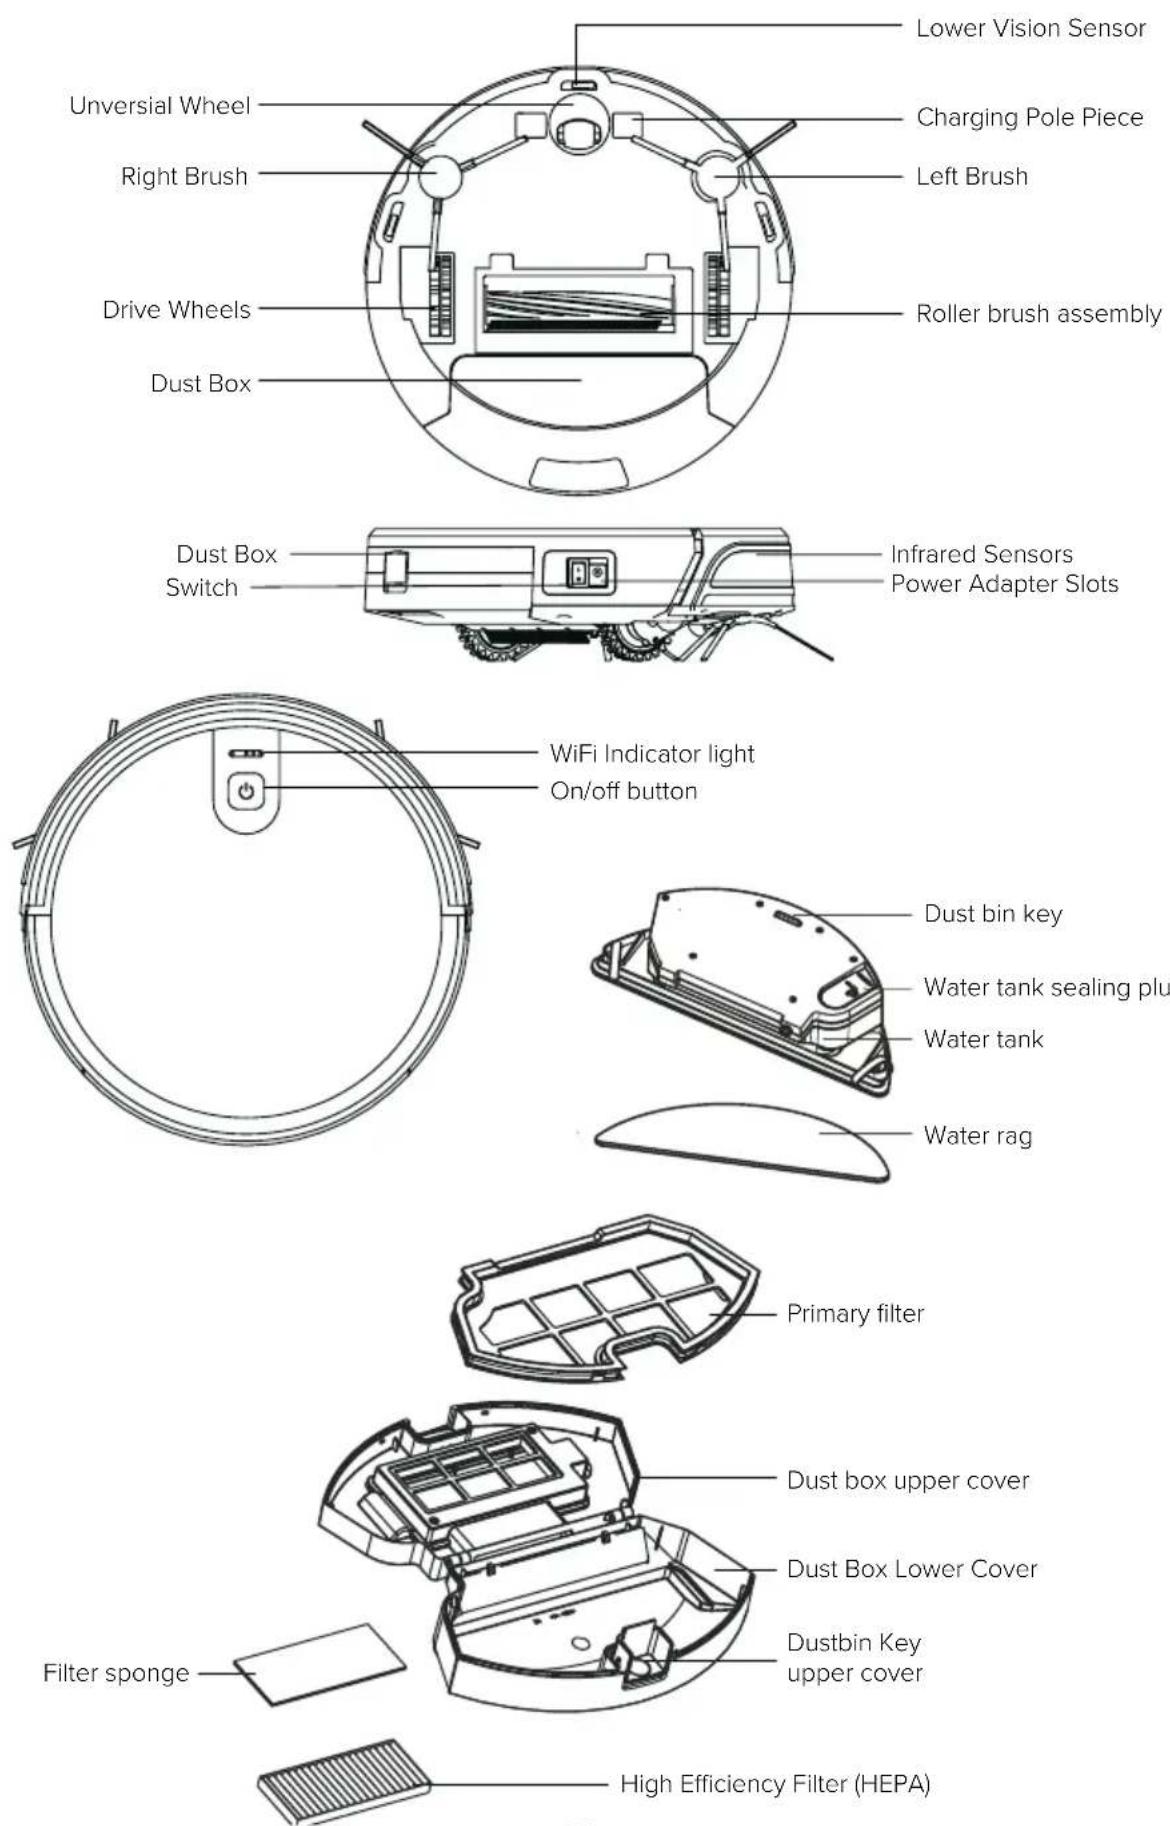
3. Product Introduction

- Signal indication light
- Power interface
- Charging terminal
4. Operation Instructions
4.1. Charging Operation
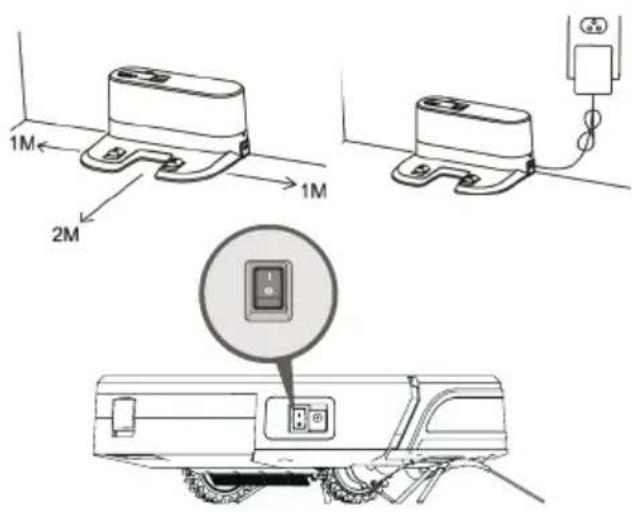
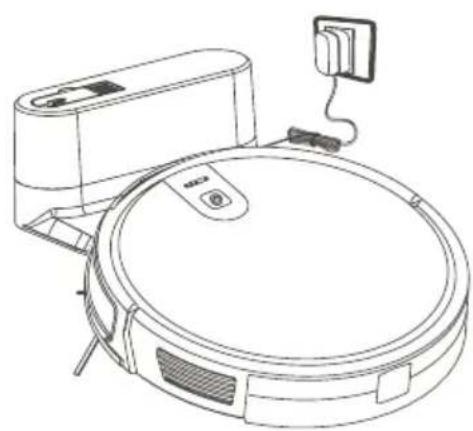
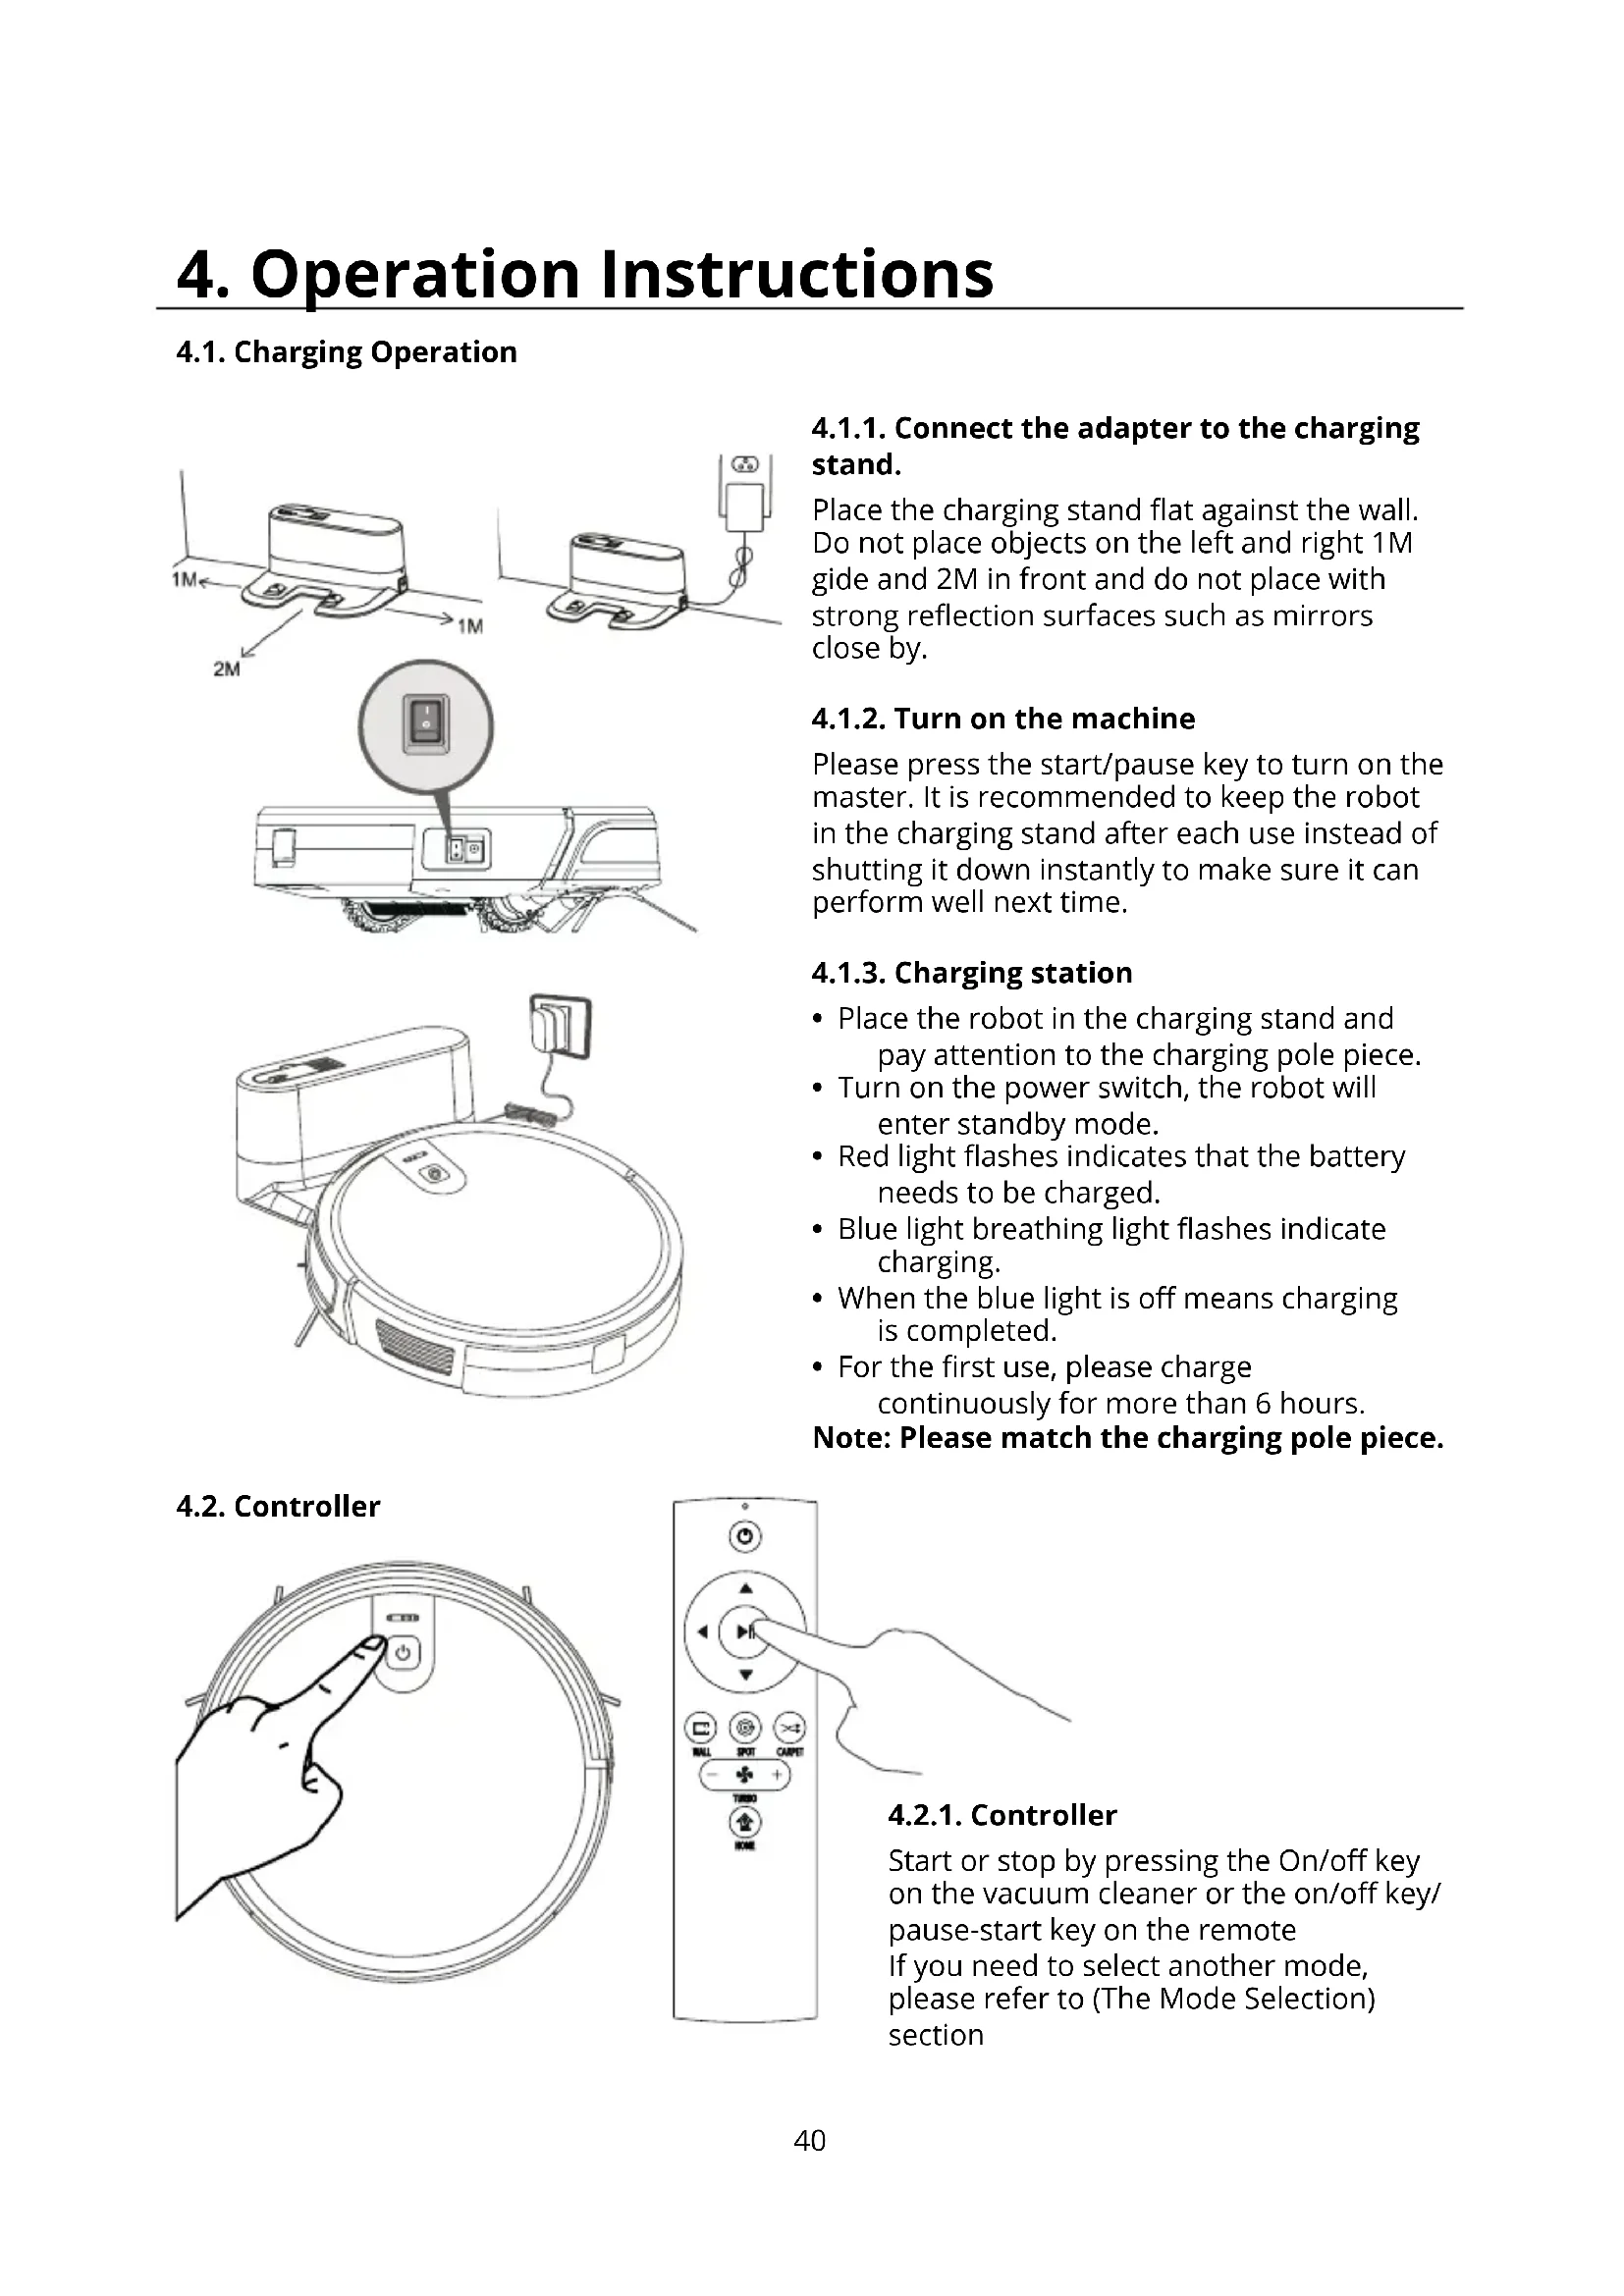
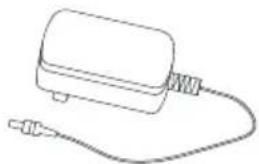
4.1.1. Connect the adapter to the charging stand.
Place the charging stand flat against the wall. Do not place objects on the left and right 1M gide and 2M in front and do not place with strong reflection surfaces such as mirrors close by.
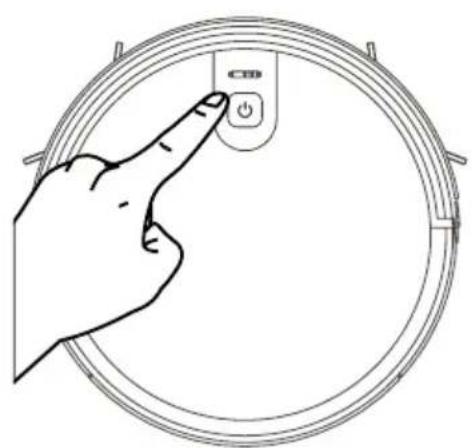
4.1.2. Turn on the machine
Please press the start/pause key to turn on the master. It is recommended to keep the robot in the charging stand after each use instead of shutting it down instantly to make sure it can perform well next time.
4.1.3. Charging station
- Place the robot in the charging stand and pay attention to the charging pole piece.
- Turn on the power switch, the robot will enter standby mode.
- Red light flashes indicates that the battery needs to be charged.
- Blue light breathing light flashes indicate charging.
- When the blue light is off means charging is completed.
For the first use, please charge continuously for more than 6 hours.
Note: Please match the charging pole piece.
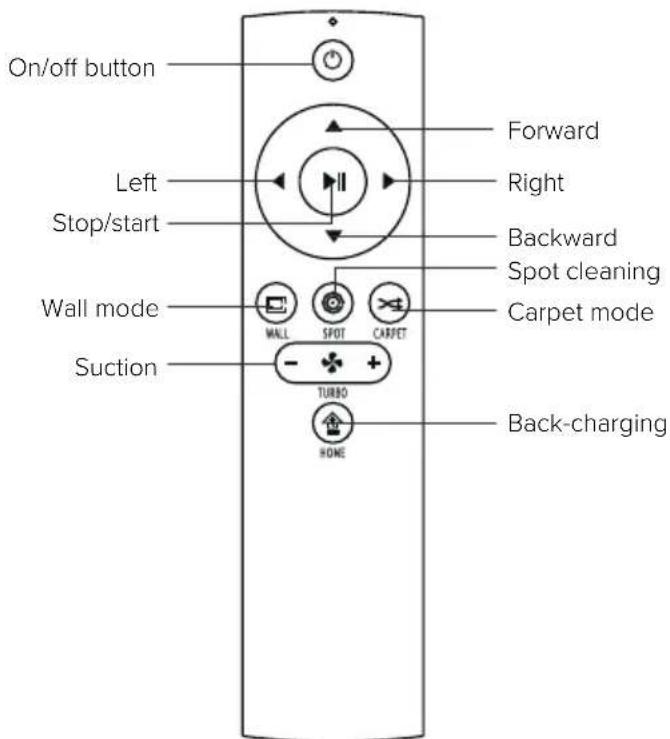
4.2. Controller
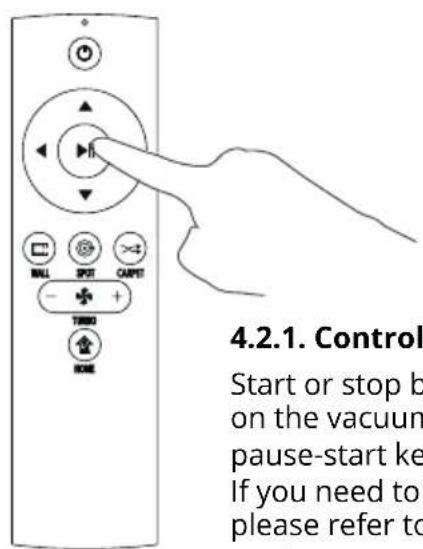
4.2.1. Controller
Start or stop by pressing the On/off key on the vacuum cleaner or the on/off key/ pause-start key on the remote If you need to select another mode, please refer to (The Mode Selection) section
4. Operation Instructions
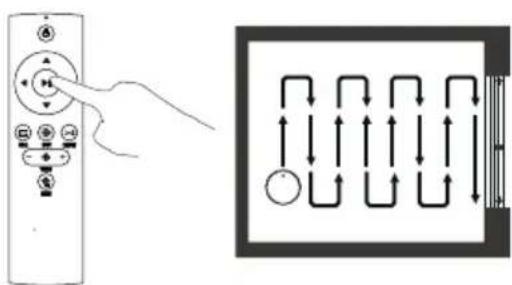
4.2.2. Mode selection

To adapt to different ground conditions and achieve deep cleaning, this product has a variety of cleaning modes, which can be selected by remote control as needed.
The remote control as needed. Before starting the mode, make sure that the WiFi indicator light is blue and the cleaner is ready to clean. If the cleaner does not wake up, short press the On/off button to wake it up.
Fixed-point Mode
It is suitable for the ground environment where the litter is concentrated. Cleaning is focused on the most polluted places, from where the vacuum cleaner continues in spiral.
Edge Mode
The vacuum cleaner cleans around the perimeter of a fixed object (e.g. a wall) and cleans it back to the charging stand.
Return Charging Mode
During the cleaning process, the vacuum cleaner can sense that its power is insufficient, and automatically find the charging stand for charging. You can press the "home" button or press the "power" button twice to make the vacuum cleaner return to the charging stand for charging
Suction Power Setting
You can choose between three modes of suction (Power Max/Standard/Low). Standard mode can be used for daily cleaning while the Max mode will increase the suction and Low mode will lower the noise.
Low suction mode can be used for cleaning wood floor and tile floor, standard mode for common household cleaning while the max mode can be used for cleaning rugs.
4. Operation Instructions
4.4. Water tank
This product is equipped with a water tank assembly. After the cleaning work is completed, if there is a demand for mopping, the dust box can be replaced with a water tank assembly. For the cleaning method, please refer to the [Maintenance] section in this manual.
Do not use the water tank assembly on the carpet. When cleaning with the rag function, fold the edge of the carpet to avoid foreign matter on the rag from soiling the carpet.
During the cleaning, please pay attention, to wet floor add water, if readed or turn off the robot in time, remove the water storage box when adding water.
When charging, be sure to remove the water permeable wiper assembly.
1. Add Water
Open the water inlet cover and take enough water.
2. Sticking the water rag
Close the water inlet cover and stick the water rag.

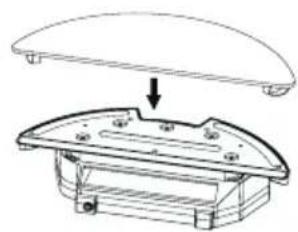
3. Install water tank assembly
Press the dust box release button at the rear of the robot to remove the dust box and replace the water tank assembly.
4. Mop
Start any cleaning mode as needed, and the vacuum cleaner will perform cleaning and mopping.
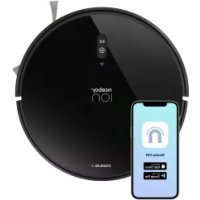
5. App connection
- Download the App by scanning the QR code with your cell phone or Search for "Niceboy ION" in the mobile app market and download the app Before using this function make sure your cell phone has been connected to WiFi.
- Open "Niceboy ION" App and register a new account or use an existing account.
- After the password is set, proceed to the next step "Add Device"
- Select and click on "robotic vacuum cleaners"
- Select and click on "Niceboy ION Charles i7"
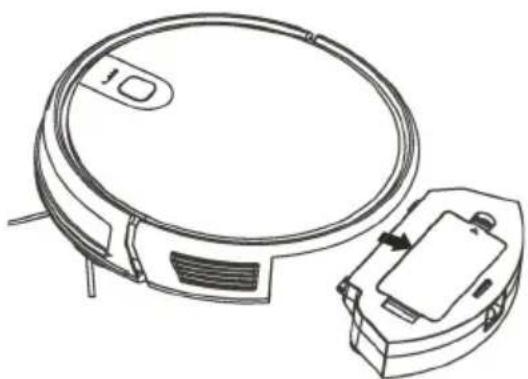
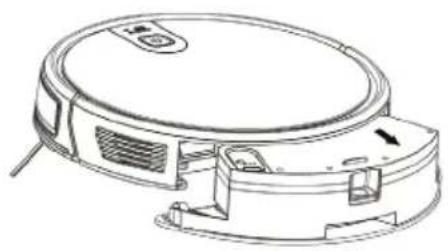
- Switch on the power button at the side of the machine (1 - ON; 0 - OFF), as shown in the picture.
- After the start-up tone is finished, long press the On/Off button on the panel for more than 3s till the buzzer beeps and WiFi LED indicator flashes.
- Make sure the name of your home WiFi, and enter the WiFi password and click on NEXT (note: only 2.4G WiFi is available), as shown in the picture.
- Make sure the WiFi LED indicator is flashing, and check "Confirm indicator rapidly blinks", and click on NEXT for network connection and on Finish after device is added successfully.
- It may take several or dozens of seconds to connect the device to WiFi network, depending on the signal strength. A control interface will be displayed when the device is bound successfully.
Reset WiFi: In case of connection timeout or before connecting another cell phone, first switch on the device and, within 10 seconds, long press the Start/Stop button for 5 seconds till it beeps, and then re-connect it to WiFi network. After the password is set, proceed to the next step "Add Device".
6. Maintenance
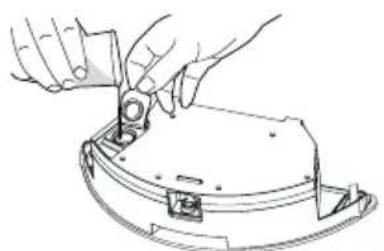
6.1. Dust Box and Filter
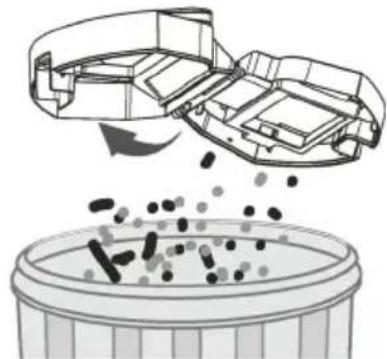
When cleaning and maintaining the vacuum cleaner and its accessories, turn off the robot and unplug the charging stand.
Remove the dust box, open the dust box cover, and clean the garbage.
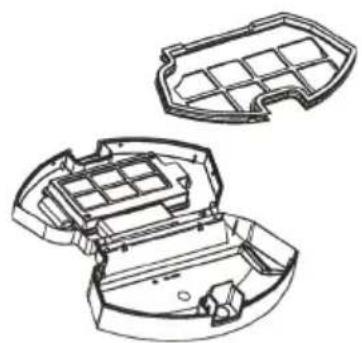
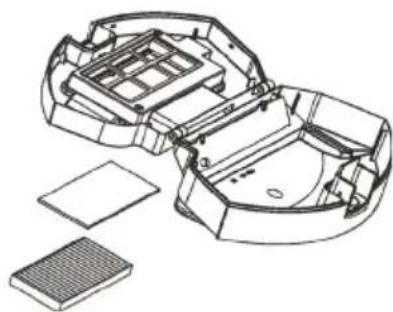
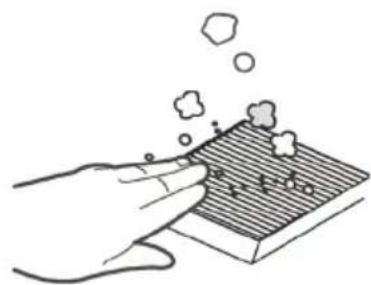
Remove dust filter. HEPA is not recommended for washing. Please pat and remove ash.
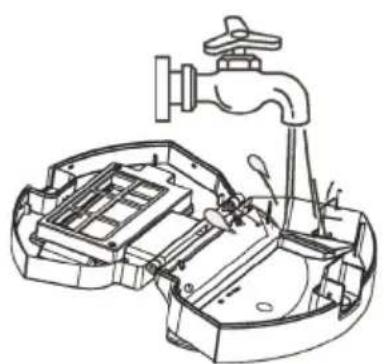
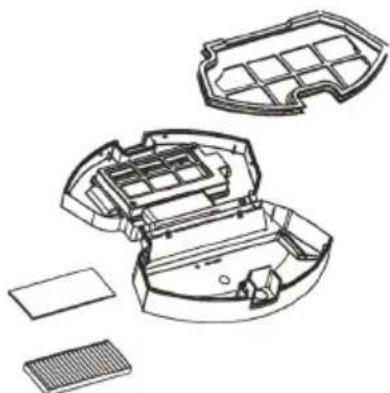
Flush the dust box and the primary filter.
Dry the dust box and the dust filter assembly and keep it dry.
6. Maintenance
6.2. Water tank assembly
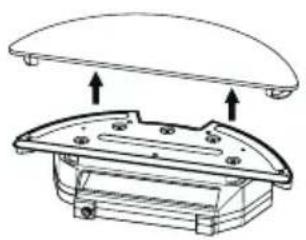
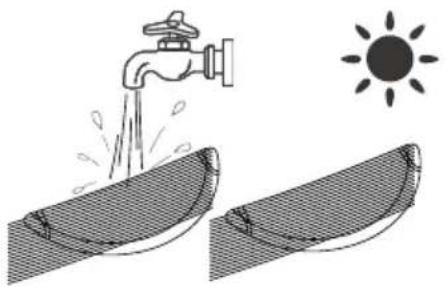
Cleaning of Water Rag
- Remove: After the mopping is completed, remove the water tank assembly, and remove the water permeable rag.
- Maintenance: Rinse and dry the water rag.
Cleaning the Water Reservoir
- Remove: After mopping the floor, remove the water tank assembly, remove the water permeable cloth, and pour off the remaining water in the water reservoir. Dry the reservoir.
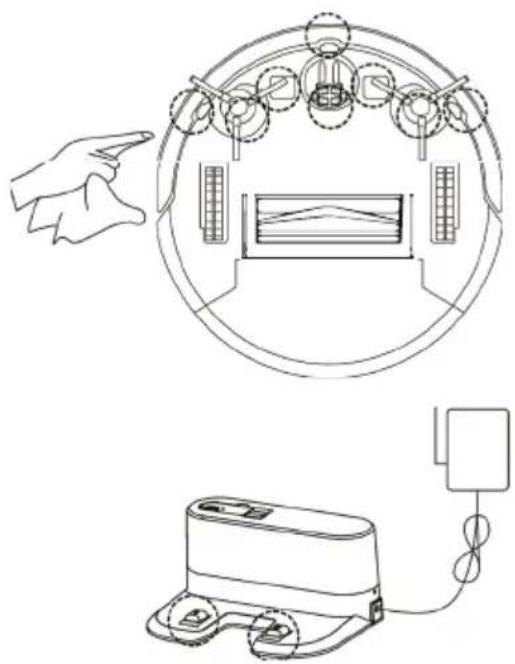
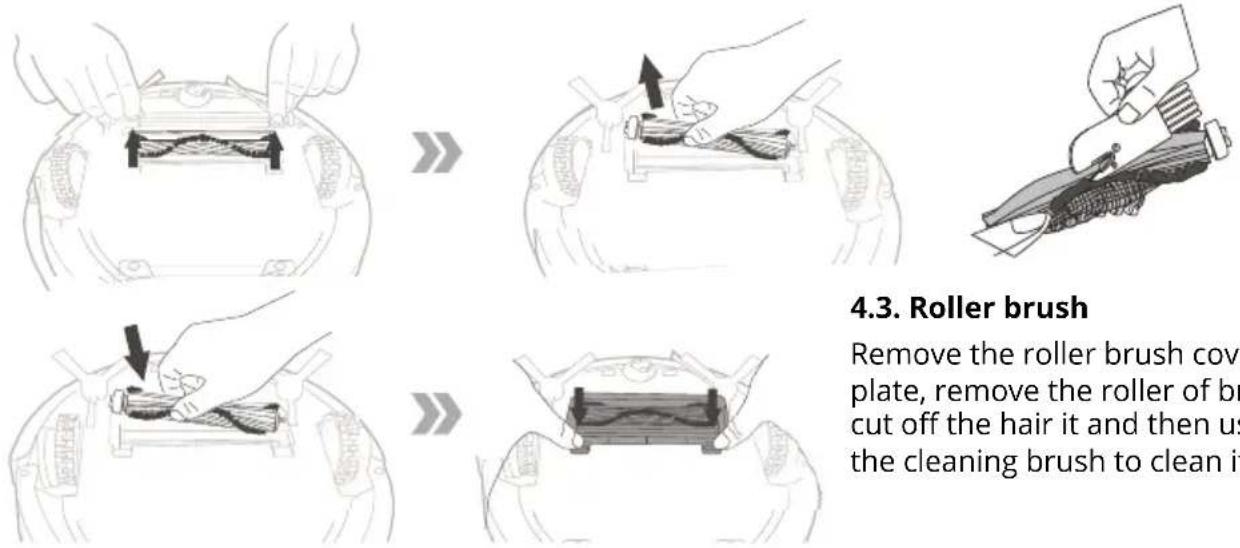
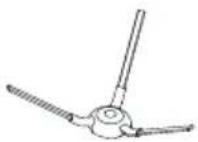
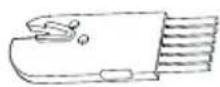
6.3. Side brushes
Cleaning Side Brushes
Pull out the side brush and wipe it with a clean rag.
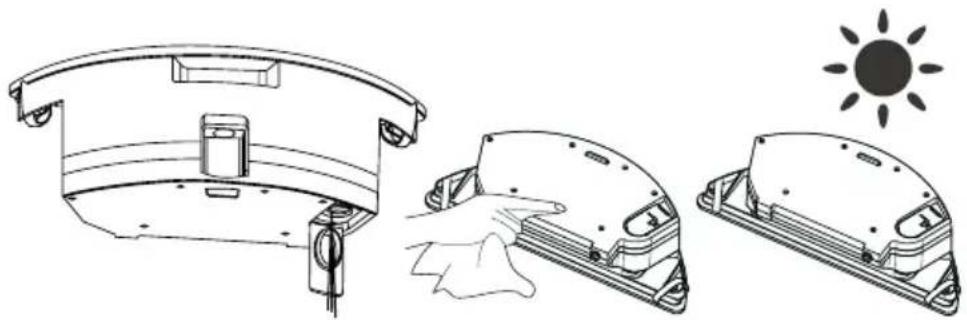
6.4. Other assembly
Cleaning the universal wheel to reduce hair entangle. Clear down the sensor to ensure the sensitivity of the sensor.
To clean the charging pole pieces, use a dry^rag to clean the charging poles on the bottom of the master or the
7. Troubleshooting
| Cause of issue Display light App content Solution | |||
| Side brush Red light on | Please check side brushes are jammed | Clean side brush | |
| Fan abnormality Red light on Motor cooling error | Please wait an hour before using | ||
| Roller brush Red light on | Please check roller brush is installed correctly | Please check whether dustbin is put in position | |
| No dustbin inside Red light on | Please check if dustbin is installed correctly | Please check whether dustbin is put in position | |
| Failure of ground detection | Red light flash | Please check if wheels are on the floor | Clean the ground detector and make sure I am not lifted up |
| Stuck vacuum cleaner | Red light flash | Please help me, I'm stuck | Please take me to the open space |
| Low battery Red light flash | Battery low, please recharge me | Manually move the cleaner back to the dock station recharging | |
| Abnormality charging | Red light flash | Please turn on the power switch for charging | Please turn on the power switch for charging |
| Gyrosopes fail Red light flash | Navigation failure, please restart me | Turn on the switch again | |
8. Packing list
- Robot Vacuum Cleaner
- Charging Base
- Remote Control
- Power Adapter
- Side Brushes × 4
- HEPA × 2
- Clean Brush
- Magnetic stripe
- Water tank
- Instruction Manual
1
2

3
4
5

6
7
8
9
10
9. Parameter
Product Model Charles i7
Input DC 14.8V
Power 30W
Battery Capacity DC 14.8V Li-ion 2600mAh
Dust Box Capacity 0.6L
Cleaning Time 120 min
Charging Time 300 min
Battery DC 3V(AAA)
Remote Control Method Infrared
Emitting and Receiving Distance < 5M
Wi-Fi 2.4 - 2.5 GHz; 5.15-5.875 GHz; 5.925 GHz-7.125 GHz
Input 100-240V/50-60HZ
Output 19V/0.6A
Install 2 AAA batteries before using the remote control for the first time. Make sure the positive and negative ends are facing the correct polarity direction as marked in the battery compartment.
The battery or accumulator that may be included with the product has a life of six months because it is a consumable item. Improper handling (prolonged charging, short circuit, breakage by another object, etc.) can lead to fires, overheating or battery leakage, for example.
Information on all frequency bands in which the radio equipment operates and intentionally transmits radio waves as well as the maximum radio frequency power transmitted in the frequency band in which the radio equipment is operated is included in the instructions and safety information.
10. FAQ
Please install the right brush into the right bottom mounting port of the machine, the left brush into the left bottom mounting port of the machine and ensure that the two side brushes are in place.
Q: What if the strength of vacuuming is weak?
A: First of all, check whether the dust bin is full, and the robot is full charged. If it is, you can try to switch it to the higher mode. For litter which is difficult to collect, try to clean it on Spot Cleaning Mode.
Q: What if my charger has difficulties charging the robot?
A: Please make sure you turn on the charging stand before charging and check if the electrical cord is connected to the charging stand (Put it back manually or press the Power button when the robot is 1 meter in front of the charging stand.)
Q: What if the robot cannot find the charging stand?
A: The charging stand should be placed against the wall with at least 1 meter clearance each side and 2 meters in front. Sometimes you can just put it back manually.
Q: What should I do if the remote control is out of order?
A: 1. The remote control has an effective control distance of 5 meters. Please make sure that the remote point to the vacuum cleaner.
-
Replace the battery with a new one if the battery has run out capacity.
-
Please make sure the master power switch is turned on and has sufficient power to complete the operation.
-
Please wipe the infrared emitter of the remote control and the infrared receiver of the vacuum cleaner with clean towel.
Q: Why does the vacuum cleaner return to charging after cleaning?
A: The working time of the master varies depending on the complexity of the room, the amount of garbage and the cleaning mode.
USER INFORMATION FOR DISPOSING ELECTRICAL AND ELECTRONIC DEVICES (HOME USE)
This symbol located on a product or in the product's original documentation means that the used electrical or electronic products may not be disposed together with the communal waste. In order to dispose of these products correctly, take them to a designated collection site, where they will be accepted for free. By disposing of a product in this way, you are helping to protect precious natural resources and helping to prevent any potential negative impacts on the environment and human health, which could be the result of incorrect waste disposal. You may receive more detailed information from your local authority or nearest collection site. According to national regulations, fines may also be given out to anyone who disposes of this type of waste incorrectly. User information for disposing electrical and electronic devices.
(Business and corporate use)
In order to correctly dispose of electrical and electronic devices for business and corporate use, refer to the product's manufacturer or importer. They will provide you with information regarding all disposal methods and, according to the date stated on the electrical or electronic device on the market, they will tell you who is responsible for financing the disposal of this electrical or electronic device. Information regarding disposal processes in other countries outside the EU. The symbol displayed above is only valid for countries within the European Union. For the correct disposal of electrical and electronic devices, request the relevant information from your local authorities or the device seller.
Inhalt
Baterie DC 3 V (AAA)
Bateria DC 3 V (AAA)
Tip telecomanda Infrarosu
Distanta de emitere / receptie < 5M
Wi-Fi 2.4 - 2.5 GHz; 5.15-5.875 GHz; 5.925 GHz-7.125 GHz
Intrare 100-240 V/50-60 Hz
Iesire 19 V/0.6 A
HactpoJaMoUHOCTN BCaCbIBaHnA
HaKMTe KHONKy «Typ60» Ha npIbTe
dNCTaHcUHOHOrO ynpaBHeHn. IpeJaRaetc 3
peXIMa BCaCbIBaHnra (CINbHoe / cTaHApTHoe
/cna6oe). CtaHapTHbI peXIM MoxHo
NCNoJIb3OBaTb dIy eKeJHeBHO y6OpKn, pni
CINbHOM peXIMe yBeJIuYBaETcM OUsHOCTb
BCaCbIBaHnra, a Cna6bI peXIM CHNXaET Shym.
PeXIM Cna6oR BCaCbIBaHnRA MoXHO
NCNoJIb3OBaTb dIy MbITbI DepeBraHHbIX NOLOB
II PInTKI, CTAHApTHbI peXIM - dIy OsbUHOH
DOMaShHeY6OpKn, a CINbHbI peXIM - dIy
YnCTKN KOBoB.

Batterie DC 3 V (AAA)
Praha 4, Czech Republic, ID: 294 16 876.
Made in China.


- User Manual / Robotic Vacuum
- Obsah
- Safety Instructions
- Please read the manual carefully before using the product and keep this instruction for reference.
- Precautions
- Product Introduction
- Operation Instructions
- Charging Operation
- Connect the adapter to the charging stand.
- Turn on the machine
- Charging station
- Controller
- Controller
- Mode selection
- Fixed-point Mode
- Edge Mode
- Return Charging Mode
- Suction Power Setting
- Water tank
- Add Water
- Sticking the water rag
- Install water tank assembly
- Mop
- App connection
- Maintenance
- Dust Box and Filter
- Water tank assembly
- Cleaning of Water Rag
- Cleaning the Water Reservoir
- Side brushes
- Cleaning Side Brushes
- Other assembly
- Troubleshooting
- Packing list
- Parameter
- FAQ
- USER INFORMATION FOR DISPOSING ELECTRICAL AND ELECTRONIC DEVICES (HOME USE)
- (Business and corporate use)
- Inhalt
- HactpoJaMoUHOCTN BCaCbIBaHnA
Brand : Niceboy
Model : ION Charles i7
Category : Robot vacuum