Z9 - Dashcam Xblitz - Free user manual and instructions
Find the device manual for free Z9 Xblitz in PDF.
User questions about Z9 Xblitz
0 question about this device. Answer the ones you know or ask your own.
Ask a new question about this device
Download the instructions for your Dashcam in PDF format for free! Find your manual Z9 - Xblitz and take your electronic device back in hand. On this page are published all the documents necessary for the use of your device. Z9 by Xblitz.
USER MANUAL Z9 Xblitz
Table of contents Spis tresci
4 Instrukcja obstugi PL
12 User manual EN
20 Bedienungsanleitung DE
29 Navod k pouziti CZ
37 Hasznalatiutasitas HU
46 Použivatel'ská príručka SK
54 Vartotojo vadovas LT
62 Lietotaja rokasgramata LV
70 Kasutusjuhend ET
78 PbKOBOdCTBO 3a ynoTpe6a BG
87 Manual de utiliser RO
96 Manuel de l'utilisateur FR
105 Manuale utente IT
113 Manual del usuario ES
PL
INSTRUKCJA OBSLUGI
WIDEOREJESTRATOR
Please read the enclosed user manual and safety guidelines carefully to avoid accidental damage to equipment or unintentional injuries.
PURPOSE OF THE PRODUCT
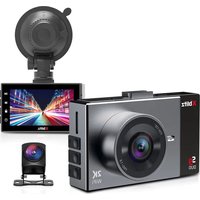
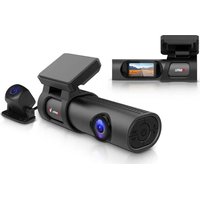
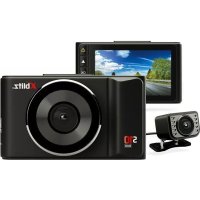
The Xblitz Z9 BLACK car camera allows you to monitor your vehicle's route and record any traffic incidents. This video recorder is made of the highest quality components.
BEFORE FIRST USE
- It is recommended to use original microSD cards of class 10 or higher.
- Before inserting the card into the recorder, it must be formatted in the computer in the FAT32 or exFAT file system (depending on the card), and then
in the recorder.
- Memory card should be installed when the device is turned off, otherwise the memory card and the device may be damaged. The same refers to putting the memory card out of the device.
- The internal battery allows for recording without the power supply for no longer than 5 minutes.
- When the memory card is full, the oldest, unprotected files will be overwritten.
- It is recommended to use the product's features with their intended use, e.g. Motion detection or parking mode during driving should be turned off, as it may cause automatic turning on / off the recording e.g. during the stay at the traffic lights.
- It is recommended to use the G-sensor feature at the minimum level so not to protect unnecessary files and lose space on the memory card.
- Sound: the device has a capacitive microphone, which records all the sounds from the surrounding. The sounds may overlap causing distortions.
THE SET CONTAINS
- Car camera Xblitz Z9 BLACK
- Car charger
- Mounting grip
- USB wire
- Memory card reader
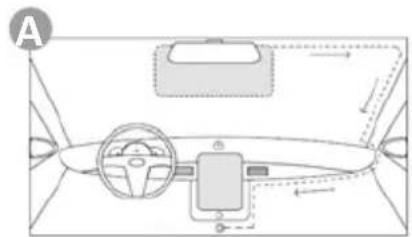
CAMERA INSTALLATION
SEE PIC.A
- Choose and clean the place of camera installation.
- Mount the camera holder.
- Run the power wire.
- Put the power adapter into the car cigarette lighter socket.
- Insert the memory card into the adequate slot in the camera.
- Mount the camera in the holder.
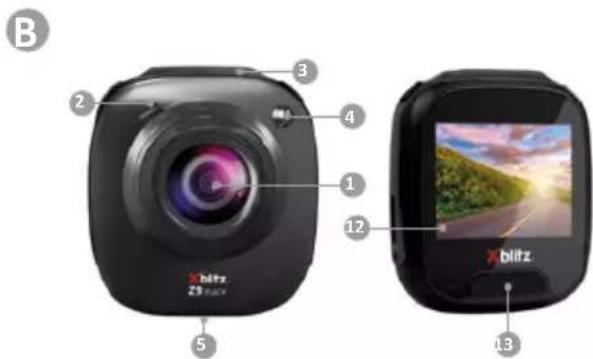
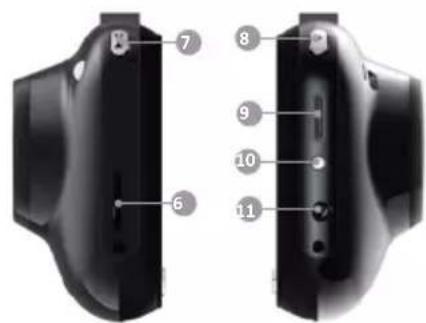
01.PRODUCT DESCRIPTION
SEE PIC.B
- Lens
- Speaker
- Space for mounting the holder
- LED
- Microphone
- Micro SD card slot
-
MENU button
-
MODE button
- USB-C slot
- RESET button
11.AV output - Screen
- POWER button
02. GETTING STARTED
- Mount and connect the camera into the power adapter.
- Insert formatted to FAT32 or exFAT (depending on the type), micro SD memory card. NOTE: Insert and remove the memory card only when the device is turned off.
- Set in the menu:
a. Date & time
b. Loop recording (adjust the length of the recordings). If you turn loop recording off, the files will not be overwritten.
c. Set the highest available resolution.
d. Set the G-Sensor on minimal possible sensitivity so the camera does not save recordings unnecessarily, which will be caused by unevenness on the road
e. Turn WDR on.
- Make sure that the motion detection and parking mode are turned off. If these functions stay on during normal usage, they will negatively affect the recordings. Turning these functions on is recommended only when the vehicle is parked.
- Camera will automatically start to record every time we turn the ignition on (unless there is no constant power supply in the car cigarette lighter socket of your vehicle).
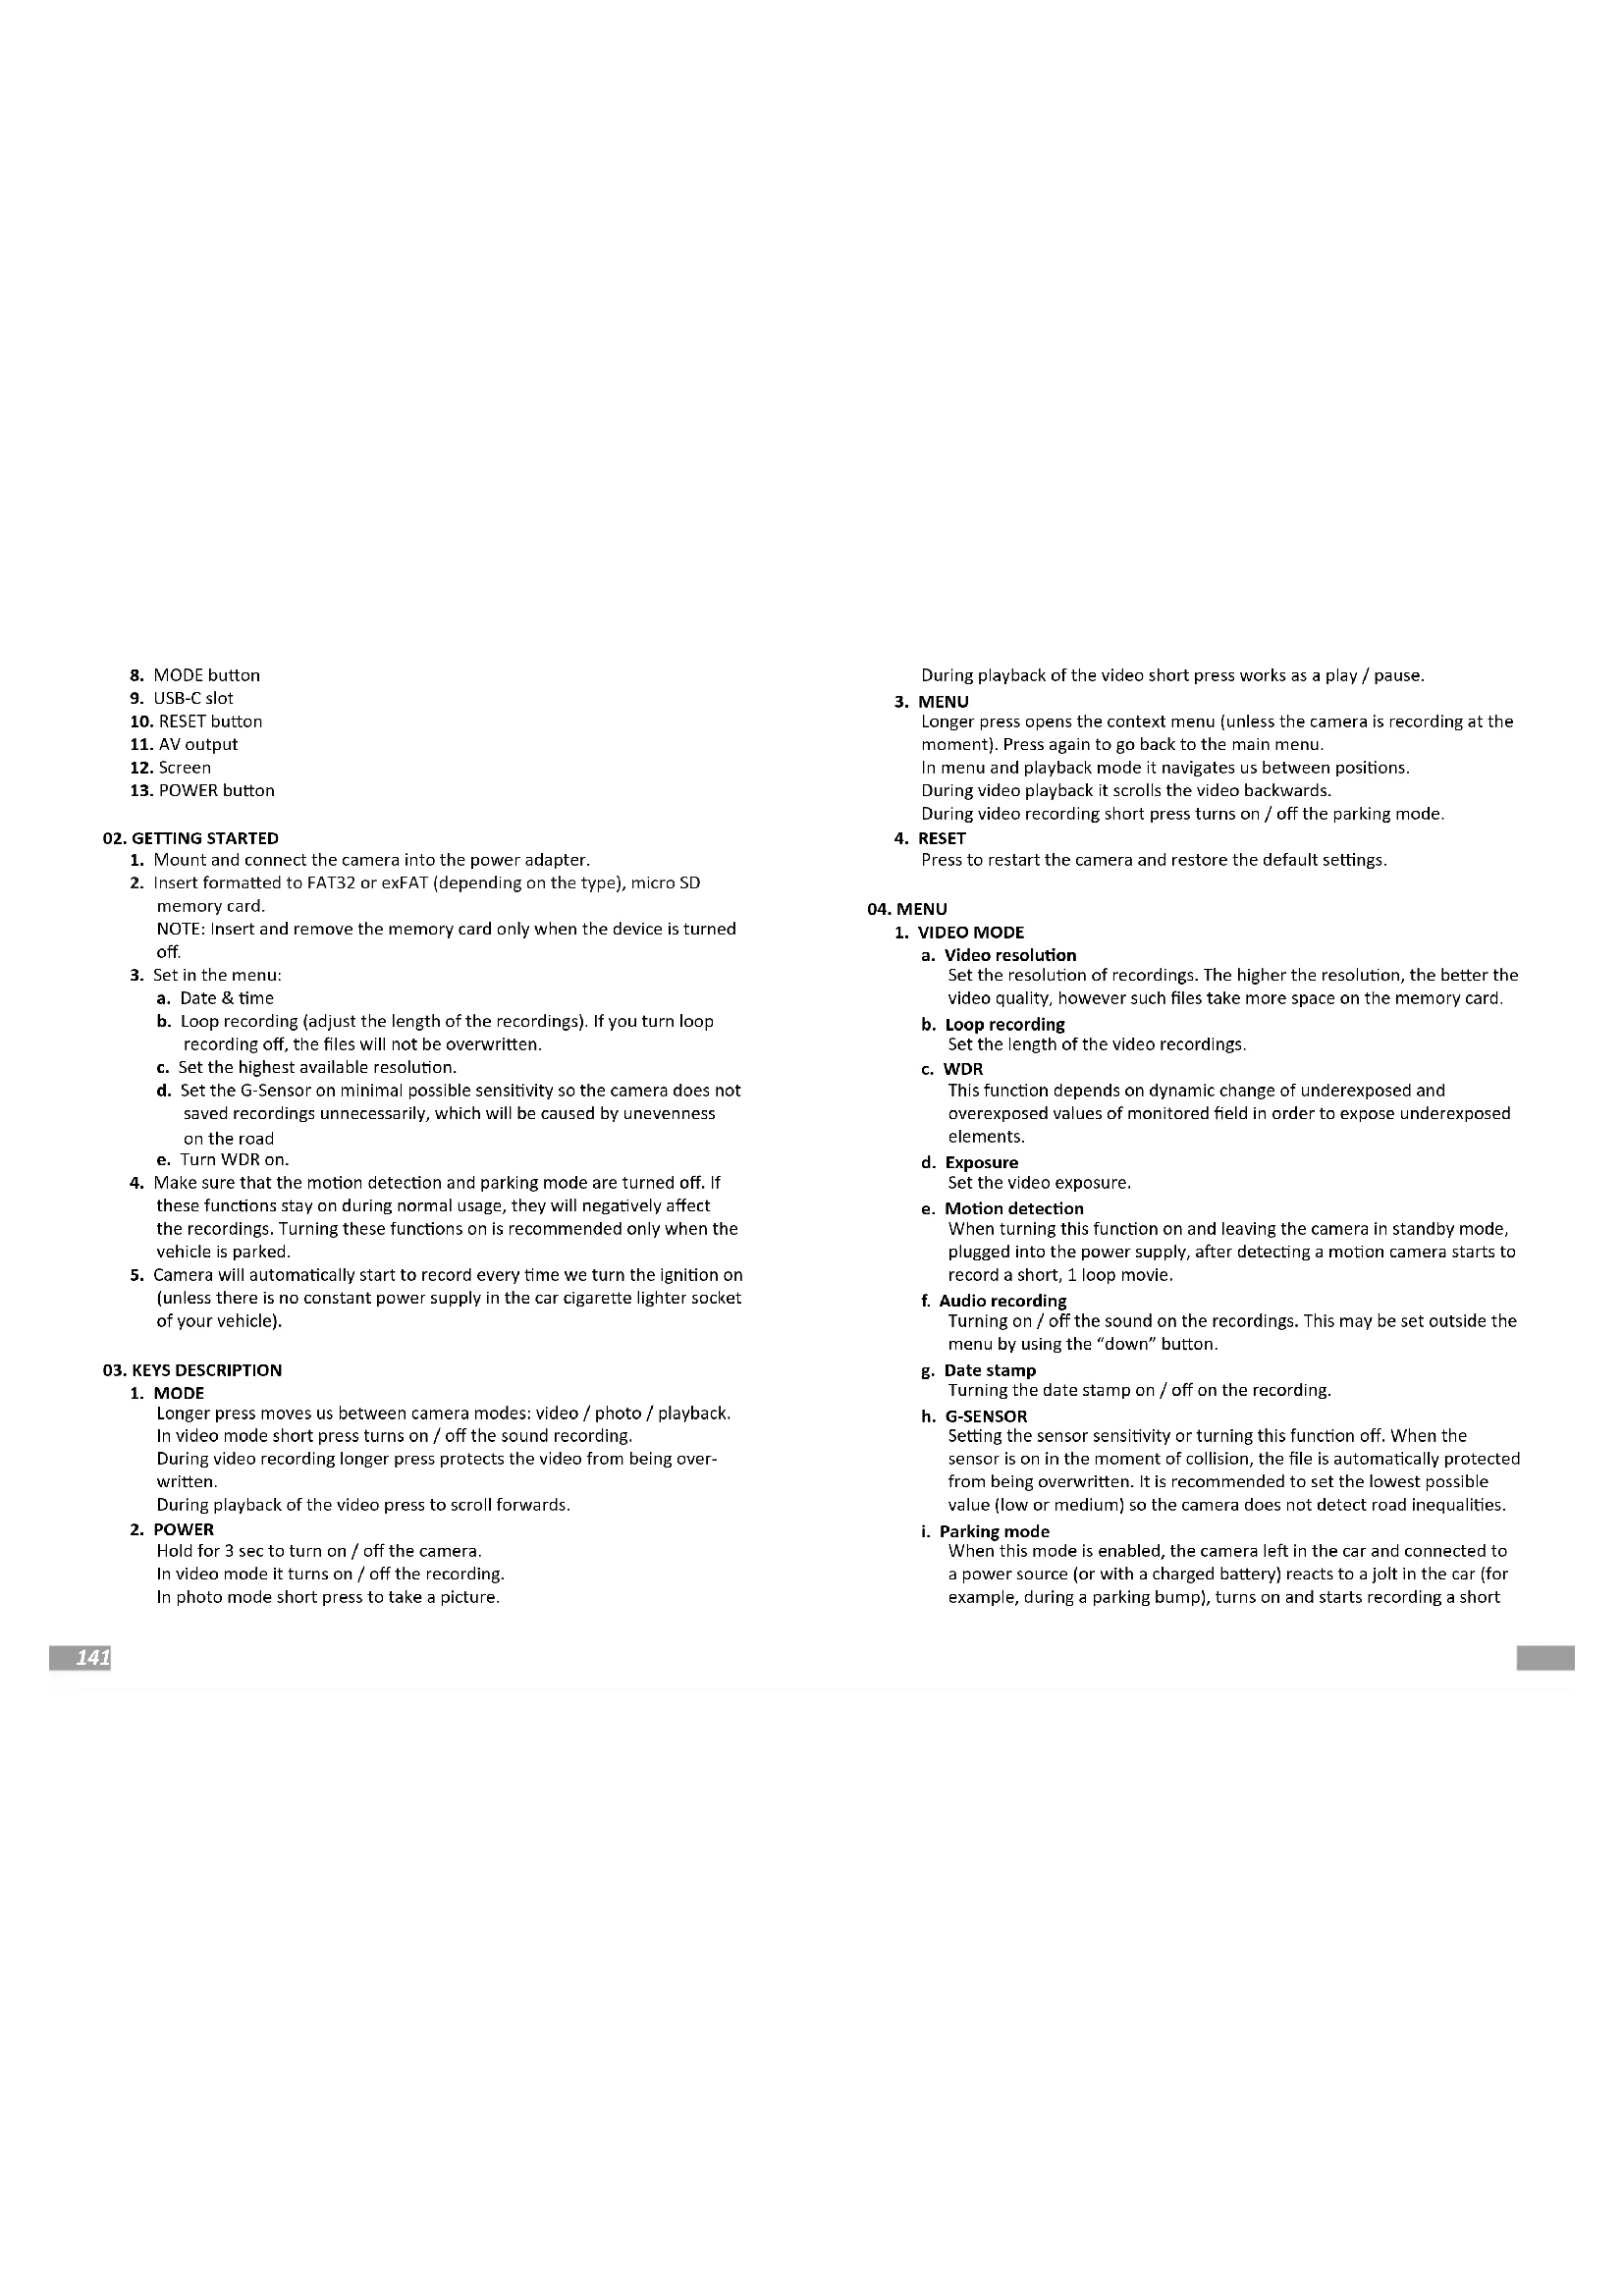
03. KEYS DESCRIPTION
-
MODE
-
Longer press moves us between camera modes: video / photo / playback.
- In video mode short press turns on / off the sound recording.
- During video recording longer press protects the video from being overwritten.
-
During playback of the video press to scroll forwards.
-
POWER
Hold for 3 sec to turn on / off the camera.
In video mode it turns on / off the recording.
In photo mode short press to take a picture.
During playback of the video short press works as a play / pause.
-
MENU
-
Longer press opens the context menu (unless the camera is recording at the moment). Press again to go back to the main menu.
- In menu and playback mode it navigates us between positions.
- During video playback it scrolls the video backwards.
-
During video recording short press turns on / off the parking mode.
-
RESET
ess to restart the camera and restore the default settings.
04.MENU
1.VIDEO MODE
a. Video resolution
Set the resolution of recordings. The higher the resolution, the better the video quality, however such files take more space on the memory card.
b. Loop recording
Set the length of the video recordings.
c.WDR
This function depends on dynamic change of underexposed and overexposed values of monitored field in order to expose underexposed elements.
d. Exposure
Set the video exposure.
e. Motion detection
When turning this function on and leaving the camera in standby mode, plugged into the power supply, after detecting a motion camera starts to record a short, 1 loop movie.
f. Audio recording
Turning on / off the sound on the recordings. This may be set outside the menu by using the "down" button.
g. Date stamp
Turning the date stamp on / off on the recording.
h. G-SENSOR
Setting the sensor sensitivity or turning this function off. When the sensor is on in the moment of collision, the file is automatically protected from being overwritten. It is recommended to set the lowest possible value (low or medium) so the camera does not detect road inequalities.
i. Parking mode
When this mode is enabled, the camera left in the car and connected to a power source (or with a charged battery) reacts to a jolt in the car (for example, during a parking bump), turns on and starts recording a short
video protected from overwriting.
2. PHOTO MODE
a. Timer
Set after what time since pressing the power button the picture should be taken.
b. Resolution
Set the resolution of the taken pictures.
c. Series
Turning this option on causes taking a 3 pictures instead of standard, single pic.
d. Quality
Set the picture quality.
e. Sharpness
Set the sharpness of taken pictures.
f. White balance
Set the white balance of the pictures.
g. Color
Set the color of the pictures (normal/intense/faded).
h.ISO
Set the ISO value.
i. Exposure
Set the exposure of the pictures.
j. Picture stabilization
Eliminates the blur of the pictures in motion.
k. Quick preview
Set if and after what time after taking a picture a preview of ones should be displayed and how long should it lasts: 2/5 seconds.
I. Date stamp
Turning on / off the date stamp on the pictures.
3. PLAYBACK MODE
a. Delete
Deletes the chosen file.
b. Protect
Protects the chosen file from being overwritten.
c. Slide show
Preview of the recorded files. You may set when every next file should be displayed (2/5/8 seconds).
4. MAIN MENU
a. Screen saver
Set if and after what time the screen saver should be on. We may also do it manually by pressing the POWER button.
b. Automatic shutdown
Set if and after how many mintues of standby, the camera should be turned off. Please remember to turn this option off when leaving the parked car in parking mode.
c. Frequency
Set the frequency. Choose between 50Hz and 60Hz - recommended setting: 50Hz.
d. Keys sound
Enable / disable the sound of keys on the device.
e. Language
Set the language in the camera.
f. Date / time
Set the date stamp in the device.
g. LED light
Set the LED light, which improves the night vision. It may be turned on / off / set automatically during bad lighting conditions.
h. Format
Format of the micro SD memory card in the device. NOTE: When formatting all data and files will be deleted from the memory card.
i. Default settings
Restore the default settings on the device.
j. Version
Software version
05. FAQ
- Device does not switch on, screen flashes.
Before switching on, charge the device battery and check the connection in the cigarette lighter socket.
- The device does not switch on/off automatically.
The reason for this behaviour may be the constant power supply in the car lighter socket.
- The camera stops recording / does not overwrite recordings.
Check: G-SENSOR - a function by which recordings with recorded overloads (e.g. uneven pavement, braking, driving off a kerb or over a speed bump, etc.) are protected from being overwritten. If you use this function, you must periodically format the memory card on your computer and then on the camera. Ultimately, each file on the data carrier will be protected from being overwritten and the device will not be able to record a further route - it will
not record in a loop. We suggest setting the sensor according to your driving style and road conditions. You can also disable the option completely, in which case each oldest file will be overwritten and the card will not need to be formatted periodically. After adjusting the function, remember to format the memory card.
4. The camera turns on and off.
Check: PARKING MODE/MONITOR and MOVEMENT DETECTION - function designed to operate while the vehicle is parked. You should deactivate the functions, before setting off, as they may cause the camera to switch on and off and make random fragments of route recordings. If the functions are deactivated, check if the fault occurs without a memory card inserted.
5. The camera records fragments of the route / randomly lasting recordings. Check: MOVEMENT DETECTION - function designed to operate while the vehicle is parked.
You need to deactivate the function, before setting off, as it may cause the camera to switch on and off and make random fragments of route recordings. If the function is deactivated, check if the fault occurs without a memory card inserted.
6. The device shows the message "card full" or does not read the card.
Check the "G-sensor" and "parking mode" functions and set them to minimum. The card must be formatted in the computer in the FAT32 or exFAT file system (depending on the card) and then in the recorder.
Check also: Whether the selected card capacity and its specification (micro SD, class 10 - U1, V10 additionally recommended) is suitable for your device (we recommend using cards from reputable manufacturers, we recommend: Kingston, Samsung, Sandisk).
If at any stage you encounter an error, replace the card with a new one from official distributors.
7. The device records noisy, distorted, unclear sound.
The device has a very sensitive microphone which records any ambient noise. Recorded sounds may overlap. Windscreen air vents may also distort the sound.
8. The device does not respond.
Briefly press the Reset button or reset the device to factory settings.
9. Transverse stripes appear on the recording.
Incorrect setting of the frame rate value. Set the frequency value to "50Hz" or "60Hz" depending on local settings.
10. Mount detaches from glass/does not stick to glass.
- Degrease the surfaces well before mounting the mount on the glass.
- Remember to avoid high temperatures, which can cause deformation of the holder, and damage to the recorder itself.
NOTES:
-
G-SENSOR - a function by which recordings with recorded overloads (e.g. uneven pavement, braking, driving off a kerb or over a speed bump, etc.) are protected from being overwritten. If you use this function, you must periodically format the memory card on your computer and then on the camera. Ultimately, each file on the data carrier will be protected from being overwritten and the device will not be able to record a further route - it will not record in a loop. We suggest setting the sensor according to your driving style and road conditions. This option can also be completely disabled, in which case each oldest file will be overwritten and the card will not need to be formatted periodically.
-
PARKING MODE/MONITOR - a function designed to operate while the vehicle is parked, uses battery power if the recorder is fully charged - (if it has a built-in battery). In this case, the camera starts recording a few seconds of video after detecting a shock - until the battery is discharged. When using this function, bear in mind the battery of the device, which needs to be recharged after the function activates (starts). You should deactivate the function, before setting off on a journey, as it may cause the camera to switch on and off and make random fragments of route footage.
*The constant power supply in the vehicle may cause this function to behave differently, e.g. leaving the camera on, which may drain the car battery.
- MOVEMENT DETECTION - a function designed to operate while the vehicle is parked - requires a constant power supply and the camera must be left on. The camera will start recording automatically when motion is detected, and will stop recording a few seconds after there is no movement in front of the camera lens. Please note that this function can drain the car battery.
It is necessary to deactivate the function, before setting off on a journey, as it may cause the camera to switch on and off and make random fragments of recordings from the route.
06.SAFETYMEASURES
- Do not disassemble or interfere with the camera. If the device is faulty, contact the service point.
- Only use the original accessories.
- Use only the original charger, included in the set. Using a different power supply can affect the battery negatively.
- Do not use the device for purposes that are against the law of the country region you are in.
- The operating temperature of the device is 0 - 35^ . Storage temperature 5^ to 45^ . Operating air humidity is 5 - 90% without condensation.
-
Avoid damaging the device with physical force.
-
Clean the device, especially the lens. Do not use detergents or other chemicals when cleaning the device.
- Clean the device only when it's disconnected from the power supply.
- Keep the device away from children.
- Do not expose the device to very high temperatures and fire.
07. TECHNICAL SPECIFICATION
Processor: JL5601 | Sensor: GC2023 | Lens: 4G | Video resolution: Full HD
1920x1080/30fps | View angle: 140^ | Memory cards: micro SD up to 64GB capacity class 10th | Video file format: MOV | Photo storage format: JPG | Power supply: DC
5V/1A | USB: USB-C | Microphone / Speaker: Built-in | G-sensor: Yes | Motion detection: Yes | Loop recording: Yes | Parking mode: Yes | WDR mode: Yes | Battery: Yes| Dimension: 65 x 58 x 34mm | Weight: 100g
NOTE: Only use chargers with a charging current up to 1A. (Do not connect directly to the 220 / 230V socket.) Failure to follow the instructions may cause camera damage or, in extreme cases, light up the device.
08. WARRANTY / CLAIMS
The product is covered by a 24-month warranty. Warranty conditions available on the website https://xblitz.pl/gwarancja/ Complaints should be reported using the form located at:
http://reklamacie.kgktrend.pl/
Contact details and website address can be found on the website: www.xblltz.pl. Specifications and contents of the kit are subject to change without notice, we apologize for any inconvenience.
DE
BEDIENUNGSANLEITUNG
VIDEO-RECORDER
dal'subor(2/5/8sekund).
4. HLAVNE MENU
a. Šetric obrazovky
Nastavenie, ci a po akom case ma byt zaputy setric obrazovky. Mozeme to urobit aj manualne stlaenim tlacidla POWER.
b. Automaticke vypnutie
3aJaIte pa3dJIeHITHe nCnO6HOCT Ha 3aNCHIE. KOJIKOTO NO-BICOKA e pa3dJIeHITHe nCnO6HOCT, TOnKOBa No-DOBO e KaucheTBO HA BIDEO, HO TAKIBA PaJIOBE 3aEMAT NObEe MRCTO Ha KAPTA c NAMET.
b.3anncBunkbn
3aadnTe npodbnnntenHocTtHa BnDeo3anncnte.
c.WDR
Ta3nФyHKZn3aBcNOnOTdHaMmHHTaIpOMHaHa HeOeKcNoHpaHIn HpeekcNoHpaHInCToHocTnHa Ha6JIbOdaHOToNE,3aJa ceEckcNoHpaTHeOeKcNoHpaHIneEMEHNTn.
d. EKcno3nua
3aadaiTe ekcn03nunraHa BnDeoTo.
e. OTKpmbaHe Ha DmXkeHne
Korato BKUHOTe T3aN ΦYHKmua octabnTe KaMePATBa PexJM Ha roTobHOCT, BKNIOUYeHa KbM 3axpaHBaHEo, cneJ 3acuHaNe H aDBXHeHe KaMePATa ZANOuBa Da aniNCBA KpTaBkO fIIMC1 uKbnL.
f. Aydo 3annc
BkIouBaHe/N3KIOUbaHe Ha 3ByKa Ha 3aIncnte. Toba MoKe Da ce
3aDae H3BbH MeHOTOC NOMOHTa Ha 6yToHa "HaDoIy".
g. DateH neayat
BkIIOUBAHe/ɪnKlIOUBAHe Ha neuTa 3a DaTa Ha 3aɪnca.
h. G-SENSOR
HactpokHa YyBCTBnTeHOCTa Ha CEh3Opa IIN NIKHOuBaHe Ha Taun CyHKUa. KORA tceHc0ptb E BKIOueH B MoMeHTa Ha c6IbcsKa, paNtBT ABToMaTHNo ce 3aunTba O npe3aNNCBAe. PnpOpBHTeHo e da 3aJaTeDe Hau-HNCkata Bb3MOKHa CTOnOHCT (NCKA INI CpeDHa), 3a Da HE OKPbA KaMepaTHe HApBHOCTn NO PbTn.
The crossed out trash can symbol indicates that unusable electrical or electronic devices, its accessories (such as power supplies, cords) or components (for example batteries, if included) cannot be disposed of alongside with household waste. In order to dispose of the devices or its components (for example, batteries) deliver the device to the collection point, where it will be accepted free of charge. Disposal is subject to the recast version of the WEEE Directive (2012/19/EU) and the Directive on batteries and accumulators (2006/66 / EC). Proper disposal of the device prevents degradation of the natural environment. Information about the collection points of the facilities is issued by the competent local authorities. Incorrect disposal of waste is subject to penalties provided for by the law in force in the given area.
DE
KGK TREND Sp. zo.o. (formerly KGK Trade Sp. zo.o. Sp. K.) st. Ujastek 5b, 31-752 Cracow, Poland. Made in PRC