
JSM 4014 - Juicer AMICA - Free user manual and instructions
Find the device manual for free JSM 4014 AMICA in PDF.
| Brand | Amica |
| Model | JSM 4014 |
| Product type | Juice extractor |
| Rated power | 200 W |
| Rated voltage | 220-240 V ~, 50/60 Hz |
| Net weight | 4.9 kg |
| Cable length | 1 m |
| Main functions | Juice extraction, ice cream (sorbet) making, self-cleaning function |
| Continuous operation capacity | 20 minutes before a 20-minute break |
| Filter material | Stainless steel (mesh) |
| Safety | Safety lock on lid, manual stop, non-slip feet |
| Maintenance and cleaning | Removable parts dishwasher-safe (according to Fig. 4), cleaning brush provided, built-in self-cleaning |
| Spare parts and repairability | Auger, mesh, ice cream mesh, pusher, separator bowl, containers, seal, brush; repair by approved specialist |
| Included accessories | Lid, auger, juice container, pulp container, mesh, ice cream mesh, separation bowl, cleaning brush, pusher |
| Recommended fruit types | Soft fruits (orange, watermelon) and hard fruits (apple, carrot) without hard pits or many seeds |
| Protection rating | Class I (fire resistance) |
| Warranty | Legal warranty (not specified) |
Frequently Asked Questions - JSM 4014 AMICA
User questions about JSM 4014 AMICA
0 question about this device. Answer the ones you know or ask your own.
Ask a new question about this device
Download the instructions for your Juicer in PDF format for free! Find your manual JSM 4014 - AMICA and take your electronic device back in hand. On this page are published all the documents necessary for the use of your device. JSM 4014 by AMICA.
USER MANUAL JSM 4014 AMICA
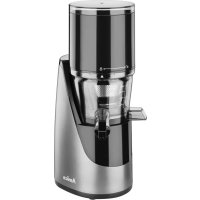
natural_image
Exterior view of a modern Amica brand juice maker with clear glass and black casing (no text or symbols visible)PL INSTRUKCJA OBSŁUGI 6
EN USER MANUAL 10
CS NÁVOD K OBSLUZE 14
SK NÁVOD NA OBSLUHU 18
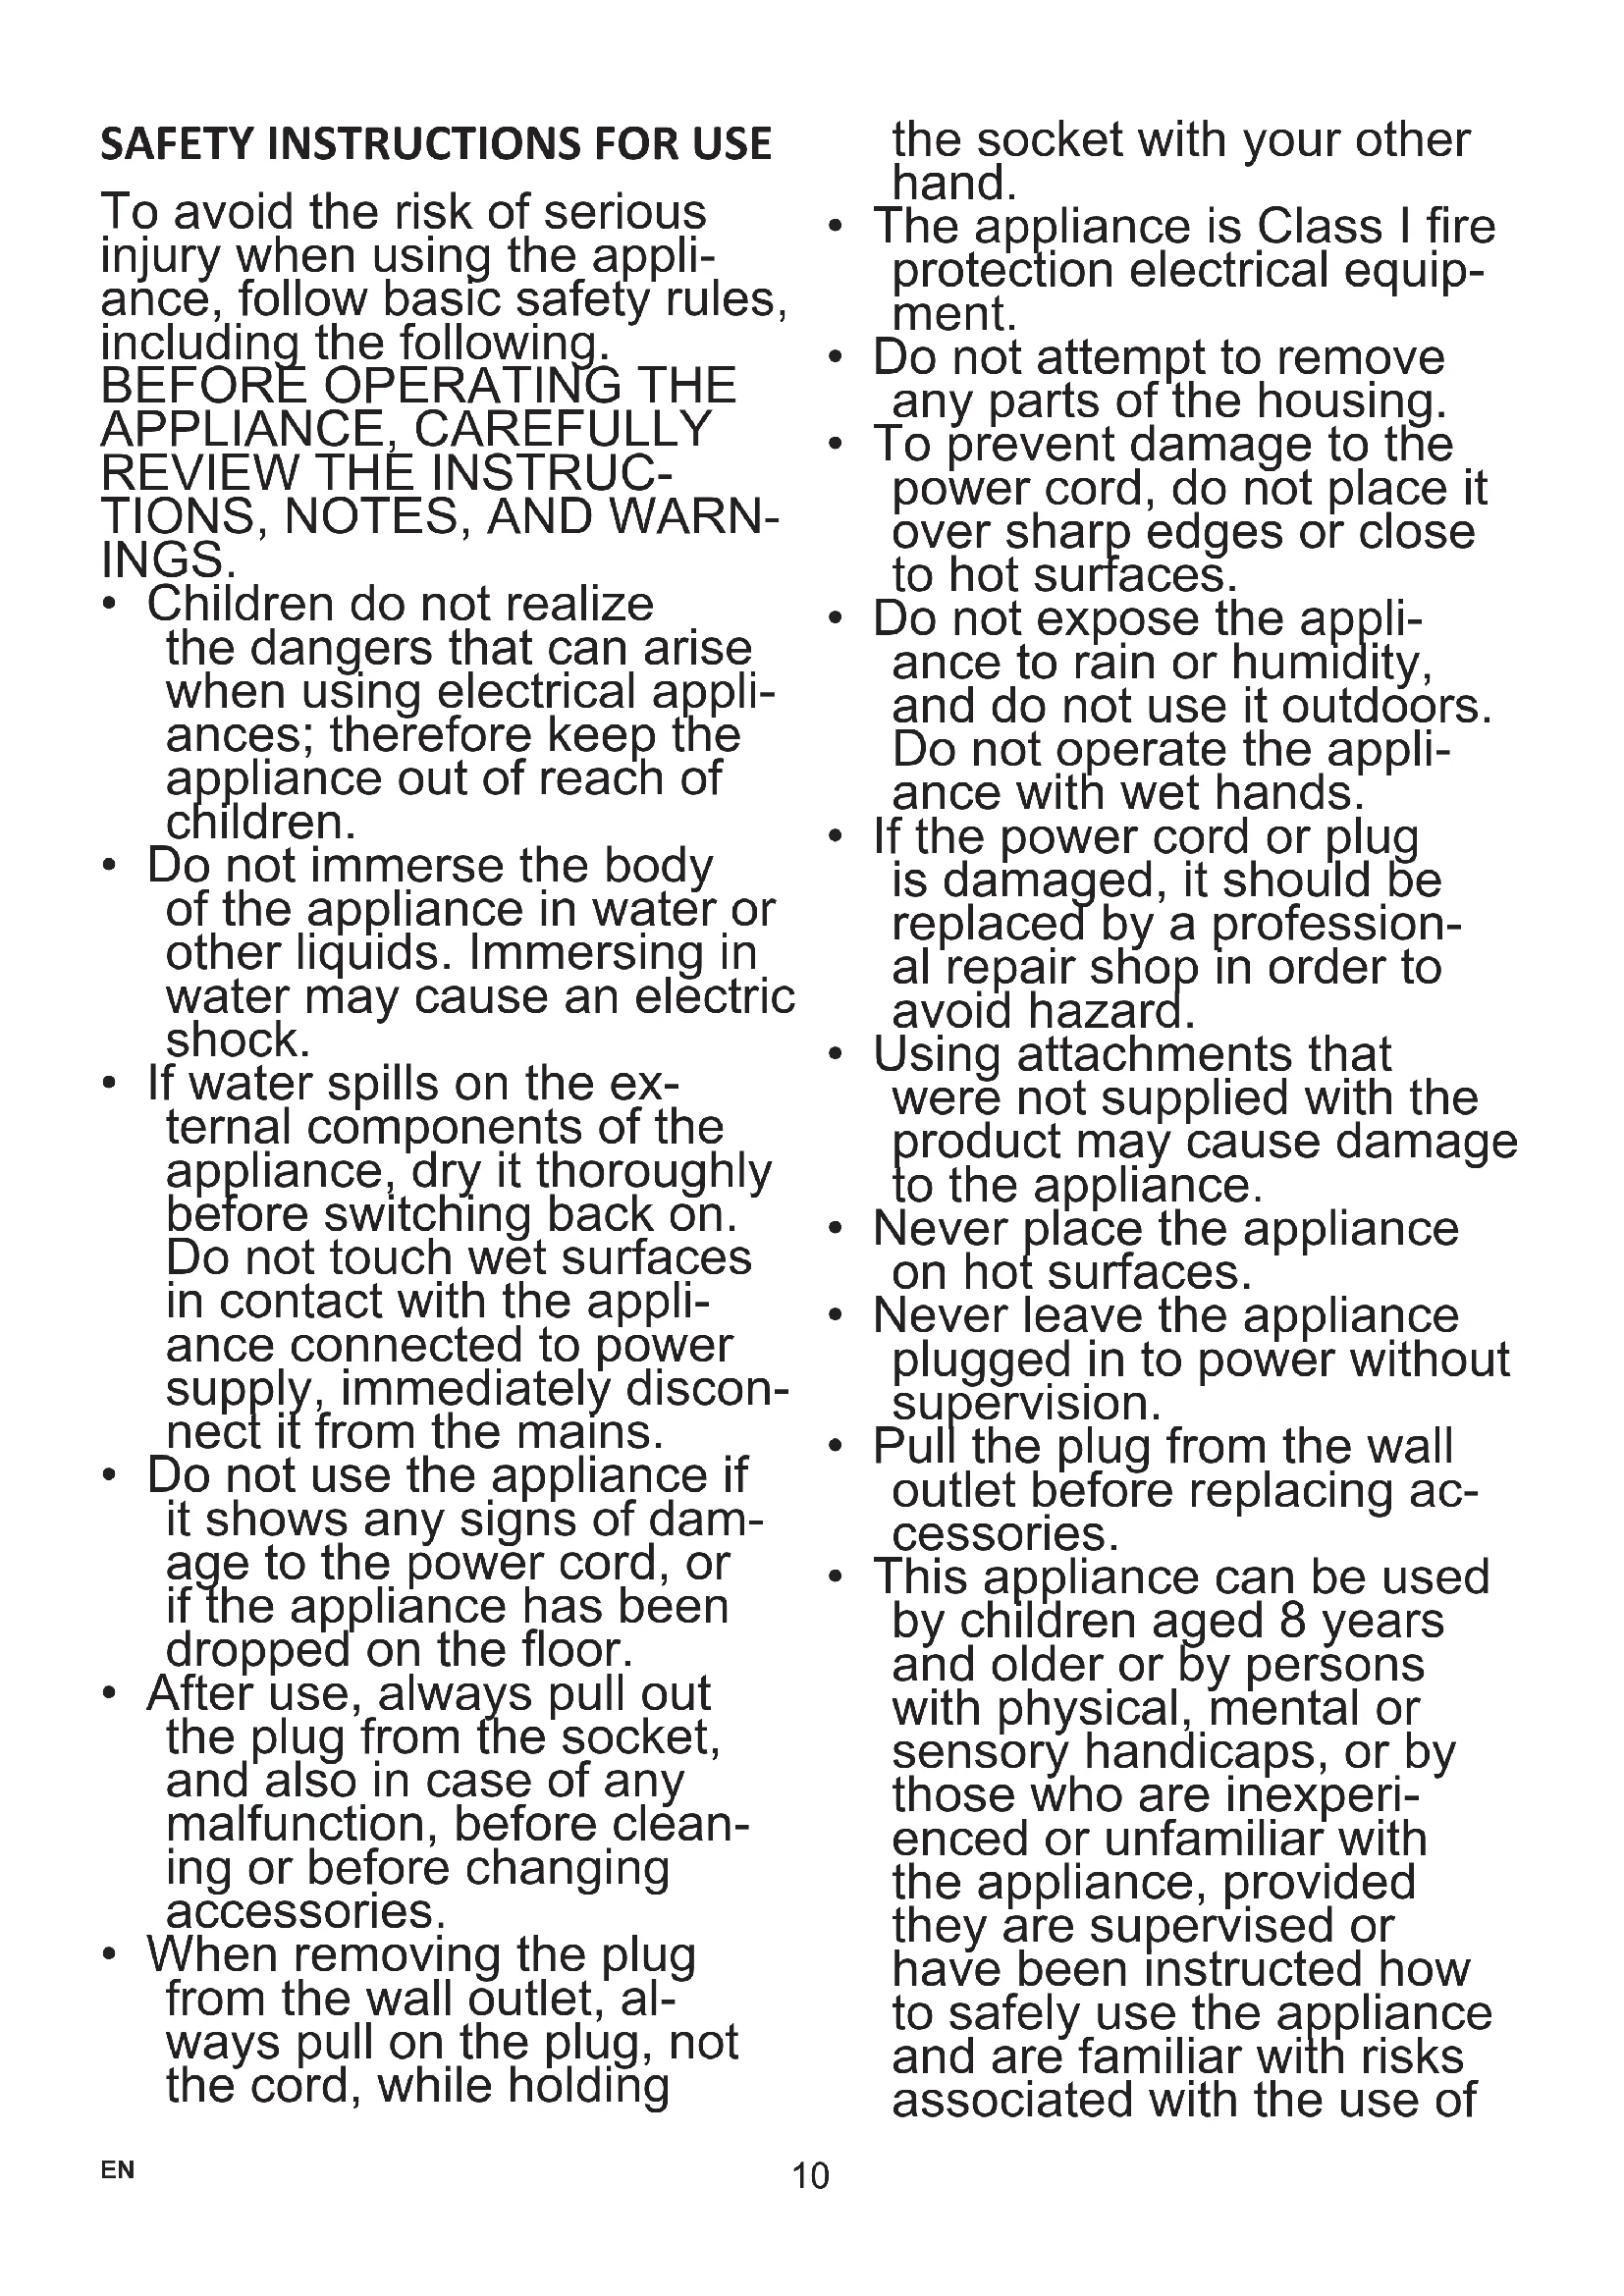
SAFETY INSTRUCTIONS FOR USE
To avoid the risk of serious injury when using the appliance, follow basic safety rules, including the following. BEFORE OPERATING THE APPLIANCE, CAREFULLY REVIEW THE INSTRUCTIONS, NOTES, AND WARNINGS.
- Children do not realize the dangers that can arise when using electrical appliances; therefore keep the appliance out of reach of children.
- Do not immerse the body of the appliance in water or other liquids. Immersing in water may cause an electric shock.
- If water spills on the external components of the appliance, dry it thoroughly before switching back on. Do not touch wet surfaces in contact with the appliance connected to power supply, immediately disconnect it from the mains.
- Do not use the appliance if it shows any signs of damage to the power cord, or if the appliance has been dropped on the floor.
- After use, always pull out the plug from the socket, and also in case of any malfunction, before cleaning or before changing accessories.
- When removing the plug from the wall outlet, always pull on the plug, not the cord, while holding
the socket with your other hand.
- The appliance is Class I fire protection electrical equipment.
- Do not attempt to remove any parts of the housing.
- To prevent damage to the power cord, do not place it over sharp edges or close to hot surfaces.
- Do not expose the appliance to rain or humidity, and do not use it outdoors. Do not operate the appliance with wet hands.
- If the power cord or plug is damaged, it should be replaced by a professional repair shop in order to avoid hazard.
- Using attachments that were not supplied with the product may cause damage to the appliance.
- Never place the appliance on hot surfaces.
- Never leave the appliance plugged in to power without supervision.
- Pull the plug from the wall outlet before replacing accessories.
- This appliance can be used by children aged 8 years and older or by persons with physical, mental or sensory handicaps, or by those who are inexperienced or unfamiliar with the appliance, provided they are supervised or have been instructed how to safely use the appliance and are familiar with risks associated with the use of
the appliance. Ensure that children do not play with the appliance. Do not allow children to clean and maintain the appliance unless they are 8 years or older and are supervised by a competent person.
- Ensure that the appliance is used on a clean, dry and level surface.
- The appliance is designed for juicing such foodstuffs as fruits or vegetables, do not use it for other purposes.
• Take caution when cleaning the attachments.
- Before use, check that the lid is securely attached.
• To push the product, only use the supplied pusher.
- Do not overload the appliance with an excessive amount of food and do not press the pusher too much.
- When the food is jammed, stop using the appliance and unplug it from the wall outlet. Remove the cause of jamming.
- Do not allow any liquid to come in contact with the appliance motor unit.
- Before you put the plug into the wall outlet, make sure your hands are dry.
- Never touch rotating parts when the appliance is in operation.
- Do not use the appliance if attachments are not secured.
• After use, disconnect the appliance from the power supply.
- Do not tamper with the safety lock before turning the appliance when attachments are not properly secured.
- Products with fine and hard seeds, such as currants, raspberries, grapes or chokeberries should be processed in small portions (\~0.3kg). After each batch of juice, turn off the appliance and thoroughly clean the separator tank according to the relevant sections of the Operating Instructions.
- When the tank is nearly full, and the pulp or juice does not flow through the holes, turn off the appliance and thoroughly clean the separator tank according to the relevant sections of the Operating Instructions.
- It is recommended to remove seeds from fruits that may change the juice taste, and in extreme situations may cause damage to the appliance.
Electrical requirements: Make sure that the voltage indicated on the nameplate corresponds to that of your home electrical mains. Alternating current must be used, typically marked \~.
In accordance with European Directive 2012/19/EU and Polish legislation regarding used electrical and electronic goods, this appliance is marked with the symbol of the crossed-out waste container. This marking indicates that the appliance must not be disposed of together with other household waste
after it has been used.
The user is obliged to hand it over to waste collection centre collecting used electrical and electronic goods. The collectors, including local collection points, shops and local authority departments provide recycling schemes.
Proper handling of used electrical and electronic goods helps avoid environmental and health hazards resulting from the presence of dangerous components and the inappropriate storage and processing of such goods.
SPECIFICATION:
Model - JSM 4014
Rated voltage - 220-240V\~, 50/60Hz
Rated power - 200 W
Power cord - 1 m
Net weight - 4.9kg
FEATURES AND COMPONENTS (FIGURE 1)
-
Lid
-
Auger
-
Juice container
-
Pulp container
-
Strainer
-
Ice cream strainer
-
Separator container
-
Cleaning brush
-
Motor unit
-
Pusher
BEFORE FIRST USE:
- Do not use the appliance continuously. If you use the appliance for 20 minutes, turn it off and allow it to cool for 20 minutes to prevent damage to the appliance.
- If you squeeze juice from high-fibre ingredients such as celery, etc., cut the ingredients into cubes no bigger than 3 cm wide before placing in the appliance.
- Extremely hard ingredients such as sugarcane and ginger are not suitable for juicing.
- Make sure you remove hard stones from fruits such as cherries, etc. It is best to peel lemons, oranges and other fruits, and remove the seeds so that they do not affect the taste of the juice.
- When processing harder fruit and vegetables, the appliance will make a squeaking noise and may vibrate slightly. This is normal and you can use the appliance with confidence.
- Use fresh fruit and vegetables for juicing. For better result, soak fruits and vegetables stored in the refrigerator in water for more than 10 minutes before processing.
- Processing of fruits and vegetables with darker pigments, such as carrots, beetroots, etc. may result in a slight discolouration on the juice containers and other parts, which is normal.
- Before starting the appliance, make sure that the separator container lid is installed in its place.
- When adding ingredients, put them in slowly one by one - the previously added ingredients must be processed before adding the next portion.
ASSEMBLE THE APPLIANCE:
- Push the valve at the bottom of the separator container. (Fig. 2, item 1).
Note!
- The valve must be installed properly, otherwise leaks may occur. (Fig. 2, item 2).
- Place the separator container on the motor unit. Fit the separator container and lock it onto the socket of the motor unit. Press down slightly and twist until installed in place. (Fig. 2, item 3).
- Fit the strainer in the separator container. (Fig. 2, item. 4).
• Install the auger in the middle of the strainer and press it down home. (Fig. 2, item 5).
• Install the lid of the separator container (Fig. 2, item 6).
- Align on the lid with an the separator container. Turn the lid clockwise so that on the lid aligns with an the separator container.
- Place the separator container and the pulp container (Fig. 2, item 7).
HOW TO USE YOUR APPLIANCE
- Put washed large pieces of fruit and vegetables into the feeder, turn the knob so that the fruit and vegetables fall into the feeder. Put small pieces of fruit and vegetables into the small feeder. Use the pusher to advance the fruits.
Note!
- Use fresh fruit and vegetables for juicing. For better result, soak fruits and vegetables stored in the refrigerator in water for more than 10 minutes before processing.
Warning!
- This appliance is not suitable for grinding grains, sugarcane or hard fruits.
- Remove the hard stones from fruits before juicing.
- Wash the appliance after pressing 0.5 kg of celery or other fibrous fruit and vegetables.
- If the appliance comes to a sudden stop, first turn the knob to the "OFF" position and then to the reverse "R" position to have the ingredients trapped in the auger pushed upwards. Then turn the knob to the "Juice" position to continue operation.
Warning!
- When the appliance is in Reverse "R" mode, gently hold the lid with your hand (to prevent the lid from coming loose).
- If the appliance still does not operate normally, remove the separator container and wash it thoroughly.
- You can keep the juice outlet cap closed while juicing. When you have squeezed all the juice, remove the cap and pour the juice into the juice container.
Benefits:
- Reduces exposure to air and slows down the oxidation process.
- Different fruits and vegetables can be used to obtain a multi fruit and vegetable juice.
- When you have finished juicing, turn the knob to the "OFF" position and unplug the appliance power cord from the wall outlet.
Recommendations:
- Do not store the squeezed juice for an extended time.
Product hardness valve setting:
-
Soft fruit — orange, watermelon, red grapes, pineapple, cucumber, tomato, ice cream.
-
Hard fruit — hard fruits and fibre rich fruits and vegetables such as apple, pear, celery, carrot, pomegranate.
DISASSEMBLE THE APPLIANCE:
-
To stop the appliance, turn the knob to the OFF position and unplug the power cord.
-
Grasp the separator container lid by hand and turn it counterclockwise. Turn to the position shown in Fig. 3, item 1 and lift the lid of the separator container to disassemble.
-
Grasp the juice spout of the separator container and lift it up to remove it (Fig. 3, item 2).
-
Remove the drive auger and filter assembly (Fig. 3, item 3).
-
Remove the drive auger from the filter (Fig. 3, item 4).
MAKE ICE CREAM:
Fruit such as bananas (peeled), durian (seedless) and stalk-less strawberries cut into cubes and place in the freezer for at least 8 hours. For authentic fruit flavoured ice cream, take the fruit out of the freezer 15 minutes before preparing, start the appliance and slowly place the fruit into the juicer feeder.
Next steps:
- Insert the ice cream strainer into the juicer.
- Place the separator container on the pulp spout;
- Set the valve to "Soft fruits"
- Turn the knob to "Ice cream"
- The ice cream comes out of the pulp outlet.
Instructions:
- To suit your own taste, you can add iced milk to fruit ice cream (the frozen ingredient should be thawed at room temperature until the surface slightly softens (at least 20 minutes for defrosting in winter and at least 15 minutes in summer) and slowly mixed in the juicer to obtain delicious ice cream.
- Feed the frozen ingredients slowly into the feeder at intervals of a few seconds.
Mango and banana ice cream:
- Set up the appliance in accordance with the "Make ice cream" section
- Cut the flesh of the mango and banana into small cubes and place in the freezer for 8-12 hours.
- Remove from the freezer and set aside for a few minutes to reduce hardness.
- Turn on the appliance, put the frozen mango and banana pieces into the feeder. Use the pusher to gently push the fruit cubes. Place the pulp container under the pulp spout. The ice cream is ready.
- You can eat the ice cream right away.
Peach ice cream:
- Set up the appliance in accordance with the "Make ice cream" section
- Wash and peel the peaches. Finely dice the peaches and put it in the freezer for 8-12 hours.
- Put fresh milk in the fridge.
- Remove the frozen peach from the freezer and set aside for a few minutes to reduce hardness.
- Place frozen peach cubes in the feeder, add fresh milk as you like. Use the pusher to gently push the fruit cubes. Place the pulp container under the pulp spout. Peach ice cream is ready.
CLEANING:
- Rinse each disassembled part under running water. If residue clogs the strainer, clean it with a brush (Fig. 1, item 8).
Note!
- Do not clean the appliance and its components with harsh detergents. When washing, move the valve back and forth to facilitate cleaning.
- Do not submerge the motor unit in water. Use only a damp, soft cloth to clean the appliance.
- When clean, dry the parts you washed and store them in a clean and well-ventilated area.
Note!
- The dried-out fruit flesh can affect disassembly and cleaning, and can also reduce performance. Therefore, you should always clean the appliance immediately after each use.
- You can remove the rubber seal under the separator container and wash it.
Table of dishwasher safe components - Fig. 4.
AUTO-CLEAN:
The juicing system is easy to clean. First, pour a moderate amount of water into the juicer. Then, after selecting the "Self clean" function, the appliance will start the leaning cycle for about a minute.
MAINTENANCE:
In the event of prolonged storage, store the appliance in a dry and well ventilated place to prevent the motor from being affected by moisture.
POKYNY K BEZPEČNÉMU POUŽÍ-VÁNÍ

- SAFETY INSTRUCTIONS FOR USE
- SPECIFICATION:
- FEATURES AND COMPONENTS (FIGURE 1)
- BEFORE FIRST USE:
- ASSEMBLE THE APPLIANCE:
- Note!
- HOW TO USE YOUR APPLIANCE
- Warning!
- Benefits:
- Recommendations:
- Product hardness valve setting:
- DISASSEMBLE THE APPLIANCE:
- MAKE ICE CREAM:
- Next steps:
- Instructions:
- Mango and banana ice cream:
- Peach ice cream:
- CLEANING:
- Table of dishwasher safe components - Fig. 4.
- AUTO-CLEAN:
- MAINTENANCE:
- POKYNY K BEZPEČNÉMU POUŽÍ-VÁNÍ
Brand : AMICA
Model : JSM 4014
Category : Juicer