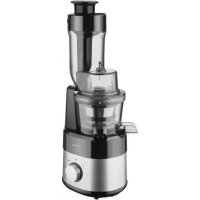
JSM4011 - Juicer AMICA - Free user manual and instructions
Find the device manual for free JSM4011 AMICA in PDF.
| Brand | Amica |
| Model | JSM4011 |
| Product Type | Masticating Juicer |
| Rated Voltage | 220-240 V~, 50/60 Hz |
| Rated Power | 200 W |
| Net Weight | 4.7 kg |
| Power Cord Length | 1 m |
| Juice Container Capacity | 1000 ml |
| Maximum Juice Capacity in Mixing Mode | 450 ml |
| Strainer Material | Stainless steel (fine and coarse strainers) |
| Main Functions | Juice extraction, juice mixing, reverse rotation |
| Strainer Type | Fine strainer (for hard/fibrous produce) and coarse strainer (for soft produce) |
| Number of Speeds | 1 speed with reverse |
| Automatic Shut-off | No (manual stop via Stop button) |
| Overload Protection | Yes (automatic stop in case of blockage, reverse possible) |
| Dishwasher-safe Parts | Yes (max temperature 45°C): funnel, pusher, strainer, collector, separator bowl, containers |
| Body Cleaning | Damp cloth, do not immerse |
| Child Safety | Lockable appliance, not for children under 8 without supervision |
| Included Accessories | Pusher, funnel, auger, 2 strainers (fine and coarse), juice collector, cleaning brush, separator bowl, pulp container, juice container (1000 ml), juice outlet cap, silicone gaskets |
| Warranty | 2 years (according to local legislation) |
Frequently Asked Questions - JSM4011 AMICA
User questions about JSM4011 AMICA
0 question about this device. Answer the ones you know or ask your own.
Ask a new question about this device
Download the instructions for your Juicer in PDF format for free! Find your manual JSM4011 - AMICA and take your electronic device back in hand. On this page are published all the documents necessary for the use of your device. JSM4011 by AMICA.
USER MANUAL JSM4011 AMICA
natural_image
Exterior view of a modern Amica brand coffee maker with clear glass and handle (no signage or text visible)PL INSTRUKCJA OBSŁUGI 8
EN USER MANUAL 13
CS NÁVOD K OBSLUZE 17
SK NÁVOD NA OBSLUHU 21
natural_image
Technical line drawing of a mechanical assembly with internal components and a red highlighted section (no text or symbols)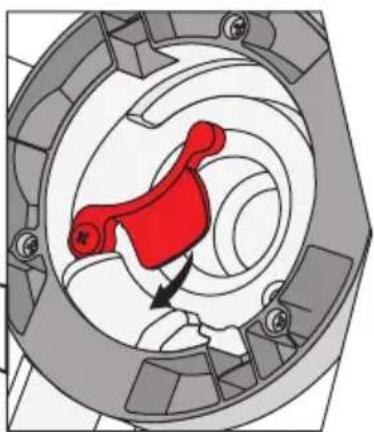
natural_image
Mechanical component diagram showing a red highlighted part inside a circular housing (no text or symbols)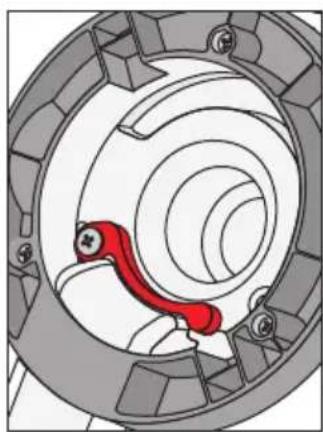
natural_image
Mechanical component diagram showing a red lever mechanism inside a circular housing (no text or symbols)2b

2e

natural_image
Exploded view diagram of a device's internal structure showing top, front, and side views with no text or symbols2f

natural_image
Diagram of a cylindrical container with a curved arrow indicating rotation, alongside a directional arrow and a stylized symbol (no text or labels)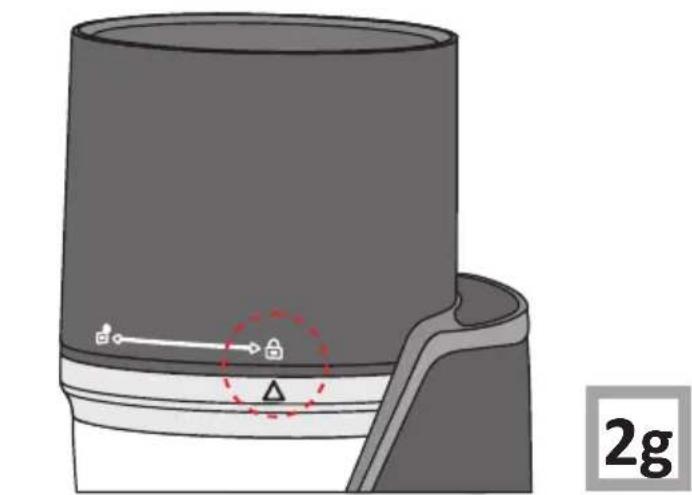
natural_image
Diagram of a cylindrical container with a side clip and a 2g label, showing internal components and arrows (no readable text or symbols)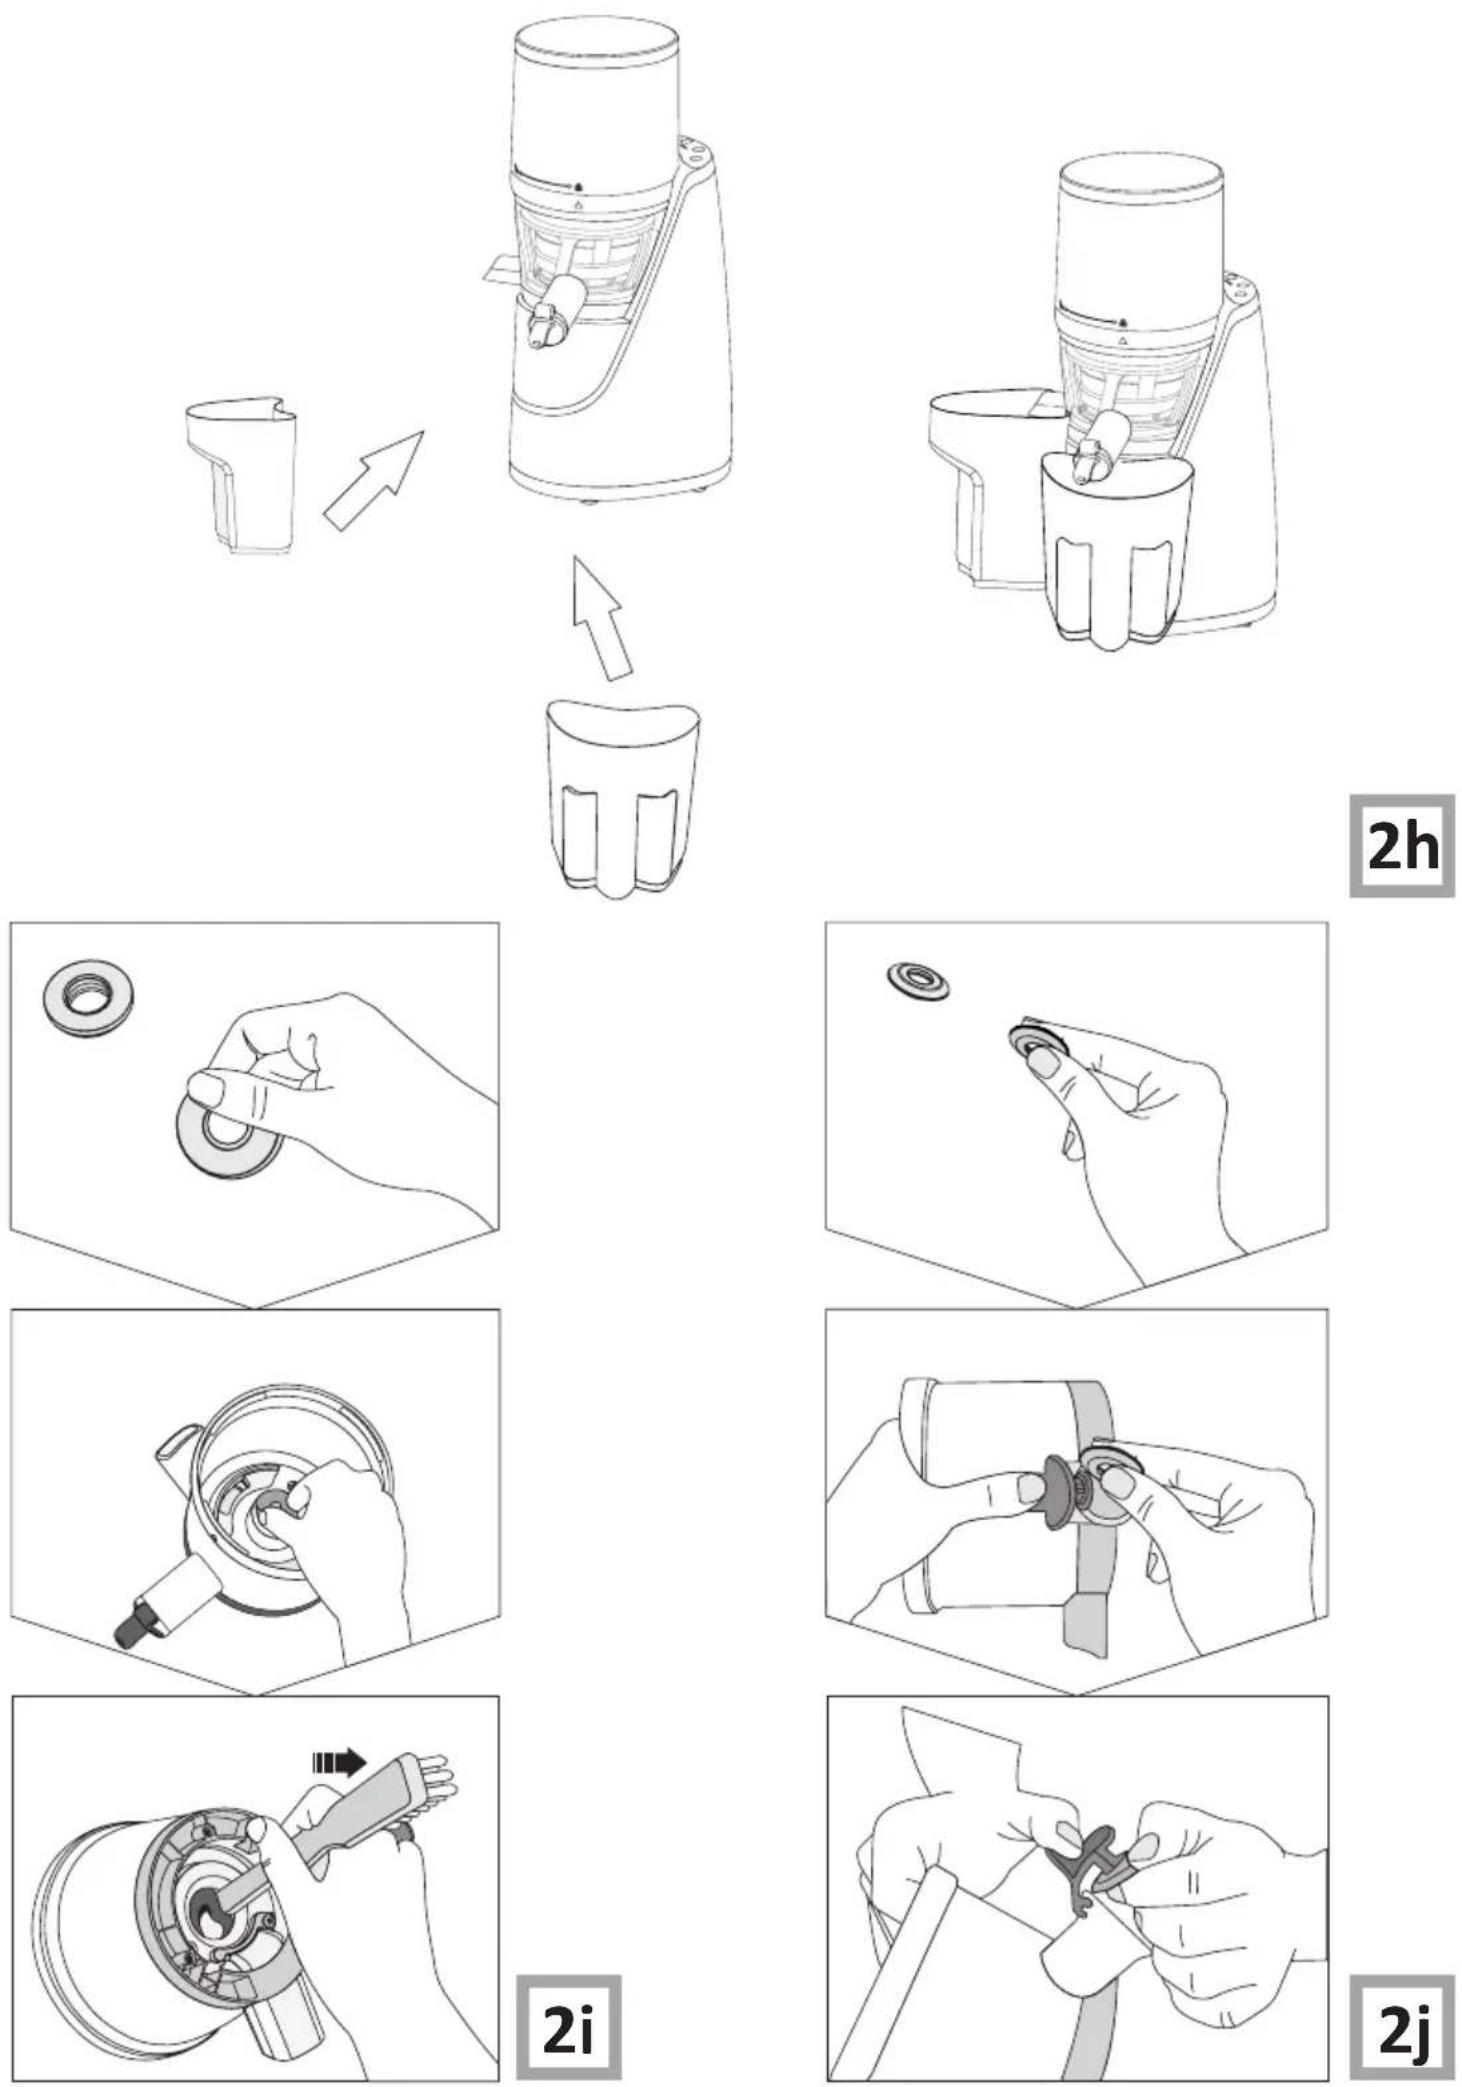
2k
21
flowchart
graph TD
    A["Juicing"] --> B["Status"]
    C["Mixing"] --> B
    D["Stop"] --> B
    E["1"] --> B
    F["23"] --> B
    G["4"] --> B
    H["3"] --> B
natural_image
3D rendering of a cylindrical mechanical component with internal mesh structure and mounting feet (no text or symbols)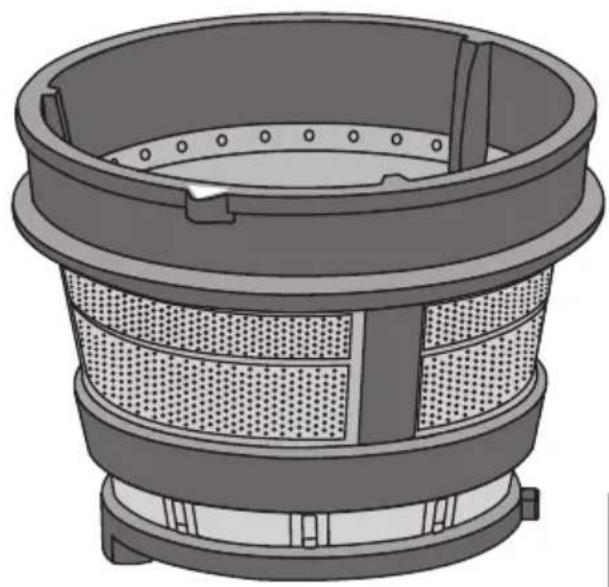
natural_image
3D rendering of a cylindrical industrial vessel with mesh pattern and side supports (no text or symbols)B
4
| √ | √ | √ | |
| √ | ∅ | √ | |
| √ | ∅ | √ | |
| √ | ∅ | √ | |
| √ | ∅ | √ | |
| √ | ∅ | √ | |
| √ | ∅ | √ | |
| √ | ∅ | √ | |
| √ | ∅ | √ | |
| √ | ∅ | √ | |
| ∅ | ∅ | √ | |
| √ | √ | √ | |
| √ | √ | √ |

WSKAZÓWKI DOTYCZĄCE BEZ-PIECZEŃSTWA UŻYTKÓWANIA
SAFETY INSTRUCTIONS FOR USE
To avoid the risk of serious injury when using the appliance, follow basic safety rules, including the following. BEFORE OPERATING THE APPLIANCE, CAREFULLY REVIEW THE INSTRUCTIONS, NOTES, AND WARNINGS.
• Children do not realize the dangers that can arise when using electrical appliances; therefore keep the appliance out of reach of children.
- Do not immerse the body of the appliance in water or other liquids. Immersing in water may cause an electric shock.
- If water spills on the external components of the appliance, dry it thoroughly before switching back on. Do not touch wet surfaces in contact with the appliance connected to power supply, immediately disconnect it from the mains.
- Do not use the appliance if it shows any signs of damage to the power cord, or if the appliance has been dropped on the floor.
- After use, always pull out the plug from the socket, and also in case of any malfunction, before cleaning or before changing accessories.
- When removing the plug from the wall outlet, always pull on the plug, not the cord, while holding
the socket with your other hand.
- The appliance is Class I fire protection electrical equipment.
- Do not attempt to remove any parts of the housing.
- To prevent damage to the power cord, do not place it over sharp edges or close to hot surfaces.
- Do not expose the appliance to rain or humidity, and do not use it outdoors. Do not operate the appliance with wet hands.
- If the power cord or plug is damaged, it should be replaced by a professional repair shop in order to avoid hazard.
- Using attachments that were not supplied with the product may cause damage to the appliance.
- Never place the appliance on hot surfaces.
- Never leave the appliance plugged in to power without supervision.
- Pull the plug from the wall outlet before replacing accessories.
- This appliance can be used by children aged 8 years and older or by persons with physical, mental or sensory handicaps, or by those who are inexperienced or unfamiliar with the appliance, provided they are supervised or have been instructed how to safely use the appliance and are familiar with risks associated with the use of
the appliance. Ensure that children do not play with the appliance. Do not allow children to clean and maintain the appliance unless they are 8 years or older and are supervised by a competent person.
- Ensure that the appliance is used on a clean, dry and level surface.
- The appliance is designed for juicing such foodstuffs as fruits or vegetables, do not use it for other purposes.
• Take caution when cleaning the attachments. - Before use, check that the lid is securely attached.
• To push the product, only use the supplied pusher. - Turn on the appliance by pressing ☐ or ☐. Turn off the appliance by pressing ☐. To turn off the appliance completely unplug it from the power supply.
- Do not overload the appliance with an excessive amount of food and do not press the pusher too much.
- If you notice strong vibrations or rotation speed is reduced, press ⬤ to change the direction of head rotation. If necessary, turn off the appliance, unplug it from power, remove all components, clean the sieve and other parts in contact with food.
- When the food is jammed in the feeder, stop using the appliance, unplug it from the wall outlet. Remove the
cause of jamming.
- Do not allow any liquid to come in contact with the appliance motor unit.
- Before you put the plug into the wall outlet, make sure your hands are dry.
- Never touch rotating parts when the appliance is in operation.
- Do not use the appliance if attachments are not secured.
• After use, disconnect the appliance from the power supply. - Do not tamper with the safety lock before turning the appliance when attachments are not properly secured.
- Products with fine and hard seeds, such as currants, raspberries, grapes or chokeberries should be processed in small portions (\~0.3kg). After each batch of juice, turn off the appliance and thoroughly clean the separator tank according to the relevant sections of the Operating Instructions.
- When the tank is nearly full, and the pulp or juice does not flow through the holes, turn off the appliance and thoroughly clean the separator tank according to the relevant sections of the Operating Instructions.
- It is recommended to remove seeds from fruits that may change the juice taste, and in extreme situations may cause damage to the
appliance.
Electrical requirements Make sure that the voltage indicated on the nameplate corresponds to that of your home electrical mains. Alternating current must be used, typically marked \~.
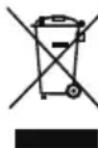
In accordance with European Directive 2012/19/EU and Polish legislation regarding used electrical and electronic goods, this appliance is marked with the symbol of the crossed-out waste container. This marking indicates that the appliance must not be disposed of together with other household waste after it has been used.
The user is obliged to hand it over to waste collection centre collecting used electrical and electronic goods. The collectors, including local collection points, shops and local authority departments provide recycling schemes. Proper handling of used electrical and electronic goods helps avoid environmental and health hazards resulting from the presence of dangerous components and the inappropriate storage and processing of such goods.
SPECIFICATION:
Model - JSM 4011
Rated voltage - 220-240V\~, 50/60Hz
Rated power - 200 W
Power cord - 1 m
Net weight - 4.7kg
FEATURES AND COMPONENTS (FIGURE 1)
- Pusher
- Hopper
- Auger
- Strainer (coarse)
- Strainer (fine)
- Juice collector
- Cleaning brush
- Separator container
- Pulp outlet
- Juice outlet
- Juice outlet plug
- Motor unit
- Control Panel
- Drive shaft
- Pulp container
- Juice container (1000 ml)
- Silicone squeegee
BEFORE FIRST USE:
- After unpacking the appliance, make sure that all the attachments are included and there are no visible signs of damage.
- Before first use, wash in hot water all the attachments which come into contact with food. In addition, thoroughly dry all parts before use.
- Never immerse the body of the appliance in water or other liquids. This can cause damage to the motor and pose a risk of electric shock.
- Wash all food products before juicing. Cut large fruits, such as apples, into smaller pieces to fit into the inlet.
- Do not use frozen products.
- Remove hard seeds and pits before juice extraction.
- Before assembling the appliance, make sure that the power cord is disconnected from the wall outlet.
HOW TO USE YOUR APPLIANCE
-
Expand the power cord, place the body of the appliance on a stable, dry and flat surface.
-
The order of assembly of individual components is shown on Fig. 2a.
- Make sure that the rubber protective buffer is fixed on the pulp outlet hole at the bottom of the separator container (Fig. 2b).
- Make sure that the separator container gasket (Fig. 2i) and the juice outlet plug gasket (Fig. 2j) have been installed correctly.
- Place the separator container on the motor unit (Fig. 2a, item 1) so that the two ridges in the motor unit fit into the grooves in the bottom of the separator container (Fig. 2c). Make sure that the components are properly connected.
- Assemble the strainer and juice collector (Fig. 2d).
- Place the combined elements (strainer and juice collector) inside the separator container (Fig. 2f). Note that there is a socket inside the container (partially covered by the safety buffer) (Fig. 2e, item 2), and you need to fit the tab located in the strainer (Fig. 2e, item 1) into the socket. Make sure that the components are properly connected (Fig. 2f).
- Insert the worm shaft in the separator container unit along with other fitted components (Fig. 2f). Make sure that the worm shaft is properly mounted on the drive shaft and the elements are properly connected. Otherwise, the container will not close.
- Close the separator container by putting the hopper on (Fig. 2g). Put the hopper on the vessel in such a manner that the triangle symbol on the separator container and an open padlock symbol on the hopper were in a straight line (Fig. 2f). Then turn the lid clockwise until it clicks into place. Make sure that the elements are properly connected (the triangle symbol on the vessel and a symbol of a closed padlock on the hopper must be aligned (Fig. 2g). Incorrect installation will prevent the start of appliance.
- Put the juice container under the juice outlet and the pulp container under the pulp outlet (Fig. 2h).
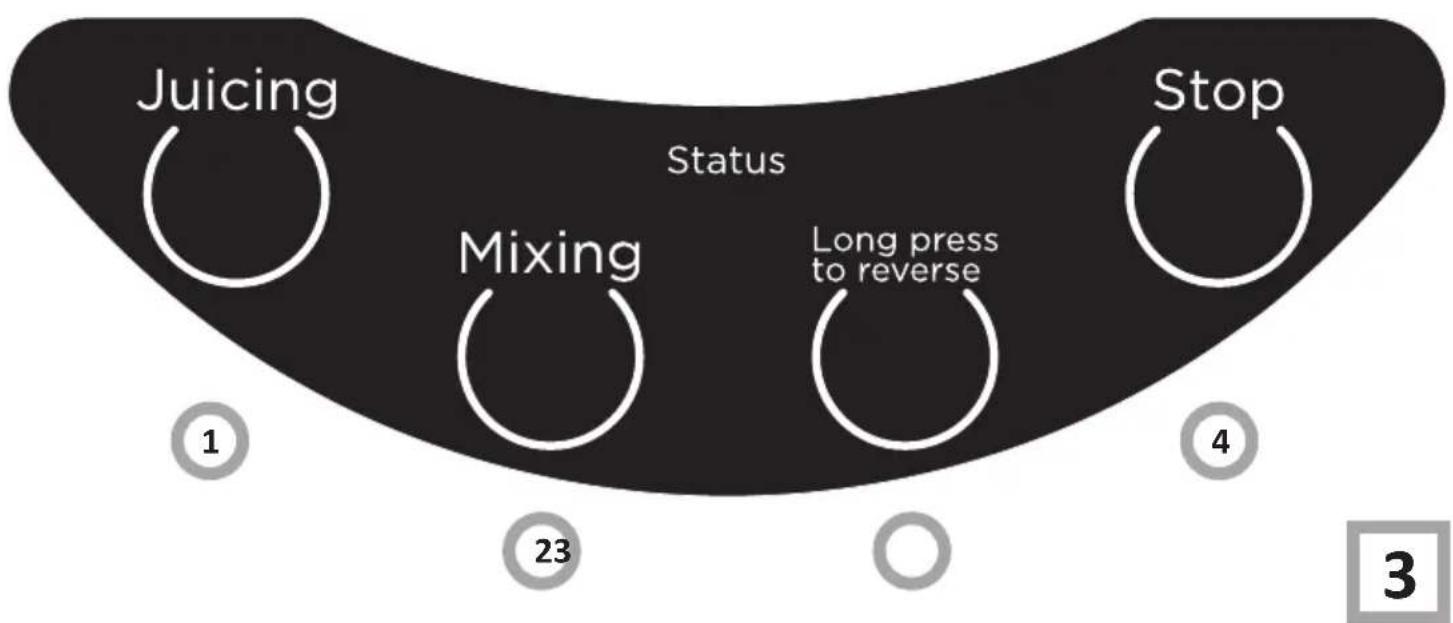
CONTROL PANEL (FIG. 3):
To start the appliance, press the "Juicing" button on the control panel (Fig. 3, item 1).
In order to obtain mixed juice from various products, first use the “Juicing” function (Fig. 3, item 1) with a closed cap. Then to mix the juice, press the Mixing button (Fig. 3, item 2). The juice in the appliance will be mixed.
To turn off the motor, press the "Stop" button (Fig. 3, item 4). Pres and hold the "Long press to reverse" button (Fig. 3, item 3) for 2-5 seconds to reverse the rotation. Use this function when the food products block the drive shaft or strainer. Press the "Juicing" button (Fig. 3, item 1) to resume normal juicing.
JUICING FUNCTION:
- Place the prepared products in the hopper and start the appliance by pressing the "Juicing" button on the control panel (Fig. 3, item 1).
Note! While operating in the juicing function, juice outlet plug must open at all times. Failure to do so will result in juice staying in the appliance, which may lead to overflow, and consequently to the appliance failure.
- When the appliance is in operation, put in products of suitable size through the inlet hole (cut larger fruits or vegetables into smaller pieces), and press products with the pusher. Within seconds the juice will start to flow, and the pulp will be pushed into the pulp container through the outlet. Do not press the product too hard with the pusher, this may result in stopping the drive shaft.
- If the appliance jams during operation and stops, turn it off with the "Stop" button (Fig. 3, item 4), and then press and hold the "Long press to reverse" (Fig. 3, item 3) for 3-5 seconds. After a complete stop of the shaft try to restart the appliance. If necessary, repeat this process 2-3 times. If the appliance still operates improperly, turn it off, disconnect from the mains, dismantle and remove the products from inside the appliance.
- When the juice vessel or pulp container is full, switch off the appliance and empty the containers.
MIXING FUNCTION-EXTRACTION AND MIXING DIFFERENT KINDS OF JUICE
- Close the juice outlet plug.
- Start juicing as described in section Juicing function -put in products in random order.
- Ensure that the level of juice in the separator container did not exceed the marked level of 450 ml.
Note! While using mixing function, the juice outlet plug must be closed. The extracted and mixed juice level in the separator container must not exceed the maximum marked level. Exceeding the maximum level could lead to overflowing, and consequently to the appliance failure.
- Press the "Mixing" button (Fig. 3, item 2) to mix all kinds of juices.
- Open the juice outlet plug to empty the separator container.
- When the juice vessel or pulp container is full, switch off the appliance and empty the containers.
Note! Never use hands or items not suitable for the appliance to push the products in hopper (for example, a table spoon). Only use the pusher supplied with the appliance. After processing all products, switch off the appliance with the "Stop" button and pull out the plug from the wall outlet.
The maximum time of continuous operation is 20 minutes. After this time, turn off the appliance and wait until the motor temperature reaches room temperature. Longer continuous use of the appliance may lead to motor damage. Intervals between operating cycles should be a minimum of 30 minutes.
ATTACH THE JUICE SPOUT GASKET (FIG. 2J)
- Open the juice spout plug.
- Hold the gasket as shown in the figure.
- Hold the separator container and juice spout plug.
- Attach/remove the gasket.
- Fit the gasket in a correct position. Incorrect fitting may cause juice leaks.
ATTACH THE SEPARATOR CONTAINER GASKET (FIG. 2I):
- Hold the gasket in such a way that its ring was directed upwards.
- Insert the gasket in the groove of the separator container.
- If the separator container gasket is not properly fitted, fit it correctly using for example the brush supplied.
PRACTICAL EVERYDAY TIPS:
- Use fresh products as they have the most juice. Recommended foods for processing in the appliance include pineapple, beetroot, celery stalks, apples, cucumbers, carrots, spinach, melon, tomato, pomegranate, citrus, and seedless grapes.
- You do not have to remove thin peel from products, peel off thick peel from products such as oranges, pineapple, uncooked beetroot. Also remove white flesh found directly under the peel of citrus, it has a bitter taste.
- Note that the density of apple juice can be influenced by the type of apples used. To minimise browning, add a few drops of lemon juice to apple juice as it tends to turn brown quickly due to oxidation. This will slow down juice browning.
- Products such as bananas, papayas, avocados, figs or mangoes are not suitable for processing in the appliance. It is recommended to use a hand blender or a food processor for processing this type of fruit.
- Stalks and leaves (for example, lettuce or cabbage) may also be processed in the appliance.
- The produced juice should be consumed as soon as possible. Extended exposure to air can diminish the original flavour and nutritional value of juice.
- To obtain as much juice out of the products as possible, slowly press the products with a pusher.
- The appliance is not suitable for processing hard, fibrous and/or starchy products, such as sugar cane.
- It is not recommended to reprocess the extracted pulp. This causes dense pulp clot in the juice outlet.
- Density of the juice is affected by the type of processed food
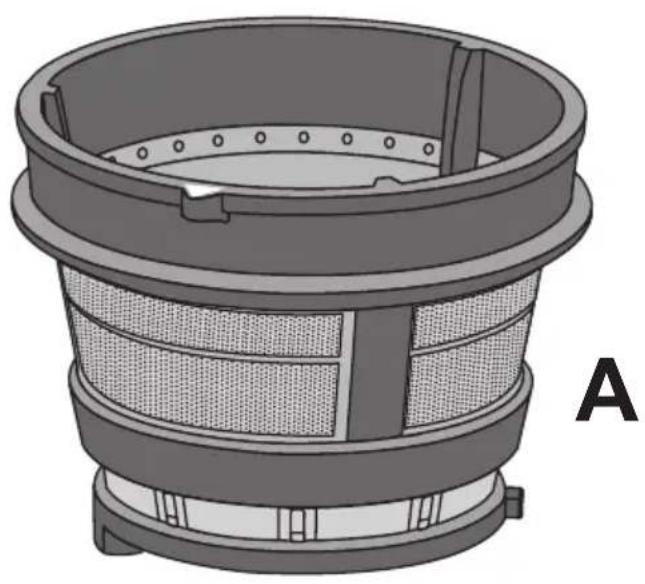
TYPES OF STRAINERS AND THEIR APPLICATIONS (FIG. 4):
- Fine strainer (Fig. 4, item A) — use it for hard and/or fibrous food products. The juice squeezed using this strainer is clearer.
- Coarse strainer (Fig. 4, item B) — use it for soft fruits such as strawberries, kiwi or tomatoes. Do not use this strainer for juicing fruits with small seeds. The juice squeezed using this strainer is thick.
CLEANING
- Before cleaning the appliance, make sure that it is in complete stop and disconnect it from the mains. Furthermore, it must cool down completely.
- Wipe the appliance with a damp cloth and then dry thoroughly. Do not immerse the appliance motor unit in water or any other liquid.
- Wash other attachments in warm water with mild detergent, preferably immediately after finishing work. This will facilitate removing the food residues.
- Some parts of the appliance can be washed in the dishwasher at a maximum temperature of 45°C.
- To clean the strainer, use the supplied brush (Fig. 1, item 7).
- Do not use harsh detergents to clean the appliance.
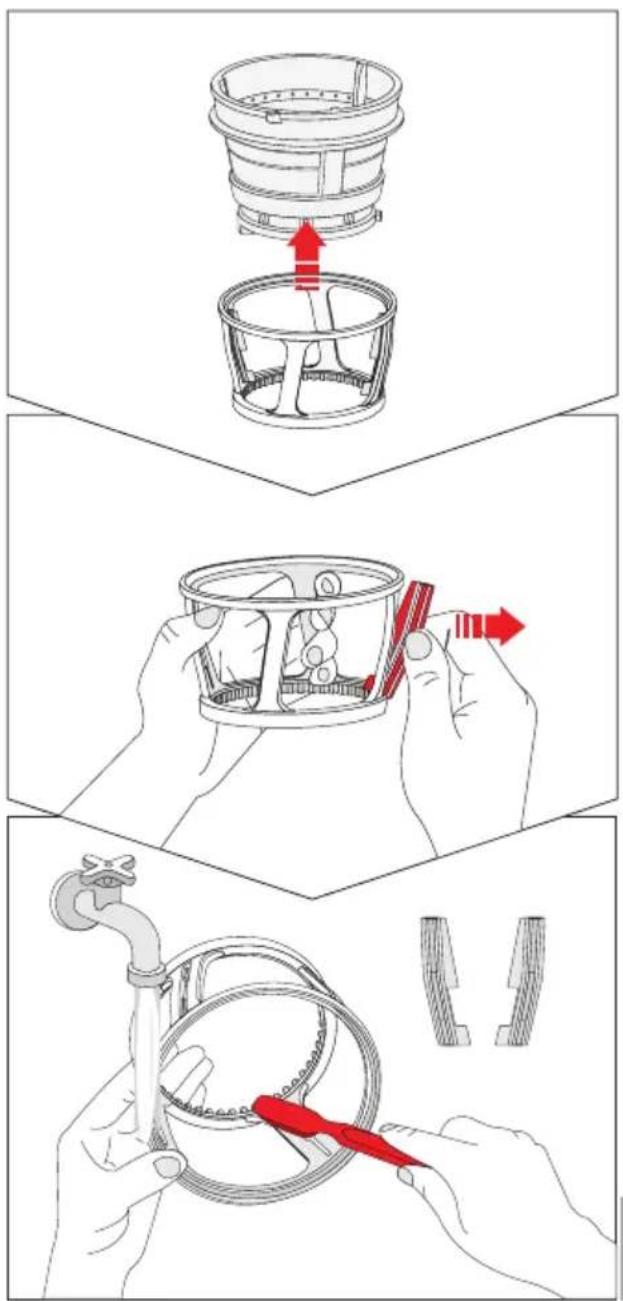
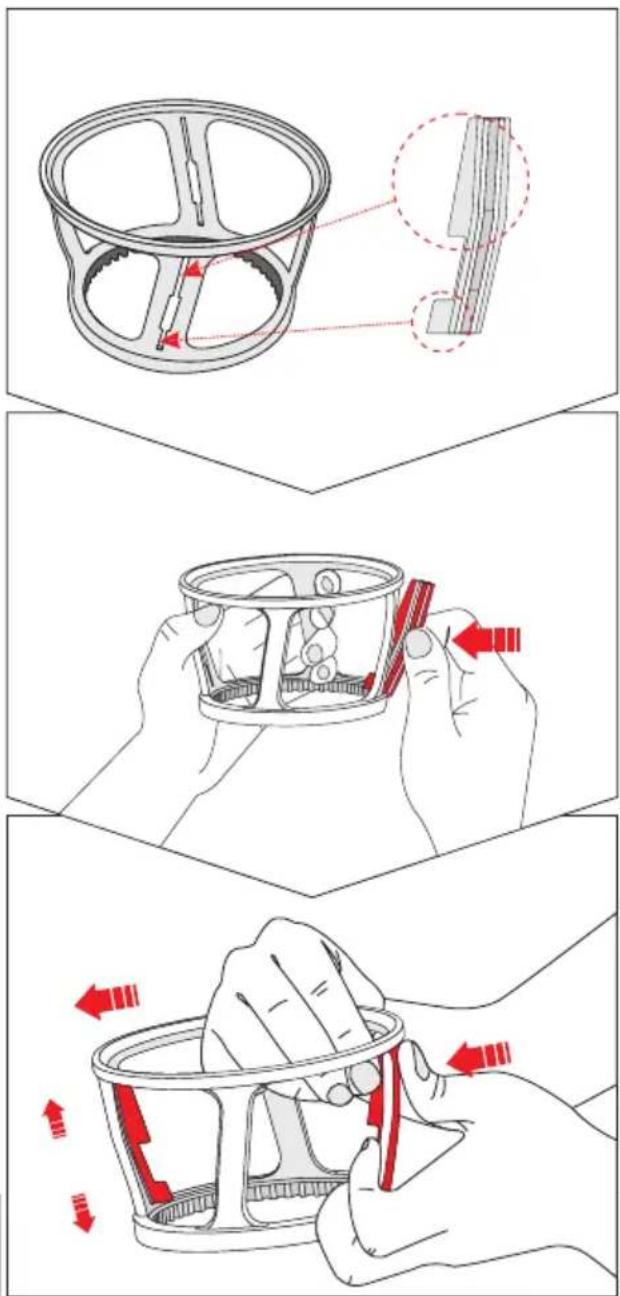
- In order to thoroughly wash the pulp outlet, pull out the rubber protective buffer from the pulp outlet in the separator container, and then clean the outlet with a brush (Fig. 2i, 2j).
- Before cleaning the juice collector, remove the silicone squeegees (Fig. 2k). Once cleaned, replace them (Rys. 2l).
- Dry all parts and assemble the appliance.
- Store the appliance in a dry place. Juice container can be stored in the pulp container
Table of dishwasher safe components - Fig. 5.