DJM150BTVHF - Mixer IBIZA SOUND - Free user manual and instructions
Find the device manual for free DJM150BTVHF IBIZA SOUND in PDF.
| Brand | Ibiza Sound |
| Model | DJM150BTVHF |
| Product type | Stereo mixing console with USB, Bluetooth and VHF microphone |
| Power supply | 12V AC power adapter included |
| Inputs | 2 RCA line inputs (channels 1 and 2), 1 6.35mm microphone input, 1 wireless VHF microphone input, 1 USB port |
| Outputs | RCA main output, RCA MON (pre-listening) output, 6.35mm headphone output (8-600 Ω) |
| Tone controls | Treble, mid, bass: ±12 dB adjustment |
| Frequency response | 20 Hz - 20 kHz ±2 dB |
| Harmonic distortion | < 0.02% |
| Signal-to-noise ratio | > 70 dB |
| Bluetooth functions | Wireless connection for audio streaming on channel 1 |
| USB functions | MP3 player with controls (play/pause, previous/next, volume, EQ) |
| VHF microphone | Frequency 202.75 MHz, typical range 30 m, 1.5 V battery included |
| Crossfader | Mixes between channels 1 and 2 (center position = both channels audible) |
| Talkover | Attenuates other sources by 14 dB when using the microphone |
| Display | General level LED (left/right) and MP3 LED display |
| Maintenance and cleaning | Disconnect the device before cleaning; use a soft dry cloth. Do not use solvents |
| Safety | Do not open the enclosure; do not expose to humidity; maintain a minimum distance of 0.5 m around for ventilation |
| Batteries and recycling | Do not dispose of with household waste; recycle at an approved collection point |
| Dimensions | Approximately 250 x 200 x 80 mm (estimate) |
| Weight | Approximately 1.5 kg (estimate) |
Frequently Asked Questions - DJM150BTVHF IBIZA SOUND
User questions about DJM150BTVHF IBIZA SOUND
0 question about this device. Answer the ones you know or ask your own.
Ask a new question about this device
Download the instructions for your Mixer in PDF format for free! Find your manual DJM150BTVHF - IBIZA SOUND and take your electronic device back in hand. On this page are published all the documents necessary for the use of your device. DJM150BTVHF by IBIZA SOUND.
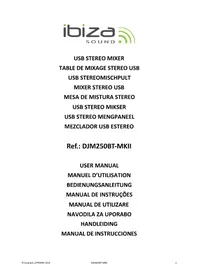
USER MANUAL DJM150BTVHF IBIZA SOUND
USB STEREO MIXER
TABLE DE MIXAGE STEREO USB
USB STEREOMISCHPULT
MIXER STEREO USB
MESA DE MISTURA STEREO
USB STEREO MIKSER
USB STEREO MENGPANEL
MIKSER STEREO Z USB
Ref.: DJM150BT-VHF
USER MANUAL
MANUEL D'UTILISATION
BEDIENUNGSANLEITUNG
MANUAL DE INSTRUÇões
MANUAL DE UTILIZARE
NAVODILA ZA UPORABO
HANDLEIDING
MANUAL DE USUARIO
INSTRUKCJA OBSLUGI
DJMISOBT-VHF
SAFETY RECOMMENDATIONS
MAGNETIC FIELD
CAUTION! Do not locate sensitive high gain equipment such as preamplifiers or tape decks directly above or below the unit. This unit has a strong magnetic field which can induce hum into unshielded devices that are located nearby. The field has strongest spots just above and below the unit. Locate the amplifier at the bottom of the rack and the preamplifier or other sensitive equipment at the top.
| CAUTION |
| RISK OF ELECTRIC SHOCK |
| DO NOT OPEN |
To prevent electric shock, do not remove top or bottom covers.
No user serviceable parts inside.
Refer servicing to qualified servicing personnel.
Disconnect power cord before removing back panel cover to access gain switch.
No naked flame sources, such as lighted candles, should be placed on the apparatus
The unit should only be used in moderate climates
This unit should be cleaned only with a dry cloth. Avoid solvents or other cleaning detergents
A minimum distance of 0.5m around the unit must be kept to ensure sufficient ventilation and avoid overheating
WARNING! To reduce the risk of electric shock, do not expose this equipment to rain or moisture!

The exclamation point triangle is used to alert the user to important operating or maintenance instructions

The lightning bolt triangle is used to alert the user to the risk of electric shock
WATCH FOR THESE SYMBOLS:

The exclamation point triangle is used to alert the user to important operating or maintenance instructions.

The lighting bolt triangle is used to alert the user to the risk of electric shock.
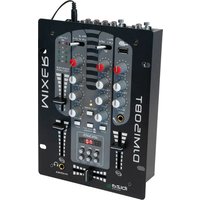
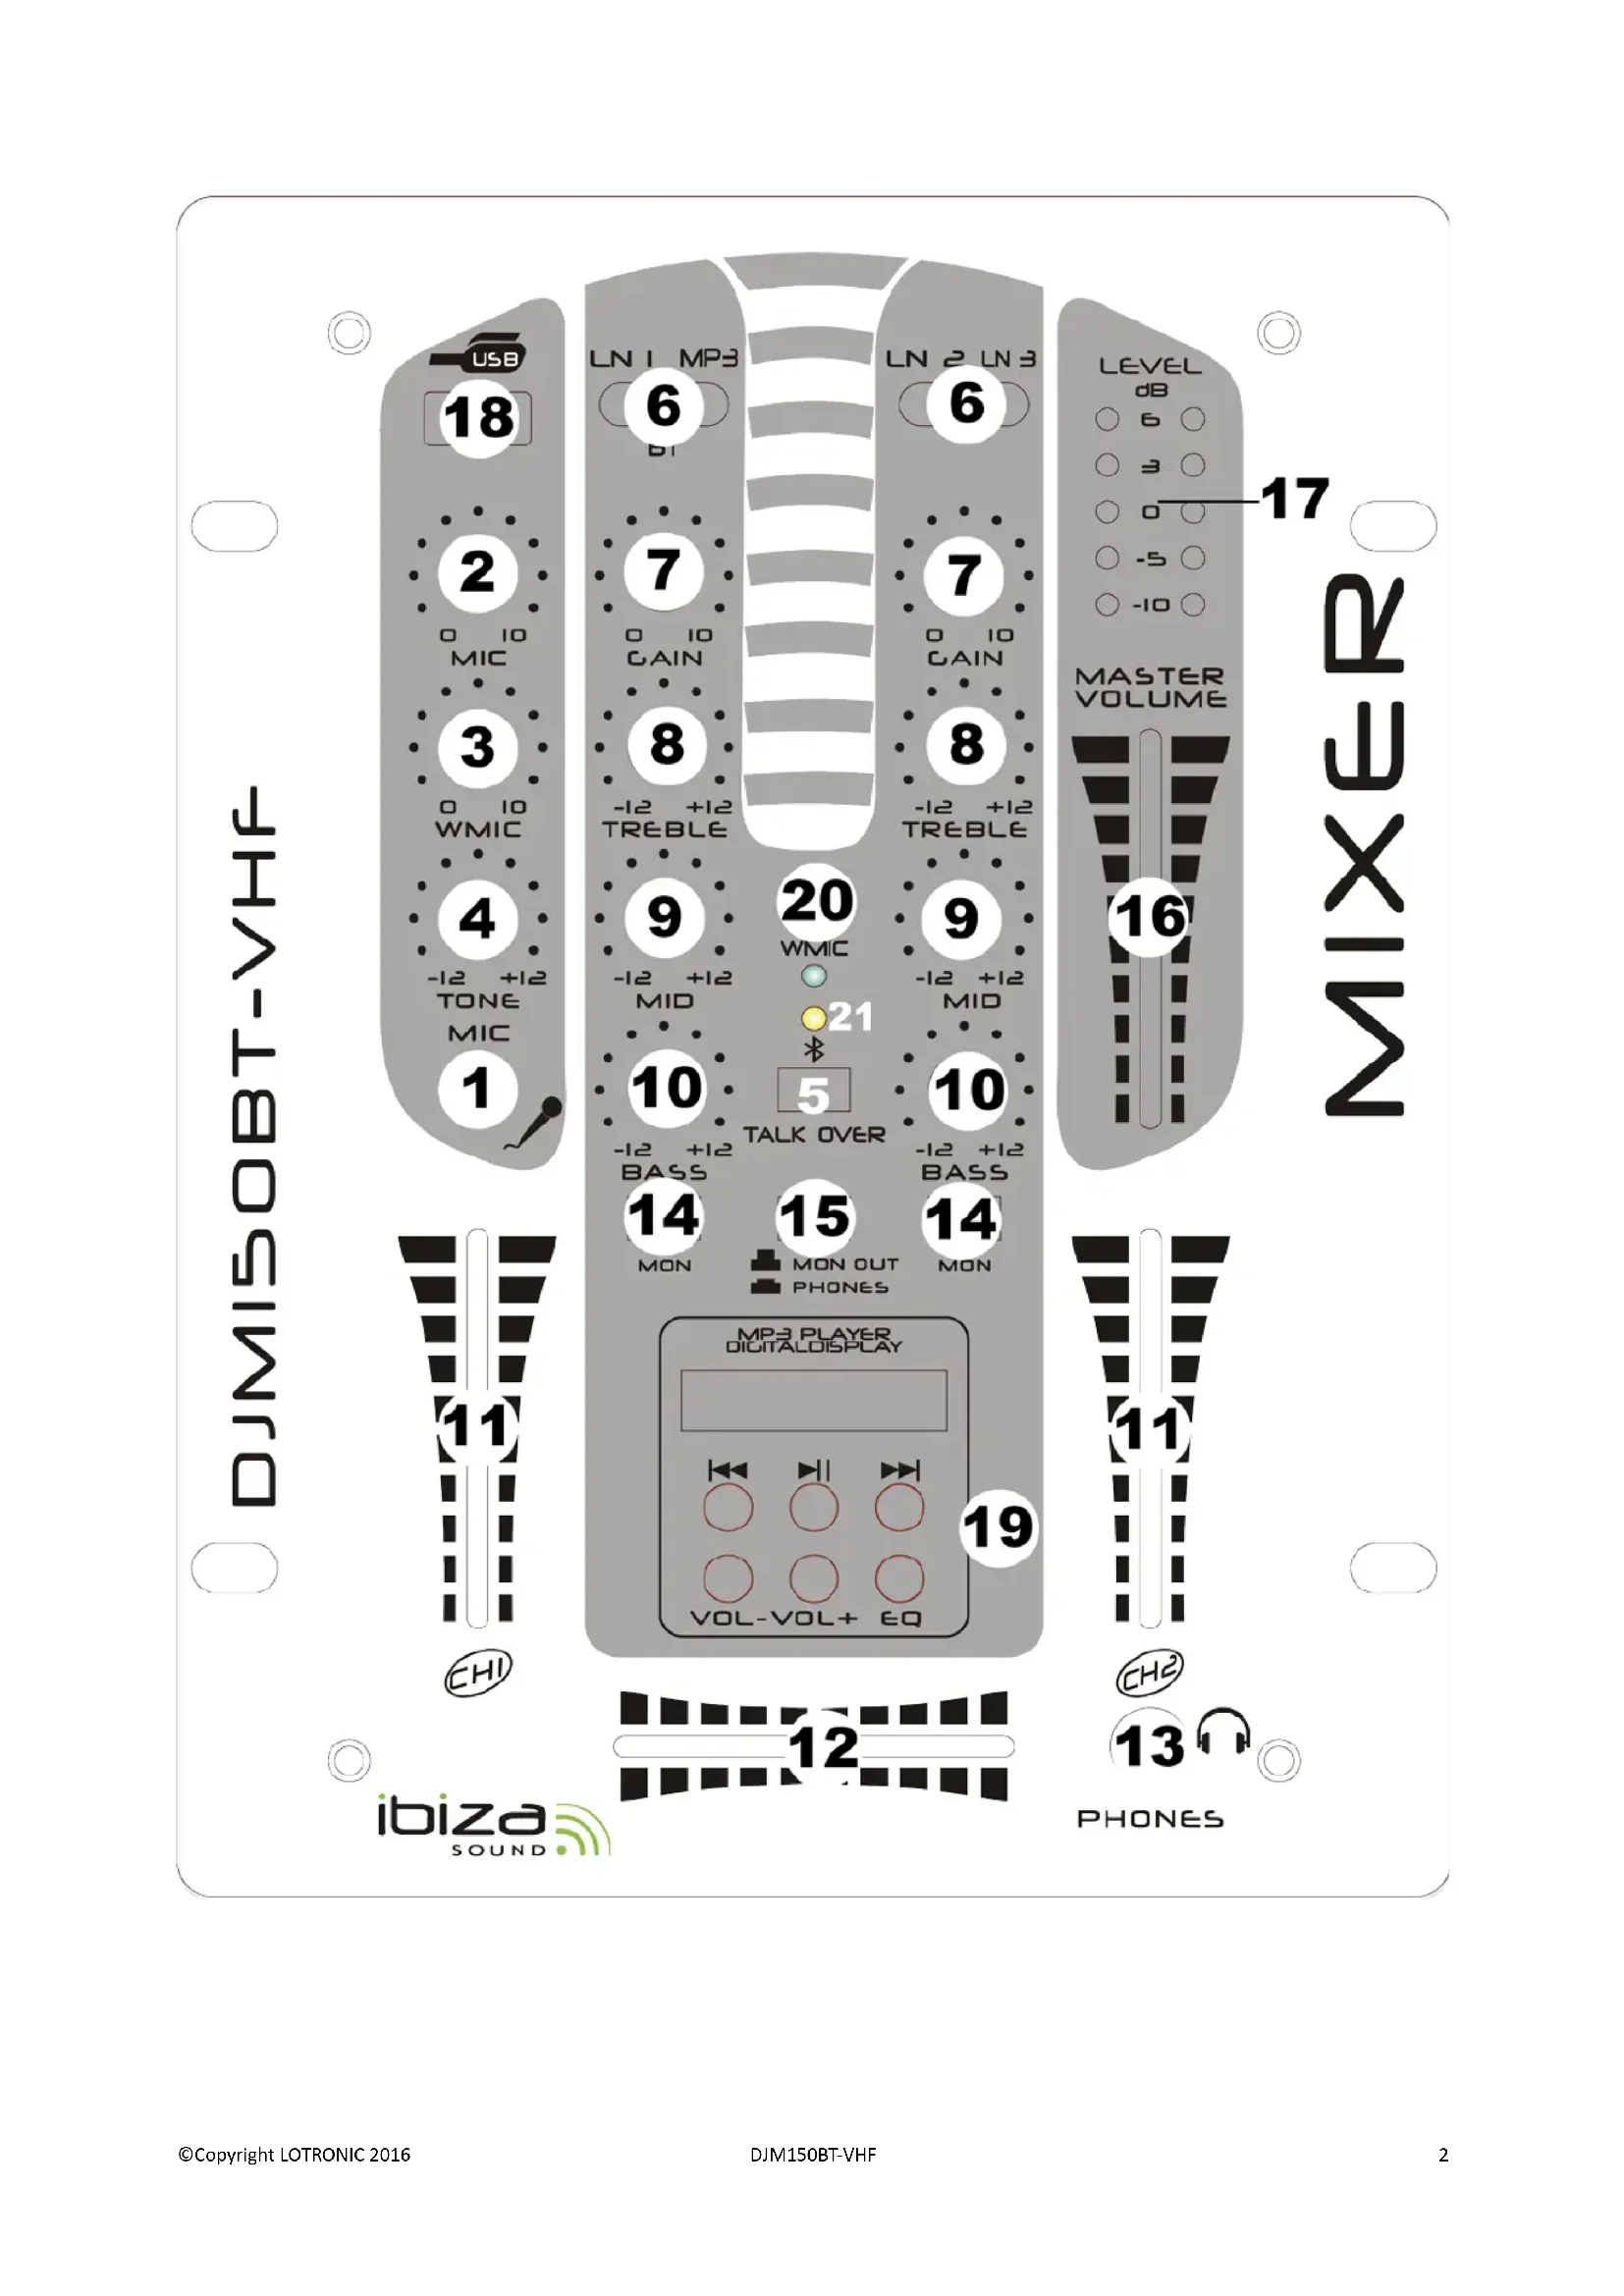
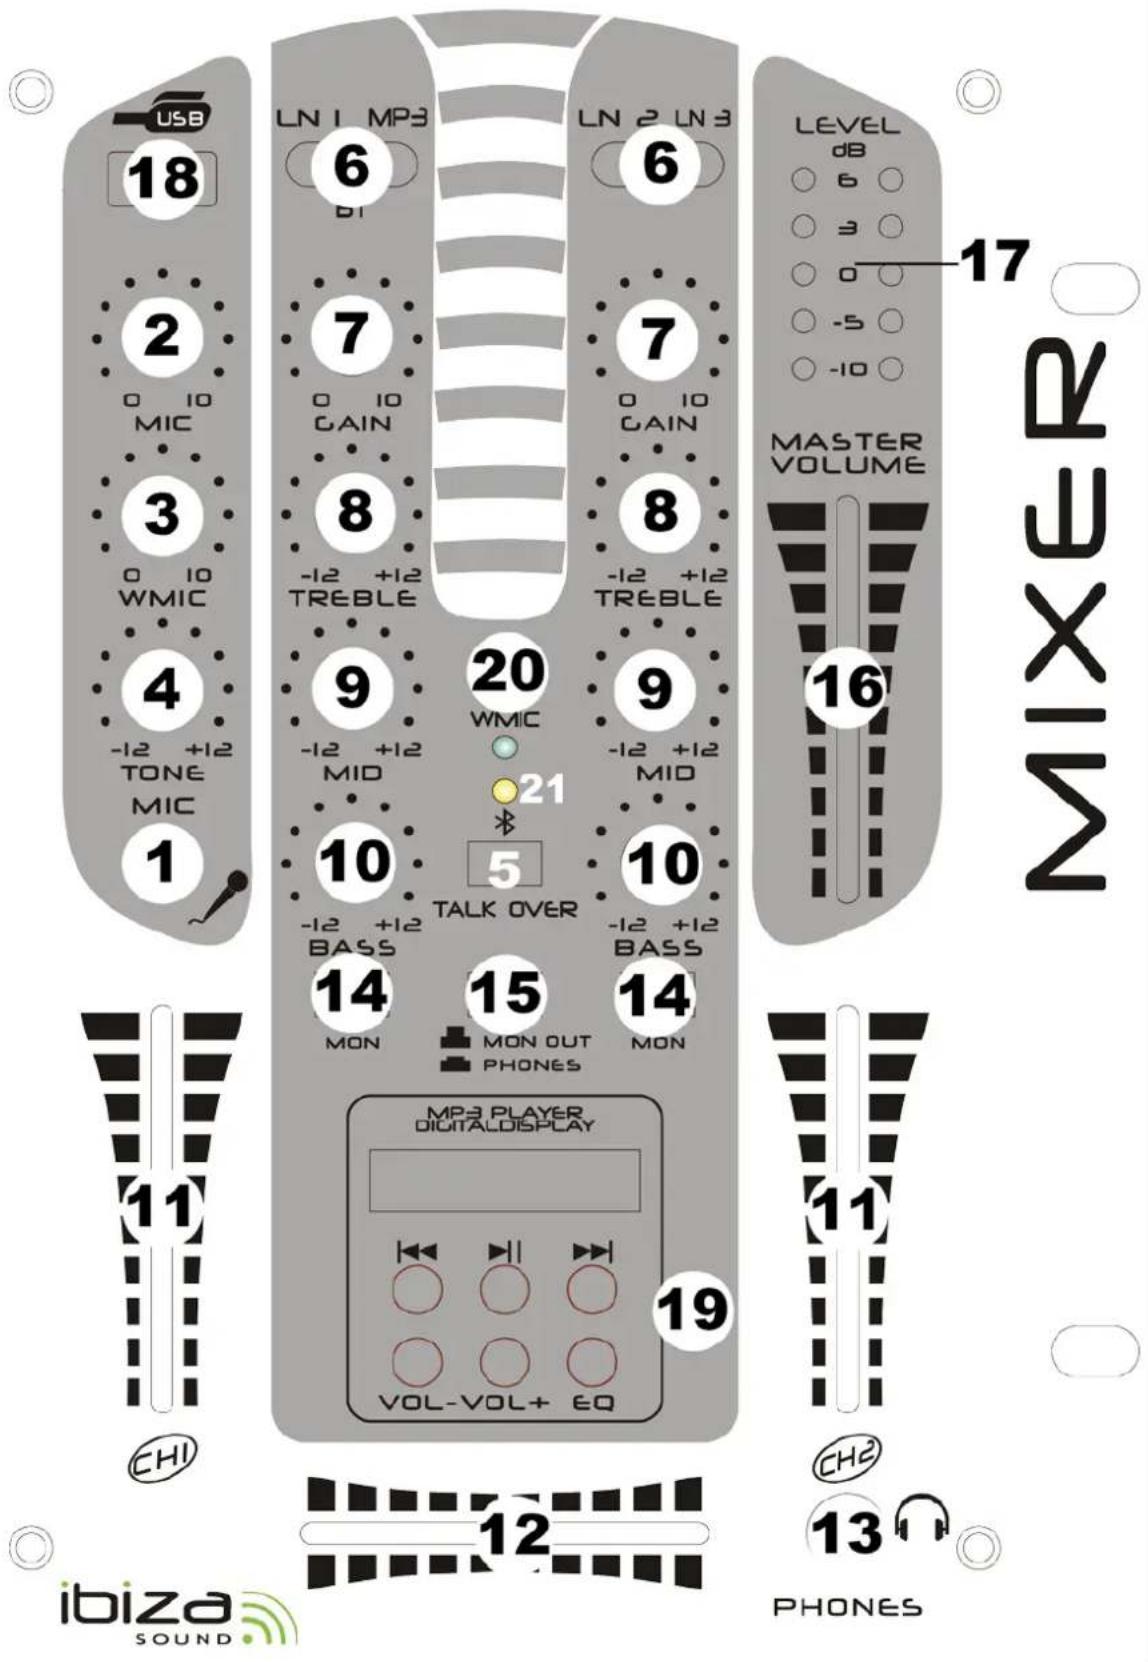
Controls
- Mic 1 Socket
Connect your microphone with 1 / 4'' jack plug here.
- MIC Level Control
With this knob, you can adjust the microphone volume
- WIRELESS MIC Level control
Adjusts the volume of the wireless microphone.
- MIC Tone control
Adjusts the tone of the microphone.
- Talkover Button
Press this button if you want to use your microphone. When the button is pressed, all other signal sources will be attenuated by 14dB, so that the microphone can be clearly heard. In the OFF position, all signals return to their original level.
- Line/BT/MP3 Switch
Use this switch to select the input to be sent to the individual channel.
- Gain Control
Use this knob to set the level of input channel.
- Treble Control
Used to increase or lower the HIGHS of the input channel.
9.Middle Control
Used to increase or lower the MIDS of the input channel.
- Bass Control
Used to increase or lower the LOWS of the input channel
- Channel Fader
Used to adjust the level of each channel.
- Crossfader
Mixes the signals of one channel with another. If the crossfader is in the center position. Both channels can be heard.
- Headphone Socket
Connect your headphone with impedance between 8 and 600 Ohms to this connector.
- Cue Button
Use this button in order to select the channel(s) to be monitored by headphones.
- PHONE/MON OUT Button
Press this button to select phones out or monitor out.
- Master Control
Adjust the level of the master-output.
- Master Level Display
The LED display shows the level of the left and right master output
- USB STICK SOCKET
USB stick input.
- USB CONTROLS
USB player transport controls
a: |<< : Use this button to re-start the track or to select the previous track.
b: Play/Pause: Each time you press this button, the operation changes from play to pause or from pause to play.
c: >>|: Use this button to select the next track.
d: VOL:: Use this button to control level down.
e: VOL+(28): Use this button to control level UP.
f: EQ(29):Allow you to select the effect.
g: LED DISPLAY(30): Display to MP3's information.
20.WIRELESS MIC SIGNAL LED
Lights up when a signal is received from the wireless microphone
- BLUETOOTH LED: It displays the Bluetooth operating status. When you turn on the power, the Bluetooth LED is flashing slowly which means that it is ready to connect to a Bluetooth device. If no connection is found after 1 minute, le LED goes out and enters into standby mode. If the Bluetooth connection is made with a player, the light flashes slowly, about 2-3 seconds flicker once. At this point you can use the bluetooth player playing music can hear the music of the corresponding channel.
BACK PANEL DESCRIPTION

22. Power Switch
Press down the button to turn on this unit. The LED will illuminate when the power is on.
23. AC Connection
This unit comes with a 12V AC adapter. Plug into the 12V AC jack before plugging it into a proper power source.
24. Master Output
Master output connects to the main amplifier (DJ final mix after crossfader section), accepts RCA jacks.
25. MON Output
To connect your AUX unit. These jacks are RCA types. Which are suitable for connection of a recording device. Its level is not influenced by the master/channel control.
26. Line Inputs Sockets
These inputs, for ch1-ch2 and accept RCA-plug connectors.
27. VHF Antenna
Extend fully to receive the VHF signal from the wireless microphone
BLUETOOTH PAIRING PROCEDURE
Set the selector switch of channel 1 to BT (center position). Set your Bluetooth device (e.g. mobile phone) to Bluetooth connection mode. Switch the mixer on. The BLUETOOTH LED will flash slowly. Select "BLUETOOTH" among the found devices on your mobile phone. You can now play music via CHANNEL1 of the mixer.
WIRELESS MICROPHONE
- Open the battery compartment on the microphone via a screwdriver. Insert a 1.5V battery (included) with the correct polarity into the battery compartment. Close the battery compartment and tighten the screws.
- Slide the switch ("ON/OFF") upwards to the ON position, the LED below the switch should light and the LED on the main unit should also light to indicate that carrier signals are being received.
- If the "LOW-BATT" LED on the microphone lights, change the battery.
- Avoid "feedback" (howling or screaming sound through the speaker) by keeping the microphone at a sensible distance from the speaker and pointing it away from the speaker so that it doesn't hear its own output.
- When not in use, switch the wireless microphone off. If you will not use the microphone for an extended period of time, remove the battery.
SPECIFICATIONS
INPUTS:
Microphone. 3mV/2.2kΩ
Line. 150mV/47kΩ
OUTPUTS:
Main 0 dB/1V600Ω
MON 0 dB/1V600Ω
PHONE 300mW/16-32Ω
Tone Control
Treble.+12dB/-12dB
Middle .+12dB/-12dB
Bass .+12dB/-12dB
GENERAL:
Frequency response 20Hz~20 kHz ±2dB
Distortion .<0.02%
S/N Ratio better than 70 dB
Electric products must not be put into household waste. Please bring them to a recycling centre. Ask your local authorities or your dealer about the way to proceed.
CONSIGNES DE SECURITE
CHAMP MAGNETIQUE
Microphone. 3mV/2.2kΩ
Ligne 150mV/47kΩ
SORTIES:
3. WIRELESS MIC Level control
Uzyj的方式来庆祝 the 19th birthday of my mother.
Imported from China by:

LOTRONIC SA
Avenue Zénobe Gramme 9
1480 SAINTES
Belgium

CE
EC Declaration of Conformity
Hereby we, LOTRONIC SA
Avenue Zénobe Gramme, 9
1480 SAINTES
Belgique
0032.2.390.91.91
Certify and declare under our sole responsibility that the following product:
Trade name: IBIZA SOUND
Product name: USB STEREO MIXER WITH BLUETOOTH & VHF MIC
Type or model: DJM150BT-VHF
conforms with the essential requirements of the LVD directive 2006/95/CE and RTTE directive 1999/5/EC based on the following specifications applied:
Safety standard: EN60065: 2002 + A1: 2006 + A11: 2008 + A2: 2010 + A12: 2011
RF EMC standard: EN 300 422-2 V1.4.1
EN 300 422-1 V1.5.1
EN 301 489-1 V1.9.2
EN 301 489-9 V1.4.1
Health standard: EN62479 : 2010
and therefore complies with the essentials requirements and provisions of the LVD and RTTE Directive.
Place and date of issue: Saintes (Belgium), on 06/01/2016
LOTRONIC SA
LOTROIC SA
Av. Zenobe Gramme 9
1480 Sa ntoe - Stigium
Tel.: +322-390.31.91
Fax: +322.390.93.19
info@lotronic.net