LYCOS 40300 T - Grass trimmer Wolf Garten - Free user manual and instructions
Find the device manual for free LYCOS 40300 T Wolf Garten in PDF.
User questions about LYCOS 40300 T Wolf Garten
0 question about this device. Answer the ones you know or ask your own.
Ask a new question about this device
Download the instructions for your Grass trimmer in PDF format for free! Find your manual LYCOS 40300 T - Wolf Garten and take your electronic device back in hand. On this page are published all the documents necessary for the use of your device. LYCOS 40300 T by Wolf Garten.
USER MANUAL LYCOS 40300 T Wolf Garten
(Original operating instructions)
FR Francais 33
Meaning of the symbols 21
For your safety. 22
Safety information. 23
Intended use 26
Identification plate. 26
Operating controls 27
First use 27
Assembly 27
Operation 29
Servicing 30
Transport and storage 31
Troubleshooting 32
Warranty 32
CE Declaration of Conformity 32
Environmentally-friendly disposal 32
Meaning of the symbols

WARNING!
To reduce the risk of injury, read the instruction manual!
Caution!
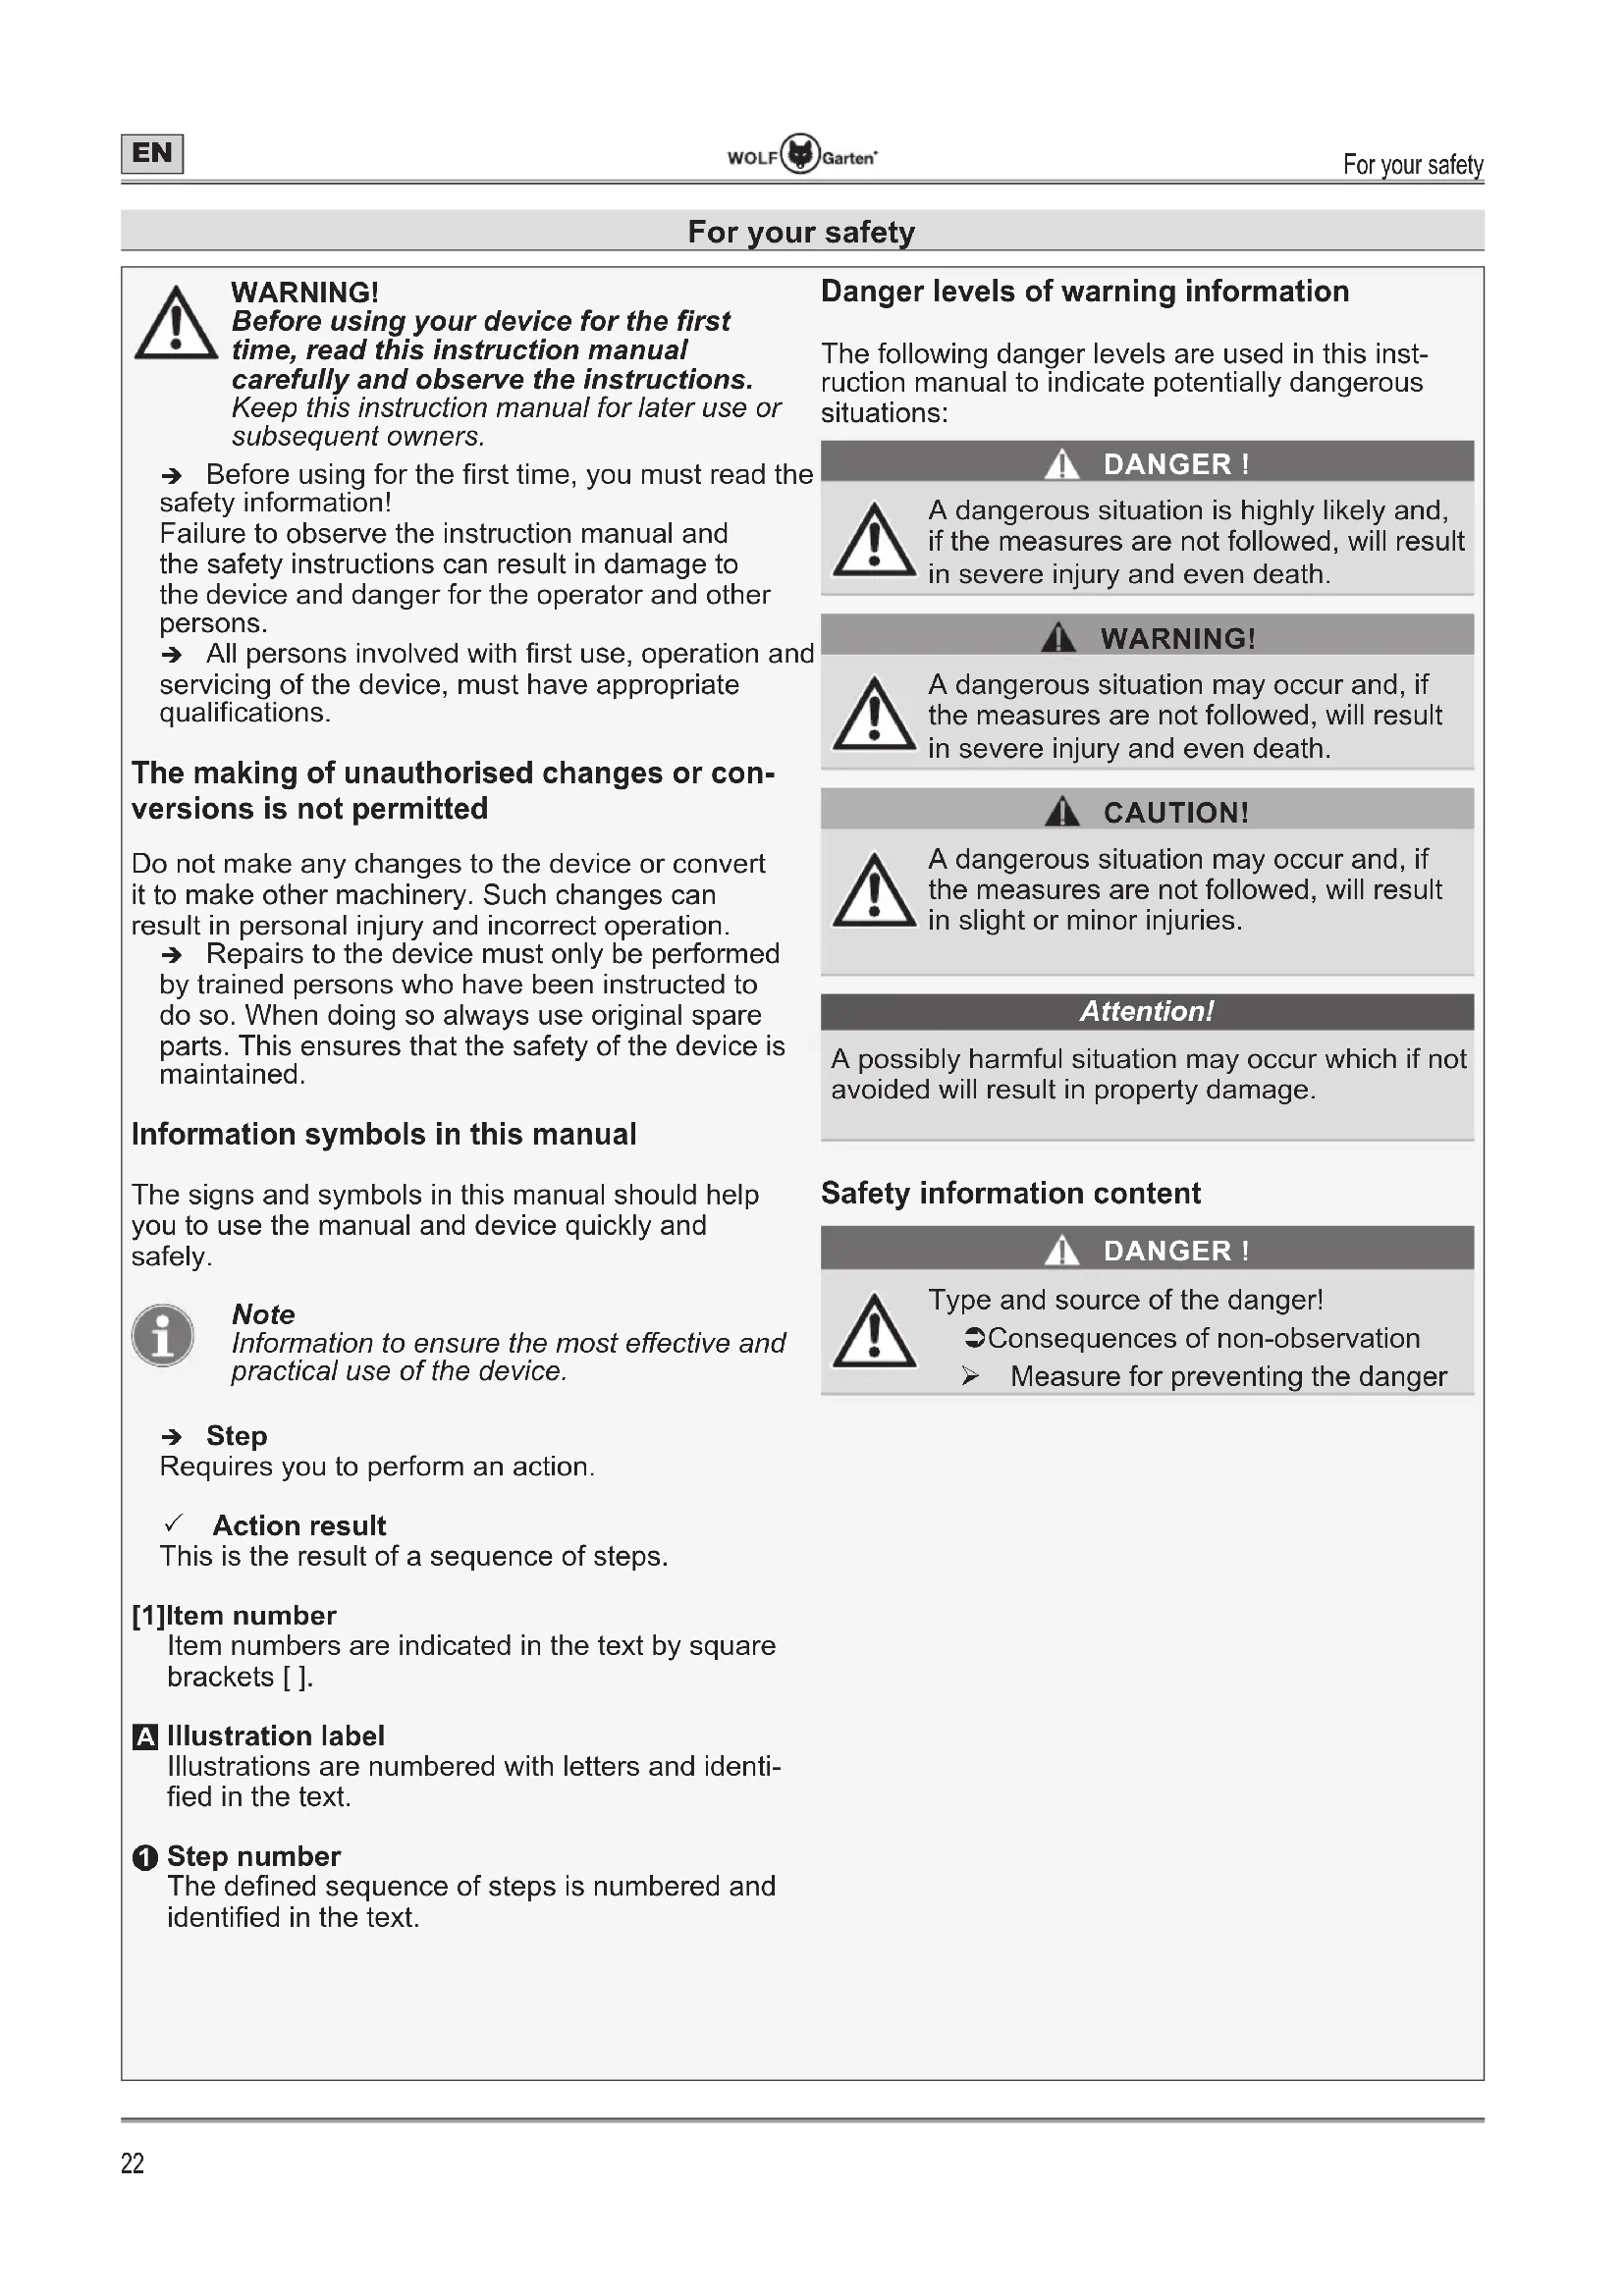
Do not allow any other persons to enter the danger area.

Wear non-slip boots and work gloves.
Caution!
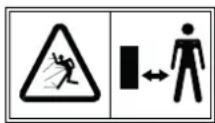
Do not allow any other persons to enter the danger area. Minimum distance to the device: 15m

Always remove the power pack prior to working on the device!

Wear goggles, ear defenders and a safety helmet!

Do not leave the device in the rain!
Caution!
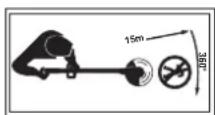
Risk of kickback.
Do not use the device with sawblades!

Ejected objects and rotating parts can cause severe injuries!
For your safety

WARNING!
Before using your device for the first time, read this instruction manual carefully and observe the instructions.
Keep this instruction manual for later use or subsequent owners.
Before using for the first time, you must read the safety information!
Failure to observe the instruction manual and the safety instructions can result in damage to the device and danger for the operator and other persons.
All persons involved with first use, operation and servicing of the device, must have appropriate qualifications.
The making of unauthorised changes or conversions is not permitted
Do not make any changes to the device or convert it to make other machinery. Such changes can result in personal injury and incorrect operation.
Repairs to the device must only be performed by trained persons who have been instructed to do so. When doing so always use original spare parts. This ensures that the safety of the device is maintained.
Information symbols in this manual
The signs and symbols in this manual should help you to use the manual and device quickly and safely.

Note
Information to ensure the most effective and practical use of the device.
Step
Requires you to perform an action.
✓ Action result
This is the result of a sequence of steps.
[1]Item number
Item numbers are indicated in the text by square brackets [ ].
A Illustration label
Illustrations are numbered with letters and identified in the text.
1 Step number
The defined sequence of steps is numbered and identified in the text.
Danger levels of warning information
The following danger levels are used in this instruction manual to indicate potentially dangerous situations:

DANGER!

A dangerous situation is highly likely and, if the measures are not followed, will result in severe injury and even death.

WARNING!

A dangerous situation may occur and, if the measures are not followed, will result in severe injury and even death.

CAUTION!

A dangerous situation may occur and, if the measures are not followed, will result in slight or minor injuries.
Attention!
A possibly harmful situation may occur which if not avoided will result in property damage.
Safety information content

DANGER!

Type and source of the danger!
Consequences of non-observation
Measure for preventing the danger
Safety information
Protection of yourself and others
This device must not be used by children under 16 years of age or persons with reduced physical, sensory or mental capabilities or with inadequate experience or insufficient knowledge. Likewise persons must be familiar with this instruction manual before using the device. The minimum age for using the device may be specified by local or national legislation.
Do not let children or persons who have not read these usage instructions use the device. The minimum age of users may be defined by local or national legislation.
Do not place the device in operation if there are people (especially children) or animals in the immediate proximity. Ensure children do not play with the device.
Stop using the device if persons (especially children) or animals are nearby.
Cleaning and servicing may not be carried out by children.
Only switch the motor on if your feet and hands are at a safe distance from the cutting element.
Always remove the power pack from the device if you are leaving it unattended or removing a blockage.
Always wear non-slip boots and long trousers as well as other appropriate personal protective equipment (safety glasses, ear defenders, work gloves, protective clothing etc.) when working with the device. The wearing of personal protective equipment minimises the risk of injury. Do not wear loose clothing, etc., which could be caught by the cutting tool. Working without ear protection may result in loss of hearing.
The operator or user is responsible for accidents, injuries to other people or damage to their property.
Do not use this device if you are tired or ill or under the influence of drugs, alcohol or medication.
Before use
Before use, make sure you are familiar with the device, its functions and operating elements.
Do not use any device whose switch is defective and which can no longer be switched on or off. It must be repaired by a qualified expert or workshop.
Before use, always check the device for damage. Replace damaged parts.
Ensure that all connecting elements are fitted and tightened. Replace all cutting attachments, that are cracked, flawed or damaged in any way. Ensure that the cutting attachments are correctly fitted and properly secured. Ensure that the protective cover for the cutting attachment is correctly fitted and is located in the recommended position.
Failure to observe these instructions can result in injuries to the user and bystanders, and could damage the device.
Ensure that the middle handle is in the prescribed position.
Observe the instructions in the section "Fitting/ adjusting the middle handle".
Use only original replacement line with a diameter of no more than 2.4mm . Never use metal-reinforced cord, wire, chain, rope or similar. This
could break off and form dangerous projectiles.
Always remain aware of the risk of injury to head, hands and feet.
When working on the cutting attachment, always wear work gloves to prevent injuries caused by sharp edges or blades.
Never use a device with damaged or missing guards or covers. They must be repaired or replaced by a qualified expert or workshop.
Before use, make sure that the lawn is free from branches, stones, wire etc. and look out for such objects the whole time when trimming.
Keep children, bystanders and animals outside of a circumference of at least 15m ; there is always a risk for bystanders of being hit by ejected objects. Bystanders should wear eye protection. If someone approaches you, switch the device off immediately.
Before making adjustments to the device or cleaning it, switch it off and remove the power pack.
Read and observe the operating instructions of the power pack and the charger.
Safety information
Tips for use
Beware of injuries to the feet and hand caused by the cutting element.
Remove the power pack from the device:
- Whenever you leave the device unattended.
- Before removing blockages.
- Before checking cleaning or working on the device.
- After impacting a foreign body to check the device for damage.
- For immediate checking if the device starts to vibrate excessively.
Do not use the device in potentially explosive atmospheres containing flammable liquids, gases or dusts. The device can generate sparks which could ignite dust or vapours.
Never leave the device unattended during breaks and store it in a secure location.
Hold the device parallel to the lawn when switching on, otherwise there is a risk of injury.
When working also maintain a safe distance relative to the rotating line/cutting blade.
Do not reach into the area of the rotating line or the blade.
Do not try to catch hold of rotating parts.
Do not injure yourself on the line cutter.
After pulling out new line, always hold the device in its normal working position before you switch it on.
Wear suitable safety goggles and ear defenders!
The protective cover must always be fully attached when you are using the device as a lawn trimmer. Both trimming lines must be pulled out for operation and the correct line must be installed. The trimming line must not be pulled out beyond the end of the cover.
The protective cover must always be attached when you are using the device as a brush cutter with a cutting blade.
Before switching on the device, ensure that the line spool/blade will not come into contact with any object.
Adjust the level of the middle handle to match your height so that you have a good grip of the device.
Only use the device in daylight or under bright artificial light.
Only use this device for its intended purpose.
Always hold on to the device firmly with both hands during operation: one hand on the handle, the other hand on the middle handle.
Always wear the carrying belt during operation.
When working, alternate your position and take breaks to prevent tiredness and fatigue.
Adopt a normal posture. Ensure you are standing securely and that you maintain your balance at all times. Pay particular attention, if you are working on a slope. Do not run, rather walk forwards at a steady pace. This will ensure that you can maintain better control of the device if unexpected situations occur.
Take extra care if you are walking backwards. Risk of tripping!
Remove the power pack when carrying the device to or from separate working positions.
Never bypass or manipulate safety devices installed on the device.
Do not allow the line head to impact against wall edges. If the line head suddenly receives a heavy blow, be prepared for increased vibration at the handle. If this does occur, the device must be checked and, if necessary, repaired by a qualified expert or workshop.
Additional instructions for operation using the cutting blade
Always keep the middle handle with standoff holder between the user and the cutting attachment.
Never cut with the cutting blade at a height of 75 cm or greater above ground level.
Kickback can occur if the rotating blade impacts an object which cannot immediately be cut through.
Kickback can be strong enough to fling the device and/or user in any direction resulting in possible loss of control of the device.
Kickback may occur without warning if the blade becomes stuck, clamped or blocked. This can easily occur in areas, in which it is difficult to oversee the material to be cut.
When using the cutting blade, do not cut anything that is thicker than 12.7mm . Otherwise severe kickback can occur.
The protective cover must always be fitted when using the cutting blade.
Do not attempt to touch or stop the blade when it is turning.
Safety information
Even after the device has been switched off, a blade that is still rotating may cause injuries. Hold the device firmly until the blade has come to a complete standstill.
If you impact debris or get caught up in foreign material, immediately switch off the motor and check for damage. The damage must be repaired/rectified before you continue to use the device. Do not use the device with a bent, cracked or blunt blade. Discard any bent, distorted, cracked or broken blades.
Do not sharpen the cutting blade. The sharpened blade tip could break off during use. This could result in serious injuries. Replace the blade.
Only transport or store the device with the safety cover fitted to the cutting blade.
Information about vibrations:
Vibrations can cause nerve damage and impair the blood circulation in the hands and arms.
When working in the cold, wear warm clothing and keep your hands warm and dry.
Take breaks.
If you notice that the skin of your fingers or hands goes numb, tingles, hurts or goes white, stop working with the device and, if necessary, consult a doctor.
The specified vibration emission values:
- Were measured according to a standardised testing procedure.
- Make it possible to estimate the power tool emissions and compare these with different power tools. Dependent on the conditions of use, the state of the power tool or tools inserted for use with it, the actual vibration load may be higher or lower. When estimating the emissions, consider doing so during work pauses and phases when the tool is under reduced load. Based on the correspondingly adjusted estimated values, take protective actions, e.g. organisational actions.
After use
Switch the device off, remove the power pack and check the device for damage. Attention, danger! Cutting tool still running!
If you need to clean or service the device, switch it off and remove the power pack.
Always wait until the cutting tool comes to a standstill and do not touch any moving dangerous parts, without first removing the power pack.All work on the device such as replacement of the cutting line, conversion to operation with the cutting blade, adjustment work, cleaning, etc., must only be performed after the power pack has been removed.
Use only original replacement lines/cutting blades and observe the fitting instructions.
Ensure that ventilation slots are free from dirt.
Do not clean the device with water.
Store the device in a secure location.
Store the device out of reach of children.
Do not repair the device yourself; it must be repaired by a qualified expert or workshop.
Let the device cool down before putting it away and/or storing it.
General safety information
Never replace the non-metallic cutting element with a metallic cutting element!
Always wait until the cutting tool comes to a standstill and do not touch any moving dangerous parts, without first removing the power pack.Spare parts must meet the requirements of the manufacturer. Therefore, use only original spare parts or those spare parts authorised by the manufacturer. During replacement, always observe the supplied fitting instructions, remove the power pack in advance.
Repairs must only be performed by a qualified technician or service centre. Specialist workshop addresses can be found on our website.
Ensure maintenance work is always performed to schedule so that the device remains in a safe condition.
Only use the power packs intended for this purpose in power tools. Use of other power packs can result in injuries and fires.
This device is intended for the care of lawn edges and smaller grass and lawn areas, and when used with the blade, for the cutting of brush, bushes and undergrowth in private households. The device must not be used for purposes other than those intended because of the risk of bodily injury to the user or other persons.
Safety information
Only use the device when the weather is dry. Do not leave the device out in the rain or leave it in damp conditions and do not use it during a storm. Penetration of water into the device increases the risk of an electric shock.
Even if all safety and operating instructions are heeded, there is always a residual risk of injury and property damage. Always bear this in mind.
Do not use the device if it is raining or there is a risk of storms.
Replace all worn or damaged information signs on the device.
Only use power packs and chargers approved by the manufacturer. The designations of the approved power packs / chargers are listed in the enclosed CE Declaration of Conformity.
Never use parts, accessories or attachments such as multiple-part metallic cutting tools with swivelling chains and flail knives, which are not approved for this device. The consequences might include severe injuries for the user and device damage. Moreover, you warranty may be invalidated.
Keep the device clean and ensure that no plants or other objects become stuck between the cutting attachment and protective cover.
Intended use
This grass trimmer/brush cutter is intended solely for
- domestic and hobby gardens,
with a line head for the cutting of lawn edges and small or difficult-to-access areas of grass (e.g. under bushes), - used with the blade, for the cutting of brush, bushes and undergrowth,
- use in accordance with the descriptions and safety information given in this instruction manual.
Any other use is classed as an unintended use. The user is liable for any damages arising from unintended use.
Incorrect/abnormal use
This device should not be used in or on public facilities, parks, sports grounds, roads etc. nor in agriculture or forestry.
To prevent bodily injury to the user, the device must not be used to cut thicker branches or for shredding prior to composting.
Identification plate
Position
The identification plate is located on the device casing.

Note
The label has the status of a certificate. It must never be altered or obliterated.
Layout
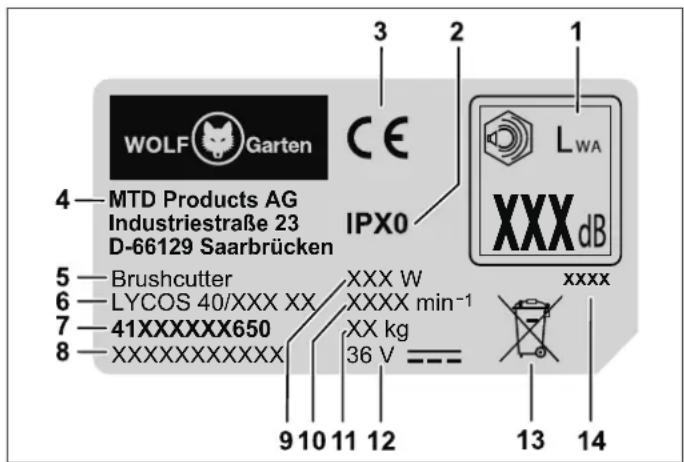
1 Guaranteed sound level
2 Protection class/IP code
3 Manufacturer CE mark
4 Manufacturer
5 Device group
6 Model name
7 Model number
8 Serial number
9 Power
10 Engine speed in rpm
11 Weight
12 Rated voltage, kind of current
13 Disposal instruction
14 Year of manufacture
Operating controls
Operating elements P
1 Power pack release
2 Handle
3 Eco button
4 Hook for carrying belt
5 Middle handle
6 Fastening sleeve
7 Protective cover
8 Line spool
9 Line knife
10 Power pack compartment
11 On/off switch
12 Lock-on switch
13 Standoff holder
14 Carrying belt
15 Nut for retaining dome
16 Retaining dome
17 Cutting blade
18 Blade safety cover
First use
Supplementary documentation

Make sure the supplied instruction manuals of the charger and the power pack are available. Please read and understand them before using the device.
Power pack charging

WARNING!

Risk of injuries or material damage.
Only charge the power pack using the charger approved by the manufacturer. The designations of the approved chargers are listed in the enclosed CE Declaration of Conformity.
Attention!
The power pack is supplied partially charged. Before first use, fully charge the power pack to ensure full capacity of the power pack.
Power pack charging must be carried out according to the instructions in the supplementary documentation.
Operating times
Observe the times stipulated in local byelaws.
Check with your local authorities to determine if there are any operating time limitations.
Assembly
Assembling the protective cover A B
Press the outer edge into the recess of the protective cover until it engages 1.
Secure the outer edge with the long screAsj and tighten by hand 2.
Fitting the protective cover A C
Position the protective cover on the trimmer head 1.
Screw on the protective cover with the short screws A k 2. Only tighten the screws by hand.
Connecting the shaft of the trimmer unit to the operating arm D
Align the shaft and arm in such a way that the recess and the retaining collar are opposite to one another.
Insert the trimmer unit in the holder of the operating arm 1.
Fully tighten the fastening sleeve ②.
Fitting the middle handle A E
From above, position the middle handle fitt on the arm of the operating module 1 between the two adjustment limiters (a).
Place the middle hand onto the fitting so that the holes lie on top of one another in a concentric manner 2.
Press the bsi into the holes 3 from the side with the depression for receiving the bolt head.
Position the was A g and the nut A f on the bolt from the other side and tighten the nut by hand 4.
Screw the standoff holAth by hand on the other end of the bolt 5.
Align the middle handle on the arm so that the imprinted arrow on the fastening piece is aligned with the marking line on the arm.
Secure the middle handle in this position, by holding the standoff holder and tightening the nut 6.

Note
Dependent on the version, the adjustment limiters (a) may be on the left or right-hand side.

Note
The device may only be operated, if the middle handle is located in the prescribed position. This means that it must be located between the two adjustment limiters (a) and that the imprinted arrow on the fastening piece is aligned with the marking line on the arm.
Adjusting the middle handle F
Release the nut on the middle hand
Push the middle handle to the desired height between the two adjustment limiters (a).
Adjust the inclination of the middle hange
Align the middle handle on the arm so that the imprinted arrow on the fastening piece is aligned with the marking line on the arm and retighten the nut 4.

Note
The device may only be operated, if the middle handle is located in the prescribed position. This means that it must be located between the two adjustment limiters (a) and that the imprinted arrow on the fastening piece is aligned with the marking line on the arm.
Attaching the carrying belt A G
Attach the carrying using the two snap hooks on the hook of the operating module.
Adjusting the carrying belt H
Adjust the carrying belt to the desired length. The Fitting the line head attachment hook should be at hip height 1.

Note
Always use the carrying belt with the device to give you better control over the device and to prevent your arms and back from tiring too quickly.

Note
For safety reasons only carry the device supported over your shoulder and never around your neck. The belt has a quick release attachment so that it can be quickly disconnected in the event of a malfunction.
Fitting the cutting blade
Rotate the line head until hole in the spacer is aligned with the recess of the gear casing.
Push the retaining Atn through the recess in the hole and hold it tight to lock the thread 1.
Hold the retaining rod tightly and rotate the line head clockwise (to the right) from the drive shaft 2/3.
Push the cutting blade on to the drive shaft and position it, centred, on the spacer. Press the cutting blade tightly home.

Note
Ensure that the cutting blade is centred and lies flat.
Push the retaining do on to the drive shaft and the cutting blade 4.
Rotate anticlockwise (left) on the drive shaft and tighten to a torque of 20 Nm ⑤.

Note
Before final tightening, check for correct seating of the cutting blade. Hold the retaining rod while rotating and tightening the nut.

Note
If no torque wrench is available, tighten the nut with a ring spanner or using the supplied box spanner (dependent on the model), until the retaining dome is firmly located against the blade. Then tighten the nut by one full turn (360^) .
Remove the retaining 6d
Remove the blade safety cover from the cutting blade 7.

Note
If necessary, remove the edge of the protective cover to simplify working. Refit the edge to the protective cover if you are using the device with the cutting line. See section "Assembling the protective cover".
Fitting the line head
Remove the blade in the reverse sequence to that described in the section "Fitting the cutting blade" 1.
Lock the gearbox with the retaining Adm and rotate the line head anticlockwise (left) on the drive shaft.
Manually tighten the line head.
Operation
Inserting the power pack J

WARNING!

Incorrect handling of the power pack and the charger.
Risk of injuries and property damage.
Read and observe the operating instructions of the power pack and the charger.
The 2-stage latching mechanism is used to set operating or transport mode of the power pack.
Push the power pack into the power pack compartment until it engages in the desired position
1/2.
Position 1
The power pack is in transport mode.
- The electric contacts are open to prevent the power pack from self-discharging during storage.
Position 2
The power pack is in operating mode.
The electrical contacts are closed and the device is ready for use.
Switching the device on K

WARNING!

Risk of injuries or material damage.
Always hold on to the device with both hands during operation. One hand encloses the handle, the other hand holds the middle handle.
Put on the carrying belt.
Press the lock-on switch on the handle
Simultaneously press the on-off switch on the handle 2.
Release the lock-on switch ag3n
The device operates.
Press the eco button
The speed of the cutting attachment reduces. The lamp on the eco button goes green.

Note
Only use eco mode withe the line head. Eco mode extends device running time by about 50% . Eco mode remains active after switching the device off and on. To switch eco mode off, the eco button must be pressed again so that the device can work in normal mode (fast speed of the cutting section).
Switching the device off K
Release the on/off switch to switch the device off ⑤.
The device is switched off.

Note
The cutting tool continues to run for a brief period after being switched off.
Holding the device H
Before you use the device, located in the Operating position.
Check the following:
-
The user is wearing the prescribed protective equipment.
The carrying belt is set to the correct length.
The middle handle is adjusted correctly for the body height. -
The middle handle is correctly adjusted, if you can hold it with the hand, without having to stretch your arm.
-
The device is below waist height.
- The cutting attachment is held parallel to the ground, so that the plants to be cut can be easily accessed without the user having to bend forward.
Line readjustment when operating with the line head
The line head has a press knob with which you can release the trimming line without having to stop the motor. To release more trimming line, press the press knob of the line head gently against the ground while the device is running.

Note
The trimming line should always have the maximum length. Line release becomes more and move difficult the shorter the trimming line becomes. Each time the press knob is pushed, about 30~mm of trimming line is released. A blade on the edge of the protective cover, cuts the line back to the correct length if too much line is released. Optimally the press knob should be pressed against the bare ground or hard soil.

Note
Do not guide the press button along the ground during operation.
The line could break or wear through: -Entanglement with foreign material
-Normal material fatigue
-Normal cutting process
-Attempts to cut tightly growing weeds
-Impacts on walls, garden fences, etc.
Tips for optimum trimming results when working with the line head
Hold the cutting attachment parallel to the ground.
Only cut with the tip of the line, especially along walls. Cutting with more than the tip reduces the cutting ability and can overload the motor.
Where grass is longer than 20~cm cut from the top to the bottom in small steps to prevent premature wear of the line and overloading of the motor.
If possible, cut from left to right. Cutting to the right improves the cutting ability of the device. Grass cuttings are then thrown away from the user.
Move the device slowly at the desired height into and out of the cutting area. Move either forwards and backwards or from side to side. Cutting smaller areas achieves better results.
Only carry out cutting when grass and weeds are dry.

Note
The endurance of the cutting line depends on the following:
-Following the preceding cutting tips
- The plants being cut
-Where they are cut
For example, the line wears more quickly when cutting along a house wall than when cutting around a tree.
Decorative cutting H
You can obtain a decorative cut, when you are cutting all plants around trees, posts, fences, etc. Rotate the entire device, so that you are holding the cutting attachment at an angle of 30^ to the ground 2.
Operation using the cutting blade
Before you use the device, hold it in the operating position. See "Holding the device".
Tips for operation using the cutting blade:
Cut with an even cadence.
Adopt a steady and comfortable posture on the ground.
Do not use eco mode. The blade then has maximum cutting force and does not jam so easily, remain stuck, or cause impacts to the blade that could result in serious injuries to the user or other persons.
Cut by turning the upper part of your body from right to left.
Turn the device in the same direction in which the blade cuts. This helps cutting.
Take one or two steps forward to the next area after the return swing and then stand firmly again.
Follow the guidelines below to reduce the possibility that plants will wind around the blade.
- Do not cut in eco mode.
- Swing from right to left into the plants to be cut.
- Avoid plants that have just been cut, while they are swinging back.
Removing the power pack N
Press the power pack release
Remove the power pack
Servicing

WARNING!

Risk of injuries or material damage due to moving parts.
Only clean or service the device if the motor is stationary and also the cutting tool.
Always remove the power pack prior to working on the device.
Do not clean the device with water.
Repair and service work as well as the replacement of safety elements must be performed by a qualified expert or workshop.
Cleaning the device
Switch the device off and wait until the cutting tool comes to a standstill before removing the power pack.
Clean the device with a hand brush after every use.
Clean the ventilation slots and underside of the device at regular intervals to remove grass residues.
Cleaning the cutting blade
To remove all residues, clean the cutting blade using a domestic cleaning agent.
Oil the blade with machine oil to protect it against rust.
Cleaning the line head
After any use, clean the line head from the outside with a brush or cloth.
Clean the inside of the line head regularly when fitting a new trimming line. Proceed as shown in 0 :
- Simultaneously press both retaining lugs 1 and pull off the spool cap 2.
- Remove the remainder of the line from the spool.
-
Pull the spool of ③
-
Remove any dirt and deposits on the spool housing, spool and spool cap. Clean the individual parts with a clean cloth.
-Replace the spoo4 - Align the retaining lugs of the spool cap with the openings in the spool housing. Simultaneously strongly press both of the engaging lugs of the spool cap together 1 and push it on to the spool housing until it engages 5.
Fitting and replacement of the trimming line M

WARNING!

Risk of injuries due to the cutting tool.
Only adjust the device with the motor switched off and the cutting tool at a standstill.
Do not reach into the area of the rotating line.
Always remove the power pack prior to working on the device.
Never use metal-reinforced cord, wire, chain, rope or similar. This could break off and form dangerous projectiles and severely damage the device.
Use only original replacement line with a diameter of 2.4mm . Use of a thicker trimming line can cause the motor to overheat or fail.

Note
Always use the specified line length! If the line is too long, then under certain circumstances, it will not be fed out correctly.
Cut the new trimming line to a length of 4m
Turn the press knob clockwise until the arrows on the press knob and the spool cap coincide 1.
Push one end of the trimming line into the inlet line eye (LINE IN) ②. Continue pushing the trimming line through until it extends about 10~cm out of the opposing line eye.
Pull the projecting end out so far that about 2 m trimming line extends out of each line eye ③.
Hold the spool cap firmly and rotate the press knob clockwise until about 12 cm projects from each line eye 4.

Note
Never press in the press knob during winding on of the line!
Transport and storage

WARNING!

Risk of injuries due to the cutting tool.
Before transport or storage, switch off the device and wait until the cutting tool comes to a standstill.
Remove the power pack before transport or storage.
Fit the safety cover onto the cutting blade after every use and during transport and storage.
Storage
Thoroughly clean your device after every season.
Always store the device in a dry and safe location that is inaccessible to children.
Store the power pack and tool separately.
Store the power pack in a cool and dry location. Recommended storage temperature approx. 0 - 23^ Keep the device and especially its plastic components away from brake fluids, petrol, mineral oil containing products, penetrating oils etc. They contain chemical substances that can damage, attack or destroy the plastic components of the device.
Fertilizers and other garden chemicals contain substances that may have a highly corrosive effect on the metal parts of the device. Therefore do not store the device near to these substances.
Store and safely lock away the cutting blade to prevent damage to the blade and unauthorised use.
Troubleshooting

WARNING!

Risk of injuries or material damage
In case of doubt always consult a specialist workshop.
Before any inspection or any work on the device, switch off the motor and remove the power pack.
| Problem Possible cause Remedy | ||
| The device switches off. | The power pack is too hot. Allow the power pack to cool. | |
| The power pack is discharged. Charge the power pack. | ||
| The temperature of the device (electronics) is too high. | Allow the device to cool and if necessary, clean the ventilation slots. | |
| Overcurrent release If this occurs again take your device to a specialist workshop. | ||
| The device will not switch on. | The power pack is discharged. Charge the power pack. | |
| Overvoltage release If this occurs again take your device to a specialist workshop. | ||
| Overcurrent release If this occurs again take your device to a specialist workshop. | ||
| Power pack temperature too high or too low. | Allow the power pack to cool down or heat up. | |
| The power pack is defective. Replace the power pack. | ||
| Readjustment of the line during operation does not work. | The spool is empty. Wind on a new cutting line. | |
| The totothing between the spool housing and the line spool is dirty. | Use a brush to remove dirt from the parts. | |
| The line has torn off and has been pulled into the line spool. The line has become caught in the spool. | Remove the line spool and remove the line from the spool. Refit the spool and rewind the cutting line on it. | |
| The line is welded onto the spool. | Remove the line and rewind the line. | |
| Strong vibrations Device fastening elements have become loose. | Consult a specialist workshop. | |
Warranty
The warranty conditions of our local company or importer apply in all countries. Under the terms of the warranty we will repair faults on your device free of charge, insofar as material or manufacturing defects are the cause. To make a claim under warranty please contact your seller or your nearest branch.
CE Declaration of Conformity

Further details about the device are contained on the separately enclosed CE Declaration of Conformity, which forms part of this instruction manual.
Environmentally-friendly disposal
Electrical tools, accessories and packaging must be routed into an environmentally compatible recycling chain.
Power packs/batteries:
Do not dispose of power packs/batteries in domestic waste, by burning or throwing into water. Power packs/batteries must be collected, recycled or disposed of in an environmentally-friendly manner.
Power tools (without power packs/batteries): Do not throw your old power tool away with the domestic waste. Take it to a disposal facility.
Table des matieres
A k pa ②. Dra endast at skruvarna for hand.
Satta in batteriet J

Instalar o accumulator J

AVISO!

KataTn diapkeia xpno
Ppoooxn yia Tpaumatioouc oE Tóbia kai xépiα λoyw tnc diataegns kontns.
Apaipéite tov oouoewutn aTOn ouokean:
He donyckaite nonaHa Ha yctpOCTBO DOxKDeB0 BObl!
OctopoxHo!
Onachoctb OTdauH.

He nCnoJb3yIe noJIoTHa nnJI B yCtpoIcTBe!
OT6paCbIbAemblcOBeKtbl IN BpaauHouNecrTeTaN MOryCTaTb npuHHo cepbe3hBIX TpaBM!
ДяВаш经6e3onachocntu

PENEYNPEXKDEHNE!
Ipeod nepbIM uCnoB3oBaHuem ycmpoucmea EHumameJbHo npOumme Hacmoue pykoobcmeo no 3Kcnnyamauuu u deucmeyume e coomem-cmuu c Hum. Coxpanme hacmouee Pykoobocmo no 3Kcnnyamauu dno nocnedyioeoo uCnoNb30aHua unu dno nocnedyioeoo enadaebua.
→Перед первим ВВОДOM ВЗКПУаТAUИО六个月TeЛьно почтinte уka3aHAЯ NO ТхнIKE 6e3Oanac-HocTn!
B cnyuae HecoblodeHna pykoBocCTBa n 3Kc- npyaataun yka3aHn no TexHke 6e30NaCHOCTu BO3MOXHO NOBpeJDeHne ycTpoiCTBa, TaKKe MOrTy BO3HNKHyTb ONaCHOCTn dJa NOpb3OBaTeJIy I dpyrnx IIOdeI.
BceIinaa, BbINOJIHRAUcne BBOD B 3KcNpyaTaunIO, 06cnykBaHne n TexHnueckoe 06cnyXnBaHne yCTPOINCTBa, DOnJXhbl O6Jaadatb COOTBeTCTByIOuien KBaIIINΦnKaUeNe.
3anpET Ha cAmOBONbHbIe N3MeHeHnI n nepe-606OpydoBaHne
3anpeuaeTcBHOCTbN3MeHeHnB KOHCTpyKUHO yCTPOICTBa NIN N3ROTaBNIIBaTB N3 Hero DONOJIHNTeJIbHbIe yCTPOICTBa.Takne N3MeHeHn MOYr IPNBECTN K TpaBMam HENCnpaBHOCTm.
→ PemOHnPOBaTb yCTPOINCTBO MOrYT TOnbKO NMeIOUne COOTBETCTByIOUne NOHOMOuN I O6yueHHbIe JNuCA. Pn 3TOM BcERda NcNoJIb3yInTe OPUNHaJIbHbIe 3aNaCHbIe YactN. 3TO No3BOJNT COxpaHnTB 6e30NaChOCTb yCTPOINCTBa.
HhopmauOHbIe CmBOLbl B HactoIeM pyKOBoDCTBe
3HaKn n CnMBOJb B HAcTOraIeM pyKOBoDCTBe DOnJXHb Bam NOMOy 6bICTpo N 6e3OnacHO NcONb3OBaTb pyKOBoDCTBO N yCTpOInCTBO.

YKa3aHue
Hopmaua O Haubonee 3pkeMuehOM u npakmuHOM uCnObn30aHuu ycmpoucmea.
→ War deiuctbna
PpeDnncBbAeT DeiCTBne.
√ Pe3yIbTaT DeiCTBnA
3necyka3bIbaeTpe3yNbTaT nocneIOBaTeBHOCTN WaOB DeiCTBna.
[1]Homep no3nui
Homepa no3nui o6o3HaueHb B TeKCTe KBaDpaTHbIMN CkO6KaMn [ ].
A O6o3naeHne nJIIOCTpaIcN
HnnIOCTpaunn CHa6XeHbI 6yKBeHHbIMN nDeHTnOkaTopamn N 0603HaueHbIB TEKCTe.
1Homep wara deNCTBnA
OnpeIeHnHa nocJeObaTeIbHOCTb IarOB DeIcTBnI pOHymepoBaHa n 063HaueHa B TEKCTe.
Moket HactyntB noTeHuaJIbHO onaCha CHTyaun, KOtOpA npuBeT K MaTePnaJIbHomy yUep6y, ecn He npeDoTbpaTb ee.
CTpykTypa yka3aHn no TexHnke 6e3onacHoCTn

ONACHO!

BnN nctouhNK onachoCTn!
TnocneIcTBnI rHOpnpoBaHn
Mepa no npeDoTbpaueHnIO onaChocTu
Yka3aHnno TExHnke 6e3onachOCTn
HnBnDyaIbHa3aunTa
YcTpoIcTBo He DoJXHO 3KcnNyaTHnpOBaTBcR DeTbMn B Bo3pacte Do 16 Nt NnCAMn C OrpaHnueHHbIMn Fn3NueCKnMn, CeHCOPHBIMn Hn YmCTBeHHbIMn CnOCO6HOCTaMn, a TaKKe - npn OTCyTCTBnN ONbITA n 3HaHn. TaKKe 3TO yCTpoIcTBo He DoJXHO 3KcnNyaTHnpOBaTBcR NnCaMn, He O3HaKOMNBuHMnC n HactoUm PykoBoIcTBom No 3KcnNyaTaun. MeCThble npedncaHn MOryt yCTaHaBnBaTb OrpaHnueHn BO3pacta NoIb3OBaTeJeN.
No coo6paXeHnM 6e30NaChOCTN DeTAMNJNnUaM,He O3HaKOMNBWHMCr C pyKOBOdCTBOM NO 3KcNpyatauH,HCNOJb3OBaTB yCTPOIcTBO 3anpeueHo.MNHIMaJIbHbI BO3pact NOJIb3OBaTeJIa MoKET ONpeJeJIaTbcRA MeCTHbIMN HOpMaTI-BAMn.
He 3anyckaIte yctpoiCTBO,ecnB HenoCpeDCTBeHHoJ 6nn3OCTn HaxoJrTcJIIOuN (B Oco6eHHoCTn,TeTu) INN XNBOTHbIe. CneIte TaKke 3a Tem, YTObI c yCTpoiCTBOM He IrgpAnI DeTu.
BbIKHouHTe yCTpOoiCTBO, ecn pAOM HaXoJrTcra JIOi (B OCO6eHHOCtN - DeTn) NJI DOMaUSHHe XNBOTHbIe.
OuNTka n TexHnueckoe 06cIyXnBaHne He DOJIxHbI BbINoJHrTbCra DeTbMn.
BknHouaTe DnRaTeIbTOJbKO B TOM Cnyae, ecn Baun HOrn npyKn HaxOJaTcHa 6e3-onachHom pacctoHnn OT pexyuero yctpoiCTBa.
EcN Bbl co6npaTeCb OCTaBnty yCTPOIcTB 6e3 npncMOtpa Hnn ydaNTb 3a6NBwniC8 B Hero MaTePnA, BcerDa CHMaIte C yCTPOI-CTBa aKKymJrTOphIbe 6aTapeH.
Bo Bpempa60bI cyctpoNCTBOM HIN BO3Ne Hero Bcerda Hocnte CanOrn C HeCKoJIb3KoH NOOWBON JINHHbIE WTAHbI, a TAKKe NcNOJb3yIte NOxOJaUne CpeDCTBa INHdNB- dyAJIbHOJ 3aunTbI (3aunTHbIe OUYKN, npOTNU BOUMHBIE HayuHKn, pa6OHe nepaTKn, 3aunTHyIO Odekny I. d.). NcNoJIb3OBaHne CpeDCTB INDNBUNyAIBHOJ 3aunTbI CHIXKa-et ONaCHOCt b TpaM. He HocTe CBO6OHyIO Odekny I. n., KOTOPAR MOKeT 6bITb 3axBaueHa peKyuIm IHCTpyMeHToM. Pa6Ota 6e3 npOTNUOwMHbIX HayuHKOB MOKeT npVBecTN K NOTEpe cNYxa.
OTBETCTBEHHOCtB 3a HecyactHbIe Cnyan yuep6, npuHHeHHbI dpyrIM IIOdAm INN INN MMyEcTBy, BO3NaaraetcHa ONepaTopa INN Ha NOnb3OBaTeJI.
He nCnoNb3yIte yctpOcTBO,ecnBbI yCTaJIH,6oJIbHbI IJIH HaxODntEcB NOB BIIraHneHapKOTnueckx BeIeCTB IJI MEdnKaMeHTOB.
PpeepnpimmeHneHem
Npeed HauaJom pa60TbI 03HaKOMbTeEc b c yctpoiCTBOM, ero yHKUIMN 3JIeMeHTaMn ynpablenHn.
He nCnoNb3yIte yCtpoiCTBO,ecn erO BblKIOHATeJIb HenCnpaBEN HpecTaJI BKIOUHTBCr NII BblKIOHATbcr. IopyuHTe ero pEmoHT KBaIINΦuINpOBaHHOMy CneuaJIHCTY INI CNeuaJIIN3IPOBaHHoM MaCTepCKoI.PepeKaJdbIM NcNoJIb3ObaHnem npOBepaTe yCTpoIcTBo Ha OTCyTcTBnE NOBpeXdEHn. 3aMeHnTe nobpeXdEHhle DeTaII.
Y6eHNTecb, YTO BCE COEHNHTeNbHbIe 3JIeMeHTbI yCTaHOBHeHbI n 3aKpeNIIeHbI. 3aMeHnTe TpeCHyBwne HnN NMeOuNe HbIe NOBpeXdHnA DetAnppeKyUe HacAdKn. Y6eHNTecb, YTO peKyUaHacAdKa HadLeXaUM o6pa3OM yCTaHOBHeHa n XopoWo 3a-KpeNlEHa. Y6eHNTecb, YTO 3aUnTHbI KoxyX peKyUe HacAdKn yCTaHOBHeH HndLeXaUm O6pa3OM n HaxoNTcR B peKOMHdyemom NJIOKeHH.
HrhopopOBaHne daHHbIX yka3aHm MOKeT npBecn K TpaBMIpOBaHnIO NOnb3OBATeJN OKpyKaHOxN IIODeI N IOBpeNTb yCTpOICTBO.Y6eIntecb, yTO cpeHnry pyKoTka HaxOHTcB B npEiNcaHHOM nIOXKeHN.
Co6JIIOJaIe npn 3TOM yka3aHnra, npNBedeHHbIe B pa3dene «MoHTax n peryInpOBka cpeHne pyKoRtKn».
NcnoJb3yIte TOnbKO opnHnHaJIbHyIO 3anacHyIO necky dnaMeTpOM He 6OJee 2,4 MM. Hn B KOEM cnyae He nCNoJb3yIte apMnpoBaHHbIMeTaNOM WHyp, npoBOJOKy, Zenb, Tpoc nT.I.N OHN MOrTy OTJLOMTbcra, a INX OblomKn 6bITb ONaCHblMN.
Bcerda oTdaBaIte ce6e OTye T haJnUHn ONaCHOCTN TpaBMnpOBaHHra rOIOBbl,pyK n HOR.
Bo Bpempa60tbicpexueyen hacaKoB O n36exaHne TpaBMnpoBaHn o6 octpbie Kpa HnJIe3BnA Bcerda HocHTe pa6Oue nepaTKN.
He 3KcNpyaTpyte yCTpoiCtBO c NOBpeXDeHHbIMN NIN OTCyTCTBYIOUImN 3aUNTHbIMN yCTpoiCTBaMn NIN KpbIkwam. IopyaTe IN peMOHT NIN 3aMeHy KBaJIHΦuInpOBaHHOMY IN CneuaJIncTy NIN CneuaJIncI npOBaHHoJ MaCTepCKOJ.
Ipeed ctpnKoR ra30Ha y6eHntecb, YTO C Hero y6paHbI cyhB, KAMH, npOBOnoka NT. D., NocToHHO yHTbIBaHTe 3TO BO Bpemra pa60TbI c TpIMMepom.
Yka3aHnno TExHnke 6e3onachOCTn
He noDnyckaIte DeTeN, OKpyXaIoXx IIOeH IN KINBOTbIX 6IInKe Yem Ha 15 M; cyueCTByeT ONaCHOCTb NOnaDaHnB HnX OT6poWeHHbIX npEIMeTOB. OkpyXaIOUne IIOdN, NaJIHOaIO- uNe 3a pa6OToI, DOJNXHbI HocNTb 3aUNTHbIE ouKn. PpN pnp6LnKHeHN K Bam Koro-Jn6o cpa3y Je BblKnUoyaIte ycTPOIcTBO.
Перед ВынОнHeHem HabTpoe yCTpoIcTBa Hn erO OYnCTKn BbIKNIOuHTe yCTpoIcTBO n CHmnte c Hero aKKymJrTOpHbIe 6aTapei.
Почтnteи co6JIIOJaTe pyKOBoDcTBO no 3KcNpyaTaunn aKKyMylrTopHoi 6aTapen n 3apAHorO yCTpoiCTBa.
BoBpeMa npImMeHnHa
OnachocTb TpaBM Hor npyK pexuym yCTpoiCTBOM.
N3BJIeKaITe aKKyMylrTOpHyIO 6aTapeIO n3 ycTpoiCTBa:
- Bcerda, KOrda Bbl octabJare Te yCTPOINCTBO.
-
npeed cHraTneM 6JIOKINPOBKn.
-пени Вынонемп роверки, очирки пп пабот на устор捶ve. -
nocne cToIKNHOBeHnC npenTCTBnEm,ДЯ npOBepkn yctpoiCTBa Ha npedMeT NOBpeKdEHH.
-ДЯ HEmeДлЕнHоиnpOBepKn,KOrda yCTpoIcTBO NaHHaet Ype3MepHO Bn6pnpoBaTb.
He nCnoNb3yInTe yCTpoiCtBO BO B3pblBOO-nachOn CpeDe, rDe npHcyTCTByOT rOpIOue XnDKoCTn, ra3bl nn nbIb. YcTpoiCTBO MOxET 06pa3OBbIBaTB NCKpbI, KOTOpbie MOrYT BOCnJaMeHHTb nbIb nn napbl.
Bo BpemnpepebIOB B pa6Ote He ocTabJnTe yCTPOcTBO 6e3 npncMOtpa n xpaHnTe ero B HaJeXHom MecTe.
Bo BpeMa BKIOueHn yCTpOncTbA DepxNteero npaJIneIbHO ra3OHy, B npOTNBOM cnY- qae Bo3HNKaet OnaCHOctb TpaBM.
BoBpempa60tblbIepKnBaHTe63onacHoepacCToHHeDObpaauOuuecnaeckn/Je3Bn.
He nbitaTecb cXBaNTb BpaaioyIOcnaecky nI ne3Bne.
He xbaataTecb 3a Bpaauoounecraactn.
BybTe octopoxhbl npn obaeHn c HOXOM dna neckn, yTo6bl He nOnyuHTb TpaBMy.
Nocne BbITraHbAHnHOBOJNeCKN Do BKJIOpYeHn yCTpoIcTBA Bcerda DepeXnte ero B HopMaJIbHOM pa6Oyem NOLOKeHH.
NcnoIb3yTe noxOJaune 3aunTHbIe OUKn I npOTnBOuMhIe HayuHnKn!
3aunTHaKpbIkaD0JXHa6bITbBCerda NOHocTbU yCTaHOBnHa,ecN Bblncnonb- 3yeTe yCTpoiCTBO B KaueCTBe TpMMepa.ДЯ pa6oTbI Heo6xOdmo BblrHyTb Obe Jeckn, D0JXHa 6bITb yCTaHOBJIeHa NODxOJaA Ja necka.Iecky Heo6xOdmo BblrNBaTb TaK, YTO6bl OHa He BblxOdnla 3a KOHeu KOKyxa.
3aunTHbI KOxuyX DOJxH 6bITb BcERda yCTaHOBHe,ecn Bby nCNoJb3yTe yCTpOiCTBO BAueCTBe MOTOKocbl C Je3BnEM.
Ipeed BkIIOueHHeM yCTpOietBa y6eIITecb, YTO WnyIbKa DnI JeCKn/Je3BHe Hn C Yem He cOnpNkacaetc.
Otperynnpynte cpeHIO pyKoTky C yyeTOM CBOero poCTa, YTO6bI Bbl MornHaedxHo ydepXnBaTb ycTpoNcTBO.
IcnoJIb3yIte yCTpoINCTBO TOnIbKO npn DHeB-HOM CBeTe INI INpN XOpOWeM NCKycCTBeHHOMOCBeUeHN.
NcnoJb3yIe DaHHoe ycTpoiCTBO TOnbKO no Ha3HaueHIO.
Kpenko ydepxnBaTe yctpoNCTBO BO BpeMa pa60tbl oBeHMn pykAm: OndHou pyKo3a pyuKy, dpyroN pyKo 3a cpeHIOO pyKoTky.
BoBpempa60tbI Bcerda nCnoJb3ynteHa- nJIeHbI peMeHb.
Bo Bpempa60TbI MeHnTe NOnOKeHne n CBOeBpeMeHHo DeNaTe nepepbIBbl -3TO 103BOJNT N36ExKaTb yCTaIOCTn yYtOMJeHnA.
N36eraIte Heyyo6hBix NOIOxHn TeHa. CnE dTe 3a XopoWeyCTOuNBOcTbUo N BcerDa nOeepXnBaIte paBHOBecne. ByIbTe OCO6eHHO OCTOpOXHbI, IpeEdBnraJcB No CKIOHy. Hn B KOem clyuae He 6eraIte, DnraITecb BnepeD CNOKOHNbIM WArOM. 3TO IO3BOJNT Bam lyuwe KOHTPOINPOBaTb yCTpOJCTBO B HeOJNuAHHbIX CNTya4nX.
BydbTe oO6eHNO OCTOpXHbI, DBnraCbHa3aAd. OnacHocTb cNOTKNHyTbcR!
Bo Bpem TpaHcnpTnpoBKn yCTpOncTba npn nepexode Mekdy OTdEJIbHbIMN MeCTaMn pa60tI Bcerda CHMaIte aKKyMyJrTOphHyIO 6atapeio.
He nepembikaTe yctaHOBneHHbIe Ha yCTpOcTBe yCTpoiCTBa BKJIIOUeHn I BbIKJIIOUeHn I He BbINOJIHnTe C HmN HnKaKnx HeHaJNeJxauNX DeiCTBuN.
He ydapayte roJIOBky c JIeCKo o Kpaar CTHe. Pocne cnIbHoro yDapa roJIOBKn c JIeCKo npOBepbTe HAnuye NOBbIeHHoBnB6paun Ha pyKoTKe. Pn HAnuyn NOBbIeHHoBnB6paun Heo6xOIMO NOPyUHT peMOHT yCTPOINCTBa KBaJIncnupOBaHHOMy CNEuaNtCTy INN CNeuAaNN3npOBaHHoMaCTepcKO.
Yka3aHnno TEsHHke 6e3onachOCTn
DOnOJIHnTeIbHbIe yKa3aHnI no pa6oTe c Je3BnEM
Деркnte cpeHIOуpyKoTkycIncTaHcuHOHbIM3JIeMeHTOMmExdyco6Ou npexyueHacakkoI.
Hn B Koem Cnyuae He Kocnte Jne3Bnem Ha Bblcote 75 cm N BbiIe HaJ ypoBHeM 3emJH.
Bo3MOxHa OTdaua, ecn BpaasaOuueecr ne3Bne cOpnkacaetc C npedMeTOM, KOTOpbI He pa3pe3aETcra cpa3y.
OTdau MoKet 6bItb DOCTaTOH CnJbHO, YTO6bl OT6pocntb yCTpoNCTBO H/INI INoJIb3O-BaTeJI B JIO6OM HAnpaBHeHH N 3aCTaBtB erO NotepaTb KOHTPOJIb HaD yCTpoNCTBOM.
OTdau MoKET BO3HnKaTb HEOXnDaHHO B Cnyae 3auePHeH, 3axmHa nn 6IokpOBKn Je3Bn. 3TO MOKET JERKO IPONCxOAnTb TaM, rDe CLOXHO BNDtB CkaUNBaEmbMyatepnaI.
HeKoCnTeJe3BnEM npeDmEtbToIuHOn60-nee12,7MM.BnpOTNBHom cnyae BO3MOxHa cnIbHaorTa4a.
BoBpempa60bIcJe3BnEM3aunTHbIKoJxdoJKeH6bTbBCerdayCTaHOBJeH.He nbitaTecb npNKoCHyTbcra K Ne3BnO nnn octaHOBNt bero,ecnno OHO Bpaaetca.
BpaaHooeeecJe3Bne MOxET CtaTb npuHnHO TpaBM daKe NocJe BBIKHoueHn yCTpoiCTBa.IpOuHO depKHTe yCTPOIcTBO, NOKA Je3Bne He OCTaHOBNTC NOHOCtBu.
EcnBbHaTKHeTcBHaNoCTOpOHnnpedMetnn3anyTaetecBHeM,cpa3yXeBbIKIOUHTeDBNAteNBnPpOBepbTe,HETnIOBpeJxHn.PpeJxDeYem npoOJXHTbNCNOJB3OBaTBycTPOIcTBO,obecneYteycTpaHHeNe NOBpeJxHn. He 3KcNpyATnpuyTe yCtpoIcTBOCdΦopMnPOBaHHbIM,TpeCHyBmIMnTynbIMJe3BmEM.BbIbpaBaIe DeΦopMnPOBaHHbIE,TpeCHyBmNE nNNnoLOMAHHbIeJe3BnI.
He TouHTe Je3Bne. HaToUeHHoe OcTpne Je3-BnA MoKET OTNOMITbCRA BO BpEma pa6Otbl. 3TO MoKET NOBJeCb 3a Co6o CepBe3HbIe TpaBMbl. 3aMeHnte Je3Bne.
TpaHcnpOpTyPe nIIN xpaHnTe yCTpOncTOJIbKO C yCTaHOBJIeHHbIM 3aUHTbIM KOxyXOM Je3BnI.
Yka3aHn, kacaOuIeCeBn6paun:
Bn6paunma MoKeT npNBecTN K NOBpeKJeHnA HepBHOcNCTeMbI HApUeHNIO CnpKyJauCIN KPOBn B COcydax pyk N ppeDnpeuN.
Bo Bpempaobtbpn Hn3kOHTemepaType Hocnte Tepnyo Odejdy n CneDnTe, YTO6bI Baun pykn 6bln B Tnen ne cyxmm.
ДeнайтenepepbIbbl.
B clyuae onemehn Koxn naIbueB nn pyk, nOBJIeHn B Hnx 3yda, 6oJIeBbIX OuyueHn nn noBeHn npekpatnte pa6Oty C yctpoinCTBOM n, B clyuae Heo6xOaMocTn, o6paTnTEcB K BpaCy.
YkaaHHbIe 3HaueHnBn6paunHOHmNC CUN:
-ИЗмеряOTС NO CTaHДapTn3NpOBaHHOМETODIKe IcNbItaH.N.
-ПОЗВОЛЯТО OUCEHINBAТУРОЕНБ 3MUNCCN N 3JIeKTPOINHCTPymEHTA И BbINOJNHYt CBaBHeHne pa3IINuHbIX 3JIeKTPoINHCTPymEHTOB.ВЗABNCIMO- CTN OT YCNOBNI ПИМЕHнЯ, COCTOHNH3JIeK- TPoINHCTPymEHTA И Np pa6OчERO INHCTPymEHTA ФakTnuecka Harpy3ka MoXeT 6bITb 6OJIbWe IIN MeHbWe. Пп BbINOJHEnH N OUCEHKn UyHtIBaYte NepepbIBbI B pa6OTe И NePnoDbl HN3KOH Harpy3- KN. ПрIMITE Мерbl 3aUNTbl, COOTBeTCTByIOUSe N3MepeHHbIM 3HaueHnR M, HApPmEp, OprAHN3a- UHOHbIe Мрbl.
Pocne npimehnna
BbIKIOUHTe yCTPOIcTBO, CHIMTE aKKyMyl TOpHyO 6aTapeIO n npOBepbTe yCTPOIcTBO Ha npEiMeT NOBpExdHn. BHMaHne, onac-HocTb! PexyuN INcTpymENT BpauaetcNo HnepuN!
EcnBam Heo6xOJMo BbIOnHnTb pa60Tb I no TexHnueckOMy 6cIyXnBaHNIO n OuncTe yCTpOncTBa, BblKlHouHTe erO n CHmMTe aKKyMyJrTOphHyio 6aTapeHO.
Bcerda doxkndaaTecb octaHOBKn peKyuero HnCTpyMeHTa n He npNKacaTecb K NOdBHX-HbIM ONaCHbIM qactm, ppeDbapnteJbHO He CHAB C yctpoiCTBa aKKyMnyTOphyIO 6atapeHO.
Bce pa6oTbI c yctpoNCTBOM, TaKne KaK, Hanpimep, 3aMeHa neckn, npeHanaJaKa dJa pa6oTbICJe3BnEM, peryInpOBOUHbI pa6oTbI, ONUCTKa N T.Д., DOJXHbI BblONHrTbCra TOJbKO CO CHrTbIM aKKymyJrTOPOM.
NcnoJb3yIte TOnbKO opnHHaJIbHbIe Jeck/Je3BnI n Co6JIoDaIte HNCTpyKcIINo yCTaHOBKe.
CneIte 3a Tem, YTo6bI BeHTnJIaUNOHHbIE ueHN He 6bln 3arpa3HeHbl.
Yka3aHnno TExHnke 6e3onachOCTn
He ouhzaaIte yctpoNCTBO BOOn.
XpaHnte yctpoNCTBO B HaJeXHOM MeCTe.He depknte yctpoiCTBO B MecTax,doctynHbIX DeTm.
He pemOHtnpuYe yCTpoNCTBO camOTo-TeIbHo, npuyaHTe erOppeMOHT TOnbKO KBaHnΦnCpOBaHHOMy CneuaJNCTu JINcNeuaJI3NpOBaHHo MaCTepCKoN.
Прждчem NOCTaBt b ycTpoiCtBO Ha MeCTO HIN NOMeCTHTb ero Ha xpaHeHne, daIte DBN- rateJIIO OCTbITb.
06zne yka3aHnno TeXnke 6e3onacHocTn
HNKOrda He yctaHaBnBaIte BMeCTO pexyueTo ycTPOncTbA n3 HEmTaJIneCKoR MoTaJIInueckoe pexyuee ycTPOncTBO!
Bcerda doxkndaaTecb octaHOBKn peKyuero HnCTpyMeHTa n He npNKacaTecb K NOdBHXHBIM ONaCHbIM YactM, PpeDbAPNTeJbHO He CHRA C yCTpOcTBa AKKyMnyTopHyIO 6atapeHO.
3anactndoJXhcoOTBeTCTBOBaTb Tpe6oBahm, yCTaHOBJEHbIM npOn3BOIDTeJem.103tomy nCpONb3yIte ToJIbKO opuHnHaJIbHbIe 3anactn nnODo6peHHbIe npOn3BOIDTeJem3anactn. Ppi 3ameHe BcERda Co6JIouaIte npInaraemblc HcTpyKUIN NO yCTaHOBKe, ppeBapNTeJbHo CHImaTe aKKMyJrTOphHyO bTaapeIO.
NopyaTe npoBeHne peMOHTa nCKIHOuTteNbHO KBaHnΦnUPOBaHHOMy CneuaNtCy HnCneuaH3npoBAHHo MaTePckO. AApca CneuaHn3npoBAHHbIX MacTepeCKx yka-3aHbHa HaWeB6-CTpaHnce.
CBoeBpeMeHHo npOBOnTe BCE pa6OtBi NO TEX06cJyXnBAHnIO, YTO6bI NODepKnBaTb yCTPOINCTBO B 6e3ONaCHOM 3KcNpyaTaUHOHOM COCTOHN.
IcnoJb3yIeB 3JIeKTPoHnHCTpyMeHTax TOnbKO npEHa3HaueHHbIe DJIa HNX aKKMyJrTOpHbIe 6aTapeN. IcnoJb3OBAHHe dpyRnx aKKMyJrTOpHbIX 6aTapeM oKET nPUBecTu K TpaBMam N ONaCHOCTn NOkapa.
3To yctpoCTBO npedHa3HaeHo dnyxOda 3a KpaMn raoHOB n He6oJbWUMn TpaBnbl- Mn LyXaKamn n ra3OHAMn, a npn nCNoJIb3O- BaHHn Je3BnA — IJN o6pe3Kn DnKopactuNX paCTeHH, KyCTapHNKOB N MeJKNX 3apocJeB DOMaunhem Xo3nCTBe. H3-3a ONaCHOCTn TpaB- MnpOBaHH NOJb3OBaTeJI N JIN dpYnx JIOJe TpIMMeP HeJb3r INcNOJb3OBaTb B HecBOICTBeHHbIX Emy CEJIAX.NcnojB3yIte yCTpOncBO TOnbKO B cyxuonorody. Bepernte yCTpOncBO OTdoXdYnNcblpoCTn Hne 3KcPJIyaTnpUte erO BO BpeM rpo-3bl. IonoaHHe BObl B yCTpOncBO NObIIaetOnaCHOCTb nopaxeHnE 3JNEKTpUueckm TOKOM.
Дахе пи сбл�день Ссex yka3aни no texнke 6e3oNaChOCTn n ynpabIeHnO cyueCTByet OCTaTOUHbI pCK TpaBM n MaTePNaIbHorO yuepe6a. Bcerda nomHInTe o6 əTom.
He 3Kcnnyata npyte yctpoiCTBO BO BpeMa DOxkra nn rpo3bl.
YctaHaBnBaIte Ha yCTpOInCTBO HOBbIe yKa3aTeJIbHbIe Ta6JIuKbIM BmecTo N3HOWeHHbIX ININ NOBpeKdEHHbIX.
NcnoJb3yIte ToIbKO aKKymJrTOpHbIe 6aTapeN 3apJHbIe yCTpoiCTBa, pa3peSeHHbIe npOn3BOJntJeM. O6o3NaHeHnO oD6peHHbIX aKKymJrTOpHbIX 6aTaapeN 3apJHbIX yCTpoiCTB yka3aHbI B npNJraemoi DeKJIapaun COOTBeTCTBnE EC.
HnB Koem cnyae He nCnoJb3yIte He dony- Ⅲe HbIe IaHHO yCTpoiCTBa DeTaN, npHaadJeKHOCTN IIN HacaDN, TaKe KaK, HApnpMep, CoCTaBHbIe MetaJIInueckne peXy- UHe INcHTpyMeHTbIC ZeIeIMN IwapHnPbIM HOxOM. CNeIDCTBnEM MOrTy 6bITb cepBe3- HbIe TpaBMbl NOnb3OBaTeIg N NOBpeXdHne yCTpoiCTBa.KpOme TORo, MoKet YtpaTNTb cnNy Baasa rapaHTnI.
CodepKHTe yCTpoNCTBO B uHCTOTE n CnEHTe 3a TeM, YTObI MExypeKyuSeH hAcAkoN N 3aunTHbIM KoxyXOM He 3acTpeBaII paCTehn IIN npyrHe npedMeTbI.
PpimHeHne no Ha3HaueHnIO
3TOT TpMMMep/MOTOKoca npedHa3HaueH(a) NCKNHOHTeJIbHO
-ДЯпrimeHeHnBДOMaWHeM XO3YICTBEИнНа пIDOMOBbIX yuaCTkax,
Дя CTpnKKn KpaEB Ra30HOB N He6OJIbUnx TpaBЯньИлжаEK INN B TpyIHOIOCTyINHbIX MecTAX (Ha npIMep, NOd KcyCTapHnKaMn) npN IcNoJb3OBAHn rONOBKn C JneCKoN,
-ДяобраздИКОРACTuXpacteHn,KcTapHnKOBmEJIKNX3apocJeIprNNCIOJb3OBAHnNJIe3BnY.
B COOTBETCTBUN C ONNCAHNAIMN UYKa3aHNAIMN NO TEXHNKE 6e3OnacHOCTN,COJepXkaUIMMnCBAHHOMpyKOBOIDCTBENO3KcNpyatauIN.
JIO6oe BbIXOJaUe 3a 3TN paMkn NcNOlb3OBaHne CnTaeTc npIMHeHem He No Ha3HaueHIO.3a yIep6, npOn3oWeDunB Cnyae npIMHeHn Hn Ho HA3HaueHIO, OTBeuaye TNOb3OBaTeJIb.
PpimHeHne He no Ha3NaYeHnIO
3TO yCTPOINCTBO He DOJXHO NCSOJB3OBaTbCBA MeCTAX O6UeIIOJIb3OBaHnA, NapKax, ObBeKTax CnOpTINBHO INΦpactpykTypbI, Ha yNtax, a TAKKe B IpeIINPRAHX CeIbCKOTo I NeCHOrO Xo3YnCTBa. YuHTbIBa BO3MOxHbIe TpaBMbl, yCTPOINCTBO He DOJXHO NCSOJB3OBaTbCDA JnObe3Kn TOlCTbIX CyUBeB IN DnI N3MeJIbYeHn MaTePnAnaHa KOMNOCT.
PacnopTna Ta6nUka
IopokHeHne
PacnopTnHa Ta6JnUka HaxoDITcHa KOpnyce yCTpoNCTBa.

yKa3aHue
Nacnpmna ma6nukka Hocum xapakmep dokymehma - ee HeIb3a u3MeHmb UJU npubodumb b Heuumaembl bud.
CTpykTypa

1 TapaHTnIPOBaHHoe 3NaueHne 3ByKOBoM OMOHOCTH
2 Knaacc 3aunTbI/CTeHb 3aunTbI
3 3HaK CE npOn3BovnteIa
4 PpOn3BODnTeNb
5 Pynnna yctpoicTB
6 Ha3BaHne MoJeIN
7 Hoomep moDenn
8 CepHbI Homep
9 MoHooCTb
10 Yactota BpaueHnI DnIraTeIa, 06/MnH
11 Bec
12 PauchetHoe HnpanKHeHne /poToka
13 Ka3aHne no yTuIN3aUIN
14 TOrBbInycka
3nemeHbI ynpaBneHna
3JIemEtbl ynpaBneHnra P
1 KhoNka pa36nOKnpOBKn aKkyMnyTOpHoi 6aTapeN
2 Puyka
3 KhoNka Eco
4 Kpouky noi HanneHbI peMeHb
5 CpeHpykoTka
6 Kpenexnha Btylka
7 3aunTHbIKoKoyx
8 甲yIbKa c necko
9 HoxdIeckn
10 AKKyMnyTOpHbI OTcK
11 BbIKIOUaTeNb
12 KhoNka 6JIOKIpOBKn BkJIoueHnIa
13 DnCTaHUNHOHHB 3JEMeH
14 HanneuHbI peMeHb
15 RaikaДякpenexKHOKJnaka
16 KpenenHbIKoJnak
17 Ie3Bne
18 3aunTHbI KOxUx Ine3BnI
BBoD B 3KcIIyatauio
DOnONHnTeJIbHaJ DOKyMeHTaUa

Beodume ycmpoicmbe 3knpnyama zuo nuub b mom cnyae,ecnu y Bac umeomc npunaabeMbte pykoobocmea no 3knpnyamauuu 3aprdho2o ycmpoucmea u akkymyamopa u Bbl nohauu co6nlodaeme ux.
3apdka aKKyMnyTopHO6aTapeu
I P E D U N P E X D E H N E!

Onachoctb noJyueHn TpaBM mMaTepn anbHorO yuepe6a.
3apjkaTe aKKyMylTOpHyo 6aTapeo TOJbKO C NOMOuBIO ODo6peHHoro npOn3BOIDHTeJIem 3apJdHoro yCTpoiCTBa. O603NaHeHnO ODo6peHHbIX 3apJdHbIX yCTPOIcTB Yka3aHbIB npInaraEmoN DeKnapaun COOTBeTcTBnE EC.
BhumaHue!
AkkymyIaTOPHa 6aTapeJe NoCTabJIeTcB UacTHUHO 3apJxKeHHOM COCToHn.ДЯ OBeCneHEnIPOHNO MOuHOCrN aKKymyIaTOPHoI 6aTapeENpeD NepBbIM IcNoJIb3OBaHHeM NOHocTbIO 3apJnte ee.
→3apynte aKKymyIaTOpHyIO 6aTapeIO B COOTBeTCTBUN C INHCTpyKUINM, COepeXaUMMCB DOnOJHHTeBHOJ DOKymeHTaUN.
Yacbl pa60TbI
Co6IIOdaTe perHOHaJIbHbIe npednicaHna.
→ Y3haIte O pa3peWeHHbIX yacax pa60tbl B MeCTHOM opraHe oBueCTBeHHoro npabONopraKa.
C6opka
C6opka 3aunTHoro koxyxa A B
BdaBnte HapyHbI O6oA B n3 3aunTHoro koxya do qnkcaunn 1.
→3aKpeHnTe HapyXhBbO6oDOK JINHHbIMN BHN-TAMN A jN 3aTnHTe INX OT pyKn 2.
MOHTaX 3aUHTHOKOKxya A C
→Pa3MeCTnTe 3aIHTbI KOKyX Ha rONOBKe TpIM-Mepa ①.
→PnBnHTTe 3aUHTbI KOKyX KOPOTKIMN BnHTAMN A k 2. 3aTaNBAITe BNHTbl TOJbKO OT pyKN.
CoeHHeHne WtahrnpMMepHoro 6Joka n WtahrnyynpaBHeHnA D
PacnoJoxTe WtAHn TaKIM o6pa3OM, YTo6bI na3 COBnaI C BbICTyNOM.
→ BCTaBbTe TpMMePbHb 6JOK B OTBeTHyU qactb WtAHrN ynpabNeHn
→ 3aTnHTe KpeNexHyIO BTy
MOHTaK cpeHne pykoAeTKn A E
PacnoIoxKeKpeJexHyO deTcpeHne pyKOATKN BBepy, MExNy OboIMn peryIINPOBOUHbIMN orpaHnHTeJIaMn (a), Ha 7TaHre ynpabnaIOuSeYhactn 1.
YCTaHOBnTe CpeHIOpyKoHa KpeNEXKHOI DeTAn, YTObI COBnAIN KOHcHTpUeCKHe OTBepCTn 2.
BCTaBte 6A1c6Oky B yrgny6neHne dny 3aXbata roIOBKn 6oJTA OTBepCTnMn
→HaeneBte noiknaHyu wA y ng raKy A f C npyro CTopoHbHa 6oNT n 3aTnHTe raKy ot pyKn 4.
→PnBHTNTe DnCTaHcNoHHbI 3JeM ATH K dpYrO CTOpOHe 6oTtA, C yCnnm O T pyKn 5.
PacnoIoxKeIe cpeHIOpyKoTky Ha 7aTHRe TaKIM o6pa3OM, yTo6bI BBiBntaR CTpeNka Ha KpeNexHOJ DeTaJIc COBnAna C MapKnipoBOOHOJ UePTOn Ha 7aTHRe.
→3aKpeHnTe cpeHIOpyKOrTKy B 3TOM NONO- XeHN, yDePKiBaJNCTaHcNOHHbI 3JIeMeHT N 3aTAYB Teepb raiKy 6.

yKa3aHue
Peaynpo80chbe oapauhumenu (a) Mozym, 3abucumocmu om ucnnonHeHua, pacnonaaambc c neo uu c npaoou cmopohbl.

Yka3aHue
3Kcnnnyamupoeamb ycmpoucmeo moxho monbko mosa, kozda cpehry pykocrma haxodumc8 npednucanHom noJIOXeHu. 3mo 3Naum, ymo oHa donkha haxodumbcmexdy oboumu peaynpooboyhmu opaHuhumela (a), a bibumar cmpelka Ha KpenexHo demaru donkha cobnadamb C mapkpupoeohu cepmo Ha wmahe.
PerynpoBka cpeHne pyKoTkn F
→OTnyctnte raIky c pykoTkoH ha cpeiHei pykoTke 1.
→IpepeBnHbTe cpeHIO pyKoTky MeKdy o60mnperyNipOBOHbIMn ORpaHnHTeJIaMn (a) Ha Tpe6yemyIO BbICOTy 2.
→ OtperynnpyTe HaKNoH cpeDHe pykOaM
PacnoIoxKte cpeHIO pyKoTky Ha 7aHRe TaKIM o6pa3OM, yTObblb6nTaA CTeJIka Ha KpeNekHOJ DeTaN COBnA n C MapKnpoBOOHOJ UePTOn HA 7tAHRe n CHOBA 3aTnHTE raKy4.

yKa3aHue
3Kcnnyamupoabmb ycmpoucmeo moKHO mOJko mo2da, KO2a cpeHry pykoarnka haxodumc8 npednucAHOM noToXeHuU. 3mo 3Naum, ymo OHa donxHa haxodumbcMexdy obouMu peaynpuOboyhbIMu opaHuhumelaMu (a), a bIbumar cmpeNka Ha KpenexHo demanu doJxHa coBnadamb C Mapkupooyho Yepmou Ha wmaHze.
HabeunBaHne HapLeuHoro peMHrA G
→ HabecbTe HAnIeHbI pemO o6oUMn Kapa- 6HHaM3a KpUcKy npabJIOue JAcTn.
PerynpoBka HanneuHoro pemHra
Otperynpyte Tpe6yemyu dnnHy HanneuHoro peMH. KapabHH noDBeCKn DOJKeH pacnoNa- rataBcHa ypOBHe 6epa1.

yKa3aHue
Ira oecneueHn nyueeO KOmpoHa ycmpoucBOM u CHuxeHuaymomJreMo cmu pyk u cnunb60 epmraKcnnyamau u ycmpoucMa 6ce2da cneyemucno3o- bamb HanneuHbU pemeHb.

yKa3aHue
I3 coo6paKeHu 6e3onachocmu nepenoCume ycmpoucmeo, nepe6pocue peMeHb uepe3 npeo, a He uepe3 ueo. Pemehb Umeem 6bicmpodeucmeyuyo 3acmexky I0380nrauuyo 6bicmpo omcmzhymb peMeHb 60 BHeumamHou cumyaauu.
YcTaHOBkaJe3BnI
→Bpaaante roJOBky c Jiecko, nOepeCTne B pacnopHoi wai6e He oKaKeTcHa OdHOI INHMn C BbIeMKoKopnyCa peDyKTopa.
BCTaBbTe CTePKeA mYepe3 BbIeMky B OTBePcTne H yDepKnBaIte ero, YTO6bl 3aФNkCnPoBaTb pe3b6y ①.
→YdepKINBaA CTePKeHb,OTKpyTIne RoJIOBky CJeCKoI NO YacOBO CTpeJIke (BnpaBO) C npNBOHOBAJa 2/3.
YcTaHOBnTeJe3Ha npNBOHOBaJI pa3MeCTnTe ero no ceHTpy Ha pacnOpHoi wa6e. 3aKmTe ne3BVE.

yKa3aHue
Cneodme 3a mem, ymo6bl ne3eue pacnonanaocb no uehmpy u po8Ho.
YCTaHOBnTe KpeNEXKbI KOJI Ha npuBOHOH BaN I Ne3BNE 4.
→ HabnHTnte rayn npotnb yacobO CTpeJIKN (BJIeBO) Ha npINBOHOH BaI N 3aTAHNTe ee C MoMeHToM 20 Hm ⑤.

yKa3aHue
Ipeod okohyameIbHbIM 3amrauhaHu- em npoeepme npabunbHOe noJoxehue ne38u. Ydepkuame wmahy 60 epMa HabunyuabaHua u 3amrauaHaRa2aKu.

yKa3aHue
Ppu omcymcBuu duhamomempueecko20 KnOya HauHuaBaume 2aUKy KOIbueBIM KIOUOM UUNpunaaembIM mOpueBIM KIOUOM (e 3aBucumocmu om modenu), noka KpeNkHiKoIIak He 6yDcM npouHO npuIeZamb K Ne3Euo. 3aem 3amHume 2aUKy Ha cenbu obopom (360^)
→N3BneKeNTeCTepXe
CHIMMTE3aunTHbI KOKxCJe3

YKa3aHue
Ppu Heobxodumocmu dna 6oonee 3fpekmueho paobmbi cHumume o6odok 3auumHo2o Koxyxa.CHO8a ycmaHOBume 6o0DKHa 3auumhbu Koxyx npu uCnOJb3oeaHuUycmpoucmea c neckou. Cm. pa3den «C6opKa 3auumHo2o Koxyxa
MOHTAX rOJOBKc Jnecko
DeMOHTpynteJe3BnE B NocJeIOBaTeJb-HoCTn,6paTHoH ToH,KOtOpaONuCAHa B rIabe《MoHTax Je3BnR》1.
3aФнКсИpyTe peIyKTop cTePkHm n HABnHTnTe rIOBky C neCKo IpoTnB YacOBO CTpeJKN (BJIeBO) Ha npuBOdHO BJI.
OTpykn npouho 3aBnHTnte roJIOBky c JeckoN.
3Kcnnyatauia
UctahOBka aKKymyIaTOpHoi 6aTapeu J
I PENEYNPEXDEHNE!

HenpaBnIbHoe o6paueHne c aKymyTTopHO 6aTaapee n 3apAHyIM yCTpOINCTBOM.
Onachocb noIyueHn TpaBM nIN NOBpeKdEHHN mMyuectBa.
Почтute n co6nIOaIte pyKOBOdCTBO NO 3KcNJIyatauIN aKKymJrTOpH0n 6atapen n 3apAHO rCPOJCTBa dIra aKKymJrTOpH0 6atapen.
Pn nomou 2-ctyneHcatoro fHKcaTopa moXHO HactpanBaTb pa6OuN peKIM uIN peKIM TpaHCnOpTnpOBKn aKKymJrTOpHOB 6aTapen.
→BCTaBBte aKKymyIaTOpHyo 6aTapeHb B aKMyIaTOpHbI OTCeK - OHa DoJnxHa 3aФnKcnpoBaTbcHa Tpe6yEmo CTyneHn 1/2.
Ctynehb 1
AkkymyIaTOPHa8 6aTapeH HaxoIITcBpeKIMTepaHCnOpTnpOBKn.
3NeKtpnueckne KOHTaKTbI pa3beDInHeHbI, YTO npedOTbpaaaet HeKeNaTeNbHbI camOpa3pRd aKKymyIaTOpHO 6aTapeIN BO BpeM xpaHeHn.
CTyneh2 ②
AkkymyIaTOPHa 6aTapeHaxoDntcB pa6oempeXnme.
3NeKtpnueckne KOHTaKTbI COeINHeHbI, aKKMyJNtOPHa8 BaTapeR rTOBa K 3KcNlNyatauun.
BkIIOUeHne yCTpoiCTBa K
I P E D U N P E X D E H N E!

Onachoctb noJyueHn TpaBM mMaTepnAnbHorO yuep6a.
KpeNko yndePknBaIte ycTpoiCTBO BO Bpempa60tbl oBeIMn pykam. OHa pyka depknt pyky, npyra-cpeHIOpyKOaTKy.
HaedeHbTe HAnIeHbI pEmHeB.
→HaxMMTe KHOKNy 6JIOKINPOBKN BKNIOUeHNHa pyuKe 1.
OДНовременс CЗТИМ HaKMNTe BbIKNIOUaTeIb HApyKe 2.
OTnyCTnTe KhoNky 6NoKnpOBKn BkJIIOueH
YcTpoNCTBOpa6oTaet.
HaxMnte KhoNky Eto
Yactota BpaueHnpeKyuue HacaKn yMeHb-Shaetc. JAmnoUka Ha KHonke Eco 3aropaetc 3eJehbIM.

YKa3aHue
IcnoJIb3yUme peKum Eco moJbKO dna paobmbi c 20NoEkoC necko. Pekum Eco npOdoNeBaem bPempaBomby ycmpoucmba npumepno Ha 50% .Ppu noBmOpHOM EKIOUeHuN Nocne BbIKIOUeHuYcmpoucmba peKum Eco ocmaemcAkmuehIM.YMOb6 bIKIOUcHbpeKum Eco, Heo6xOduMo eue pa3 Haxamb Ha KHOkky Eco, Komopar nepeKIOUcHm ycmpoucmb8 o6bHyupeKum (bICOKa Yacmoma 8paueHua peKyuue HacaDu).
BbIKIIOHeHne yCTpoiCTBa K
→ⅡIЯ BBIKJIIOueHnY yCTPOINCTBa OTNyCTNTe BBIKJIHOaTeNb ⑤.
√ YcTpoICTBO BbIKJIIOUeHO.

YKa3aHue
Iocne ebiknueHua pexyuui uHcmpymHe npodjkaem epaambcye ue Hekomopoe epeMa.
YdepeKnBaHne yctpoNCTBa H
Ipeed hauaIOM nCNoJIb3OBaHn8 3aIMnTe pa6ooye noJoxKeHne.
PpOBepbTe cneyUouee:
-
POnb3OBaTeJIb IcNoJIb3YeT npeIINcaHHbIe cpeCTBa 3aUNTbl.
-ДинаннecuHOro pemn npabunbHo Otpery-nipobana.
CpeHnpykoTka Otperyu npoBaHa npaBnIbHo C yETOM poCTa NOJb3OBaTeJI. -
CpeHna pyKoTka Otperyu npObaHa npaBnIbHo,ecN Bbl MoKeTe B3rTbe naDoHbIO,He BblraHba pyKy.
-
YctpoICTBO HAXOINTC HIXe ypOBHra TaIIIN.
-
Pexyuza Hacaika Depxntc npaJIeJbHO 3emne, yTo6bl Ierko cpe3aTb pactehn 6e3 Heo6xoDmOCTn HaKIOHrTbcR.
Iopaua neckn npn pa6ote c roJOBkoJ IJIneckn L
TOnOBKa C NeCKo IMeET KHOKNy, C NOMOUsbIO KOToPOB Bb MoKeTe NOpaBaTb NeCKy, He OCTaHaBJIINBaY DnIraTeNb. INaI NoDaun NcKIn CNeRka yDapbTe KHOKNo TOnOBKn C NeCKo O 3eMJIIO BO BpEm pa60tby ycTpoiCTBa.
yKa3aHue
Necka 6ce2da doJnxHa 6bimb MaKcumaHb-Hou dunhI. Nodaaye necku ycNoxHraemcno Mepe mozo, kak necka cmaHoobumc KopoOye. KaXdbiu pa3 npu yOape KhoNkoU O 3emnIO nodaemc oKOLO 30 MM necku. Jezue y Kpar 3auumHOo KOxya Obpeaem necky do npabunbHO uINHbI npu nodaue nuwe Hneku. Lyuwe ecezo ydapm b KhoNkoU no zonou unu mepdoz 3emne.

yKa3aHue
Bo epempaobmhe boudme KhoNkou no 3emne.
Necka moxem obnomambca unu u3Hocumbcra e pe3ybnmame
- 3anymbibaHua O nocmopOHue npedMembl
-obbyou ycmanocmu mamepuana
-HopMaIbHOzO npouecca KooeHua
-NonbIMOKCKOCumbCopHbIe pacmeHu c moncmbmu Cme6nmu
-yapoe o cmeHKu, caoobie u32opodu um.
Cobetbl dny noyuhen Haunyushx pe3ynb-taTOB npn pa6ote c rONOBKOc JeckoN
DepeKnte peKyuHnHaCaNky npaPJIeJIbHO 3emJIe.
Kocnte TOJbKO KOHcNKOM NcCKN,OCo6eHHO BDOJIb CTeH.EcNI KocTb HE KOHcNKOM,yxuJaTaCra 3ΦΦeKTINBHOCTb IMoKeT pOn30Tu nepeRpy3Ka DBnIaTeJIa.
Kocnte TpaBy BbICOTOn 60Jee 20 cm nOhemHory CBepxy Bn3, yTO6bI n36ExKaTb npexKeBpeMeH-Horo n3HOCA JeCKn I neperpy3Kn DnuratEn.
→No BO3MOXHOCTN KOCITE CJIeBA HAnpabo.3TO NOBbIwaeT OΦΦEKTNBHOCtB KOUeHnB. B 3Tom Cnyaee CKoUeHHa TpaBa OT6paCbIBaETcR B CToPOHy OT NOnb3OBaTeJRA.
MeIeHNO nepemeuAte yctpoCtBO Ha He0xOIMoB Bicote B Obnactb KoWHeHn I N3 Hee. DnuraTecb JNoB Bneped n Ha3aD, Jn6o N3 CTOpOHb IB CToPOHy. Cpe3aHne He6oJIbUnx KyCKOB Daet JnyUne pe3yJbTaTbI.
Kocnte ToIbKO B Tom Cnyae, ecnn TpaBa n copHn cyxne.

YKa3aHue
Cpok cnjxkbI necku 3aucum om cneyioux qakmopoe:
-cobniodeHue npedweecmyuux coemoe no pe3Ke
-ckauaueaembe pacmeHua
-MECMO KOWEHUR
Hanpumep, necka u3hauuaemc 6bicmpee npu kowehuu y cmehbl, yem npu obkauuaaHuu 603ne depeea.
Декоратиьhoe 6kaшиBaHne H
EkopaTnBHOe 6kaunBaHne npednonaraetCKaunBaHne BCex paCTEHIN BOKpyr DepeBBeB,CTOn6OB,3abOpOB n T.Ⅱ.
IobopauBaTe BCE yCTPOINCTBO TaK, YTO6bI ydepXnBaTb peKyUHO HacaNkY NOD yrnom 30° K 3emJIe 2.
Pa6ota c Je3Bnem
Ipeen Hauanom nCnoB3OBAHn 3aMnte pa6ooye noJoxHe. Cm. «YdepxnBaHne yCTpoNCTBa>.
CobetbI no pa6ote cJe3BnEM:
KoCHTe pNTMnH0.
→ CToIe yCToIuBO u yD06HO.
He nCnoJIb3yIte pexIM Eco. EcIn pexIM Eco He nCNoJIb3yeTcR, To ne3Bne IMeET MaKcImaJIbHOe pexyUee ycINNE H He TAK JERKO 3aUeMnErcr, 3AcTepeBaEt INN yDapReTcR, YTO CHNXaET PnCK Ce- pBe3HbIX TpaBM NOnb3OBaTeJN INN Dpynx IIOJe.
Kocnte, nobopauuBaB aepxHIOU qactb Tynoua cnpaBa HaneBO.
→Поворачные устюгв В ТОМ ХЕ HabрВлени,В KOTOPOM pexket Льбп.ЗTO NOBblaet 3ффektNBHOCThb KoшEHЯ.
BbINOJIHMB Max Ha3aI, cIeNaIte OINH INN HeCKoJIbKO WaROB K CJIeNyUOuEMy yUacTKy N CHOBACTaHbTe YcToHBO.
→Co6JIIOJaITe cIeMyUOJIne yKa3aHnA, YTO6bl CHN- 3NTb pNCK HAMaTbIBaHn paCTeHn Ha Ne3BVe:
-He kocnteBpekime Eco.
-Kocnte pacteHn, dela max cnpaba HaneBO.
-Делая образнын Max,и3бeraNTe TOnbko YTOCKOWeHHbIX pactehn.
ChTne aKkyMnyIaTOPHO 6aTapen N
→HaxMMTe KHOIpKy pa36JIOKINPOBKn AKKymJIaTOpHO 6aTapeN 1.
→ CHHmnte aKKyMynTOpHyio 6aTap
TexHnueckoe 06cIyKbBaHne

I PENEYNPEXDEHNE!
Onachoctb noJyehn TpaBM n NOBpeKdEHHN mMyIeCTBa N3-3a NOBnKhblx YacteN.
Pa6oTbI NO TexHnueckomy 06cnyKuBaHNIO N OUHCTKe MOXHO BbINOJHrTbTOJIbKO C BbIKNoeHHbIM DBNrAteJeM NOCtAHOBJIeHHbIM pexyumm HNCTpyMeHTOM.
Перед нааномлобьх paBOT no o6-cnyкванию yctpoNTBa CHrTb aKKMy-ЯТOPHyO 6aTapeI.
He ouhiaainTe yctpoiCTBO BOIOI.
PopyaIte npoBeDeHne peMOHTa, texnueckoro o6cnykBaHnA, a TAKKe 3ameHbI npeOxpaHITeBHBIX 3JeMeHTOB KBaINΦuNpOBAHHOMy CneuaJIInCTU INN CNEuaJIN3npOBAHHoM MaCTepCKoN.
OuNCTka yCtpoNCTBa
→ BbIKIOHTe yCTPOINCTBO, NOOJOITe, NOKa peKyuIN INHCTPMEHT OCTAHOBNTcN CHUMITE aKKMyIANTOPHYIO 6aTapeHO.
→PocneKaKdOrOHCNoB3OBaHNoOuHuaTe yCTPOINCTBOUeTKoNcpyKoN.
→PeryIaRHO OuHuaTe OT OCTaTKOB TpaBbI BEHTNJIaUHOHHbIe IeJI N HIXHIOCTOPHYcTPOI-CTBa.
OuNCTkaJe3BnA
→OuHuaTeJe3BHe6bITOBbIMMOUOMCpeiCTBOM,YTO6bIydaJIHTb BCE OCTaTK.
→ CmaXbTe Je3BHe MaUHHbIM MacJlOM, YTO6bl 3aUHTb erO OToPxAuBvHbI.
OuHCTka roJOBKc JneCKoI
→IocneKaKdOrO nCnOJIb3OBAHnO OuNlaTe roJIOBky C Jecko CHapyKn UeTKo NIN BetoUbIO.
→ PeryIpaHNo OuNuaTe rOIOBky C neCKoB BHyTpN BO BpeM yCTaHOBKn HOBOJneCKn. PpN 3TOM DeIcTByIte, KAK NOKa3aHO Ha0:
-HaxMNTe 6oa a3bIyKa KpbIuKn IwnyJbKn C JeCKoN 1 n CHMNTe KpbIuKy 2.
-YdaJInte oCtATKJneCKn 3IyNbKn.
-CHIMMTEwnynbK3
-YdaJInte rpa3b n OTNoXeHnA CO 7nyJbKn, C ee Kopnyca n KpbIwKn. OuNCTnTe OTdEnbHbIe DeTaN NcCTOn BetoBIO.
- CHOBA yCTaHOBnTE IinyIbKy4.
- BbipOBHnTe r3bIyKn KpbIuKn 7nyIbKn OTHOCTeNbHO OTBepCTn B Kopnyce 7nyIbKn. ODHOBpeMeHHO COxMITE r3bIyKn KpbIuKn 7nyIbKn C o6enxCtopoH 1 n yCTaHOBnTE ee Ha Kopnyc 7nyIbKn TaKIM 06pa3OM, YTO6bl OHa 3aΦnKCuPobalacb 5.
YcTaHOBka 3aMeHa JIeCKn M
I P N E D U N P E X K D E H N E!

OnachocTb TpaBMnpoBaHnapeKyuIm HhCTpyMeHToM.
BbINOJIHnIe HAcTpoKy yCTpoNcTBa TOnbKO npn BblKnIOUeHHOM DBNrAteNe IN HeNoDBNXHOM pexkysem NHCTpyMeHTe.
He xbaataTecb 3a BpaauooyocJecky.
Перед нааномлобх paBOT NO OcIyкнванIO yCTpoINCTBa CHrTb aKKMyJIaTOphYIO 6aTapeIO.
HnB KOem clyuae He nCNoIb3yIte apMnPOBaHHbIM MetaJIOM uHyp, npOBONoKy, ZeNb, Tpoc N T. N. OHN MOrYT OTNO-MITbcra, aNX ObIOMKn 6blb ONaCHbIMKaK dJa OKpyKeHnA, TaK n DnA camoro yCTpoIcTBA.
NcnoB3yIe TOJbKO opnHnHaNbHyIO 3aIacHyIO JeCKy DnAmEtPOM 2,4 MM. Ppi nCNoB3OBAHH NKeCKN BoJbWei TOIuINbI DBrAteJIb MOKeT nepepeTbcr IIN OTKa3aTb.

yKa3aHue
Bce2da uCnoJb3yUme necky yka3aHHOJ dnuHb! Ecnu necka cnuwkom dnuHHa, Oha MoXem He nodaambcn HadneKaum o6pa30M.
O6peKbTe HOByIO NeCKy Do dHnHb 4 M.
→BpaaainTe KhoNky roNoBkn c necko no yacobon CTpeKe, noka CTpeKn Ha KhoNke Hn KaPbIuKe WnylbKn He CoBnaDyT 1.
BCTaBBTe KOHeu NcCKN B yUko (LINE) BCTaJIyIe NcKy Do Tex noka, noka OHa He BbICTyNT np6n3nteNbHO Ha 10 cm n3 yUka Ha npOTUBONOJXHOn CTOpOHe.
→ N3BneKaIeTe TOpuaIeN KOHeU Do Tex nop, noka n3 KaJDoRo yIka He 6yJeT TopuAtb npn6n3nTeJIbHo no 2 M neckn ③.
→ YdepknBaIte KpbIbKU WnyIbKn IN BpaaIaTe KHONKY RIOBKn C IeCKoN NO YacOBO CTpeJIke, NOKa IN3 KaXdOrO yuKa He 6yJeT BbICTynaTb OK. 12cm IeCKn 4.

yKa3aHue
Hu b Koem cnyuae He eadnubaume KhoNky 20oBku c neckou eo epemHaMOMku necku!
TpaHcnpTnpOBka n xpaHeHne
I P E D U N P E X D E H N E!

Onachoctb TpaBMnpoBaHnapeKyuIm HhCTpyMeHTOM.
Kakdbi pa3 neped TpaHcnpTnpOBkoi n NOMeueHem yCTpoiCTBa Ha XpaHeHne BbIKIOuayTe ero NdoXnDaIteCb OCTaHOBKn peKyuieo HcTpyMeHTa.
Перед Трансортукови пиnomешием устюпва на xpaHeHne CHIMITE aKKymyЯлтOPHyIO batapeio.
YctaHaBnBaIte 3aUHTbI KoxyX dIJIe3Bna Iocne KaJDoTO NcNoJIb3OBA-HNIA, a TaKKe npi TpaHCnOpTnpOBKe INxpaHeHNI.
XpaHne
Nocne kaxdoTo ce3oHa TuaTeIbHO OuHuaTe yCTPOINCTBO.
Bcerda xpaHnTe yCTPOINCTBO B cyXOM n HaNExKHOM MeTe, HeIOCTyNHom dIa DeTei.
XpaHnTe aKKyMyJIaTOpHyIO 6aTapeIO OTdEJIbHO OYCTPOINCTBa.
XpaHnTe aKkymyIaTOpHyo 6aTapeEO B npoxnaHOM cyxom MeCTe. PeKomeHIOBaHHa TEmnepaTpya xpaHeHn: npImepHO 0-23 ^ C . He OONYCKaIte IOnaHaHn Ha yCTpoIcTBO,OCoBeHNO Ha ero IIaCTMaCCOBbIe YactN, TOPMO3HO JNIDKOCTN, 6eH3Ina, HeFTEXIMUeCKNX IpOdyKTOB, IPONIToCHbIX Macen. OHn CoDEpKAT XmNUeCKNe BeIecTBA,KOTOpbIE MOrYT NOBPeIITb, INCOPTNb IIN pa3pyuHTb IIaCTMaCCOBbIe YactN yCTpoIcTBA.
Ydo6peHnI npyIne aRpoTeXHnueckNe XUMKaTbI COePkaT BeIecTBa, KOTOpBIE MOrY T OKa3bIBaTb CINbHOe Koppo3IOHHOe BO3dEICTBHe Ha MeTaJI-NuYeCKNe yactn ycTpoNCTBa. IOnTOMy He xpaHInTe ycTPOINCTBO pAnOM C 3TNIM BeIeCTBaMn.
XpaHnte n 3aKpbIbAitte Je3Bne XopoO, YTO6bl 3aUHTtB Je3Bne OT NOBpeKJdeHn IIN HeCAHK- CIOHOPOBaHHORO NCNOJIb3OBaHn.
YcTpaHHeH HeuCnpaBHOCTe
I PENEYPPEXDEHNE!

Onachocb noJyehn TpaBM n NobpeKdEHHN MyuecTba
3NeKtpOnHCTpyMeHTbI, npHaJnEeKHOCTn yNaKOBKa DONXHbI NOBepraTbCnOBTOpHO npepa60Te 6e3OanChbIM dny OkpyKaUoJe CpeDbI cnOCo6om.
AkkymyIaTOPbIe 6aTapeu/6aTapeu:
He Bb6paCbIBaIe AkKMyJrTOpHbIe 6batapeu/6batapeu C 6blTOBbIMN OTXoAMn, He 6pocaiTe INx B OROh bnn B Body. AkKmyJrTOpHbIe 6batapeu/ 6batapeu DOJKNbI CObnpaTbcra, NODBepraTbcra NOBTOPH nepepa6OTke INnn yTtIN3npoBaTbc 6e3OanChbIMdJIa OKpykaUoJe cpeblcno6obm.
3JIeKTpnuEcKn HnCTpyMeHT (6e3 aKKymJrTopHbIX 6aTapei/6aTapei):
He BbIbpaCbIbAaTe 3JIeKTpOHnHCTpyMeHT BmecTe C6bITOBbIMN OTXoJaM! CdaBaIte erO B COOTBETCTBYIOUIN NyHKT yTNIN3aUN.