
MH 178 Vario - Multi-cooker ECG - Free user manual and instructions
Find the device manual for free MH 178 Vario ECG in PDF.
| Brand | ECG |
| Model | MH 178 Vario |
| Appliance type | Multi-cooker |
| Container capacity | 5 L |
| Maximum oil quantity | 2.9 L |
| Rated voltage | 220–240 V~ 50–60 Hz |
| Rated power | 1500 W |
| Temperature range | 50 °C – 240 °C |
| Maximum cooking time | 9 h 59 min |
| Preset cooking modes | Slow cook, Stew, Sauté, Boil, Deep fry, Fry, Grill, Steam |
| Additional functions | Fondue, Keep warm |
| Control panel | Digital with LCD screen, Start/Stop, Time/Temp, Keep Warm, Menu buttons |
| Included accessories | Glass lid, Steam rack, Frying basket, Fondue set (6 forks), Grill rack, Drip tray |
| Container coating | Non-stick |
| Base material | Heat-resistant plastic |
| Container cleaning | Dishwasher (lid only) or hand wash with mild detergent |
| Base cleaning | Do not immerse, wipe with a damp cloth |
| Safety | Automatic shut-off at end of program, overheating protection |
| Recommended use | Domestic and similar premises (store kitchens, offices, etc.) |
| Approximate weight | 3.5 kg |
| Approximate dimensions | 35 x 30 x 30 cm |
| Repairability | No user-serviceable parts, contact professional service |
Frequently Asked Questions - MH 178 Vario ECG
User questions about MH 178 Vario ECG
0 question about this device. Answer the ones you know or ask your own.
Ask a new question about this device
Download the instructions for your Multi-cooker in PDF format for free! Find your manual MH 178 Vario - ECG and take your electronic device back in hand. On this page are published all the documents necessary for the use of your device. MH 178 Vario by ECG.
USER MANUAL MH 178 Vario ECG
MH 178 vario
CZ
MULTIFUNKČNÍ HRNEC
NÁVOD K OBSLUZE
SK
MULTIFUNKČNÝ HRNIEC
NÁVOD NA OBSLUHU
PL
NACZYNIE WIELOFUNKCYJNE
INSTRUKCJA OBSŁUGI
HU
TÖBBFUNKCIÓS EDÉNY
HASZNÁLATI ÚTMUTATÓ
DE
MULTIFUNKTIONSKOCHTOPF
BEDIENUNGSANLEITUNG
GB
MULTIFUNCTIONAL POT
INSTRUCTION MANUAL
HR/BIH
VIŠENAMJENSKO KUHALO
UPUTE ZA UPORABU
SI
MULTIFUNKCIJSKI KUHALNIK
NAVODILA
FR
MULTICUISEUR
MODE D'EMPLOI
IT
CZ
- Glass lid handle
- Glass lid
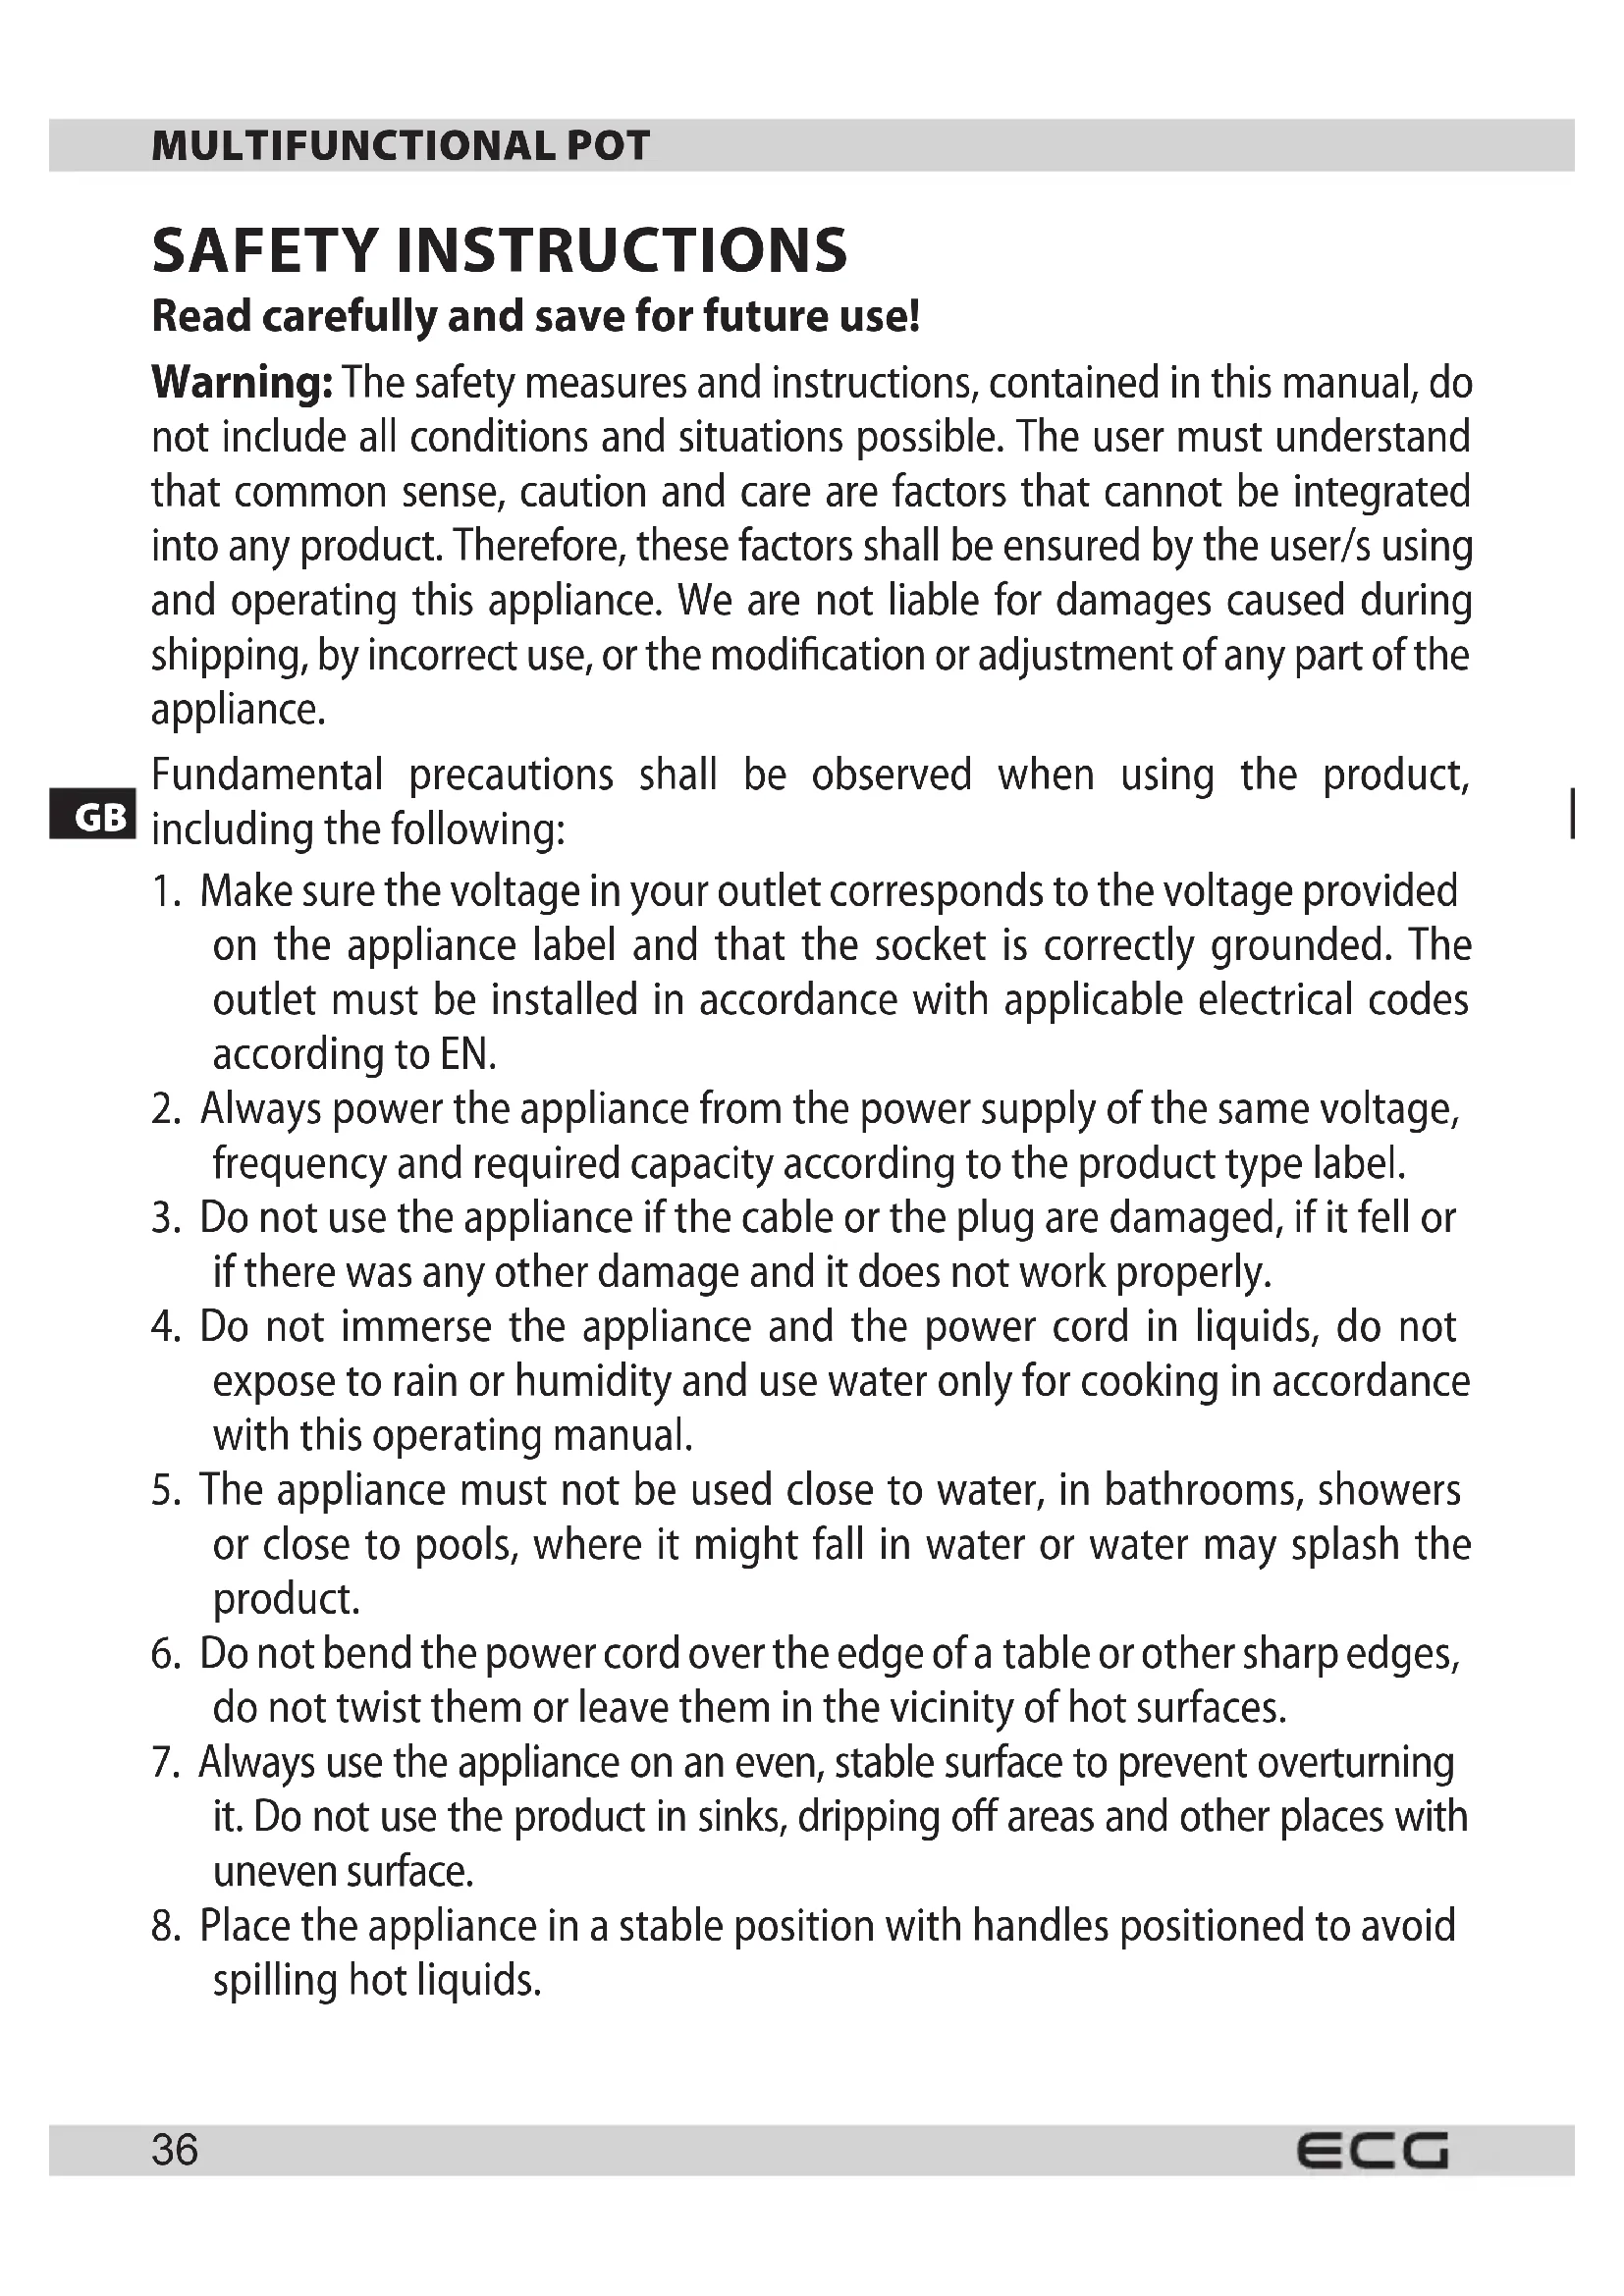
- Steam rack
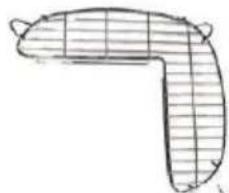
- Deep-fry basket
- Basket handle
- Removable container with non-stick surface
- Base
- Digital control panel
HR/BIH
natural_image
Simple line drawing of a rectangular grid structure with no text or symbols②
natural_image
Line drawing of a wire mesh-coated container with two handles (no text or symbols)③④⑤
natural_image
Simple line drawing of a bent, L-shaped object with grid lines (no text or symbols)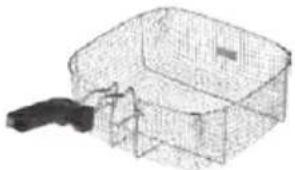
natural_image
3D wireframe model of a mechanical housing or enclosure with a handle, no visible text or symbolsCZ
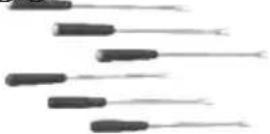
- Grilling grate
- Steam rack
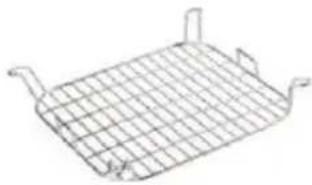
- Fondue set 6 forks
- Drip tray for excess oil
- Deep-fry basket
HR/BIH
Do not immerse in water! – Neponořovat do vody!
ZAČÍNÁME
První použití hrnce
natural_image
Line drawing of a basin with four legs and a handle, no text or symbols presentTlačítko Keep warm
natural_image
Line drawing of a woven basket with handle and side panel (no text or symbols)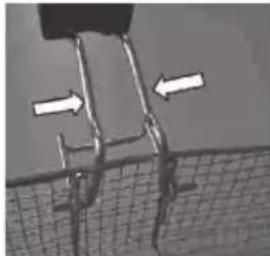
natural_image
Close-up of a metal structure with two white arrows pointing to it, against a dark background (no text or symbols)7. Fry (zapékání)
natural_image
Line drawing of a square container filled with a mesh grid (no text or symbols)Příprava fondue
natural_image
Line drawing of a basin with four legs and a handle, no text or symbols presentnatural_image
Line drawing of a woven basket with handle and handle, no text or symbols present6. Grill/Roast (grilovanie)
natural_image
Diagram showing a structural element with two white arrows pointing to it, overlaid on a grid-patterned background (no text or symbols)7. Fry (zapekanie)
natural_image
Line drawing of a square container filled with a mesh grid (no text or symbols)8. Steam (varenie v pare)
natural_image
Line drawing of a rectangular basin with three vertical pins inserted, placed on a patterned plastic base (no text or symbols)PL
natural_image
Line drawing of a woven basket with handle, no text or symbols present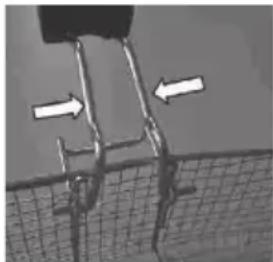
natural_image
Diagram showing two white arrows pointing to a structural element or component, with a grid-patterned background (no text or symbols)7. Fry (zapiekanie)
natural_image
Line drawing of a square container filled with a mesh grid (no text or symbols)PL
natural_image
Line drawing of a rectangular basin with four vertical supports and a mesh base (no text or symbols)natural_image
Line drawing of a woven basket with handle and side panel (no text or symbols)natural_image
Close-up of a mechanical component with two white arrows pointing to a section, set against a textured gray background (no text or symbols visible)7. Fry (pirítás)
natural_image
Line drawing of a square container with a mesh grid pattern on top (no text or symbols)natural_image
Line drawing of a rectangular basin with four legs and three feet, placed on a patterned basket (no text or symbols)DE
natural_image
Line drawing of a woven basket with handle and side arm (no text or symbols)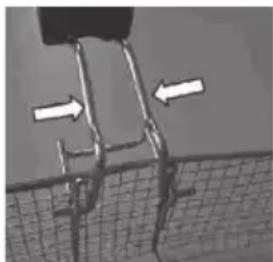
natural_image
Diagram showing a structural component with two white arrows pointing to specific areas, set against a dark background (no text or symbols)natural_image
Line drawing of a square container filled with a mesh grid (no text or symbols)Fondue-Zubereitung
Read carefully and save for future use!
Warning: The safety measures and instructions, contained in this manual, do not include all conditions and situations possible. The user must understand that common sense, caution and care are factors that cannot be integrated into any product. Therefore, these factors shall be ensured by the user/s using and operating this appliance. We are not liable for damages caused during shipping, by incorrect use, or the modification or adjustment of any part of the appliance.
GB
Fundamental precautions shall be observed when using the product, including the following:
- Make sure the voltage in your outlet corresponds to the voltage provided on the appliance label and that the socket is correctly grounded. The outlet must be installed in accordance with applicable electrical codes according to EN.
- Always power the appliance from the power supply of the same voltage, frequency and required capacity according to the product type label.
- Do not use the appliance if the cable or the plug are damaged, if it fell or if there was any other damage and it does not work properly.
- Do not immerse the appliance and the power cord in liquids, do not expose to rain or humidity and use water only for cooking in accordance with this operating manual.
- The appliance must not be used close to water, in bathrooms, showers or close to pools, where it might fall in water or water may splash the product.
- Do not bend the power cord over the edge of a table or other sharp edges, do not twist them or leave them in the vicinity of hot surfaces.
- Always use the appliance on an even, stable surface to prevent overturning it. Do not use the product in sinks, dripping off areas and other places with uneven surface.
-
Place the appliance in a stable position with handles positioned to avoid spilling hot liquids.
-
Do not put the appliance in places where it could be exposed to high temperatures from stoves, radiators, gas appliances, etc.
- Do not place the appliance on top of electrical or gas stoves and ovens.
- If you do not use the appliance, switch it off and unplug it from power. Disconnect the power cord by pulling the plug – never by pulling the power cord.
- Never connect and switch the appliance on without inserting properly the container with non-stick surface.
- Do not switch the appliance on when the container is empty.
- Do not immerse the base in water.
- Lift the glass lid carefully, and tilt it in such a way that the steam is escaping away from you to prevent scalding.
- Check the power cord, the plug and whole appliance regularly for any damage. If you find any damage stop using the appliance immediately and contact the service centre.
- The lid is fragile, handle with increased care. Do not use a damaged or broken lid or container.
- Do not use the appliance for any other purpose than it is designed for.
- Do not use outside.
- The appliance should not be left unattended when in operation.
- Store the appliance inside in a dry place.
- Do not try to repair or modify the appliance or change its parts. There are no parts inside repairable by the user.
- Let the appliance cool down before cleaning and storing it.
- Do not place other objects on the appliance, do not insert foreign objects in the openings and do not use it close to walls, drapes, etc.
- The appliance warms up during operation. Do not cover any openings. Do not touch hot surfaces. Always use handles and buttons. Use oven mitts or tea towel when handling the hot lid.
- Do not try to carry a hot appliance.
- Do not switch the appliance on if it lies on the side or is upside down.
- Using accessories and attachments not recommended by the manufacturer may endanger persons and property.
-
This appliance is intended for household use and similar areas, including:
-
kitchenettes in shops, offices and other work places
• appliances used in the agricultural industry
• by guests in hotels, motels and other residential areas
• in bed and breakfast establishments -
This appliance may not be plugged in an outlet controlled by a timer or controlled remotely.
-
Be extra cautious when moving the appliance containing hot foods or liquids.
-
ECG is not liable for damage or injury caused by negligence or improper use. Prior to use do not forget to read carefully all instructions and information. The external surface of this device heats up and may cause burns. Do not leave unattended when children are present.
-
Children aged from 0 to 8 must not use this appliance. This appliance may be used by children aged 8 and older, who are constantly under supervision. This appliance can be used by persons with reduced physical, sensory or mental capabilities or lack of experience and knowledge if they are supervised or have been instructed to use the appliance in a safe way and understand the potential dangers. Keep the appliance and its power supply out of reach of children younger than 8 years. Children must not carry out cleaning and user's maintenance.
Do not immerse in water!
LET'S START
First use of the pot
Remove all labels and stickers from the product.

WARNING:
Before using, remove the container from the base and remove all the styrofoam packaging material!
Before you start using the multifunctional pot, clean the removable container, steam tray, frying basket, fondue forks, lid and all accessories using soft cloth moistened in water with detergent. Rinse thoroughly and dry. Never immerse the base in water – this could result in injury or damage to the appliance. Attach the container with non-stick surface to the base with power supply, so that the tabs fit into the four holes in the metal surface of the base.
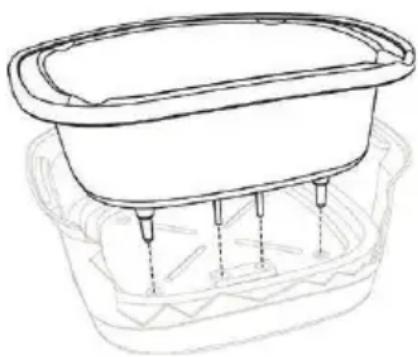
natural_image
Line drawing of a basin with three legs and a central basin, no text or symbols presentNote: You may smell a faint odour when first using the product caused by burning off of the new product. This is entirely normal and disappears after you use it a few times. Therefore before first use you can pour two cups of water in the non-stick container and start the steam cooking mode. If necessary, repeat the process.
INSTRUCTIONS FOR USE
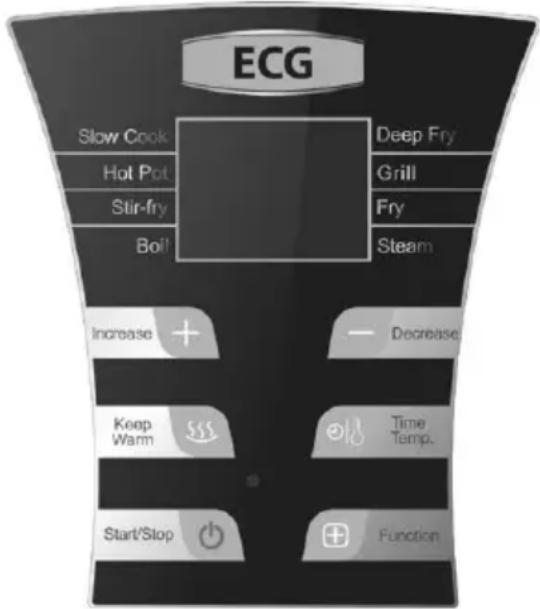
Control panel elements
Start/Stop button
- You will hear a beep after connecting to power supply and LCD display will light up. Select required function and press Start/Stop to start the appliance. Press the button again to turn off the appliance into standby mode.
Time/Temperature button and Increase and Decrease (+ a -) buttons
- Press Time/Temperature once to set time: time on the display starts flashing, which you can adjust using +/- buttons. Each time you press, the time will increase/decrease by one minute. When you press and hold + or - the time changes by 10 minutes. You can set maximum time 9h 59min.
- Press Time/Temperature twice to set temperature: the temperature on the display starts flashing and you can adjust it using +/- buttons. Each time you press + or -, the temperature changes by 10 degrees. The highest temperature setting is 240 °C, the lowest is 50 °C.
GB
Keep warm button
- When you press this button, the indicator Keep warm lights up, the display shows temperature of 80°C and the time is set for 2 hours. When you press the button again, the indicator turns off and the appliance stops warming the food and goes into standby mode. You can freely adjust the time during the warming process.
Function button
- Allows you to set one of the preset modes, see chapter "Food preparation".
Food preparation
Note: When cooking, maintain a minimum and maximum amount of food, oil or water as indicated by the MIN and MAX lines inside the container.
Note: The set temperatures vary within a tolerance of +/- 5–10%.
Multifunction pot offers 8 preset modes that you can go through by repeatedly pressing the Menu button. Each time you press the Menu button, you choose successively from the following modes: Slow Cook -> Hot Pot -> Stir Fry -> Boil -> Deep Fry -> Fry -> Grill -> Steam. When you press Menu and select the required function, the relevant indicator lights up and flashes. Press the Start/Stop button to start heating, the indicator of the selected function stops flashing and stays lit. During the food preparation process, you can freely modify the time or temperature depending on the set program, see below. You cannot change the selected mode after you start heating. If you want to change the mode, first you have to press Start/Stop to switch the device into standby mode and then again select the required mode.
1. Slow Cook (slow cooking, default mode for preparing fondue)
- Put the ingredients for soup or other foods directly into the non-stick container and close the lid. Press the Menu button once, the indicator Slow Cook starts flashing. Press Start/Stop to start heating (the default temperature for this mode is 100 °C, the default time is 6 hours). You can adjust time and temperature as needed while cooking by using the Time/temperature button. Once the process is finished the unit automatically switches to warming mode (Keep Warm). Do not remove the lid while cooking to retain maximum temperature and moisture.
2. Hot Pot (stewing)
- First, put into the non-stick container the necessary ingredients. Then press the Menu button twice. The indicator Hot Pot starts flashing. Press Start/Stop button to start heating. The default temperature for this function is 220°C, the default time is 1 hour. You can adjust time and temperature as needed while cooking by pressing the Time/temperature button. Once the process is over, the device automatically enters the standby mode.
3. Stir-fry (frying)
- Press the Menu button three times. The Stir-fry indicator starts flashing. Press Start/Stop button to start heating. The default temperature for this function is 240 °C, the default time is 15 minutes. Pour the required amount
of oil in the non-stick container and when it becomes hot, put in food and fry to taste. You can adjust time and temperature as needed while cooking by pressing Time/temperature button. Once the process is over, the device automatically enters the standby mode.
4. Boil (boiling)
- Put the food or the rice directly in the non-stick container, add the required amount of water and close the lid. Press the Menu button four times, the indicator Boil starts flashing. Press Start/Stop to start heating (the default temperature for this mode is 150 °C, the default time is 25 minutes). You can adjust time and temperature as needed while cooking by using the Time/temperature button. Once the process is finished the unit automatically switches to warming mode (Keep Warm).
5. Deep Fry (deep fry)
- First, heat the oil in the non-stick container. There should not be too much oil to avoid splashing of oil after the immersion of the deep fry basket. Never fill over the mark of maximum level! Press the Menu button five times. The indicator Deep Fry starts flashing. Press Start/Stop button to start heating. Put food in the deep fry basket and immerse it in the heated oil. The default settings are 180 °C and 30 minutes. You can adjust time and temperature as needed while cooking by pressing Time/temperature button. Once the process is over, the device automatically enters the standby mode.
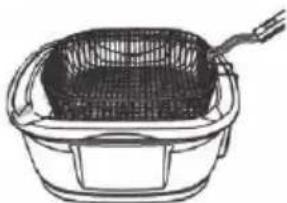
natural_image
Line drawing of a woven basket with handle and side panel (no text or symbols)GB
6. Grill/Roast (grilling)
- Place the grate on the non-stick container. Place the marinated chicken slices or other foods on the grate, close the lid and press the Menu button six times, the indicator Grill starts flashing. Press Start/Stop to start heating (the default settings are 240 °C and 30 minutes). You can adjust time and temperature as needed while cooking by pressing the Time/temperature button. Once the process is over, the device automatically enters the standby mode.

natural_image
Close-up of a mechanical component with two white arrows pointing to specific features, no visible text or symbols.7. Fry (browning)
- Press the Menu button seven times. The indicator Fry starts flashing. Press Start/Stop button to start heating. Then add oil or lard in the non-stick container and add the foods. The default temperature for this function is 200 °C, the default time is 25 minutes. You can adjust time and temperature as needed while cooking by pressing Time/temperature button. Once the process is over, the device automatically enters the standby mode.
8. Steam (steam cooking)
- First, place the steam tray on the non-stick container. Then pour 2 cups of water in the non-stick container. Make sure that the water does not reach the steam tray. Place the foods on the steam tray and close the lid. Press the Menu button eight times, the indicator Steam starts flashing. Press Start/Stop to start heating (the default settings are 220 °C and 15 minutes). You can adjust time and temperature as needed while cooking by pressing the Time/temperature button. Once the process is over, the device automatically enters the standby mode.
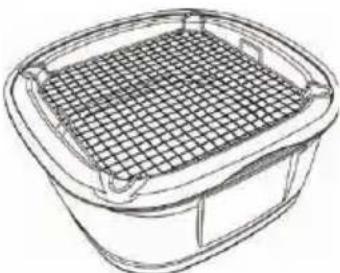
natural_image
Line drawing of a square container filled with a mesh grid (no text or symbols)Fondue
The optimum temperature for fondue cooking is 80 to 100 °C, optimum time about 1 hour.
Put in the non-stick container the required ingredients, close the lid and press the Function button once. The "Slow cook" indicator starts flashing and the default temperature and time will appear (100°C / 6 h). Press the Time/Temperature button once and adjust the time using the +/- buttons. Press the button Time/Temperature again and adjust the temperature using the +/- buttons. Press Start/Stop button to start heating. You can adjust time and temperature as needed while cooking by pressing Time/temperature button.
CLEANING AND MAINTENANCE
Never immerse the base in water or any other liquid and do not wash it in the dishwasher.
- You can wash the lid in the dishwasher.
Cleaning:
- Unplug the power cord.
- Lift the lid and take out all the accessories. Wash the accessories in soapy water.
• Always remove oil or other liquid from the non-stick container prior to cleaning.
• Take out the container with non-stick surface, remove leftovers of liquid or food and let it cool. Wash the non-stick container using warm water with mild detergent. Do not use abrasive materials to clean.
- You can wipe the exterior using moistened sponge. Never use abrasive sponge pads or powders.
Maintenance:
- Make sure that the container with non-stick surface is perfectly dry before using it.
- Never pour cold water in the container with non-stick surface.
- Do not use abrasive cleaners or scouring pads, you could damage the non-stick surface.
- Use only wooden or heat-resistant plastic utensils when cooking to prevent damage to the non-stick surface.
- Never use metal utensils.
- Never immerse the base (external unit) in water or any other liquid. Wipe with damp cloth only.
- Never pour water in hot oil.
TECHNICAL SPECIFICATIONS
Capacity of the vessel 5 l
Maximum amount of oil: 2.9 l
Nominal voltage: 220–240 V\~ 50–60 Hz
Nominal input power: 1500 W
USE AND DISPOSAL OF WASTE
Wrapping paper and corrugated paperboard – deliver to scrapyard. Packing foil, PE bags, plastic elements – throw into plastic recycling containers.
DISPOSAL OF PRODUCTS AT THE END OF LIFETIME
Disposal of electric and electronic equipment (valid in EU member countries and other European countries with an implemented recycling system)
The represented symbol on the product or package means the product shall not be treated as domestic waste. Hand over the product to the specified location for recycling electric and electronic equipment. Prevent negative impacts on human health and the environment by properly recycling your product.
Recycling contributes to preserving natural resources. For more information on the recycling of this product, refer to your local authority, domestic waste processing organization or store, where you purchased the product.
This product complies with EU directive requirements on electromagnetic compatibility and electrical safety.
The instruction manual is available at website www.ecg-electro.eu.
Changes in text and technical parameters reserved.
SIGURNOSNE UPUTE
natural_image
Line drawing of a basin with three legs and a central basin, no text or symbols presentTipka „Keep warm“
natural_image
Line drawing of a woven basket with handle and side panel (no text or symbols)HR/BIH
6. Grill/Roast (grill)
natural_image
Close-up of a metal structure with two white arrows pointing to it, against a dark background (no text or symbols)7. Fry (prženje)
natural_image
Line drawing of a square basket filled with a mesh grid (no text or symbols)Priprema fondija
Optimalna temperatura za pripremu fondija je od 80 do 100 °C, a optimalno trajanje je 1 sat. U posudu stavite potrebne sastojke, poklopite i jednom pritisnite tipku Function. Na zaslonu će zasvijetliti „Slow Cook“, a prikazat će se i zadana temperatura i trajanje (100 °C / 6 h). Pritiscima na tipku Time/Temperature i +/- postavite željeno vrijeme. Naknadnim pritiscima tipe Time/Temperature i +/- možete promijeniti postavljenu temepraturu. Pritiskom na tipku Start / Stop pokrenuti ćete zagrijavanje. Tijekom pripreme možete koristiti tipke Time/Temperature da biste podesili vrijeme i temperaturu po potrebi.
ČIŠĆENJE I ODRŽAVANJE
Prosimo previdno preberite in shranite!
natural_image
Line drawing of a basin with three legs and a handle, no text or symbols presentnatural_image
Line drawing of a woven basket with handle and side handle (no text or symbols)6. Grill/Roast (žar)
- Vstavite rešetko v posodo s površino proti prijemanju. Vmetnite perutninsko meso ali drugo hrano na rešetko, pokrijte s pokrovom in šestkrat pritisnite tipko Menu, lučka Grill začne utripati. Taste Pritisnite tipko Start/Stop in segrevanje se začne (začetna temperatura je 240 °C in kuhanjem nastavite čas in temperaturo po želji s pritiskom na tipko Time/temperature. Takoj, ko se postopek zaključi, preide aparat samodejno v način pripravljenosti.

natural_image
Close-up of a mechanical component with two white arrows pointing to specific features, no visible text or symbols.7. Fry (gratiniranje)
- Pritisnite Menu sedemkrat. Lučka Fry začne svetiti. Pritisnite tipko Start/Stop in segrevanje se začne. Vlijte olje v posodo s površino proti prijemanju in vstavite hrano. Začetna temperatura je 200 °C, čas je 25 minut. Med kuhanjem nastavite čas in temperaturo po želji s pritiskom na tipko Time/temperature. Takoj, ko se postopek zaključi, preide aparat samodejno v način pripravljenosti.
8. Steam (kuhanje na pari)
natural_image
Line drawing of a square basket filled with a mesh grid (no text or symbols)Fondue-priprava
Optimalna temperatura za pripravo fondu-a je med 80 do 100 °C, optimalni čas okoli 1 uro.
Vstavite želene sestavine v posodo s površino proti prijemanju, pokrijte in enkrat pritisnite tipko funkcije. Na zaslonu utripa „Slow cook“ in prikazana je začetna temperatura kot tudi čas (100 °C / 6 ur.). Pritisnite enkrat tipko Time/ Temperature in nastavite s tipko +/- čas. Spet pritisnite tipko Time/Temperature in nastavite s tipko +/- temperaturo. Pritisnite tipko Start/Stop za začetek segrevanja. Med kuhanjem nastavite čas in temperaturo po želji s pritiskom na tipko Time/temperature.
ČIŠČENJE IN VZDRŽEVANJE
Nikoli ne potapljajte bazo naprave v vodo ali druge tekočine. Naprave nikoli ne perite v pomivalnem stroju.
natural_image
Line drawing of a bowl with three legs and a side screw, placed on top of a textured basket (no text or symbols)Touche Function (Fonction)
natural_image
Line drawing of a woven basket with handle and side panel (no text or symbols)5. Deep Fry (mode friteuse)
natural_image
Diagram showing two white arrows pointing to a rectangular structure within a grid-like boundary (no text or symbols)6. Grill/Roast (griller/rôtir)
natural_image
Line drawing of a square container filled with a mesh grid (no text or symbols)FR
natural_image
Line drawing of a rectangular basin with four legs and a side plate, no text or symbols present2. Hot pot (stufare)
natural_image
Line drawing of a woven basket with handle and side panel (no text or symbols)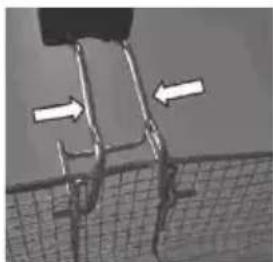
natural_image
Diagram showing two white arrows pointing to a rectangular structure with internal lines, set against a grid background (no text or symbols)natural_image
Line drawing of a square container filled with a grid-patterned lid (no text or symbols)natural_image
Line drawing of a rectangular basin with four vertical supports and a textured base (no text or symbols)natural_image
Line drawing of a woven basket with handle and side panel (no text or symbols)ES
natural_image
Microscopic view of a cracked surface with directional arrows indicating movement (no text or symbols)6. Grill/Roast (grillar)
7. Fry (freir dorando)
natural_image
Line drawing of a square container filled with a mesh grid (no text or symbols)Fondue
natural_image
Line drawing of a bowl with four pins inserted into a basket (no text or symbols)LIETOŠANAS INSTRUKCIJAS
Sildišanas poga
natural_image
Line drawing of a woven basket with handle and side panel (no text or symbols)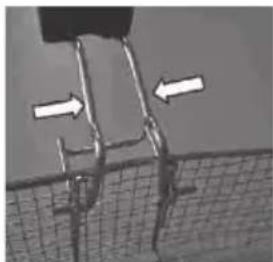
natural_image
Close-up of a mechanical component with two white arrows pointing to features, no visible text or symbolsnatural_image
Line drawing of a square container filled with a mesh grid (no text or symbols)Fondī
natural_image
Line drawing of a rectangular basin with three vertical pins inserted into its side, placed on a textured base (no text or symbols)natural_image
Line drawing of a woven basket with handle and side panel (no text or symbols)6. Grill/Roast (grillimine)
natural_image
Close-up of a cracked concrete structure with two white arrows indicating direction (no text or symbols)natural_image
Line drawing of a square container filled with a mesh grid (no text or symbols)Fondüü
250 69 Kličany, Czech Rep. e-pasts: ECG@kbexpert.cz
ET
K+B Progres, a.s.
U Expertu 91 tel.: +420 272 122 111
250 69 Klíčany, Czech Rep. e-post: ECG@kbexpert.cz

- MH 178 vario
- CZ
- HR/BIH
- Do not immerse in water! – Neponořovat do vody!
- ZAČÍNÁME
- První použití hrnce
- Tlačítko Keep warm
- Fry (zapékání)
- Příprava fondue
- Grill/Roast (grilovanie)
- Fry (zapekanie)
- Steam (varenie v pare)
- Fry (zapiekanie)
- Fry (pirítás)
- DE
- Fondue-Zubereitung
- Read carefully and save for future use!
- GB
- Do not immerse in water!
- LET'S START
- First use of the pot
- WARNING:
- INSTRUCTIONS FOR USE
- Control panel elements
- Start/Stop button
- Time/Temperature button and Increase and Decrease (+ a -) buttons
- Keep warm button
- Function button
- Food preparation
- Slow Cook (slow cooking, default mode for preparing fondue)
- Hot Pot (stewing)
- Stir-fry (frying)
- Boil (boiling)
- Deep Fry (deep fry)
- Grill/Roast (grilling)
- Fry (browning)
- Steam (steam cooking)
- Fondue
- CLEANING AND MAINTENANCE
- Cleaning:
- Maintenance:
- TECHNICAL SPECIFICATIONS
- USE AND DISPOSAL OF WASTE
- DISPOSAL OF PRODUCTS AT THE END OF LIFETIME
- Disposal of electric and electronic equipment (valid in EU member countries and other European countries with an implemented recycling system)
- SIGURNOSNE UPUTE
- Tipka „Keep warm“
- Grill/Roast (grill)
- Fry (prženje)
- Priprema fondija
- ČIŠĆENJE I ODRŽAVANJE
- Prosimo previdno preberite in shranite!
- Grill/Roast (žar)
- Fry (gratiniranje)
- Steam (kuhanje na pari)
- Fondue-priprava
- ČIŠČENJE IN VZDRŽEVANJE
- Touche Function (Fonction)
- Deep Fry (mode friteuse)
- Grill/Roast (griller/rôtir)
- Hot pot (stufare)
- Grill/Roast (grillar)
- Fry (freir dorando)
- LIETOŠANAS INSTRUKCIJAS
- Sildišanas poga
- Fondī
- Grill/Roast (grillimine)
- Fondüü
- ET
Brand : ECG
Model : MH 178 Vario
Category : Multi-cooker