
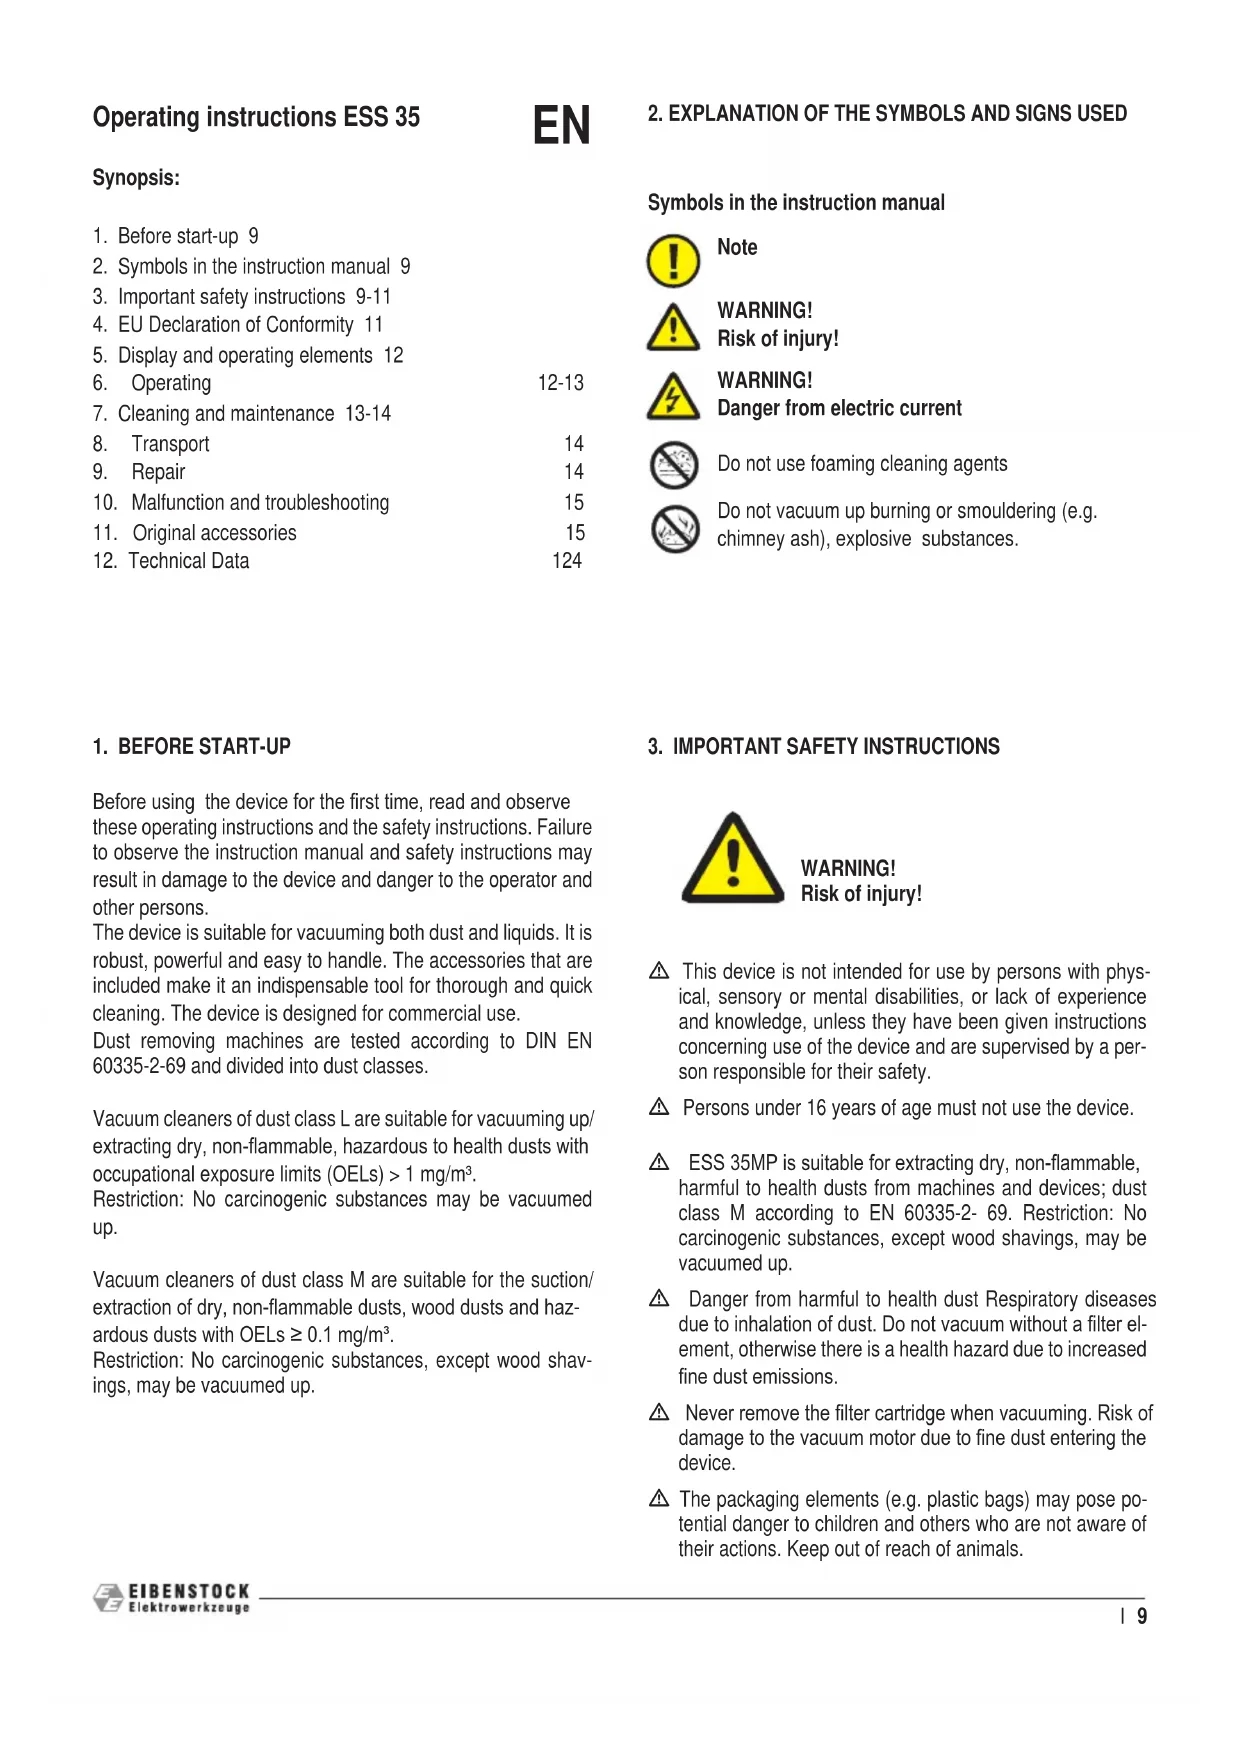
ESS 35MP - Vacuum Cleaner Eibenstock - Free user manual and instructions
Find the device manual for free ESS 35MP Eibenstock in PDF.
| Product Type | Wet and dry vacuum cleaner |
| Brand | Eibenstock |
| Model | ESS 35MP |
| Dust class | M (according to EN 60335-2-69) |
| Tank capacity | 35 L |
| Suction hose diameter | Up to 35 mm (adjustable) |
| Main filtration | HEPA 13 filter cartridge |
| Supply voltage | 220-240 V AC |
| Operating modes | Standard and automatic (with tool socket) |
| Automatic filter cleaning | Cleaning by backwashing every 45 s |
| Automatic water level shutdown | Yes (level sensor with electrodes) |
| Socket for power tool | Yes (automatic activation in Auto mode) |
| Adjustable power | From 50% to 100% |
| Bag type | Non-woven filter bag or disposal bag |
| Commercial use | Yes |
| Permissible ambient temperature | -10°C to +30°C |
Frequently Asked Questions - ESS 35MP Eibenstock
User questions about ESS 35MP Eibenstock
0 question about this device. Answer the ones you know or ask your own.
Ask a new question about this device
Download the instructions for your Vacuum Cleaner in PDF format for free! Find your manual ESS 35MP - Eibenstock and take your electronic device back in hand. On this page are published all the documents necessary for the use of your device. ESS 35MP by Eibenstock.
USER MANUAL ESS 35MP Eibenstock
natural_image
Two black and green industrial vacuum cleaner units with control knobs, displayed side by side (no visible text or symbols on the devices themselves)ESS 35MPESS 35LP
natural_image
Technical line drawing of a mechanical component with numbered parts (no text or symbols)Operating instructions ESS 35
EN
Synopsis:
- Before start-up 9
- Symbols in the instruction manual 9
- Important safety instructions 9-11
- EU Declaration of Conformity 11
- Display and operating elements 12
-
Cleaning and maintenance 13-14
-
Operating 12-13
-
Transport 14
-
Repair 14
-
Malfunction and troubleshooting 15
-
Original accessories 15
-
Technical Data 124
1. BEFORE START-UP
Before using the device for the first time, read and observe these operating instructions and the safety instructions. Failure to observe the instruction manual and safety instructions may result in damage to the device and danger to the operator and other persons.
The device is suitable for vacuuming both dust and liquids. It is robust, powerful and easy to handle. The accessories that are included make it an indispensable tool for thorough and quick cleaning. The device is designed for commercial use.
Dust removing machines are tested according to DIN EN 60335-2-69 and divided into dust classes.
Vacuum cleaners of dust class L are suitable for vacuuming up/extracting dry, non-flammable, hazardous to health dusts with occupational exposure limits (OELs) > 1 mg/m ^3 .
Restriction: No carcinogenic substances may be vacuumed up.
Vacuum cleaners of dust class M are suitable for the suction/extraction of dry, non-flammable dusts, wood dusts and hazardous dusts with OELs ≥ 0.1 mg/m ^3 .
Restriction: No carcinogenic substances, except wood shavings, may be vacuumed up.
2. EXPLANATION OF THE SYMBOLS AND SIGNS USED
Symbols in the instruction manual

Note

WARNING!
Risk of injury!

WARNING!
Danger from electric current

Do not use foaming cleaning agents

Do not vacuum up burning or smouldering (e.g. chimney ash), explosive substances.
3. IMPORTANT SAFETY INSTRUCTIONS

WARNING! Risk of injury!
This device is not intended for use by persons with physical, sensory or mental disabilities, or lack of experience and knowledge, unless they have been given instructions concerning use of the device and are supervised by a person responsible for their safety.
⚠️ Persons under 16 years of age must not use the device.
⚠️ ESS 35MP is suitable for extracting dry, non-flammable, harmful to health dusts from machines and devices; dust class M according to EN 60335-2-69. Restriction: No carcinogenic substances, except wood shavings, may be vacuumed up.
⚠ Danger from harmful to health dust Respiratory diseases due to inhalation of dust. Do not vacuum without a filter element, otherwise there is a health hazard due to increased fine dust emissions.
⚠️ Never remove the filter cartridge when vacuuming. Risk of damage to the vacuum motor due to fine dust entering the device.
The packaging elements (e.g. plastic bags) may pose potential danger to children and others who are not aware of their actions. Keep out of reach of animals.
⚠️ Any use not in accordance with the intended use may constitute a danger and must therefore be avoided.
The device must be mounted correctly before use. Furthermore, check that the filter elements (e.g. filter cartridge, etc.) are correctly mounted and powerful enough.
⚠️ Check that the socket outlet is compliant with the device's plug.
When operating the device, avoid bringing the vacuum opening close to sensitive parts of the body such as eyes, mouth, ears, etc.
This vacuum cleaner is designed for wet and dry cleaning of floor and wall surfaces.
⚠ Explosion and fire hazard! The following substances must not be vacuumed:
- Flammable or explosive solvents
- Substances impregnated with solvent
- Explosive dusts
• Liquids such as petrol, oil, alcohol, thinner
• Substances hotter than 45 °C
The device is not suitable for environments protected against electrostatic discharge.
⚠️ Only use the original accessories supplied with the device.
⚠️ Do not leave the running device unattended.
⚠️ If any liquid or foam leaks out, switch off immediately.
⚠ Do not vacuum up any aggressive liquids, as these could damage the device.
⚠️ Permissible ambient temperature -10 °C to +30 °C
⚠ Maintenance and repairs must always be carried out by qualified personnel; any damaged parts must only be replaced with original spare parts.
⚠️ Any modification of the device is prohibited. The modification may result in fires and injuries, including fatal ones, to the user, in addition to voiding the warranty.
The manufacturer accepts no liability for damage caused to objects or persons as a result of failure to observe these operating instructions or in the event of misuse of the device.


WARNING: This device contains dust that is hazardous to health. Emptying and maintenance, including removal of the dust bag, must only be carried out by competent persons wearing suitable protective equipment. Do not switch on until the complete filter system is installed.
All types of dust up to dust class L can be vacuumed up with this device.


WARNING: This device contains dust that is hazardous to health. Emptying and maintenance, including removal of the dust bag, must only be carried out by competent persons wearing suitable protective equipment. Do not switch on until the complete filter system has been installed and the function of the volume flow control has been checked.
All types of dust up to dust class M can be vacuumed up with this device. The use of a dust collection bag is required by law.
ASSURED VACUUM VOLUME

heatmap
| | max. Ø (mm) | min (m³/h) | |---|---|---| | 1 | 7 | 25 | | 2 | 32 | 158 | | 3 | 35 | 73 | | 4 | 4 | 10 | The color intensity corresponds to the value of the 'min' column in the heatmap. The 'max' column is labeled on the left side.Assignment of the max. vacuum hose diameter to the assured vacuum volume of the warning device (M vacuum cleaners only)

WARNING!
Danger from electric current
⚠️ Never pull or lift the device by the connecting cable.
Do not immerse the device in water or wash it with a jet of water for cleaning.
Before any kind of intervention or when the device is unattended, always disconnect the plug from the socket.
Always check the connection cable for damage such as cracks or signs of ageing. Replace the cable before using it again.
If the connection cable is damaged, it must be replaced by the manufacturer, its technical service or a qualified person so that any danger is prevented.
When using an electrical extension lead, check that they rest on dry surfaces and are protected from splashing water.
Use the socket on the vacuum cleaner only for the purposes specified in the operating instructions. The manufacturer accepts no liability for damage if the device is misused, improper operation or improper repair. Do not use damaged extension leads.
The voltage on the type plate must match the mains voltage.

Do not dispose of electrical devices with household waste.
In accordance with the European Directive 2012/19/EU on Waste Electrical and Electronic devices (WEEE) and its introduction into national law, waste electrical devices must be collected separately and handed over for environmentally friendly disposal.
Old devices contain valuable recyclable materials that should be recycled. Batteries, oil and similar substances must not be released into the environment. Please dispose of old devices with suitable collection systems.
4. EU DECLARATION OF CONFORMITY
EN

EU Declaration of Conformity
Due to its design and construction, the machine mentioned below complies with the relevant, fundamental safety and health requirements of the EU directives.
If the customer makes any changes to the machine, this declaration loses its validity.
Product: Wet and dry vacuum cleaner
Type: ESS 35 LP (09932000) / ESS 35 MP (09931000)
Relevant EU Directives:
2014/30/EU
2011/65/EU (ROHS)
2006/42/EG
Applied harmonised standards:
EN 60335-1:2012
EN 60335-2-69: 2012
EN 62233: 2008
EN 55014-1:2017
EN 55014-2:2015
EN 61000-3-2:2019
EN 61000-3-3:2013
General Manager Head of Engineering
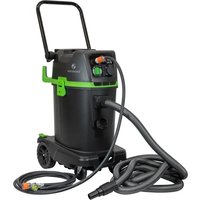
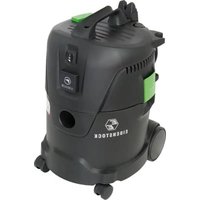
5. DISPLAY AND OPERATING ELEMENTS

6. OPERATION
6.1 Before each start-up
Before each start-up, make sure that the vacuum cleaner, power cord, vacuum hose and accessories are not damaged. It must also be ensured that the filter cartridge is inserted and not damaged.
⚠ Make sure that plugged-in power tools are not switched on. The socket on the vacuum cleaner is live when the mains plug is plugged in, regardless of the switch position.
6.2 Adjusting the hose diameter (M vacuum cleaner only)
To ensure that the warning device (3) functions as prescribed, the hose diameter used must always be set on the rotary switch (1).
6.3 Permanent filter cleaning
The vacuum cleaner is equipped with electromagnetic valves that clean the filter cartridge by air back flushing. Each cleaning cycle cleans the two chambers of the filter cartridge 2 times each. Cleaning takes place automatically every 45 seconds after the last cleaning cycle.
If continuous cleaning is not necessary due to a low level of dust, you can switch it off by deactivating the cleaning function (2).
- Hose diameter selector switch (M vacuum cleaner only)
- Cleaning function On / Off (incl.) Control light
- Warning light and horn air velocity <20m/s (M vacuum cleaner only)
- Device OFF
- Standard mode
- Automatic mode with tool connected
- Power socket

natural_image
Technical line drawing of a mechanical component with numbered parts (no text or symbols)Cleaning is active when the indicator light (2) on the control panel lights up.
When working overhead with for example long-neck grinders, make sure that the vacuuming is briefly reduced by the vacuum cleaner during the cleaning interval. This can cause the tool to fall off the ceiling. Cleaning can be switched off for small amounts of dust.
6.4 Insert fleece filter bag
- Unlock the locking tabs and remove the motor head
- Attach the fleece filter bag.
- Put on the motor head and lock it with the locking tabs.
6.5 Insert disposal bag
- Unlock the locking tabs and remove the motor head
- Attach the disposal bag and put it over the edge of the container. Note that the holes provided above the flange must be placed over the electrodes of the water cut-off.
- Spread the disposal bag against the inside of the container in order to lose as little volume as possible.
- Put on the motor head and lock it with the locking tabs.
6.6 Switching on the vacuum cleaner
The device allows 2 operating modes.
- Standard mode (5): Vacuum cleaner switches on immediately
- Automatic mode (6): The vacuum cleaner is in standby mode for power tools and only switches on when a power tool plugged into the socket (7) is switched on and switches off again 5 seconds after the power tool is switched off.
The power of the vacuum cleaner can be adjusted continuously from 100% to 50% in both operating modes.
Plug in the mains plug of the device. Set the rotary switch of the device to one of the two operating modes.
6.7 Dry vacuuming
See Fig. 3-11.
Before vacuuming, make sure that the filter cartridge, the vacuum cleaner and the vacuum cleaner accessories used are dry to prevent dust from sticking and becoming encrusted.
For dry vacuuming it is recommended to use a fleece filter bag Item no.: 35362000 or a disposal bag Item no. 35364000.
Use filter bag and disposal bag only in conjunction with filter cartridge Item no.: 35361000.
With ESS 35MP, all types of dust up to dust class M can be vacuumed up with this device. The use of a dust collection bag is required by law when class M dust is vacuumed up.
6.8 Wet vacuuming
⚠️ If foam or liquid escapes, switch off the vacuum cleaner immediately.
See Fig. 12-19
⚠️ Before vacuuming, make sure that the electrodes of the water level sensor (Fig. 39) are clean and that contact is made with the pick-up contacts in the motor head.
The filter cartridge is suitable for wet vacuuming. and must remain installed to protect the motor from coarse particles. The built-in sensor automatically switches off the motor when the container is full.
When vacuuming mainly water, it is recommended to deactivate the cleaning function (2) of the vacuum cleaner.
With any non-conductive liquids (for example drilling emulsion), the device is not switched off when the container is full. The fill level must be checked in good time and the container emptied accordingly.
After wet vacuuming, clean the main filter element with the filter cleaning device and empty the container (Fig. 19), clean with a damp cloth and dry. Remove the motor head with filter cartridge from the container to dry, also dry the suction accessories.
6.9 Working with power tools
Fig. 7, 40
⚠ Make sure that plugged-in power tools are not switched on. The socket on the vacuum cleaner is live when the mains plug is plugged in, regardless of the switch position.
- Remove the elbow from the vacuum hose
- Remove the locking sleeve from the manifold
- Push the tool adapter onto the hose socket
- Put the locking sleeve over the tool adapter and lock it.
- Insert the tool adapter into the opening provided on the power tool.
- Plug the power tool into the socket (7) of the vacuum cleaner.
- Set the control switch on the vacuum cleaner to automatic mode (6).
The vacuum cleaner is now in standby mode and only switches on when a power tool plugged into the socket (7) is switched on and switches off again 5 seconds after it has been switched off.
6.10 Switching off the vacuum cleaner
Set the rotary switch to the "OFF" position (5). The vacuum cleaner is now switched off. After switching off, pull out the mains plug and wind up the connecting cable from the vacuum cleaner.
The connecting cable can be wound over the push bar or the hose hook, for example.
Fix the vacuum pipe to the rear wall of the container by inserting it into the accessory depot.
6.11 After operation
Empty the container and clean the inside and outside of the vacuum cleaner by vacuuming and wiping with a damp cloth.
7. CLEANING AND MAINTENANCE
Make sure that the vacuum cleaner is always switched off and disconnected from the mains for care and maintenance. Acid, acetone, solvents and care products containing silicone can damage suction parts.
For user maintenance, the vacuum cleaner must be disassembled, cleaned and serviced. As far as is practicable without causing danger to maintenance personnel and other persons.
Appropriate precautions include decontamination before disassembly, provision for local filtered forced ventilation where the vacuum cleaner is being dismantled, cleaning of the service area and appropriate personal protective equipment.
At least once a year, the manufacturer or an instructed person must carry out a dust inspection, e.g. for damage to the filter, leak tightness of the vacuum cleaner and that the control device is working.
Precautions to be taken with class M vacuum cleaners
The exterior of the vacuum cleaner should be cleaned by dusting and wiped clean or treated with sealant before being removed from the danger area. All vacuum cleaner parts must be considered contaminated when removed from the contaminated area and appropriate precautions must be taken to avoid dust dispersal.
When carrying out maintenance or repair work, any contam-
inated items that cannot be satisfactorily cleaned must be disposed of. Such items must be disposed of in impermeable bags in accordance with the applicable regulations for the disposal of such waste.
7.1 Changing fleece filter bag
See Fig. 4 - 6
- Close the vacuum connection with a sealing plug
- Unlock the locking tabs and remove the motor head.
- Remove the fleece filter bag from the flange and close it tightly with the cap.
- Dispose of used fleece filter bags in accordance with legal requirements.
- Put on the new fleece filter bag and snap in the seal.
- Put on the motor head and lock it with the locking tabs.
7.2 Changing disposal bag
See Fig. 8-11, 4-5
- Close the vacuum connection with a sealing plug
- Switch the vacuum cleaner on again and wait for the cleaning cycle to clean the residual dust from the filter cartridge. Then unplug the vacuum cleaner. To ensure that the dust settles in the container, wait approx. 30 seconds.
- Remove the disposal bag from the flange and close it tightly with the cap
- Carefully close the disposal bag tightly with the enclosed cable tie.
- Dispose of used disposal bag in accordance with legal requirements.
- Put on a new disposal bag and put it over the edge of the container. Note that the holes provided above the flange must be placed over the electrodes of the water cut-off.
- Put on the motor head and lock it with the locking tabs
7.3 Cleaning the electrodes
See Fig. 39
Clean the electrodes with a brush or cloth
7.4 Cleaning the cooling air filter
See Fig. 38
To ensure that the motor is cooled sufficiently, make sure that the cooling air filter is clean. Otherwise, overheating and subsequent thermal protection shutdown may occur.
Vacuum the cooling air filter with a vacuum cleaner.
7.5 Changing filter cartridge
See Fig. 29-35
The tool for changing the filter is attached to the rear of the chassis.
-
Loosen the 6 screws on the underside of the motor head along the fastening ring. (Do not unscrew completely)
-
Loosen the fastening ring by turning it and remove it.
- Remove the filter cartridge and immediately seal it in a dust-tight plastic bag and dispose of it as intended.
- New filter cartridge Item no.: Insert 35361000.
- Attach the fastening ring and lock it by turning.
- Tighten all 6 screws.
7.6 Cleaning the exhaust air filter
See Fig. 36-37
- Remove the filter cassette on the back of the motor head and take out the exhaust air filters.
- Clean (vacuum, wash out) or change the exhaust air filter.
- Insert new or cleaned exhaust air filters and reinsert the filter cassette into the motor head.
7.7 Cleaning filter cartridge
- Remove the vacuum hose.
- Close the vacuum connection with a sealing plug.
- Switch on the vacuum cleaner and wait for the cleaning cycle to clean the residual dust from the filter cartridge.
If the filter is still not clean, switch the vacuum cleaner on again and wait for another cleaning cycle.
8. TRANSPORT
Remove the vacuum hose and close the vacuum socket with the cap.
Stow the accessories in the accessory storage provided at the back of the vacuum cleaner. Wrap the vacuum hose around the vacuum cleaner using the hose hooks. Pin the hose ends together to prevent dirt particles from escaping.
Wind the cable from the vacuum cleaner and place it around the push bar or the hose hook.
When transporting in vehicles, ensure that the vacuum cleaner is secured against slipping and tipping in accordance with the applicable directives.
9. REPAIR
⚠️ Vacuum cleaners that have not been repaired properly pose a danger to the user!
Repairs may only be carried out by qualified personnel, e.g. customer service. Only use original spare parts.
10. MALFUNCTION AND TROUBLESHOOTING
Make sure that the vacuum cleaner is always switched off and disconnected from the mains for repair.
Malfunctions are not always due to defects in the vacuum cleaner.
| Malfunction Cause Remedial action | ||
| Decrease in vacuuming power Filter cartridge dirtyFilter bag full ChangeContainer full EmptyNozzle, pipes or hose clogged CleanContainer nozzle / filter bag flange clogged Clean | Close the vacuum connection with the sealing plug and switch on the vacuum cleaner again and wait for the cleaning cycle to clean the filter cartridge. | |
| Vacuum cleaner does not start | Mains plug not plugged in Plug in the mains plugNo mains power Check fuseConnection cable defective RenewWater sensor switched off Empty container and clean electrodesVacuum cleaner switched to "Auto" see "5. Switching on the vacuum cleaner" | |
| Vacuum cleaner does not start when the tool is switched on in "Auto" mode | Power tool not plugged into socket on vacuum cleanerTool does not reach the minimum power of 20 W to be recognised by the vacuum cleaner. | Insert the mains plug into the socket on the vacuum cleanerUse the vacuum cleaner in continuous operation |
| Disposal bag is vacuumed onto the filter cartridge | Disposal bag is not inserted and fitted correctly. | Place the disposal bag completely over the edge of the container and press the flange completely over the receptacle and put the holes provided over the electrodes of the water shut-off. |
| Dust class M vacuum cleaner: with filter bag inserted, dust in the containerDust class M vacuum cleaner:Warning device constantly active. | Filter bag not fitted correctly. Press the filter bag completely over the filter bag flangeFilter cartridge cloggedvacuum hose blocked Remove vacuumed material from hoseContainer full Empty containerWrong hose diameter selected | Close the vacuum connection with the sealing plug and switch on the vacuum cleaner again and wait for the cleaning cycle to clean the filter cartridge. |
| Set the correct hose diameter. |
11. ORIGINAL ACCESSORIES
| Article designation | Special features | Item no. |
| Filter cartridge | HEPA 13 | 35361000 |
| Fleece filter bags (packing unit = 5 pcs.) | 35362000 | |
| Disposal bag (packing unit = 5 pcs.) | 35364000 |
natural_image
Technical line drawing of a mechanical component with numbered parts (no text or symbols)natural_image
Technical line drawing of a mechanical component with numbered parts (no text or symbols)General Manager Head of Engineering
natural_image
Technical diagram of a mechanical device with labeled components (no readable text or symbols)natural_image
Technical diagram of a mechanical component with numbered parts (7 and 8), no readable text or symbols present.WAARSCHUWING! Letselgevaar!
General Manager Head of Engineering
5. WEERGAVE- EN BEDIENINGSELEMENTEN

6. BEDIENING
natural_image
Technical line drawing of a mechanical component with numbered parts (no text or symbols)natural_image
Technical line drawing of a mechanical component with numbered parts (no text or symbols)General Manager Head of Engineering
5. ANVISNINGS- OG BETJENINGSELEMENTER

6. BETJENING
natural_image
Technical line drawing of a mechanical component with numbered parts (no text or symbols)natural_image
Technical line drawing of a mechanical component with numbered parts (no text or symbols)ZAJIŠTĚNÉ SACÍ OBJEMY

heatmap
| | max. Ø (mm) | min (m³/h) | |---|---|---| | 1 | 7 | 25 | | 2 | 32 | 158 | | 3 | 35 | 73 | | 4 | 4 | 10 | The color intensity corresponds to the value of the 'min' column in the heatmap. The 'max' column is labeled on the left side.natural_image
Technical line drawing of a mechanical component with numbered parts (no text or symbols)natural_image
Diagram of a vehicle air vent with labeled components (no text or symbols beyond numbers)General Manager Head of Engineering
5. INDIKAČNÉ A OVLÁDACIE PRVKY

6. OBSLUHA
natural_image
Technical line drawing of a mechanical component with numbered parts (no text or symbols)natural_image
Technical line drawing of a mechanical component with numbered parts (no text or symbols)General Manager Head of Engineering
5. ELEMENTE DE AFIŞARE ŞI DE COMANDĂ

6. OPERAREA
natural_image
Technical line drawing of a mechanical component with numbered parts (no text or symbols)natural_image
Technical diagram of a mechanical component with numbered parts (7 and 6), no readable text or symbols beyond basic labelsnatural_image
Simple line drawing of an open box with a curved arrow pointing to it (no text or symbols)ESS 35MP ESS 35LP

natural_image
Line drawing of a portable industrial vacuum cleaner with wheels and control panel (no text or symbols)
natural_image
Line drawing of a mobile industrial robotic device with wheels and control panel (no text or symbols)ESS 35MP / LP

natural_image
Collection of cleaning and cleaning tools including a brush, hose, cap, and camera (no text or labels visible)
ESS 35MP additional


natural_image
Diagram of a vacuum cleaner with attached cable and handle, showing internal components (no text or symbols)
natural_image
Line drawing of a hand operating a kitchen blender with a black arrow pointing to the handle (no text or symbols present)TROCKENSAUGEN / DRY-CLEANING

natural_image
Technical line drawing of a mechanical device with a hand operating the central component (no text or symbols visible)
natural_image
Diagram of a kitchen appliance with arrows indicating process flow, showing internal components and movement (no text or symbols)
natural_image
Technical line drawing of a cleaning brush tool on a grid background (no text or symbols)
natural_image
Technical line drawing of a mechanical device with arrows indicating motion or assembly (no text or symbols)

natural_image
Silhouette of a person pushing a cart with a long pole, no text or symbols present

7

natural_image
Illustration of a hand connecting a component to a cable with a plug, showing wiring connections (no text or symbols)100%

50%

max. 2200 W*


natural_image
Technical line drawing of a kitchen appliance with a directional arrow indicating rotation (no text or symbols)9

natural_image
Technical line drawing of a mechanical device with no visible text or symbols
natural_image
Diagram of a container with arrows indicating flow or movement, no text or symbols present10

natural_image
Technical line drawing of a mechanical device with internal components and directional arrows indicating motion (no text or symbols)11

natural_image
Simple line drawing of a binocular device and a trash bin with a handle, no text or symbols present.NASS-SAUGEN / WET-CLEANING


natural_image
Technical line drawing of a kitchen appliance with downward force arrows indicating internal components (no text or symbols)


natural_image
Technical line drawing of a mechanical device with internal components (no text or symbols)
natural_image
Silhouette of a person pushing a cart with a long pole (no text or symbols)


natural_image
Line drawing of a kitchen appliance with a directional arrow indicating rotation (no text or symbols)
natural_image
Technical line drawing of a mechanical device with no visible text or symbols

Transport
20

natural_image
Technical line drawing of a robotic vehicle with wheels and control panel (no text or symbols)22

natural_image
Line drawing of a mobile industrial machine with hoses and wheels (no text or symbols)21

natural_image
Technical line drawing of a robotic device with a curved arrow indicating rotation or motion (no text or symbols present)23

natural_image
Line drawing of a portable industrial machine with hoses and wheels (no text or symbols)natural_image
Diagram of a car interior showing a hand adjusting a seatbelt, with no visible text or symbols
natural_image
Technical line drawing of a robotic device with visible components and housing (no text or symbols)

Montage Filterpatrone
Mounting filter cartridge


natural_image
Technical line drawing of a mechanical device with internal components and mounting base (no text or symbols)


natural_image
Technical line drawing of a mechanical component with circular features and mounting holes (no text or symbols)

natural_image
Diagram of a kitchen appliance with a downward arrow indicating a process or operation, showing internal components and directional arrows (no text or symbols)Reinigung Abluftfilter
Cleaning exhaust air filter

natural_image
Technical line drawing of a mechanical device with labeled part 36, showing internal components and a close-up view of the next component (no text or symbols present)
Reinigung Kühlluftfilter
Cleaning the cooling air filter

natural_image
Technical line drawing of a mechanical device with hoses and control panel (no text or symbols)Reinigung Wasserstandssensoren
Cleaning water level sensors

Die Wasserstandselektroden regelmäßig reinigen. Clean the water level sensors regularly.
40
Werkzeugadapter Montage
Tool adapter assembly


natural_image
Technical line drawing of a mechanical component with no visible text or symbols
⑧

natural_image
Technical line drawing of a mechanical component with rotational arrows indicating motion (no text or symbols)
natural_image
Diagram showing a pipe being inserted into a vise with a downward arrow indicating compression or disassembly (no text or symbols present)

| ESS 35MP ESS 35LP | ||
 | 220V-240V/50-60Hz | 220V-240V/50-60Hz |
 | 1200 W 1200 W | |
 | LpA=75 dB(A)^1 | LpA=75 dB(A)^1 |
 | 230 hPa / mbar ^2 250 hPa / mbar ^3 | 230 hPa / mbar ^2 250 hPa / mbar ^3 |
 | 37 l/s ^2 74 l/s ^3 | 37 l/s ^2 74 l/s ^3 |
 | 10 m 10 m | |
 | 35 Liter 35 Liter | |
 | 20 Liter 20 Liter | |
 | 16 kg ^4 | 16 kg ^4 |
 | 540 x 390 mmx 635 mm | 540 x 390 mmx 635 mm |
^1 LpA=2 dB, KWA=89 dB(A), KpA=2 dB
^2 (max) bei Saugschlauchdurchmesser 38 mm und Länge 2,5 m /
(max) with suction hose diameter 38 mm and length 2.5 m
^3 am Gebläsemotor / on the fan motor
^4 Sauger incl. Versorgungskabel / Suction cup incl. supply cable
Changes in the course of technical improvements are reserved

- Operating instructions ESS 35
- EN
- Synopsis:
- BEFORE START-UP
- EXPLANATION OF THE SYMBOLS AND SIGNS USED
- Symbols in the instruction manual
- IMPORTANT SAFETY INSTRUCTIONS
- ASSURED VACUUM VOLUME
- WARNING!
- Danger from electric current
- EU DECLARATION OF CONFORMITY
- EU Declaration of Conformity
- DISPLAY AND OPERATING ELEMENTS
- OPERATION
- Before each start-up
- Adjusting the hose diameter (M vacuum cleaner only)
- Permanent filter cleaning
- Insert fleece filter bag
- Insert disposal bag
- Switching on the vacuum cleaner
- Dry vacuuming
- Wet vacuuming
- Working with power tools
- Switching off the vacuum cleaner
- After operation
- CLEANING AND MAINTENANCE
- Precautions to be taken with class M vacuum cleaners
- Changing fleece filter bag
- Changing disposal bag
- Cleaning the electrodes
- Cleaning the cooling air filter
- Changing filter cartridge
- Cleaning the exhaust air filter
- Cleaning filter cartridge
- TRANSPORT
- REPAIR
- MALFUNCTION AND TROUBLESHOOTING
- ORIGINAL ACCESSORIES
- WEERGAVE- EN BEDIENINGSELEMENTEN
- BEDIENING
- ANVISNINGS- OG BETJENINGSELEMENTER
- BETJENING
- ZAJIŠTĚNÉ SACÍ OBJEMY
- INDIKAČNÉ A OVLÁDACIE PRVKY
- OBSLUHA
- ELEMENTE DE AFIŞARE ŞI DE COMANDĂ
- OPERAREA
- NASS-SAUGEN / WET-CLEANING
- Transport
Brand : Eibenstock
Model : ESS 35MP
Category : Vacuum Cleaner