Media Talent - Digital photo frame INTENSO - Free user manual and instructions
Find the device manual for free Media Talent INTENSO in PDF.
User questions about Media Talent INTENSO
0 question about this device. Answer the ones you know or ask your own.
Ask a new question about this device
Download the instructions for your Digital photo frame in PDF format for free! Find your manual Media Talent - INTENSO and take your electronic device back in hand. On this page are published all the documents necessary for the use of your device. Media Talent by INTENSO.
USER MANUAL Media Talent INTENSO
Intenso 6“ MEDIATALENT
- Secure Digital Card (SD™)
- Secure Digital High Capacity (SDHC™)
Multimedia Card (MMC™)
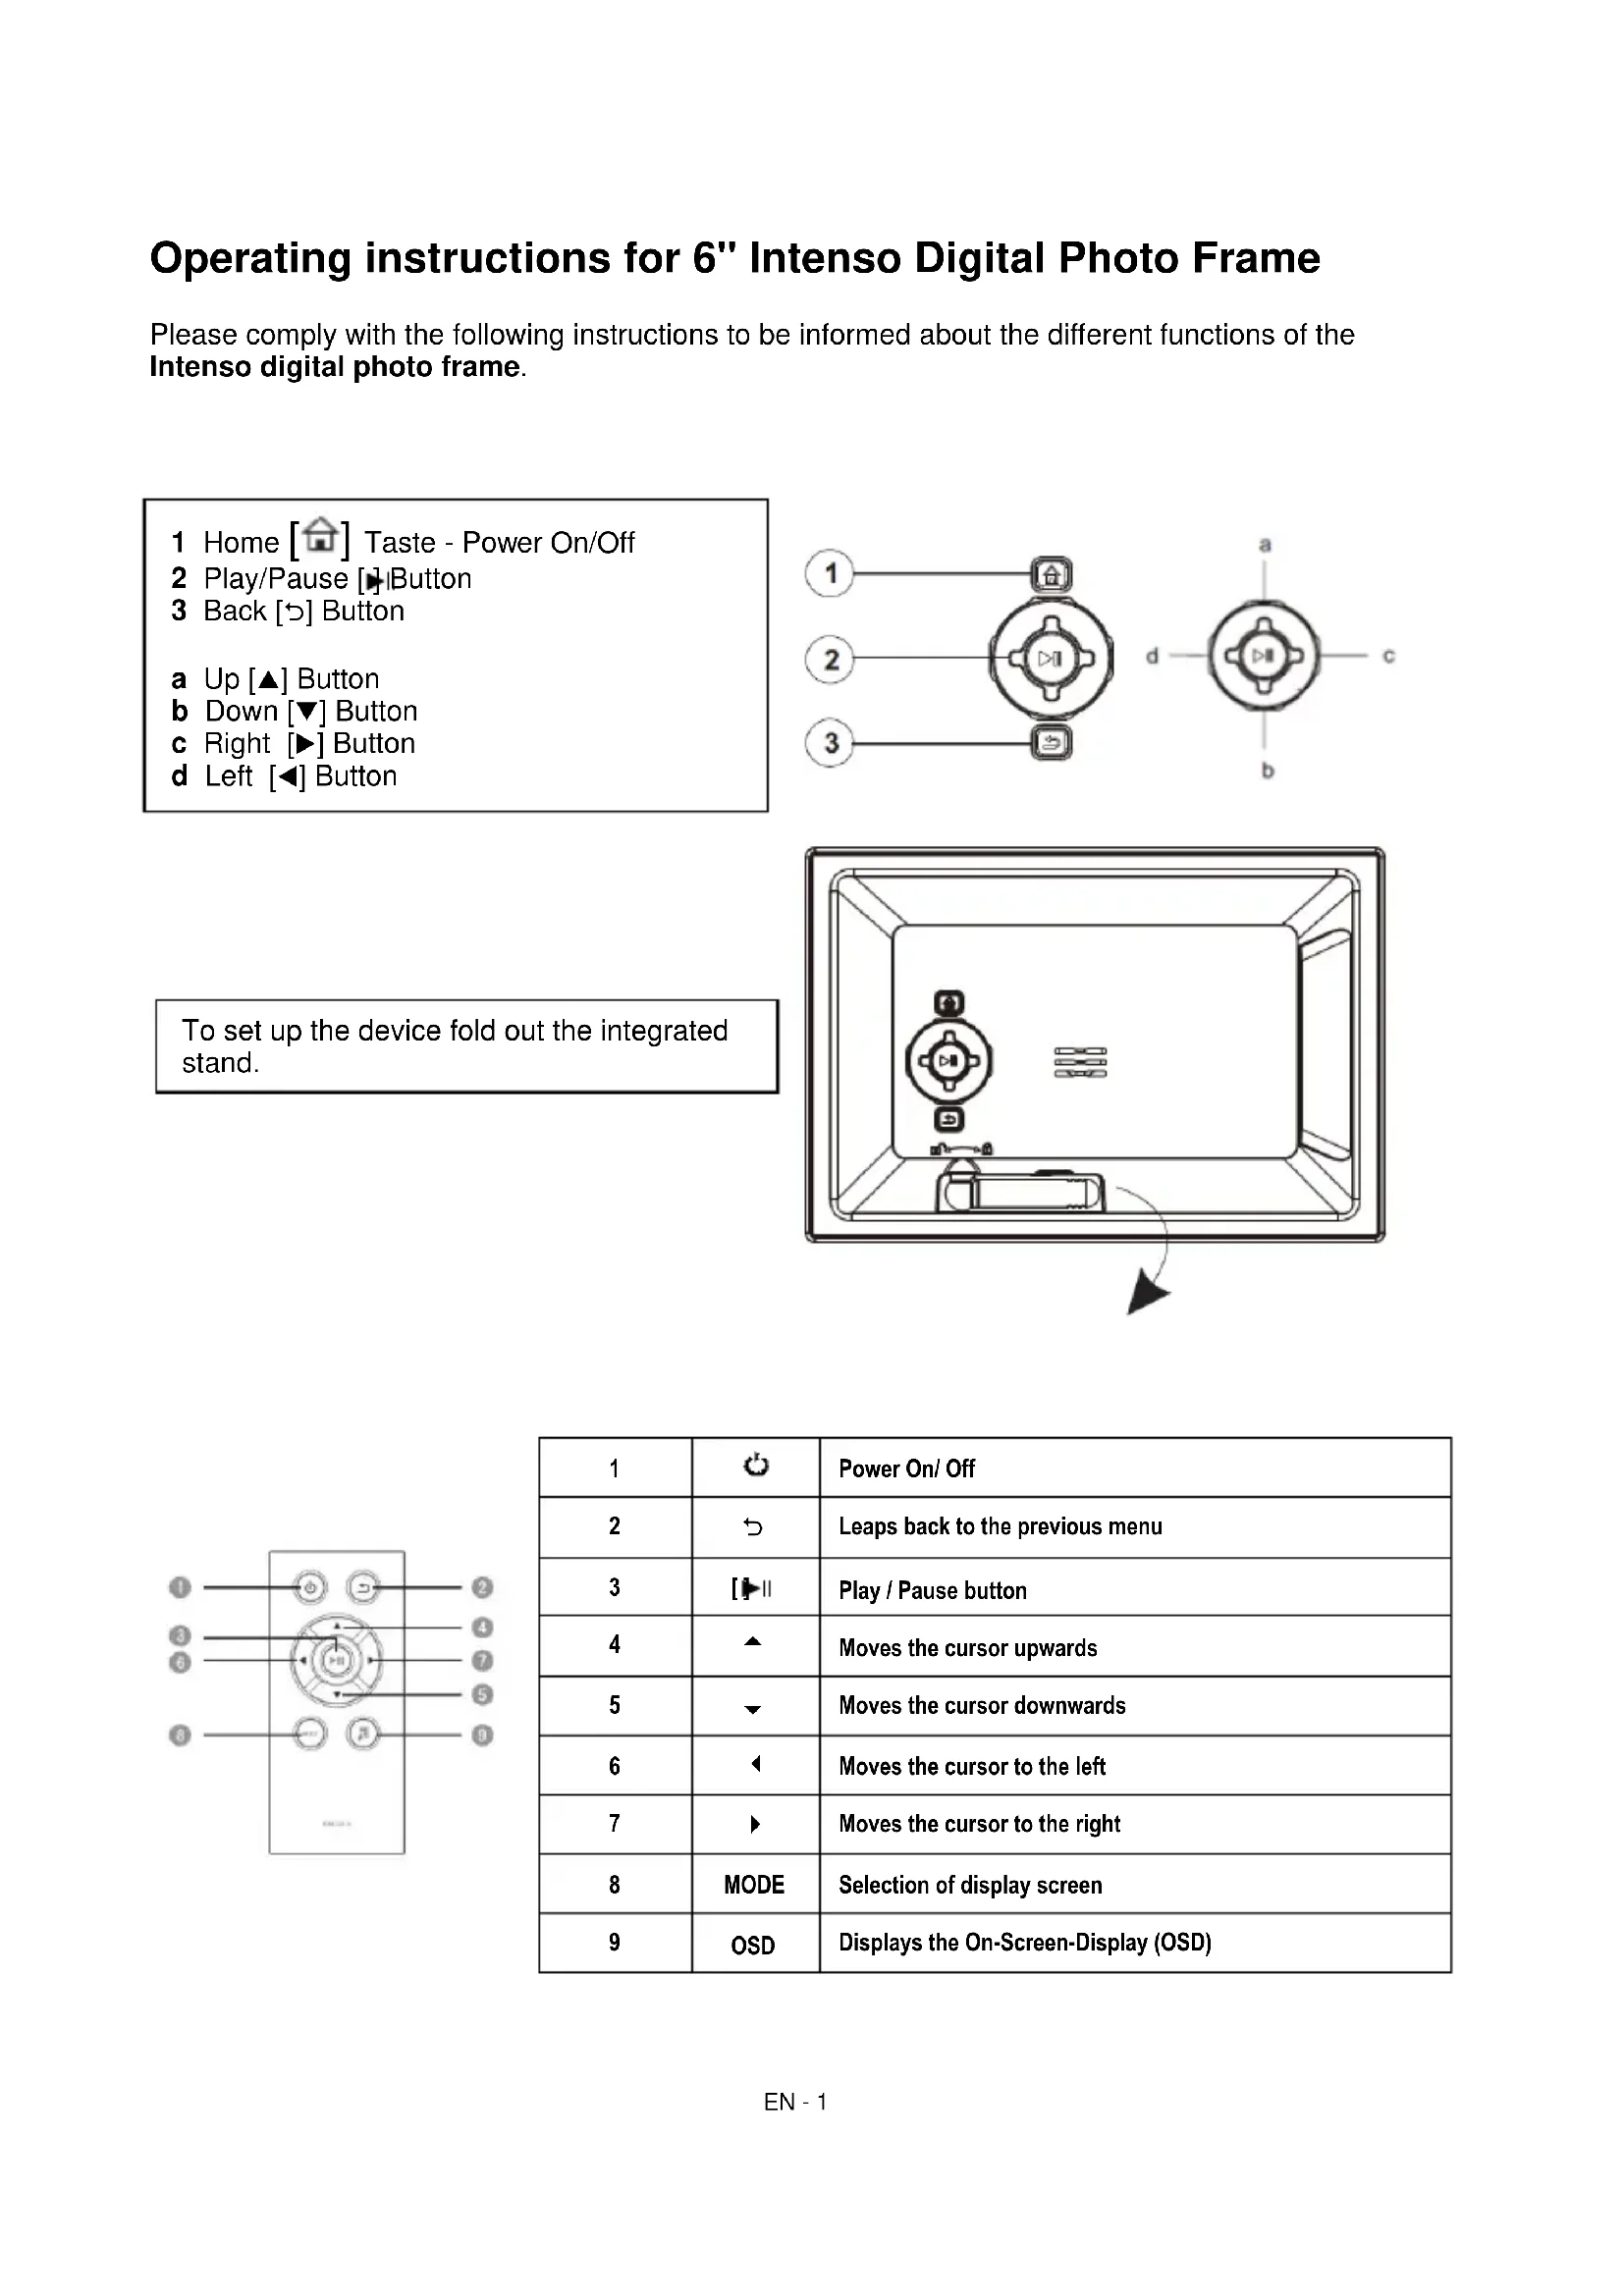
Operating instructions for 6" Intenso Digital Photo Frame
Please comply with the following instructions to be informed about the different functions of the Intenso digital photo frame.
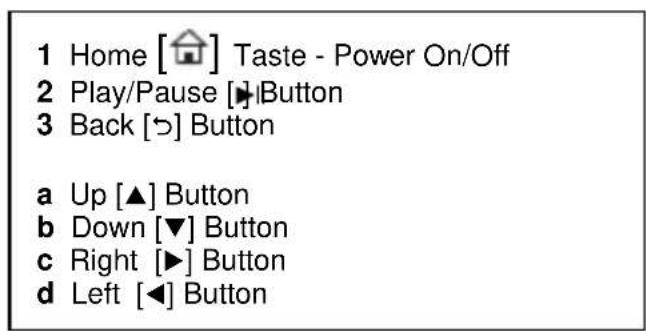
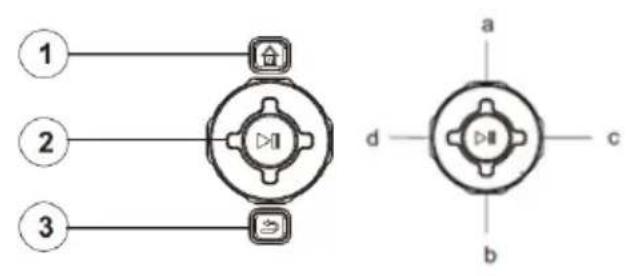
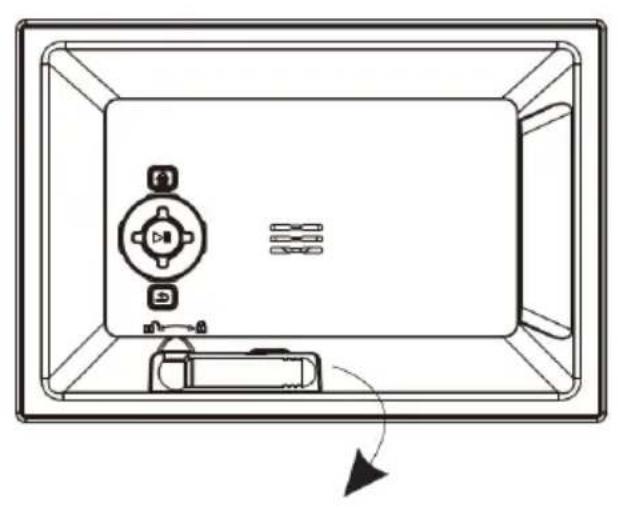
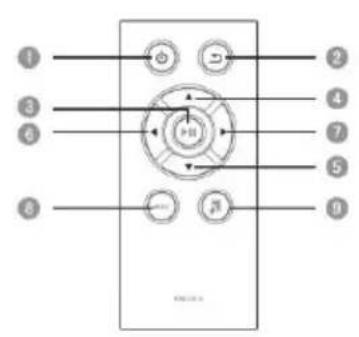
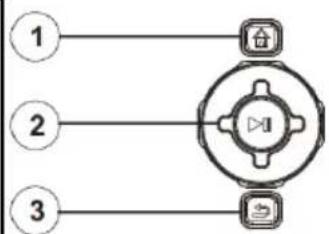
| 1 | ○ | Power On/ Off |
| 2 | ← | Leaps back to the previous menu |
| 3 | [►] | Play / Pause button |
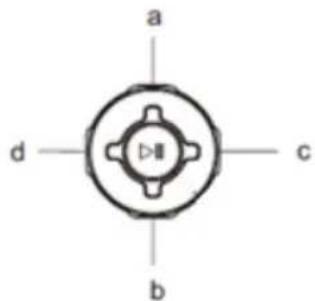
| 4 | ▲ | Moves the cursor upwards |
| 5 | ▼ | Moves the cursor downwards |
| 6 | ← | Moves the cursor to the left |
| 7 | ▶ | Moves the cursor to the right |
| 8 | MODE | Selection of display screen |
| 9 | OSD | Displays the On-Screen-Display (OSD) |
1) Connect and switch on the digital photo frame
Connect the Power Adapter supplied with the frame (DCIN). Plug the other end of the Adapter into the Socket. The photo frame will now start automatically. Hold down the Power button briefly to turn it off or on again.
Please note:
The plug must be placed next to the device so to be easily accessible.
Do not open the box of the line adapter. If the box is open, there is danger of life caused by electric shock. The product does not contain parts to be maintained.
Actuate the line adapter only with earthed plugs of AC 100-240V\~, 50 / 60Hz . If you are not sure about the provision of electricity at the installation point, ask your energy provider.
Use the included line adapter and line connection cable only.
To interrupt the power supply of your equipment, unplug the adapter. While you are unplugging it, always hold the adapter. Do never pull the cable.
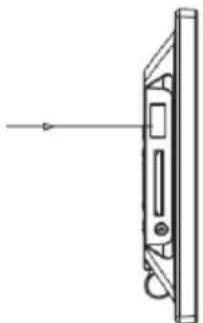
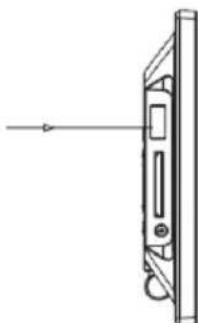
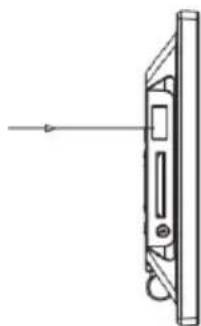
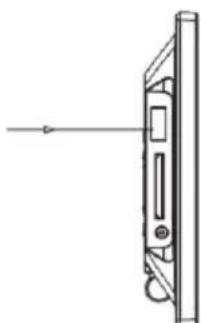
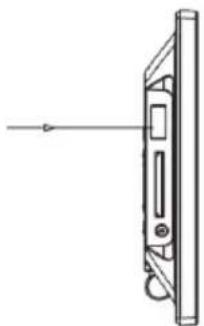
2) Insert memory cards | connect USB data carriers
Insert the Memory Card with the Logo towards the Display into the card reader slot.
Please note: Never insert cards by use of force!
The following memory card formats can be used with your digital photo frame:
- Secure Digital Card (SD™)
- Secure Digital High Capacity (SDHC™)
Multimedia Card (MMC™)
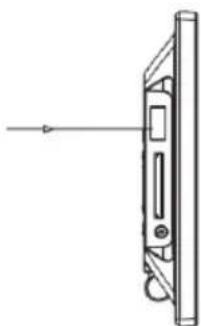
USB data carriers can only be plugged into the USB slot in one direction.
Please note: Never insert USB data carriers by use of force!
Note: The digital photo frame is exclusively designed for the use with compatible memory cards and 2.0 data media (100 mA).
3) General operation
a) Main menu
When you turn on the digital picture frame, it will automatically begin to display a slide show. If you have a storage medium with own photos inserted, those will be shown. Alternatively, the device will show the 4 preinstalled photos.
Press the Home [ ] button to open the main menu.
In the main menu, you can choose different functions of the Digital Picture Frame and of the Setup menu. Press the , button to select a menu option. By pressing the , buttons you can navigate through the respective submenus. Confirm your selection by pressing the Play/Pause [ ] button.
b) Viewing photos
From the main menu navigate to the photo function and confirm your selection by pressing the Play/Pause [▶] button. Now the connected storage mediums are shown. Depending on which medium is connected, you can choose between a memory card and an USB flash drive.
Confirm your selection by pressing the Play/Pause [▶] button. The image preview menu will now open and display all supported images saved on the storage medium. Navigate to a photo and confirm your selection by pressing the Play/Pause [▶] button to start the slide show from this position on.
If a slide show from the selected storage medium was already started, the digital photo frame will continue it automatically. The display of the image preview menu must be done manually.
Thereto, press the Return [ ] button to quit the slide show and to open the preview menu.
Options during slide show:
- By pressing the arrow buttons to the left or to the right you can skip a photo forward or backwards.
- By pressing the Play/Pause [▶] button you stop the slide show. By pressing it again the slide show continues.
- Press the key Play/Pause [▶] to open the OSD menu. Here you can select the Image mode, switch on and off the background music (if the supported audio files are available on the storage medium), zoom or rotate the photo, set up the level of luminosity, select the transition effects, set up the visualisation time of an image, scale the visualisation of the image, set up the random reproduction or the reproduction according to the memorised sequence and select the file reproduction range.
c) Hour and calendar
In the calendar mode according to the set style you can see an analogic clock, a digital clock or an analogic and/or digital clock with calendar sheet. By pressing the keys , you can pass from one indicated month to another in the calendar overview.
Press the key Play/Pause [▶] to open the OSD menu. Here you can set up the date, the clock mode and the visualisation style of the clock.
d) Playing MP3 files
Navigate the main menu to get to the music function. The storage media are displayed online.
Depending on the storage medium connected, you may select between SD/MMC and USB.
Confirm your selection with the Play/Pause [按钮.
Now all the folders with supported MP3 files are displayed. Select the folder you want to enter the preview menu music. Now browse to an MP3 file and confirm your selection by pressing the Play/Pause [reg] play the selected MP3 file.
Functions while playing song:
Pressing and holding the Play/Pause button accesses the menu options. You can perform a variety of settings:
- File: select the musical copy list
- Setting the play mode
- Track forward / back
-Play/Pause - Proceed forward / backward
e) Playing video files
Navigate the main menu to get to the video function. The storage media are displayed online.
Depending on the storage medium connected, you may select between SD / MMC and USB.
Confirm your selection with the Play/Pause button [▶].
Now all available folders are displayed. Select the desired folder to access the video preview.
Now browse to a video file and confirm your selection by pressing the Play/Pause [▶] button to start the selected video files.
Functions while playing a video:
Pressing and holding the Play/Pause button accesses the menu options. You can perform a variety of settings:
- Video up / down
-Play/Pause - Proceed forward / backward
- Go to: go to a specific point of the video
- Setting the repeat mode
- Setting the display format
- Set the light level of the display
f) Changing the settings
In the main menu, select the Setup function. Navigate with the , to the desired menu item. There are Common, ECO, Time and Multimedia. Confirm your selection with the Play/Pause button to set your individual unit.
| Settings | Description | ||
| General Setup | Language | Select the desired language. | |
| Product Information | Displays the current firmware version. | ||
| Firmware Update | Should a firmware update be available at www.intenso.de the update can be installed through here. | ||
| Factory Settings | Reset the device to the factory settings. | ||
| Auto Run | Pick the mode your photo frame will begin on after turning on. (Photo, Calendar, Last used function). | ||
| ECO | Brightness | Adjust the brightness of the TFT Display. | |
| Turn Off | Set the amount of time of inactivity which will turn off the photo frame. | ||
| Video (Multimedia) | Repeat mode | Play all | All the supported video are played 1x. |
| Repeat all | All the supported videos are repeated as an infinite sequence. | ||
| Repeat the actual | The current selected video is repeated in an infinite sequence. | ||
| No repeat | The current selected video is played 1x. | ||
| Scalar | Setting the display format for the video mode (cinema, or the original full image). | ||
| Photo (Multimedia) | Photo Mode | Selection of the different visualisation modes for the photo visualisation. You can choose the following: simple photo visualisation, photo visualisation with shown clock, photo visualisation with shown calendar sheet and pin board with 4 photos shown at the same time. | |
| File | Selection of list for the photo reproduction. | ||
| Background music | Turning the background music on or off (if music files are available incurred in storage media). | ||
| Diashow | Setting up of the passage effect. | ||
| Display duration | Setting the display duration of each image during the slide show. | ||
| Scalar | Setting the display format for the photo mode. | ||
| A sequence of reproduction | Selecting between the normal and random sequence. | ||
| Music (Multimedia) | File | Selection list to the music. | |
| A sequence of reproduction | Selecting between the normal and random sequence. | ||
| Repeat mode | Play all the titles once | All supported titles are played 1x. | |
| Repeat all titles | All titles are played in and endless sequence. | ||
| Repeat the current | The currently selected title is reproduced in infinite sequence. | ||
| Repeat once | The currently selected title is played 1x. | ||
| Time | Date | Set the current date. | |
| Time Format | Set the time format: 12 Hours (AM / PM) or 24 hours. | ||
| Time | Set the current time. | ||
| Clock correction | Adjustment details of the clock. | ||
| Timer | On / Off | Activate / Deactivate the automatic switching on / off. | |
| Turn On | Set the time for an automatic power on. | ||
| Turn Off | Set the time for an automatic power off. | ||
| Frequency | Set the frequency of the automatic power on / off. (Daily, Mon.-Fri., Weekends, Once) | ||
| Alarm clock | On/off | Turn on / off the alarm. | |
| Alarm timing | Set the desired alarm time. | ||
| Frequence | Set the desired repeat the alarm clock (every day, Mon - Fri, end of the week once). | ||
| Alarm clock tone | Select the alarm tone you want. | ||
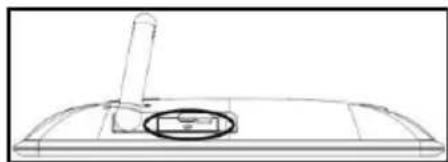
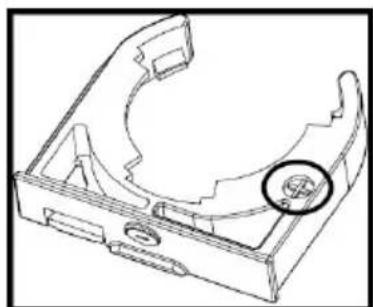
4) Back-Up Battery
a) Function
The back-up battery makes sure that the time and data settings are maintained if the device is disconnected from the electrical power supply.
b) Type
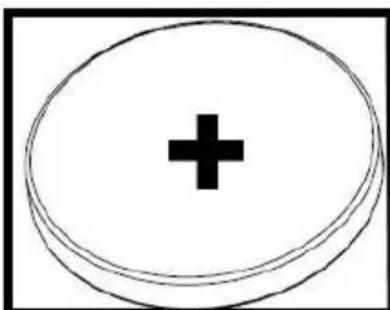
It is a coin cell of the type CR2032 lithium of 3V.
c) Battery Change
You can change the battery by your own in a simple way. Please proceed as follows:
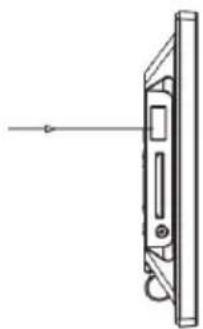
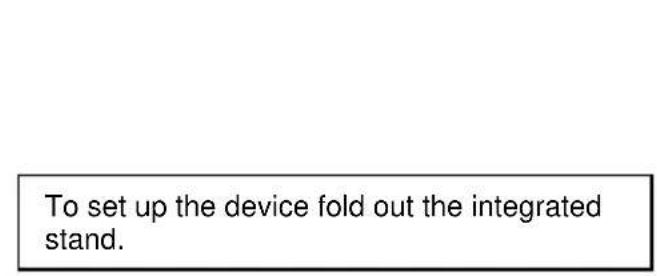
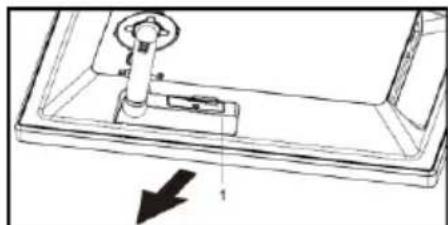
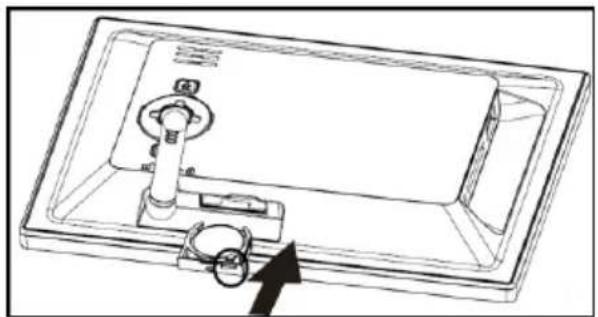
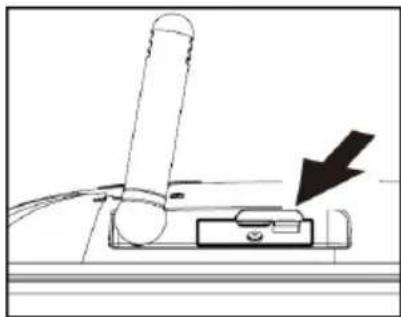
Behind the stand support there is the battery case. Please swivel out the stand support. Now press the locking device of the battery tray slightly downwards and extract it attentively from the device.
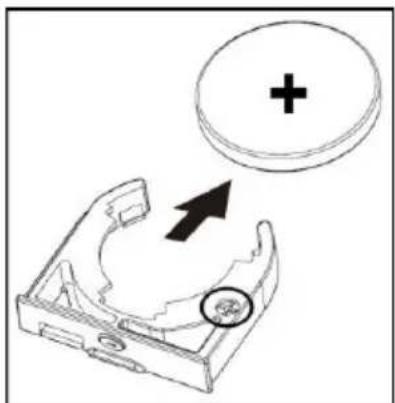
- As next extract the coin cell simply ahead from the support.
- Now insert the new coin cell of the type described above.
Please pay ABSOLUTELY attention that the poles of the coin cell (+) and (-) correspond with the designation on the battery support. The wrong insertion can cause short-circuit and damage the device.
On the battery tray there is a (+) symbol. You have to insert the coin cell so that the plus pole of the coin cell and the (+) symbol of the battery tray are on the same side.
- Now shift the battery tray with the newly inserted coin cell back into the device case.
Please pay ABSOLUTELY attention to insert the battery tray correctly. The wrong insertion can cause short-circuit and damage the device.
If the device with the display is positioned downwards in front of you, the locking device of the battery tray must be on the right side and the plus pole of the coin cell on the under part while you are inserting the battery tray.
5) Product Specifications
| Display | Digital TFT LCD Display size: 6 inch (15,24 cm diagonal viewable image) Display modus: 16:9 Resolution: 800*480 pixels |
| Power supply | Input: 100~240V AC, 50/60Hz Output: 5V 1A DC |
| USB port | USB Host 2.0 (High Speed) Supports USB storage mediums |
| Memory cards supported | SD/SDHC™ (Secure Digital Card), MMC™ (Multi Media Card) |
| Picture size supported | JPEG, max. resolution: 7000*7000 pixels |
| Operating temperature | 0°C ~ +40°C |
| Video Formats | MPEG 1/4, MJPEG |
| Music Formats | MP3 |
| Dimensions | 170*113*22 mm |
| Weight | ~200 gr. |
| Accessory | Remote control (incl. battery), Foot, Power supply, multi-lingual operating instruction |
You need help? Simply call our Technical Service Hotline at: +49 (0) 900 1 50 40 30 for 0.39 €/Min. with calls from the German telephone network. Different rates may apply to calls from mobile phones.
Enjoy Intenso's digital photo frame!
Service and Maintenance
Care
- In order to prevent danger from electric current do neither remove screws nor the case of the weather station.
- Do not operate this device near water. Do not expose the device to rain and moisture. Do not put any objects which store water or other fluids near the device.
- Do not install the picture near heaters, ovens or other heat issuing devices.
- Do not open the case. Do not try to repair the device yourself but have it repaired by qualified personnel only.
- Avoid using the device on sandy areas.
- Fully insert the power supply plug into the opening of the Intenso weather station. This will prevent electrostatic charge.
- Correctly and safely connect all ports.
- Do not push onto the display. Protect the display from direct sunlight.
- The picture frame only plays compatible data formats.
- Images may be protected by the rights of third persons. The play back without licence may infringe copyrights.
- When in operation, do not touch the Intenso weather station with metal objects.
- Avoid operating the device on pillows, sofas or other objects which support the development of heat as there is danger of overheating of the device.
- Do not remove memory cards during read operation. This may cause system crash or data loss.
- Do not switch off the device during an ongoing slide show.
- Do not wrap up the device directly after longer use. Ensure sufficient enough cooling. Otherwise, there is danger of overheating.
- In order to ensure a better service, changes of the operating instructions may be necessary.
Maintenance of the device
The device must be switched off.
Never spray or apply a fluid directly onto the display or case.
Cleaning the displays / case / frame
Carefully wipe the case, frame and LCD display with a soft cloth free from lint and chemicals. Only use cleaning agents which are specifically designed for LCD displays.
Disposal of electrical waste

Devices marked with this symbol are subject to the EG Directive 2002/96/EG.
All electrical appliances and old appliances must be disposed off separately from the household waste and are to be returned to the state authorities designed for that purpose.
By correctly disposing of electrical old appliances environmental damage may be prevented.
(Intenso)
49377 Vechta
Germany
www.intenso.de
CE

(Intenso) Warranty conditions

Dear Intenso customer,
Thank you for opting for a high-quality Intenso product. All Intenso products are subject to constant quality inspections and the legal warranty period applies, of course, from the date of purchase. Please be sure therefore to save the sales receipt as proof of purchase.
Warranty conditions
The warranty only covers material and production defects. Intenso GmbH is not liable for the loss of data in units sent to us. The free of charge warranty service covers the repair or replacement of defective parts. Please understand that we cannot render any warranty services, e.g. in case of:
- Misuse or improper handling, installation or use
- Damages, scratches or wear
- Modifications, manipulation or repairs by third parties
- Damages through force majeure or transport
Your Intenso GmbH
CLAIM PROCEDURE
In case of a claim, please proceed as follows:
- Only returns accompanied with all accessories and sales receipt are accepted.
- In addition, a RMA number is absolutely required for return shipments. You can request this RMA number via e-mail or through the service hotline.
- Please package the product including all accessories and the sales receipt safe for transport. Please stamp the package.
- Please affix the RMA number clearly visible on the outside of the package.
Please send to the following service address:
INTENSO GMBH
Service Hotline: +49 (0) 900 - 150 40 30
Service Center (your RMA-No.)
(0.39 €/min. from the landline in Germany. Usual costs apply.)
Secure Digital Card (SDTM)
Secure Digital High Capacity (SDHC™)
Multimedia Card (MMC™)
1 Home [Power On/Off
2 Touche Play/Pause [H]
3 Touche Stop [b]
- Secure Digital Card (SD™)
- Secure Digital High Capacity (SDHC™)
Multimedia Card (MMC™)
Service Center (Votre referrerce RMA)
Service Hotline: +49 (0) 900 -150 40 30
- Secure Digital Card (SD™)
- Secure Digital High Capacity (SDHC™)
Multimedia Card (MMC™)
- Secure Digital Card (SD™)
- Secure Digital High Capacity (SDHC™)
- Multimedia Card (MMC™)

Service Center (Seu N° ADM)
- Secure Digital Card (SDTM)
- Secure Digital High Capacity (SDHCTM)
Multimedia Card (MMC™)
a BBepx KhoNka [▲]
b BnH3 KHOnKa [▼]
c BJIeBO KHONKa [▶]
d Bnpabo KhoNka [
BHumaHue: He npimeHnTe npn BCTabHeHH KapTb cnIy!
LcnpoBaA pOToPamKa nOndepKnBaET CneIyUeIe pOpMaTbI KapTbI nAmrTt:
- Secure Digital Card (SD™)
- Secure Digital High Capacity (SDHCTM)
Multimedia Card (MMC™)
HocnteIb namrtn USB moKet BCTabJIbTbcraB rHe3do USB ToIbKO OINOM HAnpaBneHn.
BHumaHue: He npimehyTe cnny npn BCTabHeHH HocnteJnaMrtn USB!
BHumaue: Lufpoea qomopamka npedycmoppeha monbko dna ucnolb3o8aun C coemecmumbmu kapmau narnmu u hocumenmu namsmu USB 2 (100mA).
3) O6üee ynpaBneHne
a) TnaBHOe MeHIO
При ВКЛЮЧЕни сифрово ФOTOPAMКИ АВТOMATУСЕСК 3ANYСКАТСС LAД-шоу. При ИСПОЛБЗОВАнHOCHTEЯ ИФОРМацИС C COбТBEHHыIMN ФOTORpaФпЯМN OHI BUDyT NOKa3aHbI.В ИНOM cIуае устpoиCTBO NOKa3bIBaET сlaД-шоу n3 4 ppeDyCTaHOBJIeHHbIX FOITORpaФпИ.
Haxmte Ha KhoNky Home [], yTO6bl nonactb B rJaBHOe MeHIO.
B rIaBHOM MeHIO IMeETcRA BbIbOp MEJdy pa3JIuHbIMN cyHKUmaMn UINpOBOJ FOtOpAMKn I MeHIO HAcTpoE.KaMITE KHOKN , IyBaB6opa NyHKTa MeHIO. PnI NOMOUI HaXaTnaHa KHOKN A, IV pONCXODHT HabrAciN B COOTBeTCTByIOUeM IOdMeHIO. POITBepDNTe BbIbOp HxKaTneM KHONK Play/Pause []
c) Yacbl n kaJIeHdapb
B pexime kaenndapra B 3aBNCIMOCTN OT BbIbpaHoro CTnra OTObpaXaOTcra analorobbie cacbl, unpoBbie yacbl nna analorOBbie nna u npoBbie cacbl c Kaenhdape. HaxatneM Ha KHONK N , MOxHO MeHrTb OTObpaXaembl Ha Kaenhdape Mecu.
Haxmte u yepxnbaiTe KhoNky Bocnpon3BeJeHne/nay3a [I], YTO6bl OTKpbITb 3kpaHoe MeHIO. 3deB bbl MOKeTe yCTaHOBnTb DaTy, peXIM OTo6paxKeHn BpeMeHn, TeKyUee BpeMn, HAcTpOntb CTINb OTo6paxKeHn YacOB.
d) Bocnpo3BeJeHne paJIOB MP3
Ipeennte B rnaBHOM MeHIO K cyHKuIN My3bika. IoBraTcN IOcOeHNHeHHbIe ycTpoiCTBa namrtn. B 3aBnCmocTN OT NOKHouEHHoro Tnna yctpoiCTba, y Bac eCTb Bb6op Mekdy SD / MMC n USB. PoNTBepdnte Baaw Bb6op, Haxab Ha KNONky UrpaTb/Play3a [▶i].
IIOBbIyOTcBce nankn C noDdePknBaIOUzIMN faiJamn MP3. Bblbepnte JKeJaemyo nanky DnI nepeXoDa B MeHIO npocmoTpa My3bIKn. KOrda Bbl BblbpaII JKeJaembl faiMP3, IODTBepdnte Bbl6op C NOMOsbIO KHOJIKN HrpaTb/Play3a [▶] dIyBocpOn3BeDeHnra faiJa MP3.