OPD 250 - DVD player OK - Free user manual and instructions
Find the device manual for free OPD 250 OK in PDF.
| Product type | DVD player |
| Brand | OK |
| Model | OPD 250 |
| Power supply | 100-240 V~, 50/60 Hz |
| Power consumption | Less than 8 W |
| Supported disc formats | DVD, DVD±R/RW, VCD, CD-DA, CD-R, CD-RW, MPEG4, JPEG, MP3 |
| Video outputs | HDMI, SCART, Composite video (1 Vpp) |
| Audio outputs | Stereo R/L (2 Vrms) |
| USB input | USB 1, compatible up to 32 GB (FAT16/32) |
| Max. video resolution | MPEG2: 720x576, MPEG4: 800x600 |
| TV system | PAL, NTSC, Auto |
| Audio frequency response | 20 Hz - 20 kHz |
| Signal-to-noise ratio | Greater than 90 dB |
| Total harmonic distortion | Less than 0.025% |
| Playback functions | Repeat, program, zoom, angle, search, slow motion, subtitles, languages |
| OSD languages | English, French, German, Italian, Spanish, Swedish, Dutch |
| Parental control | Yes, with password (universal password 1369) |
| Remote control | Yes, with 2 AAA batteries (1.5 V) |
| Cleaning | Soft cloth, no chemicals |
| Safety | Class 1 laser, double insulation, surge protection |
Frequently Asked Questions - OPD 250 OK
User questions about OPD 250 OK
0 question about this device. Answer the ones you know or ask your own.
Ask a new question about this device
Download the instructions for your DVD player in PDF format for free! Find your manual OPD 250 - OK and take your electronic device back in hand. On this page are published all the documents necessary for the use of your device. OPD 250 by OK.
USER MANUAL OPD 250 OK
WIEDERHOLTE WIEDERGABE
ZEAIAIPTOTIMHSEONPYOMISEON

EniEETPREFERENCESETUPoEvou PuOeiewvSETUPMENuPiTeTo nKtpo △via va EniEETe to eIthmuNToTOxieio kai eTae TPO ENTER yia eniBeeaiwon.
TYNOESV
- KID SAF
- G
B. PG - PG13
- PGR
- R
- NC17
B. ADULT
OPEN/CLOSEIieote yia tnv Eayawyn touCD/DVD.
STOP Tia va otapatnoe Ipoosipiva thv avanapaywn, notemu qopao
Ia va otaatnoet evelewctnv avanapaywn, nieote duo opoc.
PLAY/PAUSE Ia npoowpivn naov ntc avanapaywync, niote μia opa to
Tia va ouvexioe, meote EaV a to
SKIP FORWARD/BACKWARD Katá Tn δiapkeia Tnc avanapaywyh, πieoTE
oTo EIOevo n 10 nponyouuve Kepalaio.
SEARCH FORWARD/BACKWARD
Kata thi diapkeia tnc avanapaywnc, nioe yphynp npowon oTo tpexov Kepalao n epiopn oTo tpexov Kepalaoio.
REPEAT PLAYBACK
Kata th diapkeia tnc avanapaywync, pieote to koupi REPEAT eaveiunmueva yia va evpyoioeTE Tc akolouOec, aeitoupyie c enavalnpsi:
BVD ENavalnneepenepnepnepnepnepnepnepnepnepnepnepnepnepnepnepnepnepnepnepnepnepnepnepnepnepnepnepnepnepnepnepnepnepnepnepnepnepnepnepnepnepnepnepnepnepnepnepnepnepnepnep
CD/VCD(PBC off) Repeat Track/Repeat All
MP3 Single/Repeat One/Repeat Folder/Folder/Shuffle/Random
MP4/MPEG4 Single/Repeat One/Repeat Folder/Shuffle/Random
ON-SCREEN INFORMATION
KaTaNiApKcA Tc avanapaywyn, Niote To koumi DISPLAY eaveiunmueva yia va npoalaaTe tic nnpoopipcE iokoue titlouc, Kepalaia, xpovo avanapaywyncnou dintheta, yawoeCknt. avaloya e to dioko nou exi eioaxei.
SUBTITLE
Piote to Koumi SUBTITLE enaveiIημεva yia tyn aλayn Tc γωσauc unotitawv
AUDIO
PiEOToKoumiAUDIO eanaveiAnmuEvayiaTnV aalayn Tnc TNC yawosac nXou.
TITLE
Piote To Koupi Title ia va otaatnoe Tnv avanapaywn kai va eniopse tO oevou diokou.
ANGLE
PiEOTKoupi ANGLE yia va aalaleyvia.
PROGRAM
Piote to Koumi PROG ia va putheta et n oepa nepioootepwv titawv n touewv.
GR
20
Avanapaywyh MP3/JPEG/MPEG4
IIEOTKOUMI ▲nTOYIAvaENIAEETOPIIKOKATALOYO KAI OTN OUVEXIA IIEOTKOUMI ENTER YIAvaEIOEHTeOTOVUNOKATALOYO.
Iieote to koupiia via va emileeTe to eimuunTo iXvoc kal otouveexia meote to koupii ENTER n To 1a va ekivnoete tn avanapaywn mouiknc taiviac.
Repeat TnV evaalay n diapopetikw aeitoupyiw avanapaywync enavalnnc.
REPEAT FOLDER
FOLDER
SHUFFLE
RANDOM
SINGLE
REPEAT ONE
Avanapaywyj CD ekovwv
Iieote to koumi n to via va emaleete to piikok katalooyo kal otn ouvexia niote to koumi ENTER ia va eiaetheta otov unokataloyo.
Avanapaywyn ekovac
- Niéoté to kouuni n va va επiλεετην επιθμntn εikova.
- 2Tn ouvexia niote to koumi ENTER n PLAY ia va npoalare tnv eikova otnv oovn.Eav Etioueite va eniortpeve te OTO avwtepo meyou, tiote to koumi a va vnialee Keta piote to koumi ENTER.
- Pepiotpoj eikovac
Thanks for your purchase of an ok. product. Please read this manual carefully and keep it for future reference.
IMPORTANT SAFETY INSTRUCTIONS. READ CAREFULLY AND KEEP FOR FUTURE REFERENCE.
- Risk of electric shock! Do not open.
- CAUTION: To prevent the risk of electric shock, do not remove cover (or back). No user-serviceable parts inside. Refer servicing to authorised service agent.
- For safety reasons, this class II device is provided with double or reinforced insulation as indicated by this symbol.
- The lightning flash with arrowhead within an equilateral triangle is intended to alert the user to the presence of uninsulated "dangerous voltage" inside the enclosure of this device, which may be of sufficient magnitude to constitute a risk of electric shock to persons.
- The exclamation point within an equilateral triangle is intended to alert the user to the presence of important operating and maintenance instructions in the literature accompanying this device.
- DANGER! Invisible laser radiation when open and safety interlock failed or defeated. Avoid direct exposure to the beam. Do not touch the lens.
- Before connecting the device to a socket outlet, make sure the voltage indicated on the device corresponds to your local mains.
- The mains plug or device coupler is the disconnecting device. It shall remain readily operable.
- If the supply cord is damaged, it must be replaced by the manufacturer or its authorised service agent or similarly qualified person in order to avoid hazard.
- WARNING! To reduce the risk of fire or electric shock, do not expose this device to rain or moisture. Protect from dripping or splashing. Do not place any objects filled with liquids, such as vases, on the device.
- Regularly check if the supply cord, device or extension cable are defective. If found defective, do not put device into operation. Immediately pull the plug.
- Place the supply cord and, if necessary, an extension cable in such a way that pulling or tripping over it is impossible. Do not allow the supply cord to hang down within easy reach.
- Do not jam, bend or pull the supply cord over sharp edges.
- Protect the supply cord from being walked on or pinched particularly at the plug, convenience receptacles and the point where it exits from the device.
- Never pull the plug by the supply cord or with wet hands.
- Disconnect the mains plug in case of faults during use, during lightening storms, before cleaning and when not using the device for a longer period of time.
- In case of malfunction due to electrostatic discharge, reset the device by removing the mains plug from the socket outlet.
- Refer all servicing to authorised service agent. Do not attempt to repair the device yourself. Servicing is required when the device has been damaged in any way, such as the supply cord or plug are damaged, liquid has been spilled, objects have fallen into the device, the enclosure is damaged, the device has been exposed to rain or moisture, does not operate normally, or has been dropped.
- The product is only suitable for use at moderate degrees of latitude. Do not use in the tropics or in particularly humid climates.
- When installing the device, leave sufficient space for ventilation. Do not install in bookcases, built-in cabinets or the like.
- Do not impede ventilation by covering the ventilation openings with items, such as newspapers, table-cloths, curtains, etc. Do not insert any objects.
- Do not place naked flame sources, such as lighted candles, on the device.
- Do not place any electronic equipment or toys on the device. Such items could fall from the top and cause device damage and/or personal injury.
- Do not install near any heat sources such as radiators, heat registers, stoves or other appliances (including amplifiers) that produce heat.
- Do not apply excessive force to the front or top, as this could ultimately overturn the device.
- Do not shift or move the device when powered on.
EN
24
- CAUTION! Danger of explosion if batteries are incorrectly replaced. Replace only with the same or equivalent type. Do not mix new and old batteries.
- Install batteries correctly, with + and - aligned as indicated on the device.
- Remove batteries when not using the device for a longer period of time.
- Do not expose batteries to excessive heat such as sunshine, fire or the like.
- In case of battery leakage, remove the batteries and clean the battery compartment thoroughly. Avoid contact with skin and eyes.
- Keep batteries out of reach of children. Seek medical advice immediately if batteries have been swallowed.
- Do not dismantle or shred batteries; do not throw into fire. Dispose of properly in accordance with the user manual. Do not dispose of in household waste.
- The batteries (battery pack or batteries installed) shall not be exposed to excessive heat such as sunshine, fire or the like.
- To prevent the spread or fire, keep candles or other open flames away from this device at all times.
- Figures and illustrations in this User Manual are provided for reference only and may differ from actual device appearance. Product design and specifications may be changed without notice.
- Excessive sound pressure from earphones and headphones can cause hearing loss.
INTENDED USE
This device is intended for playing audio and video signals. Any other use may result in damage to product or injuries.
The Imtron GmbH assumes no liability for damage to the product, for property damage or for personal injury due to careless or improper usage of the product, or usage of product which does not meet the manufacturer's specified purpose.
COMPONENTS
Main Unit
A. Tray door
B. Power indicator
C. IR-Sensor
D. USB-Port
E. button
F. button
G. button
H.▲ button
I. R, L audio output
J. Video output
K. HDMI output
L. Power cord with plug
M. SCART output
Remote Control
- button
Switch the DVD Player between on and standby mode - 0-9/10+ Numerical button
Select a numbered item in the menu - SETUP button
To enter the system set up menu - ▲b
Navigation key - MENU button
Open menu
6.SEARCH button
Jump to a certain time on a disc - STOP button
Stop a playback - FWD/REV button
Fast forward/ Fast reverse during playback - VOLUME-/+ button
Decrease/increase volume - TITLE button
Display the title menu - RETURN button
Return to root menu during normal playback and vice versa - ANGLE button
View action from 2 different angles
13.ZOOM button
Zoom in or out the picture - Battery compartment
15.AUDIO button
Change audio mode -
STEP button
-
A-B button
18.SLOW button
Selection of slow motion playback
level
- PREV/NEXT button
Skip to previous/next chapter/track
- Play / Pause button
Play/pause a playback
- REPEAT button
Repeat playback
- MUTE button
Switch on/off the sound
- ENTER button
Confirm an entry
- SOURCE button
Select DVD/USB
- CLEAR button
Clear the input number in SEARCH
and PROG mode
26.PROG button
Program playback sequences
- OSD button
During playback, press repeatedly
to show the elapsed playing time,
languages, etc. depending on the
disc inserted
- LANGUAGE button
Change language
- SUBTITLE button
Press during playback repeatedly to
display or switch subtitles
30.▲ button
Open and close the disc tray
EN
26
BEFORE FIRST TIME USE
- Remove the product and accessories carefully from the original packaging. It is recommended to keep the original packaging for storage. If you wish to dispose of the original packaging, please observe applicable legal provisions. Should you have any questions regarding proper disposal, contact your local waste management center.
- Inspect the delivery contents for completeness and damages. Should the delivery contents be incomplete or damaged, contact your sales outlet immediately.
After unpacking, please refer to chapter Cleaning and care.
OPERATION
Installing remote control batteries
1 Open the battery cover on the back of the remote control. Insert 2 batteries (AAA, 1.5 V). Ensure the + and - polarities of the batteries line up with the markings inside the case. Close the cover.
Connecting to TV
Caution: Disconnect the AC power cord before connecting any devices.
2 Connect the DVD player to the TV with an HDMI, Video or SCART cable.
Audio
3 Connect the DVD player's R and L jack to the audio input jack on the TV.
Note: Only necessary when connected via Video cable.
Plugging in the power cord
4 Connect the power plug to a suitable power outlet.
OSD
SETUP MENU
Press the SETUP button on the remote control. SETUP MENU will be displayed. After accessing the SETUP MENU, press or button to select an item desired, then press the ENTER button to confirm. Press button return to the next upper menu. To exit the setup, press the SETUP button again. In the SETUP MENU, you may choose any of the following options as you like.
TV Display
Select TV Display in the SETUP MENU and confirm with ENTER button. Press or button to select a desired format, then press the ENTER button to confirm.
Note: The image display ratio is related to the recorded disc format. Some disc cannot display images in the aspect ratio you choose. If you play a disc recorded in 4:3 format on a wide screen TV, black bars will appear on the left and right side of the screen. You must adjust the screen setting depending on the type of the television you have.
Angle Mark
Select Angle Mark in the SETUP MENU and confirm with ENTER button. Press or button to switch on or off the angle. Press the ENTER button to confirm.
- OSD Language
Select OSD Language in the SETUP MENU and confirm with ENTER button. Press or button to select a desired language. Press the ENTER button to confirm.
- Closed Captions
Closed captions are data that are hidden in the video signal of some discs.
Note: Before you select this function, please ensure that the disc contains closed captions information and your TV set also has this function.
Screen saver
Activate/de-activate the screen saver.
Note: Not all player support this function.
AUTO Standby
Set the auto standby time of the DVD Player.
AUDIO SETUP PAGE
Select Audio in the Setup Menu. Press or button to select a desired item, then press the ENTER button to confirm.
DOWNMIX
This option is used to set the R/L and Stereo Channel speakers.
DOLBY DIGITAL
The option included Dual Mono and Dynamic.
VIDEO SETUP PAGE
7 Select Video in the SETUP MENU. Press or button to select a desired item, then press the ENTER button to confirm.
VIDEO OUTPUT
Setting the options related to SCART.
- RESOLUTION
This option is used to set the resolution.
COLOR SETTING
Here you can set different color setting:
- SHARPNESS
BRIGHTNESS
-CONTRAST
-HUE - SATURATION
HDMI SETUP
Setting the options related to the HDMI.
-HDMI:ON or OFF
- AUDIO SOURCE: AUTO/PCM
- DEEP COLOR: 24 BIT / 30 BIT / 36 BIT
EN
28
PREFERENCE SETUP PAGE

Select PREFERENCE SETUP in the SETUP MENU. Press or button to select a desired item, then press the ENTER button to confirm.
TVTYPE
Selecting the color system that corresponds to your TV when AV outputs:
-PAL
-AUTO
-NTSC
AUDIO
Select a language for audio (if available).
- ENGLISH
-FRENCH - GERMAN
-ITALIAN - SPANISH
-
SWEDISH
DUTCH -
SUBTITLE
Select a language for subtitle (if available).
- ENGLISH
-FRENCH - GERMAN
-ITALIAN
-SPANISH - SWEDISH
DUTCH
-OFF
DISC MENU
Select a language for disc menu (if available).
- ENGLISH
-FRENCH - GERMAN
-ITALIAN - SPANISH
- SWEDISH
DUTCH
PARENTAL
Here you can set the Parental setting of the DVD Player.
- KID SAF
- G
B. PG - PG13
- PGR
- R
- NC17
8.ADULT
Note: A password is required to set the parental setting.
DEFAULT
Set the DVD player back to factory default.
password setup PAGE
9 Select PASSWORD SETUP in the SETUP MENU. Press or button to select a desired item, then press the ENTER button to confirm.
- PASSWORD MODE
Here you can set on/off the password mode.
Note: If Password mode is set to off, the change of parental level will not check the password.
- PASSWORD
Here you can set or change the password.
Note: If you forget your password, please use the universal password 1369 to unlock.
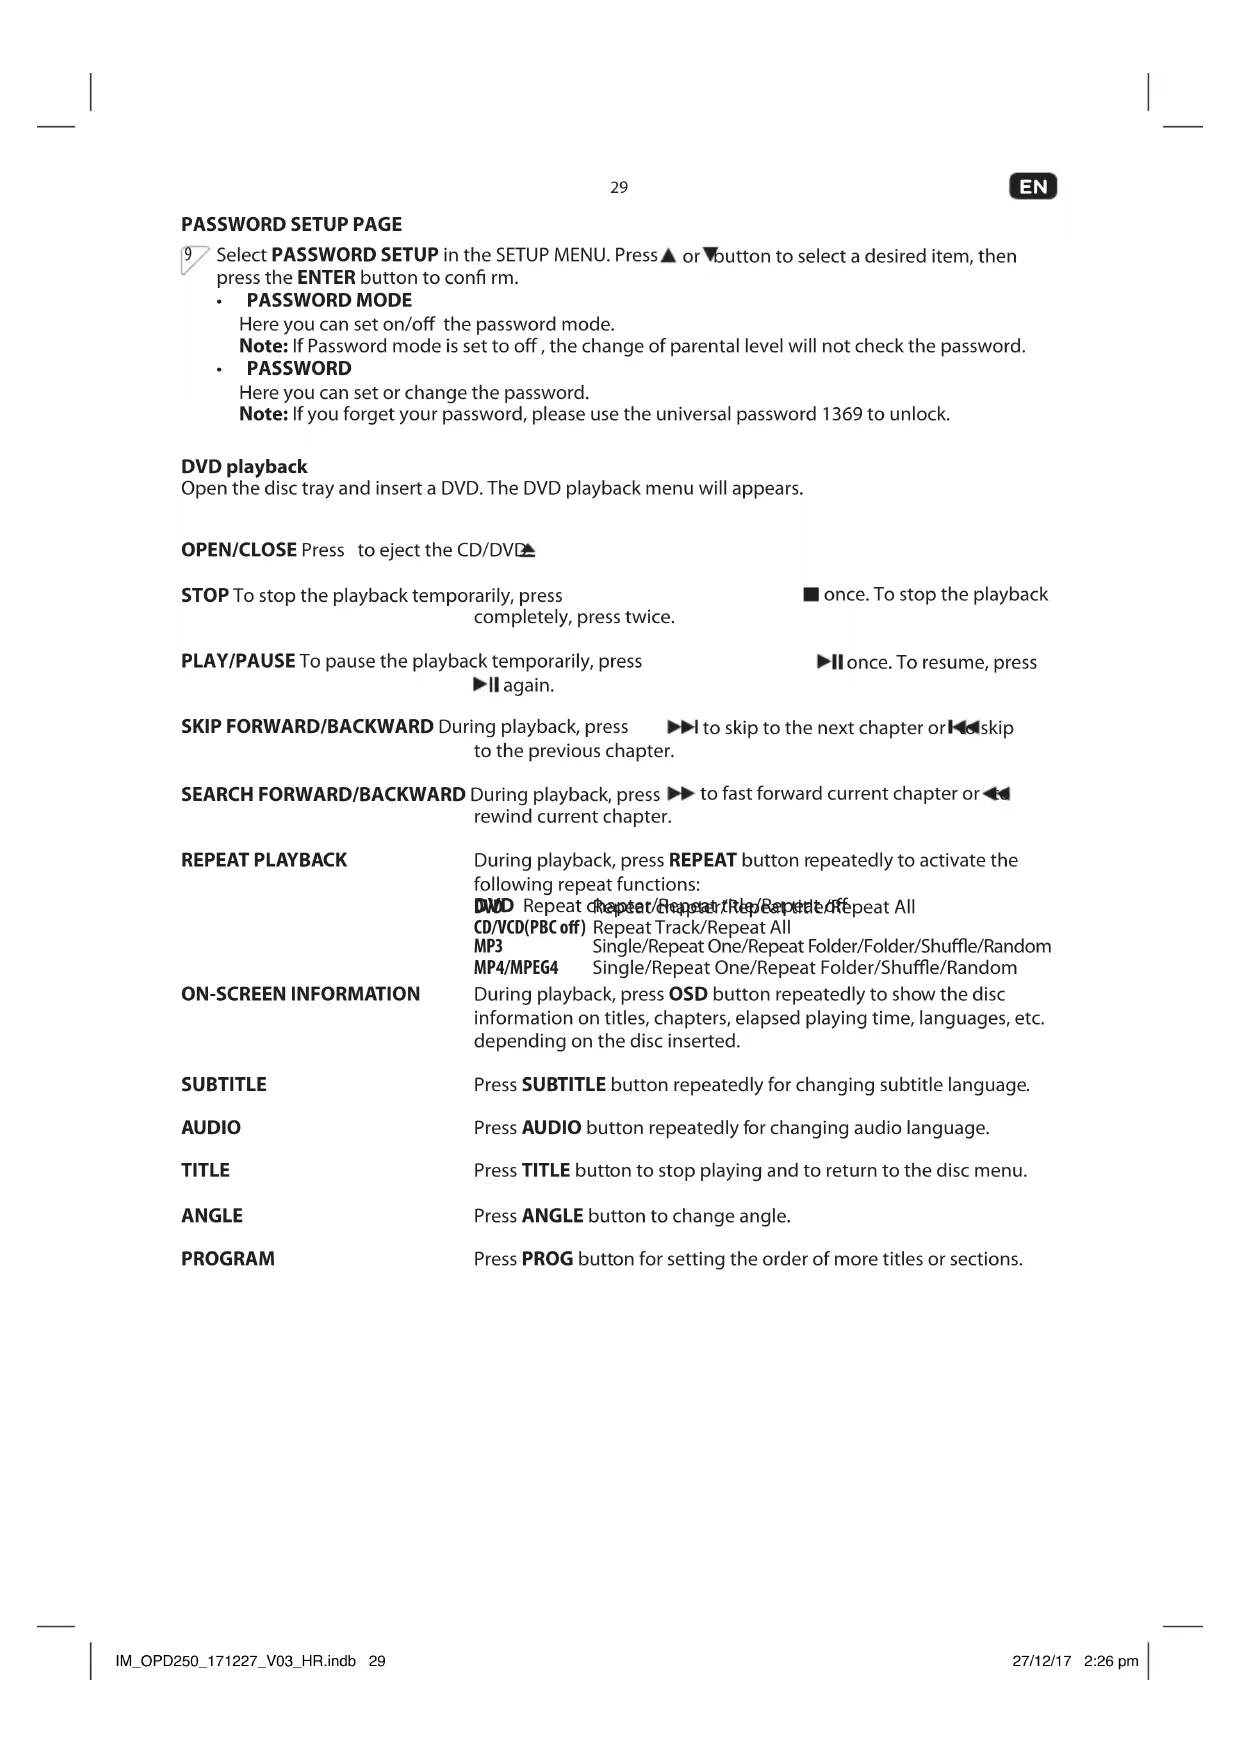
DVD playback
Open the disc tray and insert a DVD. The DVD playback menu will appear.
OPEN/CLOSE Press to eject the CD/DVD
STOP To stop the playback temporarily, press completely, press twice.
PLAY/PAUSE To pause the playback temporarily, press
again.
■ once. To stop the playback
Once. To resume, press
SKIP FORWARD/BACKWARD During playback, press
to skip to the next chapter or skip
to the previous chapter.
SEARCH FORWARD/BACKWARD
During playback, press
to fast forward current chapter or
rewind current chapter.
REPEAT PLAYBACK
During playback, press REPEAT button repeatedly to activate the following repeat functions:
DWD Repeat/Repeat/Repeat/Repeat/Repeat/Repeat All CD/VCD(PBC off) Repeat Track/Repeat All
MP3 Single/Repeat One/Repeat Folder/Folder/Shuffle/Random MP4/MPEG4 Single/Repeat One/Repeat Folder/Shuffle/Random
ON-SCREEN INFORMATION
During playback, press OSD button repeatedly to show the disc information on titles, chapters, elapsed playing time, languages, etc. depending on the disc inserted.
SUBTITLE
Press SUBTITLE button repeatedly for changing subtitle language.
AUDIO
Press AUDIO button repeatedly for changing audio language.
TITLE
Press TITLE button to stop playing and to return to the disc menu.
ANGLE
Press ANGLE button to change angle.
PROGRAM
Press PROG button for setting the order of more titles or sections.
EN
30
MP3/JPEG/MPEG4 playback
Press or button to choose the root directory and then press ENTER button to enter into the sub directory.
Press or button to choose the desired track and then press ENTER or button to start the music or movie playback.
Repeat To switch different repeat playing mode.
REPEAT FOLDER
FOLDER
SHUFFLE
RANDOM
SINGLE
REPEAT ONE
PICTURE CD playback
Press or button to choose the root directory and then press ENTER button to enter into the sub directory.
- Playback Picture
- Press or button to choose the desired picture.
- Then press ENTER or PLAY button to show the picture on screen. If you want to return to the upper menu, press or button to choose and press ENTER button.
Image rotation
In picture play state:
- Press or button to rotate the picture,
- Press PROG button to change the picture scan mode.
USB
10 Insert an USB Stick with MP3/MP4/MPEG4 files.
Note: Connect the USB device directly to the USB port of the unit. Using an extension cable is not recommended and may cause interference and failure of data transfer.
This product supports USB 1.1 and 2.0 up to 32GB with fIle system FAT16 and FAT32.
CLEANING AND CARE
Unplug the DVD player before cleaning.
- Clean the DVD player with a soft cloth. Never use substances such as alcohol, chemicals or household cleaners on the DVD player.
- To avoid deformations and color fading, wipe off water drops as soon as possible.
TROUBLESHOOTING
If there are any problems during operation, please refer to the following table. If problems cannot be solved as indicated under Solution, please contact your manufacturer.
| Problem Possible causes | Solution | |
| No picture or sound | Interrupted power supply | Ensure the power button is on. Ensure the power outlet is operational. Ensure the power cord is not damaged. Ensure the power plug is connected firmly to the outlet. |
| Picture but no sound | Interrupted audio connection | Ensure the audio jacks are securely connected. Ensure the audio connector is not damaged. Ensure the volume is turned up in VOUCH setup. Ensure you have set the player's AUDIO settings correctly. Ensure you have entered the correct AV input for your TV. Ensure the audio is not set to mute. |
| Sound but no picture | Interrupted video connection | Ensure the video jacks are securely connected. Ensure you have entered the correct AV input for your TV. Ensure the video connector is not damaged. Ensure you have set the player'sVIDEO settings correctly. |
| Poor picture or sound | Audio setting not correct Poor DVD quality AV connector loosen | Ensure you have set the player's AUDIO settings correctly. Ensure the disc is not scratched or stained. Ensure the AV connector or the output terminal is not damaged. |
| BAD DISC displayed | Poor DVD quality | Ensure the disc is not warped, damaged or deformed. Ensure the disc is not badly stained or damaged. Ensure the disc format is compatible with the player. Please check whether you have tried to play a software CD. If so, please restart the player. |
| Remote not working | Interrupted power supply Batteries are empty Obstacles between the remote control and DVD player | Make sure the Main units POWER button is on. Ensure the remote batteries are working. Point the remote control directly at the player's IR sensor. Remove any obstacles between the remote and the IR sensor. |
| Unit not working | Due to electrostatic discharge | Turn off the power, and then turn it on again. |
| NO DISC displayed | Poor DVD quality DVD was insert wrongly | Ensure you have put the disc on the tray. Ensure the disc is not upside down. Ensure the disc is not distorted, stained or scratched. |
| No playback of ACC/WMA fi les | The product only support MP2/MP3/AC3 fi les. | Insert media source with MP2/MP3/AC3 fi les. |
| No playback of Divx3.11/4/5/6 fi les. | The product only support MPEG2/MPEG4/XVID fi les. | Insert media source with MPEG2 (not higher than 720 x 576)/MPEG4 (not higher than 800 x 600)/XVID fi les |
TECHNICAL DATA
| DISPLAY FEATURES | |
| Video standard NTSC/PAL | |
| Discs Compatibility MPEG4, DVD, DVD+/-R/RW, VCD, JPEG. CD-DA, CD-R, CD-RW | |
| VIDEO OUT | |
| Video out 1.0 V (p-p) / 75 Q, sync, negative polarity | |
| AUDIO OUT | |
| Audio out level 2 V rms -1/+0.2 | |
| Frequency response 20 Hz to 20 kHz | |
| S/N ratio >90 dB | |
| Total harmonic distortion < 0.025 % | |
| POWER REQUIREMENTS | |
| Power Input 100 - 240 V~, 50/60 Hz | |
| Power consumption < 8 W | |
| CONNECTIONS | |
| Input | |
| USB 1 | |
| Output | |
| R/L 1 | |
| SCART 1 | |
| Video 1 | |
| HDMI 1 | |
DISPOSAL

Do not dispose of this product as unsorted municipal waste. Return it to a designated collection point for the recycling of WEEE. By doing so, you will help to conserve resources and protect the environment. Contact your retailer or local authorities for more information.

Please dispose of batteries in an environmentally friendly manner. Do not put batteries into the household waste. Please use the return and collection systems in your community or contact the dealer where you purchased the product.
ENHORABUENA
- KID SAF
- G
B. PG - PG13
- PGR
- R
- NC17
8.ADULT
(BUSCAR HACIA ADELANTE/
ATRÁS)
CD/VCD(PBC off) Repeat Track/Repeat All
MP3 Single/Repeat One/Repeat Folder/Folder/Shuffle/Random
MP4/MPEG4 Single/Repeat One/Repeat Folder/Shuffle/Random
ON-SCREEN INFORMATION
- KID SAF
- G
B. PG - PG13
- PGR
- R
- NC17
B. ADULT
- KID SAF
- G
B. PG - PG13
- PGR
- R
- NC17
8.ADULT
CD/VCD(PBC off) Repeat Track/Repeat All
MP3 Single/Repeat One/Repeat Folder/Folder/Shuffle/Random
MP4/MPEG4 Single/Repeat One/Repeat Folder/Shuffle/Random
ON-SCREEN INFORMATION
- KID SAF
- G
B. PG - PG13
- PGR
- R
- NC17
B. ADULT
CD/VCD(PBC off) Repeat Track/Repeat All
MP3 Single/Repeat One/Repeat Folder/Folder/Shuffle/Random
MP4/MPEG4 Single/Repeat One/Repeat Folder/Shuffle/Random
ON-SCREEN INFORMATION
CD/VCD(PBC off) Repeat Track/Repeat All
MP3 Single/Repeat One/Repeat Folder/Folder/Shuffle/Random
MP4/MPEG4 Single/Repeat One/Repeat Folder/Shuffle/Random
INFORMATIE OP HET SCHERM
- KID SAF
- G
B. PG - PG13
- PGR
- R
- NC17
B. ADULT
CD/VCD(PBC off) Repeat Track/Repeat All
MP3 Single/Repeat One/Repeat Folder/Folder/Shuffle/Random
MP4/MPEG4 Single/Repeat One/Repeat Folder/Shuffle/Random
ON-SCREEN INFORMATION
- KID SAF
- G
B. PG - PG13
- PGR
- R
- NC17
8.ADULT
BOCnpon3BedeHn,HTo6bI
POKa3aTb PpOWeJdUeBpeM
BOcnpOn3BedeHn,r3bIKN T.D.B
3aBNCIMOCTNOT BCTaBJIeHHORO DnCKa
- KhoNka LANGUAGE
I3meHHeYa3bika
- Khonka SUBTITLE
HaximaiTe IOBTOPO BO Bpemr
BOCPON3BeDHeH,YTO6bI NOKa3blBaTb
IINIpeekJIIOUaTbCy6TNTpbl
- KhoNka
OTkpblte nn 3akpbTne IOTka NcKa
RU
106
NEPEI NEPBbIM NCIOJIb3OBAHnEM
AkkypaTHo u3BNeKeNTe u3DeJIne n npHaIeXHoCTn u3 opuHaHbHO ynaKOBKn. PekomeHdyETc coxpaHntb opuHaHbHyU ynaKOBky. YtUN3aIIO opuHaHaJIbHOy naKOBKn HeO6xoIIMo IPOBOIITb B COOTBeTCTBUN C DeIcTByIOUzIM 3aKOHOdaTeJbCTBOM. ITO BONpOCAM OTHocHTeBJHO npaBUNHO yTuIN3aUHN yNaKOBKN O6paTInTeCB MecThbI ueHTp ynpabJeHn OTXoJaMn.
- PpOBepbTe KOMnJIeKTHOcTb NocTaBKn O6OpyIOBaHn y 6eIITcB b OTCytCTBn NOBpeJKeHn. B CNYaae HeKOMnJIeKTHOCTn INN pRn HAnuHn IOBpeJKeHn cpa3y Jx oe 6paTntecb B TOkY npoJaXn.
Iocne pacnaKOBKn cm.Pa3dJe YnctKa n yxoJ.
NCPOJIb3OBAHNE
YctahOBka 6aTapeek B nyIbTe dNCTaHcUNHOHorO ynpabNeHn
1 OTKpoIte KpbIshky OTdeJeHnna 746aTapeek C TbJIbHOJ CTOpOHbI NybTa DY. BCTaBbTe 2 6aTapeiKu (AAA, 1,5 B).Y6eINTEcB,yTO NOJIaRHoCtB Ha 6aTapeiKaX + n - COOTBeTCTBye t O6O3HaueHnA M BHyTpN KpOpyca. 3aKpoIte KpbIshky.
IopKJIIOUeHne K TB
BhMaHHe:peep noKJIoueHnem IIO6bIX n3dEni BbIeprNBaTe ceTeBOu Hyp n3 pO3eTKn. PoiKluoyHne uepe3 HDMI-ka6eBb PoiKIIouChTe DVD-nEEP K TB nocpeDcTBOM HDMI-ka6eJ
2 ΠoɪκJIIOUHTe DVD-ɪpɒɪrpɒbIbaTeɪb K TeɪeBɪZOpу c nɒmʊʒbɪ O BɪdɛOka6eɪa, ka6eɪa HDMI nɪn SCART.
Aydno
3 PnokkHHTe ayINOBXObl R n L DVD-npounrpbBaTeN K ayINOBXoam Ha TeJeBu3ope. PnmuMeaHHe: Heo6xoJMo TOnIko npn PNOKIOUeHN Upe3 BInDeoka6enb.
Iopknluoyehne ceteboro shhya
4 BcTaBbTe ceTeByIO BnIKy B nOxOJaIyIO po3eTKy.
OSD
HACTPOIKA CNTEMbl
5 HaxMITE KONky SETUP Ha nyIbTe DK. Ha 3KpaHe NOBITc MEHIO HACTPOEK. Nocne BxOda B MEHO HACTPOEK HaxMITE KONky AINn DnBa BbIbOpa HyXHoro 3JeMeHTa, nocne Yero NOITBepDIne BbIbOp HaxKaTnEM KONKn ENTER. HaxMITE KONky CTo6bl BepHyTcBcR B MeHIO BepxHero yPobHra. TTo6bl BbIbTu n3 HAcTpoE, HaxMITE KONky SETUP eue pa3. B MEHIO HACTPOEK Bbl MoKeTe BbIbPaTb IIO6yU n3 Heo6xOdMlbIX OncuN.
TBəkpaH
Bb6epe TB ekpaH B SETUP MENU n noTBePnTe Bb6op KhONKO ENTER .HaKMaTe KhONKy ▲ NINy,HTo6bl Bb6paTb XeNaTeNbHbI φOpMaT, 3aTeM HaxMNTE KhONKY ENTER ,HTO6bl NoTBePnTb Bb6op.
PnmeHne: Ko3ofouueHT cKaTna 13o6paXeHn 0THOCU Tc K 3aNCAHHOMy Ha DNCKe fOpMaTy. HeKOtOpbIe DnCKn He MOrYB BOCpOu3BODITb 13o6paXeHn B COOTHOWeHN CTOpOH, KOToPbI Bbl BbIbpaII. EcnB Bbl BOCpOu3BODITe DnCK, 3aNcaHbI B fOpMaTe 4:3, Ha IINPOKOM TB 3kPaHe, Ha IeBoN n npBoN CTOpOHax 3KpHaNA NOBATC YepHbIe NOLocB. Bbl DoJxHbI OTpeRyInpoBaTb HAcTPOKn 3KpHa, B 3aBNCIMOCTN OT TnNa BaWero TeNeBu3Opa.
- YrnoBaMeTka
BbI6peTe yrIIOByo MeKy B SETUP MENU n IOITBePdInTe BbI6Op KHONKoI ENTER. HaKIMaIte KHOKNy mnn TTo6bl BKIOUHTb nn BbIKIOUHTb yroI. HaxMnTe KHOKNy ENTER, qTo6bl IIOITBePdInTb BbI6Op.
R3bIK MeHIO
BbI6peTe RaBik MeHIO B SETUP MENU n IOITBePnTe BbI6Op KHOKnO ENTER. Haxmaite KHOKnky A NII YTO6bl BbI6paTb XeNaTeBbHbI Ra3IK. Haxmite KHOKnY ENTER, T06bl NOITBePnTb BbI6Op.
CkpbItble TmTpbl
Ckpblte TnTpbl npecltablaHOT co6o JaHHbIe, Ckpblte BnuDEOCnHaJax HeKOTopbIX DnCKOB.
PnmuemaeHne: PpeKdye BbIbnpaTb 3Ty yHKUIO, y6eINTEcb, yTO INCK COepeXNT INHOpMaUIO BCKpbITbIX TITpax IuTO BaW TeJeBUN3Op TOKe IMeet TaKyIO yHKUIO.
- PpeoxpaHnteB 3KpaHa
BkIIOueHne / BbIKIOueHne IpeOxpaHnteHa 3KpaHa
PpmeHHe He Bce nponrpBbATEnnnoepKnBaOT 3y fHKnIO.
- ABTomatueckn pekum oxuaHna
YcTaHOBnTe B DVD-mpoIrpblBaTeJI BpemA bTOMaTnueckoro peKIMa OxuHaHn
CTPAHUCA AYDINO HACTPOIKN
6 BbIbepe Te ayDnO B MeHIO HAcTpoE. HaxmMaTe KHOJky AINN YTO6bl Bbl6paTb XeJaTeJIbHbI npaMeTp, 3aTeM Haxmnte KHOJky ENTER , yTO6bl NOITBepdntb Bbl6Op.
DOWNMIX
3a HactpoiKa nCnoB3yeTcI Jn KOHnpyaun R/L n ctepeOnHaAMNKOB.
DOLBY DIGITAL
3a HactpoiKa BkIouaeT Bce6B BapnaHTb Dual Mono n Dynamic.
CTPAHnA BnDEO HACTPOIKN
7 BbIbepeTe Bndeo B SETUP MENU. HaxmuaTe KhoNky A nIn YTO6bBbI6paTb XeNaTeBHyn npaMeTp, 3aTeM Haxmnte KhoNky ENTER, YTO6bI NOITBePdNTb Bbl6Op.
BnDEOBbIXOJ
N3MeHeHHe NaCTpoEK, OTHOCAUHXC K BbIXOy SCART.
PA3PEUHEHNE
3Ta onuHnOJb3yeTcIaHacTpoiK pa3peWeHn.
HACTPOIKA LBETA
3decb Bbl MOKeTe yCTaHOBnTb CNeDyUOuNHe NaCTpOnKu CBeta:
- SHARPNESS
BRIGHTNESS
-CONTRAST
-HUE
SATURATION
HACTPOIKA HDMI
JaHHaHnactpoika onuOnTHocntcK MyIbTmEduHOMy INHTepeCy BicokoYtKocTn (HDMl).
-HDMI:ON or OFF
- AUDIO SOURCE: AUTO/PCM
- DEEP COLOR: 24 BIT / 30 BIT / 36 BIT
RU
108
CTPAHULA HACTPOKNI NAPAMETPOB

Bb6epe HacptpoynapamepoB SETUP MENU. Haxmaite KhoNky ▲nJv, yTo6bl Bb6paTb JcIaTeIbHbI npamepTp, 3aTeM Haxmite KhoNky ENTER ,yTo6bl NODTBepDntB Bb6Op.
TNNTB
Bb6op r3bka dnyayno (ecn neb Bb6op).
-PAL
-AUTO
-NTSC
Aydno
Bb6op y3bka dnyayno (ecnnecTb Bb6op).
- ENGLISH
-FRENCH - GERMAN
-ITALIAN - SPANISH
- SWEDISH
DUTCH
- SUBTITLE
Bb6op 3bka dny cy6TnTpoB (ecnn ectb Bb6op).
- ENGLISH
-FBENCH - GERMAN
ITALIAN
-SPANISH - SWEDISH
- DUTCH
- OFF
MEHIO INCKOB
Bb60pa3bkaIgMeHIO DCCKOB (ecn eCTb Bb60p).
- ENGLISH
-FRENCH - GERMAN
-ITALIAN - SPANISH
- SWEDISH
DUTCH
POINTELbCKN KOHTPOJIb
3decb BbIMoKTe yCTaHOBnTb HAcTpoKn poNTeNbckoro KOHTpONa B DVD-nponrpblBaTeNe.
- KID SAF
- G
B. PG
4.PG13 - PGR
6.R - NC17
B. ADULT
PnmeaHne: Iy TaHOBKn HAcTpoKn poNTeJIbCKO KOHTpOJI Heo6xOIM napoiB.
3HAUEHNIOYMOJAHNIO
UcTaHOBnTe 06paTHO 3aOBdCKne 3NaueHnI NO yMOJuaHNIO B DVD-mpoINrpblBaTeNe.
CTPAHUIA YCTAHOBKN IAPOJIAR
9 BbIbpaTb PASSWORD SETUP B SETUP MENU. HaxmMaTe KHONky ▲nN, yTO6bI Bbl6paTb JKeIaTeJIbHbI npaMeTp, 3aTeM HaxmMtE KHONky ENTER , yTO6bI NOITBepdntb Bbl6Op.
PEXIMIAPOJA
3Decb BblMOKeTe BKJIOHTb/BblKJIOHTbpeKMnapOJIa.
PpmeHHe: Ecn npexn npoJyCtAHOBnB BbIKNoeHHoe nIoXKeHne, N3MeHeHne yPoBnpoNTeBcKOrO KoHTpOnHe 6ydt npoBepaTb npoIb.
IAPOJIb
3decb Bbl MOKeTe yCTaHOBnTb NIN IN3MeHnTb napOJIb.
PpmeHne: EcnBb3a6bln npoIb, nCnoJIb3yIte yHNBepcaJIbHbI npOJIb 1369 nn pa36JIOKIpOBaHna.
Bocnpon3BeJeHne DVD
OTKPOIe DBepu DnCKOBoJa n BCTaBbTe DVD. Ha 3kpaHe BbICBeTnCmEHIO BOCPOn3BeHnEHNr DVD.
OTKPbITb/3AKPbITb
(OPEN/CLOSE)
HaxMMTe aTTo6bI n3BLeyb CD/DVD-dnck.
CTON (STOP) UTo6bl npnoctaHOBnTB BOCPpon3BeDeHne, OdHn pa3 HaKMITE
YTo6bIOCTaHOBnTBBOcnpOu3BeDeHneNOJHoCTbIO,HaXMITEBaXJIbI.
BOCIPON3BEDEHNE/ PAY3A (PLAY/PAUSE)
YTo6bI 3aepKaTb BocPon3BeHeHne, OINH pa3 HaxMnteII .ДЯ BO3O6HOBJIeHnBOCPon3BeHnHn HaxMnteHOBa.
PONYCK BNEPEI/HA3AD
(SKIP FORWARD/BACKWARD)
BoBpeMaBocnpoun3BeDeHnHaJMMTe▶,UTo6bl npOnyCTntb cIeMyuui pa3den,nnI▶o6bl npOnyCTntb npEblduuui pa3den.
NONCK BNEPEД/HA3AД
Bo BpemBocpnoun3BepeHnHaKMnTe npeMoTKn TeKyuero pa3deJa Bnepei nn npeMoTKn TeKyuero pa3deJa Ha3aJ.
(SEARCH FORWARD /BACKWARD)
IOBTOPOIN3BEENH
(REPEAT PLAYBACK)
Bo BpemBocIpOn3BeDeHnHaXmTe KHOKnY REPEAT HeckoIbko pa3, yTo6bl aKTbBnPoBaTcJeDyUOuNe yHKun nOBtopa:
DND NobTOP AepnAeeppeeppeepaee
CD/VCD(PBC off) Repeat Track/Repeat All
MP3 Single/Repeat One/Repeat Folder/Folder/Shuffle/Random
MP4/MPEG4 Single/Repeat One/Repeat Folder/Shuffle/Random
NHΦOPMALIHA 3KPAHE
Bo BpemBocnpoun3BeHnHeckoNbKO pa3 HaxMnte KhONky DISPLAY, 0To6bl OTO6pa3nTb INHOFopMaunO DnCKe: TpeKN, pa3JeJIbI, BpemBocnpoun3BeHn, J3bIKN I T.D. B 3aBNCIMOCnT OT BCTaBNEHHORO DnCKa.
CYB7NTPbl (SUBTITLE)
HeckoJIbKO pa3 HaXMMTE KHOHKy SUBTITLE IЯ CMeHbI Ra3bIka cy6TntpoB
3BYK (AUDIO)
HeckoIbko pa3 HaxMnte KhONky AUDIO dIra cMeHbI a3bka dy6Jyka.
TPEK (TITLE)
HaxMMTe KONKy TITLE dIJI OCTAHOBKn BOCnpon3BeJeHn I BO3BpaUeHn B MeHIO DnCKa.
YTOJ(ANGLE)
Haxmte KhoNky ANGLE nI3MeHeHry yrJa o63opa.
PPOPTAMMA(PROGRAM)
Haxmnte KhoNky PROG nla HacTpoiKn npaIka dpynx TpeKOB nIIN pa3deIIOB.
RU
110
Bocnpoun3BeJeHne MP3/JPEG/MPEG4
HaKMTe KONIKy MInn BbIBopa KopHeBOrO KaTaNOra, 3aTeM HaKMITE KNONKY ENTER, YTO6bI BOITN B NOKaTaNOr.
Haxmnte KhONky mIn, TTo6bI Bb6paTb HxKhBn TpeK, 3aTeM HxMnte KhoNky ENTER nnn 3anycka Bocnpou3BeHeHnMy3bIKn nnn fNoMa.
Nobtop Bb6op pa3nHbIX pexmOB nobTopa Bocnpo3BeHeia.
REPEAT FOLDER
FOLDER
SHUFFLE
RANDOM
SINGLE
REPEAT ONE
Bocnpoun3BeJeHne OTO-CD
Hajmte KhoNky ▲nI n▼ BbI6opa KopHeBoro KaTajora, 3aTeM Haxmte KhoNky ENTER, YTO6bl BoITN B NOkataJor.
Bocnpon3BeDeHne foToRpafo
- Haxmnte KhoNky mnn nBbI6opa HyxHoro n3o6paXeHn.
- 3aTeM hAkmIe KhoNky ENTER nIN PLAY, yTo6bl BbIBeCTn n3o6paXHe He kpaH. EcIn xOHTe BepHyTcB a MeHIO Ha yPoBeHb BblJe, HaxMnte KhoNky AIN, TTo6bl Bbl6paTb, HaxMnte KhoNky ENTER.
- IpebebopaumBaHne u3o6paKeHnA
Bpexime Bocnpoun3BeDeHnIu3o6paKeHH:
- Haxmte KhoNky AIN, To6bl nepeBepHyt b 3o6paKeHne,
- Haxmte KhoNky PROG, UTo6bI N3MeHnTb peXMM cKaHnPoBaHn# oTO.
USB
10
BcTaBbTe HaKoNITeNb (DnCK) USB C My3bIaJIbHbIMn foAinamn MP3/MP4/MPEG4.
PnmeHne: POKIoute yctpoCTBO USB hnapmyo K npTy USB. He peKomeHnyetcNcNoB3OBAHne ydInHHTeNbHO Ka6eIa, KOtOpbIM MoKeT Co3daTb NOMExu HHeCnpaBHOCTn npipepaue daHHbIX.
3To yCTpoIcTBo nOndepKnBaET hakOnnteTI USB 1.1 n 2.0 o6bemom do 32 Fb c faiNoBOI cnCTeMoF FAT16 nIIu FAT32.
YHCTKA UYXOJ
-песдчсткь Вьнь Te BUNKy DVD-npeepa n3 po3eTkn.
- YnCTntb DVD-nleep cneJeT MrgKo TprKnO. HnkOrda He HaHocnte Ha 3kpaH DVD-nIeepa cnInrT, XMMKAtb IIII 6bITOBbIE MOIOue CpeCTBa.
Bo n36eKaHne deΦopMaun n o6ecuBcUbaHn KaPn BObl cNeIyET BbITnpaTb KaK MoXHO cKOpee.
YCTPAHEHNE HENCNPABHOCTEIN
Ecnn B xOe 3Kcnnyataunn Bo3HnKHyT TpyHocTn, noXaanyIcTa, pyKOBOJCTByITecb CneIyIOuei Ta6niuee. Ecnn npo6JIemY He ydaTcra peuNTb nHcTpkyCUNB Peuenn, noXaanyIcTa, o6paTnTecb K CBOEmy npOn3BODInTeNIO.
| ПюбLEMа Взможи | пьпричимы Peшени | |
| OTCYTCTBVE Изобрахени в 3byka | • Порець в поаде электориатуа | • убeditorов, что кнока вklоченя рintаня нажatable. • убeditorов, что розета в мирарвом состони. • убeditorов, что с来不及шир не поведения. • убeditorов, что вилка плотно Вставлиа в розтук. |
| Изобрахени в порадке, ho 3byk OTCYTCTBYET | • Наршени щадио соедиени | • убeditorов, что щтейкидинамков Вставлиь可不是 смен! • убeditorов, что щдino-pazьем не поведения. • убeditorов, что звук вklочen в насточе VOUCH. • убeditorов, что вилка плотно наразамеры AUDIO плеса. • убeditorов, что вилд лимаь AV-bxod в сухем ТВ. • убeditorов, ч Tao 3byk не вklочу. • убeditorов, ч Tao щдino-lindу AV-bxod в сухем TB. • убeditorов, ч Tao вилд лимаь AV-bxod в сухем TB. • убeditorов, ч Tao вилд лимаь AV-bxod в сухем TB. • убeditorов, ч Tao вилд лимаь AV-bxod в сухем TB. • убeditorов, ч Tao вилд лимаь AV-bxod в сухем TB. • убeditorов, ч Tao вил徳ога AV-bxod в сухем TB. • убeditorов, ч Tao вил徳ога AV-bxod в сухем TB. • убeditorов, ч Tao вил徳ога AV-bxod в сухем TB. • убeditorов, ч Tao вил徳ога AV-bxod в сухем TB. • убeditorов, ч Tao вил徳ог�а AV-bxod в сухем TB. • убeditorов, ч Tao вил徳ога AV-bxod в сухем TB. • убeditorов, ч Tao вил徳ога AV-bxod в сухем TB. • убeditorов, ч Tao вил徳ога AV-bxod в сухем TB. • убeditorов, ч Tao вил徳ergа AV-bxod в сухем TB. • убeditorов, ч Tao вил徳ergа AV-bxod в сухем TB. • убeditorов, ч Tao вил徳ergа AV-bxod в сухем TB. • убeditorов, ч Tao вил徳ergа AV-bxod в сухем TB. • убeditorов, ч Tao вил徳erm AV-bxod в сухем TB. • убeditorов, ч Tao вил徳erm AV-bxod в сухем TB. • убeditorов, ч Tao вил徳erm AV-bxod в сухем TB. • убeditorов, ч Tao вил徳erm AV-bxod в сухем TB. • убeditorов, ч Tao вил徳erm AV-bxOD в сухем TB. • убeditorов, ч Tao вил徳erm AV-bxOD в сухем TB. • убeditorов, ч Tao вил徳erm AV-bxOD в сухем TB. • убeditorов, ч Tao вил徳erm AV-bxOD в сухем TB. • убeditorов, ч Tao вил徳erm AV-bxOD в сух-medium AV-bxOD. • убeditorов, ч Tao вил徳erm AV-bxOD. • убeditorов, ч Tao вил徳erm AV-bxOD. • убeditorов, ч Tao вил徳erm AV-bxOD. • убeditorов, ч Tao вил徳erm AV-bxOD. • убeditorов, ч Tao вил徳erm AV-bxOD. • убeditorов, ч Tao вил徳erm AV-bxOD • убeditorов, ч Tao вил徳erm AV-bxOD. • убeditorов, ч Tao вил徳erm AV-bxOD. • убeditorов, ч Tao вил徳erm AV-bxOD. • убeditorов, ч Tao вил徳erm AV-bxOD. • убeditorов, ч Tao вил徳erm AV-bxOD. • убeditorov, ч Tao вил徳erm AV-bxOD. • убeditorov, ч Tao вил徳erm AV-bxOD. • убeditorov, ч Tao вил徳erm AV-bxOD. • убeditorov, ч Tao вил徳erm AV-bxOD. • убeditorov, ч Tao вил徳erm AV-bxOD. • убeditorov, ч Tao вьд лимаь AV-bxOD. • убeditorov, ч Tao вьд лимаь AV-bxOD. • убeditorov, ч Tao вьд лимаь AV-bxOD. • убeditorov, ч Tao вьд лимаь AV-bxOD. • убeditorov, ч Tao вьд лимаь AV-bxOD. • убeditorov, ч Tao вьд лималь AV-bxOD. • убeditorov, ч Tao вьд лимаь AV-bxOD. • убeditorov, ч Tao вьд лимаь AV-bxOD. • убeditorov, ч Tao вьд лимаь AV-bxOD. • убeditorov, ч Tao вьд лимаь AV-bxOD. • убeditorov, ч Tao вьд лимаß AV-bxOD. • убeditorov, ч Tao вьд лимаь AV-bxOD. • убeditorov, ч Tao вьд лимаь AV-bxOD. • убeditorov, ч Tao вьд лимаь AV-bxOD. • убeditorov, ч Tao вьд лимаь AV-bxOD. • убeditorov, ч Tao вьд лимаь AV-bxOD. • убeditorov, ч Tao вьд лимаь AV-bxOD. • убeditorov, ч Tao вьд лимаь AV-bxOD. • убeditorov, ч Tao вьд лимаь AV-bxOD. • убeditorov, ч Tao вьд лимаь AV-bxOD. • убeditorov, ч Tao вьд лимаь AV-bxOD. • убeditorov, ч Tao вьд лимаь AV-bxOD. • убeditorov, ч Tao вьд лимаь AV-bxOD. • убeditorov, ч Tao вьд лимаь AV-bxOD. • убeditorov, ч Tao вьд лимаь AV-bxOD • убeditorov, ч Tao вьд лимаь AV-bxOD. • убeditorov, ч Tao вьд лимаь AV-bxOD. • убeditorov, ч Tao вьд лимаь AV-bxOD. • убeditorov, ч Tao вьд лимаь AV-bxOD. • убeditorov, ч Tao вь徳ога AV-bxOD. • убeditorov, ч Tao вь徳ога AV-bxOD. • убeditorov, ч Tao вь徳ога AV-bxOD. • убeditorov, ч Tao вь徳ога AV-bxOD. • убeditorov, ч Tao вь徳ога AV-bxOD. • убeditorov, ч Tao вь徳ог�а AV-bxOD. • убeditorov, ч Tao вь徳ог�а AV-bxOD. • убeditorov, ч Tao вь徳ог�а AV-bxOD. • убeditorov, ч Tao вь徳ог�а AV-bxOD. • убeditorov, ч Tao вь徳ог�а AV-bxOD. • убeditorov, ч Tao в. • убeditorov, ч Tao в. • убeditorov, ч Tao в. • убeditorov, ч Tao в. • убeditorov, ч Tao в. • убeditorov, ч Tao в. • убeditorov, ч Tao в. • убeditorov, ч Tao в. • убeditorov, ч Tao в. • убeditorov, ч Tao в。 • убeditorov, ч Tao в. • убeditorov, ч Tao в. • убeditorov, ч Tao в. • убeditorov, ч Tao в. • убeditorov, ч Tao в. • убeditorov, ч Tao в. • убeditorov, ч Tao в. • убeditorov, ч Tao в. • убeditorov, ч Tao в. * 6. * 7. * 8. * 9. * 10. * 11. * 12. * 13. * 14. * 15. * 16. * 17. * 18. * 19. * 20. * 21. * 22. * 23. * 24. * 25. * 26. * 27. * 28. * 29. * 30. * 31. * 32. * 33. * 34. * 35. * 36. * 37. * 38. * 39. * 40. * 41. * 42. * 43. * 44. * 45. * 46. * 47. * 48. * 49. * 50. * 51. * 52. * 53. * 54. * 55. * 56. * 57. * 58. * 59. * 60. * 61. * 62. * 63. * 64. * 65. * 66. * 67. * 68. * 69. * 70. * 71. * 72. * 73. * 74. * 75. * 76. * 77. * 78. * 79. * 80. * 81. * 82. * 83. * 84. * 85. * 86. * 87. * 88. * 89. * 90. * 91. * 92. * 93. * 94. * 95. * 96. * 97. * 98. * 99. * 100. * 101. * 102. * 103. * 104. * 105. * 106. * 107. * 108. * 109. * 110. * 111. * 112. * 113. * 114. * 115. * 116. * 117. * 118. * 119. * 120. * 121. * 122. * 123. * 124. * 125. * 126. * 127. * 128. * 129. * 130. * 131. * 132. * 133. * 134. * 135. * 136. * 137. * 138. * 139. * 140. * 141. * 142. * 143. * 144. * 145. * 146. * 147. * 148. * 149. * 150. * 151. * 152. * 153. * 154. * 155. * 156. * 157. * 158. * 159. * 160. * 161. * 162. * 163. * 164. * 165. * 166. * 167. * 168. * 169. * 170. * 171. * 172. * 173. * 174. * 175. * 176. * 177. * 178. * 179. * 180. * 181. * 182. * 183. * 184. * 185. * 186. * 187. * 188. * 189. * 190. * 191. * 192. * 193. * 194. * 195. * 196. * 197. * 198. * 199. * 200. * 201. * 202. * 203. * 204. * 205. * 206. * 207. * 208. * 209. * 210. * 211. * 212. * 213. * 214. * 215. * 216. * 217. * 218. * 219. * 220. * 221. * 222. * 223. * 224. * 225. * 226. * 227. * 228. * 229. * 230. * 231. * 232. * 233. * 234. * 235. * 236. * 237. * 238. * 239. * 240. * 241. * 242. * 243. * 244. * 245. * 246. * 247. * 248. * 249. * 250. * 251. * 252. * 253. * 254. * 255. * 256. * 257. * 258. * 259. * 260. * 261. * 262. * 263. * 264. * 265. * 266. * 267. * 268. * 269. * 270. * 271. * 272. * 273. * 274. * 275. * 276. * 277. * 278. * 279. * 280. * 281. * 282. * 283. * 284. * 285. * 286. * 287. * 288. * 289. * 290. * 291. * 292. * 293. * 294. * 295. * 296. * 297. * 298. * 299. * 300. * 301. * 302. * 303. * 304. * 305. * 306. * 307. * 308. * 309. * 310. * 311. * 312. * 313. * 314. * 315. * 316. * 317. * 318. * 319. * 320. * 321. * 322. * 323. * 324. * 325. * 326. * 327. * 328. * 329. * 330. * 331. * 332. * 333. * 334. * 335. * 336. * 337. * 338. * 339. * 340. * 341. * 342. * 343. * 344. * 345. * 346. * 347. * 348. * 349. * 350. * 351. * 352. * 353. * 354. * 355. * 356. * 357. * 358. * 359. * 360. * 361. * 362. * 363. * 364. * 365. * 366. * 367. * 368. * 369. * 370. * 371. * 372. * 373. * 374. * 375. * 376. * 377. * 378. * 379. * 380. * 381. * 382. * 383. * 384. * 385. * 386. * 387. * 388. * 389. * 390. * 391. * 392. * 393. * 394. * 395. * 396. * 397. * 398. * 399. * 400. * 401. * 402. * 403. * 404. * 405. * 406. * 407. * 408. * 409. * 410. * 411. * 412. * 413. * 414. * 415. * 416. * 417. * 418. * 419. * 420. * 421. * 422. * 423. * 424. * 425. * 426. * 427. * 428. * 429. * 430. * 431. * 432. * 433. * 434. * 435. * 436. * 437. * 438. * 439. * 440. * 441. * 442. * 443. * 444. * 445. * 446. * 447. * 448. * 449. * 450. * 451. * 452. * 453. * 454. * 455. * 456. * 457. * 458. * 459. * 460. * 461. * 462. * 463. * 464. * 465. * 466. * 467. * 468. * 469. * 470. * 471. * 472. * 473. * 474. * 475. * 476. * 477. * 478. * 479. * 480. * 481. * 482. * 483. * 484. * 485. * 486. * 487. * 488. * 489. * 490. * 491. * 492. * 493. * 494. * 495. * 496. * 497. * 498. * 499. * 500. * 501. * 502. * 503. * 504. * 505. * 506. * 507. * 508. * 509. * 510. * 511. * 512. * 513. * 514. * 515. * 516. * 517. * 518. * 519. * 520. * 521. * 522. * 523. * 524. * 525. * 526. * 527. * 528. * 529. * 530. * 531. * 532. * 533. * 534. * 535. * 536. * 537. * 538. * 539. * 540. * 541. * 542. * 543. * 544. * 545. * 546. * 547. * 548. * 549. * 550. * 551. * 552. * 553. * 554. * 555. * 556. * 557. * 558. * 559. * 560. * 561. * 562. * 563. * 564. * 565. * 566. * 567. * 568. * 569. * 570. * 571. * 572. * 573. * 574. * 575. * 576. * 577. * 578. * 579. * 580. * 581. * 582. * 583. * 584. * 585. * 586. * 587. * 588. * 589. * 590. * 591. * 592. * 593. * 594. * 595. * 596. * 597. * 598. * 599. * 600 * 601 * 602 * 603 * 604 * 605 * 606 * 607 * 608 * 609 * 610 * 611 * 612 * 613 * 614 * 615 * 616 * 617 * 618 * 619 * 620 * 621 * 622 * 623 * 624 * 625 * 626 * 627 * 628 * 629 * 630 * 631 * 632 * 633 * 634 * 635 * 636 * 637 * 638 * 639 * 640 * 641 * 642 * 643 * 644 * 645 * 646 * 647 * 648 * 649 * 650 * 651 * 652 * 653 * 654 * 655 * 656 * 657 * 658 * 659 * 660 * 661 * 662 * 663 * 664 * 665 * 666 * 667 * 668 * 669 * 670 * 671 * 672 * 673 * 674 * 675 * 676 * 677 * 678 * 679 * 680 * 681 * 682 * 683 * 684 * 685 * 686 * 687 * 688 * 689 * 690 * 691 * 692 * 693 * 694 * 695 * 696 * 697 * 698 * 699 * 700 * 701 * 702 * 703 * 704 * 705 * 706 * 707 * 708 * 709 * 710 * 711 * 712 * 713 * 714 * 715 * 716 * 717 * 718 * 719 * 720 * 721 * 722 * 723 * 724 * 725 * 726 * 727 * 728 * 729 * 730 * 731 * 732 * 733 * 734 * 735 * 736 * 737 * 738 * 739 * 740 * 741 * 742 * 743 * 744 * 745 * 746 * 747 * 748 * 749 * 750 * 751 * 752 * 753 * 754 * 755 * 756 * 757 * 758 * 759 * 760 * 761 * 762 * 763 * 764 * 765 * 766 * 767 * 768 * 769 * 770 * 771 * 772 * 773 * 774 * 775 * 776 * 777 * 778 * 779 * 780 * 781 * 782 * 783 * 784 * 785 * 786 * 787 * 788 * 789 * 790 * 791 * 792 * 793 * 794 * 795 * 796 * 797 * 798 * 799 * 800 * 801 * 802 * 803 * 804 * 805 * 806 * 807 * 808 * 809 * 810 * 811 * 812 * 813 * 814 * 815 * 816 * 817 * 818 * 819 * 820 * 821 * 822 * 823 * 824 * 825 * 826 * 827 * 828 * 829 * 830 * 831 * 832 * 833 * 834 * 835 * 836 * 837 * 838 * 839 * 840 * 841 * 842 * 843 * 844 * 845 * 846 * 847 * 848 * 849 * 850 * 851 * 852 * 853 * 854 * 855 * 856 * 857 * 858 * 859 * 860 * 861 * 862 * 863 * 864 * 865 * 866 * 867 * 868 * 869 * 870 * 871 * 872 * 873 * 874 * 875 * 876 * 877 * 878 * 879 * 880 * 881 * 882 * 883 * 884 * 885 * 886 * 887 * 888 * 889 * 890 * 891 * 892 * 893 * 894 * 895 * 896 * 897 * 898 * 899 * 800 * 801 * 802 * 803 * 804 * 805 * 806 * 807 * 808 * 809 * 810 * 811 * 812 * 813 * 814 * 815 -816 -817 -818 -819 -820 -821 -822 -823 -824 -825 -826 -827 -828 -829 -830 -831 -832 -833 -834 -835 -836 -837 -838 -839 -840 -841 -842 -843 -844 -845 -846 -847 -848 -849 -850 -851 -852 -853 -854 -855 -856 -857 -858 -859 -860 -861 -862 -863 -864 -865 -866 -867 -868 -869 -870 -871 -872 -873 -874 -875 -876 -877 -878 -879 -880 -881 -882 -883 -884 -885 -886 -887 -888 -889 -890 -891 -892 -893 -894 -895 -896 -897 -898 -899 -900 -901 -902 -903 -904 -905 -906 -907 -908 -909 -910 -911 -912 -913 -914 -915 -916 -917 -918 -919 -920 -921 -922 -923 -924 -925 -926 -927 -928 -929 -930 -931 -932 -933 -934 -935 -936 -937 -938 -939 -940 -941 -942 -943 -944 -945 -946 -947 -948 -949 -950 -951 -952 -953 -954 -955 -956 -957 -958 -959 -960 -961 -962 -963 -964 -965 -966 -967 -968 -969 -970 -971 -972 -973 -974 -975 -976 -977 -978 -979 -980 -981 -982 -983 -984 -985 -986 -987 -988 -989 -990 -991 -992 -993 -994 -995 -996 -997 -998 -999 -900 -901 -902 -903 -904 -905 -906 -907 -908 -909 -910 -911 -912 -913 -914 -915 -916 -917 -918 - |
TEXHUNECKNEXAPAKTEPNUCTUKN
- Closed Captions (undertexter)
- KID SAF
- G
B. PG - PG13
- PGR
- R
- NC17
B. ADULT
- KID SAF
- G
B. PG - PG13
- PGR
- R
- NC17
8.ADULT
DADD Repeat chapter/Repeat title/Repeat All
CD/VCD(PBC off) Repeat Track/Repeat All
MP3 Single/Repeat One/Repeat Folder/Folder/Shuffle/Random
MP4/MPEG4 Single/Repeat One/Repeat Folder/Shuffle/Random
ON-SCREEN INFORMATION
(EKRANDA BILGI)
Oynatma sirasinda takilan diske baglil orarak diskin baslik, bolum,