
CompactPower MFW3X13W - Meat Grinder BOSCH - Free user manual and instructions
Find the device manual for free CompactPower MFW3X13W BOSCH in PDF.
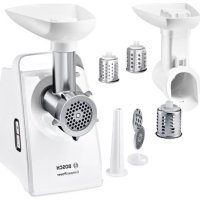


| Brand | Bosch |
| Model | CompactPower MFW3X13W |
| Product type | Multifunction electric meat grinder |
| Main functions | Grind, slice, grate, juice citrus, grind cereals, press fruits, make sausages |
| Speeds | 2 speeds (slow 1, fast 2) + reverse |
| Material | Plastic body, stainless steel blade, metal discs |
| Safety | Safety lock, overload protection, automatic shut-off in case of blockage |
| Maintenance and cleaning | Clean parts by hand with warm soapy water; do not immerse base unit; dry and oil metal parts after washing |
| Spare parts and repairability | Perforated discs (2.7 / 4 / 8 mm), slicing and grating inserts, sausage attachment, citrus press, grain mill, fruit press available as spare parts |
| Power supply | 220-240 V, 50 Hz |
| Power | 700 W (estimated) |
| Weight | Approximately 5 kg |
| Dimensions (L x W x H) | Approximately 35 x 20 x 30 cm |
| Color | White and black |
| Cord length | Approximately 1 m |
| Package contents | Base unit, meat grinder with 3 discs, sausage attachment, slicing attachment with 3 inserts, citrus press, grain mill, fruit press, pusher, cleaning brush |
| Usage type | Household use only |
| Warranty | 2 years (subject to terms) |
Frequently Asked Questions - CompactPower MFW3X13W BOSCH
User questions about CompactPower MFW3X13W BOSCH
0 question about this device. Answer the ones you know or ask your own.
Ask a new question about this device
Download the instructions for your Meat Grinder in PDF format for free! Find your manual CompactPower MFW3X13W - BOSCH and take your electronic device back in hand. On this page are published all the documents necessary for the use of your device. CompactPower MFW3X13W by BOSCH.
USER MANUAL CompactPower MFW3X13W BOSCH
CompactPower Meat mincer
MFW39... MFW3X...
[de] Gebrauchsanleitung Fleischwolf 3 [en] Instruction manual Meat mincer 18 [fr] Mode d'emploi Hachoir 32 [it] Istruzioni per l'uso Tritacarne 47 [nl] Gebruiksaanwijzing Vleesmolen 61 [da] Brugsanvisning Kødhakker 76 [no] Bruksanvisning Kjøttkvern 89 [sv] Bruksanvisning Köttkvarn 102 [fi] Käyttöohje Lihamylly 116 [es] Instrucciones de uso Picador de carne 130 [pt] Instruções de serviço Picadora de carne 146 [el] Οδηγίες χρήσης Εξάρτημα για κρέας 161 [tr] Kullanım kılavuzu Et parçalama makinesi 178 [pl] Instrukcja obsługi Maszynka do mięsa 195 [uk] Інструкція з експлуатації М'ясорубка 211 [ru] Инструкция по эксплуатации Мясорубка 226 [ar] دليل الاستخدام 259
Read and follow the operating instructions. Keep them for later reference. Enclose these instructions when passing this appliance to someone else.
If the instructions for correct use of the appliance are not followed, the manufacturer's liability for any resulting damage is excluded.
This appliance is intended for domestic use for processing normal quantities of food for household purposes. The appliance and accessories (depending on model) are suitable for the following purposes:
Meat mincer: for cutting and mixing raw meat, poultry, and fish.
Sausage filler: for making sausages and meat preparations. Shredding attachment: for shredding, grating. Citrus press: for squeezing juice out of citrus fruits. Grain mill: for grinding all types of grain, e.g., poppy seeds, linseeds, sesame, buckwheat, spices, and coffee.
Fruit press: for squeezing juice out of fruits such as raspberries, currants, strawberries, gooseberries, and tomatoes.
Food which is to be processed must not contain hard components (e.g., bones). The appliance should not be used for processing other substances or objects. Additional hazards are possible if accessories not approved by the manufacturer are used. Use the appliance only with genuine parts. Never use the attachments or slicing/shredding discs with other appliances. Only use matching parts for the appliance. Only use the appliance indoors at room temperature and at altitudes up to 2000 m above sea level. Do not place the appliance on hot surfaces, e.g., hobs.
Your work surface should be easily accessible, firm, flat, dry, and large enough to prevent accidents and to let you work unhindered.
This appliance can be used by persons with reduced physical, sensory, or mental capabilities or lack of experience and knowledge if they have been given supervision or instruction concerning use of the appliance and if they understand the hazards involved. Keep children away from the appliance and its cord, and do not allow them to use the appliance.
Children must not play with the appliance. Cleaning and user maintenance must not be performed by children.
Safety instructions
Danger of electric shock and fire
Connect and operate the appliance only according to the plate specifications. Do not use if the main cable shows any signs of damage. To avoid potential hazards, such as replacing a damaged cable, must only be done by our customer service personnel. Never connect the appliance to timer switches or remote-controllable sockets. Do not leave the appliance unattended while it is switched on. Ensure the appliance is never switched on for longer than necessary to process the ingredients.
The mains cable must not come into contact with hot parts or be pulled across sharp edges. Never immerse the appliance in water or place it in the dishwasher. Do not steam-clean the appliance. Do not use the appliance with damp hands and do not operate it with wet hands. The appliance must always be disconnected from the mains after each use, whenever the appliance is unattended, before disassembly or cleaning, and in the event of a malfunction.
Risk of injury
Immediately after using the appliance, wait for it to cool down before fitting or replacing attachments. The appliance must be switched off and disconnected from the mains.
Do not grasp the sharp blades and edges of the slicing inserts.
Keep hands clear of rotating parts. Never reach into the feed chute or outlet opening. Never put the food to be processed into the chute with your hands. Only use the pusher provided. Never clean the sharp blades and edges of the slicing inserts with your bare hands. Clean them with a brush or cloth.
Caution! Risk of damaging the appliance
Check that there are no foreign objects in the attachments. Do not poke objects (e.g., knife, spoon) into the feed chute or outlet opening.
Before changing the direction of rotation (reverse), wait until the drive has come to a complete standstill. On each use, let the appliance run uninterrupted for a maximum of 10 minutes, then allow it to cool down to room temperature.
Important!
It is essential to clean the appliance as described in the instructions, especially before first use or after it has not been used for an extended period. See "Daily cleaning" on page 27.
Congratulations on the purchase of your new Bosch appliance.
On the following pages of these instructions, you will find important information for the safe use of this appliance. We request that you read these instructions carefully and observe them. This ensures you will enjoy this appliance for a long time, and the results will confirm your choice. Retain these operating instructions for subsequent use or for the next owner. You can find further information about our products on our website.
Content
Intended use.. Safety instructions 3
Overview. Before using for the first time. Control and display elements. Overload protection. Speed setting.
Reversing function. Base unit. Base attachment.
Shredding attachment. Citrus press attachment.
Grain mill attachment. Care and daily cleaning.
Recipes. Tips.
Disposal. Guarantee. Spare parts and accessories.
Troubleshooting.
Threaded ring.
Blade. Perforated disc, medium. Perforated disc, coarse.
Sausage filter insert. Bearing ring. Sausage filter nozzle.
Fig. C: Shredding attachment.
Housing. Feed chute.
Collecting tray. Filter insert. Pressing cone. Driving shaft with spring.
Grain mill attachment*
Housing.
b Feed chute
c Filling tray
d Worm gear
e Grinding ring
f Grinding cone
g Grinding chamber
h Setting ring
i Adjustment screw with j Threaded ring
8 Fruit press attachment*
Use filling tray and pusher attachment.
a Housing
b Feed chute
c Worm gear with sealing r
d Filter inserts: fine (1)
e Filter holder with seal i
f Threaded ring
g Outlet funnel
h Pulp nozzle (adjustable)
i Hook for removing the fj
j Cleaning brush
- depending on the model
The operating instructions for the models of the Appliance are provided on the pages that show the figures. Fig.
Spare parts and accessories available from Customer Service
www.bosch-home.com. → "Spare parts and accessories" see page 30
Before using for the first time
Before the new appliance can be used, it must be fully unpacked, cleaned, and checked.
Caution!
Never operate a damaged appliance.
Remove the base unit and all
accessories from the packaging
Remove the packaging material present.
order, as described under , P
Check all parts for completeness.
Fig. A / C
Inspect all parts for visible damage.
Thoroughly clean and dry all parts.
before using for the first time.
See "Care and daily cleaning" on
page 27.
filter insert
Control and display
elements
MFW39
Button I
Press button I to switch on the drive. It will start up at once.
Button O
Press button O to switch off the drive. The drive stops.
Button O/I
Press button O/I to switch on the drive. It starts running immediately at speed 2 (fast). Press button O to switch off the appliance. The drive stops.
Button 1-2 | rev
Pressing button 1-2|rev briefly switches the speed of the appliance between 1 (slow) and 2 (fast). See "Speed setting" on page 22.
Pressing and holding button 1-2 starts the reversing function.
See "Reversing function" on page 22.
All models
Operation indicator
The operation indicator lights up when the appliance is switched on. During the reversing function, it flashes for as long as the button is pressed.
Release button
Press the release button on the attachment fitted on the appliance when the release button is possible to turn the attachment and remove it from the base.
Cable storage compartment
The mains cable can be pulled out of the cable storage compartment and pushed back in again. Only ever pull out as much as is required.
Storage compartment
Unused perforated discs for the meat mincer can be kept in a compartment and it can be closed with a lid.
Overload protection
To prevent serious damage to the appliance if the base is overloaded, the agitator paddle has a notch (predetermined breaking point). If overloading occurs, the agitator will break at this point. A replacement paddle is available from Customer Service (No. 10005188). Spare parts at the predetermined breaking point are not covered by our warranty obligations.
Replace agitator paddle (see Fig. 3)
- Release the screw in the paddle with a screwdriver (PH2) and remove the faulty paddle.
- Fit a new agitator paddle again.
Speed setting
ONLY MFW3X.
The speed setting can be set to 1 (slow) or 2 (fast) using the speed setting feature. The indicator lights up when the function is active.
Caution! Button is
For certain applications, it is recommended to use speed 1 (slow). Take note of the recommended speeds! See Fig. and unlock.
Switch on the appliance with the switch. The appliance will run at speed element. Press switch 1-2|rev briefly. The appliance will switch to speed. Press button 1-2|rev briefly. The appliance will switch back to the previous speed.
Reversing function
ONLY MFW3X. . .
The reversing function is designed to release food that has got stuck. The cover running the worm gear in reverse reverses the cover. Reversing function switches off after 15 seconds.
Caution!
Never use the reverse function with the grain mill attachment or the ddl attachment! Never press and hold button 1-2|rev continuously while the appliance is switched on. Only press and release button 1-2|rev continuously once the appliance has come to a complete stop. Switch the appliance off with the switch, wait until the drive has come to a standstill. Press and hold button 1-2|rev. After approx. 5-10 seconds, release button 1-2 and wait for the appliance to come to a standstill. Switch the appliance on again with the button o/1.
Note: If food that has got stuck is released by briefly using the reverse, switch the appliance off and clean it. → “Care and daily cleaning” see page 27
Base unit
Preparation
Risk of injury!
Do not insert the mains plug until preparations for working are complete and the required attachments are assembled correctly and the base unit.
Place the base unit on a work surface. Pull the mains cable out of the storage compartment to the required length.
The base unit is now prepared.
- Fit the threaded ring onto the meat mincer and screw tight in a clockwise direction without using force. The meat mincer is now prepared.
Preparation for sausage filling
Insert the worm gear with the connected paddle at the front in the housing. First fit the bearing ring gear and then the sausage nozzle. The sausage filler is now prepared.
Base attachment
The base attachment can be used for the following applications:
Meat mincer
For chopping up raw or cooked meat, use the appropriate perforated disc depending on the type and consistency.
be processed. → "Tips" see page 28
Sausage filler
For filling artificial and natural casings with sausage meat. For producing meat rolls.
Note: Other applications are possible. Caution!
When using the base attachment and appropriate accessories, do not process bones, gristle, or other solid components.
Service.
Caution!
When assembling the different individual
parts, make sure that the notched inserts match up with the reference unit, holding it
one on the housing.
Preparation for meat
Risk of Injury!
Do not reach into the sharp
Caution!
Always only use one perfora
→ Fig. D
- Insert the worm gear with
paddle at the front in the house, since the mains plug. Swi
- First fit the knife and the required
perforated disc onto the worm gear.
Use
Note: The food is processed in ways depending on the application. "Recipes" see page 28
The following example describes
the basic attachment as a meat
Risk of injury!
- Do not reach into the feed with your hands. Natural ingredients may be ejected when the appliance is in operation.
Caution!
and appropriate process bones, grist, and other solid components.
- Do not process frozen meat.
- Do not apply great force
Individual
Fit the repaired attachments in the reference unit, holding it. 2. Turn the attachment anticlockwise until you hear it click into position.
3. Fit the filling tray and in the feed chute.
- Prepare your food. Chop it up beforehand so it fits into the feed chute without having to press. Place a suitable container under the attachment. Add the prepared food.
In the picture tray. 5. Connect the mains plug. Switch on.
the appliance required
Note (MFW3X...):
Caution! (MFW3X...):
After switching on, the appliance always uses the shredding insert at ideal speed 2 (fast). Inserts at speed 1 (slow).
- Use the pusher to slide the food through the grating insert at the feed chute, applying light pressure. "Speed setting" see page 22.
- Once you have finished, switch off the
appliance and pull out the mains plug. Prepare the attachment
Remove the filling tray and pusher from the base unit, holding
- Hold down the release button and turn the
attachment clockwise until it disengages. Turn the attachment anticlockwise
Remove the attachment, take it apart, click it into position and clean all parts. →“Care and daily cleaning” see page 27. Place the filling tray and pusher in the feed chute.
Shredding attachment
Prepare your food. Chop up beforehand so they fit into
For shredding, grating and slicing without having to press such as cheese, fruit, vegetables, nuts, suitable container, almonds, dried bread rolls and cooked meat. Add the prepared foodstuffs. Select the appropriate insert tray.
depending on the type and consistency of the food to be processed. →“Tips” see page 28. Switch on the appliance.
page 28
Caution! (MFW3X..)
Preparation
After switching on, the appliance runs at speed 2 (fast). To use the shredding cutting inserts, you must press the button to switch to speed 1. "Speed setting" see page 22.
Risk of Injury!
Do not reach into the sharp edges of the shredding cutting inserts.
- Use the pusher to slide the food into the feed chute, applying light pressure. The food is now cut up or shredded.
See Fig. 6.
- Open the cap. Fit the required insert into the housing. When finished, switch off the appliance and pull out the mains plug.
- Close the cap until you hear it click into the correct position. 9. Remove the filling tray and...
The shredding attachment is now prepared. Turn the attachment clockwise. Use disengages.
Risk of Injury!
- Remove the attachment, take it apart and clean all parts. → "Care and cleaning" see page 27.
- Do not reach into the feed opening with your hands. Clean all parts. Care and cleaning see page 27.
- Only use the pusher when adding more food.
Caution!
- The pusher can only be inserted in one direction.
- Remove hard shells (e.g. on nuts).
- Do not apply great force with the pusher.
Citrus press attachment! (MFW3X...)
After switching on, the appliance must press button 1-2|rev once to
Preparation
Risk of injury!
The attachment for the citrus press is placed on the base and pressed down. As soon as you insert the mains plug and all preparations for working with the appliance are complete, the cone will rotate.
Caution!
The base unit is moved through pressure on the cone. After you have finished preparation and use of the citrus press, switch off the appliance and pull out the mains plug. Hold down the release button.
See Fig.
- Hold the base unit by the base and carefully tip it up. Remove the attachment, take out the drive parts. Possibly remove all parts. See "Care and cleaning" on page 27. Notes:
Hold the base unit by the base and carefully tip it up. Remove the attachment, take out the drive parts. Possibly remove all parts. See "Care and cleaning" on page 27. Notes:
- Insert the driving shaft with the largest amount element pointing down in the mode. The procedure should be repeated a few times on the base unit.
Caution!
It should be possible to push the shaft down lightly with your finger. It must be emptied as necessary.
It must not get sticky with residue. The grain mill attachment may become blocked with pips or foreign bodies.
- Fit the collecting tray onto the drive at an angle. Suitable for oats, rice, coffee beans, pepper.
- Turn the collecting tray anticlockwise until you hear it click into position. Suitable for mushrooms, almonds, soya, linseed.
- Fit the filter insert onto the collecting tray. Suitable for shelled sunflower seeds.
- Fit the pressing cone onto the driving shaft.
The citrus press attachment is driven by the base unit and prepared. See page 28.
Use
Fig. 1
- Cut the citrus fruits in half and place the adjustment screw.
- Place a suitable container and set the attachment.
- Connect the mains plug. Switch on the appliance. The drive is running clockwise. Adjust the ring to set the grinding level.
Fruit press attachment
- Insert the worm gear into the housing. Connect the mains plug. Switch on.
- Insert the grinding ring into the housing.
Note the shape of the parts! Caution!
- Insert the grinding cone with the shaft into the corresponding opening of the worm gear. Then leave the appliance to operate.
- Place the grinding chamber on the housing.
The recess on the grinding chamber must be situated on the lug on the housing.
- Fit the threaded ring onto the housing and screw tight in the clockwise direction without using force. Caution! Use setting to adjust the degree of grinding during operation.
Risk of injury!
Do not reach into the feed chute with your hands. Remove the filling tray. Do not look into the feed chute during operation, as the bouncing particles can hurt your eye. Turn the attachment clockwise to disengage.
Caution! 12. Remove the attachment, take care when the mill is attached, and use a new part. See "Care and function. Attachment may be damaged" on page 27.
See Fig.
- Fit the prepared attachment onto the drive of the base unit, holding it at an angle out of the fruit, e.g., raspberries, currants.
- Turn the attachment anticlockwise until you hear it click into position. Tighten the threaded ring. Preparation
- Fit the filling tray.
- Place a suitable container under the "the content of fruit" attachment. Fill the filling tray. Do not press fruit whose size is 28. Similar images of
Caution!
Never allow the grain mill attachment to run without ingredients.
- Set the degree of grinding by turning the filter holder setting ring: gear If not insert them into
- anticlockwise = coarser grain
- electronic = finer grain
- grooves of these parts.
- clockwise = finer grain 1. Insert the filter insert into Al ways select a value between and press it into place. STOP = see correct degree of
- STOP = coarsest degree of grinding
- 1 = finest degree of grinding (never insert the worm gear into the filter holder in
Use it at the beginning. The lug on the filter holder must stop in the recess on the housing.
- Fit the threaded ring on the pulp nozzle. Unscrew it tight in the clock makes the pulp more moist; side direction without using for cleaning makes it dryer and more juicy.
- Place the outlet funnel on top of the funnel. If the pulp holder until it audibly clicks some words, then use a needle to avoid.
- Screw pulp nozzle into the holder with the pulp.
The fruit press attachment is not one epicurean device finished, switch.
Use
Warning
Risk of Injury!
Do not reach into the feed chute with your hands. Remove the
Caution!
- Remove hard fruit peel, pips, and stones. See page 27.
- Berries such as e.g. currants to remove the filter insert pressed together with their hooks into the hole in the filter.
- Fruit with larger pips and stones should be extracted.
e.g. plums and cherries must have their pips or stones removed before juicing. Pay attention to the juice - Do not process frozen fruit. Make sure filter openings are not clogged. Do not apply great force to the housing.
See Fig. N
with the pulp of juicy fruits
- Fit the prepared attachment onto the drive unit.
drive of the base unit, hold the housing outlet becomes an angle. Switch off the appliance and put
- Turn the attachment anticlockwise and remove the attachment
you hear it click into position, turn on and tighten all parts. → "C threaded ring. cleaning" see page 27
- Fit the filling tray and insert the pusher
in the feed chute.
- Prepare the fruit. Chop the apple and set all attachments beforehand so it fits into the available accessories must be placed in a container each use.
- Remove larger pips and stones (e.g. Risk of electric shock! Cherries, plums). - Disconnect the mains cable
- Place one container under each of the apertures for juice and for the pulp prior to cleaning. Do not immerse the base unit. Add the prepared fruit to the filling tray and do not clean in the dishwasher.
- Connect the mains plug. Switch on the
appliance. Risk of injury!
- Use the pusher to slide the fruit down into the feed chute, applying gentle pressure to the shredding blade.
- The pressed juice flows through the outlet funnel. The pulp (solid components) is pressed through the pulp nozzle.
Clean the outlet funnel with a brush.
Recipes
Caution!
- Do not wash metal parts in the dishwasher! (perforated disc, medium).
- Do not use any cleaning agent containing alcohol or spirit. For the finely chopped onion, melt butter and mix.
- Do not use any sharp, pointed objects. Add the sked eggs, salt, and mix into the bread dough.
- Do not use abrasive cloths.
- Use clean cloths for drying.
- Minutes. Then knead again.
Fig. ⑥ gives an overview of how to shape the dumplings with wet hands. Roll the dumplings in flour.
Wipe the outside of the base with a soft, damp cloth and dry off. Place dumplings in boiling water, leave to simmer for approx. 2 minutes, then bring to the boil! Dismantle the attachments used in reverse order (see "Preparation" for the relevant attachment).
Tips: Clean all accessories with a detergent solution and a soft cloth. Meat grinder
a soft brush.
Allow all parts to dry.
Notes:
- Immediately rub metal parts, and cooked fish for soups; apply a little cooking oil to protect meatloaf; raw liver from rust. bacon for liverwurst; pork for
- Discolouration of plastic parts may occur when processing foods such as carf beef for pâté and C. This can be removed with a few ways of
cooking oil.
Recipes
Note (MFW3X. . .):
For all operating steps, set to 2 (fast).
Bread dumplings
- 300 g fresh white bread
- 20 ml milk
- 40 g butter or margarine
- 3 eggs
- 1 tbsp finely chopped onions. Soak natural casing in lukewarm water.
- Parsley
- A little flour
- Salt and pepper. Cut the bread into slices 10 mm thick and halve lengthways. Add 20 ml of milk and soak. Soak natural casing in Luke for about 10 minutes before use. Do not stuff casings too full, as sausages may burst during boiling.
Using the perforated discs
- Perforated disc, fine (2.7): cooked chicken / pork / beef, liver, and cooked fish for soups; beef for meatloaf; raw liver, bacon for liverwurst; pork for pâté and coarse sausages. Parts may occur.
- Perforated disc, coarse (8): roast pork for goulash soup; (joint, sausage) for bakes. If you require a finer consistency, process the food at a different speed, using the perforated discs one after the other (coarse, medium). You can add other ingredients (e.g. onions, spices) directly during processing. This ensures all are mixed together thoroughly.
Sausage filler
Shredding attachment
Caution! (MFW3X..)
- Always use the shredding inserts at speed 1 (slow).
- Use the grating insert a → "Speed setting" see page 22
Using the inserts
- Slicing insert: for carrots, kohlrabi, courgettes
- Shredding insert (coarse): for nuts, hard cheese (e.g. Emmental)
- Shredding insert (fine): for nuts, hard cheese, Parmesan cheese
- Grating insert: for potatoes, Parmesan cheese, nuts
Guarantee
The guarantee conditions are as defined by our representative in the country in which it is sold. Details regarding
these conditions can be obtained from
the dealer from whom the appliance was purchased. The bill of sale or receipt must
be produced when making any claim under the terms of this guarantee.
Grain mill attachment
- Do not grind oleaginous products at the smallest degree of grinding. The grinder may jam or become blocked.
- In the case of softer grain, such as oats or linseeds, the coarse setting must be selected for grinding.
- Wash the grinder thoroughly when changing from one product to another. This will prevent odours from impairing each other.
Disposal

Dispose of packaging in an environmentally friendly manner. This appliance is labelled in accordance with European Directive 2012/19/EU concerning used electrical and electronic appliances (WEEE). The guideline determines the framework for the return and recycling of used appliances as applicable throughout the EU. Please ask your specialist retailer about current disposal facilities.
Spare parts and accessories
| Spare parts and accessories | ||
| 2.7 mm | 10003879 | Perforated disc (fine) for meat mincer |
| 4 mm | 10003880 | Perforated disc (medium) for meat mincer |
| 8 mm | 10003881 | Perforated disc (coarse) for meat mincer |
| 00754389 | Sausage filler: for filling artificial and natural casings with sausage meat. For producing meat rolls. | |
| 10007189 | ||
| 12011263 | Shredding attachment: for shredding, grating and slicing | |
| 798161 | Slicing insert for the shredding attachment | |
| 798162 | Shredding insert (coarse) for the shredding attachment | |
| 798160 | Shredding insert (fine) for the shredding attachment | |
| 798130 | Grating insert for the shredding attachment | |
| 12013990 | Citrus press attachment: for squeezing oranges, lemons and grapefruits. | |
| 00578107 | Grain mill attachment: for grinding products such as wheat, oats, rice, coffee beans, peppercorns, wild mustard, walnuts, hazel nuts, dried mushrooms, almonds, soya, linseeds, buckwheat groats, shelled sunflower seeds, etc. | |
| 00578112 | Fruit press attachment: for squeezing juice out of fruits such as e.g. raspberries, currants, strawberries, gooseberries or grapes and tomatoes. | |
Spare parts and accessories are available from retailers and Customer Service.
Troubleshooting
Problem Cause Remedy
The appliance does not start when switched on. No power. Check the mains plug and switch.
The appliance is normally, but the overload protection has been triggered. Switch the appliance off and wait until it has stopped. Unplug the appliance, remove the attachment, take it apart and clean. The agitator paddle has broken at the predetermined break point. Replace the agitator paddle. See "Overload protection" on page 22.
The food is not being processed or only slowly. The attachment is blocked. Switch appliance off and wait until it has stopped. Unplug. Remove the attachment, take it apart and clean to remove the blockage. See "Care and daily cleaning" on page 27.
Appliances with reversing function: Switch off the appliance with button O/I and wait for drive to come to a standstill. Then hold button 1-2|rev. After approx. 5-10 seconds, release button 1-2|rev and wait for drive to come to a standstill. Switch the appliance on again and continue to use it. See "Reversing function" on page 22.
The pressure on the pusher is too great. Reduce the pressure on the pusher and fill the feed chute with less food.
The food to be processed still contains hard components. Cook/steam vegetables before processing them.
The reversing function does not start. Press and hold button 1-2|rev until the reversing function starts.
The worm gear is blocked. Switch the appliance off, wait until it has stopped, remove the attachment, take apart and clean to eliminate blockage. → “Care and daily cleaning” see page 27
If you are unable to solve the problem, always call the service. You will find the telephone numbers at the back of the manual.
2 Base accessory
a Housing
b Filling opening
c Funnel
d Pusher
Instructions (MFW3X. . .):
→ See fig. b.
and electronic equipment - WEEE)
Element support
Carriage 1.2 rev. se
Fig. B
Remove the screw from the element
recommendations regarding
See table → Fig P
-Remove hard shells (p.
Attention! ( MFW3X. . . )
Instructions for use in different languages
ECOLOGICAL USE OF THE APPLIANCE. 2TIG OEALIDEG ME TIG
The figure is for reference only. FIG. P
The spare parts and accessories
are available from customer service
www.bosch-home.com/tr
www.bosch-yetkiliservisi.com
Knife attachment: For chopping meat, sausages, and rolls.
Grater attachment: For grating, shredding, and slicing products.
Juicer attachment: For extracting juice from fruits.
Mill: For grinding any type of grain (except corn), as well as poppy seeds, flaxseed, sesame, buckwheat, and spices.
Overload protection
Speed control
Reverse function for the main drive unit
Base unit
Whisk attachment
Press attachment for citrus fruits
Mill attachment.
Press attachment for berries and fruits.
Accessories
Recipes
Warranty terms
Spare parts list
Help in case of malfunctions.
Table of contents
Figure A
1 Main control unit
a Power button with button I or O/I* with button O or 1-2 | rev* b Operating indicator c Fixation button d Handle e Storage height adjustment with lock f Power cable g Height cable
2 Base nozzle
a Body b Brake c Locking part d Cover e Lock f Ring
3 Insert-grater
a Blade b Perforated with fine holes (2.7 mm)* c Perforated disc with medium holes (4 mm) d Perforated disc with large holes (8 mm)
4 Insert-sausage maker
a Support ring b Sausage nozzle
Figure C
Do not use the device if it is damaged
Attention!
Remove the main unit and all accessories from the packaging. Remove the packaging material.
Control and indication elements
Disassemble the collected parts into separate components. Assemble them in the reverse order according to the description in the «Preparation» section. Check all parts for completeness.
Figure A / C
Carefully check all parts for damage. Before first use, thoroughly clean and dry all parts. → «Preparation for use» see page 221
Control and indication elements
MFW39. . .
Button I
The result of pressing the button I: the device turns on. The drive starts automatically.
Button O
The result of pressing the button O: the device turns off. The drive stops.
MFW3X. . .
Khonka O/I
As a result of pressing the Khonka O/I button, the device turns on. The drive starts at speed 2 (low).
As a result of pressing the Khonka O/I button again, the device turns off. The drive stops.
Khonka 1-2 | rev
Briefly pressing the Khonka 1-2 | rev button changes the drive speed from 1 (full) to 2 (low) or vice versa. See "Speed adjustment" on page 215.
As a result of pressing and holding the Khonka 1-2 | rev button, the reverse function starts.
See "Reverse function" on page 216.
All models
Operating status indicator
The operating status indicator lights up when the device is turned on. In models with the reverse function, the function indicator blinks while the Khonka 1-2 | rev button is pressed.
Fixation button
Pressing the fixation button unlocks the attachment installed on the drive shaft. To turn the attachment counterclockwise and remove it from the main block, you can only do so after pressing the fixation button.
Cable hook
The cable can be pulled out of the cable hook or wound back. The hook holds the cable at the required length.
Storage hook
The plug must be inserted into the socket only after closing the lid.
Protection against overload
To prevent damage to the base unit in case of overload, the device is equipped with a fuse (insert with a spare). In case of overload, the fuse must be replaced. A new fuse can be purchased at a service center (No. 10005188). Our warranty obligations do not apply to spare parts with a blown fuse.
Replacing the fuse
→ Figure B
- Unscrew the screw in the fuse holder using the appropriate screwdriver (PH2) and remove the blown fuse.
- Insert the new fuse and tighten it firmly.
Speed adjustment
ONLY FOR MFW3X...
The speed adjustment allows you to set the required rotation speed: 1 (low) or 2 (high).
Warning!
For certain situations, use the required speed 1 (low). Consider the recommended speed!
Preparing the sausage attachment
→ Figure E
- First insert the attachment into the housing with the fuse.
- First, put the support rings on the neck, then insert the bowl into the housing of the KOV-basin.
- Install the screw rings on the housing and tighten them behind the bearing bar without excessive force.
The bowl is ready for operation.
Application
Note: Depending on the purpose of application, the products are processed differently.
→ "Solutions" see page 222
Examples of application
of the basic nozzle as a meat grinder:
Risk of injury!
Do not put your hands into the opening. - For processing, use only the pusher.
Careful!
- It is forbidden to process bones, cartilage, tendons, or any other hard components.
- It is forbidden to process frozen meat.
- Do not press on the surfaces too hard.
→ Maintenance
- Install the nozzle by turning it onto the drive of the main unit.
- Turn the nozzle clockwise until it clicks into place with a characteristic sound.
- Install the loading chute and insert the full pusher.
4. Prepare the products. Cut large pieces of food so that they fit into the chute without pressing. Place a suitable container under the nozzle. Put the prepared products into the loading chute. 5. Insert the plug into the socket. Turn on the device.
Indicator (MFW3X...)
The device turns on only at maximum speed 2 (speed).
- Gently press, push the processed products with the pusher into the chute.
- After finishing work, turn off the device and disconnect it from the power supply.
Remove the loading chute and the pusher.
- While holding the fixation button pressed, turn the nozzle clockwise until it releases. Remove the nozzle, disassemble it, and clean all parts. -> "Care and cleaning" see page 221
Shredding nozzle
For shredding, grating, and slicing hard products such as cheese, fruits, vegetables, nuts, and dry bread. Depending on the type of consistency of the processed product, use the appropriate insert. -> "Tips" see page 222
Preparation
Risk of injury!
Do not touch the sharp blades and edges of the shredding and slicing inserts, as well as the grating inserts.
→ Pad MaJIHOHKB
- BiDunHItb HApBky. YcTaHobity KOpnyc 6aKaHy BCTaBky.
- 3aunhiTb HApnBky TaK, 06 BOHa 3aqiCyBaJacr 3 XapaKTepHm 3Bykom. TaKyBaIbHa HacaKa roToBa Do po6OTn.
3actocyBaHHa
He6e3neKa TpaBMyBaHHa!
He BCTabIaTe pyKn B rOpNoBnHy. -ДяпдшТOBxуВаHHКОпСТУNTecь BИКЛЮЧН WTOBxAчЕМ.
ybara!
- ITOBxaM MoXHa BCTaBJIaTn TiIbKn B ODHOMy HAnpRmKy. BudaiitbTBepdi uKipKn a6o uKaapanyu (Hanpukna,3 ropixiB).
- He haTnCKaITe Ha IToBxAu HaITo CnJIbHO.
YBara! (MFW3X...)
- WataKyBaJIbHi Pi3aJIbHi BCTaBKn MoJHa BnKOpNtOByBaTn JIuSe Ha WbUdKOcti 1 (NoBIbHO).
- BCTaBky-TeptuKc cnIb BNkopncTOByBaTn Ha WbNdkOci 2 (WbNdko).
→ «PezyIIOBaHnHa ueudKocmi» due. cmop. 215
→ Pád MaJIHOHKB H
- YctaHObitb niIroTOBneHy hacaKy niKytOM Ha npINBOJ OCHOBHOrO 6Ioka npnlaNy.
- Turn the attachment counterclockwise until it clicks into place with a characteristic sound.
- Install the loading cup and insert the pusher into the loading funnel.
- Prepare the products. Cut them into large pieces so that they fit into the loading funnel without pressing.
- Place a container under the attachment. Put the prepared products into the loading cup.
- Plug the device into the outlet. Turn on the device.
Attention! (MFW3X...)
After turning on, the device starts at speed 2 (fast). To use the attachments, you must press the button 1-2 times. The device switches to speed 1 (slow). See "Reduced speed" on page 215.
- Press gently and push the processed products into the loading funnel. You will feel the products being processed.
- When finished, turn off the device and disconnect it from the power supply.
- Remove the loading cup and the pusher.
- While holding the button pressed, turn the attachment clockwise until it releases.
- Remove the attachment, disassemble it, and clean all parts. See "Cleaning and Care" on page 221.
Citrus attachment
For juicing citrus fruits, such as lemons, oranges, and grapefruits.
Preparation
Danger of electric shock!
Connect the spray nozzle directly to the main unit. Insert the power plug into the socket only after all preparation operations have been completed.
Warning!
To be able to fill and use the spray nozzle for citrus fruits, it is necessary to tilt the main unit of the device by 90°. Never use other nozzles in this position.
→ For small fruits
- Hold the main unit of the device by the handle, carefully tilt it so that the drive is directed upwards. If necessary, turn the main unit of the device to have good access to the buttons.
- Insert the drive shaft with spring element into the drive of the main unit.
Warning!
The drive shaft must be positioned so that it can be easily pressed down with a finger. It must not have any side play, and its movement must not be blocked by attachments or foreign objects.
- Install the collection container on the drive.
- Turn the collection container against the clockwise arrow so that it locks with a characteristic sound.
- Install the strainer on the collection container.
- Install the pusher cone on the drive shaft.
The spray nozzle for citrus fruits is installed on the main unit of the device, and it is ready for operation.
Application
→ Pad MaJIbOHKIB J
- Po3piKTe cHTpycoBi φ pyKTn HABniJ.
- NocTaBTe nID hacaIky nIXoxKy nocyDInHy.
- BCTaBTe BnKy B po3eTKy. YbIMKhHtB npnna. 3anycTntbcra npnBOd.
YBara! (MFW3X...)
IicnBvIMKHeHH npuaad 3anyckaetbca Ha WBndkocti 2 (WBnko).Uo6 ckopncTaTncr cHTpyc-npecom, oob'ra3KOBO HATNCHtB KHONky 1·2 | rev oIN pa3. Ppuaad nepeJe Ha WBndkictb 1 (noBilbHo). → «PeaynoBaHHa Wbuokcmi» duB. cmop. 215
- ПпкладаиTe npntuCKaTe po3pi3aHn Habnil cHTpycoBI φpykTn 6bpo6nIOBaHOIO NOBepxHeI Do BnuaBHOrO KOHyCa.KoIN BnuaBnIOBaHn IpOdyKT npNTCHyTo Do BnuaBHOrO KOHyCa, KOHyC noUHae o6eptaTncr.
- Κοδ 3aBepuHTN BnUaBJIbOHaHH, 3MeHHTe CnIy npTnCKaHH N Do BnUaB-Horo KOhyca.
- 3aBepuBpuoBoTy, BmKHiTb npuaB Bi'cHaIte NOro BiE eKeTpOmepeXi.
- Utpmmyoun KhoNky φikcauii HaTncHyTOIO, NOBepTaIte HacaIKy 3a RoINHHNKOBIO CTpiIKKOIO, DOKN BOHa He BUNBilbHHTbcra.
- 3HIMITb HacaKy, po36epiB ii Ta nouchTe Bci DeTani. → «DoaJr i uOdeHHe YUeHHa» duB. cmop. 221
Bka3iBkn
- Κόδ Σοςγπι ΜθήμαλβHΟ Rνχόγ COKy, BνηαβλιοBAHΗ NOTρίδΗ ΝΟβΤΟριΝι κινύκα pa3ιB.
- To prevent splashing of fruit pulp and seeds.
Nozzle
Suitable for grinding soft products such as oats, barley, rice, coffee beans, dried mushrooms, spices, flaxseed, nuts, poppy seeds, buckwheat groats, and sunflower seeds. Not suitable for grinding very hard products such as dried peas, corn, or peppercorns. See "Adjusting the grind" on page 222.
Preparation
Illustration K
- Insert the adjusting ring onto the adjusting ring. Pull it until the scale is directed upward.
- Press the adjusting ring into the direction of the grinding chamber and turn the adjusting ring clockwise to the scale and fineness mark.
- Insert the shaft into the housing.
- Insert the grinding ring into the housing. Pay attention to the shape of the parts.
- Insert the grinding cone with the spring into the corresponding opening of the shaft.
- Install the grinding chamber onto the housing. The groove on the grinding chamber must fit over the protrusion of the housing. 7. Install the screw ring onto the housing and tighten it clockwise until secure.
Operation
Danger of injury!
Do not put your hands into the hopper. Do not look into the hopper during operation. Keep the lid on to avoid injury to eyes.
Warning!
Once the blade is installed, it is strictly forbidden to use the reverse function. The nozzle may be damaged!

Preparing the puree
- Install the puree nozzle with the nozzle on the drive of the main unit.
- Turn the nozzle against the clockwise direction until it clicks with a characteristic sound. Tighten the locking ring.
- Install the loading cup.
- Place the loading cup under the nozzle. Fill the loading cup. → "Puree" dish. p. 222
Attention!
Never start the blender without processed product.
- Adjusting the thickness of the puree, preparation
Turn the adjusting ring: - against the clockwise direction = coarser puree - with the clockwise direction = finer puree Choose any value between the positions: - STOP = coarsest puree - 1 = finest puree (start with this)

- Insert the plug into the socket. Turn on the device.
Attention!
The maximum allowed continuous operation time of the device is 15 minutes. Give the device a break for 45 minutes!
Do not put your hands into the funnel.
Attention!
Do not use frozen fruits. Such fruits, for example, berries, can be used with additives. To use them, people with large capacities, like some varieties, should remove the juice from them. Do not process frozen fruits. Do not press the plunger too hard.
→ Small bowl
- Install the prepared nozzle with the pusher onto the drive of the main block of the attachment.
- Turn the nozzle against the direction of the arrow until it clicks into place with a characteristic sound. Tighten the locking ring.
- Install the loading cup and insert the pusher into the opening.
- Cut the fruit. Remove the necessary amount of fruit so that it passes through the opening without pressing. Remove the large seeds (for example, from plums and cherries).
Place one container under each outlet: for juice and pulp. Place the prepared fruit into the loading cup.
- Insert the plug into the socket. Turn on the appliance.
- Lightly pressing, push the fruit with the pusher into the opening.
- The juice flows through the outlet. The pulp (solid parts) is squeezed out through the nozzle for pulp.
- Adjust the nozzle for pulp. If you turn it slightly, the pulp will be wetter; if you turn it more, the pulp will be drier, and more juice will flow out of it. If the fruit is dry, remove the nozzle so that the pulp does not clog the attachment.
- After finishing work, turn off the appliance and disconnect it from the power supply.
- Remove the loading cup and the pusher.
- To remove the blade, turn the nut counterclockwise until it is completely unscrewed.
Remove the blade, disassemble it and clean all parts. → "Care and cleaning" see page 221
- To remove the strainer, pull it by the tab and carefully pull it out.
Warning!
When handling the juice, be careful. Do not allow the strainer openings to become clogged. If the housing outlet is clogged with fruit pulp, the device may be damaged.
If the housing outlet is clogged, turn off the device and disconnect it from the power outlet. Remove the blade, disassemble it and clean all parts. → "Care and cleaning" see page 221
Care and cleaning
Always unplug the appliance before cleaning it after each use.
Danger of electric shock!
- Before cleaning, the power cord must be disconnected from the outlet. Never immerse the motor base of the appliance in water and do not put it in the dishwasher.
Danger of injury! Do not touch the sharp blades and edges of the cutting and slicing inserts. Use a brush for cleaning.
Warning!
It is forbidden to wash metal parts in the dishwasher! Do not use abrasive cleaning agents, use a soft sponge. Do not use sharp or metal objects. Do not use harsh sponges or abrasive cleaning agents.
The figure shows how to clean individual parts.
■ Wipe the motor base with a soft damp cloth and dry it. ■ Disassemble the attachments in reverse order (see section "Preparation" for the corresponding attachment). ■ Clean all parts with a soft cloth or soft sponge moistened in a mild detergent solution, or with a soft brush. ■ Let all parts dry.
- Metal parts should be wiped dry and lubricated with a small amount of cooking oil to protect them from rust. During processing of products such as carrots, colored stains may form on plastic elements. They can be removed with a few drops of cooking oil.
Recipes
Instructions (MFW3X...)
For all working operations, set the speed to 2 (low).
Dumplings
300 g of dry white bread, 20 ml of milk, 40 g of butter or margarine, 1 tbsp. of chopped onion, a pinch of nutmeg, salt and pepper.
Cut the bread into slices 10 mm thick and soak in milk. Let it soak. Grind the soaked bread in a meat grinder (disc with medium holes) for about 60 seconds. Add finely chopped onion, nutmeg, soft butter and mix the ingredients. Add beaten egg, salt and pepper to the bread mass. Knead for a few minutes. Then repeat once. To form dumplings, it is good to wet your hands with water. The dumplings should be shaped into balls. Dip the dumplings in boiling water and keep them for about 20 minutes. Do not let them boil!
Recipes
Meat grinder
Use of attachments
Juicer for berries and fruits: for extracting juice from berries and fruits, for example, raspberries, currants, gooseberries or grapes, as well as from tomatoes.
Make sure that no foreign objects are in the feed tube or in the attachments. Do not insert any objects (for example, knives or forks) into the feed tube or into the outlet opening.
Let the appliance cool down intermittently for a maximum of 10 minutes. Then turn off the appliance and let it cool to room temperature.
Important!
When outdated
Malfunctions
Comprehensive overview
Figure A
1 Main unit
a Drive for attachments b Button I for on/off c Button O for on/off or 1-2 | rev d Indicator of operating state e Disconnect button f Handle for carrying g Compartment for storing the lid h Mains cable i Compartment for cable storage
2 Main attachment
a Housing b Feed tube c Feed chute d Pusher e Disc with rotating sleeve f Threaded ring
3 Meat grinder parts
a Blade b Fine grinding disc with 226 holes (2.7 mm)* 27 Medium grinding disc 229 d Coarse grinding disc with 0 holes (8 mm)
4 2 Sausage attachment
a·Support ring 231 b·Filling tube
Figure 232 5 Attachment for shredding*
a Housing b Feed tube 2.34 c Valve shutter 235 d Feed chute e Pusher 2
f Cutting blade 238 g Disc for coarse shredding 2 h Disc for fine shredding Grater disc 239
Connection of the vacuum cleaner and the filter
a Collection bag b Fine dust filter 241 c Juice container d Drive with spring
Press the button to switch the appliance on.
The drive starts rotating immediately.
Button O
Press the button to switch the appliance off.
The drive stops.
MFW3X.
Button O/1
Press the button O/1 to switch the appliance on.
The drive starts working immediately in speed mode 2 (fast). Pressing the button O/1 again switches the appliance off. The drive stops.
Button 1-2 | rev
Briefly pressing the button 1-2 | rev switches the appliance speed between modes 1 (slow) and 2 (fast).
→ "Speed setting" see page 231. Press and hold the button 1·2 | rev to activate the reverse function. → "Reverse function" see page 231
All models
Power indicator
When the device is turned on, the power indicator lights up. In models with the reverse function, the function indicator lights up while button 1-2 | rev remains pressed.
Release button
When the release button is pressed, the attachment installed on the device is released. Only when the release button is pressed can the attachment be turned counterclockwise and removed from the main unit.
Cable storage compartment
The network cable can be pulled out of the cable compartment and put back. Always pull out the cable only to the necessary length.
Storage compartment
Unused forming discs can be placed in the storage compartment and closed with the lid.
Overload protection
To prevent significant damage to the device in case of overload of the main attachment, the socket is equipped with a fuse (specified breaking point). In case of overload, the catch breaks at this point. A new socket can be purchased from the service department (No. 10005188). The warranty obligations do not apply to parts damaged at the specified breaking point.
Replacing the socket
Figure B
- Loosen the screw in the socket with a suitable screwdriver (PH2) and remove the defective socket.
- Insert the new socket and screw it on firmly.
Speed setting
NUR MFW3X.
High speed can be set to speed 1 (slow) or 2 (fast).
Attention!
For certain applications, speed mode 1 (slow) is absolutely required. Follow the speed setting recommendations!
See table → figure P
Turn on the device with the ON/OFF button. The device starts operating in speed mode 2 (fast). Briefly press the 1-2 | rev button. The device switches to speed mode 1 (slow). Briefly press the 1-2 | rev button. The device switches back to speed mode 2 (fast).
Reverse function
NUR MFW3X. . .
The reverse function reduces the risk of the tool jamming during brief reverse operation. The reverse function switches off automatically after 15 seconds.
Attention!
Never use reverse with the milling attachment or the juicer attachment for this purpose! - Never press and hold the 1-2 | rev button while the device is on. Press and hold the 1-2 | rev button only after the device drive has come to a complete stop.
Turn off the device with the ON/OFF button and wait for the drive to stop completely. Press and hold the 1-2 | rev button. After 5-10 seconds, release the 1-2 | rev button and wait for the drive to stop completely. Turn the device back on with the ON/OFF button.
Note:
If the products are not released after a brief reverse operation, turn off the device, unplug it from the outlet, and clean the device. → «Care and cleaning» see p. 238
Main unit
Danger of injury is not excluded!
Injury hazard!
The device may be plugged into a power outlet only after preparation for work with the device is fully completed, i.e., after installation of the required attachments and connections to the main unit.
Place the main unit on a stable horizontal surface. Pull the power cord out of the cord compartment to the required length.
The main unit is ready for operation.
Main attachment
The main attachment has the following purpose:
Meat grinder
For chopping raw and cooked products. Use the appropriate shaping discs depending on the type and consistency of the products being processed. See "Accessories", p. 238.
Sausage stuffer
For filling sausage meat into natural or artificial casings. For making sausages.
Note: When using the base attachment and the additional accessories that can be purchased from the service department, other applications are possible.
Attention!
When assembling different parts, align the grooves on the attachments with the corresponding grooves on the housing.
Preparing the meat grinder
Danger of injury is not excluded!
Do not touch the sharp knife.
Attention!
Always use only one shaping disc.
Figure D
First insert the shaft with the drive pin into the housing.
- Install the knife on the shaft, then the lower shaping disc.
- Screw the threaded ring onto the housing and tighten it clockwise, without applying excessive force. The meat grinder is ready for operation.
- Preparing the sausage filler
Figure
First insert the shaft with the drive pin into the housing.
- First install the support ring on the shaft, then insert the sausage filler tube into the housing.
- Screw the threaded ring onto the housing and tighten it clockwise, without applying excessive force.
The appliance is ready for operation.
Application
Note: Depending on the intended use, the products are processed differently. → "Recipes" see p. 238
The following example describes the use of the basic attachment as a meat grinder:
Danger of injury!
1. Place the attachment on the drive. 2. Load the prepared products into the feed chute. 5. Plug the power cord into the outlet. Switch on the appliance.
Note (MFW3X...):
After switching on, the appliance starts operating at the optimal speed level 2 (fast).
Gently press the pusher and push the products into the feed tube.
- After finishing the work, switch off the appliance and unplug the power cord from the outlet.
- Remove the feed chute and the pusher.
8. Press the release button, turn the attachment counterclockwise so that it releases. ■ Remove the attachment, disassemble it and clean all parts. → "Care and daily cleaning" see p. 238
Attachment for shredding
For shredding, grating, and slicing vegetables, fruits, nuts, almonds, berries, and hard products. Use the appropriate disc depending on the type and consistency of the products to be processed. → "Tips" see p. 238
Injury hazard!
Risk of injury!
Never touch the sharp blades or edges on the cutting attachments with your hands. Use the pusher only.
→ See Figure B
- Open the lid. Insert the cutting attachment into the housing.
- Close the lid until it locks into place.
The pusher is ready for use.
Operation
Injury hazard!
Risk of injury!
Do not insert your hands into the feed chute. Always use the pusher.
Attention!
The pusher can only be inserted in one direction. - Remove hard shells (e.g., from nuts). - Do not apply excessive pressure with the pusher.
Attention! (MFW3X...)
The appliance can be used at speed level 1 (slow). The appliance can be used at speed level 2 (fast). → "Speed setting" see page 231
→ Fig. drawings H
- Place the prepared attachment at an angle onto the drive of the main unit.
- Turn the attachment clockwise until it locks into place.
- Insert the feed tube and push the pusher into the feed chute.
- Prepare the food. Cut large pieces into smaller pieces beforehand so that they fit into the feed chute without jamming.
- Place a suitable container under the attachment. Load the prepared food into the feed tube.
- Connect the power plug to the outlet. Switch on the appliance.
Caution! (MFW3X...)
After switching on, the appliance starts operating at speed level 2 (fast). To use the appliance with the cutting discs, you must press the button once
1·2 | rev To switch to speed level 1 (slow). → "Speed setting" see page 231 7. Gently press the pusher to push the food into the feed chute. The food is processed. 8. After finishing the work, switch off the appliance and remove the power plug from the outlet. 9. Remove the feed tube and the pusher. 10. While holding the release button, turn the attachment counterclockwise to release it. 11. Remove the attachment, disassemble it, and clean all parts. → "Care and daily cleaning" see page 238
Citrus juicer attachment
For extracting juice from citrus fruits, e.g., lemons, oranges, grapefruits.
Preparation
Risk of injury not excluded!
The juice attachment for citrus fruits is installed directly on the main unit. The plug can be inserted into the socket only after the appliance has been completely prepared for operation.
Attention!
To prepare the juice attachment for citrus fruits for use, tilt the main unit at a 90-degree angle. In this position, do not use any other attachments under any circumstances.
→ See figures
- Hold the main unit by the handle and carefully move it to a position where the cord is pointing upward. If necessary, turn the main unit to ensure easy access to the buttons.
- Insert the drive shaft with the spring element facing down into the drive of the main unit.
Attention!
The drive shaft must be easy to push in with a finger. It must not be stuck with juice residues or blocked by seeds or foreign objects.
- Install the collection bowl onto the drive.
- Turn the collection bowl counterclockwise until it locks into place with a click.
- Install the sieve filter onto the collection bowl.
- Install the cone of the juice attachment onto the drive shaft.
The juice attachment for citrus fruits is assembled and ready for use.
Use
→ See figures
- Insert the citrus fruits.
- Place the attachment and the juice container.
- Connect the power cord to the outlet. Turn on the appliance. The appliance starts rotating.
Attention! (MFW3X...)
After turning on, the appliance starts working in speed mode 2 (fast). To use the citrus juicer, press the 1·2 button once to switch to speed mode (slow). → "Speed setting" see p. 231
- Press the citrus halves with the cut surface onto the cone. As soon as the used half releases juice onto the cone, the cone starts rotating.
- To finish juicing, reduce the pressure on the citrus cone.
- After finishing work, turn off the appliance and remove the power cord from the outlet. 7. While holding the release button, turn the attachment counterclockwise to release it.
- Remove the attachment, disassemble it, and clean all parts. → "Care and daily cleaning" see p. 238
Tips:
- To ensure optimal juice yield, repeat the pressing several times.
- If necessary, clean the strainer with a brush from pulp and seeds.
Mill attachment
For grinding products such as wheat, oats, rice, coffee beans, pepper grains, mustard seeds, poppy seeds, nuts, hazelnuts, dried mushrooms, almonds, salt, flax seeds, buckwheat, peeled sunflower seeds, etc. The appliance is not intended for grinding very hard products such as dried peas, corn kernels, or popcorn. → "Tips" see p. 238
Preparation
Insert the mounting screw into the mounting ring. Make sure the scale is facing up. 2. Press the mounting screw in the direction of the grinding chamber. Turn the mounting ring clockwise to reach the desired degree of grinding.
- Insert the insert into the housing.
- Insert the grinding wheel into the housing. Pay attention to the shape of the parts.
- Insert the grinding cone with the four-sided end into the corresponding opening of the insert.
- Install the grinding chamber into the housing. The recess of the grinding chamber should be positioned on the nose of the housing.
- Install the threaded ring on the housing and tighten it clockwise without applying force.
- Application
Risk of injury cannot be excluded!
Do not insert hands into the feed tube. During operation, do not forget the feed tube. Discharged parts can cause eye injuries.
Attention!
If a grain mill is installed, never use the reverse function. This can cause damage to the attachment!
See figures L
Install the prepared attachment inclined on the drive of the main unit.
- Turn the attachment counterclockwise until it locks with the catch. Tighten the threaded ring.
- Install the loading chute.
- Place a suitable container under the attachment. Fill the loading chute. → "Accessories" see p. 238
Attention!
Never start the blender attachment without products to be processed. 5. Adjust the grinding degree by turning the setting ring: - counterclockwise = coarser grinding - clockwise = finer grinding Always select a value between the following points: - STOP = coarsest grinding - 1 = finest grinding (never start with this)

- Plug the power cord into the outlet. Switch on the appliance.
Attention! The appliance must not operate continuously for more than 15 minutes. After this, let it cool down for 45 minutes!
- Flour sifts through the perforated chamber.
- The grinding degree can be readjusted during operation in small steps.
Attention! If the setting ring is turned beyond STOP during operation, this can lead to damage to the appliance.
- Immediately after finishing grinding, switch off the appliance and unplug the power cord from the outlet.
- Remove the loading chute. 11. While holding the release button, turn the attachment clockwise so that it releases.
- Remove the attachment, disassemble it and clean all parts. → "Care and daily cleaning" see p. 238
Juicer attachment for citrus fruits
For extracting juice from berries, for example, raspberries, currants, gooseberries, or grapes, as well as from pomegranates.
Preparation
Note: The amount of pulp in the juice depends on the choice of the strainer filter. Do not squeeze juice from fruits whose seed diameter is almost the same as the diameter of the strainer filter holes (for example, from raspberries).
Figure M
Check that the sealing rings are installed on the filter holder and on the lid. If not, insert the sealing rings into the sealing grooves.
- Insert the lower strainer filter into the filter holder and press it in.
- Insert the lid into the housing.
- Insert the filter holder into the housing. The filter holder spout should be positioned in the housing recess.
- Screw the threaded ring onto the housing and tighten it clockwise without applying force.
- Install the outlet spout on the filter holder until it clicks into place.
- Screw the pulp ejector head into the filter holder. The juice extractor is now ready for operation.
Applications
Warning
Risk of injury!
Do not insert your hands into the feed tube.
- Wash the fruits, berries and vegetables. Squeeze the juice from the fruits, for example, currants, together with the stalks.
- Before squeezing juice from fruits with fairly large seeds or pits, for example, from plums or cherries, it is necessary to remove the seeds and pits. Do not process frozen fruits. Do not create too much pressure with the pusher.
- Install the prepared attachment obliquely onto the drive of the main unit.
- Turn the screw clockwise to fix it with the nut. Tighten the threaded ring.
- Install the loading chute and insert the pusher into the loading tube.
- Prepare the fruits for pressing. Cut large fruits into pieces beforehand so that they fit into the loading tube without force. Remove large pits (for example, from cherries, plums).
Place containers under the openings for juice and pulp. Load the prepared fruits into the loading chute.
- Connect the power cord to the outlet. Turn on the appliance.
- Gently press the pusher, pushing the fruits into the loading tube.
- The juice flows out through the discharge spout. The fruit pulp (solid components) is expelled through the head for the discharge of pomace.
- Adjust the head for the discharge of pomace. When unscrewing it, the pulp becomes more moist; when screwing it in, it becomes drier, and more juice flows out of the spout. If the pulp is too dry, unscrew the head so that the appliance does not clog with fruit pulp.
- After finishing work, unplug the appliance and remove the plug from the socket.
- Remove the feed chute and pusher. 11. To disassemble, turn the attachment in the direction of the arrow so that it releases.
Remove the attachment, disassemble it and clean all parts. → “Cleaning and daily care” see p. 238
12. To clean the filter, hook the hook into the opening of the mesh filter and carefully pull out the filter.
Warning!
When squeezing juice, exercise extreme caution. Make sure that the openings of the mesh filter are not clogged. If the outlet opening of the housing is clogged with pulp of fruit or vegetables, bones may get into the drive. If the outlet opening of the housing is clogged, unplug the appliance and remove the plug from the socket. Remove the attachment, disassemble it and clean all parts. → “Cleaning and daily care” see p. 238
Cleaning and daily care
After each use of the appliance, all attachments and accessories used must be thoroughly cleaned.
Danger of electric shock!
Before cleaning, disconnect the power cord from the electrical outlet. Never immerse the main unit in liquids and do not wash it in a dishwasher.
Danger of injury!
Do not touch the sharp blades and edges of the attachments for chopping and cutting. Always use a brush.
Warning!
Metal parts must not be washed in a dishwasher! Do not use aggressive cleaning agents containing alcohol or spirits. Do not use metal or sharp objects, as well as objects with sharp edges.
- Metal parts must not be washed in the dishwasher! Do not use cleaning agents containing alcohol or spirits. Do not use metal or sharp objects, as well as objects with sharp edges.
- Do not use abrasive cleaning agents.
The figure 0 shows how to clean individual parts of the appliance.
■ Wipe the main body block with a damp cloth and dry it. Disassemble the used attachments in reverse order (see section "Preparation" for the corresponding attachment). Clean all accessories with soapy water and a soft cloth/sponge or soft brush. ■ Let all parts dry.
Note
- Metal parts should be wiped dry immediately and coated with a thin layer of spray oil for protection against rust. -During processing, for example, carrots, a light coating may appear on metal parts. It can be removed with a few drops of vegetable oil.
Recipes
Note (MFW3X...):
For all operations, set the speed level 2 (fast).
Bread dumplings
300 g of stale white bread, 20 ml of milk, 40 g of butter or margarine, 1 tbsp. finely chopped onion, parsley, salt, pepper
Cut the bread into slices 10 mm thick and cut in half lengthwise. Pour 20 ml of milk and let it soak. Process the moistened bread slices in the food processor (pulse setting with medium holes) for approx. 60 seconds. ■Add finely chopped onion, parsley, melted butter and mix. Beat the eggs, salt and pepper and add to the bread mixture. Let the dough rest for a few minutes. Then knead again. Shape the dumplings with hands moistened with water. Roll the dumplings in flour. Drop the dumplings into boiling water and let them simmer on low heat for about 20 minutes. Do not let them boil!
Tips
Food processor
Use of pulse discs
-Pulse disc with fine holes (2.7 mm): cooked chicken, pork, veal, cooked beef and liver, cooked fish for soups; raw pork and veal for minced meat rolls; raw liver, meat and bacon for liver sausage; pork for raw smoked sausage
Disc with medium holes (4 mm):
Pork and beef for roasting and stewing
Disc with large holes (8 mm):
Roasted pork for Hungarian soup; leftovers (e.g., roast, sausages) for baking with leftovers
If a finer consistency of processed products is required, repeat the grinding process or use different discs sequentially (with large, medium, small holes). ■ Ingredients (e.g., onion, herbs) can be added directly during processing. This ensures all ingredients are well mixed.
Sausages and wieners
Soak natural sausage casing in warm water for about 10 minutes before processing. Do not stuff the casing too tightly, as sausages may burst during boiling or frying.
Attachment for grating
Caution! (MFW3X...)
Use the grating attachment only at speed 1 (slow). - Use the grater attachment at speed 2 (fast).
→ "Speed setting" see page 231
Use of attachments
Grating attachment: for carrots, celery, cabbage. Grating attachment (coarse): for carrots, nuts, hard cheese (e.g., Emmental)
Grating attachment (fine): for accompanying documents.
Nuts, hard cheese, Parmesan. Grater attachment: for potatoes, Parmesan, nuts
Mill-Grinder
- Do not grind products that are too fine. The grinder may become clogged. For grinding softer grains, such as oats or flax seeds, select the coarse grind setting.
- The grinder should be thoroughly cleaned if you start grinding a different product. This will help avoid absorbing the smell of the previous product.
Disposal
Dispose of the packaging using environmentally friendly methods. This appliance is marked according to the European Directive 2012/19/EU on waste electrical and electronic equipment (WEEE). These regulations define the applicable rules for the return and recycling of old appliances in the EU. You can obtain information about current disposal options from the store where you purchased the appliance.
Warranty service
You can obtain comprehensive information about warranty conditions at your nearest authorized service center, or at the service center of the manufacturer LLC "BSH Household Appliances", or
in the accompanying documentation.
We reserve the right to make changes.
Spare parts
24-hour hotline*: 8 (800) 200-29-61
Official website: www.bosch-home.ru
Addresses of authorized service centers, as well as all service information, are available on the official website: www.bosch-home.ru.
We recommend that you use the services of authorized service centers only.
Original accessories and care products for Bosch household appliances can be purchased in our online store: www.bosch-home.ru/store. You can familiarize yourself with the terms of delivery on the website. You can also purchase original accessories and care products at authorized service centers.
1. Product
- Model
Item 1-2. Fill in only if this data is not contained in the purchase documents (cash receipt and/or sales receipt, sales invoice).
3. Information on the distribution of the Bosch trademark on household appliances: coffee makers, cream makers, cream whippers, scales, kitchen machines, mixers, slicers, graters, toasters, irons, hair dryers, electric shavers, juicers, blenders, waffle irons, hair straighteners, hair curlers, floor scales, irons, steam stations, hair straighteners and similar products.

- Dear Sirs, we inform you that confirmation of conformity of our products with mandatory requirements in accordance with the legislation is carried out by the manufacturer only through certification and declaration of conformity.
Information on mandatory confirmation of conformity of appliances, including data on the certificate of conformity (declaration of conformity) number and its validity period, you can obtain from LLC "BSH Household Appliances".
Manufacturer: BSH Hausgeräte GmbH, Carl-Wery-Str. 34, 81739 Munich, Germany.
The organization performing the functions of a foreign manufacturer, authorized by the manufacturer on the basis of an agreement with it, is LLC "BSH Household Appliances", 198515, St. Petersburg, Peterhof, Karl Siemens str., 1, letter A, additionally in Moscow, 119071, Malaya Kaluzhskaya str., 1, phone (495) 737-2777, fax (495) 737-2798.
- Mandatory information on the technical characteristics of the appliance is given on the nameplate of the appliance or on its label and/or in the accompanying documentation.
6. Accessories and care products
To ensure the proper functioning of your appliance and proper care, it is recommended to use only original accessories and care products. Original accessories are developed by the manufacturer, they are ideally suited specifically for your appliance. Original accessories and care products meet the highest quality requirements of the Bosch trademark, they undergo factory tests and are designed for maximum reliability in operation. For all questions related to accessories and care products for your household appliance, you can contact authorized service centers or by phone of the support service.
7. Manufacturer's warranty
The manufacturer provides a warranty for household appliances purchased by you in the Russian Federation in accordance with the current legislation for a period of 1 year. For household appliances purchased in the Republic of Belarus, for which a warranty card was issued at the time of purchase, the warranty conditions apply that do not contradict the legislation of the Republic of Belarus.
8. Attention! Important information for consumers
This appliance is intended for use exclusively for food, household and similar domestic needs, not related to entrepreneurial activity to meet household needs in the sphere of enterprise, institution or organization. Use of the appliance for purposes other than those specified is a violation of the rules and entails improper operation of the appliance.
The rating plate on the appliance must not be removed! Please make sure it is present and keep it on the appliance for the entire service life of the appliance. Removing the rating plate leads to decommissioning of the appliance and may result in violations of its operating rules.
The manufacturer is not liable for defects in the appliance if the service department determines that they arose after the appliance was transferred to the consumer due to violations of the rules of use, transportation, storage, actions of third parties, force majeure (fire, flood, catastrophic events), ingress of household insects or rodents, exposure to external factors, as well as due to significant violations of technical requirements specified in the operating instructions, including instability of electrical parameters established by GOST 32144-2013.
To confirm the date of purchase of the appliance during warranty repair or presentation of other claims provided by law, we kindly ask you to keep the purchase documents (receipt, sales receipt, other documents confirming the date and place of purchase).
Following the recommendations and instructions contained in the operating instructions (rules of use) will help avoid problems in the operation and maintenance of the appliance.
Faulty components of appliances during the warranty period are repaired free of charge or replaced with new ones. The decision on the feasibility of replacement or repair remains with the service departments.
9. Service information
During the period after the expiration of the warranty period, the service department, as well as the workshops of our partners, are always ready to offer you their services. The list of addresses of authorized service centers is available on the official website on the Internet: www.bosch-home.ru.
The service life of small household appliances (except for kitchen machines and vacuum cleaners) is 2 years. The service life of kitchen machines and vacuum cleaners is 5 years. The service life of the product is calculated from the date of its purchase, and if it is impossible to determine, from the date of manufacture of the product indicated on the rating plate of the product in accordance with the manufacturer's standard. The date of manufacture is marked as YYMM, where YY is the year of manufacture (e.g., 1920) and MM is the month of manufacture. To determine the date of manufacture of the appliance, add the number YY to 1920.
*Free round-the-clock telephone for calls on the territory of the Russian Federation.
B34C065N1-1M00 03/2017
Information about household appliances manufactured under the control of the concern BSH Hausgeräte GmbH, Carl-Wery-Str. 34, 81739 Munich, Germany, in accordance with the requirements of the Federal Law of the Russian Federation of November 23, 2009 No. 261-FZ, legislation on technical regulation and legislation on consumer protection of the Russian Federation
Products: juicers, mixers, blenders, cutters, kitchen machines, coffee grinders, meat grinders, shredders
Trademark: Bosch
The product range is constantly updated. Technical characteristics of products, including energy efficiency, are constantly improved. Products regularly undergo mandatory conformity assessment procedures in accordance with current legislation. Information on current certificates of conformity and their validity periods, current information on the class of energy efficiency of products, and information on the current product range can be obtained from the organization performing the functions of the manufacturer on the territory of the Russian Federation: LLC "BSH Household Appliances", 198515, Saint Petersburg, Peterhof, st. Karla Simensa, 1, lit. A, branch in Moscow, 119071, st. Malaya Kaluzhskaya, 15, phone (495) 737-2777, fax (495) 737-2798.
The company LLC "BSH Household Appliances", 198515, Saint Petersburg, Peterhof, st. Karla Simensa, 1, lit. A, branch in Moscow, 119071, st. Malaya Kaluzhskaya, 15, phone (495) 737-2777, fax (495) 737-2798, carries out its activities to confirm the conformity of products of the manufacturer on the unified customs territory of the Eurasian Economic Union in accordance with current technical regulations, as an authorized manufacturer, and also fulfills the requirements stipulated by Federal Law No. 184-FZ "On Technical Regulation" for a person performing the functions of a foreign manufacturer on the territory of the Russian Federation.
Importer to the Russian Federation of products certified as serial products manufactured by LLC "BSH Household Appliances", 198515, Saint Petersburg, Peterhof, st. Karla Simensa, 1, lit. A, branch in Moscow, 119071, st. Malaya Kaluzhskaya, 15, phone (495) 737-2777.
The organization indicated on the product for the purpose of identifying the product and carrying out the initial placement of the product on the market of the European Union is Robert Bosch Hausgerate GmbH, Carl-Wery-Str. 34, 81739 Munich, Germany.
The manufacturer (producer) who, on his own behalf, manufactures the product and is responsible for its compliance with the requirements of applicable technical regulations is BSH Hausgerate GmbH, Carl-Wery-Str. 34, 81739 Munich, Germany.
During transportation, loading, unloading, and storage of the product, in addition to the instructions in the operating manual, the following requirements must be observed:
It is forbidden to subject the product to significant mechanical loads that could lead to damage to the product or violation of its packaging.
It is necessary to avoid getting the product packaging into water or other liquids.
Before transportation and before storage after previous operation of the product at low temperatures, it is necessary to make sure that there is no water in the product.
The product is intended for use at ambient temperatures above 0°C and relative humidity not exceeding 93%.
Before starting operation of the product, if it has been exposed to negative temperatures for a long time, it must be kept at room temperature for several hours.
The service life of products is determined by the manufacturer in accordance with the requirements of the current legislation.
Instructions for the use of products are contained in the operating instructions and may be clarified by municipal executive authorities.
Products manufactured within the validity period of the certificate of conformity, this certificate is valid for their supply, sale and use (application) during the service life established in accordance with the legislation of the Russian Federation on the protection of consumer rights. The service life of the product is indicated by the manufacturer in the supply documentation "Information from the manufacturer on warranty and service maintenance".
Products can be identified by the model designation (E-Nr.), the trial type (Type) and the commercial order number indicated on the product, packaging and (or) contained in the operating documents. In accordance with the internal standard of the manufacturer, the identification is carried out according to the following scheme:
E-Nr. /
The material number is a unique alphanumeric designation of the product, no more than 10 characters, used for sale (the designation or model of the household appliance) of the Bosch trade mark. The material number (model) is indicated between the code word E-Nr. and the slash /'
The product is manufactured using wood-based panels in the production process.
Operational documentation is developed by the manufacturer for a wide range of products, therefore the manufacturer has provided a reference to the operational document for a specific product, provided that this allows determining the belonging of this operational document to a specific product, accompanied by this operational document. The identification process is carried out in accordance with the characteristics of the specific product, the provisions contained in the operational documents attached to it, and the analysis of information presented in the operational documents.
The composition of operational documents provided by the product manufacturer may include this information, instructions (manual) for operation, information on warranty and service conditions.
MapKIOBAnHe npOdykUHcOcUeCTBnIeTcN3rOToBnteHcM Ha TINOBo TaBnUcKe pIb60pa,Ha yNaIOBOHOH 3tIKeTKe, HENOCpeCTBeHHo HA yNaKOBke npOBpa,Ha KIOE MeTcK, HApNIOBHOH 3tIKeTKe, HENOCpeCTBeHHo HA yNaKOBke npOBpa,Ha KIOE MeTcK, HApNIOBHOH 3tIKeTKe, HENOCpeCTBeHHo HA yNaKOBke npOBpa,Ha KIOE MeTcK, HApNIOBHOH 3tIKeTKe, HENOCpeCTBaJIeHcne HNΦOpMaun O npIObe M cTeX npOdaJ.

Products that have passed the conformity assessment procedure in accordance with the requirements of the technical regulations of the Customs Union and the technical regulations of the Eurasian Economic Union are marked with the single mark of product circulation on the market of the member states of the Customs Union (Eurasian Economic Union).
The product complies with the following technical regulations of the Customs Union:
TP TC 020/2011 Electromagnetic compatibility of technical equipment TP TC 004/2011 On safety of low-voltage equipment TP EAEU 037/2016 On restriction of use of hazardous substances in electrical and electronic products from the date of its entry into force
Operational documentation for products is performed in Russian. Operational documentation in the state languages of the member states of the Eurasian Economic Union, in addition to Russian, if there are corresponding requirements in the legislation, can be provided free of charge by the organization-resident of the corresponding member state of the Eurasian Economic Union.
Information about the product configuration presented in retail outlets can be requested by phone toll-free hotline (800) 200-2961, and also available on the Internet on the manufacturer's website http://www.bosch-home.ru
| TopoBoe oboe Hnne Hnne | Anopba Chino TNN | Pertchfikat CoTBeCTBn | CTpaHa- 3MOTOB- Te | ||||||||||
| Релагдз нь Но Homep | Да Быдч | Ду Ду Ду | Ду Ду Ду | ||||||||||
| Сокор Марлій | MCP3000 CNZP3 C-DE.AR46.B.73541 08.02.2016 | 07.02.2016 | 02.21 | Ctobehn | |||||||||
| MES25A0 CNJ03 C-DE.AR46.B.73451 08.02.2016 | 16.07.02. | 2021 | Ktay | ||||||||||
| MES25C0 CNJ03 C-DE.AR46.B.73451 08.02.2016 | 16.07.02. | 2021 | Ktay | ||||||||||
| MES25G0 CNJ03 C-DE.AR46.B.73451 08.02.2016 | 16.07.02. | 2021 | Ktay | ||||||||||
| MES3500 CNJ03 C-DE.AR46.B.73451 08.02.2016 | 16.07.02. | 2021 | Ktay | ||||||||||
| MES4000 CNCJ04 C-DE.AR46.B.73451 08.02.2016 | 17.02.2021 | Ktay | |||||||||||
| MES4010 CNCJ05 C-DE.AR46.B.73451 08.02.2016 | 17.02.2021 | Ktay | |||||||||||
| Реки | MAs4000CNAS11ST1CDE.AR46.B.73634 19.02.2016 18.02.2021 | Ctobehn | |||||||||||
| MAS4104W CNAS11EV1CDE.AR46.B.73634 19.02.2016 18.02.2021 | Ctobehn | ||||||||||||
| MAS4201N CNAS11ST1C-DE.AR46.B.73634 19.02.2016 18.02.2021 | Ctobehn | ||||||||||||
| MAS4601N CNAS11EV1C-DE.AR46.B.73634 19.02.2016 18.02.2021 | Ctobehn | ||||||||||||
| MAS6151M CNAS12 C-DE.AR46.B.73634 19.02.2016 18.02.2021 | Ctobehn | ||||||||||||
| MAS6151R CNAS12 C-DE.AR46.B.73634 19.02.2016 18.02.2021 | Ctobehn | ||||||||||||
| MAS6200N CNAS12 C-DE.AR46.B.73634 19.02.2016 18.02.2021 | Ctobehn | ||||||||||||
| MAS9101N AS9ST C-DE.AR46.B.73634 19.02.2016 18.02.2021 | Ctobehn | ||||||||||||
| MAS9454M AS9ST C-DE.AR46.B.73634 19.02.2016 18.02.2021 | Ctobehn | ||||||||||||
| MAS9555M AS10EH CN-DE.AR46.B.73634 19.02.2016 18.02.2021 | Ctobehn | ||||||||||||
| Минерсь,бөндөрь,нөмelleчтelli | MIFQ22100 CNHR30 C-DE.AR46.B.73649 17.08.2016 16.08.2021 | Ctobehn | |||||||||||
| MFQ2210D CNHR30 C-DE.AR46.B.73649 17.08.2016 16.08.2021 | Ctobehn | ||||||||||||
| MFQ2210P CNHR30 C-DE.AR46.B.73649 17.08.2016 16.08.2021 | Ctobehn | ||||||||||||
| MFQ2210Y CNHR30 C-DE.AR46.B.73649 17.08.2016 16.08.2021 | Ctobehn | ||||||||||||
| MFQ24200 CNHR30 C-DE.AR46.B.73649 17.08.2016 16.08.2021 | Ctobehn | ||||||||||||
| MFQ2420B CNHR30 C-DE.AR46.B.73649 17.08.2016 16.08.2021 | Ctobehn | ||||||||||||
| MFQ3010 CNHR19 CNHR30 C-DE.AR46.B.73649 17.08.2016 16.08.2021 | Ctobehn | ||||||||||||
| MFQ3010 CNHR19 CNHR30 C-DE.AR46.B.73649 17.08.2016 16.08 2021 | Ctobehn | ||||||||||||
| MFQ3010 CNHR19 CNHR30 C-DE.AR46.B.73649 17.08.2016 16.08.2021 | Ctobehn | ||||||||||||
| MFQ3520 CNHR17 CNHR30 C-DE.AR46.B.73649 17.08.2016 16.08.2021 | Ctobehn | ||||||||||||
| MFQ3555 CNHR18 CNHR30 C-DE.AR46.B.73649 17.08.2016 16.08.2021 | Ctobehn | ||||||||||||
| MFQ36300D CNHR27 CNHR30 C-DE.AR46.B.73649 17.08.2016 16.08.2021 | Ctobehn | ||||||||||||
| MFQ36300I CNHR27 CNHR30 C-DE.AR46.B.73649 17.08.2016 16.08.2021 | Ctobehn | ||||||||||||
| MFQ36300Y CNHR27 CNHR30 C-DE.AR46.B.73649 17.08.2016 16.08.2021 | Ctobehn | ||||||||||||
| MFQ36300Y CNHR27 CNHR30 C-DE.AR46.B.73649 17.08.2016 | Ctobehn | ||||||||||||
| MFQ36300Y CNHR27 CNHR30 C-DE.AR46.B.73649 17.08.2016 16.08.2021 | Ctobehn | ||||||||||||
| MFQ36300Y CNHR27 CNHR30 C-DE:A.R46.B.73649 17.08.2016 16.08.2021 | Ctobehn | ||||||||||||
| MFQ36300Y CNHR27 CNHR30 C-DE:A.R46.B.73649 17.08.2016 16.08.2021 | Ctobehn | ||||||||||||
| MFQ36300Y CNHR27 CNHR30 C-DE:A.R46.B.73649 17.08.2016 16.08.2021 | Ctobehn | ||||||||||||
| MFQ36300Y CNHR27 CNHR30 C-DE:A.R46,B.73649 17.08.2016 16.08.2021 | Ctobehn | ||||||||||||
| MFQ36300Y CNHR27 CNHR30 C-DE:A.R46.B.73649 17.08.2016 16.08.2021 | Ctobehm | ||||||||||||
| MFQ36300Y CNHR27 CNHR30 C-DE:A.R46.B.73649 17.08.2016 16.08.2021 | Ctobehn | ||||||||||||
| MFQ36300Y CNHR27 CNHR30 C-DE:A.R46.B. 73649 17.08.2016 16.08.2021 | Ctobehn | ||||||||||||
| MFQ36300Y CNHR27 CNHR30 C-DE:A.R46.B.73649 17.08.2016 16.08.2021 | Ctobehn Ctobehn | ||||||||||||
| MFQ36300Y CNHR27 CNHR30 C-DE:A.R46.B.73649 17.08.2016 16.08.2021 | Ctobehn Ctobehn | ||||||||||||
| MFQ36300Y CNHR27 CNHR4.C-DE.AR46.B.73649 17.08.2016 16.08.2021 | Ctobehn Ctobehn | ||||||||||||
| MFQ36300Y CNHR27 CNHR4.C-DE.AR46.B.73649 17.08.2016 16.08.2 C-DE.AR46.B.73649 17.08.2021 | Ctobehn Ctobehn | ||||||||||||
| MFQ36300Y CNHR27 CNHR4.C-DE.AR46.B.73649 17.08.2016 16.08.2021 | Ctobehn Ctobehn | ||||||||||||
| MIMR21PON CNHR22 CNHR30 C-DE.AR46.B.73649 17.08.2016 16.08.2021 | Ctobehn Ctobehn | ||||||||||||
| MIMR21PON CNHR22 CNHR30 C-DE.AR46.B.73649 17.08.2016 16.20.2021 | Ctobehn Ctobehn | ||||||||||||
| MIMR21PON CNHR22 CNHR30 C-DE.AR46.B.73649 17.08.2016 16.20.2021 | Ctobehn Ctobehn | ||||||||||||
| MIMR30A1 CNHR22 CNHR30 C-DE.AR46.B.73649 17.08.2016 16.20.2021 | Ctobehn Ctobehn | ||||||||||||
| MIMR30A1 CNHR22 CNHR30 C-DE.AR46.B.73649 17.08 2021 | Ctobehn Ctobehn | ||||||||||||
| MIMR30A1 CNHR22 CNHR30 C-DE.AR46.B.73649 17.08 2021 | Ctobehn Ctobehn | ||||||||||||
| MIMR30A1 CNHR22 CNHR30 G-DE.AR46.B.73649 17.08 2021 | Ctobehn Ctobehn | ||||||||||||
| MIMR30A1 CNHR22 CNHR30 C-DE.AR46.B.73649 17.08 2021 | Ctobehn Ctobehn | MIMR30A1 CNHR22 CNHR30 C-DE.AR46.B.73649 17.08 2021 | Ctobehn Ctobehn | ||||||||||
| MIMR30A1 CNHR22 CNHR30 C-DE.AR46.B.73649 17.08 2021 | Ctobehn Ctobehn | MIMR30A1 CNHR22 CNHR30 C-DE.AR46.B.73649 17.08 2 C-DE.AR46.B.73649 17.08 2021 | Ctobehn Ctobehn Ctobehn Ctobehn Ctobehn Ctobehn Ctobehn Ctobehn Ctobehn Ctobehn Ctobehn Ctobehn Ctobehn Ctobehn Ctobehn Ctobehn Ctobehn Ctobefn Ctobefn Ctobefn Ctobefn Ctobefn Ctobefn Ctobefn Ctobefn Ctobefn Ctobefn Ctobefn Ctobefn Ctobefn Ctobefn Ctobefn Ctobefn Ctobefn C C-DE.AR46.B.73649 17.08.2016 16.08.2021 | Ctobehn Ctobehn Ctobehn Ctobehn Ctobehn Ctobehn Ctobehn Ctobehn Ctobehn Ctobehn Ctobehn Ctobehn Ctobehn Ctobehn Ctobehn Ctobehm Ctobehm Ctobehm Ctobehm Ctobehm Ctobehm Ctobehm Ctobehm Ctobehm Ctobehm Ctobehm Ctobehm Ctobehm Ctobehm Ctobehm Ctobehm Ctobehm Ctocbefn Ctobefn Ctobefn Ctobefn Ctobefn Ctobefn Ctobefn Ctobefn Ctobefn Ctobefn Ctobefn Ctobefn Ctobefn Ctobefn Ctobefn Ctobefn Ctobefn c Ctobefn Ctobefn Ctobefn Ctobefn Ctobefn Ctobefn Ctobefn Ctobefn Ctobefn Ctobefn Ctobefn Ctobefn Ctobefn Ctobefn Ctobefn Ctobefn Ctocbefn Ctobefn Ctobefn Ctobefn Ctobefn Ctobefn Ctobefn Ctobefn Ctobefn Ctobefn Ctobefn Ctobefn Ctobefn Ctobefn Ctobefn Ctobefn C C-DE.AE.AR46.B.73649 17.08.2016 16.08.2021 | Ctobehn Ctobehn Ctobehn Ctobehn Ctobehn Ctobehn Ctobehn Ctobehn Ctobehn Ctobehn Ctobehn | Ctobehn Ctobehn Ctobehn Ctobehn Ctobehn Ctobehn Ctobehn Ctobehn Ctobehn Ctobehn Ctobehn Ctobehn Ctobehn Ctobehn Ctobehn Ctobehn Ctocbefn Ctobefn Ctobefn Ctobefn Ctobefn Ctobefn Ctobefn Ctobefn Ctobefn Ctobefn Ctobefn Ctobefn Ctobefn Ctobefn Ctobefn Ctobefn c C-DE.AE.AR46.B.73649 17.08.2016 16.08.2021 | Ctobehn Ctobehn Ctobehn Ctobehn Ctobehn Ctobehn Ctobehn Ctobehn Ctobehn Ctobehn | Ctobehn Ctobehn Ctobehn Ctobehn Ctobehn Ctobehn Ctobefn Ctobefn Ctobefn Ctobefn Ctobefn Ctobefn Ctobefn Ctobefn Ctobefn Ctobefn Ctobehn Ctobefn Ctobefn Ctobefn Ctobefn Ctobefn Ctobefn Ctobefn Ctobefn Ctobefn Ctobefn Ctobefn Ctobefn Ctobefn Ctobefn Ctobefn C C-DE.AE.EA R46.B.73649 17.08.2016 16.08.2021 | Ctobehn Ctobehn Ctobehn Ctobehn Ctobehn Ctobehn Ctobehn Ctobefn Ctobefn Ctobefn Ctobefn Ctobefn Ctobefn Ctobefn Ctobefn Ctobefn Ctobehn Ctobefn Ctobefn Ctobefn Ctobefn Ctobefn Ctobefn C C-DE.AE.AR46.B.73649 17.08.2016 16.08.2021 | Ctobehn Ctobehn Ctobehn Ctocbefn Ctobefn Ctobefn Ctobefn Ctobefn Ctobefn Ctobefn Ctobefn Ctobefn Ctobefn Ctobefn Ctobefn Ctobefn Ctocbefn Ctobefn Ctobefn Ctobefn | |||
| Toproboe obso3nau- Hne | Anpoba- zhiou TnH | CepTnФнКаT COOТБeТСВИ | Стра- нЗПОТБ- ТEL | |||||||||
| РелТуро- ньН HOMER | Датa BbIaDyI | ДуctByet do | ||||||||||
| Mнксерь,бнндөрь,имөнүүлүн | ||||||||||||
| MSM6B250 CNR11 C-DE | Ary46.B.73592 17.02.20 | 16.02.20 | 21 | C诺веня | ||||||||
| MSM6B300 CNHR12 | C-DE.AY46.B.73592 | 7.02.2016 16 | 02.2021 | C诺 БУHЯ | ||||||||
| MSM6B500 CNHR12 | C-DE.AY46.B.73592 | 7.02.2016 16 | 02.2021 | C诺 БУHЯ | ||||||||
| MSM6B700 CNHR12 | C-DE.AY46.B.73592 | 7.02.2016 16 | 02.2021 | C诺 БУHЯ | ||||||||
| MSM87130 CNHR28 | E-AY46.B.73592 17.02.20 | 2016.02.20 | 021 | C诺 БУHЯ | ||||||||
| MSM87140 CNR28 | Ary46.B.73592 17.02.20 | 16.02.20 | 1 | C诺 БУHЯ | ||||||||
| MSM87160 CNHR28 | Ary46.B.73592 17.02.20 | 16.02.20 | 1 | C诺 БУHЯ | ||||||||
| MSM87165 CNHR28 | Ary46.B.73592 17.02.20 | 16.02.20 | 1 | C诺 БУHЯ | ||||||||
| MSM87180 CNHR28 | E-AY46.B.73592 17.02.20 | 2016.02.20 | 021 | C诺 БУHЯ | ||||||||
| MSM88190 CNHR29 | E-AY46.B.73592 17.02.20 | 2016.02.20 | 021 | C诺 БУHЯ | ||||||||
| MSM881X1 | CNHR29 | C-DE.AY46.B.73592 | 17.02.2016 16 | 02.2021 | C诺 БУHЯ | |||||||
| MSM881X2 | CNHR29 | C-DE.AY46.B.73592 | 17.02.2016 16 | 02.2021 | C诺 БУHЯ | |||||||
| KухоньгКOMбayынь | ||||||||||||
| MCM3100W | CNCM12 | C-DE.AY46.B.73522 | 12.02.2016 | 11.02.20 | 21 | C诺 Б C C C C C C C C C C C C C C C C C C C C C C C C C C C C C C C C C C C C C C C C C C C C C C C C C C B C C C C C C C C C C C C C C C C C C C C C C C C C C C C C C C C C C C C C C C C C C C C C C C C C D C C C C C C C C C C C C C C C C C C C C C C C C C C C C C C C C C C C C C C C C C C C C C C C C C E M M M M M M M M M M M M M M M M M M M M M M M M M M M M M M M M M M M M M M M M M M M M M M M M M M N M M M M M M M M M M M M M M M M M M M M M M M M M M M M M M M M M M M M M M M M M M M M M M M M M L M M M M M M M M M M M M M M M M M M M M M M M M M M M M M M M M M M M M M M M M M M M M M M M M M F M M M M M M M M M M M M M M M M M M M M M M M M M M M M M M M M M M M M M M M M M M M M M M M M M G M M M M M M M M M M M M M M M M M M M M M M M M M M M M M M M M M M M M M M M M M M M M M M M M M H M M M M M M M M M M M M M M M M M M M M M M M M M M M M M M M M M M M M M M M M M M M M M M M M M m M M M M M M M M M M M M M M M M M M M M M M M M M M M M M M M M M M M M M M M M M M M M M M M M M l M M M M M M M M M M M M M M M M M M M M M M M M M M M M M M M M M M M M M M M M M M M M M M M M M P M M M M M M M M M M M M M M M M M M M M M M M M M M M M M M M M M M M M M M M M M M M M M M M M M R M M M M M M M M M M M M M M M M M M M M M M M M M M M M M M M M M M M M M M M M M M M M M M M M M B M M M M M M M M M M M M M M M M M M M M M M M M M M M M M M M M M M M M M M M M M M M M M M M M M I M M M M M M M M M M M M M M M M M M M M M M M M M M M M M M M M M M M M M M M M M M M M M M M M M Qapok | ||||||
| MFW3520G | CNFW3A | C-DE.AY46.B.73521 | 03.12.20 | 15 | 02.12.20 | 2020 | ||||||
| MFW3520W | CNFW3A | C-DE.AY46.B.73521 | 03.12.20 | 15 | 02.12.20 | 2020 | ||||||
| MFW3540W | CNFW3A | C-DE.AY46.B.73521 | 03.12.20 | 15 | 02.12.20 | 2020 | ||||||
| MFW3630A | CNFW3B | C-DE.AY46.B.73521 | 03.12.20 | 15 | 02.12.20 | 2020 | ||||||
| MFW3630I | CNFW3B | C-DE.AY46.B.73521 | 03.12.20 | 15 | 02.12.20 | 2020 | ||||||
| MFW3640A | CNFW3B | C-DE.AY46.B.73521 | 03.12.20 | 15 | 02.12.20 | 2020 | ||||||
| MFW3850B | CNFW3B | C-DE.AY46.B.73521 | 03.12.20 | 15 | 02.12.20 | 2020 | ||||||
| MFW45020 | CNFW5 | C-DE.AY46.B.73558 | 03.12.20 | 15 | 02.12.20 | 2020 | ||||||
| MFW45120 | CNFW5 | C-DE.AY46.B.73558 | 03.12.20 | 15 | 02.12.20 | 2020 | ||||||
| MFW66020 | CNFW6 | C-DE.AY46.B.72617 | 03.12.20 | 15 | 02.12.20 | 2020 | ||||||
| MFW67400 | CNFW7 | C-DE.AY46.B.72617 | 03.12.20 | 15 | 02.12.20 | 2020 | ||||||
| MFW67600 | CNFW7 | C-DE.AY46.B.72617 | 03.12.20 | 15 | 02.12.20 | 2020 | ||||||
| MFW68640 | CNFW8 | C-DE.AY46.B.72617 | 03.12.20 | 15 | 02.12.20 | 2020 | ||||||
| MFW68660 | CNFW8 | C-DE.AY46.B.72617 | 03.12.20 | 15 | 02.12.20 | 2020 | ||||||
| MFW68680 | CNFW8 | C-DE.AY46.B.72617 | 03.12.20 | 15 | 02.12.20 | 2020 | ||||||
(waste electrical and electronic equipment - WEEE).
120 150
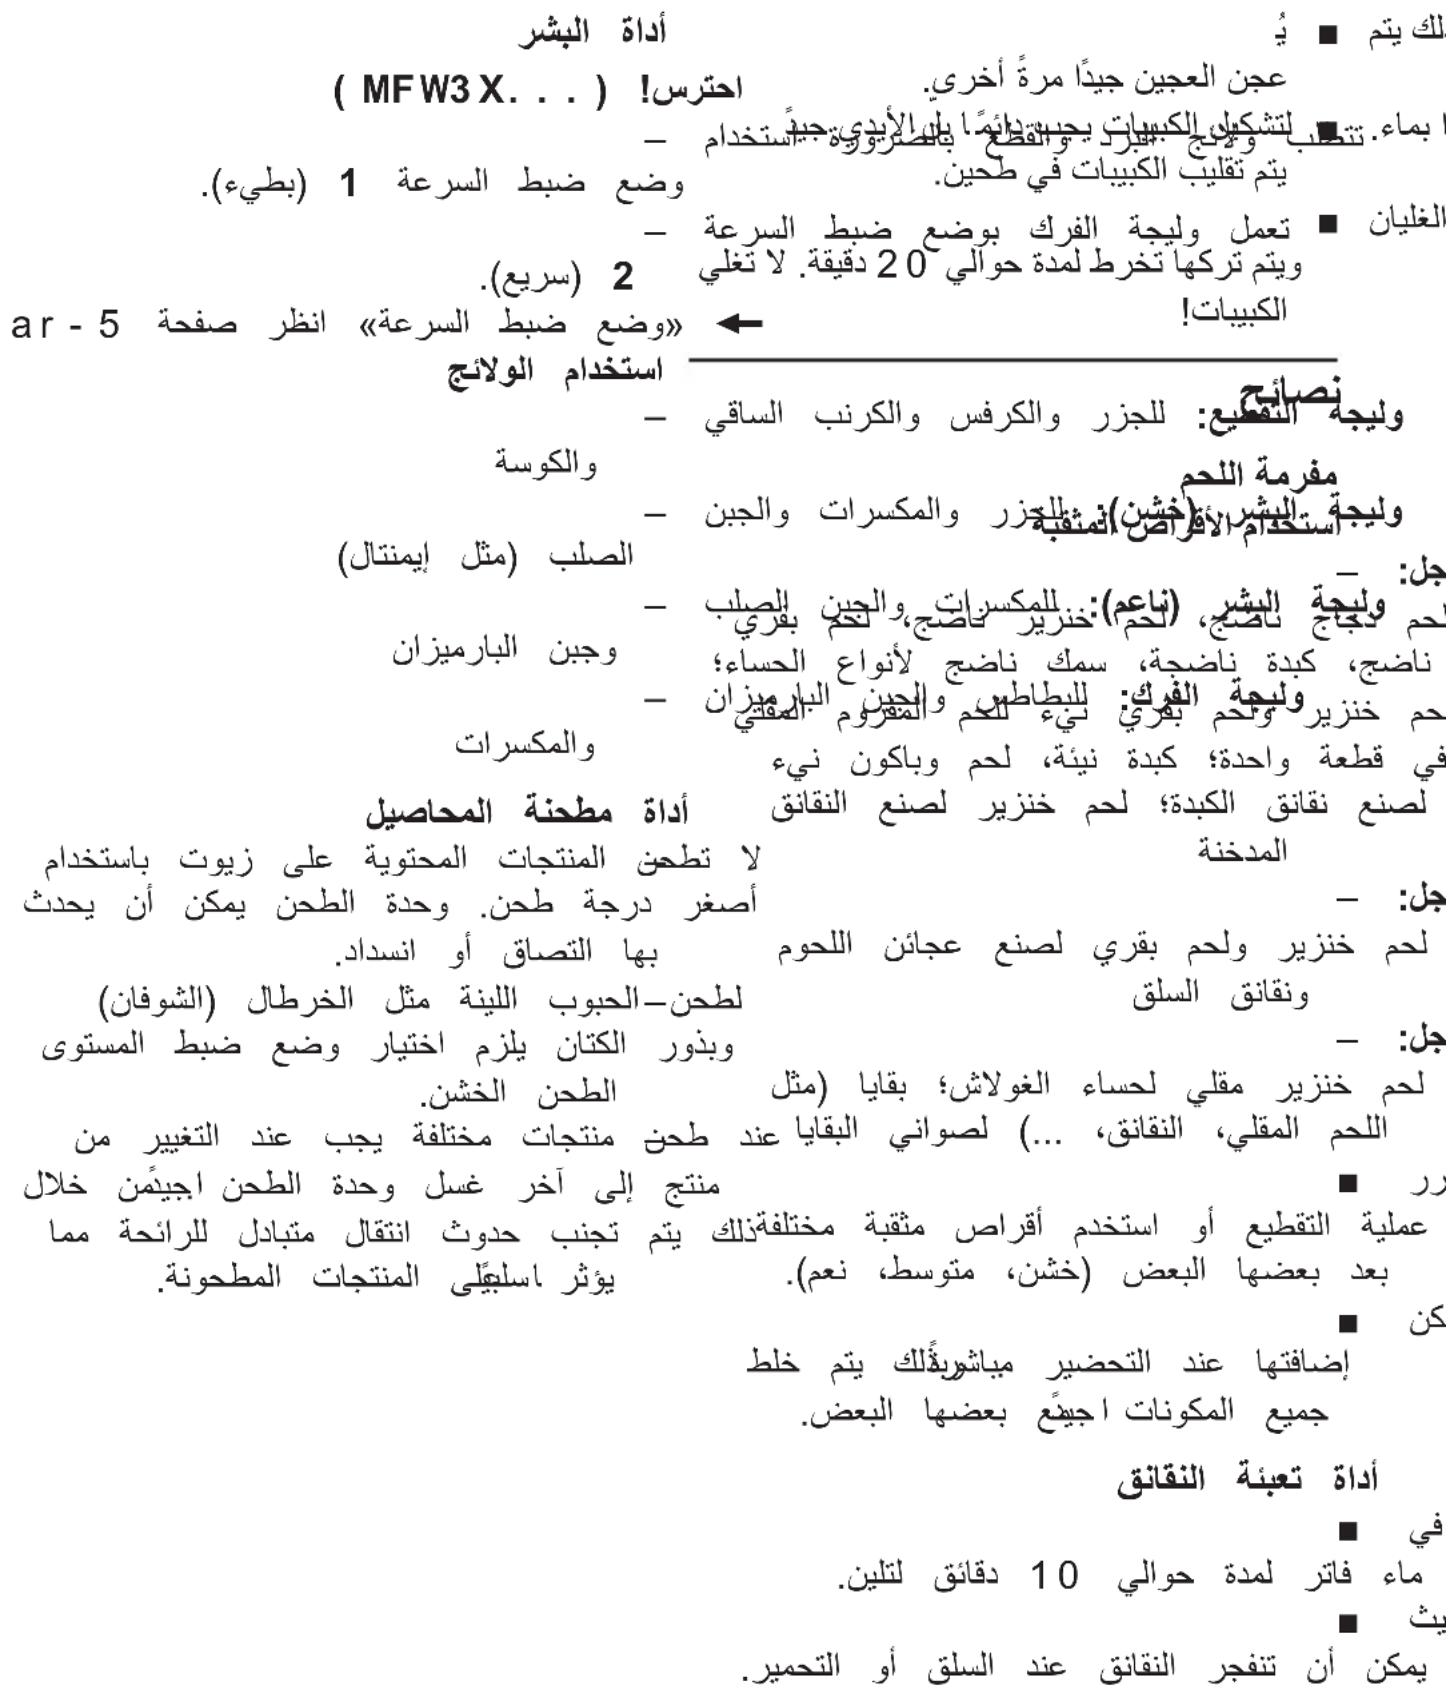
| ar-11 | a |
| ar-11 | a |
| ar-11 | a |
| ar-11 | a |
| ar-11 | a |
| ar-11 | a |
| ar-11 | a |
| ar-11 | a |
| ar-11 | a |
| ar-11 | a |
| ar-11 | a |
| ar-11 | a |
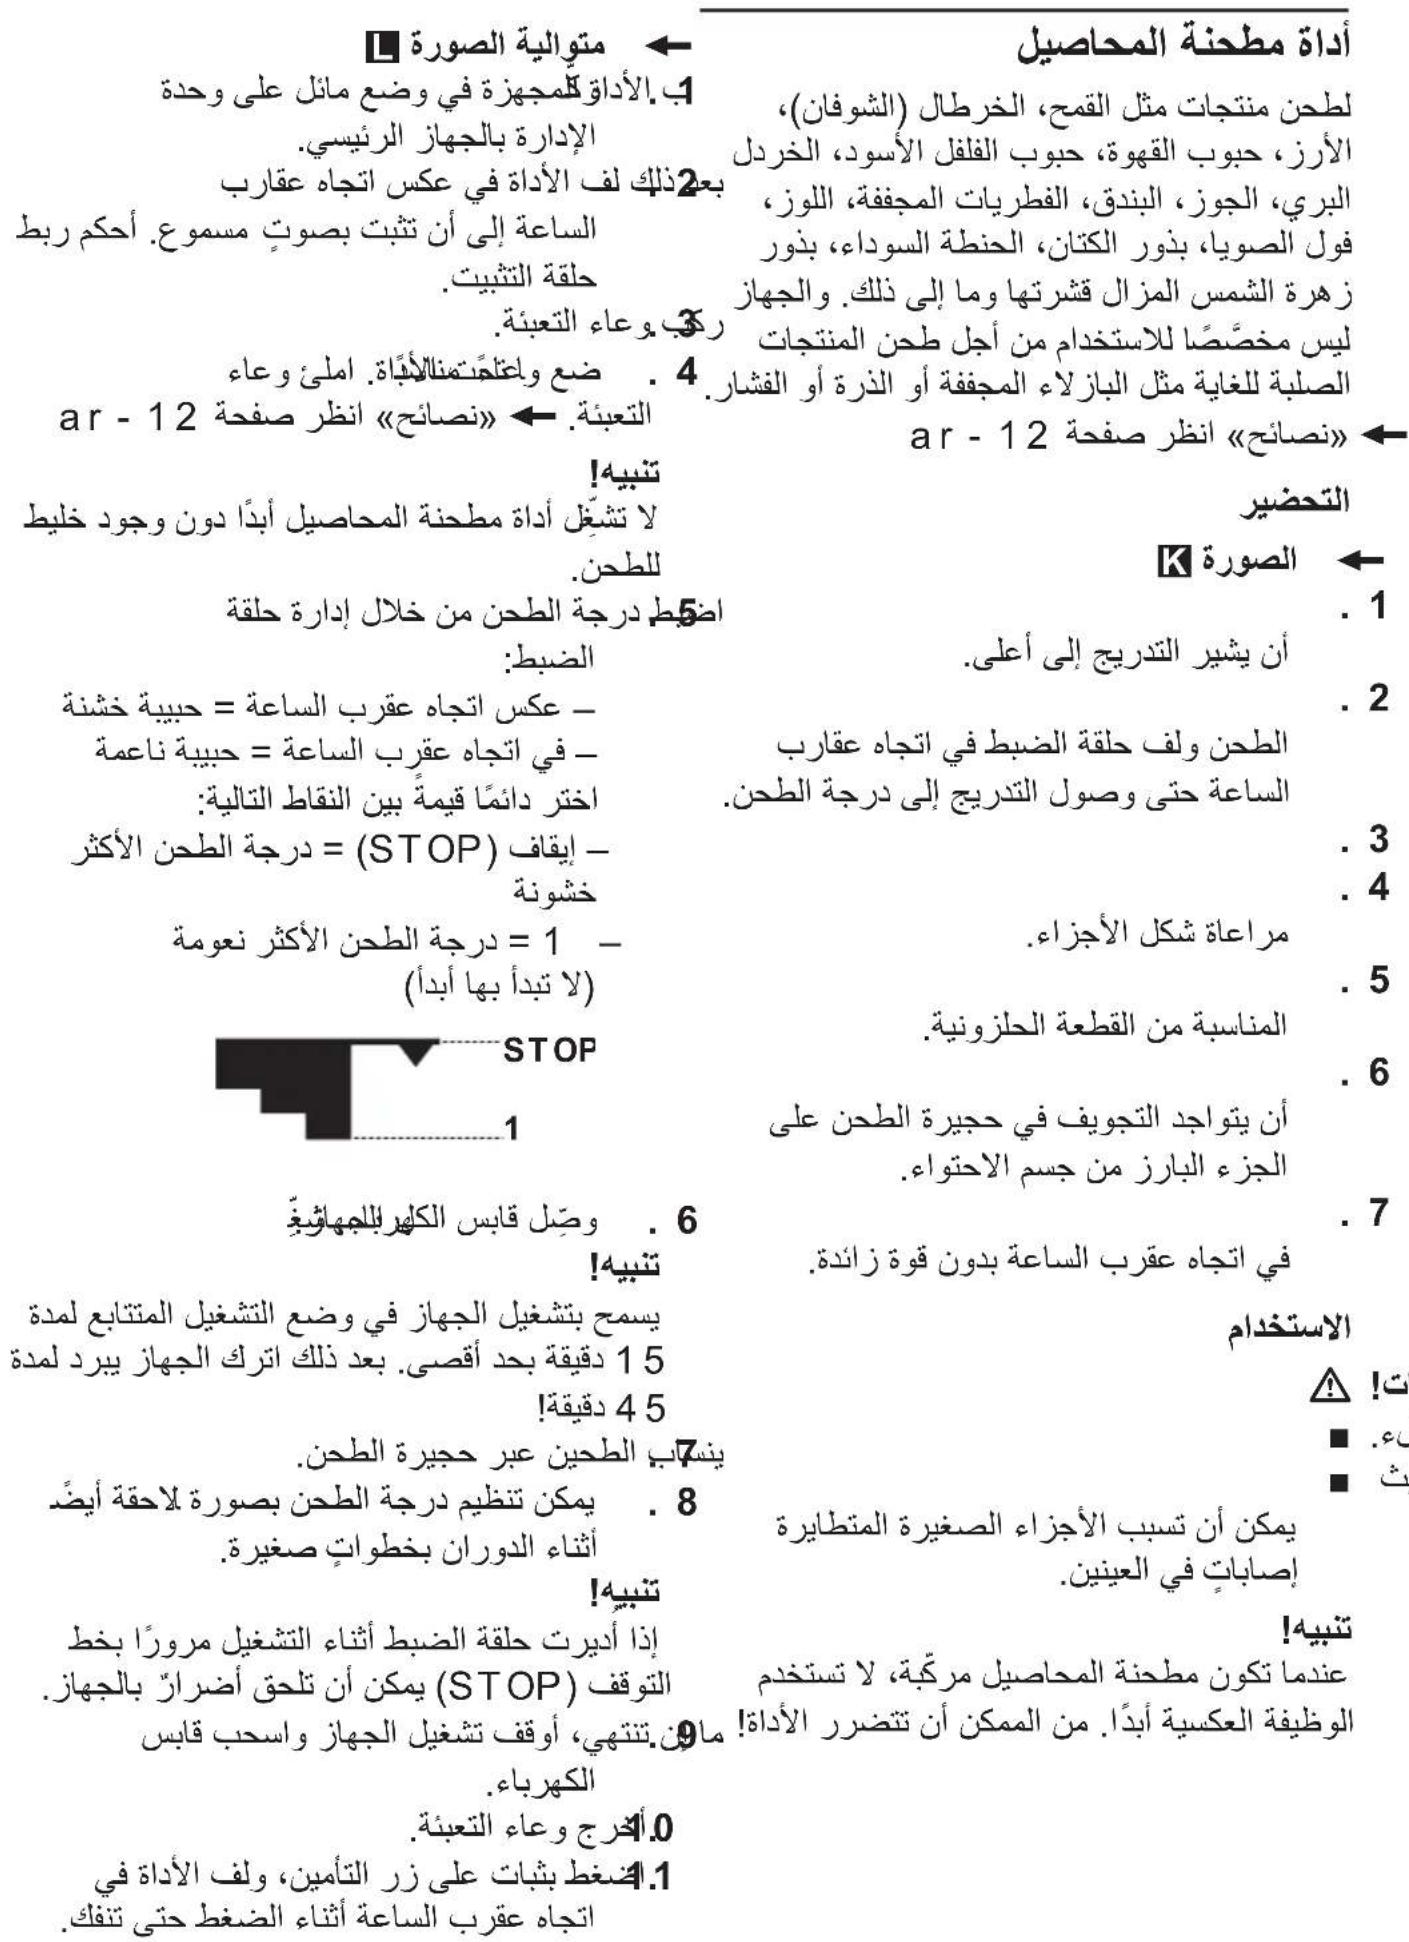
Thus, a5 = 1
Therefore, a1 = 2, and an+1 = 12(an + an+1)
( . . . MFW3X) !
Therefore, g(x) = ln x + m * (x - 1)/x + 1
1
10
1 1
.2
L
a
5.3
Therefore, it must hold
G
a 1
e1g21
j 1
1
!
J 1
L
1
10g 2
l g( t) = 1/2vgt + 1/4vg t
- 1
←
.1
1 1 1 1 1 1 1 1 1 1 1 1 1 1
2
1 1
.3
1 1
4
1 1
.5
.6
ar - 12
(MFW3X..)!
.() 2 1
10 20
12 rev
() 1
ar-5
!
Central Branch Service
17 km E.O. Athinon-Lamias & Potamou 20
14564 Kifisia
Telephone: 181 82
TnAeogwo:2104277701
mail to: nkf - Customer Service
www.bosch-home.gr
HK Hong Kng,
BSH Home Appliances Limited
Unit 1 & 2, 3rd Floor,
North Block, Skyway House,
3 Sham Mong Road
Tai Kok Tsui, Kowloon
Hong Kong
Tel.: 2626 9655 (HK)
Toll free 0800 863 (Macao)
Fax: 25656681
mail to: bosch.hk. service@bsmgl.com.cn ptnservice@mail.rnu
www.bosch-home.com/hr
HU Hungary
www.bosch-home.com/hu
IE Republic of Ireland
BSH Home Appliances Ltd.
M50 Business Park
Ballymount Road Upper
Walkinstown
Dublin 12
To arrange an engineer visit, to order spare parts and accessories or for
product advice please call
Tel.: 01450 2655*
www.bosch-home.ie
- Calls are charged at the basic rate, please check with your telephone service provider for exact charges
IL Israel
C/S/B/ Home Appliance Ltd.
1, Hamasger St.
North Industrial Park
Lod, 7129801
Tel.: 089777222
Fax: 089777245
mailto:csb-serv@csb-ltd.co.il
www.bosch-home.co.il
IN India, Bharat,
BSH Household Appliances Mfg. Pvt. Ltd.
Arena House, Main Bldg, 2nd Floor
Plot No. 103, Road No. 12,
MIDC, Andheri East
Mumbai 400 093
Toll Free 1800 266 1880*
www.bosch-home.com/in
- Mo - Sa: 8.00am to 8.00pm
(excluding public holidays)
IS Iceland
Smith & Norland hf.
Noatuni 4
105 Reykjavik
Tel.: 0520 3000
Fax: 0520 3011
www.sminor.is
abshg.com Italia, Italy
www.bosch-home.com/it
KZ Kazakhstan, Kazakhstan
IP Anackiy A.N. PTN-Service
Kuyshi Dina str.23/1 N3
Astana
Tel.: 717 236 64 55
mail@ptnservice@mail.ru
Technodom Service
Utegen Batira Str. 73
480096 Almaty
Tel.: 727 258 8544
mailto:lsr@technodom.kz
www.technodom.kz
Kombitechnocentre
Zhaombyb sbm 117
480096 Almaty
Tel.: 7273384555
mailto:ctspavel@bk.ru
www.cts.kz
TOO Evrika Service
Shimkent, Riskulova 22.
Shimkent 160018
Tel.: 727 252 44 63 75
mail to: evrika kz@mail.ru
www.evrika.com
AV SERVICE
Abulhair hana Str. 51
Uralsk 090000
Tel.: 711 293 9949
mailto:oastafiev@avservice.kz
www.avservice.kz
LB Lebain,
Teheni, Hana & Co.
Boulevard Dora 4043 Beyrouth
P.O.Box 90449
Jdeideh, 1202 2040
Tel.: 01 255 211
mailto:Info@Teheni-Hana.com
LT Li etuva, Lithuania
Senuku prekybos centras UAB
Jonavos g. 62
44192 Kaunas
Tel.: 037 212 146
Fax: 037 212 165
www.senukai.lt
UAB "AG Service"
R. Kalantos g. 32
52494 Kaunas
Tel.: 0700 556 55
Fax: 037 331 363
mailto:servivas@agservice
www.agservice.lt
Baltic Continent Ltd.
Lukšio g. 23
09132 Vilnius
Tel.: 870 055 595
Fax: 052 741 722
mail to: info@balticcontinent.lt
www.balticcontinent.lt
UAB Emtoservis
Savanoriu pr. 1 (Centrine bustine)
03116 Vilnius
Tel.: 870 044 724
Fax: 052 737 368
mail to: svc@emtoservis.lt
www.emtoservis.lt
LU Luxembourg
mail to: serviss@elektronika.lv
www.elektronika.lv
MD Moldova
S.R.L. "Rialto-Studio"
str. liceul 98
2012 Chișinău
Tel./Fax: 022 23 81 80
mailto:bosch-md@mail.ru
ME Crna Gora, Montenegro
Elektronika komerc
mail to: ekobosch.servis@t-com.me
MK Macedonia, Makeonna
GORENEC
Jane Sandanski 69 lok.3
1000 Skopje
Tel.: 02 2454 600
Mobil: 070 233 689
mail to: gorenec@yahoo.com
MT Ma I t a
Oxford House Ltd.
Notabile Road
Mriehel BKR 14
Tel.: 021 442 334
Fax: 021 488 656
www.oxfordhouse.com.mt
| MV Raaj jeyge Jumhoori y@a, Romania, Romania Maledives BSH Electrcasnics srl. Lintel Investments Sos. Bucuresti - Pioesti, Nr. 19-21, sect.1 Ma. Maadheli, Majeedhee Magu Malé 13682 Bucuresti Tel.: 021 203 9748 fax: 021 203 9733 I ntel. com. mv mail to: service. romania @bsh.com N L Nederlande, Netheriands www. bosch - home. ro BSH Huishoudapparaten B.V. Taur us avenue 36 OOO «БСХ Бытовь Рпборь» BSH Ev Al etleri Sanayi Storingsmeling: Manja Kanyxckay, 15 Tel.: 088 424 4010 119071 Mockba Fax: 088 424 4845 mail to: bosch - contact center mailto: mok-kdhl@bshg.com bshg. com www. bosch - home. ro Onderdelenverkoop: SA Kingdom Saudi Arabia Tel.: 088 424 4010 abdul Latif Jameel Electronics and Airconditioning Co. Ltd. BOSCH Service centre, Kilo 5 Old Makkah Road NO Norge, Norway BSH Husholdningsapparater A/S Grønsvagen 9 P.O. Box 7997 Tel.: 021 216 444 6333* Fax: 021 216 528 9188* mail to: carline.turkey@bshg.com www. bosch - home. com Next to Toyota), Jamiah Dist. Tel.: 021 216 528 9188* Fax: 021 216 528 9188* mail to: carline.turkey@bshg.com www. bosch - home. com Next to Toyota), Jamiah Dist. Tel.: 021 216 528 9188* Fax: 021 216 528 9188* mail to: carline.turky@bshg.com www. bosch - home. com Next to Toyota), Jamiah Dist. Tel.: 021 216 528 9188* Fax: 021 216 528 9188* mail to: carline.turkey@bshg.com www. bosch - home. com Next to Toyota), Jamiah Dist. Tel.: 02 16 444 6333* Fax: 02 16 444 6333* mail to: carline.turkey@bshg.com www. bosch - home. com Next to Toyota), Jamiah Dist. Tel.: 02 16 444 6333* Fax: 02 16 444 6333* mail to: carline.turkey@bshg.com www. bosch - home. com Next to Toyota), Jamiah Dist. Fax: 02 16 444 6333* mail to: carline.turkey@bshg.com www. bosch - home. com Next to Toyota), Jamiah Dist. Fax: 02 16 444 6333* mail to: carline.turkey@bshg.com www. bosch - home. com Next to Toyota), Jamiah Dist. Fax:02 16 444 6333* mail to: carline.turkey@bshg.com www. bosch - home. com Next to Toyota), Jamiah Dist. Fax:02 16 444 6333* mail to: carline.turkey@bshg.com www. bosch - home. com Next to Toyota), Jamiah Dist. Fax:02 216 444 6333* mail to: carline.turkey@bshg.com www. bosch - home. com Next to Toyota), Jamiah Dist. Fax:02 216 444 6333* mail to: carline.turkey@bshg.com www. bosch - home. com Next to Toyota), Jamiah Dist. Fax:02 21 444 6333* mail to: carline.turkey@bshg.com www. bosch - home. com Next to Toyota), Jamiah Dist. Fax:02 21 444 6333* mail to: carline.turkey@bshg.com www. bosch - home. com Next to Toyota), Jamiah Dist. Fax:02 21 44 6333* mail to: carline.turkey@bshg.com www. bosch - home. com Next to Toyota), Jamiah Dist. Fax:02 21 44 6333* mail to: carline.turkey@bshg.com www. bosch - home. com Next to Toyota), Jamiah Dist. Fax:02 21 44 63 |
Carl - Wery- Straße 34
81739 Munchen, GERMANY

Thank you for buying a Bosch Home Appliance!
Register your new device on MyBosch now and profit directly from:
- Expert tips & tricks for your appliance
- Warranty extension options
- Discounts for accessories & spare parts
- Digital manual and all appliance data at hand
- Easy access to Bosch Home Appliances Service
Free and easy registration - also on mobile phones:
www.bosch-home.com/welcome
BOSCH
HOME APPLIANCES
SERVICE
Looking for help?
You'll find it here.
Expert advice for your Bosch home appliances, need help with problems or a repair from Bosch experts.
Find out everything about the many ways Bosch can support you:
www.bosch-home.com/service
Contact data for all countries are listed in the attached service directory.
| P | MFW3910W | MFW3X10... | MFW3X13... | MFW3X14... | MFW3X15... | MFW3X17... | MFW3X18... |
| I O | ✓ | ||||||
| O/I 1:2 rev | ✓ | ✓ | ✓ | ✓ | ✓ | ✓ | |
| 2.7 mm | ✓ | ✓ | ✓ | ✓ | ✓ | ||
| 4 mm/8 mm | ✓ | ✓ | ✓ | ✓ | ✓ | ✓ | |
| ✓ | ✓ | ✓ | ✓ | ✓ | ✓ | ✓ | |
| ✓ | ✓ | ✓ | ✓ | ✓ | ✓ | ✓ | |
| ✓ | ✓ | ✓ | ✓ | ✓ | ✓ | ||
| ✓ | ✓ | ✓ | ✓ | ✓ | ✓ | ||
| ✓ | ✓ | ✓ | ✓ | ✓ | ✓ | ||
| ✓ | ✓ | ✓ | ✓ | ✓ | ✓ | ||
| ✓ | ✓ | ✓ | ✓ | ✓ | ✓ | ||
| ✓ | ✓ | ✓ | ✓ | ✓ | ✓ |



- COMPACTPOWER MEAT MINCER
- SAFETY INSTRUCTIONS
- DANGER OF ELECTRIC SHOCK AND FIRE
- RISK OF INJURY
- CAUTION! RISK OF DAMAGING THE APPLIANCE
- IMPORTANT
- CONGRATULATIONS ON THE PURCHASE OF YOUR NEW BOSCH APPLIANCE
- CONTENT
- GRAIN MILL ATTACHMENT
- FRUIT PRESS ATTACHMENT
- BEFORE USING FOR THE FIRST TIME
- CAUTION
- CONTROL AND DISPLAY
- ELEMENTS
- ALL MODELS
- OPERATION INDICATOR
- RELEASE BUTTON
- CABLE STORAGE COMPARTMENT
- STORAGE COMPARTMENT
- OVERLOAD PROTECTION
- REPLACE AGITATOR PADDLE (SEE FIG. 3)
- SPEED SETTING
- ONLY MFW3X
- CAUTION! BUTTON IS
- REVERSING FUNCTION
- BASE UNIT
- PREPARATION
- PREPARATION FOR SAUSAGE FILLING
- BASE ATTACHMENT
- MEAT MINCER
- SAUSAGE FILLER
- PREPARATION FOR MEAT
- → FIG. D
- USE
- THE FOLLOWING EXAMPLE DESCRIBES
- THE BASIC ATTACHMENT AS A MEAT
- INDIVIDUAL
- FIT THE FILLING TRAY AND IN THE FEED CHUTE
- NOTE (MFW3X...)
- CAUTION! (MFW3X...)
- SHREDDING ATTACHMENT
- SEE FIG
- CITRUS PRESS ATTACHMENT! (MFW3X...)
- FIG
- WARNING
- SEE FIG. N
- RECIPES
- FIG. ⑥ GIVES AN OVERVIEW OF HOW TO SHAPE THE DUMPLINGS WITH WET HANDS. ROLL THE DUMPLINGS IN FLOUR
- NOTES
- NOTE (MFW3X. . .)
- BREAD DUMPLINGS
- USING THE PERFORATED DISCS
- GUARANTEE
- DISPOSAL
- SPARE PARTS AND ACCESSORIES
- TROUBLESHOOTING
- PROBLEM CAUSE REMEDY
- BASE ACCESSORY
- → SEE FIG. B
- ATTENTION! ( MFW3X. . . )
- TABLE OF CONTENTS
- FIGURE A
- MAIN CONTROL UNIT
- BASE NOZZLE
- INSERT-GRATER
- INSERT-SAUSAGE MAKER
- FIGURE C
- CONTROL AND INDICATION ELEMENTS
- MFW
- MFW3X
- OPERATING STATUS INDICATOR
- FIXATION BUTTON
- CABLE HOOK
- STORAGE HOOK
- PROTECTION AGAINST OVERLOAD
- REPLACING THE FUSE
- → FIGURE B
- SPEED ADJUSTMENT
- ONLY FOR MFW3X
- PREPARING THE SAUSAGE ATTACHMENT
- → FIGURE E
- APPLICATION
- EXAMPLES OF APPLICATION
- CAREFUL
- → MAINTENANCE
- INDICATOR (MFW3X...)
- SHREDDING NOZZLE
- → PAD MAJIHOHKB
- ACTOCYBAHHA
- HE6E3NEKA TPABMYBAHHA
- YBARA
- YBARA! (MFW3X...)
- → PÁD MAJIHOHKB H
- ATTENTION! (MFW3X...)
- CITRUS ATTACHMENT
- DANGER OF ELECTRIC SHOCK
- → FOR SMALL FRUITS
- → PAD MAJIBOHKIB J
- BKA3IBKN
- NOZZLE
- ILLUSTRATION K
- OPERATION
- DANGER OF INJURY
- PREPARING THE PUREE
- ATTENTION
- → SMALL BOWL
- CARE AND CLEANING
- INSTRUCTIONS (MFW3X...)
- DUMPLINGS
- MEAT GRINDER
- USE OF ATTACHMENTS
- COMPREHENSIVE OVERVIEW
- MAIN UNIT
- MAIN ATTACHMENT
- MEAT GRINDER PARTS
- SAUSAGE ATTACHMENT
- CONNECTION OF THE VACUUM CLEANER AND THE FILTER
- BUTTON 1-2 | REV
- POWER INDICATOR
- REPLACING THE SOCKET
- FIGURE B
- NUR MFW3X
- REVERSE FUNCTION
- NOTE
- DANGER OF INJURY IS NOT EXCLUDED
- INJURY HAZARD
- SAUSAGE STUFFER
- PREPARING THE MEAT GRINDER
- DO NOT TOUCH THE SHARP KNIFE
- ALWAYS USE ONLY ONE SHAPING DISC
- FIRST INSERT THE SHAFT WITH THE DRIVE PIN INTO THE HOUSING
- FIGURE
- PLACE THE ATTACHMENT ON THE DRIVE. 2. LOAD THE PREPARED PRODUCTS INTO THE FEED CHUTE. 5. PLUG THE POWER CORD INTO THE OUTLET. SWITCH ON THE APPLIANCE
- AFTER SWITCHING ON, THE APPLIANCE STARTS OPERATING AT THE OPTIMAL SPEED LEVEL 2 (FAST)
- FOR SHREDDING, GRATING, AND SLICING VEGETABLES, FRUITS, NUTS, ALMONDS, BERRIES, AND HARD PRODUCTS. USE THE APPROPRIATE DISC DEPENDING ON THE TYPE AND CONSISTENCY OF THE PRODUCTS TO BE PROCESSED. → "TIPS" SEE P
- → SEE FIGURE B
- → FIG. DRAWINGS H
- CITRUS JUICER ATTACHMENT
- RISK OF INJURY NOT EXCLUDED
- → SEE FIGURES
- TIPS
- MILL ATTACHMENT
- INSERT THE MOUNTING SCREW INTO THE MOUNTING RING. MAKE SURE THE SCALE IS FACING UP. 2. PRESS THE MOUNTING SCREW IN THE DIRECTION OF THE GRINDING CHAMBER. TURN THE MOUNTING RING CLOCKWISE TO REACH THE DESIRED DEGREE OF GRINDING
- RISK OF INJURY CANNOT BE EXCLUDED
- DO NOT INSERT HANDS INTO THE FEED TUBE. DURING OPERATION, DO NOT FORGET THE FEED TUBE. DISCHARGED PARTS CAN CAUSE EYE INJURIES
- IF A GRAIN MILL IS INSTALLED, NEVER USE THE REVERSE FUNCTION. THIS CAN CAUSE DAMAGE TO THE ATTACHMENT
- INSTALL THE PREPARED ATTACHMENT INCLINED ON THE DRIVE OF THE MAIN UNIT
- JUICER ATTACHMENT FOR CITRUS FRUITS
- FIGURE M
- APPLICATIONS
- CLEANING AND DAILY CARE
- DO NOT TOUCH THE SHARP BLADES AND EDGES OF THE ATTACHMENTS FOR CHOPPING AND CUTTING. ALWAYS USE A BRUSH
- METAL PARTS MUST NOT BE WASHED IN A DISHWASHER! DO NOT USE AGGRESSIVE CLEANING AGENTS CONTAINING ALCOHOL OR SPIRITS. DO NOT USE METAL OR SHARP OBJECTS, AS WELL AS OBJECTS WITH SHARP EDGES
- FOOD PROCESSOR
- USE OF PULSE DISCS
- SAUSAGES AND WIENERS
- ATTACHMENT FOR GRATING
- MILL-GRINDER
- WARRANTY SERVICE
- HOUR HOTLINE*: 8 (800)
- ACCESSORIES AND CARE PRODUCTS
- MANUFACTURER'S WARRANTY
- ATTENTION! IMPORTANT INFORMATION FOR CONSUMERS
- SERVICE INFORMATION
- INFORMATION ABOUT HOUSEHOLD APPLIANCES MANUFACTURED UNDER THE CONTROL OF THE CONCERN BSH HAUSGERÄTE GMBH, CARL-WERY-STR. 34, 81739 MUNICH, GERMANY, IN ACCORDANCE WITH THE REQUIREMENTS OF THE FEDERAL LAW OF THE RUSSIAN FEDERATION OF NOVEMBER 23, 2009 NO. 261-FZ, LEGISLATION ON TECHNICAL REGULATION AND LEGISLATION ON CONSUMER PROTECTION OF THE RUSSIAN FEDERATION
- THANK YOU FOR BUYING A BOSCH HOME APPLIANCE
Brand : BOSCH
Model : CompactPower MFW3X13W
Category : Meat Grinder