MA 443 C - Lawn mower VIKING - Free user manual and instructions
Find the device manual for free MA 443 C VIKING in PDF.
| Product type | Electric cordless lawn mower |
| Brand | VIKING |
| Model | MA 443 C |
| Cutting width | 41 cm |
| Cutting height | 25 - 75 mm (6 levels) |
| Grass collector box capacity | 55 liters |
| Weight (without battery) | 20 kg |
| Dimensions (L x W x H) | 138 x 49 x 108 cm |
| Power supply | STIHL AP lithium-ion battery (included) |
| Charger | STIHL AL 100/101/300/500 (included) |
| Blade speed | 3000 rpm |
| Tightening torque of blade screw | 18 - 22 Nm |
| Handle | Single, height-adjustable (2 positions) and foldable |
| Cutting height adjustment | Centralized, 6 positions |
| Safety devices | Safety switch, two-hand operation, brake stop (< 3 s) |
| Grass box filling indicator | Yes, mechanical indicator |
| Maintenance | Water cleaning, blade checking and sharpening, blade replacement |
| Common spare parts | Cutting blade (ref. 63387020111), blade fixing screw (ref. 63107602800) |
Frequently Asked Questions - MA 443 C VIKING
User questions about MA 443 C VIKING
0 question about this device. Answer the ones you know or ask your own.
Ask a new question about this device
Download the instructions for your Lawn mower in PDF format for free! Find your manual MA 443 C - VIKING and take your electronic device back in hand. On this page are published all the documents necessary for the use of your device. MA 443 C by VIKING.
USER MANUAL MA 443 C VIKING
MA 443.1, MA 443.1 C
MA 443.1, MA 443.1 C
Thank you for choosing a VIKING quality product.
This product has been produced using state-of-the-art production methods and extensive quality assurance procedures, because our goal is only achieved if you, the customer, are satisfied with your machine.
If you have any questions concerning your machine, please contact your dealer or our sales agency directly.
I hope that your VKING machine will give you great enjoyment.

Dr. Peter Pretzsch
Management
1. Table of contents
Notes on the instruction manual 34
General 34
Instructions for reading the
instruction manual 34
Country-specific versions 34
Machine overview 35
For your safety 35
General 35
Battery 36
Charger 36
Clothing and equipment 36
Transporting the machine 37
Before operation 37
Working with your machine 37
Maintenance, cleaning, repairs and storage 39
Storage for prolonged periods
without operation 40
Disposal 40
Description of symbols 40
Standard equipment 41
Preparing the machine for operation 41
General 41
Installing mono handlebar (MA 443 C) 41
Installing dual handlebar (MA 443) 41
Assembling the grass catcher box 42
Battery and charger 42
General 42
Connecting charger to the mains 42
Removing/installing battery 42
Charging battery 42
LED display on charger 43
LED indicator on the charger 43
Controls 43
Safety plug 43
Battery compartment 44
Adjusting mono handlebar (MA 443 C) 44
Adjusting dual handlebar (MA 443) 44
Grass catcher box 44
Central cutting height adjustment 44
Level indicator 45
Notes on working with the machine 45
General 45
Working area for operator 45
Correct motor load 45
If the mowing blade blocks 45
Thermal motor overload protection 45
Safety devices 45
Safety devices 46
Safety plug 46
Two-hand operation 46
Motor run-down brake 46
Operating the machine 46
Preparations 46
Switching on lawn mower 46
Switching off lawn mower 46
Emptying the grass catcher box 46
Maintenance 46
General 46
Cleaning the machine 46
Electric motor and wheels 47
Battery 47
Charger 47
Checkingblade wear 47
Removing and installing mowing
blade 48
Sharpening the mowing blade 48
Storage (winter break) 48
Transport 49
Carrying and securing the lawn mower 49
Minimising wear and preventing damage 49
Environmental protection 50
Standard spare parts 50
Manufacturer's declaration of CE conformity 50
Technical specifications 51
Troubleshooting 51
Service schedule 53
Handover confirmation 53
Service confirmation 53
2. Notes on the instruction manual
2.1 General
This instruction manual constitutes original manufacturer's instructions in the sense of EC Directive 2006/42/EC.
VIKING is continually striving to further develop its range of products; we therefore reserve the right to make alterations to the form, technical specifications and equipment level of our standard equipment.
For this reason, the information and illustrations in this manual are subject to alterations.
This instruction manual is protected by copyright. All rights reserved, especially the right of reproduction, translation and processing using electronic systems.
2.2 Instructions for reading the instruction manual
Illustrations and texts describe specific operating steps.
All symbols which are affixed to the machine are explained in this instruction manual.
Viewing direction:
Viewing direction when "left" and "right" are used in the instruction manual: the user is standing behind the machine and is looking forwards in the direction of travel.
Section reference:
References to relevant sections and subsections for further descriptions are made using arrows. The following example shows a reference to a section: (2.1)
Designation of text passages:
The instructions described can be identified as in the following examples.
Operating steps which require intervention on the part of the user:
- Release bolt (1) using a screwdriver, operate lever (2)...
General lists:
- Use of the product for sporting or competitive events
Texts with added significance:
Text passages with added significance are identified using the symbols described below in order to especially emphasise them in the instruction manual:

Danger
Risk of accident and severe injury to persons. A certain type of behaviour is necessary or must be avoided.

Warning
Risk of injury to persons. A certain type of behaviour prevents possible or probable injuries.

Caution
Minor injuries or material damage can be prevented by a certain type of behaviour.

Note
Information for better use of the machine and in order to avoid possible operating errors.
Texts relating to illustrations:
Illustrations relating to use of the machine can be found in the front of this instruction manual.
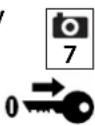
The camera symbol serves to link the figures on the illustration pages with the corresponding text passages in the instruction manual.

2.3 Country-specific versions
VIKING supplies chargers with different plugs and switches, depending on the country of sale.
Chargers with European plugs are shown in the illustrations. Chargers with other types of plug are connected to the mains in a similar way.
3. Machine overview

1 Upper handlebar
2 Quick-clamping devices (MA 443)
3 Lower handlebar (MA 443)
4 Engine hood
5 Cover
6 Front wheel
7 Handle, front
8 Identification plate
9 Housing
10 Rear wheel
11 Cutting height adjustment lever
12 Handle, rear
13 Grass catcher box
14 Level indicator (grass catcher box)
15 Motorstop lever
16 ON button
17 Handlebar detent lever (MA 443 C)
18 Handlebar console (MA 443 C)
19 Safety plug
20 Battery
21 Charger
4. For your safety
4.1 General

These safety regulations must be observed when working with the machine.

Read the entire instruction manual before using the machine for the first time. Keep in the instruction manual in a safe future reference.
These safety precautions are essential for your safety, however the list is not exhaustive. Always use the machine in a reasonable and responsible manner and be aware that the user is responsible for accidents involving third parties or their property.
Make sure that you are familiar with the controls and use of the machine.
The machine must only be used by persons who have read the instruction manual and are familiar with operation of the machine. The user should seek expert and practical instruction prior to initial operation. The user must receive instruction on safe use of the machine from the vendor or another expert.
During this instruction, the user should be made aware that the utmost care and concentration are required for working with the machine.

Risk of death from suffocation!
Packaging material is not a toy danger of suffocation! Keep packaging material away from children.
Only give or lend the machine, including any accessories, to persons who are familiar with this model and how to operate it. The instruction manual forms part of the machine and must always be provided to persons borrowing it.
The machine must only be operated by persons who are well rested and in good physical and mental condition. If your health is impaired, you should consult your
doctor to determine whether working with the machine is possible. The machine should not be operated after the consumption of alcohol, drugs or medications which impair reactions.
Children, persons with impaired physical, sensory or mental faculties or those lacking the appropriate experience, or persons who are not familiar with the instructions, must never be allowed to use the machine.
Never allow children under the age of 16 to use the machine. Local regulations may specify a minimum age for users.
The machine is intended for private use.
Caution - risk of accident:
The machine is only intended for mowing lawns. Its use for other purposes is not permitted and may be dangerous or result in damage to the machine.
Due to the physical danger to the user, the machine must not be used for the following applications (incomplete list):
- for trimming bushes, hedges and shrubs,
- for cutting creepers,
- for the care of lawn roofs and balcony boxes,
- for shredding or chopping tree or hedge cuttings,
for clearing paths (vacuuming, blowing),
for levelling earth mounds, e.g. mole hills, - for transporting clippings, except in the grass catcher box intended for this purpose.
For safety reasons, any modification to the machine, except the proper installation of accessories approved by VKING, is forbidden and results in voiding of the warranty cover. Information regarding approved accessories can be obtained from your VKING specialist dealer.
In particular, any tampering with the machine which increases the power output or motor speed is forbidden.
It is not permitted to transport objects, animals or persons, particularly children, on the machine.
Particular care is required during use in public green spaces, parks, sports fields, along roads and in agricultural and forestry businesses.

Caution: Danger to health due to vibrations!
Excessive exposure to
vibrations can result in damage
to the cardiovascular or nervous system, particularly in persons with cardiovascular problems. Please consult a physician if you experience symptoms that may have been caused by vibrational loads.
Symptoms of this kind principally affect the fingers, hands or wrists and include (incomplete list):
- numbness,
-pain,
-muscular weakness, - skin discolouration,
- unpleasant tingling sensation.
4.2 Battery
Please observe the supplementary sheet or the instruction manual for the STIHL battery and keep it in a safe place.
Only use original STIHL batteries.
Only use the STIHL battery with STIHL or VIKING machines and only charge with STIHL chargers.
Never open the battery.
Do not drop the battery.
Never use a defective or deformed battery.
Keep the battery out of the reach of children.

Only use or store the battery at temperatures from -10^ to max. +50^ .

Protect the battery against direct sunlight, heat and fire - never throw it into a fire - Explosive hazard!

Protect the battery against rain - do not immerse in fluids.
Do not subject the battery to microwaves or high pressure.
Never connect the battery terminals with metal objects (short-circuit). The battery can be damaged through short circuits.
Keep the unused battery away from metal objects (e.g. nails, coins, jewellery). Do not use metal transport containers -
Explosive and fire hazard!
Fluid may escape from the battery due to improper use - Avoid contact! In the case of inadvertent contact, rinse with water. Seek medical attention if the fluid gets into the eyes. Escaping battery fluid can cause skin irritation and burns.
Do not insert any objects in the ventilation slots of the battery.
sheets
Number of cells and energy content according to cell manufacturer's specification
For further safety instructions, see www.stihl.com/safety-data
4.3 Charger
Please observe the supplementary sheet or the instruction manual for the STIHL charger and keep it in a safe place.
Only use original STIHL chargers.
Do not use the charger if damaged.
Only use the charger to charge AP type STIHL batteries of the appropriate geometry with a maximum capacity of 10 Ah and a maximum voltage of 42V
Never charge defective or deformed batteries.
The mains voltage and mains frequency must correspond to the information on the identification plate on the bottom of the charger and the information contained in the instruction manual for the charger.
Do not open the charger.
Disconnect the mains plug after use and make sure that the charger is kept out of the reach of children.
4.4 Clothing and equipment

Always wear sturdy footwear with high-grip soles when working. Never work barefoot
or, for example, in sandals.

Also always wear sturdy gloves and tie up and secure long hair (headscarf, cap, etc.) when performing maintenance and
cleaning work or when transporting the machine.

Wear suitable safety glasses when sharpening the mowing blade.
Always wear long trousers and tight-fitting clothing when operating the machine.
Never wear loose clothes which may become caught on moving parts (control levers) – do not wear jewellery, ties or scarves.
4.5 Transporting the machine
Always wear gloves in order to prevent injuries due to sharp-edged and hot components.

Switch off the machine prior to transport, allow the blade to
come to a standstill and remove the safety plug.
Only transport the machine once the motor has cooled down.
Take the weight of the machine into account and use suitable loading aids (loading ramps, lifters) if necessary.
Secure the machine and any machine components being transported (e.g. grass catcher box) on the load floor using fastening material of adequate size (belts, ropes, etc.).
Avoid contact with the mowing blade when lifting and carrying the machine.
Observe the information in the section "Transport". It describes how to lift and lash the machine. ( 14.1)
When transporting the machine, always observe regional legislation, especially regarding load security and the transport of objects on load floors.
Do not leave the battery inside a vehicle and never expose it to direct sunlight.
Lithium-ion batteries must be treated with special care during transport. In particular, it must be ensured that short circuits are prevented during transport of the batteries. For this reason, keep the original cardboard packaging of the battery and always transport STIHL batteries either in the undamaged original packaging or in the lawn mower.
4.6 Before operation
Make sure that only persons who are familiar with the instruction manual are permitted to use the machine.
Observe the local regulations regarding permitted operating times for gardening power tools with combustion engines or electric motors.
Carefully inspect the complete area on which the machine is to be used and remove any stones, sticks, wires, bones and other foreign objects which could be thrown up by the machine. Obstacles (e.g. tree stumps, roots) can be easily overlooked in long grass.
For this reason, mark all foreign objects (obstacles) which are hidden in the lawn and cannot be removed before commencing work with the machine.
All faulty, worn or damaged parts must be replaced before using the machine. Replace any illegible or damaged danger signs and warnings on the machine. Your VKING specialist has a supply of replacement stickers and all the other spare parts.
The machine must only be used in good operating condition. Before each use, check that:
- The machine is properly assembled.
- The cutting tool and the entire cutting unit (mowing blade, fastening elements, mowing deck housing) are in good condition. In particular check for secure fastening, damage (notches or cracks) and wear.
- The safety devices (e.g. discharge flap, housing, motorstop lever) are in good condition and working properly.
- The grass catcher box is undamaged and correctly installed; a damaged grass catcher box must not be used.
- The run-down brake of the electric motor is functioning.
Carry out any necessary work or consult a specialist dealer. VIKING recommends VIKING specialist dealers.
Follow the instructions in the "Battery" ( 4.2) and "Charger" ( 4.3) sections.
Never switch the motor on without a correctly installed blade. Risk of motor overheating.
4.7 Working with your machine
Never work when animals or persons, particularly children, are in the danger area.
The switch and safety devices installed in the machine must not be removed or bypassed. In particular, never secure the motorstop lever to the handlebar (e.g. by tying it).

Caution - risk of injury!
Never put hands or feet on or underneath rotating parts.
Never touch the rotating blade.
Always keep away from the discharge opening.
Always observe the safety distance provided by the handlebar. The handlebar must always be installed correctly and must not be modified. Never operate the machine with the handlebar folded down.
Never attach any objects to the handlebar (e.g. work clothing).
Only work during the day or with good artificial light.
Do not work at ambient temperatures below +5^ (41^)
Do not operate the machine in the rain or during thunder storms, particularly when there is a risk of lightning strike.
The risk of accidents is higher if the ground is damp due to increased danger of slipping.
Particular caution should be exercised during working in order to prevent slipping. If possible, avoid using the machine when the ground is damp.
Do not leave the machine in the rain.
Switching on the machine:
Exercise care when switching on the machine and observe the instructions in the section "Initial operation of the machine". ( 12)
Keep your feet a safe distance from the cutting tool.
Place the machine on an even surface before switching it on.
The machine must not be tilted before it is switched on or during switching-on.
Do not switch on the motor if the discharge chute is not covered by the discharge flap or the grass catcher box.
Avoid switching the machine on repeatedly within a short period of time; in particular avoid "playing" with the ON button. Risk of motor overheating.
Working on slopes:
Always work across and back on slopes, never up and down.
If the user loses control when mowing up and down, there is a risk of being run over by the machine.
Be particularly careful when changing direction on a slope.
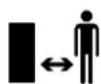
Always ensure good stability on slopes and avoid mowing on excessively steep slopes.
For safety reasons, the machine must not be used on slopes with an inclination of more than 25^ (46.6%) . Risk of injury! A slope inclination of 25^ corresponds to a vertical height increase of 46.6~cm for a 100~cm horizontal distance.
Working:

Caution - risk of injury!
Never put hands or feet on or
underneath rotating parts.
Never touch the rotating blade
Always keep away from the discharge opening. Always observe the safety distance provided by the handlebar.

Do not try to examine the blade while the machine is operating. Never open the discharge flap
and/or remove the grass catcher box when the mowing blade is running. Rotating blades can cause injury.
Only operate the machine at walking speed - never run when working with the machine. Working quickly with the machine increases the risk of injury due to stumbling, slipping, etc.
Be particularly careful when turning the machine around or pulling it towards you.
Risk of stumbling!
Use the machine with great care when working near slopes, terraces, ditches and embankments. In particular, ensure that you maintain sufficient distance to such danger areas.
Objects hidden in the turf (lawn sprinkler systems, posts, water valves, foundations, electrical wires, etc.) must be avoided. Never run over any such foreign objects.
If the cutting tool or the machine hits an obstacle or a foreign object, the motor must be switched off, the safety plug disconnected and an inspection performed by a specialist.

Beware of the cutting tool running on for several seconds before coming to a standstill.
Switch off the motor,
- if tilting of the machine is necessary when transporting over surfaces other than grass,
- when pushing the machine to and from mowing areas,
- before removing the grass catcher box,
before adjusting the cutting height.

Switch off the motor, disconnect the safety plug and ensure that
the cutting tool has come to a complete standstill
before removing the battery;
before leaving the machine unattended;
before transporting, lifting, or carrying the machine;
- before remedying blockages, including those in the discharge chute;
before you check, clean or carry out work on the machine (e.g. opening or adjusting the handlebar);
- if the cutting tool has hit a foreign object. The cutting tool needs to be checked for possible damage. The machine must not be operated with a damaged or bent blade shaft or motor shaft. Risk of injury through defective parts!
- if the machine begins to vibrate excessively. In this case, the complete machine, in particular the cutting tool must be checked for possible damage and loose parts. Damaged parts must be replaced prior to further use, loose parts must be fastened/tightened.

Risk of injury!
Strong vibrations are generally an indication of a fault. In particular, the machine must not be operated with a damaged or bent blade shaft or mowing blade. If you do not have the appropriate expertise, have the necessary repairs carried out by a specialist dealer (VIKING recommends VKING specialist dealers).
4.8 Maintenance, cleaning, repairs and storage

Switch off the motor, disconnect the safety plug and if necessary remove the battery before
working on, adjusting or cleaning the machine.
Allow the machine to fully cool down before storing it in enclosed places, performing maintenance on it or cleaning it.
Cleaning:
The complete machine must be cleaned thoroughly following use. ( 13.2)
Remove accumulated clipping deposits using a stick. Clean the underside of the mower with water and a brush.
Never use high-pressure cleaners and do not clean the machine under running water (e.g. using a garden hose).
Do not use aggressive cleaning agents. These can damage plastics and metals, impairing the safe operation of your VKING machine.
In order to prevent fire hazards, the area around the air vents between the motor hood and housing must be kept free from e.g. grass, straw, moss, leaves or escaping grease.
Maintenance operations:
Only maintenance operations described in this instruction manual may be carried out. Have all other work performed by a specialist dealer.
If you do not have the necessary expertise or auxiliary equipment, please always contact a specialist dealer.
VIKING recommends that you have maintenance operations and repairs performed exclusively by a VKING specialist dealer.
VIKING specialist dealers regularly attend training courses and are provided with technical information.
Only use tools, accessories or attachments approved for this machine by VKING or technically identical parts.
Otherwise, there may be a risk of accidents resulting in personal injury or damage to the machine. If you have any questions, please consult a specialist dealer.
The characteristics of original VKING tools, accessories and spare parts are optimally adapted to the machine and the user's requirements. Genuine VKING spare parts can be recognised by the VKING spare parts number, by the VKING lettering and, if present, by the VKING spare parts symbol. On smaller parts, only the symbol may be present.
Always keep warning and information stickers clean and readable. Damaged or missing stickers must be replaced by new, original plates from your VIKING specialist dealer. If a component is replaced with a
new component, ensure that the new component is provided with the same stickers.
Regularly check that the mowing blade is securely fastened and is not damaged or worn.
Only perform work on the cutting unit when wearing thick work gloves and exercising extreme care.
Ensure that all nuts, pins and screws (in particular the blade fastening screw) are securely tightened so that the machine is in a safe operating condition.
Check the complete machine and the grass catcher box for wear or damage on a regular basis, particularly before extended periods when the machine is not in use (e.g. over winter). For safety reasons, worn or damaged parts must be replaced immediately to ensure that the machine is always in a safe operating condition.
Components or guards that are removed for maintenance operations must be properly reinstalled immediately.
4.9 Storage for prolonged periods without operation
Store the cooled machine, the battery and the safety plug safely in a dry and locked room that is inaccessible to children.
Ensure that the machine is protected from unauthorised use (e.g. by children).
Thoroughly clean the machine before storage (e.g. winter break).
Store the machine in good operational condition.
4.10 Disposal
Ensure that old machines are properly disposed of. Render the machine unusable prior to disposal. In order to prevent accidents, ensure that you remove the safety plug and the electric cable from the motor.
Risk of injury due to the cutting tool! Always store an old machine in a safe place prior to scrapping. Ensure that the machine and the cutting tool are kept out of the reach of children.
Batteries must be disposed of separately from the machine. Ensure that batteries are discharged prior to disposal (e.g. by running the motor) and that they are disposed of safely and in an environmentally-friendly manner.
5. Description of symbols
Caution!
Read the instruction manual before initial use.

Risk of injury!
Keep other persons out of the danger area.
Caution - sharp cutting blades!
The cutting blades run on after the motor has been switched off. Remove the locking device (safety plug) before performing maintenance work.

MA 443:
Switch on the motor.
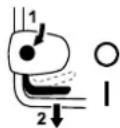
MA 443 C:
Switch on the motor.
MA 443 C:
Switch off the motor.

Remove the locking device (safety plug) before performing any work on the machine.
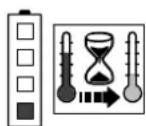
Battery is too warm. Charging starts after the cooling-down period, i.e. the battery can only be used after the cooling-down period.
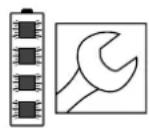
The battery is defective and must be replaced.
6. Standard equipment

Item Designation Qty.
A Basic unit 1
B Upper part of grass catcher box
C Lower part of grass catcher box
D Pin 2
N Safety plug 1
Battery
P Charger
- Instruction manual 1
MA 443:
E Quick-clamping device 2
F Bolt 2
G Cable guide 1
H Cable clip 1
Protective sleeve 2
MA 443 C:
J Sleeve 1
K Bolt 1
L Washer 2
M Nut 1
The standard equipment may vary depending on the country and version type.
7. Preparing the machine for operation
7.1 General
Risk of injury!
Observe the safety instructions in the section "For your safety" ( 4) .
Remove the safety plug, particularly before performing any work on the lawn mower ( 9.1)
- Place the machine on level and firm ground when performing all the operations described.
Upon delivery, the batteries are charged to approx. 30% . They must be therefore be charged before being used for the first time.
Charge battery ( 8.4).
7.2 Installing mono handlebar (MA 443 C)
- Insert sleeve (J) in the bore on handlebar (1).
- Fit two washers (L) with the convex side facing inwards onto the sleeve.
- 3 Hold sleeve (J) and washers (L) and insert together with handlebar (1) into handlebar console (2).
-
4 Insert nut (M) into the handlebar console as shown.
-
5 Insert bolt (K) from the outside inwards through the bores in handlebar (1) and in handlebar console (2) and tighten. Tightening torque: 18 - 22 Nm
Installing electric cable:
- Press electric cable (3) into the holders on the handlebar console and handlebar (4, 5) as shown and fasten to the handlebar using cable clip (6).
7.3 Installing dual handlebar (MA 443)

- Fit the protective sleeves (l) onto the lower handlebars (1).
- Insert the screw (F) through the bore in the cable guide (G).
- Fit the upper handlebar (2) onto the lower handlebar sections (1).
- Attach the cable guide (G) to the electric cable (3) and insert the screw (F) through the bore from the inside outwards.
- On the opposite side, insert the screw (F) from the inside outwards through the bores.
-
Screw the quick clamping devices (E) onto the screws (F) (the screw should project by about one screw thread turn) and fold upwards.
-
Check correct assembly: The quick-clamping devices (E) must be sufficiently tightened so that they are pressed tightly against the handlebar and the upper handlebar is firmly connected to the lower handlebar. If the handlebar is not firmly installed or the quick-clamping devices are not correctly located, open the quick-clamping devices and turn them until they are securely fastened.
- Insert the electric cable (3) into the holder (4) of the handlebar console as shown.
Installing the cable clip:
- Press the cable clip (H) onto the upper handlebar. Distance between the cable clip and switch:
25-27cm
Insert the electric cable (3) into the cable clip (H) as shown, close the tab (5) and allow it to engage.
7.4 Assembling the grass catcher box

- Fit the upper part of the grass catcher box (B) onto the lower part of the grass catcher box (C). Ensure correct location in the guides.
- Push pin (D) through the bores provided from inside.
- Allow the upper part of the grass catcher box (B) to engage in the lower part of the grass catcher box using slight pressure.
- Attach the grass catcher box (⇒ 9.5).
8. Battery and charger
8.1 General
The MA 443 and MA 443 C lawn mowers are operated with rechargeable batteries.
Only high-quality STIHL lithium-ion batteries of the type AP are used.
The batteries (supplied in some cases) are optimally adapted to the intended purpose, however, all batteries of the type AP can be used.
The lawn mower electronics exchange data with the installed battery and adapt the power of the electric motor to the relevant capacity.
8.2 Connecting charger to the mains
- Insert mains plug (1) in socket (2).
After connection of the charger to the power supply, a self-test is performed. During this process, the LED (3) on the charger illuminates green for approx. 1 second, then red, and then extinguishes again ( 8.6) .
8.3 Removing/installing battery
- Open battery compartment and disconnect safety plug ( 9.1) .
Removing battery:
Pull out battery (1) upwards.

Installing battery:
- Insert battery (1) into battery compartment as shown applying slight pressure and close cover.
8.4 Charging battery
- Remove battery from battery compartment (⇒ 8.3).
- Connect charger to the mains (⇒ 8.2).
- Push battery (1) into charger (2) until first resistance is felt, then press to stop. Green LED on battery and charger (3) indicate that charging is active.
- When battery is fully charged, LEDs on battery and charger extinguish. Remove battery from charger and insert in battery compartment ( 8.3) .
Charging procedure
The charger automatically exchanges data with the battery and adapts the charging process accordingly.
The battery is cooled during the charging process - either actively with a fan or passively with the natural air current in the room, depending on the charger.
The LEDs on the battery indicate the charging status ( 8.5) .
When the battery is fully charged, the charger switches off automatically and the LEDs in the battery and charger extinguish.
The charging time depends on various influencing factors such as e.g. the battery condition and ambient temperature. If a warm battery is inserted in the charger, the charging time may increase because the battery must cool down before the charging process begins.
8.5 LED display on charger
- Press button (1) in order to activate the display - display extinguishes automatically after 5 seconds.
LED displays:
The LEDs can illuminate or flash green or red.
LED illuminates green.
LED flashes green.
LED illuminates red.
LED flashes red.
Green LEDs indicate normal operation, red LEDs indicate a malfunction.
During charging:
Illumination and flashing of the LEDs indicate the charging status.
During charging, the momentary charge capacity is indicated by a green flashing LED.
When charging is complete, the LEDs extinguish automatically.
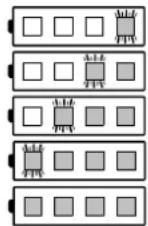
0-20%
20-40%
40 - 60%
60-80%
80-100%
Faults
One LED illuminates red
During charging:
Battery is too warm or too cold for the charging

process to start. Once the battery has cooled down or warmed up, the charging procedure starts automatically.
During work:
Battery is too warm. Machine switches off - remove the battery from the lawn mower and allow to cool for a period.
Four LEDs flash red
The battery is defective and must be replaced.
Three LEDs illuminate red
The lawn mower is overheated - allow it to cool down.
Three LEDs flash red
The lawn mower is defective and must be checked by a specialist dealer. VKING recommends VKING specialist dealers.
8.6 LED indicator on the charger
The LED (1) on the charger can illuminate green or flash red.
LED illuminates green:
Battery is being charged or cooled down before the charging process starts. The green LED extinguishes as soon as the battery is fully charged.
LED flashes red:
Charging cannot be started.


Possible causes:
- No electrical contact between battery and charger - remove and re-insert battery ( 8.4)
-Battery defective ( 8.5). - Charger defective - have charger checked by a specialist dealer. VKING recommends VKING specialist dealers.
9. Controls
9.1 Safety plug
The lawn mower can only be operated when the safety plug is inserted in the socket in the battery compartment.
The safety plug must be removed prior to transport, maintenance and cleaning work, as well as before inspecting the lawn mower.
Inserting safety plug:
- Open the battery compartment. ( 9.2)
- Press safety plug (1) into socket (2) up to the stop. The tab (3) must point inside as shown.
- Close the battery compartment again.
Removing safety plug:
- Open battery compartment (⇒ 9.2).
- Remove safety plug (1) from socket (2) and keep separately from lawn mower.
9.2 Battery compartment


The battery compartment must always remain closed during operation.
Opening battery compartment:
- Press in retaining tab (1) slightly and open cover (2) rearwards.
Closing battery compartment:
- Fold down cover (2) and ensure that retaining tab (1) engages.
9.3 Adjusting mono handlebar (MA 443 C)


Danger of pinching!
When actuating the detent lever, always hold the upper handlebar with one hand at its highest point. Never place your fingers between the handlebar and console (over and under the detent lever).
Transport position (for cleaning, for space-saving transport and for storage of the machine):
- Hold the upper handlebar (2) with one hand at its highest point and lift (relieve load) slightly.
- Press the detent lever (1) downwards and hold.
- Fold the handlebar (2) down forwards, ensuring that the electric cable is not damaged.
Working position (to push machine):
- Fold the handlebar (2) up rearwards and ensure that the handlebar is fully engaged.
Height adjustment:
The height of the mono handlebar can be adjusted to 2 levels:
- Hold the upper handlebar (2) with one hand at its highest point and lift (relieve load) slightly.
- Press the detent lever (1) downwards and hold.
- Move the handlebar (2) into the required position.
- Release the detent lever (1) and ensure that the handlebar is again fully engaged.
9.4 Adjusting dual handlebar (MA 443)


Danger of pinching!
The upper handlebar can be folded down by releasing the quick release caps. It should therefore always be held with one hand at its highest point.
Transport position (for cleaning, for space-saving transport and for storage of the machine):
- Hold the upper handlebar (2) with one hand at its highest point.
- Open the quick-clamping devices (1) - fold downwards - and fold the upper handlebar (2) forwards, ensuring that the electric cable is not damaged.
Working position (to push machine):
- Fold up the upper handlebar (2) rearwards and hold with one hand.
- Close the quick-clamping devices (1) - fold upwards.
9.5 Grass catcher box
Attaching:
- Open the discharge flap (1) and hold it open.
- Attach the grass catcher box (2) to the mountings (3) on the rear of machine by means of the locating lugs.
- Close the discharge flap (1).
Detaching:
- Open the discharge flap (1) and hold it open.
- Lift the grass catcher box (2) and remove it rearwards.
- Close the discharge flap (1).
9.6 Central cutting height adjustment
Six different cutting heights can be set.
Level 1 = 25mm
Level 6 = 75 mm

Setting the cutting height:
-
Hold the handle (1), pull the lever (2) upwards and hold.
-
Set the required cutting height by moving the machine upwards and downwards. The current cutting height can be read off at the cutting height indicator (3) by means of the marking (4).
- Release the detent lever (2) and allow it to engage.
9.7 Level indicator

The upper part of the grass catcher box features a level indicator (1).
The flow of air that is created by the rotary movement of the mowing blade and is responsible for filling the grass catcher box raises the level indicator (2): The grass catcher box is filled with clippings.
When the grass catcher box is full, this flow of air is reduced and the level indicator drops (3):
- Empty filled grass catcher box (⇒ 12.4).
10. Notes on working with the machine
10.1 General
To ensure a perfect, thick lawn, mow regularly and keep the grass short.
Do not cut the lawn too short in hot, dry conditions as it will dry out or burn in the sun and become unsightly.
The cutting pattern will be better with a sharp blade than with a blunt one; the blade should therefore be sharpened regularly (VIKING specialist dealer).
Cutting performance
The cutting performance (battery running time) depends on the properties of the grass and the selected cutting height. The cutting performance is enhanced by the following measures:
Mow the lawn more frequently
- Increase the cutting height
- Reduce speed of propulsion
- Allow the lawn to dry before mowing.
If required, additional STIHL lithium-ion batteries can be purchased (special accessories).
10.2 Working area for operator
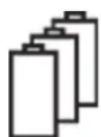
- For safety reasons, the operator must stay within the working area behind the handlebar when the motor is running. Always observe the safety distance provided by the handlebar.
The lawn mower must only be operated by one person. Other persons must keep out of the danger area. ( 4.)
10.3 Correct motor load
Do not switch on the lawn mower in tall grass. Select a higher cutting height setting if the motor is difficult to start.
The lawn mower load must never cause the motor speed to drop significantly.
If the speed drops, select a higher cutting height setting and/or reduce the rate of feed.
10.4 If the mowing blade blocks
Switch off the motor immediately and disconnect the safety plug. Then eliminate the cause of the fault.
10.5 Thermal motor overload protection
The electronics switch off the motor if it becomes overloaded during operation. Three red LEDs in the battery light up if a thermal overload occurs. ( 8.5)
Causes for an overload:
- mowing excessively high grass or cutting height adjusted too low,
excessive rate of feed, - inadequate cleaning of the cooling air guide (inlet slots).
Recommencing operation
Resume normal operation of the machine following a cooling period of up to 10min (depending on the ambient temperature) ( 12.2) .
11. Safety devices
The machine is equipped with several safety devices for safe operation and for the prevention of improper use.

Risk of injury!
If a safety device is found to be defective, the machine must not be operated. Consult a specialist dealer; VIKING recommends VIKING specialist dealers.
11.1 Safety devices
The lawn mower is equipped with safety devices, which prevent inadvertent contact with the mowing blade and with ejected clippings.
These include the housing, discharge flap, grass catcher box and correctly installed handlebar.
11.2 Safety plug
The motor can only be switched on when the safety plug is inserted ( 9.1)
11.3 Two-hand operation
The motor can only be switched on by pressing and holding the ON button with the right hand and then pulling the motorstop lever to the handlebar with the left hand.
11.4 Motor run-down brake
When the motorstop lever is released, the mowing blade comes to a complete standstill in less than three seconds.
An integrated motor run-down brake shortens the run-down time until the blade stops.
Measuring run-down time
Following motor start-up, the blade rotates and a wind noise is audible. The run-down time corresponds to the duration of the wind noise after the motor stops. This can be measured using a stopwatch.
12. Operating the machine
12.1 Preparations

Risk of injury:
Observe the safety instructions in the section "For your safety" (4).
Charge battery ( 8.4)
- Insert safety plug (⇒ 9.1).
12.2 Switching on lawn mower


Do not switch on the lawn mower in tall grass. Select a higher cutting height setting if the motor is difficult to start.
- Press and hold down ON button (1). Pull motorstop lever (2) to handlebar and hold.
The ON button (1) can be released once motorstop lever (2) is pressed.
12.3 Switching off lawn mower
- Release motorstop lever (1).
Motor and mowing blade come to a stop after a short run-down time.

12.4 Emptying the grass catcher box


Risk of injury!
The motor must be stopped for safety reasons before removing the grass catcher box.
- Detach the grass catcher box. ( 9.5)
- Open the grass catcher box at the tab (1). Fold up the upper part of the grass catcher box (2) and hold. Fold the grass catcher box rearwards and empty the clippings.
- Close the grass catcher box.
- Attach the grass catcher box. (⇒ 9.5)
13. Maintenance
13.1 General

Risk of injury!
Observe the safety instructions in the section "For your safety" ( 4) .

Remove the safety plug, particularly before
performing any work on the lawn mower ( 9.1)
Annual service by the specialist dealer:
The lawn mower should be inspected once annually by a specialist dealer. VIKING recommends VIKING specialist dealers.
13.2 Cleaning the machine
Maintenance interval: After each use

Care of the machine will protect it against damage and extend its service life.
- Remove battery (⇒ 8.3)
- Detach grass catcher box (⇒ 9.5)

Risk of injury!
Before tipping up the mower, place it on firm, level and flat ground. The machine may tip over when working on it in the cleaning position. Always stand to the side of the machine. Never work in front of or behind the mower.
Cleaning position MA 443 C:
- Stand to the right of the machine to tilt it upwards.
- Set the upper handlebar to the lowest position (as far as the stop, the detent lever does not engage in this position). ( 9.3)
- Open the discharge flap (1) with the right hand and hold it open.
- Hold the console with the left hand as shown and hold the discharge flap open. Press the detent lever (2) with the thumb at the same time and hold.
- Hold the machine with the right hand at the front handle and tilt it slowly rearwards until the handlebar is in contact with the ground as shown.
- Release the discharge flap (1) and detent lever (2) and check that the machine is standing securely.
Cleaning position MA 443:
- Hold the upper handlebar (3) and open the quick-clamping devices - fold downwards.
- Set down the upper handlebar (3) rearwards.
- Open the discharge flap (1) and hold it open.
- Lift up the lawn mower at the front and place in the cleaning position as shown. Check that the machine is stable.
Notes on cleaning:
- Clean off dirt using little water, with a brush or with a cloth. In particular, also clean the mowing blade. Never spray water on motor components, seals, bearing points or electrical components such as batteries or switches.
- First, remove accumulated clipping deposits using a stick.
- Remove dirt from the cooling air guide (inlet slots) between the motor hood and the lower housing to ensure that the motor is adequately cooled.
If necessary, use a special cleaner (e.g. STIHL special cleaner).
13.3 Electric motor and wheels
The electric motor is maintenance-free. The wheel bearings are maintenance-free.
13.4 Battery
Maintenance interval: Before each use
Visually check that the battery is undamaged. Batteries with identifiable damage (e.g. cracks or escaping fluid), must not be used.
13.5 Charger
Maintenance interval: Before each use
Check electric cable for damage and ensure that cooling air slots are free of dirt.
13.6 Checking blade wear
Maintenance interval: Before each use


Risk of injury!
Blades are subjected to differing degrees of wear depending on the location and duration of use. If you use the machine on sandy ground or use it frequently under dry conditions, the blade will be subjected to greater loads and will wear more quickly than the average. A worn blade may break off and cause serious injuries. The instructions for blade maintenance must therefore always be observed.
- Tilt the mower upwards into the cleaning position. (⇒ 13.2)
Clean the mowing blade (1). - Place a ruler (1) against the front blade edge and measure permissible grinding A.
Measure blade width using a slide calliper (2). - Check blade thickness at 5 points at least using a slide calliper (2). In particular, minimum thickness must also be ensured in the area of the blade wings.
Wear limits:
Permissible grinding A: < 15mm
Blade width B: > 39 mm
Blade thickness : >1,6mm
The blade must be replaced.
-
if it is damaged (notches, cracks),
-
if the measured values are achieved at one or more points or are outside the permissible limits.
If the multi-blade available as a special accessory is installed on the lawn mower, different wear limits apply (see instruction manual for accessory).
13.7 Removing and installing mowing blade


In order to prevent damage to the blade fastening screw, use a suitable socket (22 mm) for loosening and tightening.
1 Removing:
- Use a suitable wooden block (1) to counthold mowing blade (2).
- Unscrew blade fastening screw (3) and remove mowing blade (2).
2 Installing:

Risk of injury!
The mowing blade must only be installed as shown, in particular tabs (6) must face downwards. Always replace blade fastening screw (3) when replacing the mowing blade. The specified torque when tightening the blade fastening screw must be strictly observed, as the secure attachment of the cutting tool depends on this.
-
Clean the blade contact surface and blade bushing.
Install mowing blade (2) with curved wings pointing upwards. Locating lugs (4) must be located in recesses (5) of mowing blade. -
Use a suitable wooden block (1) to counterclockwise mowing blade (2).
- Apply Loctite 243 to thread of blade fastening screw (3).
- Tighten blade fastening screw (3). Tightening torque:
18-22Nm
13.8 Sharpening the mowing blade
If you do not have the necessary expertise or auxiliary equipment, you should have the blade sharpened by a specialist dealer (VIKING recommends VKING specialist dealers). Operation of the machine is impaired in the case of an incorrectly sharpened mowing blade (incorrect sharpening angle, imbalance, etc.).
Sharpening instructions
- Remove the mowing blade. (⇒ 13.7)
Cool the mowing blade during sharpening, e.g. with water. The blade must not be allowed to display blue colouring, as this would reduce its cutting quality. - Sharpen blades evenly to prevent vibration due to imbalance.
- Observe a sharpening angle of 30^ .
- Observe the wear limits ( 13.6) .
13.9 Storage (winter break)
Storing the lawn mower:

Remove the safety plug and remove the battery.
Keep the safety plug separately from the lawn mower and out of reach of unauthorised persons, particularly children.
Store the lawn mower in a dry locked place that is generally free of dust. Ensure that it is protected from unauthorised use (e.g. by children).
Only store the lawn mower in good operating condition, fold down the handlebar if necessary.
Keep all nuts, pins and screws tightly fastened, replace danger signs and warnings on the machine that have become illegible, check the entire machine for wear and damage. Replace all worn or damaged parts.
Any machine faults must be completely remedied prior to storage.
Note the following points when storing the lawn mower for long periods (winter break):
- Clean all external parts of the machine with care.
Thoroughly lubricate/grease all moving parts.
Storing batteries:
Remove the battery from the battery compartment or from the charger and store in a dry locked place that is generally free of dust. Ensure that the batteries are protected from unauthorized use (e.g. by children).
Do not store spare batteries unused - use batteries alternately.
For optimum battery service life, store at +10^ to +20^ and at a charge level of approx. 30% .
Storing the charger:
Remove the battery and disconnect the mains plug.
Store the charger in a dry and locked place that is generally free of dust. Ensure that it is protected from unauthorised use (e.g. by children).
14. Transport
14.1 Carrying and securing the lawn mower


Risk of injury!
Observe the safety instructions in the section "For your safety" (⇒ 4.).

Disconnect the safety plug, particularly before performing any work on
the lawn mower ( 9.1).
Exercise special care when transporting lithium-ion batteries ( 4.2)
Carrying the machine:
- Two persons: Only hold the machine at the front handle (1) and at the handlebar (3). Always ensure sufficient distance between the mowing blade and your body, particularly your feet and legs.
- One person: Lift and carry the machine using both hands, with one hand at the upper transport handle (2) and the other hand at the lower transport handle (1).
Securing the machine (lashing):
-
Secure the machine on the load floor using suitable fastening materials.
-
Attach ropes or straps at the points marked (4).
15. Minimising wear and preventing damage
Important information on maintenance and care of the product group lawn mower, manually-operated and battery-powered (MA)
VIKING assumes no liability for material or personal damage caused by the non-observance of information contained in the operating instructions, in particular with regard to safety, operation and maintenance, or which arise through the use of unauthorised attachment or spare parts.
Please always observe the following important information for the prevention of damage or excessive wear to your VKING machine:
1. Wearing parts
Some parts of the VIKING machine are subject to normal wear even when used properly and must be replaced in due time depending on type and duration of use.
These include:
- B I a d e
- Grass catcher box
-Ba t t e r y
2. Compliance with the information in this instruction manual
The VIKING machine must be used, maintained and stored with the care described in this instruction manual. Any damage caused by non-compliance with
the safety, operating and maintenance instructions is the sole responsibility of the user.
This applies in particular to:
- Incorrect electrical connection (voltage).
- Product modifications not approved by VKING.
- The use of tools or accessories which are not approved or suitable for the machine, or are of inferior quality.
- Improper use of the product.
- Use of the product for sporting or competitive events.
- Resultant damage due to continued use of the product with defective components.
3. Maintenance operations
All operations listed in the section "Maintenance" must be performed regularly.
If these maintenance operations cannot be carried out by the user, a specialist dealer must be commissioned to perform them.
VIKING recommends that you have maintenance operations and repairs performed exclusively by a VKING specialist dealer.
VIKING specialist dealers regularly attend training courses and are provided with technical information.
If these operations are neglected, faults may arise which are the responsibility of the user.
These include:
damage to the drive motor as a result of inadequate cleaning of the cooling air guide (inlet slots),
corrosive and other resultant damage caused by incorrect storage,
damage to the machine through the use of inferior-quality spare parts,
damage due to untimely or inadequate maintenance or damage due to maintenance or repair work not performed in the workshops of specialist dealers.
16. Environmental protection
Lawn clippings should be composted and not disposed of in household waste.
The machine, its packaging and accessories are all produced
from recyclable materials and must be disposed of accordingly.
By disposing of materials separately, and in an environmentally friendly manner, valuable resources can be re-used. For this reason, the machine should be disposed of for recycling at the end of its useful life. Pay particular attention to the information in the "Disposal" section during disposal ( 4.10) .
Consult your recycling centre or your specialist dealer for information on the proper disposal of waste products.

Li-Ion
Waste products such as batteries must always be disposed of correctly. Observe local regulations. Do not dispose of the batteries with
domestic waste. Please hand them in to a specialist dealer or at a hazardous waste collection point.
Consult your recycling centre or your specialist dealer for information on the proper disposal of waste products. VIKING recommends VIKING specialist dealers.
17. Standard spare parts
Mowing blade: 6338 702 0111
Blade fastening screw: 63107602800

The blade fastening screw must be renewed each time the blade is replaced. Spare parts are available from a VKING specialist dealer.
STIHL battery:
Your VIKING specialist dealer can provide you with order information.
18. Manufacturer's declaration of CE conformity
We,
VIKING GmbH
Hans Peter Stihl-Strasse 5
declare under our sole responsibility that the machine
lawn mower, manually-operated and battery-powered (MA)
Manufacturer's brand
Type MA 443.1
MA 443.1 C
Serial number 6338
and the
Charger
VIKING
Manufacturer's brand
Type AL 100
STIHL
AL 101
AL 300
AL500
Serial number 4850
conforms to the following EC directives: 2000/14/EC, 2014/30/EU, 2006/42/EC, 2006/66/EC, 2014/35/EU, 2011/65/EU
The products have been developed in conformance with the following standards: EN 60335-1, EN 60335-2-29, EN 60335-2-77
Applicable conformity assessment procedure: Appendix VIII (2000/14/EC)
Name and address of relevant, named location:
Compilation and storage of technical documentation:
Sven Zimmermann
VIKING GmbH
The year of manufacture and serial number appear on the identification plate of the machine.
Measured sound power level: 92,5 dB(A)
Guaranteed sound power level: 94 dB(A)
Langkampfen, 2017-01-02 (YYYY-MM-DD)
VIKING GmbH

Sven Zimmermann
Head of Design
19. Technical specifications
Battery
Type Lithium-ion
The machine can be operated with STIHL batteries of the type AP.
Information on the run time of the machine and the charging time can be found in the battery supplementary sheet and the instruction manual for the charger.
Chargers AL 100, AL 101, AL 300, AL 500
See instruction manual for the charger.
MA 443.1, MA 443.1 C
Serial number 6338
Motor manufacturer Domel
Type EC motor
Voltage 36 V~
Power input 900 W
Protection class III
Type of protection IPX 1
Cutting utilities Cutter bar
Cutting width 41 cm
MA 443.1, MA 443.1 C
| Speed of cutting utilities | 3000 rpm |
| Cutter bar drive | Permanen |
| Tightening torque for blade fastening screw | 10 - 15 Nm |
| Cutting height | 25 - 75 mm |
| Grass catcher box | 55 l |
| Wheel diameter (front) | 180 mm |
| Wheel diameter (rear) | 200 mm |
Sound emissions:
In accordance with Directive 2000/14/EC:
Guaranteed sound power level L_WAd 94 dB(A)
In accordance with Directive 2006/42/EC:
Sound pressure level at workplace L_pA 80 dB(A)
Uncertainty K_pA 2 dB(A)
MA 443.1
Length 138 cm
Width 49 cm
Height 107 cm
Weight (without battery) 18 kg
Hand-arm vibrations:
Specified vibration characteristic in accordance with EN 12096:
Measured value a_pw 1.70 m/sec2
Uncertainty Khw 0,85 m/sec2
Measurement in accordance with EN 20643
MA 443.1 C
Length 138 cm
Width 49 cm
MA 443.1 C
Height 108 cm
Weight (without battery) 20 kg
Hand-arm vibrations:
Specified vibration characteristic in accordance with EN 12096:
Measured value a_hw 1,30 m/sec² Uncertainty K_hw 0,65 m/sec²
Measurement in accordance with EN 20643
Transporting STIHL batteries:
STIHL batteries meet the requirements specified in UN manual
ST/SG/AC.10/11/Rev.5 Part III, subsection 38.3.
The user may transport STIHL batteries by road to the place of use of the machine without further restrictions.
Country-specific legislation must be observed in the case of air or sea transport.
For further transport instructions, see www.stihl.com/safety-data-sheets
REACH:
REACH is an EC Directive for the registration, evaluation, authorisation and restriction of chemicals. For information on compliance with the REACH Directive (EC) No. 1907/2006, see www.stihl.com/reach
20. Troubleshooting
If necessary, contact a specialist dealer; VKING recommends VKING specialist dealers.
Fault:
Motor does not start
Possible cause:
-Battery not fully charged (one green LED flashes on battery)
Battery incorrectly inserted
Safety plug is not inserted
- ON button not pressed
Motor is overloaded because the grass is too tall or too wet
Motor overload protection activated
- Battery too cold or too warm (one red LED illuminates on battery)
-Lawn mower too warm (three red LEDs illuminate on battery)
-Humidity in machine and/or battery
- Mower housing is blocked
-Fuse in safety plug defective
Machine defective (three red LEDs flash on battery)
Remedy:
- Charge battery (⇒ 8.4)
- Insert battery into battery compartment (⇒ 8.3)
- Insert safety plug (⇒ 9.1)
- Press the ON button (⇒ 12.2)
- Do not switch on motor in high grass, adapt cutting height (⇒ 9.6)
- Allow machine to cool down (⇒ 10.5)
-Warm up battery or allow to cool down ( 8.4) - Remove battery from battery compartment and dry: clean/dry battery compartment ( 8.3)
- Clean mower housing (13.2)
-Replace safety plug (x)
Fault:
Motor stops during operation
Possible cause:
-Battery or machine electronics overheated
- Electrical fault
Battery not fully charged
Safety plug incorrectly inserted
Machine overloaded due to mowing grass which is too long or too wet
Lawn mower fault
Remedy:
- Remove battery from battery compartment; allow lawn mower and battery to cool down ( 8.3)
- Remove battery from battery compartment and reinsert ( 8.3)
- Charge battery (⇒ 8.4)
- Insert safety plug (⇒ 9.1)
-Adapt cutting height and mowing speed to mowing conditions ( 9.6) - Repair lawn mower (x)
Fault:
Excessive vibration during operation
Possible cause:
- Blade fastening screw is loose
- Blade is not balanced
Remedy:
- Tighten blade fastening screw (⇒ 13.7)
- Re-sharpen (balance) or replace blade ( 13.8)
Fault:
Poor cut, lawn turning yellow
Possible cause:
- Mowing blade is blunt or worn,
- Rate of feed is too high in relation to the cutting height
Remedy:
- Re-sharpen or replace mowing blade ( 13.8)
- Reduce rate of feed and/or select correct cutting height ( 9.6)
Fault:
Problems switching machine on or deteriorating motor power.
Possible cause:
Battery discharged
- Mowing grass which is too long or too wet
- Mower housing is blocked
- Mowing blades are blunt or worn
Remedy:
- Charge battery (⇒ 8.4)
- Adapt cutting height and mowing speed to mowing conditions (⇒ 9.6)
- Clean mower housing (⇒ 13.2)
- Re-sharpen or replace mowing blade ( 13.8)
Fault:
Discharge chute blocked
Possible cause:
- Mowing blade is worn
- Mowing grass which is too long or too wet
Remedy:
-Replace mowing blade ( 13.8)
-Adapt cutting height and mowing speed to mowing conditions ( 9.6)
Fault:
Operating time too short
Possible cause:
Battery not fully charged
- Mowing grass which is too long or too wet
- Mower housing is blocked
- Mowing blades are blunt or worn
Battery has reached or exceeded the end of its service life
Remedy:
- Charge battery (⇒ 8.4)
-Adapt cutting height and mowing speed to mowing conditions ( 9.6)
- Clean mower housing (13.2)
- Re-sharpen or replace mowing blade ( 13.8)
- Check battery, replace if necessary (x)
Fault: Battery is not charged despite illuminated green LED on charger
Possible cause:
- Battery too cold or too warm (one red LED illuminates on battery)
Remedy:
Warm up battery or allow to cool ( 8.4) .Store the charger in a closed and dry place at a temperature of between +5^ and +40^ only.
Fault: Battery is not charged, no LED illuminates
Possible cause:
- No electrical contact between charger and battery
- Charger power supply faulty
Remedy:
-Remove battery from battery compartment and reinsert ( 8.3)
- Connect charger to the mains (⇒ 8.2)
- Check mains power supply
- Check charger, replace if necessary
Fault:
LED on charger flashes red
Possible cause:
-
No electrical contact between charger and battery
-Battery defective (4 LEDs on battery flash red for approx. 5 seconds) -
Charger defective
Remedy:
-Remove battery from battery compartment and reinsert ( 8.3)
- Check battery, replace if necessary (x)
- Check charger, replace if necessary (X)
21. Service schedule
21.1 Handover confirmation
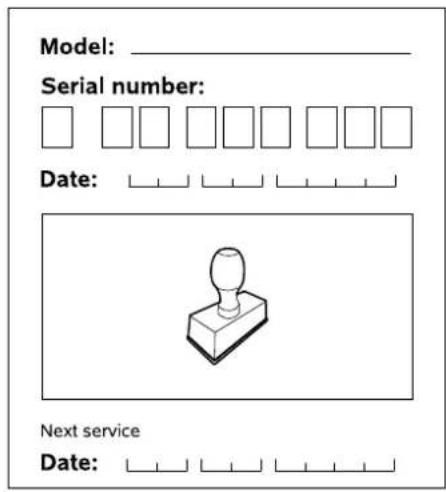
21.2 Service confirmation
Please hand this instruction manual to your VKING specialist dealer in the case of maintenance work. He will confirm the service operations performed in the pre-printed boxes.

Service performed on

Next service date
Chere cliente, cher client,
MA 443.1, MA 443.1 C
N° de série 6338
Fabricant du moteur
electrique Domel
Type moteur EC
Tension 36 V~
Puisssance absorbee 900 W
Catégorie de
protection III
Type de protection IPX 1
J Huls 1
K Bout 1
L Ring 2
M Moer 1

MA 443.1, MA 443.1 C
Serienummer 6338
Fabrikant
elettromotor Domel
Type EC-motor
Spanning 36 V~
MA 443.1, MA 443.1 C
Opvangvermogen 900 W
Beschermklasse III
Beschermtype IPX 1
Snijssystem Mesbalk
Snijbreedte 41 cm
Meting conform EN 20643
MA 443.1 C
Lengte 138 cm
Breedte 49 cm
Hoopte 108 cm
Gewicht (zonder
accu) 20 kg
Vibrations hand-arm:
Meting conform EN 20643
Transport van STIHL accu's:
Attenersianchealle normative
MA 443.1, MA 443.1 C
MA 443.1, MA 443.1 C
- insensibilities,
-dolores,
2017-01-02 (AAAA-MM-DD)
VIKING GmbH

Sven Zimmermann
MA 443.1, MA 443.1 C
Identificacion de
serie 6338
FabrICA del motor electrico Domel
Tipo Motor EC
Tensión 36 V~
Guardar as baterias:
MA 443.1, MA 443.1 C
MA 443.1, MA 443.1 C
Dispositivo de corte Barra portalinas
Largura de corte 41 cm
Rotação do disposi-
tivo de corte 3000 U/min
Acionamento da
barra porta-laminas permanente
Vedlikehold, rengjaring.
Montere dual-style (MA 443) 181
SetteSAMEN opposamleren 181
7.3 Montere dual-style (MA 443)
9.3 Stille inn mono-styret (MA 443 C)

Klemfare!
När du betjener lasearmen til styreoverdelen, ma du hele tiden holde med en hand overst. Ikke ha fingre nellom styret og konsollen (over og under lasearmen).
9.4 Stille inn dual-styret (MA 443)

Klemfare!
2017-01-02 (AAAA-MM-DD)
VIKING GmbH

Sven Zimmermann
MA 443.1, MA 443.1 C
MA 443.1, MA 443.1 C
Garantert lydeffekt
niva LwAd 94 dB(A)
I henhold til direktiv 2006/42/EC:
Lydtrykkniva pa
arbeidsplassen L_pA 80 dB(A)
Usikkerhet KpA 2 dB(A)
MA 443.1
Lengde 138 cm
Bredde 49 cm
Hoyde 107 cm
Varning - risk for olycksfall!
2017-01-02 (AAAA-MM-DD)
VIKING GmbH

Sven Zimmermann
MA 443.1, MA 443.1 C
Modellnummer 6338
MA 443.1, MA 443.1 C
Hjul- bak 200mm
Buller:
Hand/armvibrationer:
Risiko for at snuble!
MA 443.1, MA 443.1 C
Serienummer 6338
MA 443.1, MA 443.1 C
Klippebredde 41 cm
Skaereanordningens
Ppooxh- Koepa aiaipka kntic!
Ta maXaipia KOTnC
ouvexiouv v
Tepiotpeovotai meta Tnu
atvepyoioan tou
nAeKtpokivtnpia. Ppv aio
Tic epyaoieocvvnponnc
ophiopeote n diatae
kAeisawatoc (phi
aOphialeac).
MA 443:
Oeote tvnAektpokivntnpa OE Aetoupyia.

MA 443 C:
Oeote tov nAektpokivntnpa
0E Aetoupyia.
MA 443 C:
Oeote tov nAektpokivntnpa EKTOC AETOUpyiac.

Oeon mEaopac (yiaTovKaaepiou tou
unxavmaoc, yia n mEaopackai
phiAe):
KpataTe to eTavw tunua Tou tiovou (2) oTo yntoepo onuio e to eva xepi.
AvoTE TOV TAXUTAUOTnpa (1)
SITIAWVOVTACTOV TPOC TA KATW KA
AVADITIAWOTE TO ETTAVTUNJATOU
TIOVIOU (2) TPOC TA MTPPOOta,
TPOOE TE WATE VAMYTPOKANBOUV
ZNUEc OTO NAEKTPIKO KAALWDIO.
Oeon epyaoc (yia nV wOnn tou nnxaanoc):
- AINWOT To ETTAVW TUNmuTou TUOviOu (2) PPOC ta TIOw KAI KpAHToE TO eVxEPI.
KLeiTeToVtoxutauvoTnpa1) 8inawovtac ToV npoc ta Etnavw.
9.5 XopToouAekTc
Toontheta:
AvoiTe KAI Kpatnote avoikto to oToio Eaywnc (1).
- Iepaote to xoptooulambdaektn (2) ta puyxn ouykpamonc otic untofoxc (3) oyniow nleupa tou epyaleiou.
- Kλείστε ο τόσμιο εξαγωγπε (1).
Aphiipεση:
AvoTe kai Kpattnote avoikto to oTomuo Eaywnc (1).
- Avonkwote To xoptouuAektn (2) kau oapaeote tov poc ta iow.
KLeioTeToTooioEoxynic(1).
9.6 Kevtpikn puθμiαn vouoc kottic
Mtopovvva puthetaouv 6 diaoepetiku uyn konnc.
$$ \Sigma \kappa \alpha \lambda \alpha 1 = 2 5 \mathrm {m m} $$
$$ \Sigma \kappa \alpha \lambda \alpha 6 = 7 5 \mathrm {m m} $$
Pouan youskotnc:
Piatae Tn xeipoaaBn (1).TpaBnEto moXo (2) Ppoc ta ETTAVW KA KpatnoTe tov aout n Theon.
MA 443.1, MA 443.1 C
Avayvupion oepac 6338
KataaekuaotnC
mEktpokivtnipα Domel
TuToc Kivntipac EC
Tao 36V\~
Aynnioxoc 900W
Karnyopia
προστασίας III
MA 443.1, MA 443.1 C
Ybaxaemble nokynateIn!
Bolbwoe cnacn6o 3a To, yTo Bbl Bb6paNn BbICOKokaueCTBeHHoe N3dEJIne KOMNaHnVIKING.
3To n3dene 6bIIO n3rOToBneHO no cambIM COBpeMeHHbIM TexHONrUHeCKM MeTODAM IN COOTBeTCTBm C MepaMn NO obecneHnK aueCTBa npOdykun, BeNb HaaCenb CnTaeTcra DOCTnHyTOI TOJbKO B Cnyae NOJHOrO yDObJIeTBOpEHHN NOKyNaTeJI.
Ecyny Bac ImeKOTc BONPOcbln Baewemy yctpoictby,TO o6paauTecb, noxaynta, K Baewemy dInepy nn HenocepndBeHHo B Hauy KomnaHIO.
Mbl Haneemcra, cyTo pa6oTa c yCTpOeCTBOM KOMnAHIN VIKING doCTaBt Bam ydoBOJIbCTBne

Dr. Peter Pretzsch
DinpekTop
1. CodepkaHne
OIOJIb3OBaHHn DaHHoH
HnCTpyknei no 3Kcnnyataun 262
06nne cBeDen 262
Yka3aHne no YTeHHIO HhCTpyKlunno 3Kcnnyataun
BapnntbI npa3nnHbIX cTpaH
Onncanue yctponctBa
TexHnka 6e3oNaCHOCTN
O6uue cBeDeHn 263
AkkymyTOp
3apdnoyectbo
Pa6oayoJekda n cpeIcTba 3aunTbI
TpaHcnpTupOBka yCTpoiCTBa
Pepedpa60toi
BoBpempa60tbI
TexHueckoe 6cbnyKbHaHne, ouNCTka, peMOHT XpaHeHne
XpaHHeI npn dInTeIbHbIX nepepbIbax B pa6oTe
YTNIN3aun
OINCAHHe CnMBOJOB
KomnneKT noCTaBku
IoproToBka yctpOcTbKa pa6oTe 271
O6uue cBeDeHn 271
MOHTAX MOHO-pyKoRTKN (MA 443 C)
MoHTaX DByxCTOpOHHeI pyKoTkn (MA 443)
C60pKa TpaBoc6OpHnka
AkkymyItopHna 6aTape n 3apdHoe yCTpoNCTBO
O6nne noJoxeHn
3neKtpnueckoe noKnIuOeHne 3apAnHO rYcTpoiCTBa
YCTaHOBka n CHrTne
aKymyTopHo6atapen 272
3apka akkymyTopHn 6aTapeu 272
CBeToOnDHaHnDnKaunHa aKkymyTOpHo6aTapee
CBeToIOOHa HNdkaua Ha 3apHOM yctpoiCTBe 273
3JemeHTbI ynpaBJIeHn 274
BloKIpOBoUHbI uTeKepe 274
OToCekIaKkymyIaTOpHoi 6batape 274
PerynipobKa MoHO-pyKoTkn (MA 443 C) 274
PerynipOBka DByxcToPOHHe pykoTkn (MA 443) 274
TpaBoc6opHnK 275
LcHTpaBnapeynpobka BbICOTbl CkawBaHn 275
INHdkaTop 3anonHeHHN 275
Pekomehdaqun no pa6oTe 275 O6uHne nOIOKeHH 275
Pa60aHa 30Ha nOlb30BaTeIa 276
PpabnIbnaHaHarpy3ka 3NeKtpoDbuRatela 276
Ppi 6nKnpOBKe HOKa KocNJKn 276
UcTpoIcTBo 3aIITbI
3JIeKTpOdBVIRaTeIa OT
TePmUuecko nepeRpy3Kn 276
3aunTHbIe ycTpoiCTBa 276
3aunTHbIe yCTpoNCTBa 276
BnokpoBOUHyI WTeKepe 276
UnpaBHeHne o6eIMn pykamn 276
TopMo3 oCTaHOBKn 3NeKtpoDbVraTeIa 277
BBeHeHne yCtpoNCTBa B pa6Oty 277
IodroTOBHTeHbHle MeponpTn 277
BkHouHeHne ra3oHOKOJIKN 277
BbIKIOueHHe r30HOKOCJIK 277
OnyctoWeHne TpaBoc6OpHnka 277
Texnueckoe o6cnykBaHne 277
Obe nnoJoxeHn 277
OuICTka yctpoiCTBa 277
3NeKtpoBnraTeIb N KOJeca 278
AkkymyIaTOpHa 6aTapee 278
3apnHoe yctpoNCTBO 278
PpOBepka n3HOca HOxa
JEMOHToX MOnToX HOXAKOcUNK 279
3aToUka HOka KocuKN 279
XpaHHeHne (B 3mHn npnoD) 280
TpaHcnpTnpOBka 280
Ipehenoc n 3akpenenneHne ra3OHOKOcNIKIN
CbeHeHne K MmHmMy m3Hoca npeoTbpaueHne nobpekdeHn 281
OxpaHaOkpyKaIOoIe Cpebl 282
CTaHapThbIe 3aNactn 282
Eknapaunn n3ROBNTen o COOTBeTCTBn DnpeKtNBam EC
Texnueckne daHHbIe 283
Ponck HeucnpaBHOCTe 284
TpaФИK cepBnCHORO 06CJIyXnBAHnA 286
Повъерждени поедау
IopTBePKeHne cepBnCHOrO 06CnyKnBaHHa
2. O noIb3OBAHn DaHHoN HNCTpyKuNei No 3KcnpJyatauni
2.1 O6uine cBedeHn
DaHHa HNCTpyKUIN NO 3KCNyatauIN
YBJIeTcNApeBODOM OPUNHbHO
NHCTpyKUIN NO 3KCNyatauIN
PON3BOJNTeIN B COOTBeTCTBNI C
DInpeKTNoB 2006/42/EC.
KoMaHnVIKING noCToHnHO pa6oTaET
Ha yCOBepueHcTBOBaHnEM
accopTmEHTa CBOe npOdykUIN,
IO3ToMBy Mbl OCTabJIeM 3a Co6oI npABO
Ha N3MeHeHn BHeuHero BVda
NoCTaBJIeMbIX N3deJIn, TexHOJOrn IN OCHaSeHn.
BcIeCTBnE 3TOrnpTeEHnB OTHoWeHmTexHnueCKNX DaHHbIX INN pucyHKOB 3ToB6poUOpbl He npHHMaHOcra.
DaHnHa INCTpyKuINo 3KcNpyataunn 3aUuIeHa 3akOHoDAteJIbCTBOM 06 abTOPcKOM npabe. Bce aTbOpckne npaba coXpaHryIOrC, B nepByIO oupepeJb Ha pa3MHOxKeHne, nepeBOd, a TaKke Ha nepepa6Otky C nCnoJIb3OBaHNEM 3JIeKTPoHHbIX CNTEm.
2.2 Yka3aHne no YTeHnIO INHCTpyKcnn NO 3Knnyataa
Ha pncyHKax n B TeKCTax ONNCbIBaETCn ONpeJeHHeHnA NOcNeIOBaTeJIbHOCTb Oepaun.
B daHHo HnCTpyKuIN NO 3KnJyataun INORCHIOCTC Bce NKTOrpaMMbl, KOToPbIe HaHeceHbHa yCTpoNCTBe.
HanpaBneHe B3rJaDa:
HanpaBHe B3rJa, npHnToe B nHCTpyKuN No 3KcnIyatauN npN yNoTpe6HeHn TepMnHOB «CneBa» N «Cnpaba»:
Польбовateлб CTОТ 3a yCTPОДСВОМ CMOTРNT Bнeped no HAnpaBNeHnO DBNIXEHN.
CcbinkaHa rnaBy:
IIN CcblOK Ha COOTBETCTByUOuNe rnaBbI IIOpa3deJIbI c ceJIbIO NOpO6HbIX O6bcHeHn ICNoJb3yETc CTpeNka. B CNEyIOUeM npIMpe npNBedeHa CcblKa H a rNaBy: ( 2.1)
06o3haeHne pa3deNoB TeKCTa:
OncaHbIe yka3aHnMOryT BblIaTeB, KaK B CJIeNyUOxN npImepax.
Onepaun, Tpe6yUcne BMeaTeNbCTBa nIb30BaTeN:
OcnaBntb BnHT (1) C nOMoUbIO OTBePfKn, HaxaTb pyKoTky (2) ...
Obeenepeuucnene:
-ПурменинizденидпспорTNBbIX МероприТи KOKkypcOB
TeKCTbI C DonoJIHnITeJIbHOJ 3HaUIMOCTbIO:
Pa3dJIbI TeKCTa C DonONHnTeJbHOI 3HaUIMOCtBIO NOMEeHbIB INHCTpyKcUNI NO 3KcNlyaTaUIN ODNHM IINPnBeJeHHbIX DaJee CmBOJOB JIbOpaueHnHa HNX OC60rO BHNMaHn.

Onachoctb!
IpeDynpexkdaetobOnacHocTn HeCuaCTbIX CnyaAEB INONyueHnRA TKeBbIX TpaBM DnI NIOeJ. Tpe6yeTc Co6NHOaTb ONpeJeEHbIe npaBnna NOBeHnN I BO3dEpxNBaTbCra OT HapuWeHn.

PpeDynpexkdenne!
OnacHocTb TpaBMaTH3Ma IJIAIOJe.CobIIOHeHneONpeIeENHbIX npaBnIO NOBeEHnnpedOTBpauaeT BO3MOXHbIE ININBepoTHbIe TpaBMbl.

Octopoxho!
IonyeHn IerKnx TpaBm nnn HaneceHn MaTePnaJbHoro yue6a MoXHo N36ExKaTb, co6JIouDa onpeJeeneHHbI npabNla NOBeDeHn.

Yka3aHne
HOpMaIgI ONTUMaJIbHOIcNtB30BaHnY cTPOIcTBaI npTeOTBpaIeHnBO3MOXHbIX OuIN6oK ynpabJeHn.
TeKCTbI C CbILKaMn Ha pncyHKn:
PncyHKn, NOcHJIOUne NOJIb3ObaHne yCTpOINCTBOM,HaxoJrTcB CaMOM HaaJe HNCTpyKUnn No 3KcIpyatauun.
CmboJ foToaannapaTa cnjxnt
TnBcB3n pncyHKOB Ha cTpaHuaX
CpncyHKaMn C COOTBeCTByIOuei
YacTBIO TEKCTA B INHCTpyKUIN NO
3KcnNyaTaUIN.
Ha pncyHKax n3o6paxeHb 3apAaHbIe UcTpoiCTBa C eBPOuTekepaMn, NOKluOHeHne K cETn yCtpoiCTB C dpyrMM TINAMM uTEkePOB npOn3BOoNTc aHaJIoNHO.
3. OnncaHne yctpoIcTba

1BepxHra Yaactb Beyuuey pyuKn
2 BbICTpo3axmHOnΦnKCaTOp (MA 443)
3 HnKnJa YacTb BeDyuee pyuKn (MA 443)
4 Kanot Dnuratae
5 Kpbioka
6 NepeedHee KoJecO
7 Puyka cpepi
8 3aBoDcKa Ta6JnUka
9 Kopnyc
10 3aJHee KoJIecO
11 PykoTka perynipoBKN BbICOTbCKaunBaHn
12 Puchka c3aui
13 TpaBoc6opHnK
14 INdikaTop 3aonHeHnra TpaBoc6OpHnka
15 ByreIb octaHOBKn dBnraTeJIa
16 KhoNka BKnHoueHn
17ФИКСИРУJOUI npHar BeDyUeI pyKn (MA 443C)
18 KoHcOJIb BeDyUeI pyUKN (MA 443 C)
19 BIoKIpOBoUHbI WTeKepe
20 AkkyMnyTOp
21 3apAHOe yCTpoIcTBO
4. TexHnka 6e3oNaCHOCTN
4.1 06uine cBeHeHn

Ppna pa6oTe C yctpoiCTBOM Heo6xoJIMo 06ra3aTeJIbHO co6IIOJaTa DaHHbie Tpe6ObaHnnoTexHnke
6e3oNaCHOCTN.

IpeepnepBbIM BBOOMB pa60Tu Heo6xOIMMO BHIMATEJIbHO IpOuHTaTb BCHO HCTpyKUIO NO 3KcNPyTaAUIN.
HCTpykuu no 3Kcnnyataun CneJeT 6epeXHO coxpaHbIaJIbHeJWero noIb3OBAHHa.
Co6JIIODeHne 3TnxMep
npEOCTOPOXHOCTn Heo6xOJIMo Dnna
obecneueHnBaWe6e3OnaCHocTn,
Ondako nx nepeyeHb He yBnreTCs
NOHNbIM.PpIMeHrTByCTpoiCTBO CNeJeYET
BCOTBETCTBmC yBCTBOM 3dpaBOrO
CMblcna n OTBeTCTBeHHOCtN,He 3a6bIBa
PnI 3TOM,yTO NOJb3OBaTeNb Hecet
OTBE TCEBHHOCTb 3a HeCuaCThBiE CnyuAn
CdpTuMM NlUaM N11 3aNX
CO6CTBeHHOCtB.
O3HaKOMbTEcB c 3JeMeHtAmn ynpaBHeHn u Oco6eHHocTAMn npImeHHeN yCTpOJCTBa.
IcnoB3oBaTb yctpoCTBO pa3peWaaETcra ToJbKO JnUaM, N3yHNBUM INHCTpyKUIO NO 3KcnjLyatauN IMeOUsIM HaBbIKN ynpabEnHryctpoiCTbOM. Peped nepBBIM BBODOM Bpa0Ty NOb3oBaTeNb DOJXKeH No3a60TntbC O NOlyueHIN KBaINΦuIupOBaHHORI n pKaTNUHOrO INHCTpykTaXa. POJIb3oBaTeNb DoJXKeH
2.3 BapnaTbI Jnla pa3JnHbIX CtpaH
VIKING noctablaer3apnHbIe yctpoiCTBa C pa3hblIMu WTekepaMn IN nepeKnIOyateJIaMn, B 3aBUNMOCTN OT cTpaHbI Ha3HaueHn.
noIyntb nHCTpykTak y npOda uu nn dpyroro cneuaJncta no BOnpocy 6e0nacHOro o6paueHHc yCTpoNCTBOM.
Bo Bpem 3toro INhctpykTaKa
noIb30BaTeJIb DOJKeH, npexJe BCero,
nOHTb, YTO npu paBoTe C yCTpoiCTBOM
Heo6xOdIMbIOcO6aTuaTeJIbHOCTb IN
KOHcEHTpaUra.

OnachocTb dnn JxN3Hn BCneCTBne ydyu7y!
Onacnocb ydysbJnI DeTeB BO BpemIrp C ynaKOBOHbIM MaepnAION. YnakOBouHbIM MaepnA nCneDyET HnpeMeHHO XpaHnTb B HeIOCTynHOM JIaTee MeCTe.
YcTpoiCTBO CO BcEM HaBeChbIM
obOpyIOBaHNem MOxHO NepeJaBaTb NIN
OdaJKNBaTb TOnbKO Tem NoIb3OBaTeJIaM,
KOTOpBie, B npHcNHe, 3HaKOMbIC DaHHoH
MoJeIbIO u ObcLyJKNBaHNem YcTpoiCTBa.
YcTpoiCTBO Heo6XoDmO nepeJaBaTaB
BCerDa C INHCTpyKUneNo 3KcNPyatauN.
PoiIb3OBaTbCra yCTpoNCTBOM
pa3pe7aepTaTOJIbKO,HaxOJaCB B
XopoWemΦn3UeCKOM INCINuYeCKOM
coCToHmN.EcnnyBac IMHeOTcR
np6bEmbCo 3DopOBBeM,TO CNEyET
obpaNTbC K BPau N BbIaCHHTb,MOxHO
Ji Bam pa6oTaTc C yCTPONCTBOM.
3anpeuaeTcpa6oTaB c yCTPONCTBOM
nocne yNoTpe6JIeHnAJIKOToJIbHbIX
HaHNTKOB,HapKOTIKOB nII npEma
JIekapCTB,KOTOpBle MOrY OKa3aTb
HeratNBHe BJIraHHe Ha peakun
pa6oTaHoJeRo.
Ctporo 3anpeaaetcnoIb3oBaTbcra
yCTPOINCTBOM DeTAM NnUaM C
fN3nuecknMI, PCNXnuecknMI Nn
ymCTBeHHbIMn HeOCTaTKaMn, a TaKke
JIuam, ObnadaoUcIMn HeOCTaTOHbIM
ONbITOM 3HaHnMaM, INI JInuam, KOtOpBle He O3HaKoMJIeHbI C He06XoDmMbIM NHCHTpyKUaMn.
3anpeaaetcnoB30BaTbcra yctpoiCTbOM Detam NnN NOpocTkam, He doCTnHIM 16 let. MecThbIe npedncaHm MOyT ONpeJeTb MNHMaHbHbI B03paCT NoB30BaTeJI.
UcTpoIcTBpa3pa60TaHOДЯлИнHOrO nCNoIb3OBAHn.
BHMaHHe - onachocTb HecuaCThblX cnyuaeB!
YcTpoIcTBo npEHa3HaueHo TOJIbKO dIg
CKaUINBaHnra30HOB. IVoe npIMeHHeN
3aIpeLseHO.OHO MoKeT npIBecTu K
ONaChbIM NocIeDCTBnM INI
NOBpeKdEHnO yCTpoIcTBa.
I3-3a onachoctn noJyehnTtpaBM nOJIb3OBaTeJe mYCTPOINCTBO 3aIpeuaeTCnPIMHeHbIg CNeIyUx npoBt (HenoHoe nepeuucnne):
-ДЯ NOДрЕЗКn BeTOK,3eJIeHbIX ORpaJdEHN N KycTOB,
-ДЯ ПОДре3Ки ВьЮUInxСЯ paCTeHn,
-ДЯухoda3a paCTeHnMaHa KpbIax N BЯUNKAX Ha 6aJIkoHax,
ДЯИЗМЕЛБЧЕНИОБpe3KOBДepeBbeB IN KYCTaPнIKOB,
ДЯ OунCTК ДорожЕK (Всасьвиме, npodyBko),
-ДЯ Вьравианя NOBepxHOCTN ONUBbl, HApIMep, npi HaJIuYn 3eJЯHbIX XOJMNKOB, CdelaHHbIX KpOTaMn,
-ДЯТраHCNOpTIPOBKN Cpe3aHHoI TpaBbl, KpOME NOdaH ee B NpeHa3HaueHHbI DЯ 3TOrO TpaBOc6OpHnK.
V3 coo6paKeHn 6e3onacHcOCTn
3anpeaTeTc IIOb0e n3MeHeHne Ha
yCTpOInCTBe, 3a NCKIIOUeHNEM
KBaINΦuIUPOBaHHoY UCTaHOBKn
npHaIJIeXHOCTe, DOnyUeHHbIX
KOMNaHNei VIKING. Kpome TOrO,
n3MeHHeN yCTPOINCTBa pINBOdR K
JINIeHNIO npaba HA rapaHTNIHbI
peMOHT.CBeEHN O pa3peUeHHbIX K
NCNoJIb3OBaHnIO npHaIJIeXHocTAX Bbl
NOJyUte B CneuaJIIN3IPOBaHHOM
cepBnCHOM cEHrpe VIKING.
Bocobehnoctn 3anpeuehenbI n3mehennycTpoNCBa CzelbIO yBeINuHnmoHOCHTN INN YACTOTBI BpaueHn3JeKtpoDburatela.
3anpeaaetcnaCnObn3OBaHne yctpoiCTBa dIpaTpaHCnpOpTIPOBKN npEIMeTOB,XINBOTbIX INN JIOJeB,BOco6eHHoCTn DeTei.
Ocobyo octopokHOCTb CneDyeT npOBJIbT bn pnpMeHn yCtPOIcTBa B30hax 3eJIeHbIX HacKaJdeHn,napkax,Ha cnOpTNIOUaKax,Ha yNuaX n npEaPnraTnx JecHO r NCbCKoro XO3yCTB.

BHHMaHHe!OnaCHOCTbIJI 3dOpOBbBCNeCDTBe
Bn6paun!Upe3Mepna Harpy3Ka,Bbl3BaHHa
Bn6paunM,MOKeT npBeCTN K
HaeneHIO yuepe6a IJRA CNTeMbI
KpOo06paueHnI HEPBHO CNCTeMbI,B
OCo6eHHocnY JnUc HApuyHeHnMI
KpOo06paueHnI. Pn NOABNeHN
CmIMTOMO, KOTOpBE MOyT NOBHTCBs
n3-3a Bn6paounHOH Harpy3Kn,
HeoXoDIMO o6paTuTBcK Bpauy.
PiOnoHbIe CmIMTOMbI,HaNPImep,
NoaBJIaOTcB OCHOBHOM B NaJIbCaX, Ha
pykax nIN 3aJIaCTHBx CyCTaBax
(HeNOHoe nepeuNCleHne):
-NotepaCyBCTBnTeJIbHOCTN,
-60n,
-MAactehn
-DCXPOMN KOKN,
- HénpriTbIe IaBHeHn foPmkaIIM.
4.2 AkkymyIaTOp
Co6JIOaTb npnloKeHne nnn
«IHCtpykuu no 3Kcnjnyataun
aKKymyTATopa STIHL》,a TaKke XpaHHTb
IX B HAdexHOM MecTe.
CneNyETNCNOB30BaTbTOJbKO opnHaJIbHbeaKKyMylTopblSTIH.L.
AkkymyIaTOpbSI THL nCnoB3yIOCTcToIbKO C yCTpoNCTBaMn STIH NINVIKING u 3apJkaIOTC3apRdHbIMNyCTpOncBaMn STIH.
HnBkoemCnyae He BckpbBaTb aKkyMylrTop.
He poHrTa akKMyJrTOp.
He nCnoIb3ObaT nobpeJdeHHbI nnIeΦopMnPOBaHHbI aKKMyJrTOp.
AkkymyTOp CneJyET XpaHnTB B HeIOCTyNHom DnI DeTei MeCTe.

AkkymyIaTOp MOxHo
HcNoIb3OBAtB I XpaHnTb npi
TeMnepatype ot -10 ^ C do +50 ^ C .

3aunuatabkkymynTOpOT npMbIX COJHbIX Lyuei, CNbHOrHarpeBaNOrH, He 6pocatB erO B OROHb, TAK KAK
cyuectByeT OnaCHOCTb B3pbIbIa!

3aunuatab akkymyIaTOp OT DOKJI, He NOrpyKaTb erO B KUdkoCTN.
He noDBepratb aKKymyIaTOp BO3DeiCTBnIO MKNPOBOJN ININ BlicOKORO daBJIeHnI.
HnB Koem Cnyuae He 3aMbikatb
HaKOpOTKO KOHTaTbI aKKymyIaTopa
MeTaJIInueCKMn IpeDMeTaMn. KOpOTKoe
3aMbikaHne MoKeT npNBecTe N
NoBpeXdeHIO aKKymyIaTopa.
HEnCNoJIb3yEmbI aKkyMylrTop cNeDyET
dEpxaTb BdaJIOn OT MeTaNIIuecKnX
npEmeTOB (HaNPIMep, rBO3eJ, MoHET,
yKpaWeHn). He nOmeUaTb aKkyMylrTop
B MetaIINueckn KOHTeHep dJa
TpaHCNOPTNPOBKn - ONaCHOCTb B3PbIBa
n noxapa!
Pn HeHaJLexKaIeM NcNoJIb3OBAHN n3 aKKymyIaTOPa BO3MOXHa yTeUka XIKIOCTN - IN36eRaTB KOHTaKTA C He! Ecn JIKIOCTB BCE Je nona Ha KOKy, CmItb ee BOIoE. Ecn JIKIOCTb nonana B rna3a, cNeNyET opaNTbcra 3a MeiHnckoN NOMOsbU. BbITEkaHOuaa n3 aKKymyIaTOPa XIKIOCTb MOxET BblBaTb pa3dpapKeHne I XMMueckn OXOR KOKN.
He BCTaBJIaTb npEIMTeB B BeHTnIaIcHNoHHbIe OTBepCTN aKKMyJrTopa.
KoJIHueCTBO 3JEMeHTOB n
3HePROeMKoCTb COIaCHO
CneuΦnKaunn
npoun3BOUNTeJI 3JEMeHTOB.
DOnonHnTeNbHbIe yka3aHnna no e3ONaCHOCTn CM. com/safety-data-sheets
4.3 3apraHoe yctpoIcTBo
Co6JIOdaTb npnloKeHne nIu
«IHCtpyKcNIO NO 3KcNJaTaauN
3apdHorO yCtpoiCTBa STIHGL», a taKke
XpaHHTb INB HAdEHXOM MeCTe.
CneNyet nCnOJb30BaTb TOnbKO opuHaJIbHbIe 3apAaHbIe yCTpoiCTBa STIHL.
3aepueaeTcNcnoB30BaTb HeucnpaBHOe 3apdHoe yctpoiCTBO.
3apndoe yctpoiCTBO pa3peeHOnCnOJIb3OBaTb ToJIbKO dIpaJKnIOxOJIuIX Np pa3Mepy aKKyMyIATopoBSTIH TnA APc MaKcIMaJIbHOIEMKoCTbHO 10 Au nMaKcIMaJIbHbIMHaPraKeHnem 42 B.
He 3apxKaTb NOBpeXeHHbIe INn DeOpMUpoBaHHbIe AkkMyJrTopbl.
HanpaxHe n uactota cetn doJXhbl coBnadaTb C daHHbIMn Ha 3aBOcko Ta6nueke, HaxOJaIeCra Ha HxKHei CTopoHe 3apAHorO yCTpoNCTBa, mIn C daHHbIMn, npuBeJeHHbIMn B «HcTpyKcnn No 3KcNlyataun 3apAHorO yCTpoNCTBa>.
He BCKpbBaTb 3apAnHoe yCTpoiCTBO.
IIO OKOHaHH 3apJIKn I3BLey CeTeByo BNJKy 3apJHOrO yCTPOHCTBa N3 PO3ETKIN NOMeCTNtB yCTPOHCTBO HHeOCTynHOE DnA DeTeMecTo.
4.4 Pa6oay oJexka n cpeIcTba 3aunTbI

Ppi pa6oTe Bcerda Hocntb npouhyo 06yBc Heckonbl3kO nooWBO. HeIb3a pa6oTaB Jn, Hanpimep, B caHdaJnx.

Kpome TORO, BO Bpempa60 TPO Texo6cnyxmbaHIO N OuynCTKe, a TaKKe npu TpaHCnOpTnPOBKe yCtpoiNCTBa CneJeYeHnAedeBaTb NepaTkN, He HocuTb HHbIMN DInHHBe BOJOCbi N Tb IX (NCNoJIb3OBA Tb IOnOBHO INKy n T. P.).

Pn3aToUKe HOKa KocuJIHK HeoXoDmO NOJb3OBaTbcr NOxOJaUMM 3aUNTHbIM OOKAMI.
Pa6oTaTb c yCTpoNCTBOM pa3peWaaETcra TOnbko BДПINHbIX 6pOKax N B ПIOTHO npJneraIoUeoi OeKJe.
HelenhaeBaTcB6oHyOJeKdy, KOtopa MoKeT 3aueNtbcra 3a DnKyuuneCyaYbI (pbuarrynypabneHna), TaKxe He pa3peWaeTcHocntb ykpaWeHHraNTcyuN uapfbl.
4.5 TpaHcnpTIpOBka yctpOcTbA
Длпретврашени Травь мocгрьиnpогуMuнчсTamУстpoиCTBa Cneуetpa6oTaB B nepuATkax.

Ipeep TpaHcnpTnpOBKo CNeDyET BbIKIOHTb
yCTPOIcTBO,DOXdTaBcRnONHOOCTaHOBKn HOKa N BbHyTb6JOKIpOBOUHbI WTeKepe.
UcTpoIcTBO CJIeNyET TpaHcnpTnPoBaTb TOIbKO Ipi OCTbIBWEM 3JIeKToPdBnRaTeNe.
YuHTbBaTb Bec yCTpoCTBa n npn Heo6xOIMOCtN NcNoJIb3OBaTb Dnnporpy3Kn NoXODJUne CpeCTBa (norpy3OHbIe NpTaOpMbI, NOBemHbIe npncnocobJeHna).
YcTpoiCTBO IN TpaHCnOpTnpyEmbIe y3Nbl
yCTPOiCTBa (HAnpIMep, TpaBOc6OpHNk)
DOJXHbI 6bITb 3aФNKCuPObAHbI Ha
NOrpy3OuHOINaTΦOpMe C NOMOUsHo
DOctaTOUHorO KOJIueCTBa KpeENKHBIX
CpeiCTB (peMHeI, TpOCOB I.T. ).
PnnoBemne npeHoce He dOnyckaTb npNKoCHOBENKHOKY KOCINK.
Co6IaTb yka3aHn, coepKaaunecB rnaBe «TpaHCnOpTnpOBKa». B Hei OncaHO, KaK NOHMaTB INN 3akpenJIaTb yCTpOJcTBO. ( 14.1)
PtpaHcnpTnpoBke yctpoNCTBa HeoXoIMo coJIbTaB MeCThBié 3aKHOdaTeNbHbIe npedncaHn, B Ooc6eHHocTn no 6e3OnaChOCTn nOrpy3Kn I TpaHCnOpTnpoBKe npEdMeTOB Ha nOrpy3OuHbIX PnATΦopMax.
PpeoXpaHnTe aKkymyIaTOpHyO 6aTaapeo OT pRmBix COJIHeuHbIX Nyuei HIKoTdHa He ocTabnIe ee B MaunHe.
Oco6eHNO TtateIbHoro 6paueHnnp
TpaHCnOpTnPOBKe Tpe6yIOT NITneBO
HOHHbIe AKKMyJTIopbl. He06xOIMo
OecneuHTb, B aactHOCTn, INX 3aUHTy OT
KopoTKOrO 3ambyKaHnra. IIO3TOMy
CoXPAHnTe OpINrHAJIbHyIO KAPTOHHyIO
ynakOBky AKKMyJTIopa STIH L
TpaHCnOpTnpyIte erO JNoBo B 3Toi
ynakOBke, JNoBo HEnocpeDCTBeHNO B
ra3OHOKOsJIke.
4.6 Ipepe pa6oToi
CneNyET yOCTOBepntbCra, YTO C yCTpOINCTBOM pa60aHOT TOJIbKO Te JInuca, KOtOpBle 3HaKoMbI C INHCTpyKUnei NO EKcNPyataun.
Дяустов no yxody 3a caObblmyuactkamn C DBuratelma BHytpenHcropanna NNNEKTPoDBuratelmaCneyetco6IOnDaTb MyHUnnaJbHbIe npdncahnno npdoonjntbHoctnpa60tbl.
TtataTeIbHO OcMOpteMbUyactOK,Ha KOTOpOM 6ydet pa6oTaMb yCTpoIcTBO, IN Y6paTb BCE KaMHn, NaIKN, PpOBONky, KOTNI INHbIE NOCTOPOHHne ppeMMeTbI, KOTOpBle MOrIN 6bl6bl3axBaueHbl
BBepx. B BbICOKO TpaBe MoKHO He 3aMeTnTB npeTCTBna (HaNPmep, HNn KOpHn DepeBbe).
I030my nepei pa6oToC yCTpoCTBOM Ha ra30HHom yactke CneJyET NOMeTb BCE CKpbTbe 06BeKtBI (npenrTcBn), KOTOpbl HeBO3MOXHO y6paTb.
Ipeep nCNoB3OBAHnem yCTpoiCTBa CneJeT 3aMeHnTB NOBpeKdEHHbIe N3HOWeHHbIe DeTAlN. NOBpeKdEHHbIe IIN HeUeTKne HaKJIeKN Ha yCTpoiCTBe C npEduPexKeHHnMn UyKa3aHHmN O6 IMeOuXxCr OaNCHOTx HeoBXoDIMO BOBpEmo OBHJrTb.HOBbie HAcJIeKNu B BCE dpyrIe 3aNaChbIe qACTn IMeIoTCB BCneuaIIIn3uPoBAHHOM cepBnCHOM ueHTpe VIKING.
YcTpoIcTBdoJIOJXHO NcNoJIb3OBA TbCB TaToJbKoBTEXHnueeCKn6e3OnaCHOM COCTOHN. IpePe, KaXdbIM NcNoJIb3OBAHnem yCtpoIcTBa CneNyET npOBepaTb,
CMOHtnpoBaHO JIN yCTpoiCTBO B COOTBETCTBUN C npEanncAHnA M
-6e3ynpueHNO IN COCTOHNPEpxyUero HNCTpyMeHTa IN BCero pexyUero MExaHn3Ma (HOXA KOCNJIK, KpeJnxHbIX 3NeMeHToB, Kopnyca KocnNoCHOro MExaHn3Ma).Oc06oe BHNMaHne CJIeDyET ObaaTaB Ha fKcnpOBaHHoe NIOXKeHne, NOBpeXdEHHa (HaceYKn IIN TpeuHHbI), N3Hoc, a TaKxHe Ha To,
-6e3ynpeHNO nIcoCTOHNHe npaBnIbHa InpaBoTa 3aUHTbIX yCTpoiCTB (HanpIMep,OTKnIHaJ KpbIuKa, Kopnyc, ByreIb OCTaHOBKn DBrarTeJI).
IIOJIHOCTbIO JIN CMOHTIpOBaH IN He NOBpeJdeH JIn TpaBOc6OpHnK; 3aPpeJaaTeCnOJb30BaTb IOBpeJdeHHb TpaBOc6OpHnK.
pa6oTaetIINTOPMO3OCTaHOBKn 3NeKtpoDburatJI.
B cnyae Heo6xOIMOCTN BCE Tpe6yEmbIe pa60TbIOJHXHbI nepenopyaTbcr CneuAnIm3npOBaHHOMy cepBnCHOMy ceHTpy. KomnaHry VIKING peKomeHdyet CneuAnIm3npOBaHHbI cepBnchblcHTp VIKING.
Co6nloaTe yka3aHnra rnaB
«AkkymyTOpHaa 6atapee» ( 4.2) «3apAnHoe yctpoNCTBO» ( 4.3) .
3anpeaetcBKNIOHb 3JIeKpOdBnIaTeNb6e3 npaBnIbHO yCTaHOBJEHORo HOxa. OnaCHOCTb neperpeBa 3NeKpOdBnIaTeNla!
4.7 Bo Bpempa6oTbI

He pa6oTaTb,ecnB onaCHOI 3OHe haxoJrTcXINBOThbIe IIN JIOuO,OC6eHNO DeTn.
3anpeaetc ydaTb nI nepeMbikatb yctaHOBneHbte Ha yCTpoiCTBe nepeKnIOuOuIe I npEOxpaHITbHbIe yCTPOIcTBa. B qactHOCTn, H N B KOem clyuae He fNkCupoBaTb 6yreIb OCTaHOBKN DnIRataTeHa CTOnke BeDyuepe pyKn (HaNPmep, PyTem CBaIBaHna).

BHHMaHHe - onaCHOCTb noJyueHn TpaBM!
HnKoIa He KnaCTb pyKn nn HOrn Ha BpaauOuuecra TaII
HIN NIOHIX.3aPpeuEHO npKacatbC K BpaauoUeMyc HOxy.Heo6xOIMMO BCERda HaxOINTbcra Ha HeKOTOPOM paCCTOHHN OT OTBepCTnA DnA BbIPoca.
Heo6xoDIMO Bcerda coxpaHb
6e30nacHoe paccToHne ot yctpoCTBa,
obecneHHeOe Beyuue pyKo.
Beyuapyka Bcerda doJXHa 6bItb
cMOHTnpOBaHa HaIeKaUIM o6pa3OM.
3anpeaaetc BHeceHne n3mehn B ee KOHCtpyKuIO. 3anpeaaetc HauHaTb pa60Tu yctpOInCTBa CO CLOXeHHoB Beyuue pyko.
Hikorda He 3akpenIte npedMeTbHa Beyuue pyuKe (HaepMep,paobuyo odexdy).
CneNyet pa60TaTb TOnIbKO npn DHeBHom CBTe nn XopoWem NCKycCTBeHHOM OCBeueHnn.
HeIb3pa6oTaTb npu TempeaTypax OkpykaHoue cpebl Hnke +5^
HEnb3pa6oTaB CyCTpoTcBOM BO BpeMdoxN rpo3bl,OCo6eHNO Cnyae onachoCTn yapa MoHHN.
Pn HauuBn BnaJHNO nobepxHocTn HeycToUHBOE NOIOXeHne Nb3OBaTeN yBeIuBaet OaCHOCTb HecactHoro cnuya.
CneJeT pa6oTaB, co6IIOJaO oc6yIO octopoxHOCTb, YTO6bl He NOCKoJIb3HyTbcra. No BO3MOXHOCTn 136eRaT npIMHeHn yCTPOIcTBa Ha BIAxHoi NOBepxHOCTN.
He octabTb yctpoCTBO noDdoxDEM.
BknHueHne ycTpoNCTBa:
BkHouHeHne yctpoNCTBa npOn3BOdntb C octopoxKHOCTbIO, coJIIOJaYka3AHn rIaBbl «BBeJeHne yctpoNCTBa B pa6OToy>. (12.)
HorndoJXhbl HaxoDnTbCnHa IOCTaTOOHpacCTOHHNOTpexuyero INHCTpymEnTa.
PnBKNIOHmYcTPOIcTBO DONKHO CToRbHa pOBHOn NOBepXHOCTN.
Ipeed BkIIOUeHnEM nB npOceCE BkIOUeHn HEnb3a ONpOKuDbIBaTb yCTpoIcTB.
He npo3B0dntb BKIOUeHnA 3JeKtpoDnBraTeTn,ecn KaHaJ Bbl6pOca He 3aKpBT OTKnIDHO KnBkoN TpaBOc6OpHNkOM.
Heo6xoJIMO n36eRaTb YacTBIX BKNIOueHn B TeueHne KOpOTKOrO nepNoDa BpeMeHn, B Oco6eHHocTN He DOnyckaIte «Irp» C KHONKO BKNIOueHn. OnachocTb neperpeBa 3NeKtPOdBnArateJIa!
Pa60TbHaCKJIOHax:
HaKnloHhIe yUaCTKn Bcerda
06pa6aTbIBaTbB NonepeuHOM
HaNPaBLeHIn, HN B KOeM Cnyuae He B
npoDolbHOM HaNPaBLeHIn.
Ecnn noIb3oBateI npKoc6be B npOIOJbHOM HnPaPABHeHn NpTepeT KOHTPOJIb, 3TO MoXeT PnUBeCTN K TOMy, yTo OH nonaTeT nD paBoTaIoUeeyCTpoIcTBO.
Bydte oocob octopokhbl,ecn BbMeHareTe HappaBHeHne DnHexeHnaCKIOHe.
Bcerda cneIte 3a Tem, yTo6bl coCToHnE CKIOHOB 6bIIO XOPOuMm, n 136eRaIte paobc ycTpoiCTBOM Ha CJINuKOM KpyTBIX CKIOHax.
13 coo6paKeHm 6e3onacNoCTn 3anpeueHO nCNOJb3OBAb yCTpoiCTBO Ha CKIOHAX KpyTn3H0N 6Ooe 25° (46,6 %).
Onachoctb noJyehn TpaBM! YrOHa KaHIOHa 25° COOTBeCTByeT BePINKaBHomY NOBemy 46,6 cm np1 100cm rOpN3oHTaJI.
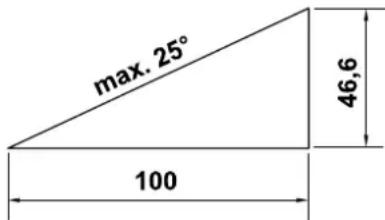
Bo Bpempa60TbI:
BHMaHne - onaCHOctb nOlyeHn TpaBM!
Hn B KOem Cnyae He KnaCTb pykn Hn Hor Ha
Bpaauouecra DeTALIN NIOHIX.
3anpeeNo npkacaTbcn K
Bpaauoemycra HOxHy. Heo6xoDIMO
Bcerda HaxoDntbca Ha HeKOTOpOM
pacctOAHN OT OTBepCTnIa Bbl6poca.
Heo6xoDIMO Bcerda COxpaHnTb
6e3onacHoe pacctOAHne OT yCtPOiCTBa,
06ecneuHaEMoe BeyuSeI pykoI.

He nbitaTbca OcMaTpnbTaHOK BO Bpempa60bIyCTpoiCTBa. 3anpeaetcOtKpbibatb
OTKnHyK KpbIiKy N/IN CHMAtb TpaBOc6OpHnK Do NOHnOCTaHOBKn HOKa KocNIKn. BpaauounCra HOX MOKeT CTaTB npuHnOH nOnyuHeHn TpaBM.
IpeepBraTecb CytpoCTBOM TOnbKO B TeMne Waara - npn paObe 6bICTpoe nepeBxKeHne 3aPpeUeHO. BcIeCTBne 6bICTPOrnpeMeueHn BO3pactaET OnaCHOCTb HecuACThBX CnyuaEB N3-3a CNOTbKaHn,CKoJIbXeHn I T.D.
BydTe oc6o octopoxhbl,ecn Bbl nobopaunBaete yctpoiCTBO nn noDbnaeTe erK ce6e. Onachoctb cnotkhytbcra!
Co6HJaTe Oc6yO OCTOPXHoCTb npn
NCNoB3OBaHHN yCTPOICTBa B6NJ3N
CKHOHOB, KPMOK yAcTKB, KaHAB n
npyOB. B YacTHOCn CneJyET
BbIepKINBaTB DoCTaTOHoe paCtOHNHe
do NoD6HbIX OnaChbIX 30H.
Heo6xoDIMO Or6BaTb HeBnDnMbIe 06bKeTbHa NyroBuHne (6pb3raNbHbIe yCTaHOBKn IJIra3OHOB,3aBNTbIE B NoOBy
CBAN,BOHbIeBEHTnN,ФyHdAmEHTbl, 3NeKtpueckne KaBeJIn nT.n.).Hae3n Ha TAKNE NOCTOPOHHe O6BeKtB 3anpeuen.
EcnpexyunnHnCTpymEn nnn yctpoiCTBO HatoJIKNHyIncb Ha KaKoe-NN6o npenrTCTBNE nn 3aJeN NoCTOPOHn npedMeT, HeoXoIMO OCTaHOBTb 3JKeTPODIBRAteNb, BbIHytb 6IOKINPOBOUHbI uTEKeP IN BHIMATEJBHO OCMOTpeTB yCTpOICTBO.

Cneintb 3a INHepuOnHHbIM DnBxHempeKyUeero INCTpyMeNTa, KOtOpoe IINTCa HECKOJIbKO CeKHyD IOIIOHO OCTaHOBKn.
Heo6xoJIMO BbIKNIOuTaB 3JeKtpOdBnraTeIb,
ecn yctpOcTBTOpe6yETc CnerKa HAKIOHNT npTpaHCnOpTnpOBKe NO yactKy,JIiueHHOMy TpaBbl,
ecn yctpoiCTBO nepemeeaetcK ckaunBaemomyuactkyo6paTHO,
- Nepei TeM KaK ChrTb TpaBoc6OpHNK,
- nepei TeM KaK yCTaHOBnTb BbICOTy Cpe3aHnI.

BbIKIOUHTb 3JIeKTOPOBUNrAteJIb, BbIHytb 6JIOKINPOBOUHbI WTeKeP TBCB NOJHOOCTAHOBKe TO INHCTpyMeHTa,
-праздучemснгтбakkMyIЯТOP;
IpeKJe Yem OCTaBt b yCTpoiCTBO, IIN ecn yCTpoiCTBO HaxoDntc 6e3 HaD30pa;
- nepeTem KaK TpaHCnOpTnPOBaTb, NOdHmMaTb NIN nepeHoCnTb yCTpOcTBO;
- npeTem KaK BbINOHNtB pa36loKIpOBaHHe NnYcTpAHtB 3a6uBaHnB KaHaJIe BbI6pOca;
- nepei TeM KaK BbIOnHnTb npOBepKy yCTpoiCtBa, OChTky nnn pa6oue nOepaunn Ha HEM (HaNPmep, OTKnDbIbAHmE/YcTaHOBkOB BeNyue pyuKn B 3aDaHHoe NIOJKeHne);
ecn pekyu nHCTpyMeHT 3aJeI kakoi-Ji6o NoctopoHHn npedMeT. Heo6xoJIMO npOBepuB erO Ha BO3MOXHbIe NOBpeKdEHNr. 3anpeaetc npBOIDHT B DeIcTBne yCTPOINCTBO C NOBpeKdEHbIM INI INOTHyTBIM HOKeBBIM BaIOM INI BAON DBNrTaTeJI. Onachocb noJyHeHn TpaBM n3-3a deΦeKTHbIX dTeJAEI
ecnnyyctpoiCTBaNoBnIincb HeinpBbIyHO CInhHbIe Bn6paunm.Bce yctpoiCTBO,BOCo6eHHocTH npexyun m HnCTpyMeHT,Heo6xoDmO BCerda npOBepaTbHaOTcyTCTBne NOBpeKdEHN nPiXO3akpenHbIX deTaneN.PpeD aJbHeuwe NkCnPyatauue nCleNyET 3aMeHNTb NOBpeKdEHNbIE DeTaNN,PiXO 3akpenHbIe DeTaNN COOTBeTCTBeHHO 3akpenHbTb NN 3aTAYTB.

Onachocb nonyuHnraTpaBm!
HaJIyue CINbHOB Bn6paun, KaK
npaBnIO, CBUeTeIbCTByeT O
HeNCnPaBHOCTN.
3anpeuaetc npBODHTb
yCTpoJCTBO BdeICTBne,
HaNPIMep, C NOBpeXeHHbIM NNI
NOrHyTBIM HOKeBbIM BAJIkOM NNI C
NOBpeXeHHbIM NNI NORHyTBIM
HOXOM KOCUNIK.
EcJn Bam He Xbataet Hxhblx
3HaHn, nopuynte Tpe6yeMbI
peMOHT cneuaInCTy -KOMnaHnA
VIKING peKomeHnyet o6paatbcra
B cneuaJIINpOBaHnbI
cepBnCHbI ueTp VIKING.
4.8 TexHnueckoe o6cnyKuBaHne, ouHCTka, peMOHT n XpaHeHne

Ipeep IIO6bIM pa6oTaMn C yctpoiCTBOM, nepeD peYIpOBKo NIn OChTko
BbIKNIOHTb DnIRaTeJIb, BblHyTb 6ILOKINPOBOUHbI WTeKeP I npn Heo6xOdMIOCTn CHaTb aKKyMylrTOp.
IpeepyctaHOBkoHa xpaHene B 3akpbTOM nomeueHHn,nepe pa6oTaMn IO TexHnueckomy o6cnyKbAHIO uOCHTE CNeDyeTe DOxdaTcR OXnaKeHHy yCTpOInCTBa.
OuInctka:
Iocne pa6oTb BCE yCTpoNCTBO He06xOIMMO TuaTeNbHO OuHCTNTb. ( 13.2)
YdaJIntbOCTaTKTpaBbIpeBeyHHO naIOUko. OuICTNTb UeTKoN BOOJ HIXHHIO NOBepxHOCTb KOCNIKN.
3anpeaetcncnojb30BaT aannapat
DnOYCTKN BbICOKO DaBNEHnA, a TaKKe
PpOMbIbTa yCTPOIcTBO CTPyAMN BObl
(HanpImep, pni NMOU CaIOBOr
ShaHa).
HeIb3r IcNoIb3ObAtb arpeccnBhble
HCTaUne CpeDCTBa. 3TN CpeDCTBa MOryt
IOBpeDnTb NtAcTMaCCy N MeTaJI, YTO
MOKeT Bbl3BaTb HApUeHne 6e3OnaCHO
3KcNpyataun yCtpoiCTBa VIKING.
Bo n36eKaHne onaChocTn Bo3ropaHnna
OBlaCTb BeHTnIaIyIOHHbIX OTBepCTNI
Mekdy KaOTOM DBURAteJI N KOpNycOM
CJeNyET COePkaTb B YNCToTe,
peYIpaRHO OCBO6OxJaA, HAnpIMep, OT
TpaBbl, COIOMbl, MxA, IINCTbeB ININ
BbITEKWe CMa3Kn.
Pa60tblnoTexHnueckomy 06cIyKnBaHHIO:
Pa3peaaeTcBbINOHnTb TOnbKo Te pa60tbo IO TexHnueckomy 06cIyKuBaHnIO, KOTOpBe OINcaHb I DaHHo INCTpyKuIN No 3KcNlYaTaUIN. Bce DpyrHe pa60tbo DoJHXbI npOIN3BOIDnTBcB CneuaIn3nPoBaHHom ceHTpe.
IJIIOJyueHnHEo6xOIMbIX CBeHn I OKa3aHn NOMOUs ObaaauTecb
Bcerda B cneuaJn3IpuBaHbI ueHtp. KomnaHnY VIKING peKomeHnyet BblOJIHrTa pa60Tb I NO texHnueCKOM O6ClyXuBaHIO n peMOHT TOJIbKO B CneuaJn3IpuBaHHom cepBuChom ceHTpe VIKING.
CneuHaun3npoBaHhbie cepBnchbIe UIKING peryIaRHO npEpaNarAOT KypcbI npeoCTaBIAOT TexHueckyo HOpMaUIO.
CneNyET NcNoB30BaT ToNbKO
HnCTpyMeHTbl, npHaJdNxHocTH nIIN
HaBeChoe o6OpyObaHne, DOnyUeHHbIe
VIKING dIaDnHO yCTpoiCTBa nIIN
TexHueckn aHaIOruHbIe y3JIb. B INHom
cLyuae Bo3MOxHbI HeCuaCThBiE cLyuAn,
pNbOBoJaUe K NoJyUeHNIO TpaBM nIIN
NoBpeXeHNIO yCTpoiCTBa. PnI
BO3NHKnHOBeHN BONpOCOB CneNyET
O6paTaBCB CneUaIIIN3InPobAHbIe
ZeHTp.
OpunHaJIbHbIe INCTpyMeHTbl,
PnHaJnxHoCTn 3aIuaCTn VIKING no CBOUM CBOIcTBAM ONTImaJIbHO COOTBeTCTByIOY UCTPOINCTBY u yIOBJIeTBOPaIOT Tpe6oBaHnA M NOlb3OBeTJe. OpunHaJIbHbIe 3aIacHbIe qactn VIKING ono3HaIOTCn no Homepy 3anachOn qactn VIKING, no HApNci VIKING n B cnyae Heo6xOIMocTn no
3NaKy 3anaChbix qacteY VIKING. Ha MaJeHbKnX DeTaNJx 3HaK MoKe TcOaTb TaKke OTdJIbHO.
HaKeiC npEynpeKdEHHaMn U yKa3AHMaMn CNeDyET BcerDa CoepKaTb B uCTOM XoPoOo OHTabeBHom COCToHm. IOBpeXeHbIe NnN yTePraHbIe HAKneKN Heo6xOIMO 3aMeHtB HObIMOpuHaJIbHbIM, KOTopbIE MOXHO NOnyHTB CneuaNIm3npoBaHOM cHTpe VIKING. Ppi 3aMeHe y3Na NN DeTaJIN HOBbIM y3NM Nn DeTaJIbIO, CneINbT, YTObl HOBbIe qACTN NOnyUIn TAKNe Jke HaKeiKn, KaN i npeXhHe y3NbI N dTaJI.
Perynphno npoBepaTb HadeekHocTb KpennenHnHOxKa KOCNJKN,OTcyTCTBne NOBpeJdeHn N3HOca HaHEM.
Ppi pa6oTe cpejUIM MexaHn3MOM Heo6xoJIMO BcerJa Hocntb npouHbIe pa6oJe nepaTkn co6JIOdaT npdeJIbHyO OCTOpOXHOCTb.
ДяТORO yTO6bI yCTpoiCTBO pa6oTANO HAdexKHO, CNeDyET 3aTnBaTb BCE rAnKIN, B0JrBn BnHTbI Do yNopa, B Oco6eHHOCTB BnHT HOXa.
PeryIpaHNo npOBepaIte Bce yCTpoIcTBO n TpaBoc6OpHnK -Oco6eHNO nepei yCTaHOBkoHa xpaHeHne (HanpIMep, B 3mHNn Nepno) -Ha OTCyTCTBnE n3HOca n NOBpeXKeHn. IV3 coo6paXKeHn 6eONaCHOCTn Heo6xOdmo Cpa3y 3aMeHrTa H3HOWeHHbIe mNIOBpeXKeHHbIe DeTaJI, oBeCneuVBa TeM CaMbIM HaJeKHyIO pa6Oty yCTPOINCTBa.
B cnyae cHraTna KaKix-Im6o DeTaJeI INI 3aUHTbIX npCnOco6JIeHNI BO BpeM npOBeHeHn pa60 TcXHueCKOMy o6CnykBaHnIO nx
HcOxOIMHOMeIeHHO CHOBa YCTaHOBtHa MeCTO B COOTBeTCTBn C npEINsCaHnMn.
4.9 XpaHeHne npn dInTeNbHbIX nepepbBax B pa60te
OCTbIBWEE yCTPOIcTBO,AKKMyJITOP IN 6JIOKINPOBOUHBI WTEKeP Heo6XODIMHOaHexHO xpaHHTB BCyXOM 3aKpbITOM NOMEeHNN,HeoCTyHOM DnA Deten.
Heo6xOIMO NCKIOHTB BepoTHOCTb NOJIb3OBaHnY yCTpoIcTBA NOCTOpOHMMI JIiZAMn (HaNPmEp, DeTbM).
IpepeyctaHOBKoHa xpaHeHne (Hanpimep,B 3mMnN nepnoID) yCTPOIcTBO CNeDyET TuaTeNbHO OuHuaTb.
XpaHbTyCPOBCTBO B COCTOHN ITOBHOCTN K EKCNyatauIN.
4.10 Ytvnnaa
CneyuT oecnTuHaJnxauyO ytni3aunO tcnjxmbwero yctpoiCTBaIpeD ytni3auey uctpoiCTBO cneyuTpnpBeCTB H enpniroHoe coCToHHe.Bo n36ekaHHe Heucacthbx Cnyaeb B nepByO Ohepeb ybupatb 6JOKnPOBOuHb IteKep NIN 3JeKTPOKaBeJb, NyuN K 3JeKTPODBnRaTeHIO.
Onachoctb noJyehn TpaBM n3-3a pexyuero nHcTpymenta!
HnB KOem cnyae He octaBnTb
OTcnykWBwe yCTpoiCTBO 6e3
IpiCMoTpa.ObecneuTb,YTObbl
yCTpoiCTBO IN pexyuIN HCTpymeHT
XpaHNINCb B HeIOCTyINOM IJIa DeTeN MeCTe.
AkkymyIaTOp CneIyEt yTuIN3nPoBaTb OTdIeNbHOOTyCTpoIcTa. IpePeI yTuIN3aUnei AkkMyJIaTOp pa3pIaNTb (HaIpIMep, NyTeM BKNIOueHInr 3JeKTPoDnBraTeIeN) uYTuIN3nPoBaTb erO 6e3 yUePb6a dIra OkpyKaIOuSe cpebl.
5.Описане симвовс


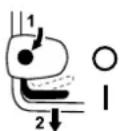
BHUMAHne!
Ipeed nepBbIM npmeneHnem npoHTaTb HNCTpyKuIO NO 3Kcnpyataun.
Onachoctb noJyehnra TpaBM!
3anpeeHNO npncytCTBne nocTopoHHnx NUC B 30He pa60T.
OCTOPOXHO - OCTpbie Jez3BnI!
Pexyue HOxn npoJnxKOT Bpaaatbca eue HeKOTope Bpemn noe BbIKIOUeHn 3JeKtpoDBuRatena. Pepe npabotamn no Texo6cnykBaHnO ydaanTb orpaKaiooee yctpoICTBO (6NOKPOBOHbI WTekep).
MA 443:
BkIIOuHTb 3JIeKToDnBnraTeNb.
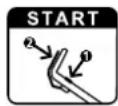
MA 443 C:
BknHouHtB 3nEeTpoDburatetb.

MA 443 C:
OTKnHouNtB 3NeKtpoDbuRatSeNb.

IpeepnHbIMpa6oTAMuC yCTpOINCTBOMydaNITb orpaxdauoouee yCTpoiCTBO (6LOKnpOBouhnyuTekep).
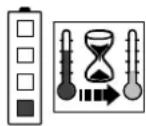
AkkymyTOp cNIuKOM
Harpet. Ppoecc
3apdKn HauHeTc
nocne OCTbBaHn
6batape, 6batapee
MOXHO N0b30BaTbc
TONbKO nocne ee
OCTbBaHn.
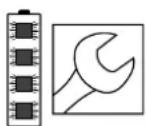
AkkymyIaTOPHa8 6bTapeHHeNcPpaBHa NIOJIeKHT3aMeHe.
6. KomnjeKT NOCTABK

No3.HaMeHOBaHne 1T.
A Ba3OBoe yCTpOInCTBO 1
B BepxHyaCTb 1 TpaBoc6OpHnka
C HxHxHy qactb 1 TpaBoc6OpHnka
D Paine 2
N BLoKIpOBoUHbI uTeKepe 1
O AkkymyTApTOp
I03.HaHMeHOBaHne 1T.
P 3apJnHoe yctpOiCTBO
- INHCTpykunno 1 eknnyataun
MA 443:
E BbICTpo3aXmHnO H KcTOp 2
F BnHT 2
G ČepkaTeNb ka6eNa 1
H 3aXmKa6eIa
3aunTHbIe rNlb3bl 2
MA 443 C:
J TnIb3a 1
K BuHT 1
L 2
M Taimka 1
KOMJIeKT NOCTaBKN 3aBUCNT OT CTpaHbI Ha3HaueHnI INCNOJIHeHnYcTPOJCTBa.
7. Побтовka устpoиства Крабote
7.106ue cBeDeHn
Onachoctb noJyueHnra TpaBm CneJyET co6IoudaT npEaHncaHnno Texnke 6e3oNaChOCTn, npuBeHeHHbE B rnaBe «Texnka 6e3oNaChOCTn» ( 4)
Pepa0bTaMnra3OHOKCNKOBbHbTe6NIOKPOBOUHbWTekep ( 9.1)
- BbINHHeNBCex ONuCaHHbIX pa60yCTpoiCTBO DOnKHO 6bITb Ropn3oHTaBHO yCTaHOBNeHO ha POBHOM N TBepOM OCHOBAHIN.
I npn noctabke yctpoiCTBa aKKyMyJITOpb3apXKeHb npimepno Ha 30% .NoTOMy neped Hauanom pa6oT Heo6xOIMo IOn3aPAnTb INX.
3apkaakkymnyTopoB ( 8.4)
7.2 MoHTaX MOHO-pyKoTKn (MA 443 C)
1 BCTaBtB BtyIky (J) B OTBepCTne Ha Bedyuei pyKe (1).
HaTeb o6e 1aai6bl (L) Ha BTyIky BbIyKnIO CTOpOHOBBHyTp.
3 YdepxnBaBByIky (J) uAnIbly (L), BMeCTe C BeNyUeepykoN (1) BCTaBnTb B KOHCOJIb BeNyUeepykn (2).
4 BCTaBnTb raiKy (M) B KOHcOJIb BeDyuei pyuKn, KaK noka3aHo Ha pncyHke.
5 BCTaBnTb BNHT (K) C hapyKnOH CTOpONb BOHyTpB YpeE3 OTBepCTNHa BeNyue pyuKe (1) n Ha KOHcOnn BeNyue pyuKn (2), nocne yero 3aTaNtB. MOMENT 3aTAAKKN: 18-22 Hm
MONTAK 3JIeKtpoka6eJa:
BdaBntb 3neKtpokabeJb (3),kak noka3aHO Ha pncyHke, B KpennHeHa KaOHcOnn Beyuue pyuKn Hn BeDuye pyuke (4,5),a TaKke 3aФnkCnpoBaTb c nOMOsbIO 3aKIMa Ka6eJIa (6).
7.3 MoHTaX DByxCTOpOHHepykoTKn (MA 443)
HaJeTb 3aUHTHbIe rNb3bl (1) Ha HnXnHe Yactn Beyuue pyu (1).
BCTaBHT BINT (F) BOTBepctne depkaTeI Ka6eIg (G).
- YdepxnBaTb BepxHIOU qactb Bedyue pyu (2) npnxKaToI K HxKHM qactm Beyuue pyu (1).
- YctaHObITb DepkatEnb Ka6eIg (G) Ha 3NeKtpoka6Je (3) n BCTaBHT BnHT (F) yepe3 OTBepCTnC BHyTpHeHcTOpOHbHapxKy.
H a npoTbONOJXHO CTOpOHe BCTaBHTB BNT (F)Yepe3 OTBepCTnC BHyTpENHe CTOpOHbI HApyKy.
HabHTb 6bICTpo3axmHOn
fKcTOp (E) Ha BnHTb (F) (OJxKeH
BbICTyNaTb npIMepHO OINH BNTOK
pe3b6bl) n OTKNHyTB HApEx.
- PpOBepka npabnIbHocT MoHTaxa: BbICTpo3axmMhble pbuarr (E) DoJXhbl 6bIb 3aTAYtBc TaKo CnIO, YTO6bl OHn IIOTHO npneran K Beyucey pyKe, a BepxHra Yactb Beyucey pyKn 6bIa npouHO coeDInHea c HnKHe yactb Beyucey pyKn. Ecnn Beyuzaay pyKa 3akpenHea HnpouHo nNbStpo3axmMhble pbuarr yCTaHOBLneHb HnpabuNbHO, OTKpbITb 6bICTpo3axmMhble pbuarr n PpOBepHyTB hAcToJIbKO, YTO6bl oBeCneHTb IN pOpyHuO fMKcaUHO.
BCTaBtB 3neKtpoka6enb (3) B depKaTeB (4) KOHcOJI N BeDyuee pyuKn, KaK NOKa3aHO Ha PnCyuHke.
MOnTax 3aXnMa dIa Ka6eJIa:
3NeKtpoHnka r30HOKOcNkN
OBMeHNBaeTc DaHHbIMN C
NCNoB3yeMbIM AkKyMyJrTOpOM N
IOCTpaINBaet IOE eMKOCTb
MOUHOCTb 3NeKtpoDBuTaTeJIa.
8.2 3Jektpnueckoe noKluoyehne 3apdHoro yctpoiCTBa
BcTaBbTe ceTeByIO BnIKy (1) Bpo3eTKy (2).
- После поdkнчeyня зардноу cctpoiCTBa K cetn npoicxOINT camoiaarHoctnka.Bo Bpemr 3TOro npouecca CBeToIDNOJ (3) Ha 3apdHOM yctpoiCTBe CBETTC npn6IIN3HTeJIbHO 1 cekyHdy Chayana 3eJeHbIM UBeTOM, 3aTeM KpacchbIM, NOTOM rachet ( 8.6)
8.3 YctaHObKa u ChrTne aKymyIaTOPHO6aTapen
OTKpbTbOTCEKdIaKKMyJITOpHO6BatapeuN BbHyTb 6IOKINPOBOHbI WTekep ( 9.1).
ChTne akymyIaTOPHO6aTapeN
- IэblneKeIe aKkyMyJrTopHyo 6aTaapeo (1) BBepx.
UcTaHObKa aKkMyJrToPHoH 6aTapeN:
Cnerka haxab Ha aKKyMnyTopHy0 6atapeo (1) nomeCTnte ee BOTcK, KaK noka3aHO Ha pucyHke, N 3akpoTKe KpbIuKy.
8.4 3apyaakymyTopHoi 6aTapei

BbHbTe aKKyMyJrTopHyo 6aTapeIO n3 OTceKa dJa aKKyMyJrTopa ( 8.3).
- Θлектpresckoe nodknohei 3apdHoro yctpoiCTBa ( 8.2)
3aBnraTe aKMyJrTOHy6bTapeo(1)B3apAnHoe yCTpoiCTBO(2)Noka He nouyBCTByeTe cOnpOTNBHeHne,3aTeM BdABHTe ee Do ynopa.CBeueHne 3eJeHbIX CBToIOIOOB Ha aKKMyJrTOpe n 3apAnHom yCTpoiCTBe (3) CnHaIN3uPyET O TOM, YTO ndet npOecce 3apAnk.
- 3TN CBeTOnIObI rachyT, KOrJa aKkMyJrAToP NOHocTbO 3apJKeH. OToeINHtE 6aTapeo OT 3apJHO yCTpoiCTBa I NOMeCTNe ee B OTCek JnAkkMyJrAToPa ( 8.3).
Ipocecc3apdkn
3apnHoe ycTpoICTBO aBtOMaTHueckn 06MeHNBaETcAaHHbIMN C akMyJrTOpOM Ha OCHOBAHIN 3TOKopkeTnpye IpoceC 3apnK.
B xode 3aprKn aKkyMnyTOp
oxlaJdaeTc: B 3aBNCIMOCTN OT
3aprHoro yCTpOncTBa Jn6o AKTNBHO
nocpeDCTBOM BEHTNJTOpA, Jn6o
naCCNBHO eCTeCTBeHHbIM NOTOKOM
BO3dyxA B NOMEueHIN.
XoI 3apAKn OTo6paKaeTcBcTeOIOIOOM Ha aKKyMnyTAtope ( 8.5) KOrda aKkMyJnTOp NOnHocTbIO 3apXKeH,3apJHOe yCTPOINCTBO aBTOMaTnueCKNBbIKIOUaETcA, a CBeTOIOBbHa HEM aKKyMnyTAtope rachyt.
BpeMa 3apAKn 3abNCNT Opa3JIuHbIX
ΦaKTopoB,HaNPmEp,OT COCTOHN
aKKMyJLTopa NN OkpyKaIOSei
TemnepaTpybl.Ecn BCTaBtB 3apJHOe
yCTpOInCTBO HarpEwHcNcAKKMyJLTop,
3apJa MoKeT 3aHrTb 60bIe BpeMeHn,
Tak Ka KnePd 3apJkOu AKKMyJLTop
Heo6xOIMO OxJaNTb.
8.5 CBeToDnOHaN HnDnKaunna Ha akymyTOpHoi 6aTaapee

- T O 6 bI akTNBnPOBaTb HNDNkaUHO, HAXMNTe KHOkY (1) -Yepe3 5 cekyHd INHdkaTop norachet ABTOMATueckn.
CbeToOnoHaHnHnKaun:
CBeToIONoIbMoIyT CBeITbC3eJIeHbIM IIN KpaChbIM UBeTOM,a TAKKe MInrA Tb.
CBeToIIOI CBeTITcra 3eJIeHbIM UBEtom.
CBeToIIO,MIraeT3eJIeHbIM LBEtom.
CBeToIONoCDBeTNTcKpaCHbIM CBETOM.
CBeToIIO, MnraeT KpaChbIM UCBETOM.
3eHoe CBeueHne CBetOIOnda cnHaN3npyeT O HopMaIbHOM pexIme pa60tbl, KpaCHOE -O HeNCnPaBHOCTn.
B npocece 3apAn:
O xoJe 3apJdkn MOxHo y3HaTb nO xapaKTepy CbeueHn N MmraHn CBETOINOOB.
Mirahne 3eHbIM LBeTOM COo6uaet 06 yKe IOCTnHyToI EMKoCTn 6atapen.
IIO OKOHaHIN npouceca 3apAKn CBETOINOdbI ABOTMaTNUeCKn rachyT.
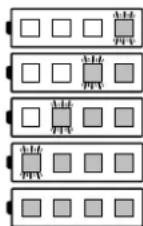
0-20%
20 - 40%
40 - 60%
60-80%
80 - 100%
HencnpaBHOCTN
CBeToIONo CBeTnTcKpachbIM CBETOM
B npouecce 3apnK: AkymyIaTOPHa 6atape

CNIuKOM HarpeTa nn CNIuKOM octbIa, YTO6bI CMOr HauaTbcra npouecc 3apJKn. Nocne octbIbaHnna nn nporpeBa 6aTapei npouecc 3apJKn NaHauHETcA BTOMATueckn.
BoBpempa60tbl:
AkkymyIaTOp CnIuKOM Harpet. YcTpoIcTO BbIKIOUaEcTc -OcTaHbTe 6aTaapeIO n3 Ra3OHOKoCNIKN I daITe eN OCTbITb.
Yetbipe CBeToaNoDa MuraOT KpaCHbIM UCBETOM
AkkymyIaTOpHa 6aTapei HeuCnPaBHa n noJleKnT 3aMeHe.
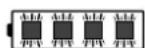
TpncBcTeODnOda CBeTcra KpaChbIM cBetom
Ta3OHOKOcJka CnUJKOM Harpeta -daIte eI OCTbITb.

TpN CBETOINOda MIRaHT KpaCHbIM UBETOM
Ta3OHOKOCUNKa HncnpaBHaNdoJXHa 6bItb npOBepeHa B

cneuann3npoBaHHom ueHTpe.ΦnpMa VIKING peKoMeHnyeT cneuaan3npoBaHbI ueHTp VIKING.
8.6 CBeToDIOHnHa INHnKaHnHa 3apAHOyCTPOIcTBE
CBeToIOIOI (1) Ha 3apAnHOM yCTPOINCTBE MOXET CBETNbCA 3eJIeHbIM NII MIRaTb KpaCHbIM LCBETOM.

IIOCTOHHoe CBeueHne 3eJIeHbIM UBEtOM:
AkkymyIaTOpHa 6aTape8 3apJxAeTc HIN OCTbIbAeT, yTo6bl 3aTeM Haatb
3apKaTc.3eHbIn CBTeODIOI rachET, KOrda aKKMyJITOP NnHOCTbIO 3apJKeH.
MuraHne KpaChbIM UBeTOM:
Hebo3MOxHo HauaTb npoecc 3apKn.

Bo3MOxHbIe npuynHbI:
- OTCyTCTBye TJIeKTPnueCKM KOHTaKT MEXdy AkkMyJrTOpHO BsaTapeeN 3apAHHbIM yCTpoIcTBOM - CHMNTE N CHOBA yCTaHOBtE 6baTeIO ( 8.4)
-AkkymyIaTOPHa6aTapeHHeNCnPaBHa(8.5).
3apndoe yctpoCtBO HeNCpabHO ndoJXHO 6bIb npOBepeHO Bcneuaan3npoBaHHom ceHTpe.ΦnpMaVIKING pekomehdyet cneuaan3npoBaHbI ueHTp VIKING.
9. Θлем entbl ynpablenhy
9.1Блokировнышт ekp
BBoD rAOHOKOKN B 11
3KcNpyaTuIIO BO3MOKeH TObKO B
TOM Cnyae,ecn6IoKInpOBOuHbI
WTeKeP BCTaBHeH BrHe3oB OOTceKe DnA
aKKyMylrTOPHO 6aTapei.
Ipepe TpaHcnpTupOBko ra3oHokocnKn, a TaKoe nepepe pa6oTaMn no ee TexO6cnykuaHnO, ouNCTke npOBepke 6JIOKpOBOuHbI uTeke doJKeH 6bIb N3BneueH.
YctaHOBKa 6JOKnpoBOuHOro uTekepa:
- OTKpbITb OTcEK dIaakymyIaTOPHO 6aTapeN. ( 9.2)
BdaBnB 6IIOKIpOBOUHbI WTeKeP (1) Do yNopa B rHe3do (2).HaKaJaKa (3) DOJIxHa 6bITb 6paueHa BHyTpB B COOTBeTCTBm C pncyHKOM. - Choba 3akpbItb otcek dna akkymyIaTOpHoi 6atapen.
Charthe 6nokpobooyhoro wTekepa:
- OTKpoIte oTceK dIJIa AkkymyIaTOPHOI 6aTapeu ( 9.2)
- BbHbTe 6nOKpOBOuHb WTeKepe(1) n3 pa3bema (2) n depXnTe ero OTdEJIbHO OT rAOHOKOCJKN.
9.2 OTeck dIaakymyTOpHoi 6aTapei


3KcnJyatnpyTe ra3OHOKOcNkY TOJbKO C 3aKpbTbIM OTCEKOM dJa aKKymyTAOPHO 6aTapei.
OTkpItne oTceKa nlaakymyIaTOPHO6aTapeN:
Cnerka HadaBnte 3aueNky (1) nOTKNHbTe KpbIuKy (2) Ha3a.
3akpbitne oTceka nna akkymyIaTOPHO6aTapeN:
3akpoTe KpbuKy (2), y6eHntecb, TTo 3aueJka (1) 3aueKHynaCb.
9.3 Perynipobka MOHO-pykoTkn (MA 443 C)

A
Puck 3aueemnneHn!
Pn npBedeHn B deCTBne
fNknpyUoero pbyara
ydepXnBaTb pyKoB cepXHOu cactb
BeyuJe pyKn B haNBbcwem
noIOKeHN.
Hn B KOe Cnyae He donyckaTb
nonaHaHna NaIbueB O6NaCTb
mExdy BeyuJe pyKoN
KOHcoJIbIo (HaN nOd
fNkCpYUoUM pbHarom).
MoHO-pyKoRTka NMeET 2 yPOBnpeRyNnPoBKn NO BICOTE:
- UdepKnBa pyKo BepXHIOU qAcTb BeNyuee pyu (2) B HauBbcIeM NOIOKeHH, CJIeKa PpINoHrTb ee (ChrTa HaPy3Ky).
- PnKaTb pKcnpuyoun pbuar (1) BHN3 uyepeXNBaTb erO.
- YctaHOBtB BeDyHpyKy (2) B HuykHoe nOIOKeHne.
OTnyctntbФHKCnpHouu npyar(1) npOBepnTb,UTo6bI BeDyuaa pyka 6blna noJIHOCTbIO 3aFHKpObaHa.
9.4 Perynipobka DByxcToponHe pykoTkn (MA 443)

A
Puck 3aueemJeHnA!
OTKNHyTB BepxHIOU qactb
Beyupe npyKn MOxHO NyTeM
OTBHNHBAHH
6bICTPOeNCTByOuNX
coeHNHTene. I03tOMy BepxHIOU
qactb BeNyue npyKn Heo6XoDMO
IOCTOHNHO ydepKINBaTb OHOH
pykON BHaNBbcWem NOnOKeHH.
IonoXeHne npTpaHCnOpTnpOBKe
(Дя OунсткУстpoиCTBa,УдбовТраснортурови KOMпakTHORO xpaHeHЯ):
UdepKnBaTbBepXHIOu YacTb BeDyue pyuKn (2) OJHOI pyKO B HAnBbICwEM NOJIOKeHN.
OTKpbTb 6bICTPO3aXIMHbIe pbHar (1), npeBecTNx BHN3, OTKNHYb BEPxHIOU qactb Beyuue pyu (2) Bnepei n CJeNTb 3a TEM, TTO6bl 3JIeKTpoka6ebn He 6bl NOBpeXdEh.
Pa6ooye noJIOXKeHne (nna nepemeeHHy yCTpoiCTBa):
- OTKHyTB BepxHIOU qactb Beyupei pyu (2) Ha3aI u yepKuBaTb ee pyko.
3akpbItb 6bIcTp03aXmHbIe pbIar (1) npeBecTNx HABepx.
9.5 TpaBoc6OpHnK
YCTaHOBka:

- OTKpbITb OTKnDHyo KpbIuKy (1) nydepXnBaTb ee.
- YctaHOBt TpaBOc6OpHnK (2), BCTaBnBФNKcpyUOuIe BbICTybl B KpeNExHbI eIemEnTbI (3) Ha 0bpaTHoCtOPOHe yCTpOInCTBa.
3aKpbbTb OTKnDHyu KpbIuKy (1).
Charne:
-OTKpbITb OTKNHHyo KpbIuKy (1) nydepKnBaTbe.
- PpInoDnHtB TpaBOc6OpHNK (2) n CHaTb Ha3a.
3aKpbbTb OTKnHHyo KpbIuKy (1).
9.6 LcHTpaJIbHa perynipoBka BBICOTbl CkawBaHn
Moxho yctaHaBnBaTb 6 pa3nHbIX ypOBHe BbICOTbl CkaWNBaHna.
ypoBeHb1=25MM
ypoBeHb6=75MM
YCTaHOBka BbICOTbI CKaUNBaHnA:
B3aTbC3a pyky (1), notHytb pbIar (2) Habepx u ydepXnBaTb erO B 3TOM nIOJoxEHIN.
BbIbpaTb HxKHyIO BbICOTy CkAunBaHn, nepemeea yCTpoiCTBO BBepx N BH3. Tekuyn ypoBeHb BbcOTbl cAunBaHn MOXHO CHTaTb Ha INDkaTope BbcOTbl Cpe3aHn (3) c nOMoUbO MapKnpOBKn (4).
- OTnyctntb qnknpyoum npyar (2) n 3aueKHyTb ero.
9.7Инданкаторзаолн electnna
HaBepxHeJyactn TpaBoc6OpHnka yCTaHOBJeH INdKaTOp 3anONHeHn (1).
Bo3duhHbI NToK, Bo3HnKaIOuN 3a Cuet BpaUeHnHOxKa KocuNKn H CnOC6CTByOuN 3aONHeHNO TpaBOc6OpHnKa TpaBO, npINOdHmHaET HnDKaTOp 3aONHeHn (2): TpaBOc6OpHnK 3aONHReTc Cpe3aHHo TpaBOi.
Ecnn TpaBoc6OpHnK3aONHHeN TpaBoi,TO BO3dyuHbI NOTOK yMeHbwaETcN, INHdkaTOp 3aONHHeHnOnyUcKaETcN (3):
OnycToUHTb 3aONHeHHbI TpaBoc6OpHk ( 12.4).

10. PekomeHdaucn npa6ote
10.1 O6uJe noJoxeHn
TTO6bI NMeTb KpacNBbI rA3OH C rYcToI TpaBO, Heo6xOJIMo Yacto NOppe3aTb TpaBy, cKaUINBa eE KOPOTko.
PnXapKOM nCyXOM KJIMMaTe He CJIeDyEt CNIuWKOM KOpOTKO NOpDe3aTb TpaBy, TaK KaK rA3OH Ha CoJHcE BbIropaET n npNo6peTaet HEnpNBneKaTeNbHbN BuN!
Han60ee KpacnBbI BmIOCTpNKeHHorra30Ha o6ceNeuBaetc B pe3yltateNCo1b3OBaHnO cTporo HOka, no3Tomeryo Heo6xOIMo perynrphO 3aTaunBaTb(B cneuaIIm3npoBaHHom ceHTpe VIKING).
PpOun3BODnTeJIbHOCTb Cpe3aHn
PpOIN3BOIDNTJIbHOBtBcpe3AHnB(BpeMpa60TbIakKMyJrTopa)3aBNCITOT CBOINCTB TpaBBNOT BbIbpaHHOB BbcOTbl cpe3AHn. OHa yBeJIuHBAETCB Pe3yNbTaTe CJIeDyUOxMep:
- Ra30H Heo6xOДIMO KocNTb YaCTO.
- Y Bělín qún T b BbIcOTy cpe3aHn,
-ymeHbWntbCKOpOCTdbBnXeHnA, - Ipeed ckaaunbaHnem DaTb r30Hy BbICOXHyTb.
Pn Heo6xOAMOCr MOxHO npno6peCtI DOnOHHTeNbHbIe NHTNeBO-NOHHbIe AKyMylrTOpbl STIH L (cneuaNbHbIe npHaJNExKHOCTn).
10.2 Pa6o7a 30Ha noJIb3OBATeJI

13 coo6paKeHn 6e0nacHOCTn NOb3OBaTeNb npa paOtaUcE MNeKtpoDBnIgATEJe DOJIKeH Bcerda HaxoINTbcraBpaOceH 30He 3a Beyuue pyko. Bcerda cO6IIODaTb 6e0nacHoe pacctOraHne ot ycToPiCTBa, oBecepeHHoe Beyuue pyko.
- Y npablene ra30HOKOpa3peaetcBbINOHrTb TOnbKO OHNOMyYeNoBEky, NOCTOPOHNMJNtam 3anpeheHO HaxoNTbcB ONaCHO3OHe. ( 4.)
CTeHb 3NHOca A: <15 MM
山pHaHOkaB:>39MM
ToIuHa Hoxa C>:>1,6 MM
Hox noDnEeNt 3aMeHe,
ecn OH noBpeKdEHN (HaceK, TpeunHbI),
ecnH3MepeHHbIe 3HaueHnB OOnHom nHeCKoNbKIN MeCTax DoCTnJyKa3aHHbIX BeJIuHn INn BbIXOJaT 3a DOnycTmMbI nepeJebl.
EcHnHa ra3oHokocnke yctahOBneH MHOOrOyHKUHOHaJIbHbI HOX N3 CNeuaJIbHbIX npHaJdNexHoCTe,TO DeJeCTByOT dpYrHe 3NaYeHnI ppeDeNa n3HOca (CM. «INcHTpyKUIO NO 3KcNPyatauPi npHaJdNexKHOCTn»).
13.7 DEMOHTaK MONTaK HOKa KOCNJKN


Bo n36ekaHne noBpeXdeHn BnHTa HOKa npN OTKpyuBaHN uIN 3aTJKE npIMeHbTb NOxOJaUyTO TopoByo roIObKa KInOua (22 MM).
1 DEMOHTax:
-Дяуджьань Нжа kocunk (2)ИспьзOBaTB NOxOJaUNIdepeBHHb 6pycok (1).
- OTKpyTntb BNHT HOKa (3) IN CHaTb HOK KOCNJIKN (2).
MOHTAX:

Onachoctb nonyueHn TpaBM! Hox Kocniln pa3peweno yCTaHaBnBaTb TOIbKO TaK, KaK nokaHaHO Ha pncyHke, B YaactHOCTn, HAKnaKn (6) DOJXhbl 6bITb o6paueHb BHn3. Pnp 3aMeHe HOxKa KOCnIKN Bcerda CneNyET 3aMeHrTa TaKe BnHT HOxA (3). CToPO Co6nOdaTb PpeDncaHHbIM MOMeT 3aTjKKn BnHTa HOxA, TaK kAcOT 3TOrO 3aBnCtH NaExHoe KpenJe HpeKyuJero IHCTpyMeHTa.
OuHCTnTb NOBepxHOCTb KOHTaKtA HOXa N BTyIky HOXA.
Hoxkocnkn(2)cneNyET yCTaHaBnBaTb N30rHyTbIMN 3akpbilKaMn Habepx. KcnpyUoNe BbICTynl (4) DOnKhbl HaxOAnTbcB BBiceKkax (5) HOka Kocnkn.
Дяуджьаньнoga kocnkn(2)NcNoIb3OBA Tb NOxOJaUdIepeBHHb 6pycok (1).
HaheCTn Ha pe36by BnHTa HOxa (3) cpeDCBo Loctite 243.
3aTMyTb BnHT HOxa (3). MomeHT 3aTJKKN: 18-22HM
13.8 3aToUka Hoxa KocuJIK
B cnyae oTCyCTBn Heo6xOaMbIX 3HaHn INB CBNOMORAteNbHbIX CpeIcTB 3aTOcky HOka KocuKn CneJeT NOpyAtb CneuaNtcy (KOMnaHn VIKING peKoMeHdyet CneuaHn3npoBaHHbI ueHtp VIKING). HenpaBnBHO 3aToeHHb HOK KOcUKN
(He npabnblbnyyrol3aToQK,nc6baHc nT.)OTpuataJIbHO cKa3bIbAeTcHa pa6oTOCnOc6HOCTnuCTpoNCTBa.
PykoBODTBO no 3aToUKe
CHaTb HOx KocuKn. ( 13.7)
Bo Bpem 3aToQn CneIyE ToXlaJdaTb HOK KocNIK, HApPIMep, BODoI. HeIb3r DoNyCKaTb NOBLeHnCnHeBaTOrO UbetaT, TAK KAcB 3TOM Clyuae yMeHbShaetc DOJIROBeUHOCTb HOKa.
Bo n36ekaHne Bn6paunn 13-3a Dnc6baHaHaC HoK KocuKn CneNyET 3ataHbTa paBHomepHo.
- YrOJI 3aToUckn IOnJKeH COCTaBnIb 30°.
- YuHTbBaTb npedeJIbI u3Hoca ( 13.6)
13.9 XpaHHeHne (B 3mHn nepnoD)
XpaHeHne ra3oHOKocnkn:

BbHyTb 6IOKINPOBOUHbI WTeKepe n ChrTa bAkyMylTOp.
BnokpoBOOH WTeKep CneDyET XpaHNTb OTJeBHOOTraOHOKOCNI K BHe IpeJeIOB DOcRAeMOCTN NOCTOPOHNX JIu, B YactHOCTN, DTeN.
Ta3OHOKOCNIky CJIeIyET XpaHHTB CByXOM 3aKpbITOM HEnbIbHOM NOMEueHHN. Heo6xOIMO NCKJIOHTB BepoRTHOCTb NCNoJIb3OBAHNA yCTPOINCTBa IOCTOPOHHM JInCaMn (HaNPIMep, DeTBMN).
Ta30HOKOcNkCy CneJeYt yCTaHaBnBaTb
Ha xpaHeHHe ToIbKO B COCToHIN
TOTOBHOCTN K 3KcIIyatauN, PnN
HEo6xOIMMOCTn CIOXHTb BeDyUyo
pyKy.
CneyeT 3aTMyT Bce rain,60ntb INBnTbI DO ynopA,OBHOITb CTaBWeHepa36OpHbIMN ppeDynpKdeHnYkazHnO hmeoXxCraOnachoctax,npOBepNTb BCMO MaHNHy Ha OTCyTCTBNEu3HocaNOBpeKdEHH.3aMeHnTBn3HOweHHbIE NNI NOBpeKdeHHbIEDeTann.
Bo3MOxHbIe HncnpaBHOCTu yctpoiCTBa CneDyET yCtpaHHTb nepe,IyTaHOBKO ero Ha xpaHeHne.
PpeI dIITeIbHOM xpaHeHem ra3OHOKOcNIKIN (B nepNOd 3mMHeRo xpaHeHn) BblONHHTcNeDyUoee:
TtataeIbHO OuHCTnTB BCE HApyXHbIe. Yactn yctpoCTBa.
Bce DnKxuiecAeTaJIN xopoOo Cma3aTb.
XpahenHe aKkymyIaTOpHoi 6aTapei:
N3BNeKeNTe aKKyMnIaTOpHyIO 6aTaapeIO n3 OTcKa Ha ra3OHOKOCNIke NIN N3 3apdHoro yCTpoiCTBa IN NOMeCTnte Ha XpaHeHne B CyXoe, 3akpbItoe H HeblbHoe NOMEseHne. Heo6xoDIMO NCKIQUHTb BEPOrTHOCTb NCIOJIb3OBaHIn ee NOctOpOHmN IuCaAMN (HaNPIMep, DeTbM).
Pe3epBHe bIe aKkyMylTOpbI He doJxHbIOCToHHO xpaHnTbcra 6e3 dea, nepoOnuYeCKn Heo6xoDmIoN IXNCNoB30BaTb B pa6Ote.
Cpok cnjxkbbl akkymnyTOpOB 6yJeT MaKcImaJIbHbIM,ecIN INX xpaHNTb npIn TemnepaTypeOT +10^ Do +20^ n npIn CTeneHN 3apJKn OkOIO 30%
XpahenHe 3apAnHOro yctpoCTBa:
BbHtbcTeByIO Bnky n ChrTb aKymyIaTopHy6BaTapeo.
3apnHoe yctpOCTBO Heo6xOJIMO
XpaHTB CyxOM, 3aKpbTOM HEnbIbHOM
NomeeHN. Heo6xOJIMO NCKIOCHITb
DOCTyN K HEmy NOCTOpOHNX NlUc
(HanpImep, dTe).
14. TpaHcnpOpTnpoBka
14.1 Ipehenoc n 3akpenJIeHne ra3OHOKOcNIKn


Onachocb nonyueHnraTpaBm! CneNyet co6nOdaT npedncaHn noTexnke 6e3oNaChOCTn, yka3aHHbe B rnaBe «Texnka 6e3oNaChOCTn» ( 4.).

IpeepIIObIMpa6OtaMnCra3OHOKOJIKOJ
BbIHMaTb 6NOKINPOBOHbI WTeKeP (9.1).
Oco6eHNO TuaTeIbHorO
06paueHnna Ipn TpaHCnOpTnpOBKe
TpE6yOT NITNeBO-NOHhIe
akMyJrTOpbl ( 4.2)
Ipehenoc yctpoicBa:
BIOE M: UcpoCTBO CneDyeT npnOHaMaTb TOnbKO 3a nepeHIOI pyKy (1) n 3a BeNyUIO pyKy (3).NoIb3oBaTb BCeRda DOJKeH HaxOHTbcra Ha DOCTaTOHOM paCtOHHN OT HOKa KocnIKN,OCo6eHHO CneINb 3a NOLOXKeHHeM HOr n CTynHe.
B OdHOnyK:
PnnoBemnpeHoe yctpoNCTBa CneJeT 6paTbC8 OndHou pyKo3a ueHTpAibHyO uactb BepxHei TpaHCnOpTnpOBoUHOn pyKn (2), a BTOPOIpyKo-3a HIXHHIO TpaHCnOpTnpOBoUHpyKy (1).
KpenJIeHnE yCTpoNCTBa:
- UCTPOINCTBO Heo6xOIMMO 3akpeinTb Ha Norpy3ouHoi nlaTΦopMe C NOMOUIIO NOxOIAuNX CpeIcTB KpeIIeHn.
TpocblnnpeMHndoJNkHbI cnKcnpoBaTbcB nOmeeHHbx Tockax (4).
15.CBeDeHne K MUNHMMy m3HOca N IpeDoTbpaUeHne NOBpeXdeHn
BaxKbIe yka3aHn no TexHnueckomy 06cJyXnBaHnIO yxOdy dny cJeDyUoNx rpynn n3denn
Ta3oHokocnka,nepeMeuaemar BpyHyu npa6oTaOua OaKkymyTopa (MA)
KomnaHnVIKING He hecet HnkaKoI OTBeTCTBHeHcOtn 3a noJyHeHne TpaBM n HaHeceHne MaTePnAlbHO rUepe6a, KOtOpBle npOn3oUIn BCJeCDTBnE Heo6JIouDeHn IHCtpyKuIN IO 3KcNpyatauIN, B Oco6eHHocTN B OTHoWeHN 6e3oNaChOCtN, ynpaBLeHn I TexHnueCKOrO o6ClyXnBaHN, INN B pe3yNbTaTE NcNoJIb3OBAHn HEIOyUeHHbIX HaBeCHbIX y3IOB INN HeOpunHaJIbHbIX 3aAnacteN.
InpedeotbpaueHn BO3NHKHOBeHHNIOBpeXeHn nn Ype3MePHoro n3HoCaDeTaneBawero yctpoNCTBaVIKING6o3aTeNbHO co6blOdaIte cJeDyUOuHeBaXhBiyeKa3AHHn:
1.БыICTpon3HaUNBaIounuecKOMNHOHeHTbl
HekotopbIe Detajn ycTrooCTBa VIKING
daJke npn nCnoNb3OBAHN IN NO
Ha3NaueHNO NOBepraHO TcR
HopMaJIbHOMy N3HOCy, INx Heo6xoDmO
CBOEbpemEH0 3aMeHrTb B 3aBNCMOCtN
OT BNJa I npDoJXHTeNBHOCTN
3KcnnyatauIN.
K HIM OTHOCATCA:
-
HoXn
-TpaBoc6opHnK
-AkkymyTApOp -
Co6HIOeHne npEINscaHn daHHo HNCTpyKcH N O3KnJyatauHn
NcnoIb3OBAHne,Texnueckoe
obcnykubAHne n xpaheHne yctpoCTBa VIKINGdoJXhblocuyuceCTBnTbCraToH0
Tak,KaOKoNCaHO BdaHHoINHCTpyKcIMn NO
3KcnNyatauM.NoJIb3OBATeNb cam Hecet
OTBeTCTBeHHOCt 3a BCE NOBpeXJeHnna
yUep6,Bbl3BaHHbIE HecO6JIIODeHnEM
npedncahm no Texnke 6e3OnaCHOCTn,
yka3AHnNo npapBHeHNO yCTpoCTBOM n
Texnueckomy OcbnykubAHnIO.
3To, B nepByu OuepeBb, pacnpocTpaHnEeTaHa:
- HenpaBnBHOe NOKIOUeHne K 3NeKTpuuecko ceTu (HanpJKeHne).
-
N3MeHeHnB KOKHCTpyKUm N3DeJnA, He COrJIacOBaHHbIe C KOMNaHnei VIKING.
-ПиMuMeHHeNnCTpyMeHTOBnIN npHaJnxHoCTeK,KOtOpBie He DonyUeHbI INn HE nPiTuOdHbI INY yCTpOuCTBa,INN ABJIAOTc Hn3KOKaYeCTBeHHbIMN.
IcnoJb3ObaHHe H3dJIeNHe B COOTBETCTBnC Ha3HaYeHHeM. -
PpimmeHne n3eJnB O BpeM cOpTnBbIX MeponpTuN KOHKypcoB.
KocBeHHbIe y6bItkN B pe3yNbTaTe nocJeDyUoJero NcNoJb3OBaHnN 3dEINr C HeuCnpaBHyIMn DeTaNMy.
3. Pa6oTbI NO TEXHnueckomy 06cnyXnBaHHIO
Bce pa60tblnpueDeHHbE Bpa3dene «TexHnueeCKoe 06cnyXnBaHne》,doJXhbl BbINOHNrTbcpeyIaPHO.
EcIN 3TN pa6OblI NObl3OBaTeJIb He MOKeT Ipon3BOUInb CaMOCToRteJIbHO,TO Heo6xOIMo O6paTnTBcB CneuaHn3uPoBaHHbI ueHtp.
KomnaHnVIKING pekomehnyet BbIIOJIHrTb pa6Otbl NO Texo6cnyXINBaHIO n peMOHTy TOnbKO B cneuaIIIm3npoBaHHOM ueHTpe VIKING.
CneuHaN3npoBaHhbie cepBnchbIeHTpbVIKINGperyIpaHNopeJaRaOT KypcbI npEIOCTaBnaT TEXHueckyo HOpMaunio.
B cnyae yuepe6a n3-3a nobpekdeHn BCJIeCTBHe HeBbINONHeHHbIX pa60 T NO TEXHNueCKOMy o6cIyKbBAHIO OTBETCTBeHHOCTb Hecet Nl630BaTeNb.
K TAKIM NOBpeXDeHnM OTHOCATC:
-NoBpeKdHnnpuBoDHorO dBuraTeNBAeCTBHe HeKaueCTBeHHo OvNCTKN KaHaJa OxJaAioUe Ro3Dyxa (KaHaJa BCacbBaHna).
KoppoHnHbIe NoBpeXdEHHN I npYrNe nocIeDCTBn HnPaBnBHO xpaHeHn.
-Поврждени устюпства в pe3yЛьтATE пимеонин HekauectBeHHbIX 3anachbIX YACTe.
-Повржденя BCлeДCTВи нecBoeBpeMeHHocTиИ нedoctaTOUHOCTn TExHnueCKOrO обсчкваня,Ии pa6OT no TEXHnueCKOMy OбСчКuВaHиюи peMOHTy,КOTOpbIe npOn3BOdINICb HeyNoNHomOeHHbIMn CneuaJIInCTamN He B CneuaJIIn3UpOBaHHbIX MactepcknX.
16. OxpaHa okpyXaHoueien CpeIbI
CkOWeHHa TpaBa He OTHOCNTcK OTXoJaM, ee CJIeNyET NcNoB3OBaTb DnI nprirotobnHn KOMnoCTa.
UcTpoIcTBO, npHnHaIeNexHoCTN
KHeMy INx ynaKOBka n3rOToBLeHbI n3 MaTePnAIOB, npiroDhbIX nIy BTOpUHoro NCNoJIb3OBAHnI, I NOJIeXaT COOTBETCTByIOSeYtINN3aUN.
Pa3dneBnaYtJIN3aunO octaKOB MaTePnANoB,yIOBNeTbOpraUaJ 3KOJIOnueckm Tpe6oBaHnM, CnOCo6CTByET BO3MOXHOCTN MHOrOKpaTHORO pImMeHENMaTePnANoB. ITOI npuHHe nocne HCTeHEnrO o6bHoro cpoKa cnKy6bl yCToIcTB0 CneJyET OTnpabnTa Ha nyHKrYTJIN3aun. PnYtJIN3aun CneJyET co6KnDaTb daHHbE B rnaBe «YtJIN3aun» ( 4.10)
O6paaTecb B BaW nyHKT npHema yTNbcbipBnN B CNEuaJIN3npoBaHHbI ueHTp, yTObblNoJyUHTb INHfOpMauIO O npabNbHOyTNIN3aunOTXoOB.

Li-Ion
Takne OTxOdbi, kak
aKkMyJyTOpHbIe 6aTapeu,
cJeNyET yTuNl3nUpoBaTb
HaJIeXaUm o6pa3OM.
Co6JIIODaTb MeCThBle
npedncaHn. He BbipacbBaTe
6aTape n C 6bITOBIM Mycopom, a
cDaBaTe nx IINBO B
CneuNaIIm3NPOBaHnBHyI CEHTp, IINBO Ha
nyHK T c6opa BpeDHBIX BeIeCTB
KOMMyHaJIbHOro XO3raICTBa.
06paTntecb B BaW nyHKT npnema
yTNbcbipbI INB CNEuaJIN3npoBaHHbI
UeHTp, yTObbl NOpYuNTb INHfOpMaIIO O
InpaBnIbHOy Tynl3aunm OTxOIOB.
ΦnpMa VIKING peKomeHdyET
cneuaJIN3npoBaHHbI ceHTp VIKING.
17. CtaHndapThbIe 3aunactn
Hox KocnIkn:
63387020111
BnHT HOXA:
63107602800

BnHT HOKa Heo6xOJIMO 3aMeHrTb npKaKdo3aMeHeHOka.
3anachbIye yactn MOxHo npno6pctn B CneuaJIuN3npoBaHHOM ceHTpe VIKING.
AkkymyIATOP STIH:
HOpMaIgIa3a3aIMeTcB CnEuaIIN3NPOBaHOM cHTpe VIKING.
18.Декларачи
N3ROTOBUTENAO
COOTBETCTBHN IINPEKTKUBAEMC
Mbl,
VIKING GmbH
COOTBeTCTByIOT CNeIyUOuIM MInpeKtNBAM Ebponeckoro Coo6uectBa (EC):
2000/14/EC, 2014/30/EU, 2006/42/EC, 2006/66/EC, 2014/35/EU, 2011/65/EU
I3dJIIN6bIINpa3pa6oTaHbB COOTBETCTBnCO CJeDyUOuMM CTaHApTAMM:
EN 60335-1, EN 60335-2-29, EN 60335-2-77
Примений метол оцени COOTBETCTBNAДИРЕKTINВAM:
ПиJOJOKeHnE VIII (2000/14/EC)
Ha3BaHne n aDpec npnHmAbweyuactne HCTaHcN:
PykoBODIteJIb KOHCTpyKTopCKOrO OTeJa
YcTaHOBJIeHHbI cpoK cIyX6bl
IOnHbI yCTaHOBHeHHbI cPOK CnyK6bl -do 20 neT. YcTAHOBHeHHbI cPOK CnyK6bl npeDnOraeT COOTBeTCTByIOUne I CBOEbpemHHbe 6CbNyKBaHne uYxOJ corNaCHO pyKOBoIDCTBy no EKnNpyTaUIN.
19. TexHHueckne daHHbIe
AkkymyraTop
NITNEBO- TnIOHHbI
UcpoIcBO MoKet pa6oTaB ot
aKKymyIaTOPOB STIH L TnA AP.
INHOpMaUNO BVPeMeHN pa6oTbI
ycToPcTBa N BPeMeHN 3apJKn
npuBeHeHa B «PpInNoXeHN nIra
aKKymyIaTOpa> N «INCTpyKUnn no
3KcNPyataun 3apJdHO rO yCToPcTBa>.
3apAHyIe yCTpoiCTBa AL 100,AL 101, AL 300,AL 500
MA 443.1, MA 443.1 C
CepnHbH Homep 6338
PexyuiMexaHn3M HOKeBa
山npuHa pe3a 41cm
CkopoocbBpaueHnpejUeeroMexaHn3Ma 3000o6/MnH
PnBOD HOKeBOI TpaBepcbI NOCTOHN.
Momet 3aT8Kn BHTa HOKa 10-15HM
BbocTa cKaunBaHn 25-75 MM TpaBocOpHnK 55J
YpOBeHb 3ByKa Ha pa6ooyem MeCTe LpA 80 dB(A)
MA 443.1, MA 443.1 C
IorpeuHocb KpA 2dB(A)
MA 443.1
Динан 138cm
山nHa 49cm
Bbicota 107 cm
Bec (6e3 akkymyTopa) 18 Kr
Bn6paun, npepaB. Na knctn/pykn:
3aHaHHoe 3NaueHne Bn6paun COIaCHO EN 12096:
3amepeHHoe
3NaueHne ahw 1,70 m/c²
IorpeuHoctb Khw 0,85 M/c2
3aMep cornacho EN 20643
MA 443.1 C
138cm
山nHa 49cm
BbICota 108cm
Bec (6e3
aKymyTopa) 20 K
Bn6paun, npepaB. Ha KnCTn/pyKn:
3aHaHHe 3NaYeHne Bn6paun cornaCHO EN 12096:
3amepeHHoe 1,30 M/c²
3haeHne ahw
IorpeuHoctb Khw 0,65 M/c2
3aMep cornacno EN 20643
TpaHcnpTnpoBka aKKymyIaTOPOB STIHL:
AkkymyITopb STIH yDObNETBOPaHT yCIOBnM, npBeDeHHbIM B pyKOBoIDCTBE ST/SG/AC.10/11/BvN.5 YaCTb III, noDa3dE 38.3.
PnDopoxhbxnepeB03kax
NoIb3oBaTeNb MoKeT TpaHcnpTuPoBaTb
aKMyJrTopb1 STIH K MeCTy pa6Otbl
ycTpOuCTBa 6e3 KaKx-Ni6o
doONHHTeNbHbIX OrpaHnHeHn.
PnnepeBo3Kax ABNaUOnHbIM NINMOPCKIM TpaHCnopTOM Heo6XoDIMOco6JIOaTb PpeDNncAHnX, xapaKTePbIeDnCOOTBeCTByOuSei CTpaHbl.
AkkymyIaTOPHa 6aTapeH He 3apXaETc, CBeToIOIObI He CBETATC
Bo3mOxHna npuHa:
- Het 3JIeKTPnueckoro KOHTaKaTa MeJxNy 3apAHybIM yCTpoiCTBOM n aKMyIyTOpHoi 6atapee
-HapyeHo 3neKtpoNTaHne 3apAHOro yCTpoCTBa
YcTaPaHeHne:
-ДocTaHbTeakKMyIaTOpHyIO6BaTapeIO n3OTcKaДЯakKMyIaTOpaNCHOBA yCTaHOBInTe eeHaMeTo ( 8.3)
- PoiKJIIOUHTe 3apAIDHOe yCTPOINCTBO K cETn ( 8.2)
- PpOBePbTe HnApJxKeHne B CetN
- PpOBePbTe 3aPAnHoe yCTpoNcTBo, npn Heo6XoDmOCTn 3aMeHnTe (x)
HeunpaBHOCTb:
CBeToIOIO Ha 3apAHHOM yCTpoICTBE MIRaET KpaCHbIM UBeTOM
Bo3MoXHa npuHa:
- Het 3neKtpnueckoro KOHTaKaTa MeKdny 3apAHybIM yCTpoiCTBOM n aKKyMnTOpHoi 6atapee
AkkymyItopHa 6aTapeHHeNCnpabHa (4 CBeToDnOda Ha Hei MuraHT B TeueHne npImepHo 5 cekyHk pachbIM LBeTOM)
-3apnHoe yctpoCTBO HeCnpaBHO
YcTaPaHHe:
-ДocTaHbTeakKymyIaTOpHyo6batapeHo 3OTcKaДЯakKymyIaTOpu n CHOba yCTaHOBInTe ee Ha MeTo ( 8.3)
- PpOBepeTaeakKymyIaTOpHyIO6aTaapeo, npHHeo6xoDmOcTN3aMeHnTe (x)
- PpOBePbTe 3apAHyoe yCTpoIcTBo, npHne06XoDmOCTn 3aMeHInTe (x)