
AD 5032 - Iron ADLER - Free user manual and instructions
Find the device manual for free AD 5032 ADLER in PDF.
| Product type | Iron |
| Brand | Adler |
| Model | AD 5032 |
| Power supply | 220-240 V ~ 50/60 Hz |
| Rated power | 2400 W |
| Max power | 3000 W |
| Soleplate | Ceramic coated |
| Water tank | With MAX indication, filling through opening |
| Ironing functions | Dry ironing, steam, spray, vertical steam, burst steam function, self-cleaning |
| Temperature adjustment | Thermostat with positions for synthetic, silk/wool, cotton/linen, MAX |
| Anti-drip system | Yes, prevents water leakage at low temperature |
| Anti-scale system | Yes, integrated permanent filter |
| Automatic shut-off | Yes, after 30 s in horizontal position, 8 min in vertical |
| Indicator lights | Power indicator (always on) and heating indicator (turns off when at temperature) |
| Power cord | With rotating cable gland |
| Care and cleaning | Wipe soleplate with damp cloth; monthly self-cleaning recommended; empty tank after use |
| Safety | Automatic shut-off, overheat protection, do not immerse in water, use on stable surface |
| Repairability | Any repair must be carried out by an approved service center |
| Environmental information | Do not dispose of with household waste, drop off at collection point |
| Intended use | Household use only |
Frequently Asked Questions - AD 5032 ADLER
User questions about AD 5032 ADLER
0 question about this device. Answer the ones you know or ask your own.
Ask a new question about this device
Download the instructions for your Iron in PDF format for free! Find your manual AD 5032 - ADLER and take your electronic device back in hand. On this page are published all the documents necessary for the use of your device. AD 5032 by ADLER.
USER MANUAL AD 5032 ADLER
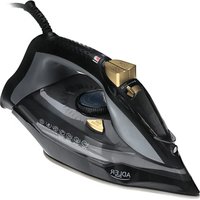
natural_image
ADLER electric iron with blue and black casing, no visible text or symbols on bodyAD 5032
(GB) user manual - 3
ENGLISH
SAFETY CONDITIONS. IMPORTANT INSTRUCTIONS ON SAFETY OF USE PLEASE READ CAREFULLY AND KEEP FOR FUTURE REFERENCE
The warranty conditions are different, if the device is used for commercial purpose.
- Before using the product please read carefully and always comply with the following instructions. The manufacturer is not responsible for any damages due to any misuse.
- The product is only to be used indoors. Do not use the product for any purpose that is not compatible with its application.
- The appliacable voltage is 220-240V, \~50/60Hz. For safety reasons it is not appropriate to connect multiple devices to one power outlet.
- Please be cautious when using around children. Do not let the children to play with the product. Do not let children or people who do not know the device to use it without supervision.
- WARNING: This device may be used by children over 8 years of age and persons with reduced physical, sensory or mental capabilities, or persons without experience or knowledge of the device, only under the supervision of a person responsible for their safety, or if they were instructed on the safe use of the device and are aware of the dangers associated with its operation. Children should not play with the device. Cleaning and maintenance of the device should not be carried out by children, unless they are over 8 years of age and these activities are carried out under supervision.
- After you are finished using the product always remember to gently remove the plug from the power outlet holding the outlet with your hand. Never pull the power cable!!!
- Never leave the product connected to the power source without supervision. Even when use is interrupted for a short time, turn it off from the network, unplug the power.
- Never put the power cable, the plug or the whole device into the water. Never expose the product to the atmospheric conditions such as direct sun light or rain, etc.. Never use the product in humid conditions.
- Periodically check the power cable condition. If the power cable is damaged the product should be turned to a professional service location to be replaced in order to avoid hazardous situations.
- Never use the product with a damaged power cable or if it was dropped or damaged in any other way or if it does not work properly. Do not try to repair the defected product yourself because it can lead to electric shock. Always turn the damaged device to a professional service location in order to repair it. All the repairs can be done only by authorized service professionals. The repair that was done incorrectly can cause hazardous situations for the user.
- Never put the product on or close to the hot or warm surfaces or the kitchen appliances like the electric oven or gas burner.
- Never use the product close to combustibles.
- Do not let cord hang over edge of counter.
- Do not immerse the motor unit in water..
- In order to provide additional protection, it is recommended to install residue current device (RCD) in the power circuit, with residual current rating not more than 30 mA. Contact professional electrician in this matter.
- If it is necessary to use an extension cord, use only with the grounding terminal and adapted to a current minimum of 10 A. The other ("weak") extension cords can overheat. The cable should be arranged to avoid accidental strokes or stumbles over it.
- Always, before filling with water or when the steam iron is not used, unplug it from the mains.
- Touching a hot soleplate, contact with hot steam or water may cause burns. Be careful
when you rotate the iron, as in the tank, even when disconnected from the power supply iron, may still be in hot water.
- DO NOT allow for prolonged contact hot steam iron with fabric or flammable materials.
- Be careful that the power cord does not touch the hot soleplate. Allow the iron to cool completely before storage.
- If you do not use iron, even for a short time, turn off the options of steam
- Under no circumstances should be ironed clothes and fabrics that are on humans or animals.
- Never direct the steam to humans or pets.
- Use self-cleaning function at least once a month.
- Iron must be used at a stable even surface and this can only be disposed of.
- Do not fill the water tank with chemicals, perfumes or descaling substance.
- Do not fill the water tank over MAX level.
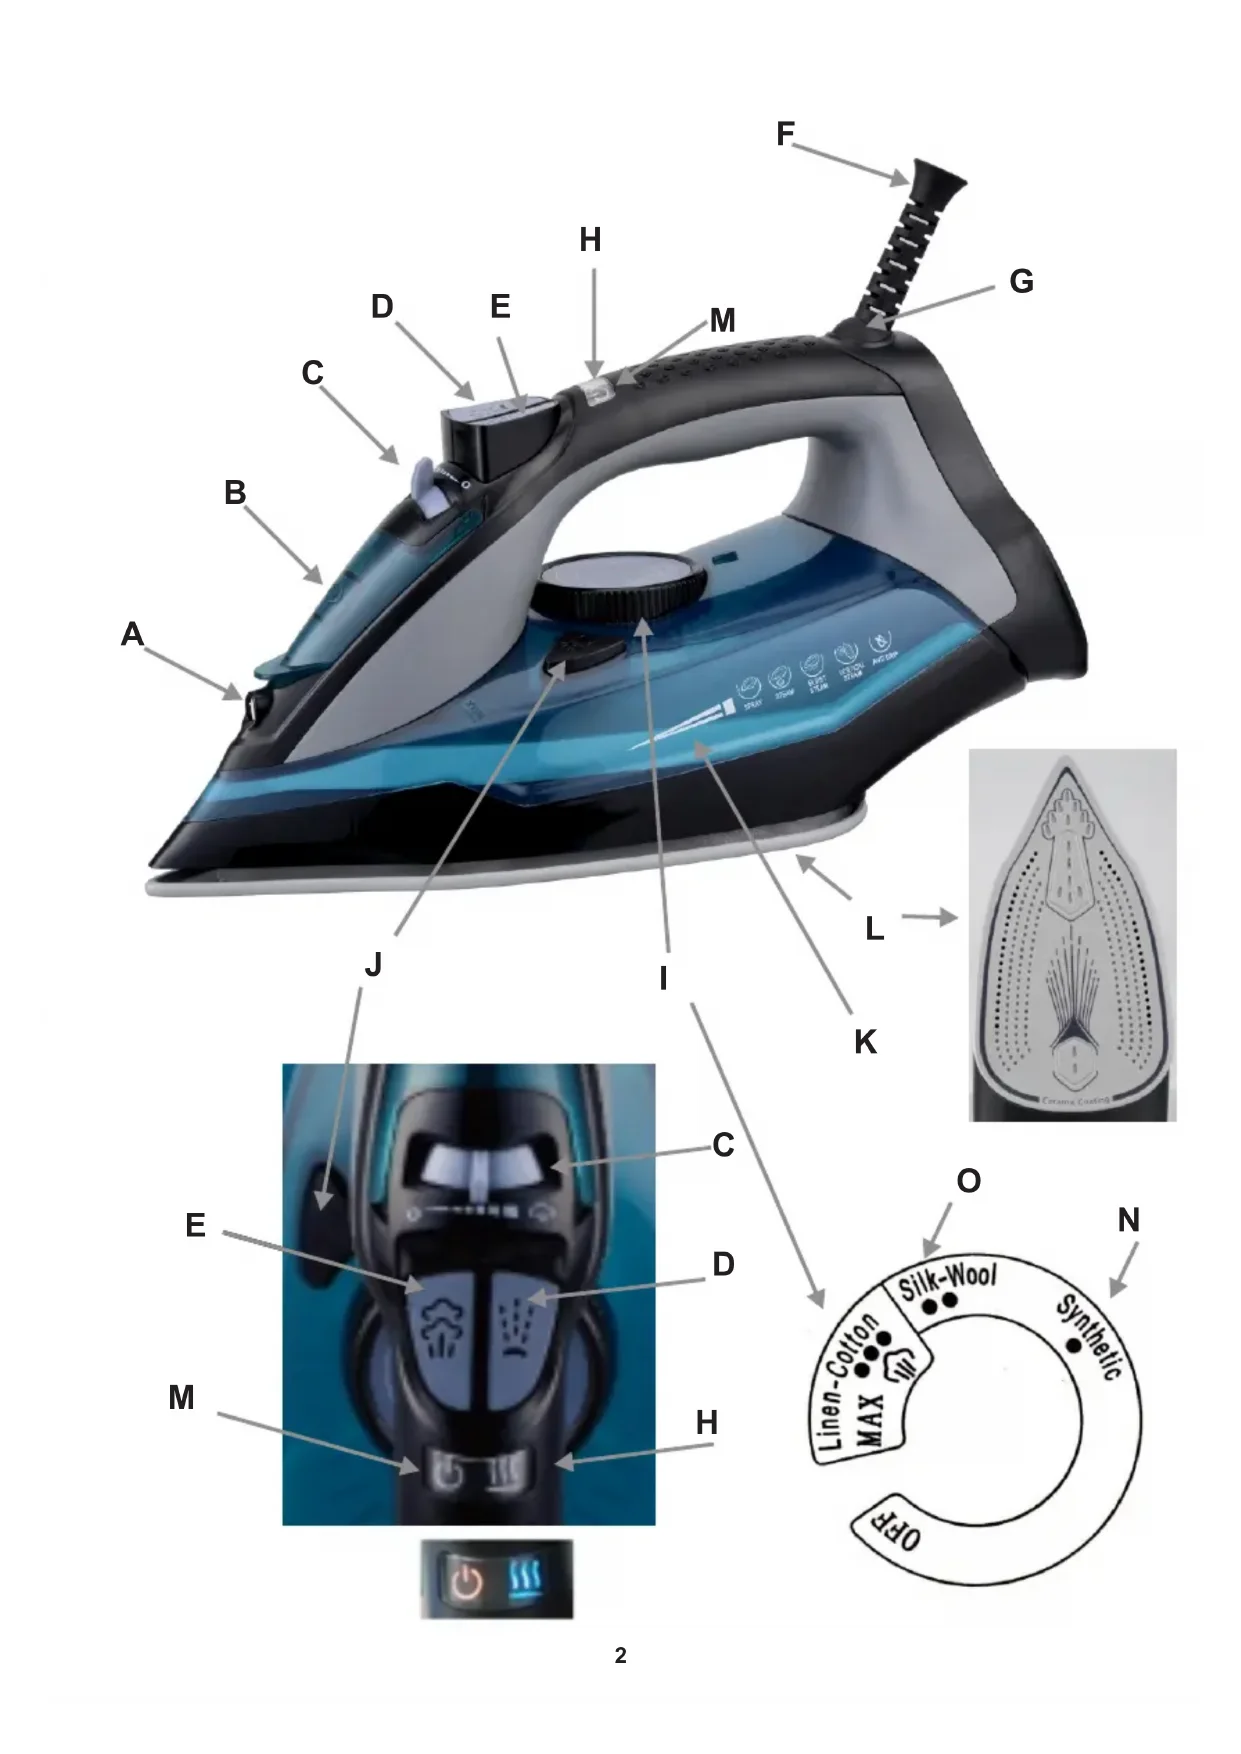
DESCRIPTION OF DEVICE
A. Spray nozzle B. The water inlet hole
C. Steam control switch D. Spray button
E. Steam burst button F. Power Cord
G. Rotary cable gland H. Heating / Thermostat indicator light
I. Temperature control knob - thermostat J. Self-clean button
K. Water tank L. Ceramic coated soleplate
M. Power indicator light N. Synthetic fabric – one drop
O. Silk – Wool fabric – two drops
INDICATOR LIGHT:
Plug in the iron, the power indicator light (M) turns on (always), when the thermostat works, the heating indicator light (H) turns on, once the thermostat off work, the heating indicator light (H) turns off.
FILLING WITH WATER:
- Set the steam control (C) to "0" (= no steam).
- Open the water filling cover and turn the iron at a 45^ angle to a flat, dry surface.
- Fill the water tank with water to "MAX".
- Push the water filling cover to close it.
PREPARATION:
Sort the laundry to be ironed according to the international symbols on the garment label, or if this is missing, according to the type of fabric.
| GARMENTLABEL | FABRICTYPE | THERMOSTATREGULATION |
| synthetic | low temperature | |
| silk - wool | medium temperature | |
| Cotton - linen | high temperature | |
| Fabric not to be ironed | ||
Caution: If the fabric consists of various kinds of fibers, always select the lowest ironing temperature of the composition of those fibers. Start ironing the garments requiring a low temperature. This reduces the waiting times (the iron takes less time to heat up than to cool down) and eliminates the risk of scorching the fabric.
FIRST USE
When using the iron for the first time, you may notice a slight emission of smoke and hear some sounds made by the expanding plastics. This is quite normal and it stops after a short time. We also recommend passing the iron over an ordinary cloth when using it for the first time.
DRY IRONING (without steam) FUNCTION
- Connect the power cord of the appliance to the wall outlet.
- Turn the temperature control knob (I) to the desired temperature depending on the type of fabric you want to iron. Make sure
that the steam control switch (C) is in the "0" position.
- When the iron reaches the required temperature, the heating indicator light (H) will turn off.
- After use, turn the temperature control knob (I) to the "OFF" position.
- Remove the plug from the wall socket.
SPRAYING FUNCTION
- Fill the water tank with water as described in "Filling with water".
- Press water spray button (D).
- Note: No matter what steam ironing of dry ironing is, spray will always be available in any case.
STEAM IRONING FUNCTION
- Fill the water tank with water as described in "Filling with water".
- Plug in. The power/heating indicator lights (M / H) will turn on.
- Turn the temperature control knob (I) clockwise to the "MAX" position. Do not turn the switch to "N" or "O" for steam ironing.
- When the iron reaches the required temperature, the heating indicator light (H) will turn off.
- Adjust the steaming by moving the steam control switch (C).
- After use, turn the temperature control knob (I) to the "OFF" position.
- Remove the plug from the wall socket.
- After each use, make sure that the water tank is empty.
Caution: Do not steam ironing synthetic fabrics, nylon, synthetic silk or silk fabrics. Steam can ruin the texture of the fabric.
BURST OF STEAM FUNCTION
This function will be able to provide more steam to remove stubborn creases.
- Set the temperature control knob (I) to MAX until the indicator light (H) goes off.
- Release the steam by pressing the steam button (E).
- Wait for several minutes and let the steam penetrate through the fabric, and then release more steam through pressing this button again.
Note:
- There should be 3-5 seconds rest between two times of pressing Steam burst button (E) in order to obtain the best steaming result.
- Fill the water to the MAX position before using this function.
- In order to prevent the water leaking from soleplate, please do not press the steam burst button (E) continuously with more than 5 seconds.
VERTICAL STEAM IRONING FUNCTION
The vertical steam ironing system allows you to use the iron for vertical ironing. This is especially useful for getting wrinkles out of hanging clothes, curtains.
- Fill the water tank with water as described in "Filling with water".
- Plug in. The power/heating indicator lights (M/H) will turn on.
- Turn the temperature control knob (I) to the "MAX" position. Do not turn the switch to "N" or "O" for steam ironing.
- When the iron reaches the required temperature, the heating indicator light (H) will turn off.
- Adjust the steaming by moving the steam control switch (C).
- Hang the garment on a clothes' hanger and pull the garment tight with one hand.
- Hold the iron in vertical position with the other hand and press the steam burst button (E) to iron the garment. Touch the garment lightly with the soleplate of the iron to remove creases.
- After use, turn the temperature control knob (I) switch to the "OFF" position.
- Remove the plug from the wall socket.
- After each use, make sure that the water tank is empty.
- Caution: Do not use steam ironing on clothes or fabrics that are wearing people or animals. The temperature is too high.
SELF-CLEANING SYSTEM
Note: Before you start the self-cleaning procedure, make sure the iron is not plugged in and the steam control (C) is in the "0" position.
- Fill the water tank with water up to "MAX". Do not use vinegar or other descaling liquids in the water tank.
- Plug in and turn the temperature control knob (I) to the "MAX" position. The power / heating indicator lights (M/H) will turn on.
- When the heating indicator light (H) turns off, unplug.
- Hold the iron in a horizontal position above the sink. Press and hold the Self-Clean button (J).
- Steam and boiling water will start to come out of the iron plate holes, which contain salts and minerals that have been accumulated in the steam chamber from previous uses.
- Gently move the iron back and forth until the water tank is empty.
Caution: The water that comes out during self-cleaning is very hot. Be very careful not to fall on you. - When the water tank is empty, release the self-clean button.
- Allow the iron to cool down completely.
- Wipe the soleplate with a cold damp cloth.
ANTI-CALC SYSTEM
A special filter inside the water tank softens the water and prevents scale build-up in the soleplate. The filter is permanent and does not
need replacing.
- Use tap water only.
- Distilled and demineralized water makes the anti-calc system ineffective by altering its physicochemical characteristics.
ANTI-DRIP SYSTEM
This iron is equipped with drip stop function: the iron automatically stops steaming when the temperature is too low to prevent water from dripping out of the soleplate.
With the anti-dripping system, you can perfectly iron even the most delicate fabrics.
AUTO SHUT-OFF SYSTEM
- An electronic safety device will automatically switch the heating element off if the iron has not been moved more than 30 seconds in a horizontal position. If in a vertical position, this will happen after 8 minutes.
To indicate that the heating element has been switch off, the heating indicator light (H) will turn off, and the power indicator light (M) will start blinking, and with alarm 6 times.
- When picking up the iron again, the power indicator light (M) and the heating indicator light (H) will turn on. This indicates that the iron is heating up again. Wait for the heating indicator light (H) to turn off. Then the iron is ready for use.
AFTER IRONING:
To extend the working life of the iron, whenever you finish ironing, you are recommended to empty the reservoir as follows:
Unplug from the mains socket. Empty the iron by opening water tank cover and holding it with the tip pointing downwards. Shake it lightly above a sink then close the cover. To dry the remaining moisture, turn the iron on again with the thermostat control knob (I) in the MAX position with steam control switch (C) in MAX position until Power indicator light (M) goes off. Unplug from the mains socket and allow to cool down. Clean the soleplate with a dry cloth as traces of moisture could mark it.
CLEANING AND MAINTENANCE
Before cleaning, remove the plug from the socket and allow the iron to cool down sufficiently.
- Wipe off the soleplate with a damp cloth and a non-abrasive (liquid) cleaner.
- If the fiber is adhered to the soleplate, use a damp cloth with vinegar to wipe off the soleplate.
- Never use strong acid or alkali in order to avoid damaging the soleplate.
TECHNICAL DATA:
Voltage: 220-240V \~50/60Hz
Power Nom.: 2400W
Power Max: 3000W
To protect your environment: please separate carton boxes and plastic bags and dispose them in corresponding waste bins. Used appliance should be delivered to the dedicated collecting points due to hazarsous components, which may effect the environment. Do not dispose this appliance in the common waste bin.
DEUTSCH
BESCHRIJVING VAN HET APPARAAT
A. Spuitmondstuk
natural_image
White portable water heater with a small lid and three buttons (no visible text or symbols)Electric Kettle AD 08
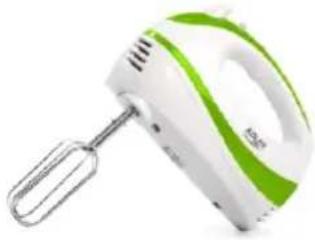
natural_image
White and green electric mixer with handle, no visible text or symbolsMixer AD 4205
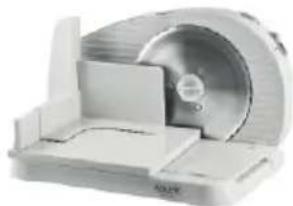
natural_image
Exterior view of a modern office building (no signage)Food Slicer AD 4701
natural_image
Glass water heater with blue liquid inside, no visible text or symbols on the bodyWater Kettle AD 1247 NEW
natural_image
Red hair dryer with white head and black handle (no visible text or symbols)Hair Dryer AD 2220
natural_image
Exterior view of a handheld vacuum cleaner with black handle and yellow component (no text or symbols visible)Bagless Vacuum AD 7036
Coffee Grinder
AD 443

Nose Trimmer
AD 2911
Precision scale AD 3162
Beard Trimmer
AD 2922
natural_image
Close-up of a black and white hairbrush with a black clip, no visible text or symbolsPet Hair Clipper AD 2828
natural_image
Close-up of a pair of hair curlers with black and orange bands (no text or symbols visible)Hair Straightener AD 2318
natural_image
White portable air conditioner unit with ventilation grilles and control panel (no visible text or labels)Air Cooler AD 7913
natural_image
White blender with clear glass body and control knob (no visible text or symbols)Blender AD 4067

natural_image
Black hair dryer with brand logo (no visible text or symbols on body)Hair Dryer AD 2251
natural_image
Circular metallic object with a ring and a small protruding knob (no text or symbols visible)Led Bathroom Mirror AD 2168
- AD 5032
- ENGLISH
- SAFETY CONDITIONS. IMPORTANT INSTRUCTIONS ON SAFETY OF USE PLEASE READ CAREFULLY AND KEEP FOR FUTURE REFERENCE
- DESCRIPTION OF DEVICE
- INDICATOR LIGHT:
- FILLING WITH WATER:
- PREPARATION:
- FIRST USE
- DRY IRONING (without steam) FUNCTION
- SPRAYING FUNCTION
- STEAM IRONING FUNCTION
- BURST OF STEAM FUNCTION
- VERTICAL STEAM IRONING FUNCTION
- SELF-CLEANING SYSTEM
- ANTI-CALC SYSTEM
- ANTI-DRIP SYSTEM
- AUTO SHUT-OFF SYSTEM
- AFTER IRONING:
- CLEANING AND MAINTENANCE
- DEUTSCH
- BESCHRIJVING VAN HET APPARAAT
Brand : ADLER
Model : AD 5032
Category : Iron