
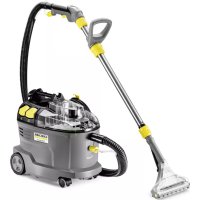
SC 2 EasyFix Premium Plus - Steam cleaner Kärcher - Free user manual and instructions
Find the device manual for free SC 2 EasyFix Premium Plus Kärcher in PDF.
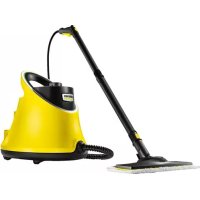



| Product type | Steam cleaner |
| Brand | Kärcher |
| Model | SC 2 EasyFix Premium Plus |
| Dimensions (L × W × H) | 380 × 254 × 260 mm |
| Weight (without accessories) | 3.1 kg |
| Power supply | 220-240 V, 50-60 Hz, 1500 W |
| Protection type | IPX4 |
| Protection class | I |
| Maximum operating pressure | 0.32 MPa |
| Heating time | 6.5 minutes |
| Continuous steam flow rate | 40 g/min |
| Maximum steam burst | 100 g/min |
| Boiler capacity | 1.0 L |
| Recommended water type | Distilled water or tap water |
| Main functions | Steam cleaning, adjustable flow with child safety lock, automatic heating shut-off |
| Included accessories | Floor nozzle, hand nozzle, round brush (small and large), Power nozzle, pencil jet nozzle, extension tubes, microfiber cloths |
| Safety | Pressure regulator, safety lock, safety thermostat |
| Maintenance | Descaling recommended after a certain number of fills depending on water hardness |
| Warranty | According to distributor conditions, material or manufacturing defects covered |
| Intended use | For steam cleaning in households, without detergent |
Frequently Asked Questions - SC 2 EasyFix Premium Plus Kärcher
User questions about SC 2 EasyFix Premium Plus Kärcher
0 question about this device. Answer the ones you know or ask your own.
Ask a new question about this device
Download the instructions for your Steam cleaner in PDF format for free! Find your manual SC 2 EasyFix Premium Plus - Kärcher and take your electronic device back in hand. On this page are published all the documents necessary for the use of your device. SC 2 EasyFix Premium Plus by Kärcher.
USER MANUAL SC 2 EasyFix Premium Plus Kärcher
Environmental protection 9
Accessories and spare parts 10
Scope of delivery 10
Warranty. 10
Safety devices 10
Description of the unit 10
Installation 10
Operation 11
Important application instructions. 11
How to use the Accessories. 12
Care and service 13
Troubleshooting guide 13
Technical data 13
General notes

Read these original operating instructions and the enclosed safety instructions before using the device for the first
time. Act in accordance with them.
Keep both books for future reference or for future owners.
Intended use
Only use the appliance in private households. The appliance is intended for cleaning with steam and can be used with appropriate accessories as described in these operating instructions. Detergents are not required. Observe the safety instructions.
Environmental protection

The packing materials can be recycled. Please dispose of packaging in accordance with the environmental regulations.

Electrical and electronic appliances contain valuable, recyclable materials and often components such as batteries, rechargeable batteries or oil, which - if handled or disposed of incorrectly - can
pose a potential threat to human health and the environment. However, these components are required for the correct operation of the appliance. Appliances marked by this symbol are not allowed to be disposed of together with the household rubbish.
Notes on the content materials (REACH)
Current information on content materials can be found at: www.kaercher.com/REACH
Accessories and spare parts
Only use original accessories and original spare parts. They ensure that the appliance will run fault-free and safely.
Information on accessories and spare parts can be found at www.kaercher.com.
Scope of delivery
The scope of delivery for the appliance is shown on the packaging. Check the contents for completeness when unpacking. If any accessories are missing or in the event of any shipping damage, please notify your dealer.
Warranty
The warranty conditions issued by our relevant sales company apply in all countries. We shall remedy possible malfunctions on your appliance within the warranty period free of cost, provided that a material or manufacturing defect is the cause. In a warranty case, please contact your dealer (with the purchase receipt) or the next authorised customer service site. (See overleaf for the address)
Safety devices
CAUTION
Missing or modified safety devices
Safety devices are provided for your own protection.
Never modify or bypass safety devices.
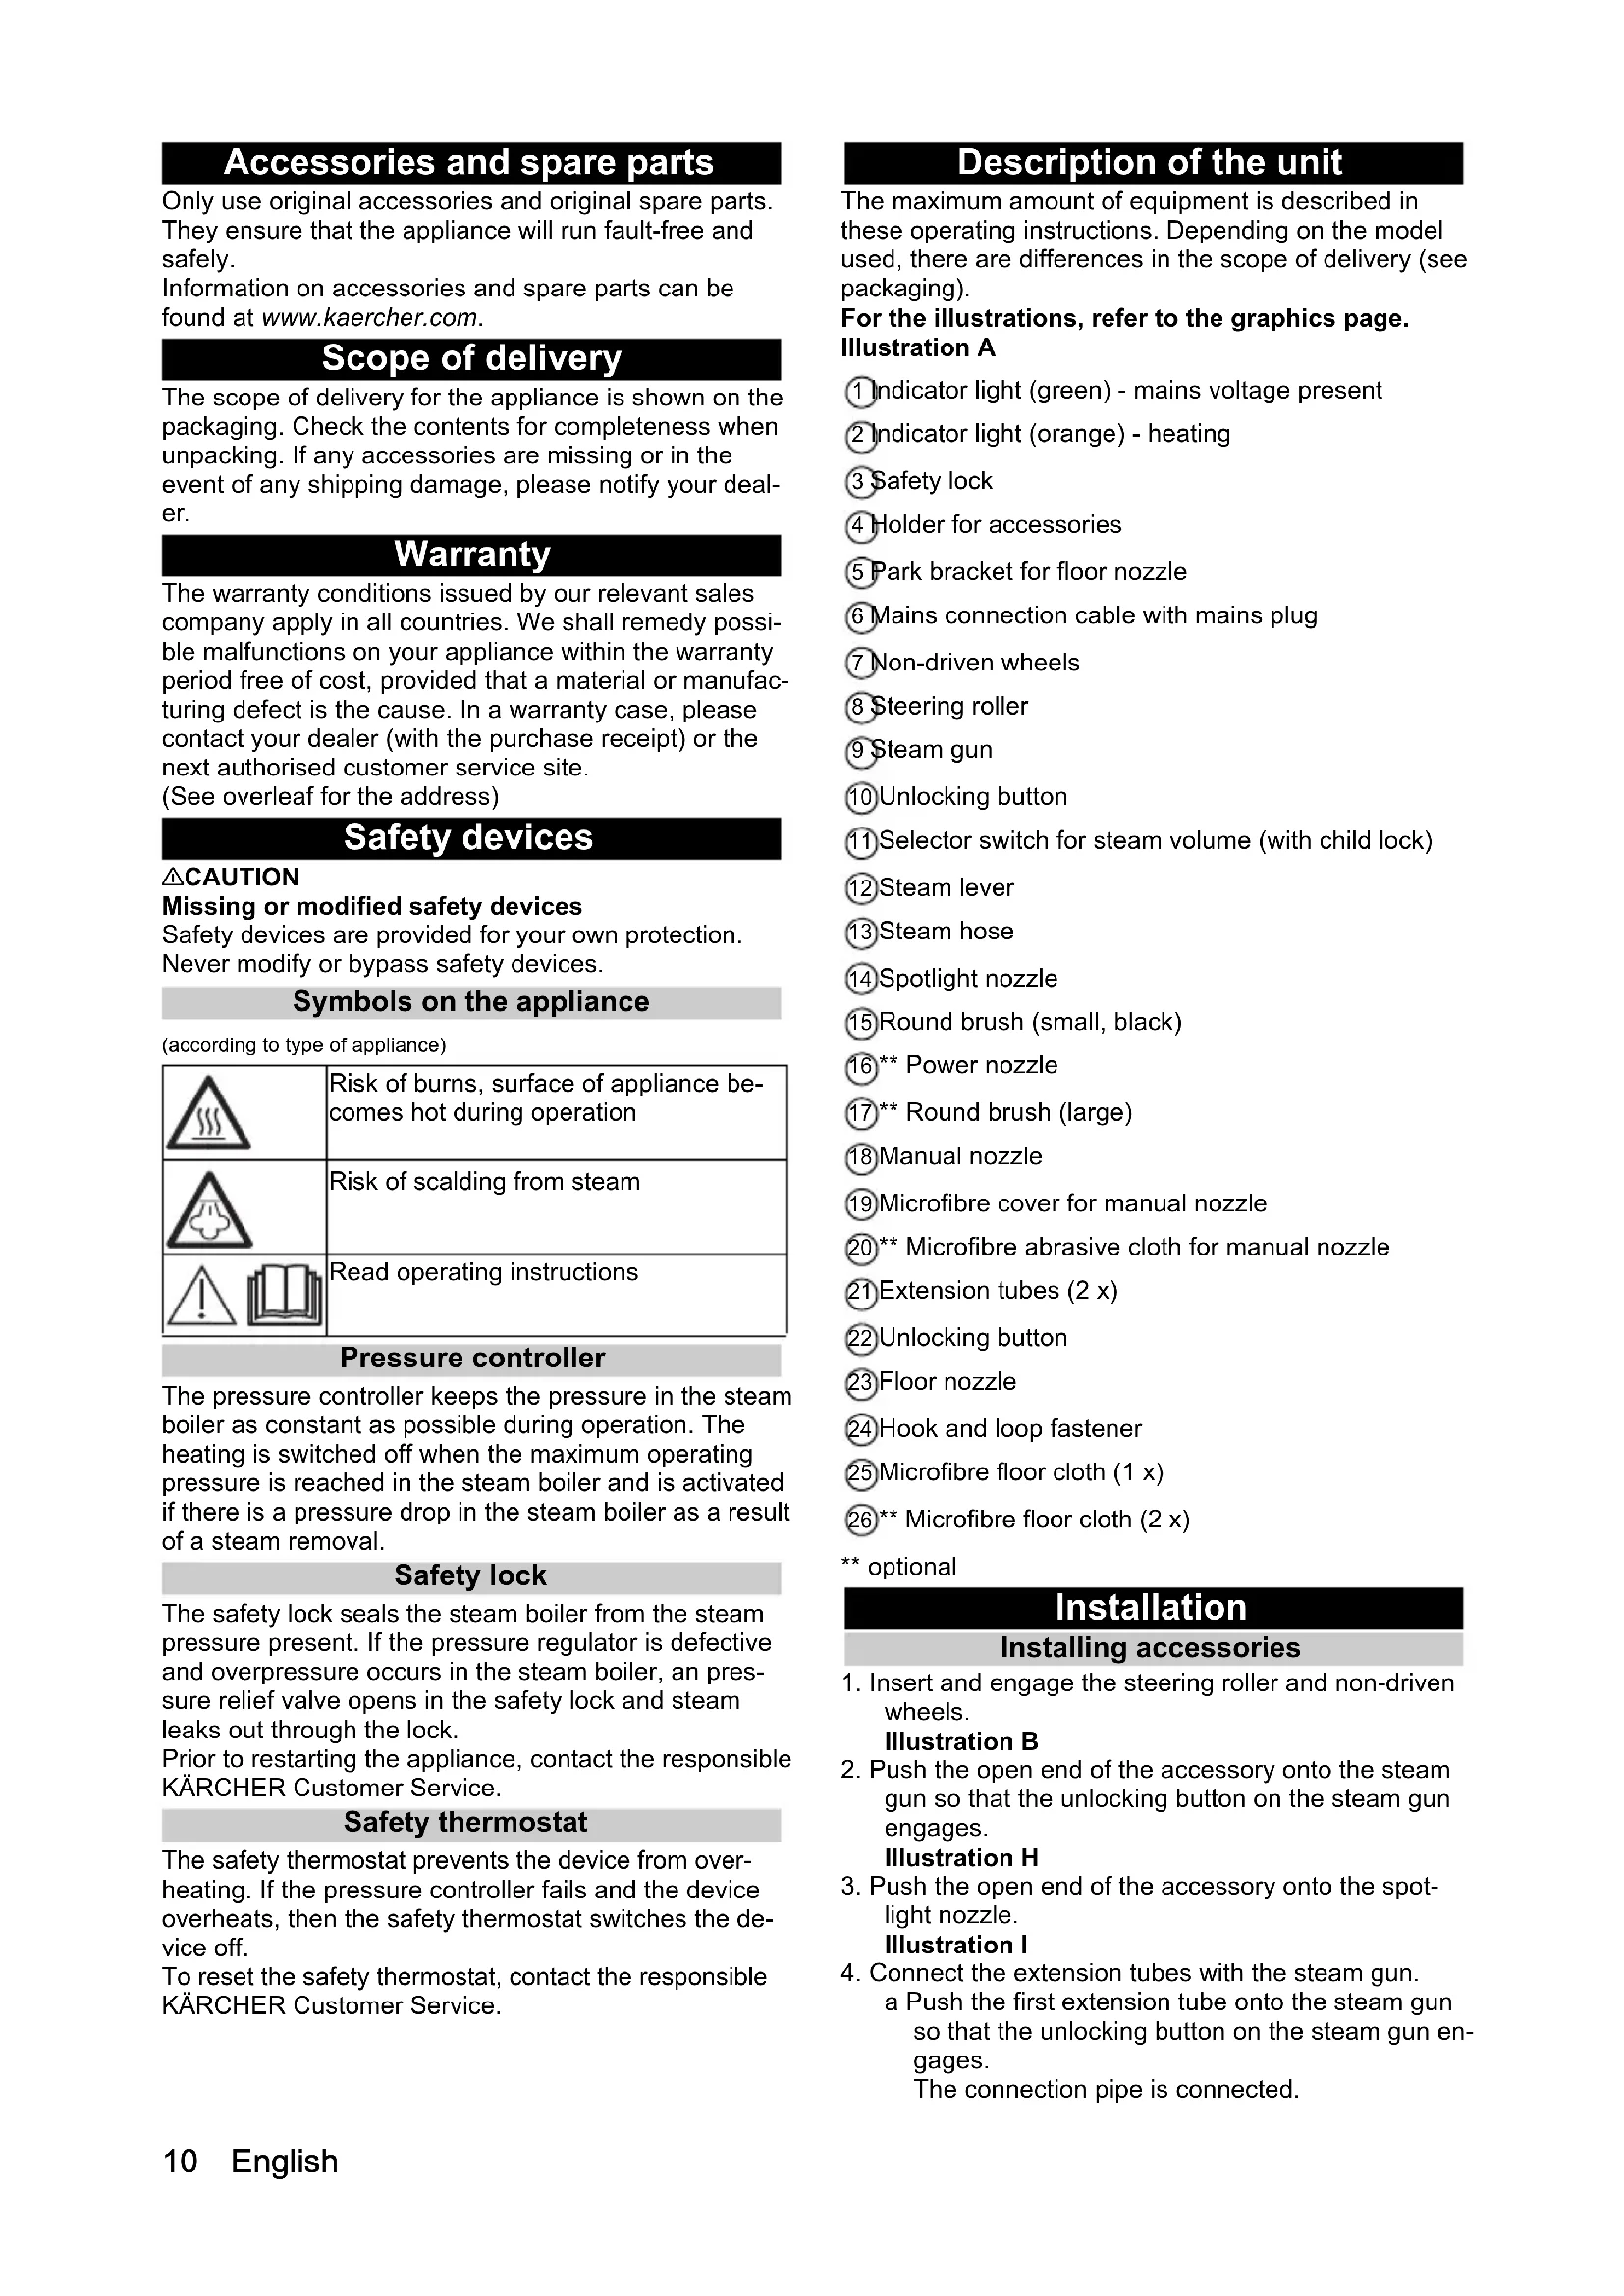
Symbols on the appliance
(according to type of appliance)
| Risk of burns, surface of appliance be- comes hot during operation | |
| Risk of scalding from steam | |
| Read operating instructions |
Pressure controller
The pressure controller keeps the pressure in the steam boiler as constant as possible during operation. The heating is switched off when the maximum operating pressure is reached in the steam boiler and is activated if there is a pressure drop in the steam boiler as a result of a steam removal.
Safety lock
The safety lock seals the steam boiler from the steam pressure present. If the pressure regulator is defective and overpressure occurs in the steam boiler, an pressure relief valve opens in the safety lock and steam leaks out through the lock.
Prior to restarting the appliance, contact the responsible KÄRCHER Customer Service.
Safety thermostat
The safety thermostat prevents the device from overheating. If the pressure controller fails and the device overheats, then the safety thermostat switches the device off.
To reset the safety thermostat, contact the responsible KARCHER Customer Service.
Description of the unit
The maximum amount of equipment is described in these operating instructions. Depending on the model used, there are differences in the scope of delivery (see packaging).
For the illustrations, refer to the graphics page. Illustration A
Indicator light (green) - mains voltage present Indicator light (orange) - heating 3 Safety lock 4 holder for accessories 5 Park bracket for floor nozzle 6 Mains connection cable with mains plug Non-driven wheels 8 steering roller ⑨ Steam gun 10Unlocking button ① Selector switch for steam volume (with child lock) ⑫Steam lever ① Steam hose 14Spotlight nozzle 15 Round brush (small, black) 16 Power nozzle 17 Round brush (large) 18Manual nozzle 19 Microfibre cover for manual nozzle 20** Microfibre abrasive cloth for manual nozzle 2 Extension tubes (2 x) 22Unlocking button 23Floor nozzle 24 Hook and loop fastener 25 Microfibre floor cloth (1 x) 26** Microfibre floor cloth (2 x)
** optional
Installation
Installing accessories
- Insert and engage the steering roller and non-driven wheels.
Illustration B
- Push the open end of the accessory onto the steam gun so that the unlocking button on the steam gun engages.
Illustration H
- Push the open end of the accessory onto the spotlight nozzle.
Illustration I
- Connect the extension tubes to the steam gun. a Push the first extension tube onto the steam gun so that the unlocking button on the steam gun engages.
The connection pipe is connected.
b Push the second extension tube onto the first extension tube.
The connection pipes are connected.
Illustration J
- Push the accessory and/or the floor nozzle onto the free end of the extension tube.
Illustration K
The accessory is connected.
Disconnecting accessories
- Set the selector switch for the steam volume to the rear. The steam lever is locked.
- Push the unlocking button and pull the parts apart.
Illustration M
Operation
Filling water
Note
Warm water reduces the heating-up time.
Note
Descaling the steam boiler is not required if commercially available distilled water is used.
- Unscrew the safety lock.
Illustration C
- Drain the water completely out of the steam boiler.
Illustration Q
- Fill a maximum of 1 I distilled water or tap water into the steam boiler.
Illustration C
- Insert the safety lock.
Illustration D
Switch on the device
- Place the device on a firm surface.
- Insert the mains plug into a socket.
Illustration E
The green and orange indicator lights illuminate.
- Wait until the orange indicator light - heating goes out.
Illustration F
- Press the steam lever.
Illustration G
Steam leaks out.
Regulating the steam volume
Note
The device heating always switches on again during use to maintain the pressure in the steam boiler. The orange indicator light - heating illuminates to indicate this. The expelled steam volume is regulated using the selector switch for steam volume. The selector switch has 3 positions:
| Maximum steam volume | |
| Reduced steam volume | |
| No steam - child lock Note In this position, the steam lever cannot be operated. |
- Set the selector switch for the steam volume to required steam volume.
- Press the steam lever.
- Before starting cleaning, point the steam gun at a cloth until steam is expelled evenly.
Topping up the water
If the steam volume is reduced during work or if no more steam volume comes out, the water will have to be refilled.
- Switch the appliance off, see Chapter Switch off the appliance.
- Unscrew the safety lock.
- Fill a maximum of 1 l distilled water or tap water into the steam boiler.
- Insert the safety lock.
- Insert the mains plug into a socket.
- Wait until the orange indicator light - heating goes out. The appliance is ready for use.
Switch off the appliance
- Pull the mains plug out of the socket.
- Press the steam lever until no more steam flows out.
Illustration N
The steam boiler is depressurised.
- Set the child lock (selector switch for steam volume) to the rear.
The steam lever is locked.
Rinsing out the steam boiler
Rinse the appliance's steam boiler after max. every tenth boiler fill.
- Switch the appliance off, see Chapter Switch off the appliance.
- Allow the appliance to cool down.
- Disconnect the accessory.
- Fill the steam boiler with water and swing it around vigorously. Lime residue which has been deposited on the bottom of the steam boiler will be released as a result.
- Drain the water completely out of the steam boiler. Illustration Q
Storing the device
- Connect the extension tubes to the large mounts for accessories.
- Connect a manual nozzle and spotlight nozzle to each extension tube.
- Fasten the large round brush to the spotlight nozzle.
- Connect the small round brush and nozzles to the medium-sized mount for accessories.
- Hang the floor nozzle in the park bracket. Illustration Q
- Wind the steam hose around the extension tube and connect the steam gun to the floor nozzle. Illustration P
- Wind the mains cable around the extension tube.
- Store the device in a dry location that is protected from frost.
Important application instructions
Cleaning the floor areas
We recommend sweeping the floor or vacuum cleaning it before using the appliance. In this way the floor will be cleared of dirt and loose particles before the wet cleaning.
Freshening up textiles
Prior to using the appliance, always check the compatibility of the textiles at a concealed point: Steam down the textile, allow it to dry and then check it for any change in colour or shape.
Cleaning coated or painted surfaces
ATTENTION
Damaged surfaces
Steam can loosen wax, furniture polish, plastic coatings or paint and edge band from edges.
Do not direct the steam at glued laminated edges as the edge band may loosen.
Do not use the appliance for cleaning unsealed wood or parquet floors.
Do not use the appliance for cleaning painted or plastic coated surfaces such as kitchen or living room furniture, doors or parquet.
- To clean these surfaces, steam a cloth briefly and use it to wipe over the surfaces.
Glass cleaner
ATTENTION
Glass breakages and damaged surfaces
Steam can damage sealed points of the window frame and, at low outside temperatures, lead to tension on the surface of window panes and hence to glass breakages. Do not direct the steam at sealed points on the window frame.
At low outside temperatures, heat up the window panes by gently steaming the full surface of the glass.
- Clean the window area with a manual nozzle and cover. To remove the water, use a squeezegee or wipe the surfaces dry.
How to use the Accessories
Steam gun
The steam gun can be used for the following applications without accessories:
- For removing slight creases from the hanging clothing items: Steam the clothing item from a distance of 10 - 20cm .
- For wiping damp dust: Steam a cloth briefly and use it to wipe over the furniture.
Spotlight nozzle
The spotlight nozzle is suitable for cleaning areas, joins fittings, drains, sinks, WCs, blinds or radiators that are difficult to access. The closer the spotlight nozzle is to the soiled area, the greater the cleaning efficiency will be as the temperature and steam volume are at their highest at the nozzle opening. Larger lime deposits can be treated before steam cleaning with a suitable detergent. Allow the detergent to soak in for approx. 5 minutes and then steam it off.
- Slide the spotlight nozzle onto the steam gun.
Illustration H
Round brush (small)
The small round brush is used for cleaning stubborn dirt. Stubborn dirt can be removed more easily by brushing.
ATTENTION
Damaged surfaces
The brush may scratch sensitive surfaces.
It is not suitable for cleaning sensitive surfaces.
- Fit the round brush to the spotlight nozzle.
Illustration I
Round brush (large)
The large round brush is suitable for cleaning large rounded surfaces, e.g. wash basin, shower tray, bath tub, kitchen sink.
ATTENTION
Damaged surfaces
The brush may scratch sensitive surfaces.
It is not suitable for cleaning sensitive surfaces.
- Fit the large round brush to the spotlight nozzle.
Illustration I
Power nozzle
The power nozzle is used for cleaning stubborn dirt, blowing down corners, joins etc.
- Install the power nozzle onto the spotlight nozzle according to the round brush.
Illustration I
Manual nozzle
The manual nozzle is used for cleaning small areas that can be washed down, shower cubicles and mirrors.
- Push the manual nozzle onto the steam gun according to the spotlight nozzle.
Illustration H
- Pull the cover over the manual nozzle.
Floor nozzle
The floor nozzle is used for cleaning washable wall and floor coverings e.g. stone floors, tiles and PVC floors.
ATTENTION
Damage due to build-up of steam
Heat and moisture can lead to damage.
Check the heat resistance and steam effect on an inconspicuous area using a minimal volume of steam prior to use.
Note
Detergent residue or care emulsions on the surface to be cleaned can lead to streaks during steam cleaning, which will disappear however once these have been used several times.
We recommend sweeping the floor or vacuum cleaning it before using the device. In this way the floor will be cleared of dirt and loose particles before the wet cleaning commences. Work slowly on surfaces that are heavily soiled so that the steam has longer to take effect.
- Connect the extension tubes with the steam gun. Illustration J
- Push the floor nozzle onto the extension tube. Illustration K
- Fasten the floor cleaning cloth to the floor nozzle. a Place the floor cleaning cloth with the hook and loop fastener strips pointing upwards on the floor. b Place the floor nozzle onto the floor cleaning cloth, applying slight pressure.
Illustration L
The floor cleaning cloth will stick to the floor nozzle of its own accord due to the hook and loop fastener.
Removing the floor cleaning cloth
- Place one foot on the bottom corner of the floor cleaning cloth and lift the floor nozzle up.
Illustration L
Note
Initially, the floor cleaning cloth's hook and loop fastener strip is very strong and cannot be removed from the floor nozzle easily. After the floor cleaning cloth has been used several times and washed, it is easier to remove from the floor nozzle and it has reached the optimum adhesion.
Parking the floor nozzle
- Hang the floor nozzle in the park bracket during breaks in work.
Illustration O
Care and service
Descaling the steam boiler
Note
Descaling the steam boiler is not required if commercially available distilled water is used.
Note
Since the lime becomes caked on the appliance, we recommend descaling the appliance as specified in the table (BF=boiler fillings) based on the number of times the steam boiler is filled.
| Hardness range °dH | mmol/l KF | |||
| soft 0 | 7 0-1.3 55 | |||
| II Medium | 7-14 1.3-2 | 5 45 | ||
| III | Hard | 14-21 | 2.5-3.8 | 35 |
| IV | Very hard | >21 >3.8 25 | ||
Note
Your water board or municipal utilities authority can provide information on hardness of tap water.
ATTENTION
Damaged surfaces
The descaler may corrode sensitive surfaces. Fill and empty the appliance carefully. 1. Switch off the appliance, see Chapter . 2. Allow the appliance to cool down. 3. Unscrew the safety lock. 4. Drain the water completely out of the steam boiler.
Illustration Q
ATTENTION
Appliance damage due to descaler
An unsuitable descaler and incorrect dosing of the descaler may damage the appliance.
Only use KÄRCHER descaler.
Use 2 dosing units of the descaler for 1.0 l of water.
- Apply descaler solution to the descaler according to the details.
- Fill the descaler solution into the steam boiler. Do not seal the steam boiler.
- Allow the descaler solution to take effect for approx. 8 hours.
- Drain descaler solution completely out of the steam boiler.
- Repeat the descending process if necessary.
- Rinse the steam boiler 2-3 times with cold water in order to drain all the descaler solution residue.
- Drain the water completely out of the steam boiler. Illustration Q
Care of accessories
(Accessories - depending on scope of delivery)
Note
The micro fibre cloths are not suitable for dryer.
Note
When washing the cloths, observe the instructions on the washing tag. Do not use any liquid softeners as this will affect the ability of the cloths to pick up dirt. 1. Wash the floor cleaning cloths and covers at a max. temperature of 60°C in the washing machine.
Troubleshooting guide
Malfunctions often have simple causes that you can remedy yourself using the following overview. When in doubt, or in the case of malfunctions not mentioned here, please contact your authorised Customer Service.
WARNING
Risk of electric shock and burns
Trying to eliminate faults while the appliance is connected to the mains or has not yet cooled down is always dangerous.
Remove the mains plug.
Allow the appliance to cool down.
The steam boiler is scaled.
- Descale the steam boiler
No steam
No water in the steam boiler - Refill water, see Chapter Refilling water.
The steam lever cannot be pressed
The steam lever is locked with the child lock.
- Set the child lock (selector switch for steam volume) to the front.
The steam lever is released.
Long heating-up time
The steam boiler is scaled.
- Descale the steam boiler.
High water egress
The steam boiler is too full. - Press the steam gun until a little water comes out.
High water output
The steam boiler is scaled. - Descale the steam boiler.
Technical data
| Electrical connection | ||
| Voltage | V 220-240 | |
| Phase | ~ | 1 |
| Frequency | Hz 50-60 | |
| Protection class | IPX4 | |
| Protection category | I | |
| Performance data | ||
| Heating capacity | W 1500 | |
| Maximum operating pressure MPa 0.32 | ||
| Heating-up time | Minutes | 6.5 |
| Continuous steaming | g/min | 40 |
| Maximum steam blast | g/min | 100 |
| Filling quantity | ||
| Steam boiler | I | 1.0 |
| Dimensions and weights | ||
| Weight (without accessories) | kg | 3.1 |
| Length | mm | 380 |
| Width | mm | 254 |
| Height | mm | 260 |
Subject to technical modifications.
Contents
General remarks 14
Clean paved surfaces
(alt according to appliance type)
Regulate the steam amount
Note
Mark the surfaces
The steam can cause burns on sensitive surfaces.
Not suitable for cleaning sensitive surfaces.
- Place the small steam nozzle on the nozzle of the steam hose.
Figure I
Mark the surfaces
The steam can cause burns on sensitive surfaces.
Not suitable for cleaning sensitive surfaces.
- Place the large steam nozzle on the nozzle of the steam hose.
Figure
Nozzle for high power
The high power nozzle is used for cleaning, e.g., for removing dirt.
- Place the high power nozzle on the nozzle of the steam hose as shown in the figure.
Eikovai
Akpoquio xEipoc
To akpouio xieipoc evdeikvutai yia tov kaapioo miKpwv ETTiPavEiw, Vtouiepewk Ka Kppeptw.
Znua otic emipaveiec
To diaupa aqaipaeanc aaatwv mTIOpei va npokaleoei diapwoon otic euaiaoThec ETTIAPVEIE.
Anouvdeote to qic aTnTo Tnpia
Agnote n oukeun va kpuwoe1.
O aTmuoIeβntaç exI aaIaIa.
- Apaaatwotetov atmuoAeBnTa.
Δv npayetai atuoC
O aTmuoAeBnTac 8ev ExE1 vepo
H Tpoeppuavon diapkei nolu
O aTmuoAeBnTaC exEi alata.
- Apaaatwotetov atuohBnta.
Meyánn ekpon vepou
The steam iron is for ironing.
Press the steam iron handle while less water is coming out.
Large water tank
The steam iron has a scale.
- Descale the steam iron.
Technical specifications
Electrical connection
Voltage 220-240
Phase ~1
Frequency Hz 50-60
Installation of accessories
- Insert and fix the guide wheel.
Figure B
- Open the accessory cover, press the steam iron until the unlock button of the first iron is fixed.
Figure H
- The nozzle attachment can be pushed onto the fine jet nozzle.
Figure 1
- Connect the extension tubes to the steam pistol.
Push the first extension tube until the release button of the steam pistol locks.
The extension tube is connected.
Push the second extension tube onto the first extension tube.
The extension tubes are connected.
Figure J
5. Accessories: Push the nozzle onto the free end of the extension tube.
Figure
The accessory is connected.
Disconnecting the accessory
- Set the steam quantity regulator to the minimum position.
The lever is locked under the handle.
- Press the release button and disconnect the parts.
Operation
Water filling
Note
Hot water reduces heating time.
Note
With constant use of standard distilled water, removal of scale from the steam boiler is not required.
- Unscrew the safety cap. Figure C
- Pour all water out of the steam reservoir. Figure Q
- Fill the steam reservoir with no more than 1 liter of distilled or demineralized water.
Figure C
- Screw the safety cap back on.
Figure D
Device setup
- Install the device on a solid foundation.
2. Plug the power cord into an outlet.
Figure E
The green and orange control lamps light up.
3. Wait until the orange heating control lamp goes out.
Figure F
- Press the steam supply lever.
Figure G
Steam output.
Steam quantity adjustment
Application
During operation, the heating system switches on periodically to maintain steam pressure in the steam reservoir. The orange heating control lamp lights up during this process.
The steam quantity is adjusted using the steam quantity switch.
Set the switch to position 3.
| Мakсимальhoe колочевто пара | |
| Орразношиhoe колочевто пара |
Response from the device (with delay) Note
In this position, the lever for supplying steam cannot be brought into action.
- Set the quantity switch for steam to the lower position.
- Press the steam supply lever.
- Before starting the device, check the water level on the sight glass until the water level in the boiler becomes equal.
Draining the boiler
If the steam quantity decreases or increases excessively, it is necessary to add water.
- Turn off the device, see chapter Turning off the device.
- Unscrew the fuse.
- Pour into the boiler reservoir no more than 1 liter of distilled or tap water.
- Screw the fuse back in. 5. Insert the power plug into the socket. 6. Wait until the orange control lamp for heating goes out. The device is ready for use.
Turning off the device
- Remove the power plug from the socket.
- Press the steam supply lever until the steam output stops.
The steam reservoir is in a safe condition. 3. Set the child safety lock (steam quantity switch) to the rear position. The control lever must be locked.
Rinsing the steam reservoir
Rinse the steam reservoir of the device at least after every 10th filling of the reservoir.
- Switch off the device, see chapter Switching off the device. 2. Let the device cool down.
- Disconnect the accessory.
- Fill the steam reservoir with water and shake it vigorously. This is necessary to remove any scale deposits that have settled on the bottom of the steam reservoir.
- Pour all the water out of the steam reservoir. Figure Q
Storing the device
Do not direct the steam jet at the painted parts of the window frame.
At low outside temperatures, the window panes should be heated by briefly steaming the entire surface of the glass.
Clean the window with a soft cloth. If necessary, use a little detergent or wipe the surface dry.
Using accessories
Steam pistol
The steam pistol can be used without accessories in the following cases:
- Removal of small creases on ironed items of clothing: treat the item of clothing with steam from a distance of 10-20 cm. Damp dusting: briefly work with the steam jet and wipe the furniture.
With constant use of standard distilled water, removal of scale from the steam boiler is not required.
Note
Taking into account the formation of scale in the device, it is recommended to remove scale after reaching the number of boiler fillings indicated in the table (BF = boiler fillings).
Use only KARCHER descaling agent.
Use 2 doses of descaling agent per 1.0 liter of water.
5. Prepare a solution of the descaling agent according to the instructions for the agent. 6. Pour the solution of the descaling agent into the steam boiler. Do not close the steam boiler. 7. Leave the solution to act for about 8 hours. 8. Pour out all the solution for descaling from the steam boiler. 9. If necessary, repeat the descaling process. 10. Rinse the steam boiler 2-3 times with cold water to remove all residues of the descaling solution. 11. Pour out all the water from the steam boiler. Figure Q
Care of accessories
(Accessories - depending on the scope of delivery) Note
Microfiber cloth is not suitable for drying in a tumble dryer.
Note
When washing, observe the care instructions on the label. To ensure that the cloth absorbs dirt well, do not use fabric softener.
- Microfiber cloth for cleaning and care: machine wash at a temperature not exceeding 60°C.
Help with malfunctions
Malfunctions often have simple causes, so with the help of the following overview you can fix them yourself. In case of doubt or if malfunctions not described here occur, contact the authorized customer service.
Check the device and the condition of the hoses.
It is dangerous to operate a device connected to the electrical network that is not warmed up. Pull out the power plug.
Let the device cool down.
Scale has formed in the steam reservoir.
- Remove the scale from the steam reservoir.
No steam
There is no water in the steam reservoir.
- Add water, see the chapter on adding water.
It is impossible to press the steam supply lever.
The steam supply lever is locked by the child safety lock.
- Set the child safety lock (steam quantity switch) to the forward position.
The steam supply lever is unlocked.
Long heating time
Scale has formed in the steam reservoir.
- Scale formation in the steam reservoir.
Significant water discharge
The steam reservoir is overfilled.
Turn on the steam generator until less water comes out.
Significant water discharge
Scale has formed in the steam reservoir.
- Remove scale from the steam reservoir.
Technical specifications
Electrical connection
Voltage 220-240
Phase ~ 1
Frequency 50-60
Protection class IPX4
Protection class
Operating characteristics
Heating power 1500 W
Maximum working pressure MPa 0.32
Heating time minutes 6.5
Continuous steam output g/min 40
Maximum steam pressure g/min 100
Filling volume
Steam reservoir 1.0
Dimensions and weight
Weight (without accessories) kg 3.1
Length 380
Width 254
Height 260
We reserve the right to make technical changes.
Device design 85
www.kaercher.com/REACH
www.kaercher.com/REACH
Accessories and spare parts
Use only original accessories and original spare parts. They ensure that the appliance runs fault-free and safely.
Information on accessories and spare parts can be found at www.kaercher.com.
Scope of delivery
The scope of delivery of the appliance is shown on the packaging. When unpacking, check that the contents are complete. If accessories are missing or if damage occurred during transport, please contact your dealer.
Warranty
In each country, the warranty conditions issued by our responsible distribution company apply. We will remedy any faults on the appliance free of charge within the warranty period, provided that the cause of the fault is a material or manufacturing defect. In the event of a warranty claim, please contact your dealer or the nearest authorized customer service location with your receipt. (See address on the back)
Safety devices
△CAUTION
Demonstration of functionality
- Set the preselector for the amount of detergent. The detergent is locked.
- Press the button to unlock and pull the parts apart. Shape M
Operation
Instructions
The water tank must be filled before use.
Instructions
With regular use of distilled water from the trade network, cleaning of the boiler in the steam generator is not necessary.
- Remove the pre-installed cap.
Figure C
2. Remove the filler cap from the steam generator. 3. Pour into the steam generator a maximum of 1 liter of distilled water or tap water. Figure C 4. Replace the pre-installed cap.
Figure D
Installation of the device
- Place the device on a stable base.
- Plug the plug into the socket.
Figure E
The green and orange control lamps light up.
3. Wait until the orange control lamp for heating goes out.
Figure F
- Steam nozzle.
Figure G
Steam burst.
Adjusting the amount of steam
Note
The heating of the device is activated periodically during use, in order to maintain constant pressure in the steam boiler. During this, the orange control lamp for heating lights up.
With the steam amount selector, the amount of steam emitted is adjusted. The selector can be set to:
Using the accessories
Steam brush
The steam brush can be used without the accessory in the following areas of use:
For removing wrinkles from hung garments: Spray the hung garment with steam from a distance of 10-20 cm. For removing wet dust: Spray briefly with steam, then wipe the furniture with a cloth.
Steam jet nozzle
The steam jet nozzle is suitable for cleaning hard-to-reach places, radiators, fittings, pipes, sinks, toilets, and shower cabins. The closer the steam jet nozzle is to the surface to be cleaned, the higher the effect of cleaning, as the temperature and amount of steam are highest at the nozzle outlet. When cleaning, stubborn dirt can be treated with a suitable cleaning agent. Leave the cleaning agent to act for about 5 minutes, then steam it off.
- Attach the steam jet nozzle to the steam brush.
Figure H
Brush (small)
The small brush is suitable for cleaning narrow surfaces. Narrow surfaces can be removed more easily through extraction.
CAUTION
Sensitive surfaces
The brush may scratch sensitive surfaces.
Not suitable for cleaning sensitive surfaces.
- Mount the small brush on the pointed side of the nozzle.
Figure I
Brush (large)
The large brush is suitable for cleaning large surfaces, e.g., upholstery, floors, bathtubs, kitchen sinks.
CAUTION
Sensitive surfaces
The brush may scratch sensitive surfaces.
Not suitable for cleaning sensitive surfaces.
- Mount the cover of the housing clearly on the current string of the hose.
#
Power hose
The power hose is suitable for cleaning heavily soiled surfaces, ventilation ducts, gutters, etc.
- Mount the power hose analogously to the cover housing on the current string of the hose.
Figure 1
Flat hose
The flat hose is suitable for cleaning surfaces, furniture, and cabinets.
- Place the flat hose analogously to the current string of the hose on the nozzle. H
2. Remove the cover on the flat hose.
Rotary hose
The rotary hose is suitable for cleaning surfaces, walls, and parts, e.g., stone floors, PVC floors.
WARNING
Damage due to the effect of steam, heat, and moisture can lead to damage.
Before use, check the stability of the steam hose against the effect of the steam on the nozzle with a small amount of steam.
Instruction
Keep the appliance away from the body and clothing, pour onto the upper surface, when the appliance is not in use, when using with steam, bring it to the boil, which disappears after repeated use.
The recommended appliance is intended for use on the surface to be cleaned or to be vacuumed. Thus, the appliance, when in contact with the surface, is freed from the dirt and the free parts. Strongly soiled surfaces should be treated more often, so that the steam acts for a longer time.
1. Remove the water tank from the steam generator.
Figure J
- Place the water tank on the steam generator. Figure K
- Attach the cover for the water tank. a Place the cover with the locking tabs on top of the tank.
b With the lever, place the water tank on the cover.
Figure L
Thanks to the locking with the tabs, the cover attaches automatically to the water tank.
Removal of the cover
- Place one hand on the service tab with the hook of the cover and lift the water tank upwards.
Figure L
Instruction
At the beginning of operation of the boiler, for all these reasons, it is very likely that the water will be contaminated. For this reason, after the first use of the boiler, it is necessary to drain the water from the boiler and make it inaccessible to the optimal adhesion.
Maintenance of the boiler
1. Preliminary work: shut off the boiler and wait for it to cool down.
Filter
Water filter
With regular use of demineralized water from the commercial network, it is not necessary to clean the filter in the steam generator.
Instruction
If the water filter is clogged, we recommend that you clean the filter according to the table number of refills of the steam generator (PK = number of boiler refills).
| Ниво на Тьрдост | dH mmol/l | ПР | ||
| Мека | 0-7 0-1,3 55 | |||
| I | среда | 7-14 | 1,3-2,5 | 45 |
| II | Тьрда | 14-21 | 2,5-3,8 | 35 |
| V | MHOrо Тьр-да | >21 | >3,8 25 | |
Instruction
The service department can provide information about the hardness of the water in the water supply network.
WARNING
Damaged surfaces
The cleaning solution for the filter may damage sensitive surfaces.
Fill and spray the device carefully.
1. Remove the steam boiler. 2. Empty the steam boiler. 3. Open the intended filling opening. 4. Remove the water from the steam boiler. Figure Q
WARNING
Damage to the device from descaling agent
Improper descaling or incorrect dosage of the descaling agent can damage the device.
Use only KARCHER descaling agent.
Use 2 doses of descaling agent per 1.0 l of water.
- Prepare the descaling solution according to the instructions on the descaling agent.
- Pour the descaling solution into the steam boiler. Do not close the steam boiler.
- Let the descaling solution take effect for about 8 hours. 8. Remove the descaling solution completely from the steam boiler.
- If necessary, repeat the descaling process. 10. Rinse the steam boiler 2-3 times with cold water to remove all residues of the descaling solution. 11. Remove the water completely from the steam boiler. Figure Q
Accessories
(Accessories - depending on delivery scope) Nozzle
Microfibre cloths are not suitable for drying in a tumble dryer.
Note
For cleaning the cloths, follow the care instructions on the label. Do not use fabric softener, so that the cloths can absorb moisture well.
- Replace the cap for the opening in the furnace at maximum temperature 60°C
Troubleshooting
Many times the cause of damage is elementary and with the help of the instructions below you can fix it yourself. If you are not sure or the damage is not described here, contact an authorized service.
WARNING
Danger of electric shock and burns
While the device is connected to the electrical grid or has not cooled down, troubleshooting is dangerous.
Unplug the device.
Let the device cool down.
Disconnect the boiler from the water supply.
- Disconnect the water supply from the boiler.
Drain the steam
Drain the water from the boiler - pour water, see chapter Filling with water.
The steam button cannot be pressed
The steam button is locked with the child safety lock.
Set the child safety lock (press the button for selecting the amount of steam) forward. The steam button is unlocked.
YdbjkaBaHe Ha BpeMeTo 3a 3arpaBaHe
IapoctpyHnT KOTeJI cBdRpKa BapOBnK.
-ПоунстваеHaВapOBиkaBnapoctpyHnKOTeJI.
BncoKo n3nycKaHe Ha BOda
PapoctpuyHnT KOTeI e npenbInHe.
- HatnckaTe napoctpyHnHnntoJeT,doKaTo 3ano-ue He da n3Jn3a NO-MaIKO BODa.
Bucoko n3nyckaHe Ha Boda
NapoctpyHnT KoteJcBbPka BapOBNK.
- NocntBaHe Ha BapOBnKa B npoctpyHnKoTeJ.
TexHHueckn DaHHN
EneKtpnueckn n3BOD
HansekeheV220-240
a3a 1
Uectota Hz 50-60
Tin 3aunta IPX4
Klac 3aunta
aHHn 3a MOUHOCTTa
Heating power W 1500
Maximum working pressure MPa 0.32
Heating time minutes 6.5
Steam output g/min 40
Maximum steam output g/min 100
Water tank capacity
Steam boiler 1.0
Dimensions
Weight (without accessories) kg 3.1
Length mm 380
Width mm 254
Height mm 260
Subject to technical changes.
Table of contents
General instructions 108
Intended use 108
Environmental protection 108
Mounting accessories
Electrical appliances are made of recyclable materials and components such as batteries and oil, which, if not disposed of properly or incorrectly, can pose a potential hazard to human health and the environment. However, these components are necessary for the reliable operation of the device. The device, marked with this symbol, must not be disposed of with household waste.
Instructions for components (REACH)
Current information on components is available at: www.kaercher.com/REACH
Spare parts and accessories
Use only original accessories and original spare parts, as they guarantee safe and uninterrupted operation of the device.
Information on accessories and spare parts is available at www.kaercher.com.
Scope of delivery
The device is supplied with packaging. When unpacking the device, check the completeness. In case of missing parts or damage during transport, please contact the sales organization from which you purchased the device.
Warranty
The warranty terms are established by the authorized organization of the manufacturer in the country of purchase. We eliminate any malfunctions during the warranty period free of charge, provided that the malfunction is due to defects in materials or manufacturing defects. In case of a claim during the warranty period, please contact the retail organization that sold the product or the nearest authorized service center.
(Address on the reverse)
Safety devices
CAUTION
Missing or modified safety devices
Safety devices are intended for your protection.
It is forbidden to modify safety devices or to disable them.
Symbol devices
(Depending on the type of devices)
Do not point the steam at sealed frames of the finished frame.
At low ambient temperatures, heat the window slightly, having treated the entire surface with steam.
Clean the window surface with a hand spray and a cloth. Wipe the glass with a device and a dry cloth or wipe dry with a rag.
Application
Steam pistol
The steam pistol can be used for the specified tasks without any issues.
- Spray the nozzle at a distance of 10-20 cm. To rinse, supply a large amount of steam and wipe the furniture.
Nozzle with a narrow jet
The nozzle with a narrow jet is designed for cleaning hard-to-reach areas, seams, fittings, drain pipes, washbasins, toilets, radiators, and tension elements. If the nozzle with a narrow jet becomes clogged, the steam temperature and quantity at the nozzle outlet will be at maximum. Strong contamination can be removed before cleaning with a suitable cleaning agent. Apply the agent to the surface for about 5 minutes, then rinse it off.
- Install the nozzle with a narrow jet on the steam pistol.
Figure 4
Round brush (small)
The small round brush is designed for cleaning stubborn dirt. It helps to remove dirt more easily.
ATTENTION
Rolled surfaces
The brush may damage sensitive surfaces.
Do not use on sensitive surfaces.
- Install the small round brush on the nozzle with a narrow jet.
Figure 5
Round brush (large)
The large round brush is designed for cleaning large round surfaces, such as washbasins, bathtubs, showers, and sinks.
__SUPPIMER__
The nozzle with a pointed stream is designed for cleaning contaminated surfaces.
It is not intended for use on surfaces that are not contaminated.
- Install the large round brush on the nozzle with a pointed stream.
Figure 1
Nozzle with pointed stream
The nozzle with a pointed stream is designed for cleaning contaminated surfaces, blowing out corners, and joints.
- Install the nozzle with a pointed stream according to the round brush on the nozzle with a pointed stream.
Figure 2
Rubber scraper
The rubber scraper is designed for cleaning small surfaces, such as mirrors, shower cabins, and windows.
- Install the scraper according to the nozzle with a pointed stream on the steam cleaner.
Figure 3
- Pull the rubber scraper towards you.
The steam cleaner is designed for cleaning surfaces and floors (for example, stone floors, tiles and PVC floors).
ATTENTION
Damage caused by steam
High temperature and moisture can cause damage.
Before using, check the heat resistance and suitability for steam on a small area with a small amount of steam.
Warning
Using a protective agent or cleaning agents on the surface to be cleaned, before steam cleaning, can cause the formation of stains, which, over time, disappear after repeated use.
We recommend cleaning the floor before using the device with a broom or vacuum cleaner. This will allow you to remove dirt and loose particles from it before steam cleaning.
On heavily soiled surfaces, work slowly, allowing the steam to have longer contact with the surface.
1. Attach the extension tubes to the steam pistol.
FIGURE J
- Install the floor nozzle onto the extension tube.
FIGURE K
- Secure the floor nozzle on the floor nozzle attachment.
Place the cap on the bottle and turn it clockwise until it clicks. b. Place the cap on the bottle and turn it until it is firmly closed.
Figure L
The cap on the bottle self-locks onto the nozzle thanks to the tabs.
Removing the cap from the bottle
- Place your foot on the base of the cap and pull the cap off the bottle.
Figure L
Indicator
The cap-tab on the bottle is very tight, and it is difficult to remove the cap. After repeated use, the cap becomes easier to remove and requires less effort.
Positioning the bottle for storage
1. During first use, insert the bottle into the parking bracket.
Figure O
The fabric care instructions are indicated on the label. Do not use conditioner for fabrics that are not suitable for it.
- The fabric for the bottle and its parts should be washed in a washing machine at a temperature not exceeding 60°C.
Help in case of malfunctions
Malfunctions often have a simple cause that can be fixed by yourself with the help of the instructions below. If in doubt or in case of unspecified malfunctions, contact an authorized service center.
Danger of electric shock and burns.
If the device is connected to the electrical grid or has not cooled down, access to troubleshooting is dangerous.
Unplug the power cord.
Let the device cool down.
Fill the steam reservoir.
Remove the plug from the steam reservoir.
Steam is absent.
There is no water in the steam reservoir.
- Add water, see the filling chapter.
The steam control knob no longer presses.
The steam control knob is blocked by the safety device.
Reset the safety device (steam quantity switch) to the forward position.
The steam control knob is unlocked.
Heating time.
Handle on the steam reservoir.
Remove the handle from the steam reservoir.
Large water inlet
The steam reservoir is full.
- Press the steam button until a little water comes out.
Large water inlet
Handle on the steam reservoir. Remove the handle from the steam reservoir.
Technical specifications
Electrical connection
Voltage 220-240
Phase ~1
Frequency 50-60
Protection class IPX4
Protection class I
Operating characteristics
TennoBa notyXhictb B1 1500
MaKcMaJIbHn po6OuN TnCK MNa 0,32
Yac harpiBaHHxBnHn 6,5
TpBaJa o6po6ka napom r/xB 40
MaKcMaIbHn napOBn imnybc r/xB 100
06'cM 3aIOBHeHHr
Iapobn pe3epByap 1,0
PozMipu Ta Macn
Maca (6e3 npnlaan) 3,1
IOBxHHa MM 380
UnpHaMM 254
Bucota MM 260
36epiraetbca npabo HA BheceHHaTexhiuHx 3miH.
Ma3MyHbI
Kannbl Hycaynap 125
ByibIMbMaKcTaBHa CaiKeC KOnaHy 126
Kopwaarh opTaHbI Kopray 126
Kepek-kaapKaHe KocaJIbI 6eJIWeKTeP. 126
Ketki3iIm XHaftbl. 126
Kenndik 126
KopraHbIc KypaI-Ka6bIKTapbl. 126
Akaynap KeiHderi KEmek 130
TexHnKaJIbIK MaFJyMaTTap. 130
XaannbHyckaynap


KypbIbnBbIbI aIraaw pet KOnlaH6ac 6ypbIH, OcbI naJaIaNHy XeHiNderi TynHcycka HcyckayIbIK neh 6epinre
Kayinci3ik KeHHderi HcKayapdbI Okbln WbIfbIbI3. Onapra caepeket etiH3.
Eki kitanshaHb da epi kapa naJaIaHy Hemece KeNeci neci yuih caTan KoIbIHbI3.
Буйыды MaKcaTbIHa cэйКec KОДану
BiybIMdbI yIwapyaWbIbIbIHda raHa KOJaHbIHb3. Kypan 6ydbI Ta3apTyra apHaJFaH JxHe OHbIOcbI HyCKayIbIKTa CnNaTTaNFAHdai CcKeC ToJIbIMdayWBInapMeH KOJaHyf 6oJaDb. Ta3apTKbiU KypaIqap KaKet emec. Kayinci3dk TexHnKaCbI 6oBbHwa HyCKaynapDbI opbIHdaHb3.
KopwaFAH opTaHbI Kopray

Dispose of packaging materials in an environmentally friendly manner. Dispose of the packaging through the authorized recycling center for your device.

Electrical and electronic devices contain materials that must not be disposed of with household waste. Dispose of old devices through an authorized collection or recycling center.
Before disposal, remove any batteries, rechargeable batteries, or lamps that are not permanently installed. Dispose of these separately. If the device contains batteries, they must be removed before disposal. Do not dispose of the device together with these components.
Directives on waste electrical and electronic equipment (WEEE)
Information on the disposal of the device can be found at the following link: www.kaercher.com/REACH
Accessories and spare parts
Only use original accessories and spare parts. They ensure the safe and trouble-free operation of the device. Information on accessories and spare parts can be found at www.kaercher.com.
Warranty
The warranty conditions issued by our responsible sales company apply in each country. We will rectify potential malfunctions free of charge within the warranty period, provided that the cause is a material or manufacturing defect. In the event of a warranty claim, please contact your dealer or the nearest authorized customer service center with the purchase receipt.
Dear Customer,
The warranty conditions issued by our responsible sales company apply in each country. We will rectify potential malfunctions free of charge within the warranty period, provided that the cause is a material or manufacturing defect. In the event of a warranty claim, please contact your dealer or the nearest authorized customer service center with the purchase receipt. (This is a translation of the original text.)
In the case of a warranty claim,
The following information must be provided:
Model: 30190
Production date: 1st production year 9th production month 0th production day 1st production number
The device is designed for use with water at a temperature of 90°C (194°F) and a pressure of 0.9 MPa (9 bar).
Safety instructions
WARNING
Read all safety instructions carefully.
These safety instructions are intended for your safety. Read and understand them before using the device.
Intended use
(For household use only)
If you have any questions about the water used, please contact the manufacturer.
- Do not use the device if it is damaged. See Figure C
2. Do not use the device with water other than clean water.
Figure Q
- Do not use the device with water that is not clean or with a maximum of 1 liter of water.
Figure C
- Do not use the device if it is damaged. See Figure D
Do not use the device if it is damaged.
- KypblfblHbl TpaKtbl Tipekke opHaanacTbipblhbl3.
- Kenjinik wTekeprDi 3neKeTp po3eTKacbHa KocbHbI3.
Figure E
Xacblxhecapfbll6aKbIaywaMdpblxhaHaDbI.
- Capfbint 6aKbInay WAmbl eWKeHHe KyTih3.
Figure F
4.By TetiriH 6acbHb3.
Figure G
By wymekeh wbaia.
By menweipin peTey
HycKay
By Ka3aHbIHda KblcBIMbl yCTan Typy wHn naHaanHaH Ke3de KypblfblHbl Kbl3dbipy KocblnaBl. CohIme Hipre capfbIT 6akblay Kb3dbipy WAmblKaHaDbI.
Bepinetih 6y meuopei 6y meuopeip aybictbipbnKockblkemerepeTenei. Aybictbipbn-KockbltbiH3kanbp6ap:
| м akс. 6у м eншерi | |
| т e m e n d e t i n r e n 6у м e n s h e p i | |
| 6у ѧok - 6алалардан корганыс H y c k a y Бул калы m b i 6у memiai бась m a r a n Ку у d e 6олд b i. |
- AbyICTbIPbIN-KOCKbIUtbI KaIaFaH 6y MeIWepeiHe opHaTbIHbI3.
- By TetiriH 6acbHb3.
- Ta3anay andbHda 6y nctonetin wSybepeke 6aftTan, 6y Teric wblfapbImaBihwa kytihi3.
CyblToTbIbHbI3
Kymbc Ke3iHne Hemece 6y 6oJMaHaH Ke3e 6y MeIwepi a3aIca, cybl ToTbipy KaKeT.
- KypblfnbHbEwipy, 6enimki kapaHb3: KypblfnbHbEwipy.
- CaKaTHDbipfbIkw KaKnaKTbI 6ypan aWbHbI3.
- By ka3aHbHa MaKc. 1 JnTp dNCTnIeHReH HeMece Ky6bIp cybIH KyNbIHbI3. 4.CaKaTHnDbipfblI KKaNaKTB6ypan Ka6bHb3 5.Keinik uTekepi 3neKtp po3etKaCbHa KocBihbI3.
- Capfbnt 6aKbJnay wambl eWKeHwe KytIi3. KypbInf bnaDanaHyfa daBih.
KypbInfbHbI eWipy
1.Keinik wTekepi 3Jektp po3eTKacbIHan WbIFapbln aJIbIHbI3. 2. By 甲bIapbIybyH TOKtaTnaBihwa, 6y teTirIH bacbin TypbIHb3.
Cyper N
By rehepaTOpbl KbICbIM YcTIHde eMec.
- Banaanapdah KoprA hbc aybictpbin-Kockblwih (6y MeIwepiH aybictpbin-KockblwTb) apTKbl KaIbInKa KOIBHb3.
By Tetiri kynbnTanraH.
By reHepaTopbIn kyy
Ka3aHdbI ap 10 ToTbipraHHaH KeiH KypblfblHbH 6y Ka3aHbIH KyblbI3.
- KypbIINrBihI eWipy, 6eNIMdi kapaHbI3: KypbIINrBihI eWipy.
- KypbInfblHb cyblTbHb3
- KoHdbipMaapdbiaKbipTaBbI3.
- By rehepaTopbIH cyMeH TOINbIPbIN, KaTbI WaiKaHbI3. Byn By reHepaTopbIHbIH actbHa aKTI WeriHdinepHn Ka6aTTanybHa eKeNei. 5.By rehepaTopbHaH 6yKIn cydbI aRb13bHb13. Cypert Q
KypblfblhlcakTayra6yay
- ¥3apTbIi T TyIKTepiH Kypamdac 6eNikTeepin YnKeH TyTkbluHa caJIbIHbI3.
- Kolmeh Kymbic icTeinH KOHdbipMa MeH HYKTeJI To3aHdaty KOHdbipMacbIHbIH eP6ipH 1-3apTkbiW TyTikke Knirizhi3.
- YIkeH DeHreNeK WeTKeHi HYKTeJI ToaHdAty KOHdbipMacbHa 6ekiriH3.
- KiIkeHTaI DeHreJIek WTeTkeci MeH 6ypiKlUtePih KypamJac 6eJIkTepeIH optaHfbl TyTkblbHa Knri3iHi3.
- EdeH KOHdbipMacbIH TypaKKa KOIO TyTkblIbHa CaJIbIHbl3. Cypet O
- By wlaHricin y3apTkbiu TyTKeptdi aHaJIbIpa opan, 6y nictoJeTI eDeH KOHdbIpMacbHa caJIbHbI3.
Cyper P
7.Kei Ka6eHIn y3apTkblu TytikTepei aHaJbIpa opaHb13. 8. KypblfbiHbI KypfaK XHe a3daH KopFaJFaH opbiHa CaKTaHbI3.
Consult a specialist for advice on removing stains from clothing and fabrics. Before using any stain remover, test it on a hidden area of the fabric.
Removing stains from fabric
Before removing stains from fabric, check the care label: remove stains with a clean, dry cloth, or with a mild detergent solution.
Removing stubborn or dried stains
CAUTION
Closed stains
This product, when used on leather, plastic, or other surfaces, may cause discoloration or damage.
Do not use on surfaces that may be damaged by this product; it may cause discoloration.
Do not use on leather or suede surfaces.
Do not use on painted or plastic surfaces, or on surfaces that may be damaged by water or moisture.
- To remove these stains, blot the stain with a clean cloth, then wipe with a damp cloth.
Remove stains.
CAUTION
If the temperature of the glass surface is lower than the dew point, condensation may form on the glass surface, and its amount may increase.
Do not touch the glass with sharp objects.
If the glass is damaged, replace it when the outside temperature is low.
The glass surface may be damaged by impacts or scratches. Be careful when cleaning or wiping the glass surface.
Condensation prevention
This section
This product may be damaged in the following cases:
For windows with double glazing: use a soft cloth with 10-20 cm distance. - For windows with single glazing: use a soft cloth and wipe gently.
Electric shock
Electric shock may occur if you touch the terminals, wires, resistors, switches, sockets, or radiators. If the electric shock is severe, it may cause burns, and the temperature and these parts may be higher. When cleaning, be careful not to touch the terminals with wet hands. If the power is turned off for 5 minutes, you can clean it.
1. Turn off the electric shock. Water and
Cleaning brush (accessory)
The cleaning brush is used for cleaning hard-to-reach places. Use the brush to clean old parts.
ATTENTION
Closed valve
The soft bag valve can be squeezed by hand.
The bag valve is not intended for disinfection.
- Do not place the valve in a steam sterilizer.
Figure 1
Large valve
When using the large valve, the patient connection, hose, and bag can be used to disinfect the large valve parts.
ATTENTION
Closed valve
The soft bag valve can be squeezed by hand. The bag valve is not intended for disinfection.
- Do not place the large valve in a steam sterilizer.
Figure 1
Disinfection adapter
The disinfection adapter is intended for disinfection of old parts, hoses, etc. for disinfection.
- Insert the disinfection adapter into the valve opening as needed.
Figure I
Control box
Control box and the main rubber belt, for the cable to be able to pass through.
- Use the control box to start the device by pressing the start button.
Figure II
2. Check the rubber belt.
Head position
The head position and the posture for spraying on the wall, e.g., stone walls, brick walls, etc.
ATTENTION
Damage from the effect of the steam
The hot steam and moisture can cause damage.
Before use, check the stability of the steam effect of the device on an inconspicuous place with a small amount of steam.
Use
Remaining from the use of the device for cleaning, on the surface to be cleaned, rinse with water can cause damage, which disappears with repeated use.
The device is intended for use with the device to be changed or to be cleaned with a vacuum cleaner. Thus, when the device is used, the surface is freed from dust and free particles.
Treat the surfaces to be sealed with a primer, for the action of the adhesive for a longer time.
1. Insert the plugs into the pipes with the help of a tool.
Level J
- Place the new plug on the pipe.
Level K
- Attach the cap for the plug to the new plug. Then place the cap with the sealing rings on top of the plug.
b. With light pressure, place the new plug on top of the cap.
Level L
Instructions for the generator set
Instruction
Before starting the generator, check the oil level.
Instruction
Before starting the generator, check the fuel level and refill if necessary (KF = fuel level).
| KaTTbIbIK ayKbIMbl | dH (немic kaTTbIbIK rpaJycbl) | MMOJIb/л KF | (6y reHepa TopblN ToJIbIP у) |
| Жумсak 0-7 0-1,3 55 | |||
| I opTa | ka 7-14 1,3-2,5 45 | ||
| II KaTbI | 14-21 2,5-3,8 35 | ||
| VTe KaTbI | >21 | >3,8 25 |
Instruction
The water pump or municipal water supply must be connected to the water inlet of the device.
ATTENTION
Closed cover
The device can be operated with the cover closed.
Do not operate the device without the cover.
- To open the cover, press:
- Lift the cover.
- Remove the filter and the container.
- Empty the water from the generator.
Figure Q
ATTENTION
With the brush attached to the container
Closing
It is possible to close the cover with the brush attached to the container.
Place the brush attached to the container on the handle.
Pour 1.0 l of water into the container for the brush attachment. 5. Insert the brush attachment into the opening on the container. 6. Close the generator with the brush attached to the container. 7. Remove the brush attachment from the container after 8 hours. 8. Empty the brush attachment with water from the generator. 9. If necessary, rinse the brush. 10. To remove all residues from the brush attachment, rinse the generator 2-3 times with clean water. 11. Empty the water from the generator.
Cyper Q
TolbIMdayuBnapra Kytim KepceTy
(KeTkiinyiHe Kapai TOnbIMdayuBnap)
Hyckay
MnKpo4a3aHaH JacaIraH MaIbIK KeTIpriWTe KENTipyre apHaMaFaH.
HycKay
MaJIbIKTapDbI KByaH Ke3De JKaNcBIpMaJaTbI Kyy JAPTTapbI KepCetijReH HcykayJnapDbI CaKTaHbI3.
MaNbIKap NaTbJkaKcbciHipeanybi yuH,XyMcaK WauFbIWTb naDanaHaBb3.
- EdeHre apHaHanFaH MaIbIKTap MeH KaNTapBIn Kip JyfbI MauHnHa da eH Ke6i 60°C-NeH KybIbI3.
Akaynap Ke3iHderi KemeK
AkayapdbH cebentepi ken kafda naKeleci wonydbn naDanahy apkblbE3diirHeN KOIra 60NaTbHdakapanabim 60aDb. KydkTepe 60na Hemece ocJI Kepde Kepcetinmereh akayap 60nFaH Ke3De, pyKcat etinreH cepBnctIK opTaIbIKKa xa6apnacbHb3.
ECKEPTY
Kyniktp Kayni KHe 3JekTp TOrbHaH XapaKaT any Kypblfbl Kyat Ke3iHe KocbIy Ke3De HEmece CybImaHaN K3de, akayapdbI KOHO Kayinti.
Keniiik wTekepi03eKaadHwifapbIn aIbIHb13. KpyblfblHbCyblTbHb13.
By rehepaTopb KaKneH Ka6bnFaH.
The generator is installed.
By kok
The generator is installed, the oil is filled: the oil is filled.
By teiri 6acblMaJdbI
By tetiri 6anaapdah KopfaHbcneH KyJbInTanfAH.
- BanaanapdaH KopraHbIc aybICTbIPbIN-KockblWBIn (6y MAnsePiH aybICTbIPbIN-KockblWTbl) aNDbIHfbl KaBnKa KObHb3. By tetiri KynbIntaH WbIFapblnFaH.
¥3ak yaKbIT KbI3aIbI
By rehepatopbikaknneHka6bnfah.
By rehepaTopbIH KaKaTah Ta3apTbHbI3.
Cy wbfibhblXKofapbl
By Ka3aHbI TbIM TOJIbI.
CydbH a3 Menwepi UbikKaHa deiH 6y TanaHuaCbH 6acbIn TypbHb3.
Cy wblbfihbXofapbl
By rehepatopbkaKneH kablnfah.
By the regulator of the cascade of the hazard.
Technical data
Electric connection
Connection 220-240
Phase ~ 1
Frequency T50-60
Protection class IPX4
Protection class
Water supply
Water pressure at 1500
Maximum water flow rate 0.32
Heating time minutes 6.5 p
Continuous output g/min 40
Maximum output g/min 100
Capacity
By regulators 1.0
Examples of candles
Candles (only for use with) to 3.1
Narrow ones MM 380 and MM 254
Include MM 260
Technical data sheet attached.
Jd
slll lsslll llll lllllllllll
山
1
. cJl JLaSul Jabil . cJl JLaSul
jllgljbsooj
Jabla aL> alwgo jolll
Jl (jlaa Jj) Jaal aLg
120 1
Therefore, 2ab = 15, θ = 220°.
JL 14.
J 1 JyI aIbI yOgso
J J W W W J j
algo jgglj gswlo
oogwlo 2 aaiil aillawll oogwlo j> b
aIbawwJgWJ
Jgog Jgogill jgi 2xixcg
a>la|0g0
gssalll jalll lglj gglj> .5
aJUwJ oJgWlaJ
a>la!ogK
alogoljgul ogrslo
Jolal
1.
.
2..
5..
125
.1J4
Joo
J
A
(6)
6 7 8 9 10 11 12 13 14 15 16

THANK YOU!
MERCI! DANKE! ¡GRACIAS!

Register your product and benefit from many advantages.
www.kaercher.com/welcome


Rate your product and tell us your opinion.
www.kaercher.com/dealersearch
Alfred Kärcher SE & Co. KG
Alfred-Karcher-Str.28-40
71364 Winnenden (Germany)
Tel.: +49 7195 14-0
Fax: +49 7195 14-2212
- GENERAL NOTES
- INTENDED USE
- ENVIRONMENTAL PROTECTION
- NOTES ON THE CONTENT MATERIALS (REACH)
- ACCESSORIES AND SPARE PARTS
- SCOPE OF DELIVERY
- WARRANTY
- SAFETY DEVICES
- CAUTION
- SYMBOLS ON THE APPLIANCE
- PRESSURE CONTROLLER
- SAFETY LOCK
- SAFETY THERMOSTAT
- DESCRIPTION OF THE UNIT
- FOR THE ILLUSTRATIONS, REFER TO THE GRAPHICS PAGE. ILLUSTRATION A
- INSTALLATION
- INSTALLING ACCESSORIES
- ILLUSTRATION B
- ILLUSTRATION H
- ILLUSTRATION I
- ILLUSTRATION J
- DISCONNECTING ACCESSORIES
- ILLUSTRATION M
- OPERATION
- FILLING WATER
- NOTE
- ILLUSTRATION D
- SWITCH ON THE DEVICE
- REGULATING THE STEAM VOLUME
- TOPPING UP THE WATER
- SWITCH OFF THE APPLIANCE
- ILLUSTRATION N
- RINSING OUT THE STEAM BOILER
- STORING THE DEVICE
- IMPORTANT APPLICATION INSTRUCTIONS
- CLEANING THE FLOOR AREAS
- FRESHENING UP TEXTILES
- CLEANING COATED OR PAINTED SURFACES
- ATTENTION
- DAMAGED SURFACES
- GLASS CLEANER
- GLASS BREAKAGES AND DAMAGED SURFACES
- HOW TO USE THE ACCESSORIES
- STEAM GUN
- SPOTLIGHT NOZZLE
- ROUND BRUSH (SMALL)
- ROUND BRUSH (LARGE)
- POWER NOZZLE
- MANUAL NOZZLE
- FLOOR NOZZLE
- DAMAGE DUE TO BUILD-UP OF STEAM
- ILLUSTRATION L
- REMOVING THE FLOOR CLEANING CLOTH
- PARKING THE FLOOR NOZZLE
- ILLUSTRATION O
- CARE AND SERVICE
- DESCALING THE STEAM BOILER
- ILLUSTRATION Q
- APPLIANCE DAMAGE DUE TO DESCALER
- CARE OF ACCESSORIES
- TROUBLESHOOTING GUIDE
- WARNING
- RISK OF ELECTRIC SHOCK AND BURNS
- NO STEAM
- THE STEAM LEVER CANNOT BE PRESSED
- LONG HEATING-UP TIME
- HIGH WATER EGRESS
- HIGH WATER OUTPUT
- CONTENTS
- CLEAN PAVED SURFACES
- REGULATE THE STEAM AMOUNT
- MARK THE SURFACES
- FIGURE I
- FIGURE
- NOZZLE FOR HIGH POWER
- EIKOVAI
- AKPOQUIO XEIPOC
- ZNUA OTIC EMIPAVEIEC
- ΔV NPAYETAI ATUOC
- H TPOEPPUAVON DIAPKEI NOLU
- MEYÁNN EKPON VEPOU
- LARGE WATER TANK
- TECHNICAL SPECIFICATIONS
- ELECTRICAL CONNECTION
- INSTALLATION OF ACCESSORIES
- FIGURE B
- FIGURE H
- FIGURE J
- DISCONNECTING THE ACCESSORY
- WATER FILLING
- FIGURE C
- FIGURE D
- DEVICE SETUP
- FIGURE E
- FIGURE F
- FIGURE G
- STEAM QUANTITY ADJUSTMENT
- APPLICATION
- DRAINING THE BOILER
- TURNING OFF THE DEVICE
- RINSING THE STEAM RESERVOIR
- USING ACCESSORIES
- STEAM PISTOL
- HELP WITH MALFUNCTIONS
- LONG HEATING TIME
- SIGNIFICANT WATER DISCHARGE
- OPERATING CHARACTERISTICS
- FILLING VOLUME
- DIMENSIONS AND WEIGHT
- △CAUTION
- DEMONSTRATION OF FUNCTIONALITY
- INSTRUCTIONS
- INSTALLATION OF THE DEVICE
- ADJUSTING THE AMOUNT OF STEAM
- USING THE ACCESSORIES
- STEAM BRUSH
- STEAM JET NOZZLE
- BRUSH (SMALL)
- BRUSH (LARGE)
- POWER HOSE
- FLAT HOSE
- ROTARY HOSE
- INSTRUCTION
- FIGURE L
- REMOVAL OF THE COVER
- MAINTENANCE OF THE BOILER
- FILTER
- WATER FILTER
- DAMAGE TO THE DEVICE FROM DESCALING AGENT
- ACCESSORIES
- TROUBLESHOOTING
- DANGER OF ELECTRIC SHOCK AND BURNS
- DRAIN THE STEAM
- THE STEAM BUTTON CANNOT BE PRESSED
- YDBJKABAHE HA BPEMETO 3A 3ARPABAHE
- BNCOKO N3NYCKAHE HA BODA
- BUCOKO N3NYCKAHE HA BODA
- TEXHHUECKN DAHHN
- ENEKTPNUECKN N3BOD
- AHHN 3A MOUHOCTTA
- WATER TANK CAPACITY
- DIMENSIONS
- TABLE OF CONTENTS
- MOUNTING ACCESSORIES
- CURRENT INFORMATION ON COMPONENTS IS AVAILABLE AT: WWW.KAERCHER.COM/REACH
- USE ONLY ORIGINAL ACCESSORIES AND ORIGINAL SPARE PARTS, AS THEY GUARANTEE SAFE AND UNINTERRUPTED OPERATION OF THE DEVICE
- THE DEVICE IS SUPPLIED WITH PACKAGING. WHEN UNPACKING THE DEVICE, CHECK THE COMPLETENESS. IN CASE OF MISSING PARTS OR DAMAGE DURING TRANSPORT, PLEASE CONTACT THE SALES ORGANIZATION FROM WHICH YOU PURCHASED THE DEVICE
- MISSING OR MODIFIED SAFETY DEVICES
- SYMBOL DEVICES
- NOZZLE WITH A NARROW JET
- NOZZLE WITH POINTED STREAM
- RUBBER SCRAPER
- FIGURE K
- REMOVING THE CAP FROM THE BOTTLE
- INDICATOR
- POSITIONING THE BOTTLE FOR STORAGE
- FIGURE O
- HELP IN CASE OF MALFUNCTIONS
- STEAM IS ABSENT
- THE STEAM CONTROL KNOB NO LONGER PRESSES
- HEATING TIME
- LARGE WATER INLET
- CM 3AIOBHEHHR
- POZMIPU TA MACN
- MA3MYHBI
- XAANNBHYCKAYNAP
- БУЙЫДЫ MAKCATBIHA CЭЙКEC KОДАНУ
- KOPWAFAH OPTAHBI KOPRAY
- DIRECTIVES ON WASTE ELECTRICAL AND ELECTRONIC EQUIPMENT (WEEE)
- DEAR CUSTOMER
- MODEL
- SAFETY INSTRUCTIONS
- DO NOT USE THE DEVICE IF IT IS DAMAGED
- BY MENWEIPIN PETEY
- HYCKAY
- CYBLTOTBIBHBI
- KYPBINFBHBI EWIPY
- CYPER N
- BY REHEPATOPBIN KYY
- KYPBLFBLHLCAKTAYRA6YAY
- CYPER P
- REMOVING STAINS FROM FABRIC
- REMOVING STUBBORN OR DRIED STAINS
- CLOSED STAINS
- REMOVE STAINS
- CONDENSATION PREVENTION
- THIS SECTION
- ELECTRIC SHOCK
- CLEANING BRUSH (ACCESSORY)
- CLOSED VALVE
- LARGE VALVE
- DISINFECTION ADAPTER
- CONTROL BOX
- FIGURE II
- HEAD POSITION
- DAMAGE FROM THE EFFECT OF THE STEAM
- USE
- LEVEL J
- LEVEL K
- LEVEL L
- INSTRUCTIONS FOR THE GENERATOR SET
- CLOSED COVER
- FIGURE Q
- WITH THE BRUSH ATTACHED TO THE CONTAINER
- CLOSING
- CYPER Q
- TOLBIMDAYUBNAPRA KYTIM KEPCETY
- AKAYNAP KE3IHDERI KEMEK
- ECKEPTY
- CY WBLBFIHBXOFAPBL
- TECHNICAL DATA
- ELECTRIC CONNECTION
- WATER SUPPLY
- CAPACITY
- EXAMPLES OF CANDLES
- JD
- JOLAL
- JOO
- J
- (6)
- THANK YOU
- MERCI! DANKE! ¡GRACIAS
Brand : Kärcher
Model : SC 2 EasyFix Premium Plus
Category : Steam cleaner