USER MANUAL DCV586M DEWALT
English (original instructions) 33
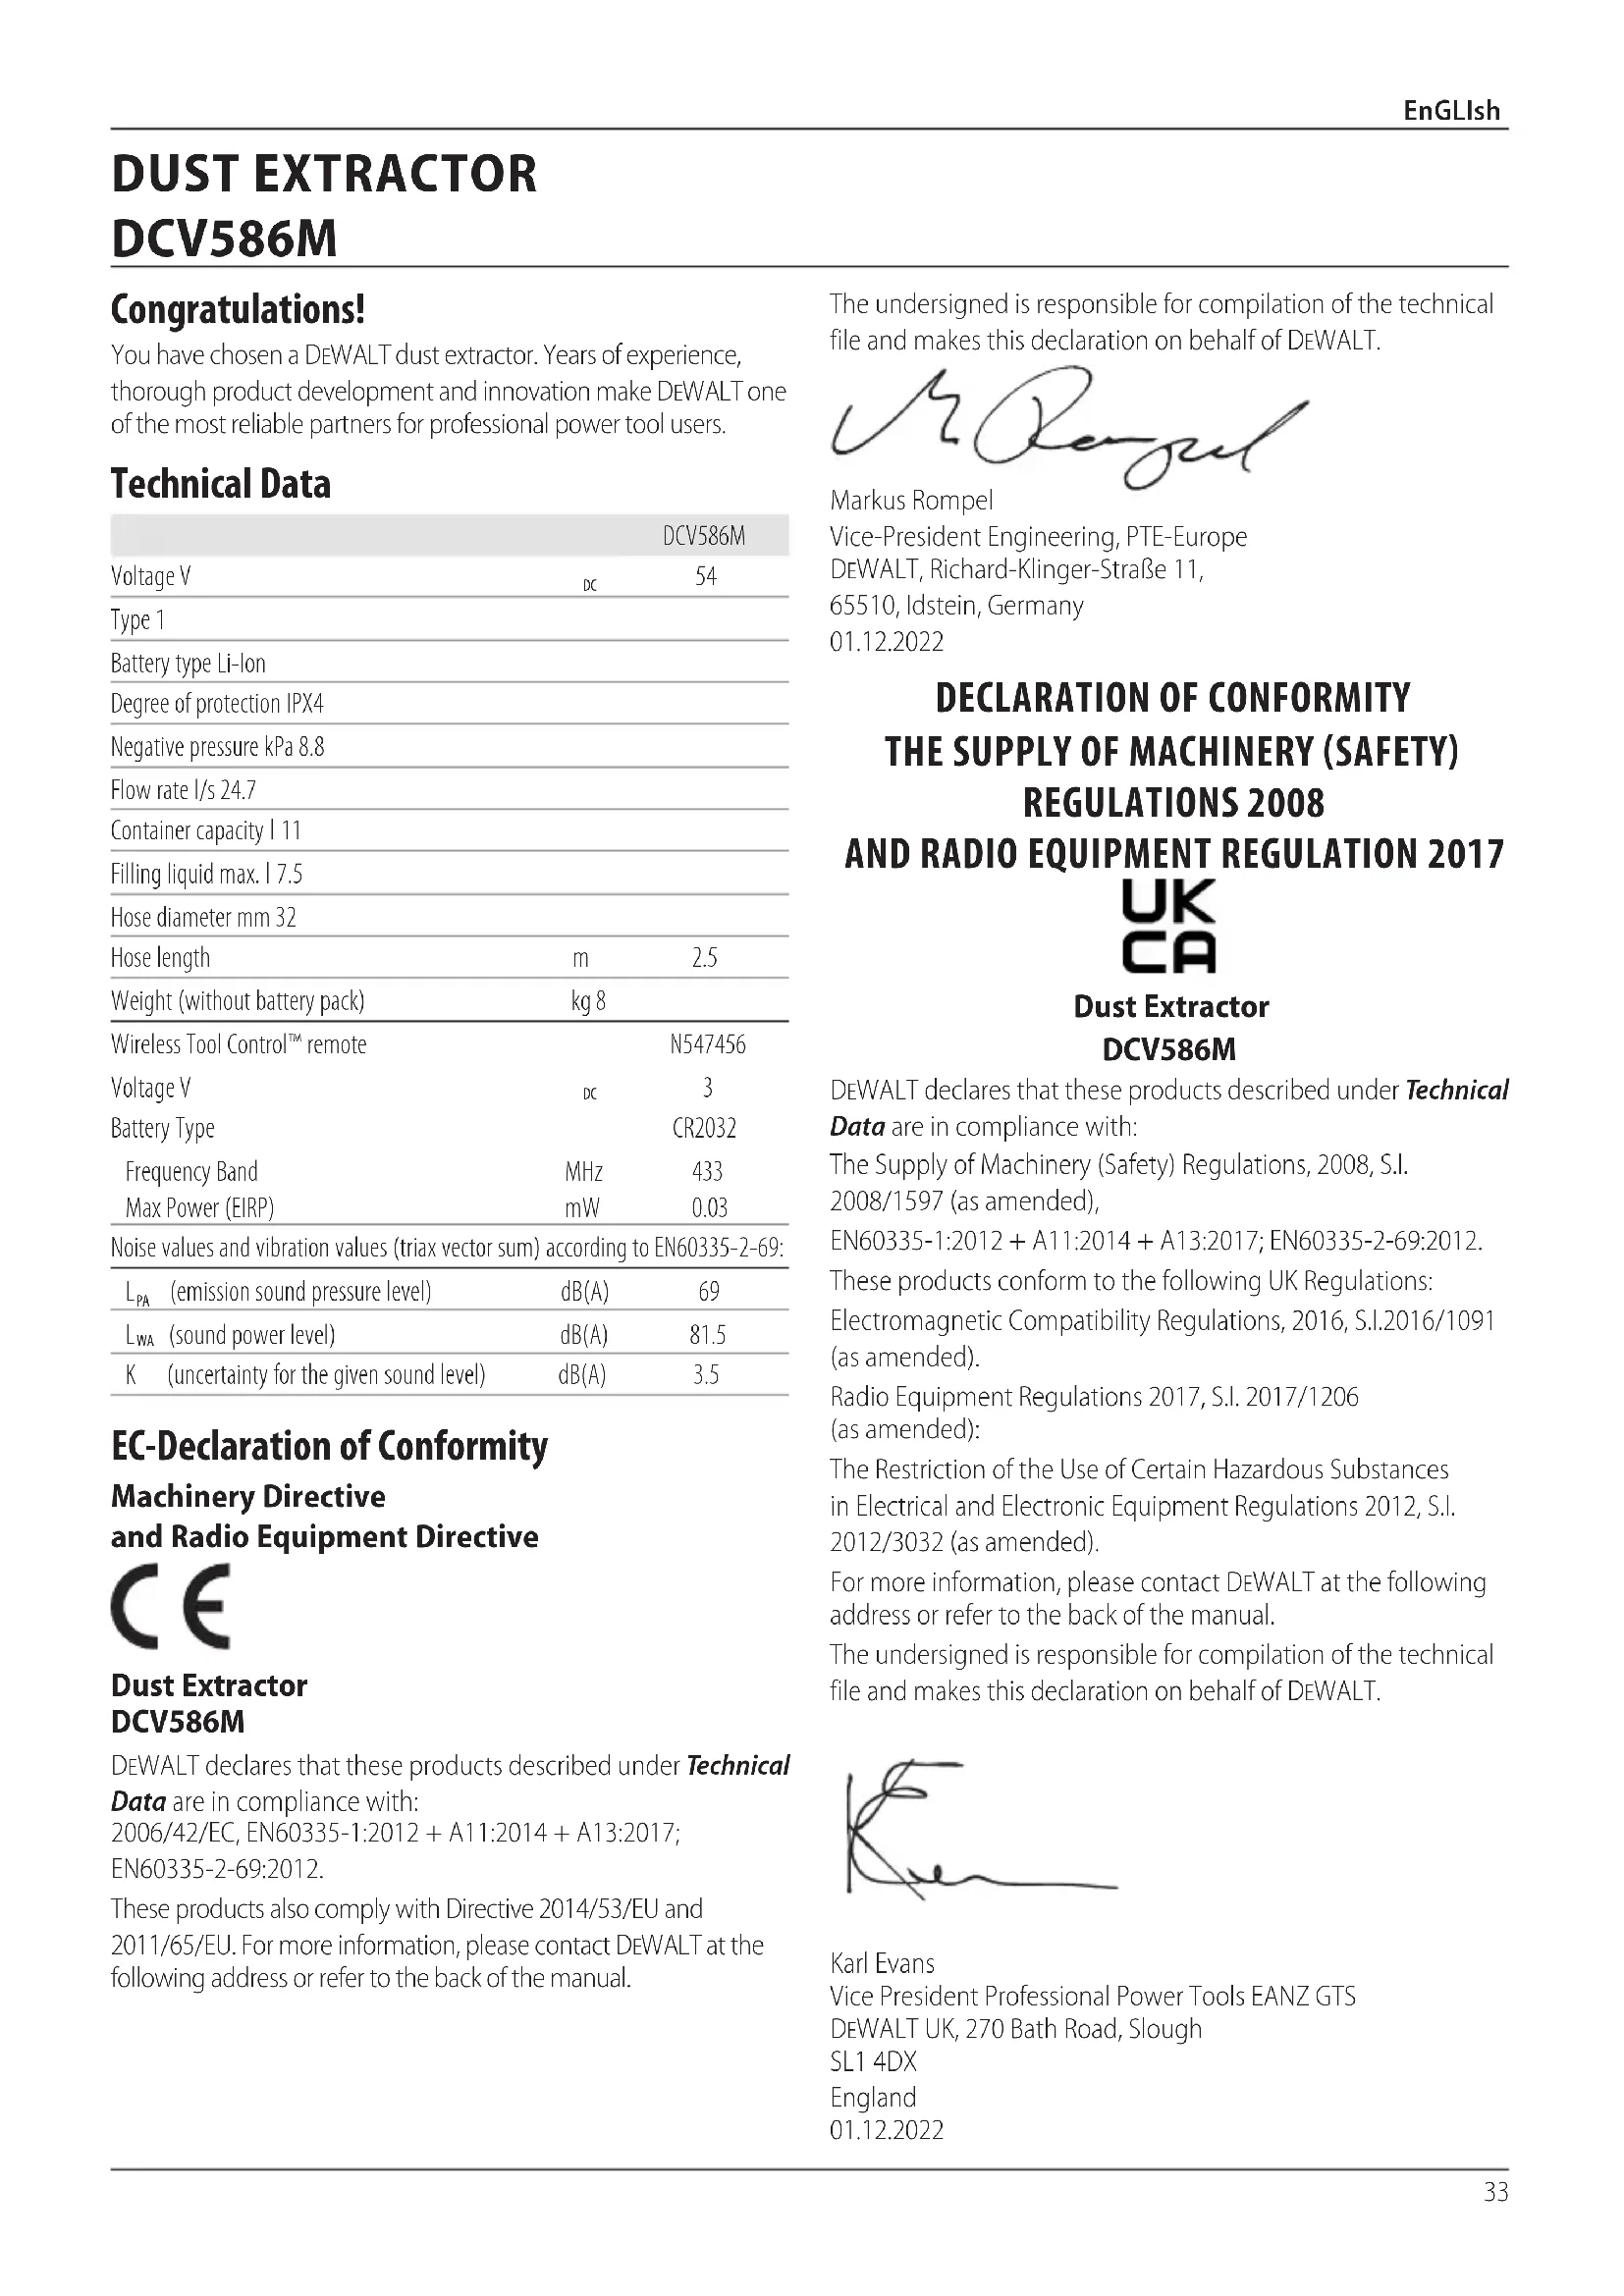
You have chosen a DEWALT dust extractor. Years of experience, thorough product development and innovation make DEWALT one of the most reliable partners for professional power tool users.
Technical Data
| | DCV586M |
| Voltage V | DC | 54 |
| Type 1 | | |
| Battery type Li-lon | | |
| Degree of protection IPX4 | | |
| Negative pressure kPa 8.8 | | |
| Flow rate l/s 24.7 | | |
| Container capacity I 11 | | |
| Filling liquid max. I 7.5 | | |
| Hose diameter mm 32 | | |
| Hose length | m | 2.5 |
| Weight (without battery pack) | kg 8 | |
| Wireless Tool ControlTM remote | | N547456 |
| Voltage V | DC | 3 |
| Battery Type | | CR2032 |
| Frequency Band | MHz | 433 |
| Max Power (EIRP) | mW | 0.03 |
| Noise values and vibration values (triax vector sum) according to EN60335-2-69: |
| L_PA (emission sound pressure level) | dB(A) | 69 |
| LWA (sound power level) | dB(A) | 81.5 |
| K (uncertainty for the given sound level) | dB(A) | 3.5 |
Machinery Directive and Radio Equipment Directive

DEWALT declares that these products described under Technical
Data are in compliance with:
2006/42/EC, EN60335-1:2012 + A11:2014 + A13:2017;
EN60335-2-69:2012
These products also comply with Directive 2014/53/EU and 2011/65/EU. For more information, please contact DEWALT at the following address or refer to the back of the manual.
The undersigned is responsible for compilation of the technical file and makes this declaration on behalf of DEWALT.

Markus Rompel
Vice-President Engineering, PTE-Europe
65510, Idstein, Germany
01.12.2022
THE SUPPLY OF MACHINERY (SAFETY)
REGULATIONS 2008
AND RADIO EQUIPMENT REGULATION 2017

DCV586M
DEWALT declares that these products described under Technical Data are in compliance with:
The Supply of Machinery (Safety) Regulations, 2008, S.I. 2008/1597 (as amended),
EN60335-1:2012 + A11:2014 + A13:2017; EN60335-2-69:2012.
These products conform to the following UK Regulations: Electromagnetic Compatibility Regulations, 2016, S.I.2016/1091 (as amended).
Radio Equipment Regulations 2017, S.I. 2017/1206 (as amended):
The Restriction of the Use of Certain Hazardous Substances in Electrical and Electronic Equipment Regulations 2012, S.I. 2012/3032 (as amended).
For more information, please contact DEWALT at the following address or refer to the back of the manual.
The undersigned is responsible for compilation of the technical file and makes this declaration on behalf of DEWALT.

Karl Evans
Vice President Professional Power Tools EANZ GTS
DEWALT UK, 270 Bath Road, Slough
SL14DX
England
01.12.2022
| Batteries Chargers/Charge | Times (Minutes)*** |
| Cat # V | DC | Ah Weight (kg) | DCB104 | DCB107 | DCB112/DCB1102 | DCB113 | DCB115/DCB1104 | DCB116 | DCB117 | DCB118 | DCB132 | DCB119 |
| DCB546 | 18/54 | 6.0/2.0 | 1.08 | 60 | 270 | 170 | 140 | 90 | 80 | 40 | 60 | 90 | X |
| DCB547/G | 18/54 | 9.0/3.0 | 1.46 | 75* | 420 | 270 | 220 | 135* | 110* | 60 | 75* | 135* | X |
| DCB548 | 18/54 | 12.0/4.0 | 1.46 | 120 | 540 | 350 | 300 | 180 | 150 | 80 | 120 | 180 | X |
| DCB549 | 18/54 | 15.0/5.0 | 2.12 | 125 | 730 | 450 | 380 | 230 | 170 | 90 | 125 | 230 | X |
| DCB181 | 18 | 1.5 | 0.35 | 22 | 70 | 45 | 35 | 22 | 22 | 22 | 22 | 22 | 45 |
| DCB182 | 18 | 4.0 | 0.61 | 60/40** | 185 | 120 | 100 | 60 | 60/45** | 60/40** | 60/40** | 60 | 120 |
| DCB183/B/G | 18 | 2.0 | 0.40 | 30 | 90 | 60 | 50 | 30 | 30 | 30 | 30 | 30 | 60 |
| DCB184/B/G | 18 | 5.0 | 0.62 | 75/50** | 240 | 150 | 120 | 75 | 75/60** | 75/50** | 75/50** | 75 | 150 |
| DCB185 | 18 | 1.3 | 0.35 | 22 | 60 | 40 | 30 | 22 | 22 | 22 | 22 | 22 | 40 |
| DCB187 | 18 | 3.0 | 0.54 | 45 | 140 | 90 | 70 | 45 | 45 | 45 | 45 | 45 | 90 |
| DCB189 | 18 | 4.0 | 0.54 | 60 | 185 | 120 | 100 | 60 | 60 | 60 | 60 | 60 | 120 |
| DCBP034/G | 18 | 1.7 | 0.32 | 27 | 82 | 50 | 40 | 27 | 27 | 27 | 27 | 27 | 50 |
| DCBP518/G | 18 | 5.0 | 0.75 | 50 | 240 | 150 | 120 | 75 | 60 | 50 | 50 | 75 | 150 |
Date code 201811475B or later
Date code 201536 or later
**Battery charge times matrix provided for guidance only; charge times will vary depending on temperature and condition of batteries.

WARNING: To reduce the risk of injury, read Construction manual.
Definitions: Safety Guidelines
The definitions below describe the level of severity for each signal word. Please read the manual and pay attention to these symbols.
DANGER: Indicates an imminently hazardous reaction which, if not avoided, will result in death or serious injury.
WARNING: Indicates a potentially hazardous situation when, if not avoided, could result in death or serious injury.
CAUTION: Indicates a potentially hazardous situation, if not avoided, may result in minor or moderate injury.
NOTICE: Indicates a practice not related to personal injury which, if not avoided, may result in property damage.
D. notes risk of electric shock.
D. notes risk of fire.
IMPORTANT SAFETY INSTRUCTIONS
SAVE ALL WARNING AND INSTRUCTIONS FOR FUTURE REFERENCE
When using this appliance, basic safety precautions should always be followed including the following:
WARNING: Operators shall be adequately instructed on the use of this dust extractor.
WARNING: To reduce the risk of fire, electric shock jury:
Make sure that the dust extractor is engaged in the horizontal position.
- Do not leave the appliance unattended when the dust extractor is out of reach or sight. Remove the battery pack when not in use and before servicing.
- Do not allow appliance to be used as a toy. Close attention is necessary when used near children.
- Use this appliance ONLY as described in the manual. Use only recommended attachments and accessories.
- Do not use this appliance if it is showing signs of malfunction in any way. If the appliance is not working correctly, has been dropped, damaged, left outdoors or dropped into water, return it to a service centre.
- Do not handle the appliance with wet hands.
- Do not put any objects into the openings of the appliance. Do not use the appliance with any opening blocked; keep free of dust, lint, hair and anything else that may reduce air flow.
- Keep hair, loose clothing, fingers, and all body parts away from the openings and moving parts.
- Turn off all controls before disconnecting from power source.
- Use extra care when cleaning on stairs.
- Use personal protective equipment. Always wear eye protection. Protective equipment such as dust mask, non-skid safety shoes, hard hat or hearing protection used for appropriate conditions will reduce personal injuries.
- Stay alert, watch what you are doing and use common sense when operating a dust extractor. Do not use a dust extractor while you are tired or under
the influence of drugs, alcohol or medication. A moment of inattention while operating dust extractors may result in serious personal injury.
Additional SafetyWarnings
a) Prevent unintentional starting. Ensure the switch is in the off-position before connecting to battery pack, picking up or carrying the appliance. Carrying the appliance with your finger on the switch or energizing appliance with switch on invites accidents.
b) Disconnect the battery pack from the appliance before making any adjustments, changing accessories or storing appliance. Vacuum could be activated by the remote or a paired tool. Unintended energising of the appliance that has the switch on invites accidents.
c) Recharge only with the charger specified by the manufacturer. A charger that is suitable for one type of battery pack may create a risk of fire when used with another battery pack.
d) Use appliance only with DEWALT recommended battery packs. Use of any other battery packs may create a risk of injury and fire.
e) Use power tools and accessories which are connected to the vacuum in accordance with these instructions. Use of power tools for applications others than those intended, can result in hazardous situations.
f) When battery pack is not in use, keep it away from other metal objects, like paper clips, coins, keys, nails, screws or other small metal objects, that can make a connection from one terminal to another. Shorting the battery terminals together may cause burns or a fire.
g) Under abusive conditions, liquid may be ejected from the battery; avoid contact. If contact accidentally occurs, flush with water. If liquid contacts eyes, additionally seek medical help. Liquid ejected from the battery may cause irritation or burns.
h) Do not use a battery pack or appliance that is damaged or modified. Damaged or modified batteries may exhibit unpredictable behavior resulting in fire, explosion or risk of injury.
i) Do not expose a battery pack or appliance to fire or excessive temperature. Exposure to fire or temperature above 40^ may cause explosion.
j) Follow all charging instructions and do not charge the battery pack or appliance outside of the temperature range specified in the instructions. Charging improperly or at temperatures outside of the specified range may damage the battery and increase the risk of fire.
k) Do not use the vacuum cleaner if dust is blown out of the ventilation slots. Switch off the vacuum cleaner and check whether the filter is installed correctly or is defective. Defective filters must be replaced immediately.
1) Have servicing performed by a qualified repair person using only identical replacement parts. This will ensure that the safety of the product is maintained.
- The appliance may only be used by persons who are familiar with it, have been trained on how to use it safely and who understand the resulting hazards.
- When picking up dusts with an exposure limit value, precautions must be taken to ensure adequate air exchange in the room if the exhaust air from the appliance is released into the room.
Operator should observe any safety regulations to the material being handled.
- Do not use to vacuum combustible explosive materials, such as coal, grain or other finely divided combustible material.
- Do not use the appliance to pick up flammable or combustible liquids, such as gasoline or use in areas where flammable or combustible liquids are present.
- Do not use to vacuum hazardous, toxic or carcinogenic materials, such as asbestos or pesticide, unless the vacuuming of the material is specifically identified in this instruction manual as an approved use.
- Static shocks are possible in dry areas or when the relative humidity of the air is low. This is only temporary and does not affect the use of the dust extractor.
- To avoid spontaneous combustion, empty the canister after every use.
- Some wood contains preservatives which can be toxic. Take extra care to prevent inhalation and skin contact when working with these materials. Request and follow any safety information available from your material supplier.
- Do not use vacuum as a step ladder.
- Do not place heavy objects on dust extractor.
WARNING: To reduce the risk of fire, electric shock injury:
- Do not pick up anything that is burning or smoking, such as cigarettes, matches or hot ashes.
- Do not use without filter in place.
Residual Risks
In spite of the application of the relevant safety regulations and the implementation of safety devices, certain residual risks cannot be avoided. These are:
Impairment of hearing.
- Risk of personal injury due to flying particles.
- Risk of burns due to accessories becoming hot during operation.
- Risk of personal injury due to prolonged use.
Chargers
DEWALT chargers require no adjustment and are designed to be as easy as possible to operate.
Electrical Safety
The electric motor has been designed for one voltage only. Always check that the battery pack voltage corresponds to the voltage on the rating plate. Also make sure that the voltage of your charger corresponds to that of your mains.

Your DEWALT charger is double insulated in accordance with EN60335; therefore, no earth wire is required.
If the supply cord is damaged, it must be replaced only by DEWALT or an authorised service organisation.
Mains Plug Replacement (U.K. & Ireland Only)
If a new mains plug needs to be fitted:
- Safely dispose of the old plug.
- Connect the brown lead to the live terminal in the plug.
- Connect the blue lead to the neutral terminal.
WARNING: No connection is to be made to the terminal.
Follow the fitting instructions supplied with good quality plugs. Recommended fuse: 3 A.
Using an Extension Cable
An extension cord should not be used unless absolutely necessary. Use an approved extension cable suitable for the power input of your charger (refer to Technical Data). The minimum conductor size is 1mm^2 ; the maximum length is 30m . When using a cable reel, always unwind the cable completely.
Important Safety Instructions for All Battery Chargers
SAVE THESE INSTRUCTIONS: This manual contains important safety and operating instructions for compatible battery chargers (refer to Technical Data). Before using charger, read all instructions and cautionary markings on charger, battery pack, and product using battery pack.
WARNING: Shock hazard. Do not allow any liquid to get charged. Electric shock may result.
WARNING: We recommend the use of a residual current with a residual current rating of 30mA or less.
CAUTION: Burn hazard. To reduce the risk of injury, charge only DEWALT rechargeable batteries. Other types of batteries may burst, causing personal injury and damage.
CAUTION: Children should be supervised to ensure that they do not play with the appliance.
NOTICE: Under certain conditions, with the charger plugged into the power supply, the exposed charging contacts inside the charger can be shorted by foreign material. Foreign materials of a conductive nature such as, but not limited to, steel wool, aluminum foil or any buildup of metallic particles should be kept away from charger cavities. Always unplug the charger from the power supply when there is no battery pack in the cavity. Unplug charger before attempting to clean.
- DO NOT attempt to charge the battery pack with any chargers other than the ones in this manual. The charger and battery pack are specifically designed to work together.
- These chargers are not intended for any uses other than charging DEWALT rechargeable batteries. Any other uses may result in risk of fire, electric shock or electrocution.
- Do not expose charger to rain or snow.
- Pull by plug rather than cord when disconnecting charger. This will reduce risk of damage to electric plug and cord.
- Make sure that cord is located so that it will not be stepped on, tripped over, or otherwise subjected to damage or stress.
- Do not use an extension cord unless it is absolutely necessary. Use of improper extension cord could result in risk of fire, electric shock, or electrocution.
- Do not place any object on top of charger or place the charger on a soft surface that might block the ventilation slots and result in excessive internal heat. Place the charger in a position away from any heat source. The charger is ventilated through slots in the top and the bottom of the housing.
- Do not operate charger with damaged cord or plug—have them replaced immediately.
- Do not operate charger if it has received a sharp blow, been dropped, or otherwise damaged in any way. Take it to an authorised service centre.
- Do not disassemble charger; take it to an authorised service centre when service or repair is required. Incorrect reassembly may result in a risk of electric shock, electrocution or fire.
- In case of damaged power supply cord, the supply cord must be replaced immediately by the manufacturer, its service agent or similar qualified person to prevent any hazard.
- Disconnect the charger from the outlet before attempting any cleaning. This will reduce the risk of electric shock. Removing the battery pack will not reduce this risk.
NEVER attempt to connect two chargers together.
- The charger is designed to operate on standard 230V household electrical power. Do not attempt to use it on any other voltage. This does not apply to the vehicular charger.
Charging a Battery (Fig. B)
- Plug the charger into an appropriate outlet before inserting battery pack.
- Insert the battery pack 7 into the charger, making sure the battery pack is fully seated in the charger. The red (charging) light will blink repeatedly, indicating that the charging process has started.
- The completion of charge will be indicated by the red light remaining ON continuously. The battery pack is fully charged and may be used at this time or left in the charger. To remove the battery pack from the charger, push the battery release button 23 on the battery pack.
NOTE: To ensure maximum performance and life of lithium-ion battery packs, charge the battery pack fully before first use.
Charger Operation
Refer to the indicators below for the charge status of the battery pack.
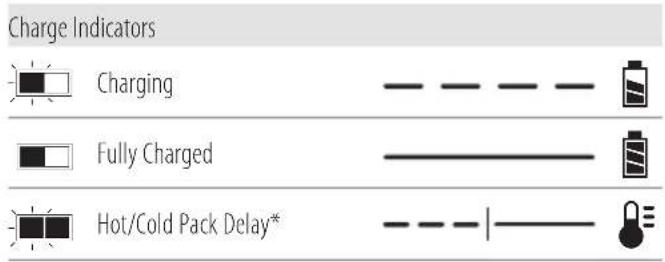
- The red light will continue to blink, but a yellow indicator light will be illuminated during this operation. Once the battery pack has reached an appropriate temperature, the yellow light will turn off and the charger will resume the charging procedure. The compatible charger(s) will not charge a faulty battery pack. The charger will indicate faulty battery by refusing to light.
NOTE: This could also mean a problem with a charger.
If the charger indicates a problem, take the charger and battery pack to be tested at an authorised service centre.
Hot/Cold Pack Delay
When the charger detects a battery pack that is too hot or too cold, it automatically starts a Hot/Cold Pack Delay, suspending charging until the battery pack has reached an appropriate temperature. The charger then automatically switches to the pack charging mode. This feature ensures maximum battery pack life.
A cold battery pack will charge at a slower rate than a warm battery pack. The battery pack will charge at that slower rate throughout the entire charging cycle and will not return to maximum charge rate even if the battery pack warms.
The DCB118 charger is equipped with an internal fan designed to cool the battery pack. The fan will turn on automatically when the battery pack needs to be cooled. Never operate the charger if the fan does not operate properly or if ventilation slots are blocked.
Do not permit foreign objects to enter the interior of the charger.
Electronic Protection System
XR Li-Ion tools are designed with an Electronic Protection System that will protect the battery pack against overloading, overheating or deep discharge.
The tool will automatically turn off if the Electronic Protection System engages. If this occurs, place the lithium-ion battery pack in the charger until it is fully charged.
Wall Mounting
These chargers are designed to be wall mountable or to sit upright on a table or work surface. If wall mounting, locate the charger within reach of an electrical outlet, and away from a corner or other obstructions which may impede air flow. Use the back of the charger as a template for the location of the mounting screws on the wall. Mount the charger securely using drywall screws (purchased separately) at least 25.4mm long with a screw head diameter of 7 - 9mm , screwed into wood to an optimal depth leaving approximately 5.5mm of the screw exposed. Align the slots on the back of the charger with the exposed screws and fully engage them in the slots.
Battery Packs
Important Safety Instructions for All Battery Packs
When ordering replacement battery packs, be sure to include catalogue number and voltage.
The battery pack is not fully charged out of the carton. Before using the battery pack and charger, read the safety instructions below. Then follow charging procedures outlined.
READ ALL INSTRUCTIONS
- Do not charge or use battery in explosive atmospheres, such as in the presence of flammable liquids, gases or dust. Inserting or removing the battery from the charger may ignite the dust or fumes.
- Never force battery pack into charger. Do not modify battery pack in any way to fit into a non-compatible charger as battery pack may rupture, causing serious personal injury.
Charge the battery packs only in DEWALT chargers.
DO NOT splash or immerse in water or other liquids.
- Do not store or use the tool and battery pack in locations where the temperature may fall below 4^ (39.2 F) (such as outside sheds or metal buildings in winter), or reach or exceed 40^ (104 F) (such as outside sheds or metal buildings in summer).
- Do not incinerate the battery pack even if it is severely damaged or is completely worn out. The battery pack can explode in a fire. Toxic fumes and materials are created when lithium-ion battery packs are burned.
- If battery contents come into contact with the skin, immediately wash area with mild soap and water. If battery liquid gets into the eye, rinse water over the open eye for 15 minutes or until irritation ceases. If medical attention is needed, the battery electrolyte is composed of a mixture of liquid organic carbonates and lithium salts.
- Contents of opened battery cells may cause respiratory irritation. Provide fresh air. If symptoms persist, seek medical attention.
WARNING: Burn hazard. Battery liquid may be infeasible if exposed to spark or flame.
WARNING: Never attempt to open the battery pack for any reason. If battery pack case is cracked or damaged, do not insert into charger. Do not crush, drop or damage battery pack. Do not use a battery pack or charger that has received a sharp blow, been dropped, run over or damaged in any way (i.e., pierced with a nail, hit with a hammer, stepped on). Electric shock or electrocution may result. Damaged battery packs should be returned to service centre for recycling.
WARNING: Fire hazard. Do not store or carry the battery pack so that metal objects can contact exposed battery terminals. For example, do not place the battery pack in aprons, pockets, tool boxes, product kit boxes, drawers, etc., with loose nails, screws, keys, etc.
CAUTION: When not in use, place tool on its side on a stable surface where it will not cause a tripping
or falling hazard. Some tools with large battery packs will stand upright on the battery pack but may be easily knocked over.
Transportation
WARNING: Fire hazard. Transporting batteries can possibly cause fire if the battery terminals inadvertently come into contact with conductive materials. When transporting batteries, make sure that the battery terminals are protected and well-insulated from materials that could contact them and cause a short circuit. NOTE: Lithium-ion batteries should not be put in checked baggage.
DEWALT batteries comply with all applicable shipping regulations as prescribed by industry and legal standards, which include UN Recommendations on the Transport of Dangerous Goods; International Air Transport Association (IATA) Dangerous Goods Regulations; International Maritime Dangerous Goods (IMDG) Regulations; and the European Agreement Concerning The International Carriage of Dangerous Goods by Road (ADR). Lithium-ion cells and batteries have been tested to section 38.3 of the UN Recommendations on the Transport of Dangerous Goods Manual of Tests and Criteria.
In most instances, shipping a DEWALT battery pack will be excepted from being classified as a fully regulated
Class 9 Hazardous Material. In general, only shipments containing a lithium-ion battery with an energy rating greater than 100 Watt Hours (Wh) will require being shipped as fully regulated Class 9. All lithium-ion batteries have the Wh rating marked on the pack. Furthermore, due to regulation complexities, DEWALT does not recommend air shipping lithium-ion battery packs alone regardless of Wh rating. Shipments of tools with batteries (combokits) can be air shipped as excepted if the Wh rating of the battery pack is no greater than 100 Wh.
Regardless of whether a shipment is considered excepted or fully regulated, it is the shipper's responsibility to consult the latest regulations for packaging, labeling/marking and documentation requirements.
The information provided in this section of the manual is provided in good faith and believed to be accurate at the time the document was created. However, no warranty, expressed or implied, is given. It is the buyer's responsibility to ensure that its activities comply with the applicable regulations.
Transporting the FLEXVOLT™ Battery
The DEWALT FLEXVOLT® battery has two modes: Use and Transport.
Use Mode: When the FLEXVOLT™ battery stands alone or is in a DEWALT 18V product, it will operate as an 18V battery. When the FLEXVOLT™ battery is in a 54V or a 108V (two 54V batteries) product, it will operate as a 54V battery.
Transport Mode: When the cap is attached to the FLEXVOLT™ battery, the battery is in Transport mode. Keep the cap
for shipping.
When in Transport mode, strings of cells are electrically disconnected within the pack,
resulting in 3 batteries with a lower Watt hour (Wh) rating as compared to 1 battery with a higher Watt hour rating. This increased quantity of 3 batteries with the lower Watt hour rating can exempt the pack from certain shipping regulations that are imposed upon the higher Watt hour batteries.
For example, the Transport Wh rating might indicate 3 × 36 Wh, meaning 3 batteries of 36 Wh each. The Use Wh rating might indicate 108 Wh (1 battery
Example of Use and Transport Label Marking

Use: 108 Wh
Transport:3x36 Wh
Storage Recommendations
- The best storage place is one that is cool and dry away from direct sunlight and excessive heat or cold. For optimum battery performance and life, store battery packs at room temperature when not in use.
- For long storage, it is recommended to store a fully charged battery pack in a cool, dry place out of the charger for optimal results.
NOTE: Battery packs should not be stored completely depleted of charge. The battery pack will need to be recharged before use.
Labels on Charger and Battery Pack
In addition to the pictographs used in this manual, the labels on the charger and the battery pack may show the following pictographs:

Read instruction manual before use.

Refer to Technical Data for charging time.

Do not probe with conductive objects.

Do not charge damaged battery packs.

Do not expose to water.

Have defective cords replaced immediately.

Charge only between 4^ and 40^

Only for indoor use.

Discard the battery pack with due care for the environment.

Charge battery packs only with designated DEWALT chargers. Charging battery packs other than the designated DEWALT batteries with a DEWALT
charger may make them burst or lead to other dangerous situations.

Do not incinerate the battery pack.

USE (without transport cap). Example: Wh rating indicates 108 Wh (1 battery with 108 Wh).

TRANSPORT (with built-in transport cap). Example: Wh rating indicates 3 × 36 Wh (3 batteries of 36 Wh).
Battery Type
The DCV586M operates on a 54 volt battery pack.
These battery packs may be used: DCB546, DCB547, DCB548.
Refer to Technical Data for more information.
Package Contents
The package contains:
1Dustextractor
1WirelessToolControlTMremote
2Filters
1Hose
1Fleecebag
1 Charger (C, D, E, G, H, L, M, P, Q, S, T, U, X, Y, Z models)
1 Li-Ion battery pack (C1, D1, E1, G1, H1, L1, M1, P1, Q1, S1, T1, U1, X1, Y1, Z1 models)
2 Li-Ion battery packs (C2, D2, E2, G2, H2, L2, M2, P2, Q2, S2, T2, U2, X2, Y2, Z2 models)
3 Li-Ion battery packs (C3, D3, E3, G3, H3, L3, M3, P3, Q3, S3, T3, U3, X3, Y3, Z3 models)
1Instructionmanual
NOTE: Battery packs, chargers and kitboxes are not included with N models. Battery packs and chargers are not included with NT models. B models include Bluetooth® battery packs.
nOTE: The Bluetooth® word mark and logos are registered trademarks owned by the Bluetooth®, SIG, Inc. and any use of such marks by DEWALT is under license. Other trademarks and trade names are those of their respective owners.
- Check for damage to the dust extractor, parts or accessories which may have occurred during transport.
- Take the time to thoroughly read and understand this manual prior to operation.
The following pictograms are shown on the dust extractor:

Read instruction manual before use.

Pairing symbol.
0
0
20
32
Hose diameter switch positions.

Acoustic alarm
Low battery alarm

Flow rate alarm
WARNING: This machine contains dust hazardous to health. Emptying and maintenance operations, including removal of the dust collection means, must only be carried out by authorised personnel wearing suitable personal protection. Do not operate without the full filtration system fitted.

Class M dust extractors are suitable to extract dry, non-combustible dusts with workplace limit values of ≥ 0.1mg / m^3
Date Code Position (Fig. A)
The date code 22, which also includes the year of manufacture, is printed on top housing under handle.
Example:
2022 XX XX
Year of Manufacture
Description (Fig. A)
WARNING: Never modify the dust extractor or any part of it. Damage or personal injury could result.
1 Battery port
10 TSTAK stacking latches
2 Dust extractor hose
11 Wireless Tool Control™ pairing button
3 Three position switch
12 Fleece bag
4 Tank latches
13 Handle
5 Hose clips
14 Wireless Tool ControlTM remote
6 Dust extractor head
15 Hose selection switch
7 Battery pack
8 Hose release latch
9 Hose inlet plug
Intended Use
This industrial dust extractor cleaner is intended for wet and dry vacuum cleaning applications.
The appliance can operate cordless by using the DEWALT 54V Li-ion batteries.
The dust extractor can be used with a DEWALT TSTAK transport system or as a stand alone unit on the floor.
The DCV586M is suitable for picking up dry and non-flammable dusts, liquids, wood chips, mineral dusts containing quartz and hazardous dusts with exposure limit values (e.g. MAK or AGW
values) greater than or equal to 0.1mg / m^3 (dust class M as per IEC/EN60335-2-69).
DO NOT pick up materials that present a risk of explosion, glowing or burning materials, flammable materials, gases or other hazardous substances.
DO NOT suck up oil, liquids with a temperature of over 32^ , aggressive or flammable liquids.
DO NOT use the dust extractor in explosive atmospheres.
DO NOT use the dust extractor without dust bag.
NOTE: This appliance is suited for professional and commercial use, e.g. in hotels, schools, hospitals, factories, shops, offices, rental companies, and on construction sites.
DO NOT let children come into contact with the dust extractor.
Supervision is required when inexperienced operators use this dust extractor.
- Young children and the infirm. This appliance is not intended for use by young children or infirm persons.
- This product is not intended for use by persons (including children) suffering from diminished physical, sensory or mental abilities; lack of experience, knowledge or skills. Children should never be left alone with this product.
ASSEMBLY AND ADJUSTMENTS
WARNING: To reduce the risk of serious personal injury, turn dust extractor off and disconnect battery pack before making any adjustments or removing/ installing attachments or accessories and if the dust extractor head is removed from the tank or not latched securely. An accidental start-up can cause injury.

ING: Use only DEWALT battery packs and chargers.
Installing and Removing the Battery Pack (Fig. B)
NOTE: Make sure your battery pack 7 is fully charged.
- To install the battery pack into the vaccum, insert/slide battery pack into battery port 1. Make sure the battery pack is fully seated.
- To remove the battery pack from the dust extractor, press and hold the battery release 23 on the battery pack and remove. To charge the pack, insert it into your DEWALT charger.
Fuel Gauge Battery Packs (Fig. B)
Some DEWALT battery packs include a fuel gauge which consists of three green LED lights that indicate the level of charge remaining in the battery pack.
To actuate the fuel gauge, press and hold the fuel gauge button 16. A combination of the three green LED lights will illuminate designating the level of charge left. When the level of charge in the battery is below the usable limit, the fuel gauge will not illuminate and the battery will need to be recharged.
NOTE: The fuel gauge is only an indication of the charge left on the battery pack. It does not indicate dust extractor functionality and is subject to variation based on product components, temperature and end-user application.
To attach the hose to the dust extractor, press the hose release latch 8 and insert the end of the hose into the hose inlet. The hose must be inserted fully before the hose release latch is released.
To remove the hose, press the hose release latch and remove the hose. The hose must be fully removed before releasing the hose release latch.
The hose inlet plug 9 may be used to cover the hose inlet if the hose is removed for transportation, cleaning, etc.
Installing the Paper or Fleece Bag (Fig. A, C, E, F)
When vacuuming fine dust, you may also use an additional paper bag or fleece bag 12 to make emptying the tank 21 easier.
NOTE: Always use a bag with M-class dust.
- Press the three position switch 3 to the Off (O) position and remove the battery 7.
- Unlatch the tank latches 4 and remove the dust extractor head 6 from the tank 21.
- Attach the bag by passing the two tabs 26 on the bag opening past the two notches 27 on the dust extractor.
- Rotate the bag a quarter turn until the square edge 28 is facing upward.
- Fit the bag inside the tank.
- Replace dust extractor head onto the tank and latch securely.
Removing and Disposing the Bag (Fig. A, D, E, F)
WARNING: Appropriate personal protective equipment like dust mask and gloves should be used while handling used dust bags.
- Press the three position switch 3 to the Off (O) position and remove the battery 7.
- Close the twist-lock hose inlet with the hose inlet plug 9.
- Unlatch the tank latches 4 and remove the dust extractor head 6 from the tank 21.
NOTE: It is normal for there to be a small amount of dust in the tank even with the bag properly installed.
- Rotate the bag until the two tabs align with the two notches on the dust extractor and remove the bag from the dust extractor.
- Once the bag is removed it can be sealed for disposal.
a. Peel the backing from the adhesive seal 29.
b. Press the adhesive seal over the opening and properly dispose of the bag. DO NOT reuse the bag.
c. Dispos of collection bag in appropriate container according to statutory provisions.
OPERATION
Instructions for Use
WARNING: Always observe the safety instructions and applicable regulations.
Replacing the Coin Cell Battery in the Remote Control (Fig. J)

DANGER:DO NOT INGEST BATTERY;CHEMICAL BURN HAZARD. This product contains a coin/ button cell battery. If the coin/button cell battery is swallowed, it can cause severe internal burns in just 2 hours and can lead to death.

NING: KEEP NEW AND USED BATTERIES AWAY
FROM CHILDREN. If the battery compartment does not close securely, stop using the product and keep it away from children. If you think batteries might have been swallowed or placed inside any part of the body, seek immediate medical attention.
WARNING: WHEN REPLACING BATTERY, REPLACE WITH THE SAME OR EQUIVALENT TYPE CR2032.
Observe correct polarity (+ and -) when replacing batteries. Do not store or carry batteries so that metal objects can contact exposed battery terminals.
WARNING:ENSURE THAT COIN CELL REPLACEMENT IS TRIED OUT PROPERLY.There is a risk of explosion.
- When replacing battery, replace it with the same or equivalent type CR2032. Do not use any other coin cells or other forms of electrical power supply.
DO NOT attempt to recharge the coin cell battery and do not short circuit the coin cell battery. The coin cell battery may leak, explode, catch fire and cause personal injury.
DO NOT overheat the coin cell or throw it into fire. The coin cell may leak, explode, catch fire and cause personal injury.
DO NOT damage the coin cell and do not disassemble the coin cell. The coin cell may leak, explode, catch fire and cause personal injury.
DO NOT allow damaged coin cells to come into contact with water. Leaking lithium may mix with water to create hydrogen, which could cause a fire, an explosion, or personal injury.
DO NOT dispose of the button cell battery with normal household waste. Contact your local waste disposal department to dispose of the device/batteries in accordance with applicable local laws and regulations.
-
Remove and dispose of drained coin cell correctly. Drained coin cell may leak and damage the product or cause personal injury.
-
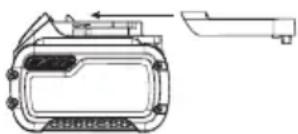
To open the housing remove the 4 screws 31 from the rear panel with a T10 torx screwdriver.
- Pull out sideways the discharged coin cell battery from the battery holder.
- Insert sideways the new coin cell battery 32 into the battery holder, pay attention to the orientation of the battery in terms of polarity.
- Replace the back cover, insert the screws and tighten.
WARNING: To reduce the risk of serious personal injury, turn dust extractor off and disconnect battery pack before making any adjustments or removing/ installing attachments or accessories and if the dust extractor head is removed from the tank or not latched securely. An accidental start-up can cause injury.
Flow Rate/Low Battery Alarm
Flow Rate Alarm Adjustment (Fig. A)
Adjust the hose selection switch 15 to the correct hose (or tube) inside diameter size or accessory diameter referring to the largest section. The chosen diameter of the hose selection switch must be equal or bigger as the largest diameter of the used hose/tube/accessories. The hose supplied is 32mm inside diameter. An acoustic alarm will sound with a slow, intermittent beep if the flow rate falls below 20~m / s . The system has a time delay to reduce unintended alarms.
If the alarm sounds when there is no apparent blockage:
- Ensure that the hose selection switch is set to the correct diameter.
- If the flow rate adjustment is set below the maximum, increase this level until sufficient flow through the hose causes the alarm to stop.
- If the alarm still continues to sound, remove hose and check that it is clear. Remove and replace dust bag if full or blocked and check filter condition and replace where necessary.
If the alarm continues to sound contact your local DEWALT service agent.
Low Battery Alarm (Fig. A)
An acoustic alarm will sound with a quick, intermittent beep if the battery life should become low. If this alarm sounds, remove the battery pack 7 from the battery port 1 and charge the battery. Refer to Charging a Battery.
- Before using the dust extractor select the proper hose diameter using the hose selection switch 15.
- Attach the appropriate accessory to the dust extractor hose 2.
- Insert the battery pack 7.
- To turn dust extractor on, press the three position switch 3 to the On (I) position.
- To use in Wireless Tool ControlTM mode press the three position switch to the Wireless Tool ControlTM 8 position. The trigger of the connected tool or the button 33 on the remote 14 will control the dust extractor.
nOTE: Refer to Pairing the Dust Extractor with a Tool using Wireless Tool Control™ Mode to use the dust extractor with a Wireless Tool Control™ equipped tool or remote.
- When finished, turn the dust extractor off by pressing the three position switch to the Off (O) position.
Wet Pick Up Applications (Fig.1)
WARNING: If foam or liquid escapes from the machine, siren off immediately.
CAUTION: Clean the water level sensors regularly and use a fine wire line it for signs of damage.
WARNING: Do not use the machine with this set up for Class M.
The dust extractor is designed to perform as a wet/dry unit. Dedicated filters should be used for wet pick up applications to avoid filter clogging.
Make sure that the dust extractor is engaged in the horizontal position.
- Before wet pick up applications the dust bag must be removed.
- Water level sensor probes 25 will automatically shut off the dust extractor when the maximum fill level has been reached. Move the three position switch to the Off (O) position, remove the battery, and empty the tank before turning the dust extractor back on.
- To avoid siphoning, remove the dust extractor hose from the source after the water sensor probes shut down the dust extractor.
It is recommended that the tank be emptied of any dry contents prior to being used for wet pick up to facilitate tank cleaning.
- Allow filters to dry after wet pick up applications.
To Empty Tank (Fig. A, E, F)
- Press the three position switch 3 to the Off (O) position and remove the battery 7.
- Unlatch tank latches 4 and remove dust extractor head 6.
- Empty contents of tank 21 into an appropriate container according to statutory provisions.
To Convert Back to Dry Vacuum Operation (Fig. A, F)
- Empty tank 21, refer to Dust Extractor Cleaning instructions.
- Place tank in upside down position until dry. DO NOT use wet tank for dry pick up.
- Place dust extractor head 6 on a level surface until dry.
- Reinstall filters when dust extractor head is dry. See Filters.
- When canister is dry place the dust extractor head 6 onto the tank and secure it by closing the tank latches 4.
CAUTION: Follow all the requirements of the power tool regarding connection of dust extractor.
- Choose the correct power tool adaptor 19 to fit the power tool connection on the tool to be used, refer to Optional Accessories under Maintenance. Attach power tool adaptor 19 to power tool.
- Your DEWALT construction dust extractor is fitted with the DEWALT AirLock connection system. The AirLock allows for a fast, secure connection between the dust extractor hose 2 and power tool. The AirLock connector 18 connects directly to DEWALT compatible tools or through the use of an AirLock adaptor (available from your local DEWALT supplier). Refer to the Optional Accessories section for detail on available adaptors.
NOTE: If using an adaptor, ensure it is firmly attached to the tool outlet before following the steps below.
a. Ensure the collar on the AirLock connector is in the unlock position. (Refer to Figure G.) Align notches 20 on collar and AirLock connector as shown for unlock and lock positions.
b. Push the AirLock connector onto the adaptor connector point.
c. Rotate the collar to the locked position. NOTE: The ball bearings inside collar lock into slot and secure the connection. The power tool is now securely connected to the dust extractor.
CAUTION: When the dust extractor is being controlled, the remote or paired power tool it may start or stop without warning.
WARNING: Do not attach the remote strap to any parts.
- Press the three position switch 3 to the Wireless Tool ControlTM 8 position.
- Press and hold the Wireless Tool Control™ pairing button 11 on the DCV586M and pull the trigger on the Wireless Tool Control™ equipped tool or press the button 33 on the remote 14 at the same time.
- The LED 30 will be steadily illuminated to indicate a successful pairing. nOTE: Only one transmitter can be paired to the DCV586M at a time. If the unit is already paired the previous transmitter will be overridden.
- Press and hold the Wireless Tool Control™ pairing button 11 on the DCV586M and pull the trigger on the Wireless Tool Control™ equipped tool or press the button on the remote at the same time.
The LED 30 will flash slowly to indicate a successful unpairing.
LED FLASH PATTERN
In pairing mode
No device is paired
Device is successfully paired
To Empty Tank (Fig. A, F, H, I)
WARNING: Appropriate personal protective equipment (e.g. dust mask and gloves) should be used while cleaning the dust extractor and emptying the tank.
WARNING: Emptying and maintenance, including disposal of the dust collection container, may be carried out only by trained and qualified specialists. Wear the appropriate protective equipment.
The buzzer sounds and suction is reduced when the tank is full.
- Press the three position switch 3 to the Off (O) position and remove the battery 7.
- Close the twist-lock hose inlet with the hose inlet plug 9.
- Remove the dust extractor head 6 from the tank 21.
- Dispose of collection bag in appropriate container according to statutory provisions.
- Clean or change filters 17. Refer to Filters section of this manual.
- Inspect machine for damage by foreign objects. Contact the nearest DEWALT authorised service centre for replacement of damaged or missing parts.
- Replace dust extractor head onto the tank and latch securely.
Stacking Using the DEWALT TSTAK Stacking Latches (Fig. A)
WARNING: When stacking, always place the dust extractor on the bottom.
The DEWALT TSTAK stacking latches 10 allow for other TSTAK products to securely stack one on top of the other for convenience and portability.
To use the TSTAK stacking latches 10, place a TSTAK compatible unit on top of the dust extractor and flip up the two TSTAK stacking latches so that they clip securely to the bottom of the unit.
Filters
WARNING: The filters must always be in place while vacuuming.
Filter Care
The filters included with this dust extractor are long-life filters. To be effective in minimizing dust recirculation, the filters MUST be installed correctly and in good condition.
Automatic Filter Cleaning System
This dust extractor has a highly effective filter cleaning system which minimizes filter clogging. Every 20 seconds, one of the two filters gets automatically cleaned. The cleaning process alternates between the filters and continues through the life of the unit.
NOTE: It is normal to hear a clicking sound during this process.
nOTE: After many hours of operation the automatic filter cleaning system may not be effective. When this happens the filters will need to be cleaned or replaced.
To Remove Filters (Fig. A, H, I)
WARNING: Appropriate personal protective equipment must mask and gloves should be used while handling the filters.
- Press the three position switch 3 to the Off (O) position and remove the battery 7.
- Release tank latches 4 and remove dust extractor head 6 from canister. Place dust extractor head on a level surface upside down.
- Turn each filter 17 counterclockwise, and carefully remove from dust extractor head, ensuring debris does not fall into mounting hole.
NOTE: Use care to not damage filter material.
- Inspect filters for wear, tears or other damage.
nOTE: If there is any doubt on the condition of the filters, they MUST be replaced. DO NOT continue use if filters are damaged.
WARNING: Never use compressed air or a brush to clean otherwise damage to the filter membrane will occur which will allow dust to pass through the filter. If needed, rinse with room temperature water and let air dry. Cleaning of the filters is typically unnecessary. Even if the filter is covered with dust, the automatic filter cleaning system will maintain maximum performance and continue to function. If visual damage to the filter membrane exists, replace filters. Filters typically last between six and twelve months, depending on use and care.
nOTE: Dispose of filter in appropriate container according to statutory provisions.
To Install Filters (Fig. E, F, I)
WARNING: The filters must always be in place while vacuuming.
- Ensure filter seal 24 is in place and is clean and secure.
- Line up the tabs on the filter 17 to the notches on the dust extractor head and using moderate force, turn clockwise until the filter is secure.
NOTE: Use care to not damage filter material.
- Place the dust extractor head 6 onto the tank 21 and secure it by closing the tank latches 4.
MAINTENANCE
The appliance must be subjected to a technical inspection by DEWALT Service or a trained person at least once a year to check damage to the filter, air leakage, and to ensure correct operation of controlling devices.
NOTE: Cleaning and user maintenance shall not be made by children.
WARNING: For vacuum cleaners of the class M, please note. The exterior of the dust extractor should be decontaminated by dust extraction and wiped clean or seal it in a suitable container or material before being removed from an area contaminated with hazardous substances. All parts of the dust extractor must be considered contaminated when taken out of the
hazardous area and appropriate measures must be taken to avoid dust distribution.
WARNING: To reduce the risk of serious personal injury, turn dust extractor off and disconnect battery pack before making any adjustments or removing/ installing attachments or accessories and if the dust extractor head is removed from the tank or not latched securely. An accidental start-up can cause injury.
The dust extractor must be handled for cleaning and maintenance in a way that avoids exposing maintenance personnel and other persons to any hazards.
- Wear personal protective equipment.
- Use filtered forced ventilation.
- Clean the dust extractor. Refer to Cleaning.
- When maintenance or repairs are carried out, all contaminated parts which cannot be satisfactorily cleaned must be packed in impermeable bags and disposed of in compliance with the applicable disposal regulations.
- After maintenance or repairs clean the maintenance area in a way that prevents hazardous substances escaping into the surrounding environment.
The charger and battery pack are not serviceable.
Lubrication
Your dust extractor requires no additional lubrication.
Cleaning (Fig. A, I)
WARNING: Never use solvents or other harsh chemicals, including the non-metallic parts of the dust extractor.
These chemicals may weaken the materials used in these parts. Use a cloth dampened only with water and mild soap. Never let any liquid get inside the dust extractor; never immerse any part of the dust extractor into a liquid.
For cleaning and maintenance in a way that avoids exposing maintenance personnel and other persons to any hazards, wear personal protective equipment. Clean the maintenance area in a way that prevents hazardous substances from escaping into the surrounding environment.
Do not use a spray system, pressure jet washer or running water for cleaning.
- Vacuum the outside of the dust extractor. For further cleaning use a cloth dampened only with water and mild soap if necessary.
- After use dispose of cloth in an appropriate container.
- Empty tank according the section Dust Extractor Cleaning.
- Inspect water sensor probes 25 during dust extractor cleaning. Water sensor probes may become contaminated during operation. If contamination is present, clean water sensor probes thoroughly with damp cloth to remove any visible contamination.
Storage (Fig. A)
CAINTION: The three position switch must be in OFF (0) on to prevent unintentional being switched on by Wireless Tool Control.
- Empty the tank. Refer to Dust Extractor Cleaning under Operation.
- Clean the dust extractor inside and outside.
- Clean or replace filters, refer to Filters.
- Store the suction hose with the hose clips 5 and the power cord as shown in the illustration. Place the unit in a dry room and secure it from unauthorized use.
NOTE: Plug hose inlet plug 9 into inlet to keep debris inside canister when suction hose is removed. You can also attach the ends of the hose together and lock together with the twist-lock end.
Optional Accessories
WARNING: Since accessories, other than those offered by DEWALT, have not been tested with this product, use of such accessories with this dust extractor could be hazardous. To reduce the risk of injury, only DEWALT recommended accessories should be used with this product.
Consult your dealer for further information on the appropriate accessories.
A replacement filter is available at extra cost at your local DEWALT service centre.
Dust Collector
In the vacuum mode, the appliance can also function as a dust collector for power tool applications producing dust or debris.
IMPORTANT! The DWV9000 dust extraction adaptor is designed to work with Dust System Compatible DEWALT power tools. An additional adaptor will be needed with non-compatible DEWALT tools.
Optional Accessories
- DCV5861 Replacement Filters (Contains 2 DC5151H filters)
DWV9316 Anti-Static Hose
DWV9350 Floor Cleaning Kit
- DWV9000 Twist Lock connection
DWV9110 29 mm-35 mm tapered rubber adaptor
DWV9120 35 mm-38 mm stepped rubber adaptor
DWV9130 35 mm OD Adaptor
DWV9150 35 mm OD angle adaptor
- DWV9210 Construction Kit (DWV9000 + DWV9120 + DWV9130)
- DWV9220 Woodworking Kit (DWV9000 + DWV9130 x 3 + DWV9120 + DWV9150 + Cable Hose Clip)
DWV9470 Y Splitter Hose Kit
- DWST17889 Cart
DWST17888 Trolley
The filter bags provide a clean, easy and quick way to dispose of the dust collected.
Paper filter bags: The DCV9401 filter bags are designed to capture many types of dust including drywall, concrete and wood. These bags should be disposed of once the airflow becomes restricted. DO NOT reuse bags.
| DCV9401 Disposable paper filter bag |
Fleece filter bag: The DCV9402 fleece bag is designed to capture many types of dust including drywall, concrete and wood. This bag should be disposed of once the airflow becomes restricted. DO NOT reuse this bag. The fleece bag is ideal for heavier materials such as concrete and drywall dust where a paper filter bag may tear.
| DCV9402 Disposable fleece filter bag |
Protecting the Environment
Separate collection. Products and batteries marked with this symbol must not be disposed of with normal household waste.
Products and batteries contain materials that can
be recovered or recycled reducing the demand for raw materials. Please recycle electrical products and batteries according to local provisions. Further information is available at www.2helpU.com.
Rechargeable Battery Pack
This long-life battery pack must be recharged when it fails to produce sufficient power on jobs which were easily done before. At the end of its technical life, discard it with due care for our environment:
- Run the battery pack down completely, then remove it from the dust extractor.
- Li-ion cells are recyclable. Take them to your dealer or a local recycling station. The collected battery packs will be recycled or disposed of properly.
TROUBLESHOOTING
| Problem Possible Cause Troubleshooting Steps |
| Motor does not run. Switch is not in On (I) position. Ensure three position switch is in On (I) position. |
| Low battery voltage/poor battery connection. Ensure battery is fully charged and fully inserted. |
| Tank is full of liquid and sense circuit is tripped. | 1. Turn the three position switch to the Off (0) position and remove battery.2. Empty tank. |
| Dust extractor stops running. Thermal overload has been tripped. 1. Turn the dust extractor off and remove battery. |
| 2. Empty the tank, if needed.3. Allow the dust extractor to cool.4. Reinsert the battery and press the three position switch to the On (I) position to test.5. If dust extractor will not restart, contact DEWALT service centre. |
| Tank is full of liquid and sense circuit is tripped. 1. Turn the three position switch to the Off (0) position and remove battery. |
| 2. Empty tank. |
| Battery is discharged. Insert fully charged battery. |
| Battery is not fully inserted. Remove and reinsert battery. |
| Dust comes out of unit while using. Filters not installed properly. Remove and reinstall per proper procedure. |
| Filters are damaged/torn. | Replace filters. |
| Filter gaskets are damaged. | Contact DeWALT service centre. |
| Head not installed properly to tank. | Remove, reinstall and ensure latches are fully engaged. |
| Head gasket damaged. | Contact DeWALT service centre. |
| Dust extractor stops capturing dust. | Filters clogged. | Remove filters, tap clean and reinstall. |
| Filters at end of service life. | Replace with new filters. |
| Automatic filter cleaning no longer functional. | If filter cleaning system is not heard every 20 seconds, contact DEWALT service centre. |
| Tank full. | Turn unit off and empty tank. |
| Hose is clogged. | Inspect and clear hose if clog is found. |
| Hose is not fully connected to tank. | Reinsert and ensure hose latch is fully engaged. |
| Hose is damaged. | Inspect hose for holes or tears. Replace if damage is found. |
| Dust extractor is not turned on by Wireless Tool Control™ equipped power tool or remote. | Dust extractor is not in Wireless Tool Control (8) mode. | Move three position switch to Wireless Tool Control™ (8) mode. Confirm LED is illuminated. If LED is not illuminated with the three-position switch in Wireless Tool Control™ (8) mode, contact DEWALT service centre. |
| Remote/power tool is not paired to dust extractor. | Follow pairing steps. |
| Remote/power tool is out of range of dust extractor. | Move dust extractor closer to remote/power tool. |
| Wireless Tool Control™ remote coin cell is dead. | Replace coin cell and retry. |
| Paired tool's battery is dead. | Ensure paired tool's battery is fully charged and fully inserted. |
| Low battery voltage/poor battery connection. Ensure battery is fully charged and fully inserted. |
| Tank is full of liquid and sense circuit is tripped. 1. | Turn the three position switch to the Off (0) position and remove battery.2. Empty tank. |
| Tool does not pair | Dust extractor is not in Wireless Tool Control (8) mode. | Move three position switch to Wireless Tool Control™ (8) mode. Confirm LED is illuminated. If LED is not illuminated with the three-position switch in Wireless Tool Control™ (8) mode, contact DEWALT service centre. |
| Tool is not Wireless Tool Control™ enabled. | Confirm that tool is Wireless Tool Control™ enabled. |
DCV586M
;Enhorabuena!
1 Wireless Tool ControlTM Telecommande
2Filtres
1Tuyau
1Sacmolletonne
Batterie rechargeable
NOTA: Anything whatsoever and/or its use in any form, whether directly or indirectly, will be subject to the applicable laws of the State of Mexico.
Vice-President Engineering, PTE-Europa
DEWALT, Richard-Slinger-Strase 11
WAARSCHUWING: Lees de
| DCV9402 | Engangs filterposer, fleece |
65510, Idstein, Germany
01.12.2022

Tekniska Data for mer information.
Sigma Eaywyns Kovnc DCV586M
H eTaipéia DEWALT 0ti Ta npoiovta nou pIpypovtai Otny evotnTa TeXviKa oXeOiaotnKav OE OuMPoPwON M ta Enc npotuna kai odnyieC:
2006/42/EK, EN60335-1:2012 + A11:2014 + A13:2017; EN60335-2-69:2012.
Auta ta npoiovta oumuopovovtai kai tic Odyiec 2014/53/EE kai 2011/65/EE. Tia nepioooTepec nnpoopoc, npapakaoue enikoiowvnoTe e Tnv DEWALT otnv npakatw i u o anavtpEeTcTo Niow epoc tou eyxepiDiou.
O katwI UTOypaPwv Eivai UTEUbVOC yia Tn ouVTaEN Tou
TEXVIKOU paKELou KAI npayMaTOnOEi Tnv napoOa 7Nawon EK
pepouc TNC EtaPeiaC DEWALT.

Markus Rompel