UniversalInspect - Thermometer BOSCH - Free user manual and instructions
Find the device manual for free UniversalInspect BOSCH in PDF.

| Product type | Digital inspection camera |
| Brand | Bosch |
| Model | UniversalInspect |
| Dimensions (L x W x H) | 161 x 70 x 41 mm |
| Weight (with batteries, without accessories) | 0.39 kg |
| Power supply | 4 alkaline LR6 (AA) 1.5 V batteries |
| Battery life | Approximately 4 hours |
| Camera cable length | 950 mm |
| Camera head diameter | 8 mm |
| Minimum bending radius | 30 mm |
| Screen resolution | 320 x 240 pixels |
| Protection rating (head and cable) | IP67 |
| Operating temperature | -10 °C to +50 °C |
| Storage temperature (without batteries) | -20 °C to +70 °C |
| Internal memory | 8 photos |
| External memory (microSD card) | 4 to 32 GB (FAT32 format) |
| Main functions | Photo, gallery, 1.5x/2x zoom, 180° rotation, brightness/contrast adjustment, black and white contrast |
| Included accessories | Mirror, hook, magnet, protective case, fixing sleeves |
| Maintenance | Clean with a soft, damp cloth; do not use solvents |
| Safety | Do not direct the light beam into eyes; keep the magnet away from pacemakers |
Frequently Asked Questions - UniversalInspect BOSCH
User questions about UniversalInspect BOSCH
0 question about this device. Answer the ones you know or ask your own.
Ask a new question about this device
Download the instructions for your Thermometer in PDF format for free! Find your manual UniversalInspect - BOSCH and take your electronic device back in hand. On this page are published all the documents necessary for the use of your device. UniversalInspect by BOSCH.
USER MANUAL UniversalInspect BOSCH
OHI DOKU-57960-001. In Page 1 Monday, February 6, 2017 8:22 AM
WEU WEU
Robert Bosch Power Tools GmbH
70538 Stuttgart
GERMANY
www.bosch-pt.com
1609 92A 3HR (2017.02) 0/170

1609 92A 3HR

natural_image
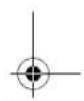
Medical device with attached cable and display screen (no visible text or symbols)UniversallInspect

BOSCH
OBJ BUCH-3040-001.book Page 2 Monday, February 6, 2017 8:23 AM


2
Deutsch......Seite7
English.... Page 17
Français....Page29


OBJ BUCH-3040-001.book Page 7 Monday, February 6, 2017 8:23 AM


Deutsch | 7
Deutsch
Sicherheitshinweise
OBJ BUCH-3040-001.book Page 8 Monday, February 6, 2017 8:23 AM


8 | Deutsch
OBJ BUCH-3040-001.book Page 9 Monday, February 6, 2017 8:23 AM


Deutsch|9
OBJ BUCH-3040-001.book Page 10 Monday, February 6, 2017 8:23 AM


10 | Deutsch
OBJ BUCH-3040-001.book Page 11 Monday, February 6, 2017 8:23 AM


Deutsch | 11
Montage
Energieversorgung
OBJ BUCH-3040-001.book Page 12 Monday, February 6, 2017 8:23 AM


12 | Deutsch
OBJ BUCH-3040-001.book Page 13 Monday, February 6, 2017 8:23 AM


Deutsch|13
Galeriemodus
OBJ BUCH-3040-001.book Page 14 Monday, February 6, 2017 8:23 AM


14 | Deutsch
OBJ BUCH-3040-001.book Page 15 Monday, February 6, 2017 8:23 AM


Ursache Abhilfe

OBJ BUCH-3040-001.book Page 16 Monday, February 6, 2017 8:23 AM


16 | Deutsch
OBJ BUCH-3040-001.book Page 17 Monday, February 6, 2017 8:23 AM


English | 17
Luxemburg
Tel.: +32 2 588 0589
Fax: +32 2 588 0595
E-Mail: outillage.gereedschap@be.bosch.com
Entsorgung

Digital Inspection Camera

Read all safety warnings and all instructions. Failure to follow the warnings and instructions may result in electric shock, fire and/or serious injury.
Bosch Power Tools 1 609 92A 3HR | (6.2.17)


OBJ BUCH-3040-001.book Page 18 Monday, February 6, 2017 8:23 AM


18 | English
▶ Have the inspection camera repaired only through a qualified repair person and only using identical replacement parts. This will ensure that the safety of the inspection camera is maintained.
▶ Do not operate the inspection camera in explosive atmospheres, such as in the presence of flammable liquids, gases or dusts. Sparks can be created in the inspection camera which may ignite the dust or fumes.
Remove the batteries from the inspection camera before carrying out any work on the inspection camera (e.g. assembly, maintenance, etc.) as well as when transporting and storing the inspection camera.
▶ Do not direct the light beam at persons or animals and do not stare into the light beam yourself (not even from a distance).
▶ Check the working range before using the inspection camera. No part of the inspection camera may come into contact with electrical lines, moving parts or chemical substances. Interrupt the power circuit of electrical lines in the working range. These measures reduce the risk of explosion, electric shock and property damage.
▶ Wear appropriate protective equipment such as safety glasses/goggles, protective gloves or respirator when materials that are hazardous to one's health are in the working range. Sewer lines or similar areas can contain solid, liquid or gaseous substances, which may be toxic, infectious, caustic or otherwise hazard to one's health.
Pay particular attention to cleanness when working in areas with substances that are hazardous to one's health. Do not eat during work. Avoid contact with substances that are hazardous to one's health. After finishing your work, wash hands and other affected body parts that may have come into contact, with warm soapy water.
▶ Do not stand in water when using the inspection camera. When standing in water while working, there is a risk of electric shock.
Magnet

Keep the magnet 25 away from cardiac pacemakers. The magnet generates a field that can impair the function of cardiac pacemakers.
- Keep the magnet 25 away from magnetic data medium and magnetically-sensitive equipment. The effect of the magnetic can lead to irreversible data loss.
1 609 92A 3HR | (6.2.17) Bosch Power Tools


OBJ BUCH-3040-001.book Page 19 Monday, February 6, 2017 8:23 AM


English | 19
Product Description and Specifications
Intended Use
The digital inspection camera is suitable for inspecting hard to reach locations or dark areas. After mounting the provided accessories to the camera head, it is also suitable for moving and removing small and light objects (e.g., small screws).
The digital inspection camera may not be used for medicinal purposes. It is also not suitable for repairing pipe clogs or pulling in cables.
The light in the camera head is intended to illuminate the direct work area of the digital inspection camera and is not suitable for household room illumination.
Product Features
The numbering of the product features refers to the illustration of the inspection camera on the graphics page.
1 Gallery mode button
2 Photo mode/shutter release button
3 Button for rotating the image through 180°
4 On/Off button
Gallery mode: Button for starting the deletion process (2nd level)
5 Magnification (zoom) button (1st level)
Button for scrolling forwards through images or deleting an image (2nd level)
6 Brightness/black and white contrast button (1st level)
Button for scrolling backwards through images or stopping the deletion process (2nd level)
7 Display
8 Camera cable
9 Hole for attaching accessories (2x)
10 Camera head
11 Illumination light in the camera head (4x)
12 Camera lens
13 Display in photo mode
14 Display in gallery mode
15 Serial number
16 Latch of battery lid
17 Battery lid
18 Slot for micro SD card
Bosch Power Tools 1 609 92A 3HR | (6.2.17)


OBJ BUCH-3040-001.book Page 20 Monday, February 6, 2017 8:23 AM


20 | English
19 Micro SD card (4 GB ... 32 GB)*
20 Ribbon for removing the batteries
21 Protective pouch
22 Mirror
23 Hook
24 Sleeve for attaching accessories (2x)
25 Magnet
Display elements (selection)
a Photo mode: Brightness/black and white contrast
b Status bar
c Selected magnification
d Battery state of charge
e Gallery mode
f Symbol for scrolling backwards
g Symbol for scrolling forwards
h Symbol for stopping the deletion process
i Symbol for deleting an image
*Accessories shown or described are not included in the delivery, nor are they part of the Bosch range of accessories.
Technical Data
| Digital Inspection Camera UniversallInspect | |
| Article number | 3 603 F87 0.. |
| Rated voltage | V= 6.0 |
| Batteries (alkali-manganese) | 4 x 1.5 V LR6 (AA) |
| Operating temperature | °C -10...+50 |
| Storage temperature (without batteries) | °C -20...+70 |
| Relative humidity | % 5-95 1) |
| Smallest bending radius of camera cable mm 30 | |
| Long camera cable | mm 950 |
| Diameter of camera head | mm 8 |
| 1) Free of moisture condensation | |
| The item number 15 on the type plate is used to clearly identify your inspection camera. | |
1 609 92A 3HR | (6.2.17) Bosch Power Tools


OBJ BUCH-3040-001.book Page 21 Monday, February 6, 2017 8:23 AM


English|21
| Digital Inspection Camera UniversalInspect | ||
| Display resolution | 320 x 240 | |
| Operating time, approx. | h | 4 |
| Weight according to EPTA-Procedure 01:2014(With batteries, without protective case, without accessories) | kg 0.39 | |
| Dimensions (length x width x height) | mm 161 x 70 x 41 | |
| Degree of protection of camera head and camera cable | IP 67 | |
| Degree of protection of housing | - | |
| 1) Free of moisture condensationThe item number 15 on the type plate is used to clearly identify your inspection camera. | ||

Assembly
Power Supply
The inspection camera can be operated with commercially available batteries.
To open the battery lid 17, press on the latch 16 and remove the battery lid. Insert the batteries. When inserting, pay attention to the correct polarity according to the representation on the inside of the battery compartment.
Always replace all batteries at the same time. Only use batteries from one brand and with the identical capacity.
Remove the batteries from the inspection camera when not using it for a prolonged period of time. The batteries can corrode and self-discharge during prolonged storage.
Note: The ribbon 20 in the battery compartment is used to conveniently remove the batteries.
Charge Condition
In photo mode, the state of charge of the batteries is shown in the status bar whenever a button is pressed. When the battery symbol is empty, you have to replace the batteries because inspections are no longer possible.
Bosch Power Tools 1 609 92A 3HR | (6.2.17)


OBJ BUCH-3040-001.book Page 22 Monday, February 6, 2017 8:23 AM


22 | English
Attaching the mirror, hook or magnet (see figures A and B)
The mirror 22, hook 23 or magnet 25 accessories can be attached to the camera head 10.
Hook the mirror 22 or hook 23 into one of the two holes 9 on the camera head 10 and fit the sleeve 24 for attaching the accessory (see image A).
Push the magnet 25 into the sleeve 24 and hook it into one of the two holes 9 on the camera head 10. Fit the sleeve 24 for attaching the accessory (see image B).
Note: The magnet 25 and the hook 23 are only suitable for moving and removing loose, small and light objects. Applying too much tension can damage the inspection camera or the auxiliary aid.
Operation
▶ Protect the inspection camera against moisture and direct sunlight. The camera cable and camera head are waterproof. However, the inspection camera's housing is not protected against water. If it comes into contact with water, there is a risk of electric shock or damage.
▶ Do not subject the inspection camera to extreme temperatures or variations in temperature. As an example, do not leave it in vehicles for longer periods. In case of large variations in temperature, allow the inspection camera to adjust to the ambient temperature before putting it into operation.
Do not use the inspection camera when the lens on the camera head 10 is misty or fogged-up. Do not switch the inspection camera on until after the moisture has evaporated. Otherwise, the inspection camera can become damaged.
The switched-on illumination light 11 can become hot during operation. In order to prevent burns, do not touch the illumination light.
Initial Operation
Switching On and Off
To switch on the inspection camera, press the on/off button 4. Photo mode 13 appears on the display 7 (magnification 1.0 and illumination 50%).
To switch off the inspection camera, press and hold the on/off button 4 for more than 3 seconds.
If no button is pressed on the inspection camera, it switches off automatically after approx. 20 minutes.
1 609 92A 3HR | (6.2.17) Bosch Power Tools


OBJ BUCH-3040-001.book Page 23 Monday, February 6, 2017 8:23 AM


English | 23
Photo mode
After being switched on, the inspection camera is in photo mode 13.
To switch from gallery mode to photo mode 13, press the 2 button. Pressing the 2 button again actuates the shutter release.
A maximum of 8 images can be saved to the inspection camera's local memory. Every further image that is taken deletes the oldest image in the local memory.
If more than 8 images are to be saved, a micro SD card (4 GB...32 GB) must be inserted into the slot 18. When a micro SD card in FAT32 format is inserted, all images are automatically transferred from the local memory to the micro SD card and deleted from the local memory. All further images are saved on the micro SD card.
All images are automatically saved in the "Bosch" folder.
Note: All images are saved in their original state, i.e. without magnification or rotation.
Note: If an image was taken with black and white contrast, it cannot be called up in colour.
Gallery mode
Pressing the 1 button opens gallery mode 14.
The 6 and 5 buttons can be used to scroll backwards or forwards through the images you have taken.
Briefly pressing the on/off button 4 shows the h and i symbols on the display. Pressing the 5 button deletes the image. Pressing the 6 button stops the deletion process. Briefly pressing the on/off button 4 reactivates gallery mode 14.
Pressing the 1 or 2 button switches to photo mode 13.
Status Bar
The status bar b is shown on the display for approx. 3 seconds each time a button is pressed. It shows:
- Photo mode a (brightness/black and white contrast) or gallery mode e
- The selected magnification c
- The state of charge of the batteries d
Setting the brightness and the black and white contrast in the camera head
Switching the camera on also switches on the illumination light 11 in the camera head. The set brightness is 50%.
To brighten the camera image, you can adjust the brightness or the black and white contrast. This adjustment can be set to one of four levels (100%, black and white contrast, 0%, 50%).
Bosch Power Tools 1 609 92A 3HR | (6.2.17)


OBJ BUCH-3040-001.book Page 24 Monday, February 6, 2017 8:23 AM


24 | English
Press the 6 button repeatedly until the desired brightness level has been reached or the black and white contrast has been set.
Note: The set brightness is 100 % for black and white contrast.
▶ Do not stare into the illumination light 11 and do not direct it at other persons. The brightness of the light can blind the eyes.
To reduce the brightness and to switch off the camera illumination light 11, press button 6 repeatedly until the required brightness is reached or the illumination light is switched off.
Magnifying the Image on the Display (Zoom)
Pressing the 5 button magnifies the image on the display by a factor of 1.5 or 2.
Rotating the Image on the Display
The 3 button rotates the image on the display through 180°.
Transferring images
It is possible to transfer images by inserting a micro SD card 19 in FAT32 format. When the formatted micro SD card 19 is inserted, all images are automatically transferred from the local memory to the micro SD card 19 and deleted from the local memory.
Inserting the Micro SD Card
Only use micro SD cards between 4 GB and 32 GB which support FAT32 format. If necessary, format the micro SD card 19 in FAT32 format before inserting it. Insert the formatted micro SD card 19 all the way into the slot 18.
Working Advice
Check the area that you want to inspect and pay particular attention to obstructions or hazard areas.
Bend the camera cable 8 in such a manner that the camera head can be easily inserted into the area subject to the inspection. Carefully guide the camera cable in.
Adjust the brightness of the camera illumination light 11 so that the image is easily recognisable. When photographing highly reflective objects, for example, you can achieve better results in lower light or using black and white contrast.
When objects to be inspected are represented unsharp, reduce or increase the distance between camera head 10 and object.


1 609 92A 3HR | (6.2.17) Bosch Power Tools


OBJ BUCH-3040-001.book Page 25 Monday, February 6, 2017 8:23 AM


English | 25
Troubleshooting - Causes and Corrective Measures
Cause Remedy
Error indication on display
| A micro SD card with an unsuitable memory size has been inserted. | Insert a micro SD card between 4 GB and 32 GB. | |
| An incorrectly formatted micro SD card has been inserted. | Format the micro SD card in FAT32 format and then reinsert it. | |
| A damaged micro SD card has been inserted. | Insert an undamaged micro SD Card. | |
| The micro SD card cannot be read. | Inspect the micro SD card and replace it if necessary. | |
 | There is no more available memory space on the micro SD card. | Delete some images. |
Other displays
Cause Effect
| A micro SD card has been inserted into the inspection camera while switched on. | Images are being transferred to the micro SD card and deleted from the inspection camera memory. | |
| The inspection camera has been switched on with a micro SD card inserted. | Data is being read. | |
| The memory is empty. No images are available. | ||
| Confirmation of the deletion process. | Image is being deleted. | |
| The shutter release has been actuated. | Confirms the image. | |
| Image has been rotated through 180°. | Confirms the rotation. | |
Bosch Power Tools 1 609 92A 3HR | (6.2.17)


OBJ BUCH-3040-001.book Page 26 Monday, February 6, 2017 8:23 AM


26 | English
Maintenance and Service
Maintenance and Cleaning
Never immerse the inspection camera in water or other liquids.
Keep the inspection camera clean at all times. Clean the inspection camera and all auxiliary aids particularly thorough after having worked in areas with substances that are hazardous to one's health.
Wipe off debris using a moist and soft cloth. Do not use any cleaning agents or solvents.
Especially clean the lens 12 of the camera regularly and pay attention for any lint.
After-sales Service and Application Service
Our after-sales service responds to your questions concerning maintenance and repair of your product as well as spare parts. Exploded views and information on spare parts can also be found under:
www.bosch-pt.com
Bosch's application service team will gladly answer questions concerning our products and their accessories.
In all correspondence and spare parts orders, please always include the 10-digit article number given on the nameplate of the product.
Great Britain
Robert Bosch Ltd. (B.S.C.)
P.O. Box 98
Broadwater Park
North Orbital Road
Denham
Uxbridge
UB 9 5HJ
At www.bosch-pt.co.uk you can order spare parts or arrange the collection of a prod-
uct in need of servicing or repair
Tel. Service: (0344) 7360109
E-Mail: boschservicecentre@bosch.com


1 609 92A 3HR | (6.2.17) Bosch Power Tools


OBJ BUCH-3040-001.book Page 27 Monday, February 6, 2017 8:23 AM


English | 27
Ireland
Origo Ltd.
Unit 23 Magna Drive
Magna Business Park
City West
Dublin 24
Tel. Service: (01) 4666700
Fax: (01) 4666888
Australia, New Zealand and Pacific Islands
Robert Bosch Australia Pty. Ltd.
Power Tools
Locked Bag 66
Clayton South VIC 3169
Customer Contact Center
Inside Australia:
Phone: (01300) 307044
Fax: (01300) 307045
Inside New Zealand:
Phone:(0800)543353
Fax: (0800) 428570
Outside AU and NZ:
Phone: +61 3 95415555
www.bosch.com.au
Republic of South Africa
Customer service
Hotline: (011) 6519600
Gauteng - BSC Service Centre
35 Roper Street, New Centre
Johannesburg
Tel.: (011) 4939375
Fax: (011) 4930126
E-Mail: bsctools@icon.co.za


Bosch Power Tools 1 609 92A 3HR | (6.2.17)


OBJ BUCH-3040-001.book Page 28 Monday, February 6, 2017 8:23 AM


28 | English
KZN - BSC Service Centre
Unit E, Almar Centre
143 Crompton Street
Pinetown
Tel.: (031) 7012120
Fax: (031) 7012446
E-Mail: bsc.dur@za.bosch.com
Western Cape - BSC Service Centre
Democracy Way, Prosperity Park
Milnerton
Tel.: (021) 5512577
Fax: (021) 5513223
E-Mail: bsc@zsd.co.za
Bosch Headquarters
Midrand, Gauteng
Tel.: (011) 6519600
Fax: (011) 6519880
E-Mail: rbsa-hq.pts@za.bosch.com


Disposal

The inspection camera, batteries, accessories and packaging should be sorted for environmental-friendly recycling.
Do not dispose of inspection cameras and batteries into household waste!
Only for EC countries:
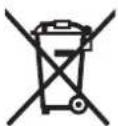
According to the European Guideline 2012/19/EU, electrical devices/tools that are no longer usable, and according to the European Guideline 2006/66/EC, defective or used battery packs/batteries, must be collected separately and disposed of in an environmentally correct manner.


1 609 92A 3HR | (6.2.17) Bosch Power Tools


OBJ BUCH-3040-001.book Page 29 Monday, February 6, 2017 8:23 AM


Français | 29
Batteries no longer suitable for use can be directly returned at:
Great Britain
Robert Bosch Ltd. (B.S.C.)
P.O. Box 98
Broadwater Park
North Orbital Road
Denham
Uxbridge
UB 9 5HJ
At www.bosch-pt.co.uk you can order spare parts or arrange the collection of a product in need of servicing or repair.
Tel. Service: (0344) 7360109
E-Mail: boschservicecentre@bosch.com
Subject to change without notice.

Français
OBJ BUCH-3040-001.book Page 30 Monday, February 6, 2017 8:23 AM


30 | Français
OBJ BUCH-3040-001.book Page 31 Monday, February 6, 2017 8:23 AM


Français | 31
OBJ BUCH-3040-001.book Page 32 Monday, February 6, 2017 8:23 AM


32 | Français
OBJ BUCH-3040-001.book Page 33 Monday, February 6, 2017 8:23 AM


Français | 33
OBJ BUCH-3040-001.book Page 34 Monday, February 6, 2017 8:23 AM


34 | Français
OBJ BUCH-3040-001.book Page 35 Monday, February 6, 2017 8:23 AM


Français | 35
OBJ BUCH-3040-001.book Page 36 Monday, February 6, 2017 8:23 AM


36 | Français
OBJ BUCH-3040-001.book Page 37 Monday, February 6, 2017 8:23 AM


Français | 37
OBJ BUCH-3040-001.book Page 38 Monday, February 6, 2017 8:23 AM


38 | Français
Cause Effet

OBJ BUCH-3040-001.book Page 39 Monday, February 6, 2017 8:23 AM


Français | 39
Robert Bosch (France) S.A.S.
OBJ BUCH-3040-001.book Page 40 Monday, February 6, 2017 8:23 AM


40 | Español
Español
OBJ BUCH-3040-001.book Page 41 Monday, February 6, 2017 8:23 AM


Español|41
OBJ BUCH-3040-001.book Page 42 Monday, February 6, 2017 8:23 AM


42 | Español
OBJ BUCH-3040-001.book Page 43 Monday, February 6, 2017 8:23 AM


Español | 43
Datos técnicos
OBJ BUCH-3040-001.book Page 44 Monday, February 6, 2017 8:23 AM


44 | Español
OBJ BUCH-3040-001.book Page 45 Monday, February 6, 2017 8:23 AM


Español | 45
Puesta en marcha
OBJ BUCH-3040-001.book Page 46 Monday, February 6, 2017 8:23 AM


46 | Español
Barra de estado
OBJ BUCH-3040-001.book Page 47 Monday, February 6, 2017 8:23 AM


Español|47
Colocar la tarjeta micro SD
OBJ BUCH-3040-001.book Page 48 Monday, February 6, 2017 8:23 AM


48 | Español
Otras indicaciones
OBJ BUCH-3040-001.book Page 49 Monday, February 6, 2017 8:23 AM


Español|49
OBJ BUCH-3040-001.book Page 50 Monday, February 6, 2017 8:23 AM


50 | Español
Chile
Robert Bosch S.A.
Calle El Cacique
OBJ BUCH-3040-001.book Page 51 Monday, February 6, 2017 8:23 AM


Português | 51
Português
OBJ BUCH-3040-001.book Page 52 Monday, February 6, 2017 8:23 AM


52 | Português
OBJ BUCH-3040-001.book Page 53 Monday, February 6, 2017 8:23 AM


Português | 53
OBJ BUCH-3040-001.book Page 54 Monday, February 6, 2017 8:23 AM


54 | Português
Dados técnicos
OBJ BUCH-3040-001.book Page 55 Monday, February 6, 2017 8:23 AM


Português | 55
OBJ BUCH-3040-001.book Page 56 Monday, February 6, 2017 8:23 AM


56 | Português
OBJ BUCH-3040-001.book Page 57 Monday, February 6, 2017 8:23 AM


Português | 57
Barra de estado
OBJ BUCH-3040-001.book Page 58 Monday, February 6, 2017 8:23 AM


58 | Português
OBJ BUCH-3040-001.book Page 59 Monday, February 6, 2017 8:23 AM


Português | 59
Causa Efeito
OBJ BUCH-3040-001.book Page 60 Monday, February 6, 2017 8:23 AM


60 | Português
Portugal
Robert Bosch LDA
OBJ BUCH-3040-001.book Page 61 Monday, February 6, 2017 8:23 AM


Italiano | 61
Italiano
Norme di sicurezza
OBJ BUCH-3040-001.book Page 62 Monday, February 6, 2017 8:23 AM


62 | Italiano
OBJ BUCH-3040-001.book Page 63 Monday, February 6, 2017 8:23 AM


Italiano | 63
19 Scheda micro-SD (4-32 GB)*
OBJ BUCH-3040-001.book Page 64 Monday, February 6, 2017 8:23 AM


64 | Italiano
Dati tecnici
OBJ BUCH-3040-001.book Page 65 Monday, February 6, 2017 8:23 AM


Italiano | 65
OBJ BUCH-3040-001.book Page 66 Monday, February 6, 2017 8:23 AM


66 | Italiano
OBJ BUCH-3040-001.book Page 67 Monday, February 6, 2017 8:23 AM


Italiano | 67
Barra di stato
OBJ BUCH-3040-001.book Page 68 Monday, February 6, 2017 8:23 AM


68 | Italiano
OBJ BUCH-3040-001.book Page 69 Monday, February 6, 2017 8:23 AM


Italiano | 69
OBJ BUCH-3040-001.book Page 70 Monday, February 6, 2017 8:23 AM


70 | Italiano
OBJ BUCH-3040-001.book Page 71 Monday, February 6, 2017 8:23 AM


Nederlands | 71
OBJ BUCH-3040-001.book Page 72 Monday, February 6, 2017 8:23 AM


72 | Nederlands
OBJ BUCH-3040-001.book Page 73 Monday, February 6, 2017 8:23 AM


Nederlands | 73
OBJ BUCH-3040-001.book Page 74 Monday, February 6, 2017 8:23 AM


74|Nederlands
OBJ BUCH-3040-001.book Page 75 Monday, February 6, 2017 8:23 AM


Nederlands | 75
OBJ BUCH-3040-001.book Page 76 Monday, February 6, 2017 8:23 AM


76 | Nederlands
OBJ BUCH-3040-001.book Page 77 Monday, February 6, 2017 8:23 AM


Nederlands | 77
OBJ BUCH-3040-001.book Page 78 Monday, February 6, 2017 8:23 AM


78 | Nederlands
OBJ BUCH-3040-001.book Page 79 Monday, February 6, 2017 8:23 AM


Nederlands | 79
OBJ BUCH-3040-001.book Page 80 Monday, February 6, 2017 8:23 AM


80 | Nederlands
OBJ BUCH-3040-001.book Page 81 Monday, February 6, 2017 8:23 AM


Dansk|81
OBJ BUCH-3040-001.book Page 82 Monday, February 6, 2017 8:23 AM


82 | Dansk
OBJ BUCH-3040-001.book Page 83 Monday, February 6, 2017 8:23 AM


Dansk|83
1 Tasten Gallerimodus
2 Tasten Fotomodus/udlöser
3 Tast til rotation af billedet med 180°
4 Start-stop-tasten
OBJ BUCH-3040-001.book Page 84 Monday, February 6, 2017 8:23 AM


84|Dansk
f Symbol for tilbagebladring
g Symbol for fremadbladring
OBJ BUCH-3040-001.book Page 85 Monday, February 6, 2017 8:23 AM


Dansk|85
OBJ BUCH-3040-001.book Page 86 Monday, February 6, 2017 8:23 AM


86 | Dansk
OBJ BUCH-3040-001.book Page 87 Monday, February 6, 2017 8:23 AM


Dansk|87
Statusliste
OBJ BUCH-3040-001.book Page 88 Monday, February 6, 2017 8:23 AM


88 | Dansk
Arbejdsvejledning
OBJ BUCH-3040-001.book Page 89 Monday, February 6, 2017 8:23 AM


Dansk|89
Årsag Virkning

Bosch Service Center
Telegrafvej 3
2750 Ballerup
På www.bosch-pt.dk kan der online bestilles reservedele eller oprettes en reparations ordre.
Tlf. Service Center: 44898855
Fax: 44898755
E-Mail: vaerktoej@dk.bosch.com


Bosch Power Tools 1 609 92A 3HR | (6.2.17)


OBJ BUCH-3040-001.book Page 90 Monday, February 6, 2017 8:23 AM


90 | Svenska
Bortskaffelse

OBJ BUCH-3040-001.book Page 91 Monday, February 6, 2017 8:23 AM


Svenska|91
OBJ BUCH-3040-001.book Page 92 Monday, February 6, 2017 8:23 AM


92 | Svenska
Illustrerade komponenter
OBJ BUCH-3040-001.book Page 93 Monday, February 6, 2017 8:23 AM


Svenska|93
OBJ BUCH-3040-001.book Page 94 Monday, February 6, 2017 8:23 AM


94|Svenska
Montage
Energiförsörjning
OBJ BUCH-3040-001.book Page 95 Monday, February 6, 2017 8:23 AM


Svenska|95
OBJ BUCH-3040-001.book Page 96 Monday, February 6, 2017 8:23 AM


96 | Svenska
Statuslist
OBJ BUCH-3040-001.book Page 97 Monday, February 6, 2017 8:23 AM


Svenska|97
OBJ BUCH-3040-001.book Page 98 Monday, February 6, 2017 8:23 AM


98 | Svenska
Bosch Service Center
Telegrafvej 3
2750 Ballerup
Danmark
Tel.: (08) 7501820 (inom Sverige)
Fax: (011) 187691
Avfallshantering

OBJ BUCH-3040-001.book Page 99 Monday, February 6, 2017 8:23 AM


Norsk|99
Norsk
OBJ BUCH-3040-001.book Page 100 Monday, February 6, 2017 8:23 AM


100 | Norsk
Magnet

OBJ BUCH-3040-001.book Page 101 Monday, February 6, 2017 8:23 AM


Norsk|101
10 Kamerahode
11 Lys i kamerahodet (4 x)
12 Kameralinse
13 Skjerm i fotomodus
14 Skjerm i gallerimodus
15 Serienummer
OBJ BUCH-3040-001.book Page 102 Monday, February 6, 2017 8:23 AM


102 | Norsk
Tekniske data
| Digitalt inspeksjonskamera UniversallInspect | |
| Produktnummer | 3 603 F87 0.. |
| Nominell spenning | V= 6,0 |
| Batterier (Alkali-Mangan) | 4 x 1,5 V LR6 (AA) |
| Driftstemperatur | °C -10...+50 |
| Lagringstemperatur (uten batterier) | °C -20...+70 |
| Relativ luftfuktighet | % 5-95 1) |
| Minste bøyeradius kamerakabel mm 30 | |
| Lengde på kameraledning | mm 950 |
| Diameter kamerahode | mm 8 |
| Oppløsning display | 320 x 240 |
| Driftstid ca. | h 4 |
| Vekt tilsvarende EPTA-Procedure 01:2014(med batterier, uten beskyttelsesveske,uten tilbehør) | kg 0,39 |
| Mål (lengde x bredde x høyde) | mm 161 x 70 x 41 |
| Kamerahodets og kameraledningensbeskyttelsesklasse IP 67 | |
| Husets beskyttelsesklasse | - |
| 1) Fri for duggInspeksjonskameraet identifiseres ved hjelp av artikkelnummeret 15 på typeskillet. | |

Montering
Energitilførsel
OBJ BUCH-3040-001.book Page 103 Monday, February 6, 2017 8:23 AM


Norsk|103
Ladetilstand
OBJ BUCH-3040-001.book Page 104 Monday, February 6, 2017 8:23 AM


104 | Norsk
Fotomodus
OBJ BUCH-3040-001.book Page 105 Monday, February 6, 2017 8:23 AM


Norsk|105
OBJ BUCH-3040-001.book Page 106 Monday, February 6, 2017 8:23 AM


106 | Norsk
OBJ BUCH-3040-001.book Page 107 Monday, February 6, 2017 8:23 AM


Norsk|107
OBJ BUCH-3040-001.book Page 108 Monday, February 6, 2017 8:23 AM


108 | Suomi
Suomi
Turvallisuusohjeita
OBJ BUCH-3040-001.book Page 109 Monday, February 6, 2017 8:23 AM


Suomi|109
Magneetti

OBJ BUCH-3040-001.book Page 110 Monday, February 6, 2017 8:23 AM


110 | Suomi
OBJ BUCH-3040-001.book Page 111 Monday, February 6, 2017 8:23 AM


Suomi | 111
Tekniset tiedot
OBJ BUCH-3040-001.book Page 112 Monday, February 6, 2017 8:23 AM


112 | Suomi
Lataustila
OBJ BUCH-3040-001.book Page 113 Monday, February 6, 2017 8:23 AM


Suomi|113
Valokuvatila
OBJ BUCH-3040-001.book Page 114 Monday, February 6, 2017 8:23 AM


114|Suomi
OBJ BUCH-3040-001.book Page 115 Monday, February 6, 2017 8:23 AM


Suomi|115
OBJ BUCH-3040-001.book Page 116 Monday, February 6, 2017 8:23 AM


116|Suomi
Hoito ja huolto
Huolto ja puhdistus
OBJ BUCH-3040-001.book Page 117 Monday, February 6, 2017 8:23 AM


Ελληνικά | 117
Vain EU-maita varten:
OBJ BUCH-3040-001.book Page 118 Monday, February 6, 2017 8:23 AM


118 | Ελληνικά
OBJ BUCH-3040-001.book Page 119 Monday, February 6, 2017 8:23 AM


Ελληνικά | 119
OBJ BUCH-3040-001.book Page 120 Monday, February 6, 2017 8:23 AM


120 | Ελληνικά
OBJ BUCH-3040-001.book Page 121 Monday, February 6, 2017 8:23 AM


Ελληνικά | 121
Συναρμολόγηση
Τροφοδοσία
OBJ BUCH-3040-001.book Page 122 Monday, February 6, 2017 8:23 AM


122 | Ελληνικά
Λειτουργία
OBJ BUCH-3040-001.book Page 123 Monday, February 6, 2017 8:23 AM


Ελληνικά | 123
OBJ BUCH-3040-001.book Page 124 Monday, February 6, 2017 8:23 AM


124 | Ελληνικά
OBJ BUCH-3040-001.book Page 125 Monday, February 6, 2017 8:23 AM


Ελληνικά | 125
OBJ BUCH-3040-001.book Page 126 Monday, February 6, 2017 8:23 AM


126 | Ελληνικά
OBJ BUCH-3040-001.book Page 127 Monday, February 6, 2017 8:23 AM


Türkçe | 127
OBJ BUCH-3040-001.book Page 128 Monday, February 6, 2017 8:23 AM


128 | Türkçe
OBJ BUCH-3040-001.book Page 129 Monday, February 6, 2017 8:23 AM


Türkçe | 129
OBJ BUCH-3040-001.book Page 130 Monday, February 6, 2017 8:23 AM


130 | Türkçe
OBJ BUCH-3040-001.book Page 131 Monday, February 6, 2017 8:23 AM


Türkçe | 131
OBJ BUCH-3040-001.book Page 132 Monday, February 6, 2017 8:23 AM


132 | Türkçe
OBJ BUCH-3040-001.book Page 133 Monday, February 6, 2017 8:23 AM


Türkçe | 133
Durum çubuğu
OBJ BUCH-3040-001.book Page 134 Monday, February 6, 2017 8:23 AM


134 | Türkçe
OBJ BUCH-3040-001.book Page 135 Monday, February 6, 2017 8:23 AM


Türkçe | 135
Bakım ve servis
Bakım ve temizlik
OBJ BUCH-3040-001.book Page 136 Monday, February 6, 2017 8:23 AM


136 | Türkçe
Bulsan Elektrik
OBJ BUCH-3040-001.book Page 137 Monday, February 6, 2017 8:23 AM


Türkçe | 137
Onarım Bobinaj
Raifpaşa Cad. No: 67 İskenderun
Hatay
Tel.: 0326 6137546
Günşah Otomotiv
Beylikdüzü Sanayi Sit. No: 210 Beylikdüzü
istanbul
Tel.: 0212 8720066
Aygem
10021 Sok. No: 11 AOSB Çiğli
İzmir
Tel.: 0232 3768074
Sezmen Bobinaj
OBJ BUCH-3040-001.book Page 138 Monday, February 6, 2017 8:23 AM


138|日本語
OBJ BUCH-3040-001.book Page 139 Monday, February 6, 2017 8:23 AM


日本語|139
OBJ BUCH-3040-001.book Page 140 Monday, February 6, 2017 8:23 AM


140|日本語
OBJ BUCH-3040-001.book Page 141 Monday, February 6, 2017 8:23 AM


日本語|141
24 アクセサリー固定用カバー(×2)
25 マグネット
表示内容(選択)
a写真モード:明るさ/白黒
b ステータスバー
c調整されたズーム
d 電池残量表示
eギャラリーモード
f巻き戻しアイコン
g 先送リアイコン
h 消去中止アイコン
i画像消去アイコン
OBJ BUCH-3040-001.book Page 142 Monday, February 6, 2017 8:23 AM


142|日本語
OBJ BUCH-3040-001.book Page 143 Monday, February 6, 2017 8:23 AM


日本語|143
OBJ BUCH-3040-001.book Page 144 Monday, February 6, 2017 8:23 AM


144|日本語
写真モード
OBJ BUCH-3040-001.book Page 145 Monday, February 6, 2017 8:23 AM


日本語|145
カメラヘッドで明るさと白黒を調節する
OBJ BUCH-3040-001.book Page 146 Monday, February 6, 2017 8:23 AM


146|日本語
操作上の留意点
OBJ BUCH-3040-001.book Page 147 Monday, February 6, 2017 8:23 AM


日本語|147
その他の表示
原因 影響

OBJ BUCH-3040-001.book Page 148 Monday, February 6, 2017 11:06 AM


148|日本語
natural_image
Symbol of a trash bin crossed out by two diagonal lines (no text or numbers present)natural_image
Symbol of a trash bin crossed out by two diagonal lines (no text or numbers present)8mm4 qPCR srr d worbein