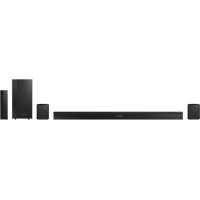
HWJ470 - Pregnant SAMSUNG - Free user manual and instructions
Find the device manual for free HWJ470 SAMSUNG in PDF.



| Product Type | Wireless soundbar with subwoofer and surround speakers |
| Brand | Samsung |
| Model | HWJ470 |
| Dimensions (W x H x D) | Main unit: 957.5 x 59.5 x 66.5 mm Subwoofer: 179 x 361 x 299.5 mm Surround speakers: 95 x 116.4 x 74 mm Rear amplifier: 50 x 200 x 132 mm |
| Weight | Main unit: 1.6 kg Subwoofer: 4.6 kg Surround speakers: 0.31 kg Rear amplifier: 0.74 kg |
| Output Power | Main unit: 80 W/channel x 2 (3 ohms, THD 10%, 1 kHz) Subwoofer: 140 W (3 ohms, THD 10%, 100 Hz) Rear speakers: 80 W/channel x 2 (3 ohms, THD 10%, 1 kHz) |
| Power Supply | DC adapter (AC power cord supplied) |
| Connectivity | Bluetooth, HDMI (with ARC), digital optical input, analog AUX input, USB (host) |
| Audio Functions | TV SoundConnect, Bluetooth Power On, Auto Power Link, Anynet+, Surround modes, treble/bass adjustment, audio sync |
| Supported Audio Formats (USB) | MP3, WMA, AAC, WAV, OGG, FLAC |
| Control App | Samsung Audio Remote (Android 3.0+) |
| Wireless Subwoofer | Automatic or manual connection (ID SET), range approx. 10 m |
| Surround Speakers | Wireless via SWA-7000S module, connection by speaker cables |
| Wall Mounting | Wall mount bracket supplied, M5 screws, at least 5 cm spacing below the TV |
| Safety | Do not expose to rain or moisture, unplug during storms, do not open (no user-serviceable parts) |
| Maintenance | Clean with a dry cloth, avoid solvents, do not block ventilation openings |
| Operating Temperature | +5 to +35 °C |
| Operating Humidity | 10 to 75% |
| Spare Parts and Repairability | Contact a qualified service center; batteries (CR2032) are user-replaceable |
Frequently Asked Questions - HWJ470 SAMSUNG
User questions about HWJ470 SAMSUNG
0 question about this device. Answer the ones you know or ask your own.
Ask a new question about this device
Download the instructions for your Pregnant in PDF format for free! Find your manual HWJ470 - SAMSUNG and take your electronic device back in hand. On this page are published all the documents necessary for the use of your device. HWJ470 by SAMSUNG.
USER MANUAL HWJ470 SAMSUNG
Thank you for purchasing this Samsung product. To receive more complete service, please register your product at www.samsung.com/register
FEATURES
TV SoundConnect
TV SoundConnect lets you listen to audio from your TV on your Soundbar via a Bluetooth connection and lets you control the sound.
HDMI
HDMI transmits video and audio signals simultaneously, and provides a clearer picture.
The unit is also equipped with the ARC function which lets you listen to sound from your TV through the Soundbar via an HDMI cable. This function is only available if you connect the unit to an ARC compliant TV.
Wireless Subwoofer/SWA-7000S Wireless Module
Samsung's wireless module does away with cables running between the main unit and the subwoofer/SWA-7000S. Instead, the subwoofer/SWA-7000S connects to a compact wireless module that communicates with the main unit.
Multi-function Remote Control
You can use the supplied remote control to control various operations with the simple press of a button.
USB Host Support
You can connect and play music files from external USB storage devices such as MP3 players, USB flash memory, etc. using the Soundbar's USB HOST function.
Bluetooth Function
You can connect a Bluetooth device to the Soundbar and enjoy music with high quality stereo sound, all without wires!
Using the Samsung Audio Remote App
To control the product with your Smart Device via the Samsung Audio Remote app, download the Samsung Audio Remote App by accessing the app through Google Play store.
LICENSES
DOLBY. DIGITAL
Manufactured under license from Dolby Laboratories. Dolby and the double-D symbol are trademarks of Dolby Laboratories.
dts® 2.0 Channel
For DTS patents, see http://patents.dts.com. Manufactured under license from DTS Licensing Limited. DTS, the Symbol, & DTS and the Symbol together are registered trademarks, and DTS 2.0 Channel is a trademark of DTS, Inc. © DTS, Inc. All Rights Reserved.
HDMI
The terms HDMI and HDMI High-Definition Multimedia Interface, and the HDMI Logo are trademarks or registered trademarks of HDMI Licensing LLC in the United States and other countries.
SAFETY INFORMATION
SAFETY WARNINGS
TO REDUCE THE RISK OF ELECTRIC SHOCK, DO NOT REMOVE THE COVER (OR BACK).
NO USER-SERVICEABLE PARTS ARE INSIDE. REFER SERVICING TO QUALIFIED SERVICE PERSONNEL.
 | CAUTIONRISK OF ELECTRIC SHOCKDO NOT OPEN |  |  | This symbol indicates “dangerous voltage” inside the product that presents a risk of electric shock or personal injury. |
 | This symbol indicates important instructions accompanying the product. |
CAUTION
WARNING : To reduce the risk of fire or electric shock, do not expose this appliance to rain or moisture.
CAUTION : TO PREVENT ELECTRIC SHOCK, MATCH WIDE BLADE OF PLUG TO WIDE SLOT, FULLY INSERT.
- This apparatus shall always be connected to a AC outlet with a protective grounding connection.
- To disconnect the apparatus from the mains, the plug must be pulled out from the mains socket, therefore the mains plug shall be readily operable.
CAUTION
- Do not expose this apparatus to dripping or splashing. Do not put objects filled with liquids, such as vases on the apparatus.
- To turn this apparatus off completely, you must pull the power plug out of the wall socket. Consequently, the power plug must be easily and readily accessible at all times.
PRECAUTIONS
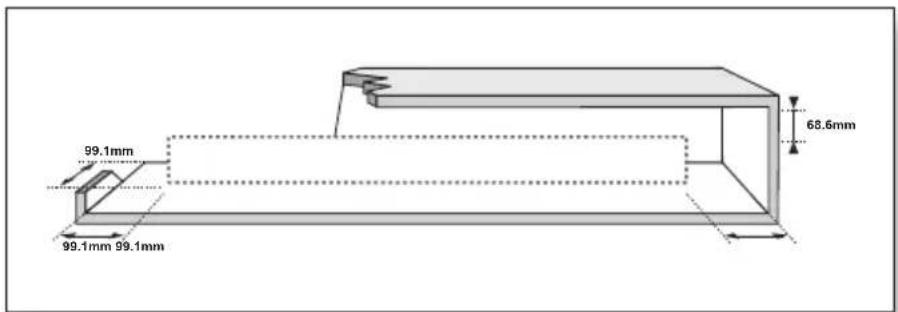
Ensure that the AC power supply in your house complies with the power requirements listed on the identification sticker located on the back of your product. Install your product horizontally, on a suitable base (furniture), with enough space around it for ventilation 7\~10 cm. Make sure the ventilation slots are not covered. Do not place the unit on amplifiers or other equipment which may become hot. This unit is designed for continuous use. To fully turn off the unit, disconnect the AC plug from the wall outlet. Unplug the unit if you intend to leave it unused for a long period of time.
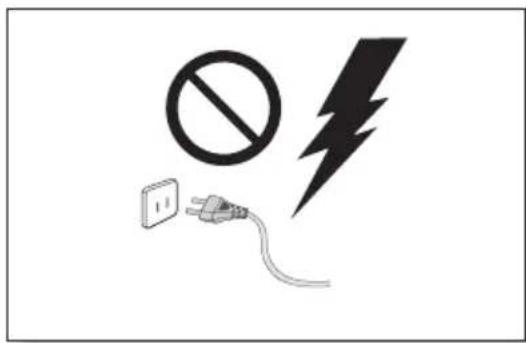
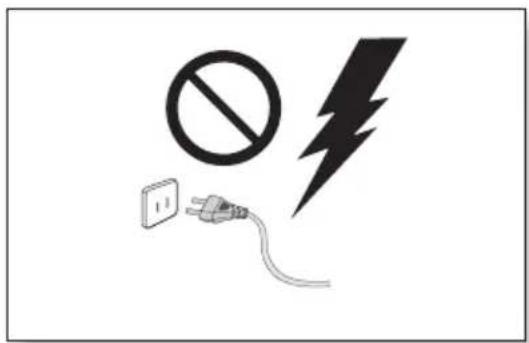
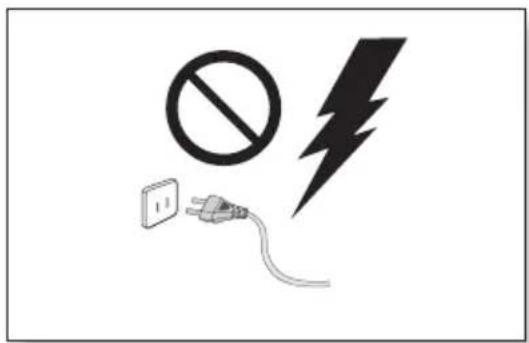
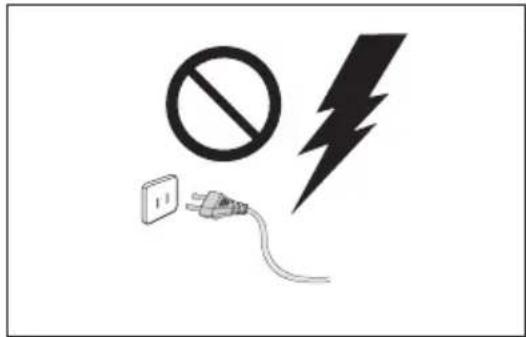
During thunderstorms, disconnect the AC plug from the wall outlet. Voltage peaks due to lightning could damage the unit.
natural_image
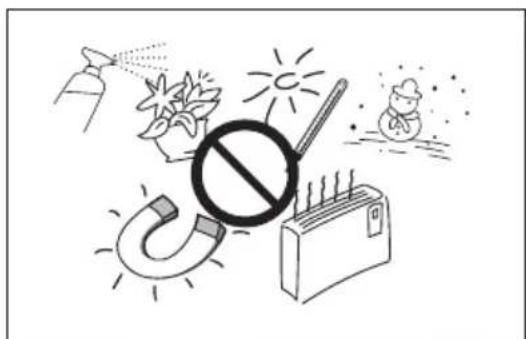
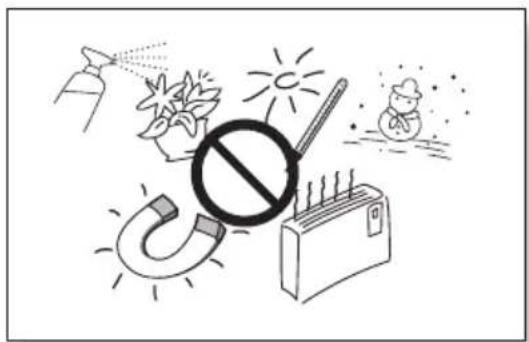
Illustration of various symbols including a prohibition sign, sun, magnet, and cartoon character (no text or labels)Protect the product from moisture (i.e. vases), and excess heat (e.g. a fireplace) or equipment creating strong magnetic or electric fields. Disconnect the power cable from the AC supply if the unit malfunctions. Your product is not intended for industrial use. It is for personal use only.
Condensation may occur if your product has been stored in cold temperatures. If transporting the unit during the winter, wait approximately 2 hours until the unit has reached room temperature before using.
natural_image
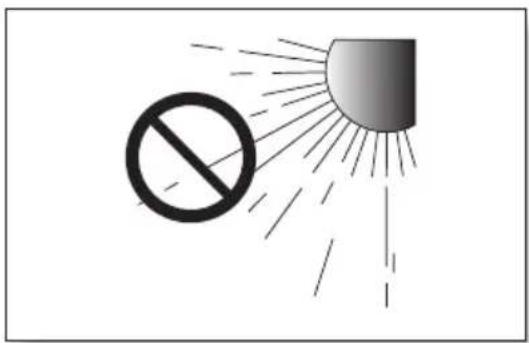
Diagram showing a prohibition symbol emitting radiating light rays toward a shaded circular object (no text or labels)Do not expose the unit to direct sunlight or other heat sources.
This could lead to overheating and cause the unit to malfunction.
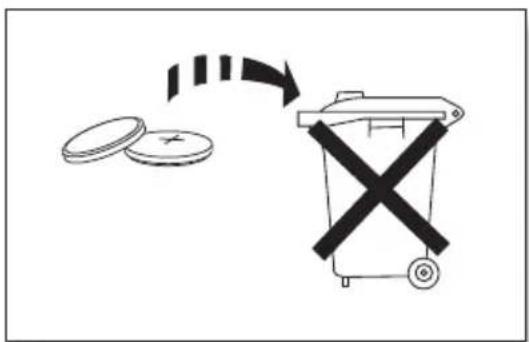
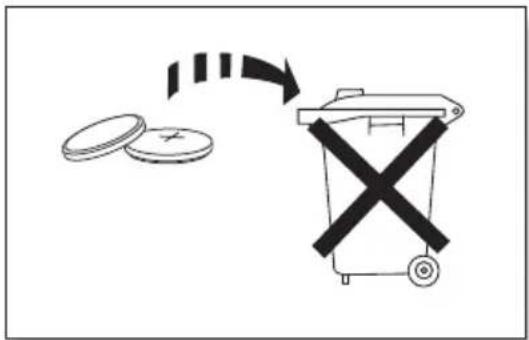
The batteries used with this product contain chemicals that are harmful to the environment. Do not dispose of batteries in the general household trash. A warning that batteries (battery pack or batteries installed) shall not be exposed to excessive heat such as sunshine, fire or the like. Do not short circuit, disassemble, or overheat the batteries. Danger of explosion if battery is incorrectly replaced. Replace only with the same or equivalent type.
CONTENTS
2 GETTING STARTED
2 Features
3 Safety Information
6 What's Included
7 DESCRIPTIONS
7 Top / Front Panel
8 Rear Panel
9 Remote Control
11 INSTALLATION
11 Installing the Wall Mount
11 Installation Precautions
12 Installing the Bracket without Referring to the Wall-Mount Installation Guide
13 Detaching the Soundbar from the Wall Mounts
14 CONNECTIONS
14 Connecting the Subwoofer and SWA-7000S to the Main Unit
15 Connecting the Surround Speakers
16 Connecting an External Device using an HDMI cable
17 Connecting an External Device using Audio (analog) cable or Optical (digital) cable
18 FUNCTIONS
18 Input mode
18 ARC (HDMI OUT)
19 Bluetooth
21 Using the Samsung Audio Remote App
22 TV SoundConnect
23 USB
24 Software Update
25 TROUBLESHOOTING
25 Troubleshooting
26 APPENDIX
26 Specifications
- Figures and illustrations in this User Manual are provided for reference only and may differ from actual product appearance.
• An administration fee may be charged if either
(a) an engineer is called out at your request and there is no defect with the product (i.e. where the user manual has not been read).
(b) you bring the unit to a repair centre and there is no defect with the product (i.e. where the user manual has not been read). - You will be informed of the administration fee amount before a technician visits.
WHAT'S INCLUDED
BEFORE READING THE USER'S MANUAL
Note the following terms before reading the user's manual.
▶ Icons used in this manual
| Icon Term Definition | ||
 | Caution | Indicates a situation where a function does not operate or settings may be canceled. |
 | Note | Indicates tips or instructions on the page that help you operate a function. |
▶ Safety Instructions and Troubleshooting
1) Be sure to familiarize yourself with the Safety Instructions before using this product. (See page 3)
2) If a problem occurs, check Troubleshooting. (See page 25)
Check for the supplied accessories shown below.
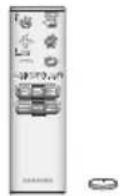
Remote Control /
Lithium Battery (3V : CR2032)
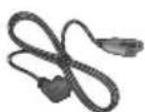
Power Cord : 3EA
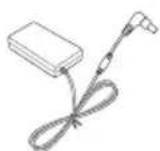
DC Adapter
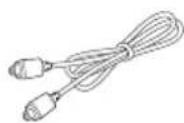
Optical Cable
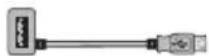
USB Cable
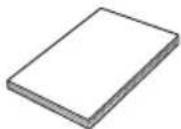
User Manual


(Wall Mount L: 1EA) (Wall Mount R: 1EA)


Holder-Screw 1: 2EA Holder-Screw 2: 2EA Wall Mount Guide
Bracket-Wall Mount


- The appearance of the accessories may differ slightly from the illustrations above.
- Use the dedicated USB cable to connect external USB devices to the unit.
▶Speaker Components
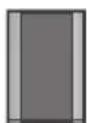
Surround Speaker : 2EA Subwoofer
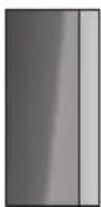
r Speaker Cable : 2EA
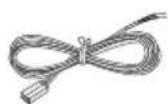
Wireless Receiver
Module (SWA-7000S)
TOP / FRONT PANEL
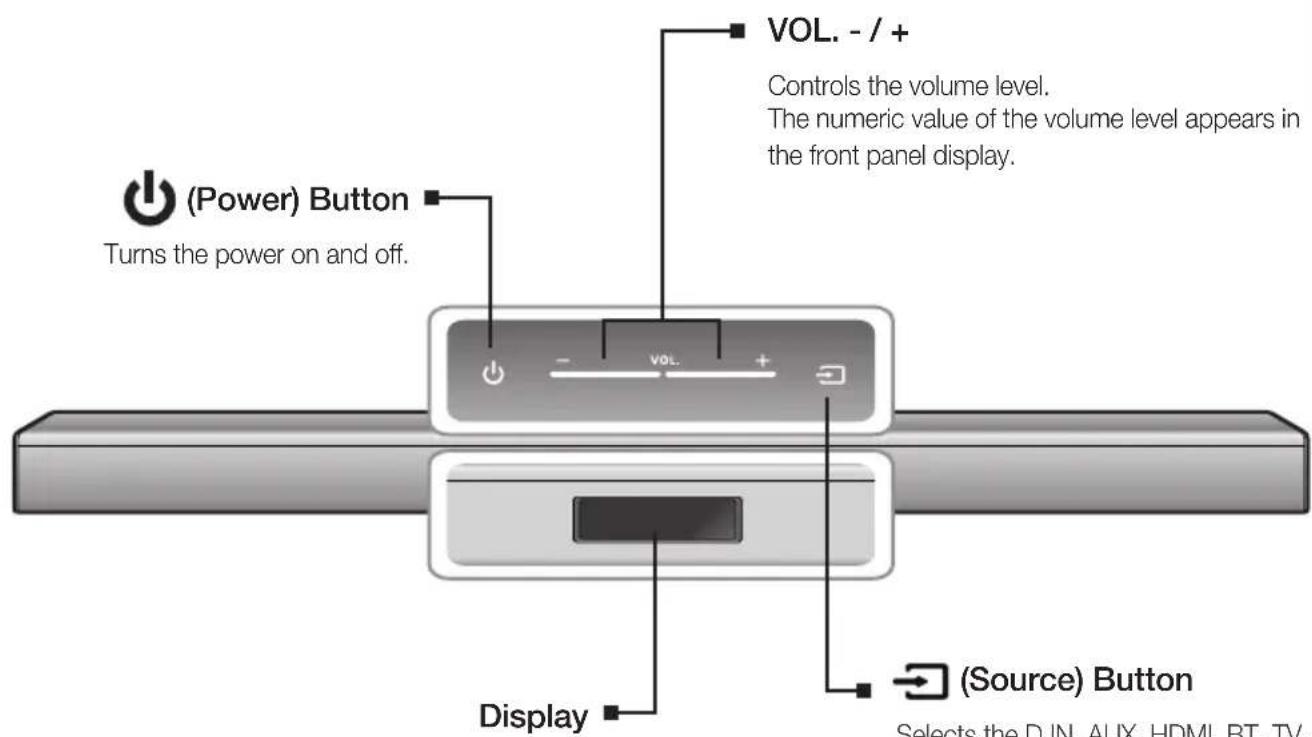
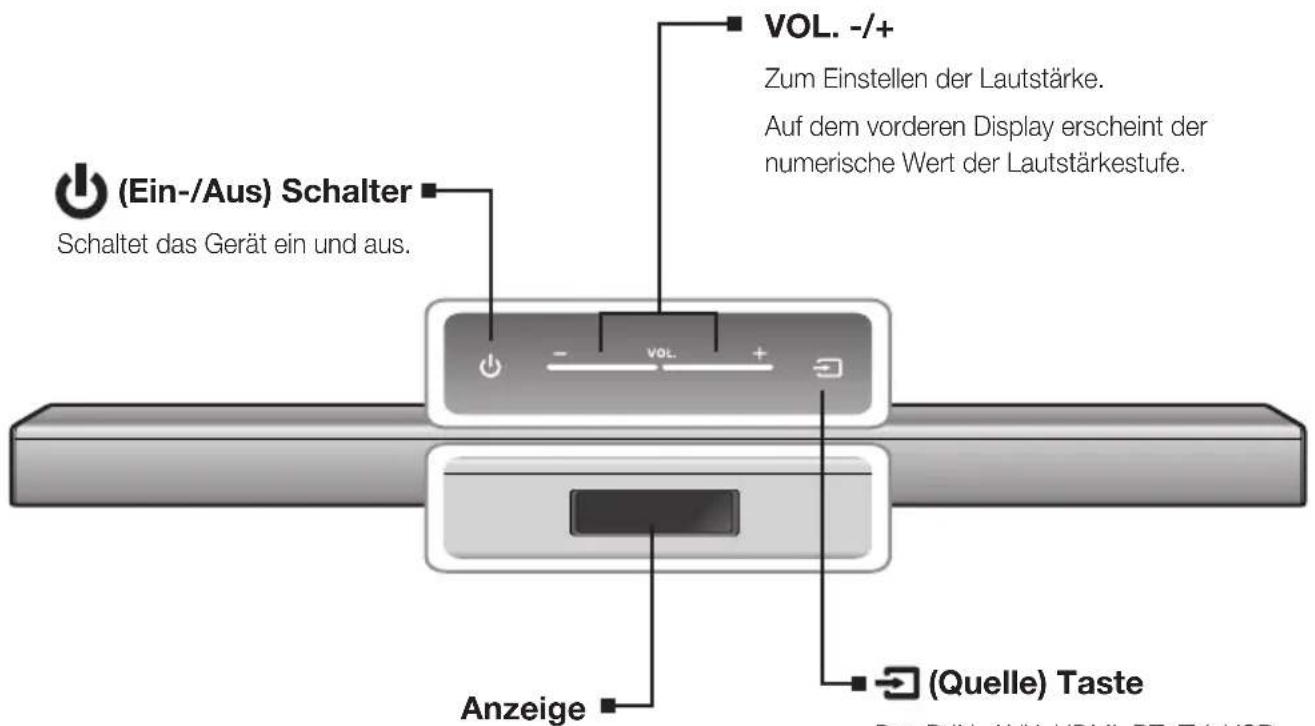
Displays the current mode.
- If there is no input from the product or remote control for 25 seconds, the display will dim automatically.
Selects the D.IN, AUX, HDMI, BT, TV, or USB input.
- While the unit is powered on, pressing the → (Source) button for more than 3 seconds sets the button to act as the ↗ (Mute) button. To cancel the ↗ (Mute) button setup, press the → (Source) button for more than 3 seconds again.

- When you turn on this unit, there will be a 4 to 5 second delay before it produces sound.
- If you want to enjoy sound only from the Soundbar, you must turn off the TV's speakers in the Audio Setup menu of your TV. Refer to the owner's manual supplied with your TV.
REAR PANEL
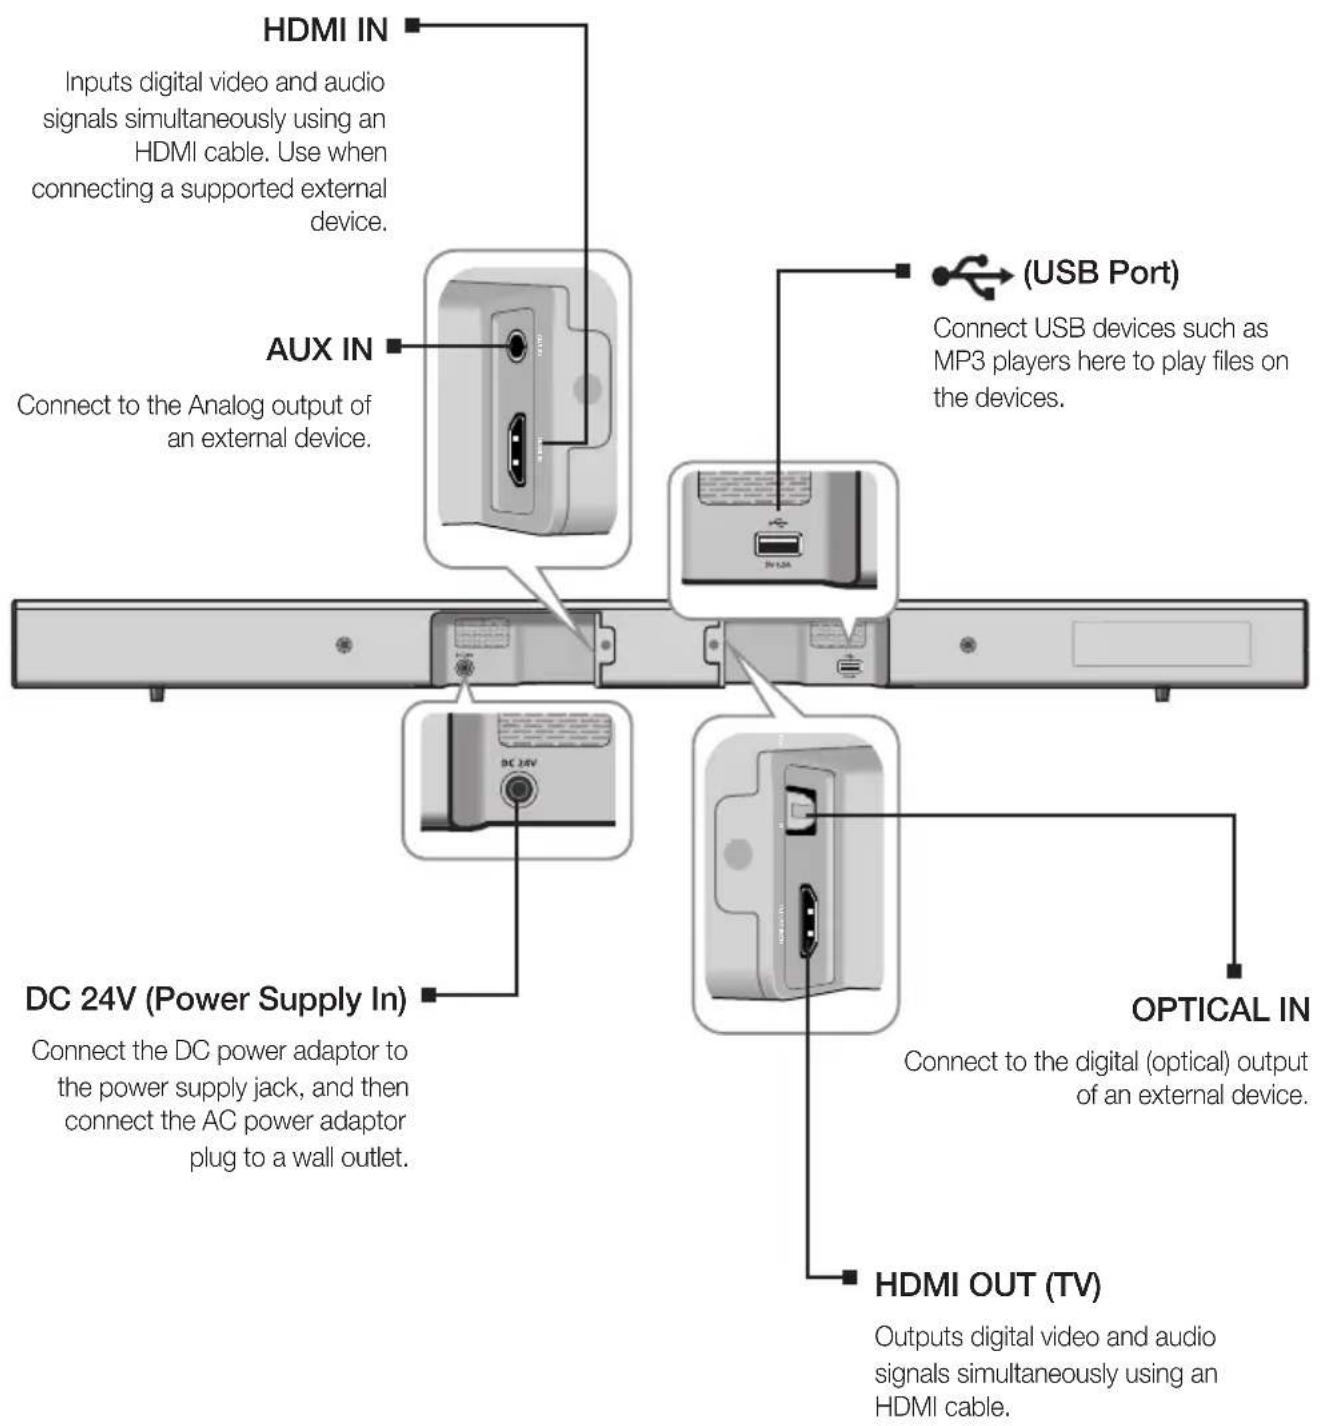

- When disconnecting the power cable of the AC power adaptor from the wall outlet, pull the plug. Do not pull the cable.
- Do not connect this unit or other components to an AC outlet until all connections between components are complete.
REMOTE CONTROL
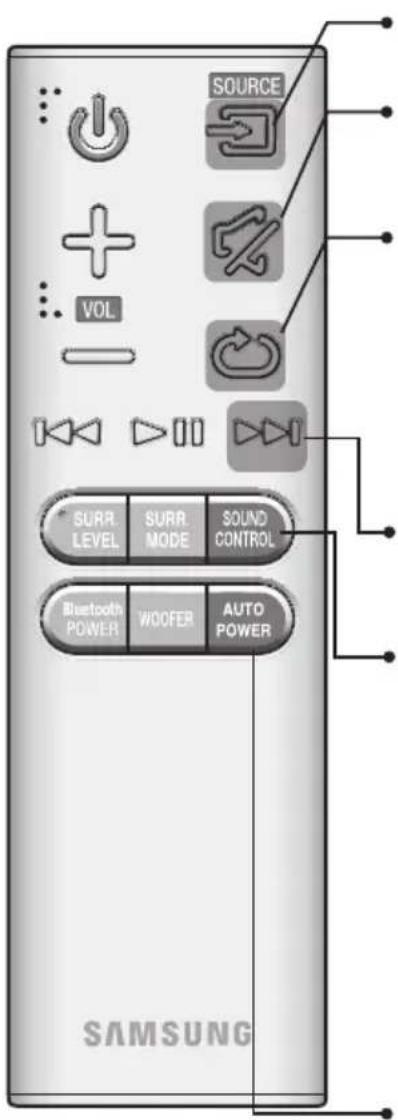
SOURCE
Press to select a source connected to the Soundbar.
Mute
You can turn the volume down to 0 with the push of a button. Press again to restore the sound to the previous volume level.
Repeat
Press to set the Repeat function during music playback from a USB device.
OFF - REPEAT : Cancels Repeat Playback.
TRACK - REPEAT : Repeatedly play a track.
ALL - REPEAT : Repeatedly play all tracks.
RANDOM - REPEAT : Plays tracks in random order. (A track that has already been played may be played again.)
Skip Forward
If there is more than one file on the device you are playing, and you press the ▶▶ button, the next file is selected.
SOUND CONTROL
Press to select TREBLE, BASS, or AUDIO SYNC. Then, use the I◄◄, ►►I buttons to adjust the Treble, Bass volume from -6 to +6.
Press and hold the SOUND CONTROL button for about 5 seconds to adjust the sound for each frequency band. 150Hz, 300Hz, 600Hz, 1.2KHz, 2.5KHz, 5KHz and 10KHz are selectable and each can be adjusted to a setting between -6 and +6.
If the Soundbar is connected to a digital TV and the video appears out of sync with the audio, press the SOUND CONTROL button to sync the audio with the video. Use the I◄◄►►I buttons to set the audio delay between 0 ms and 300 ms. In USB mode, TV mode, and BT mode, the Audio Sync function may not available.
AUTO POWER
Auto Power Link: Synchronizes the Soundbar to a connected Digital Optical source via the Digital Optical jack so it turns on automatically when you turn on your TV.
(Auto Power Link : Default OFF, ON-Anynet+ / OFF-POWER LINK or OFF-Anynet+ / ON-POWER LINK). The Anynet+ function lets you control the Soundbar with the remote from an Anynet+ compatible Samsung TV. The Soundbar must be connected to the TV via an HDMI cable.
* Anynet+: Press the AUTO POWER button to turn the Anynet+ function on or off.

• Soundbar is a Samsung proprietary name.
- Operate the TV using the TV's remote control.
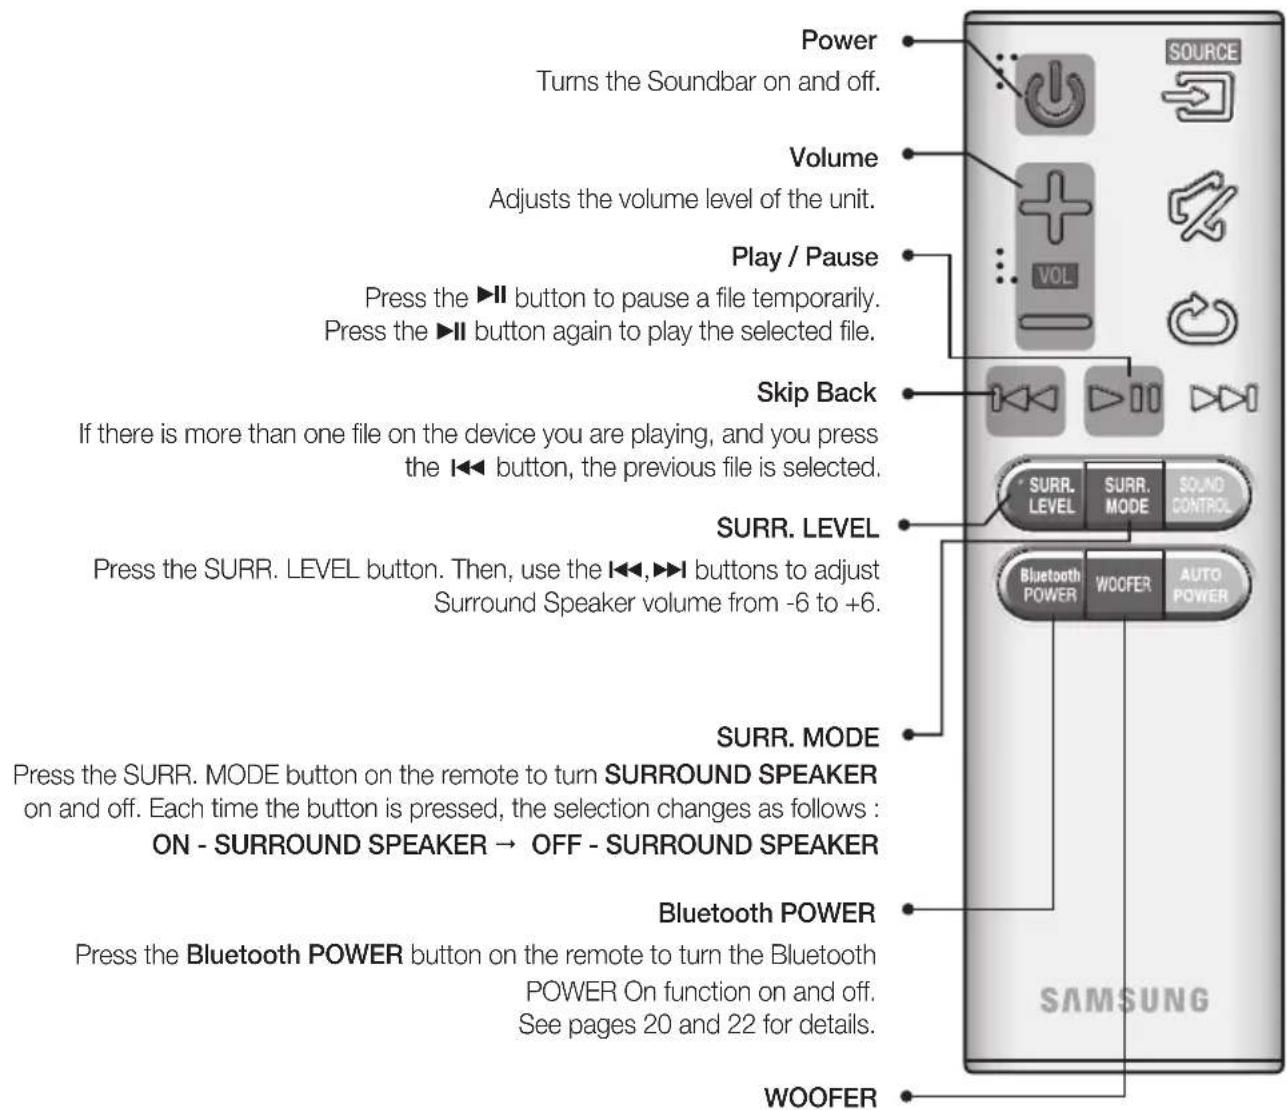
You can control the woofer volume.
Press the Woofer button, and then press the ◀◀,▶◀1 buttons to increase or decrease the subwoofer volume. You can select SW (-12, -6,-5,-4,-3,-2, -1,0,+1,+2,+3,+4,+5,+6).
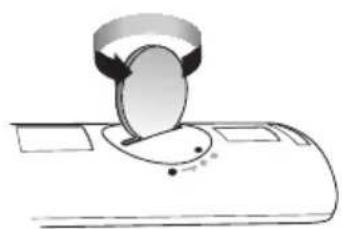
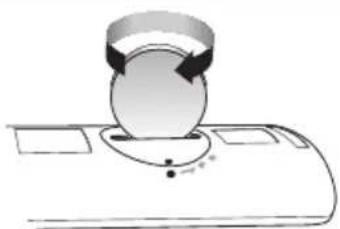
INSTALLING THE BATTERY IN THE REMOTE CONTROL
natural_image
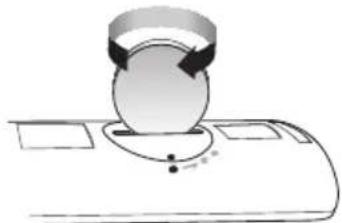
Diagram of a mechanical or electronic component with a circular component and base, no visible text or symbols- Use a suitable coin to turn the remote control's battery cover counterclockwise to remove it as shown in the figure above.
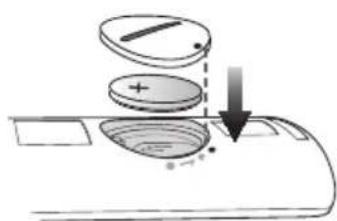
- Insert a 3V lithium battery. Keep the positive (+) pole facing up when inserting the battery. Put the battery cover on and align the '●' marks side by side as shown in the figure above.
natural_image
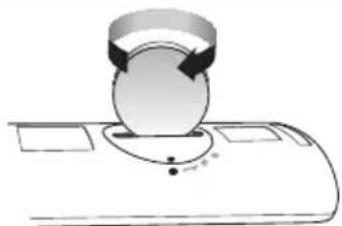
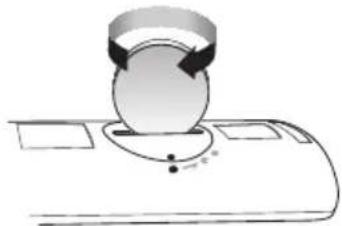
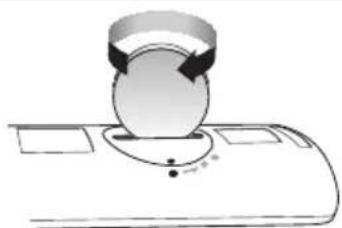
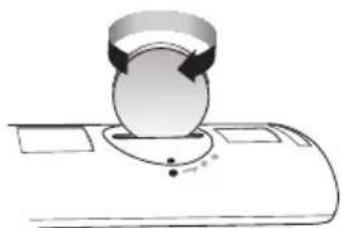
Diagram of a mechanical device with a rotating component and base components (no text or symbols)- Use a suitable coin to turn the remote control battery cover clockwise as far as it will go to fix it in place.
INSTALLING THE WALL MOUNT
You can use the wall mount bracket to mount this unit on a wall.
INSTALLATION PRECAUTIONS
- Install on a vertical wall only.
- For the installation, avoid a location with high temperature or humidity, or a wall that cannot sustain the weight of the set.
- Check the strength of the wall. If the wall is not strong enough to support the unit, reinforce the wall or install the unit on a different wall that can support the unit's weight.
- Purchase and use the fixing screws or anchors appropriate for the kind of wall you have (plaster board, iron board, wood, etc.). If possible, fix the support screws into wall studs.
• Purchase wall mounting screws according to the type and thickness of the wall you will mount the Soundbar on.
-Diameter : M5
-Length: L 35 mm or longer recommended.
- Connect cables from the unit to external devices before you install it on the wall.
- Make sure the unit is turned off and unplugged before you install it. Otherwise, it may cause an electric shock.
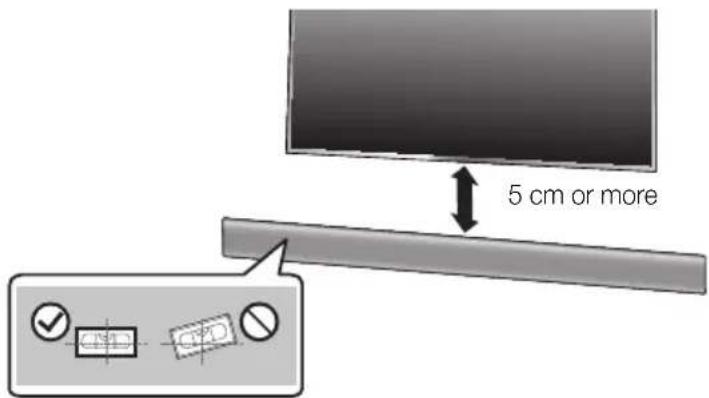
- Place the installation guide against the wall surface.
• The installation guide must be level.
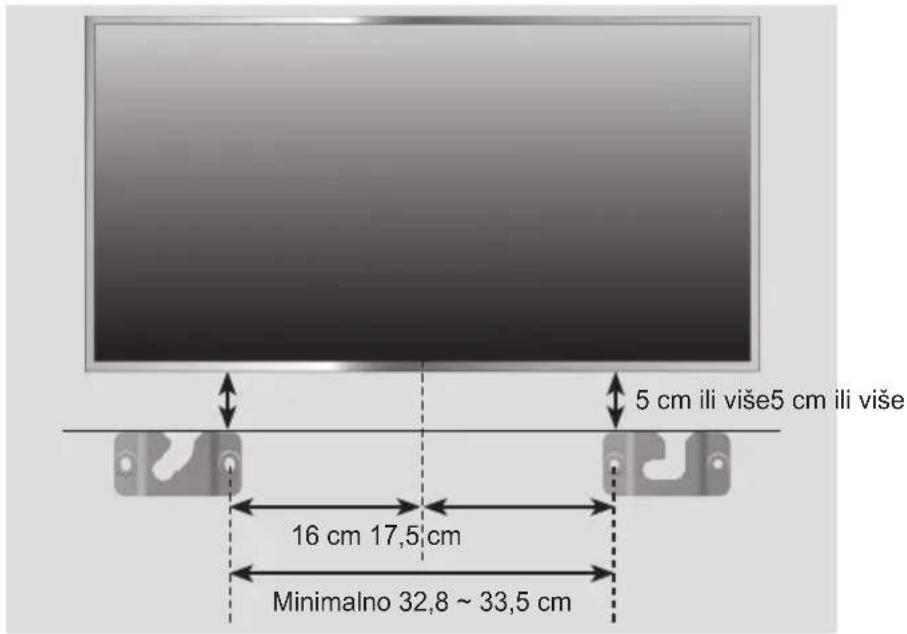
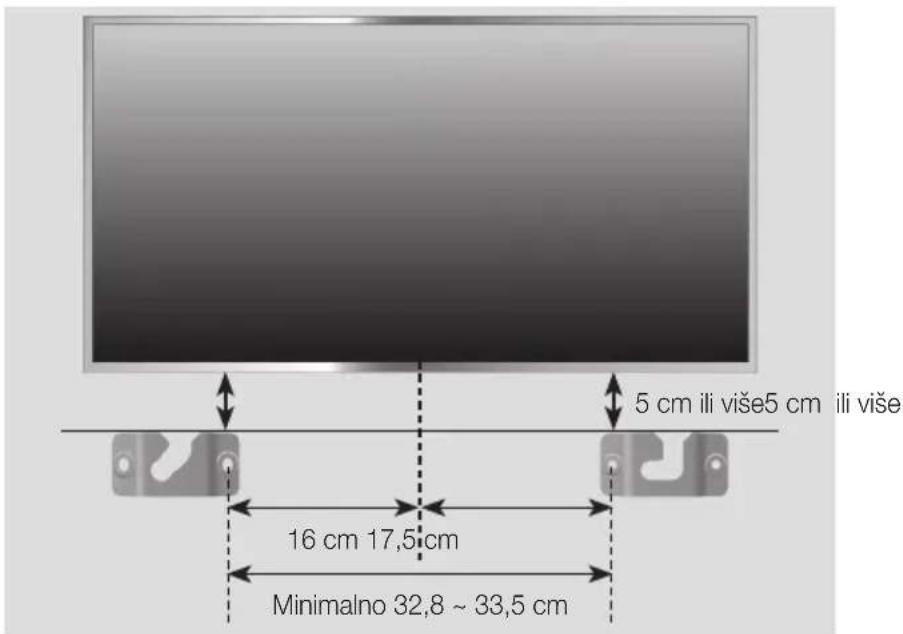
- If the TV is mounted on the wall, install the Soundbar at least 5 cm below the TV.
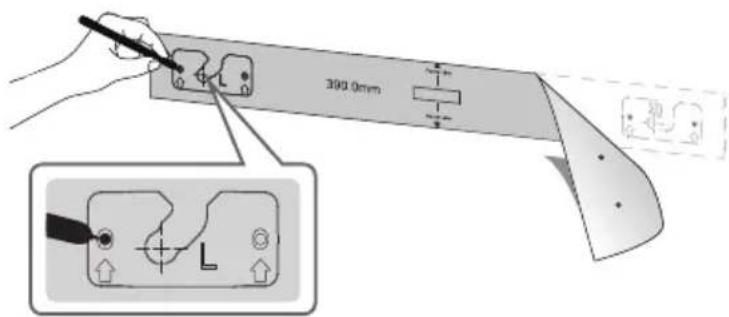
- Mark the location where the screws will go through on the wall, and then remove the installation guide. Next, drill holes for the screws using an appropriately sized drill bit.
natural_image
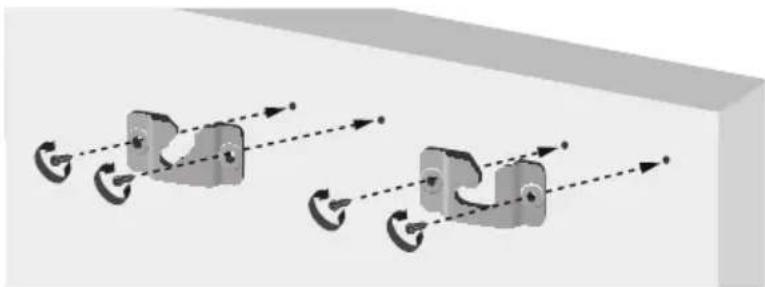
Diagram showing two mechanical clamping or lifting mechanisms with rotational arrows, no text or symbols present- Fasten the wall mounts and screws to the marked locations.
- The left and right mounts are different shapes. Make sure to position them correctly.
natural_image
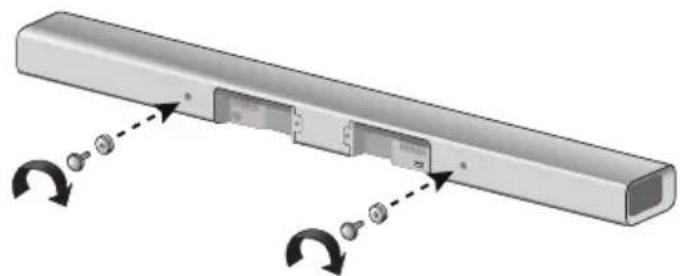
Diagram of a cable connector with two connectors and directional arrows indicating assembly (no text or symbols)Wall Mounting the SoundBar
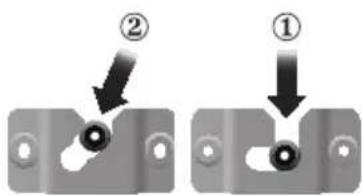
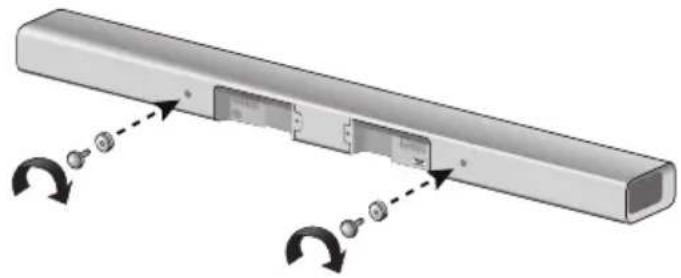
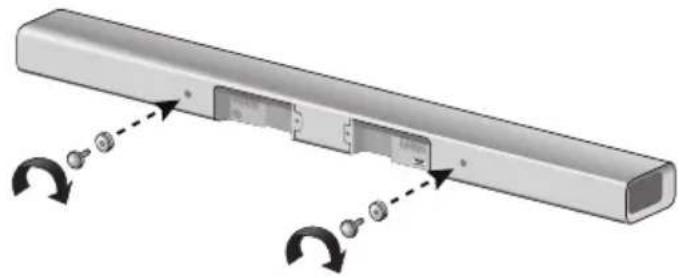
- Secure the two holder screws to the screw holes on the back of the Soundbar's main body, one on the left and one on the right.
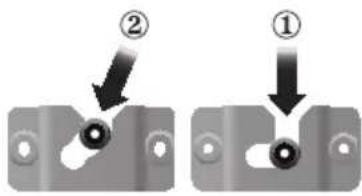
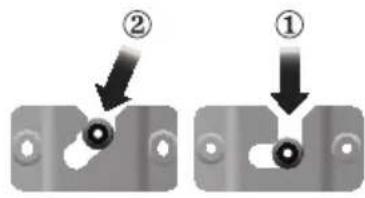
- Set the holder screws on the back of the Soundbar into the grooves of the wall mounts. For safe installation, make sure to push the holder screws all the way to the bottom of the grooves.
INSTALLING THE BRACKET WITHOUT REFERRING TO THE WALL-MOUNT INSTALLATION GUIDE

- Place Wall Mount L on the desired wall surface parallel to the floor as shown on the previous page. Mark the location of the screw holes on the wall. Drill holes for the screws at the places you have marked.
- Match the screw holes on Wall Mount L to the screw holes on the wall, and then screw one screw through the hole in its right end. Tighten the screw until it is firmly fixed to the wall.
- Place Wall Mount R on the desired wall surface parallel to the floor and aligned with Wall Mount L as shown on the previous page. Mark the location of the screw holes on the wall. Drill holes for the screws at the places you have marked.
- Match the screw holes on Wall Mount R to the screw holes on the wall, and then screw one screw through the hole in its right end. Tighten the screw until it is firmly fixed to the wall.
-
If you are mounting the Wall Mounts beneath the TV, make sure to position the mounts 5 cm or more below the TV and to align the mounts with the centre of the TV as shown on the previous page.
-
Insert screws through the remaining holes, and then tighten.
DETACHNING THE SOUNDBAR FROM THE WALL MOUNTS
- Pull the Soundbar upwards as shown in the figure to separate it from the wall mounts.
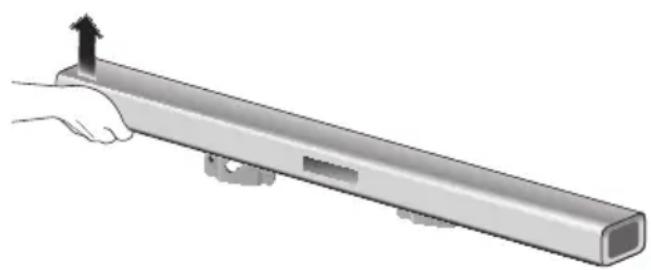
natural_image
Illustration of a hand holding a cylindrical metal rod with an upward arrow indicating force or movement (no text or symbols present)Detaching the Soundbar from the Wall Mounts
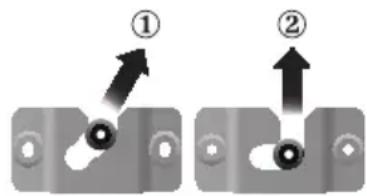

- Do not hang onto the installed unit and avoid striking or dropping the unit.
- Secure the unit firmly to the wall so that it does not fall off. If the unit falls off, it may cause an injury or damage the product.
- When the unit is installed on a wall, please make sure that children do not pull any of the connecting cables, as it may cause it to fall.
- For the optimal performance of a wall mount installation, install the speaker system at least 5 cm below the TV, if the TV is mounted on the wall.
- For your safety, if you do not mount the unit on the wall, install it on a secure, flat surface where it is unlikely to fall.

- Do not connect the power cord of this product or your TV to a wall outlet until all connections between components are complete.
- Before moving or installing this product, be sure to turn off the power and disconnect the power cord.
CONNECTING THE SUBWOOFER AND SWA-7000S TO THE MAIN UNIT
CONNECTING THE SUBWOOFER AND SWA-7000S AUTOMATICALLY
The linking IDs of the SWA-7000S wireless module and the subwoofer are preset at the factory. The subwoofer and the SWA-7000S should link (connect wirelessly) to the main unit automatically when you turn on the main unit, the subwoofer, and the SWA-7000s.
- When the subwoofer and SWA-7000S are completely connected, the blue LED Link indicators on the subwoofer and the SWA-7000S stop blinking.
CONNECTING SUBWOOFER AND SWA-7000S MANUALLY
If the blue LED lights do not stop blinking when the main unit, subwoofer, and SWA-7000S are turned on, please reset the linking ID by following the procedure below.
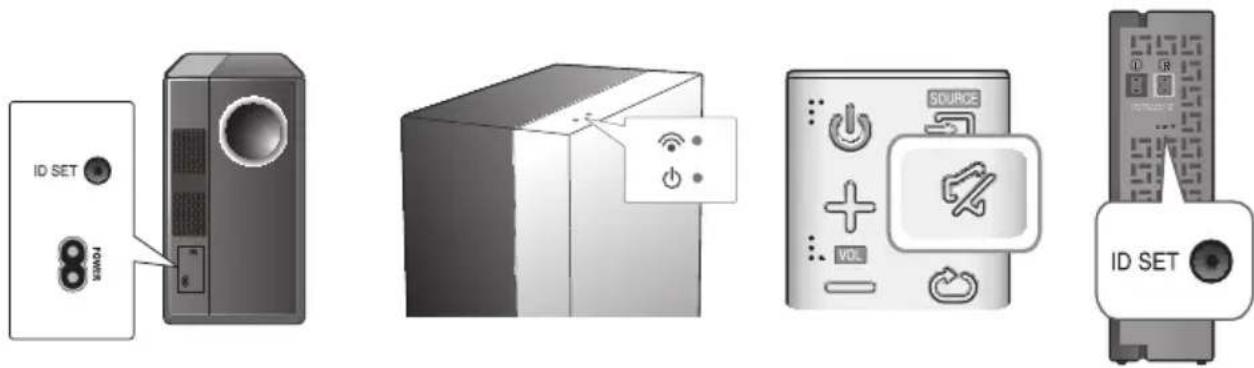
- Plug the power cords of the main unit, subwoofer, and SWA-7000S into an AC wall outlet.
- Press the ID SET button on the back of the subwoofer and the SWA-7000S with a small, pointed object for 5 seconds.
- The STANDBY indicator turns off and the LINK indicator (Blue LED) blinks quickly.
- While the main unit is powered off (in STANDBY mode), press and hold the ⚫ (Mute) on the remote control for 5 seconds.
- The ID SET message appears on the Soundbar's display.
-
To finalize the link, turn the main unit's power on while the blue LEDs on the subwoofer and the SWA-7000S are blinking.
-
The main unit, subwoofer, and SWA-7000S should now be linked (connected).
- The Link indicators (Blue LEDs) on the subwoofer and SWA-7000S should be glowing continuously. They should not be blinking.
- If the Link Indicators are not solid blue, the linking process has failed. Turn off the main unit and start again from Step 2.

- Before moving or installing the product, be sure to turn off the power and disconnect the power cord.
- If the main unit is powered off, the wireless subwoofer will be in standby mode and the STANDBY LED on the upper side will come on after the Link indicator (Blue LED) blinks for 30 seconds.
- If you use a device that uses the same frequency (2.4GHz/5GHz) as the Soundbar near the Soundbar, interference may cause some sound interruption.
- The maximum transmission distance of the wireless signal between the main unit and the subwoofer and the main unit and the SWA-7000S is about 10m, but may vary depending on your operating environment. If a steel-concrete or metallic wall is between the main unit and the wireless subwoofer or the main unit and the SWA-7000S, the system may not operate at all, because the wireless signal cannot penetrate metal.
- If the main unit doesn't make a wireless connection, follow steps 1-5 on the previous page to re-set the connection between the main unit, the wireless subwoofer, and the SWA-7000S.

- A wireless receiving antenna is built into the wireless subwoofer and the SWA-7000S. Keep the both units away from water and moisture.
- For optimal listening performance, make sure that the areas around the wireless subwoofer and SWA-7000S are clear of any obstructions.
flowchart
graph LR
    A["Surround Speaker (L)"] --> B["Device"]
    C["Surround Speaker (R)"] --> B
    B --> D["Device"]
Wireless Receiver Module

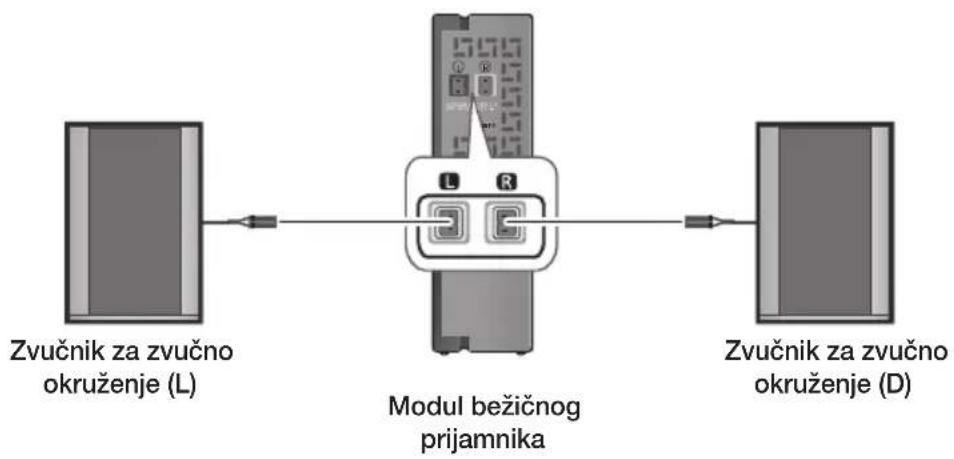
- Place these speakers to the side of your listening position. If there isn't enough room, place these speakers so they face each other. Position them about 60-90 cm above your ear, facing slightly downward.

- Surround speakers must be connected to the wireless receiver module. - Each speaker has a colored label on its back or underside. Each cable has a single colored band near its end. Match the band on each cable to the speaker label by color, and then connect the cable to the speaker.
CONNECTING AN EXTERNAL DEVICE USING AN HDMI CABLE
HDMI is the standard digital interface for connecting to TVs, projectors, DVD players, Blu-ray players, set top boxes, and more.
HDMI prevents any degradation to the signal due to conversion to analog and maintains the video and audio quality of the original digital source.
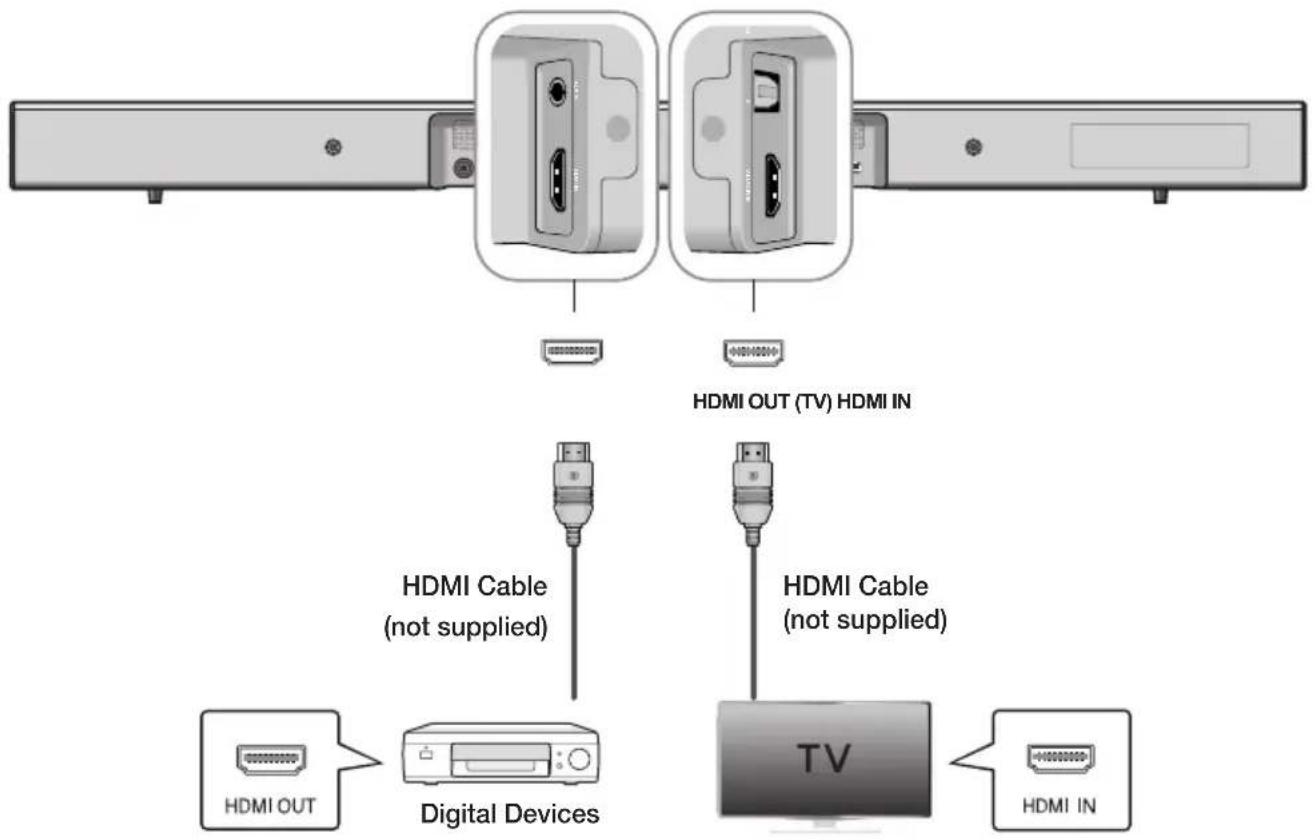
HDMI IN
Connect an HDMI cable (not supplied) from the HDMI IN jack on the back of the product to the HDMI OUT jack on your digital device.
and
HDMI OUT (TV)
Connect an HDMI cable (not supplied) from the HDMI OUT (TV) jack on the back of the product to the HDMI IN jack on your TV.

- HDMI is an interface that enables the digital transmission of video and audio data with just a single connector.
HDMI OUT (ARC)
The ARC function allows digital audio to output via the HDMI OUT (ARC) port.
It can be enabled only when the Soundbar is connected to a TV that supports the ARC function

• Anynet+ must be turned on.
- This function is not available if the HDMI cable does not support ARC.
CONNECTING AN EXTERNAL DEVICE USING AUDIO (ANALOG) CABLE OR OPTICAL (DIGITAL) CABLE
This unit comes equipped with one digital optical in jack and one analog audio in jack (Aux In), giving you two ways to connect it to a TV.
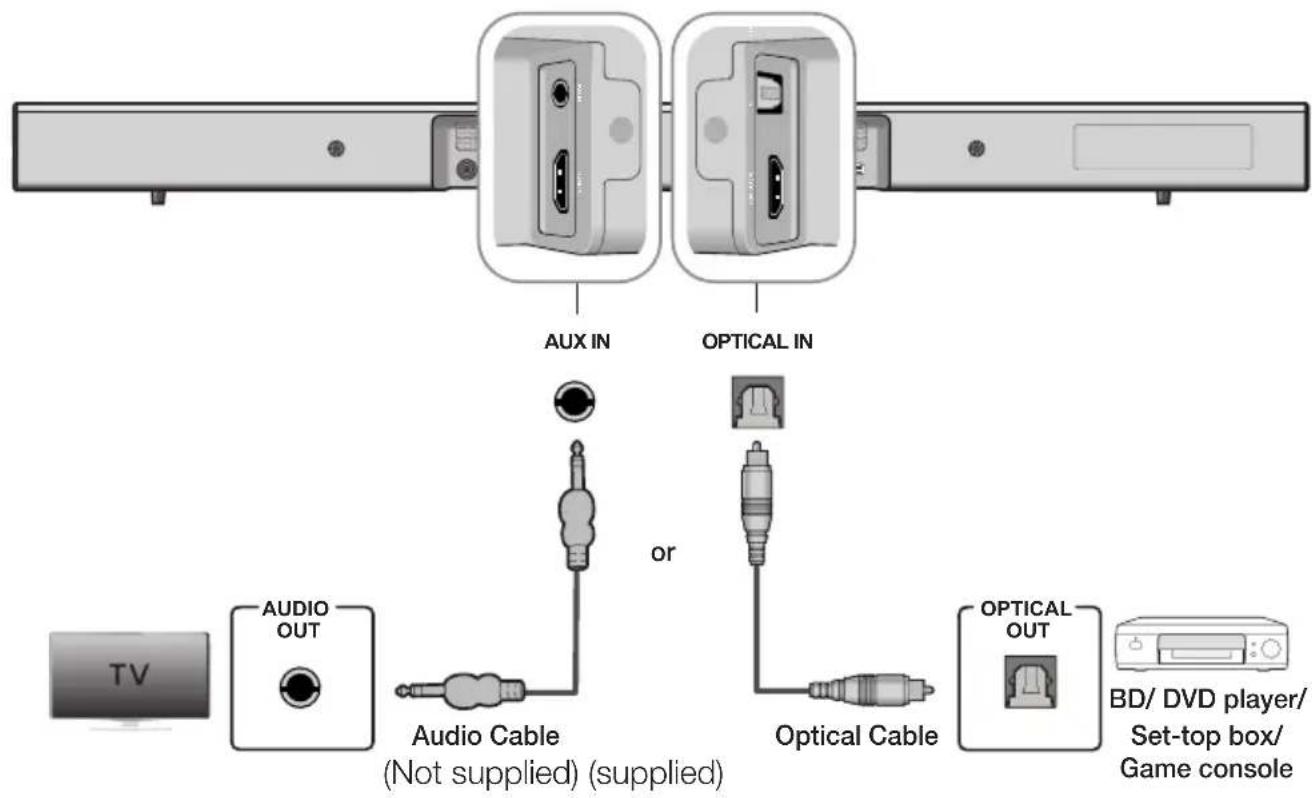
AUX IN
Connect AUX IN (Audio) on the main unit to the AUDIO OUT jack of the TV or Source Device. To use, change the function to AUX.
or
OPTICAL IN
Connect OPTICAL IN (Audio) on the main unit to the OPTICAL OUT jack of the TV or Source Device. To use, change the function to D.IN.

- Do not connect the power cord of this product or your TV to the wall outlet until all connections between components are complete.
- Before moving or installing this product, be sure to turn off the power and disconnect the power cord.
FUNCTIONS
INPUT MODE
Press the (→) button on the main unit's top panel or the → SOURCE) button on the remote control to select the mode you want.
natural_image
Pure electrical circuit symbol for a switch or connector (no text or labels)
| Input mode Display | |
| Optical Digital input | D.IN |
| AUX input | AUX |
| HDMI input | HDMI |
| BLUETOOTH mode | BT |
| TV SoundConnect | TV |
| USB mode | USB |
The unit turns off automatically in the following situations.
• D.IN/HDMI/BT/TV/USB Mode
-If there is no audio signal for 25 minutes.
- AUX Mode
-If the AUX cable is disconnected for 25 minutes.
-In Auto Power Down ON mode, if there is no KEY input for 8 hours when the AUX cable is connected.
-To turn the Auto Power Down function ON or OFF, press and hold the▶II button for 5 seconds. OFF/ON-AUTO POWER DOWN appears on the display.
ARC (HDMI OUT)
ARC (Audio Return Channel) transmits the digital audio signal to the HDMI OUT (ARC) port.

- Connect a TV supporting ARC to the Soundbar with an HDMI cable.
- Turn on the TV, turn on the Soundbar, and then turn on the Soundbar's Anynet+ function.
- Press the (1) button on the main unit's top panel or the (SOURCE) button on the remote control to select the D.IN mode.

- If the HDMI cable does not support the ARC function, ARC will not work.
• To turn off the ARC function, turn Anynet+ off.
BLUETOOTH
You can connect a Bluetooth device to the Soundbar and enjoy music with high quality stereo sound, all without wires!
▶To connect the Soundbar to a Bluetooth device
Check if the Bluetooth device supports the Bluetooth compliant stereo headset function.
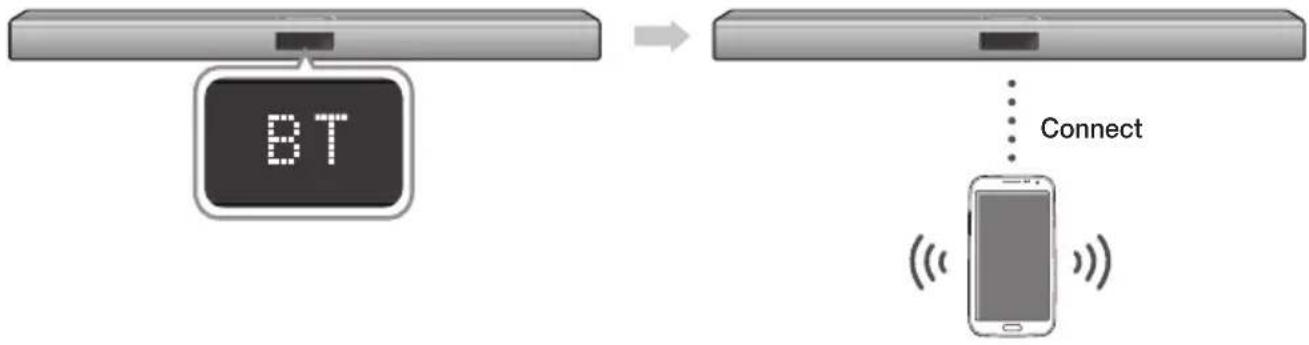
flowchart
graph TD
    A["BT"] --> B["Mobile Device"]
    B --> C["Connect"]
    C --> D["Smartphone Signal Wave"]
    style A fill:#f9f,stroke:#333
    style B fill:#ccf,stroke:#333
    style C stroke-dasharray: 5 5
Bluetooth device
- Press the →) button on the main unit's top panel or the →(SOURCE) button on the remote control to select the BT mode.
- You will see BT READY on the front display of the Soundbar.
-
Select the Bluetooth menu on the Bluetooth device you want to connect. (Refer to the Bluetooth device's user manual.)
-
Select the Stereo headset menu on the Bluetooth device.
- You will see a list of scanned devices.
- Select "[Samsung] Soundbar J-Series" from the list.
- When the Soundbar is connected to the Bluetooth device, it will display [Bluetooth device name] BT on the front display.
- The device name can only be displayed in English. An underline " _ " will be displayed if the name is not in English.
- If the Bluetooth device has failed to pair with the Soundbar, delete the previous "[Samsung]Soundbar J-Series" found by the Bluetooth device and have it search for the Soundbar again.
- Play music on the connected device.
- You can listen to the music playing on the connected Bluetooth device over the Soundbar. In BT mode, the Play/Pause/Next/Prev functions are not available. However, these functions are available in Bluetooth devices supporting AVRCP.

- If asked for PIN code when connecting a Bluetooth device, enter <0000>.
- Only one Bluetooth device can be paired at a time.
- The Bluetooth connection will be terminated when you turn the Soundbar off.
- The Soundbar may not perform Bluetooth search or connection correctly under the following circumstances:
-If there is a strong electrical field around the Soundbar.
-If several Bluetooth devices are simultaneously paired with the Soundbar.
-If the Bluetooth device is turned off, not in place, or malfunctions.
- Note that such devices as microwave ovens, wireless LAN adaptors, fluorescent lights, and gas stoves use the same frequency range as the Bluetooth device, which can cause electric interference.
- The Soundbar supports SBC data (44.1kHz, 48kHz).
- Connect only to a Bluetooth device that supports the A2DP (AV) function.
- You cannot connect the Soundbar to a Bluetooth device that supports only the HF (Hands Free) function.
- Once the HW-J470 has been paired with a device, if the Soundbar is in D.IN, AUX, HDMI or USB mode and you select "[Samsung] Soundbar J-Series" from your Bluetooth device's list, the HW-J470 will automatically change to BT mode.
▶Bluetooth POWER on (Bluetooth POWER)
When the Bluetooth Power On function is on and the Soundbar is turned off, if a previously paired Bluetooth device tries to pair with the Soundbar, the Soundbar turns on automatically.
-
To turn Bluetooth Power ON, press the Bluetooth POWER button on the remote while the Soundbar is turned on.
-
ON-Bluetooth POWER appears on the Soundbar's display.

- Available only if the Soundbar is listed among the Bluetooth device's paired devices. (The Bluetooth device and the Soundbar must have been previously paired at least once.)
- Soundbar will appear in the Bluetooth device's searched devices list only when the Soundbar is displaying [BT READY].
- In the TV SoundConnect mode, the Soundbar cannot be paired to another Bluetooth device.
▶To disconnect the Bluetooth device from the Soundbar
You can disconnect the Bluetooth device from the Soundbar. For instructions, see the Bluetooth device's user manual.
• The Soundbar will be disconnected.
- When the Soundbar is disconnected from the Bluetooth device, the Soundbar will display BT DISCONNECTED on the front display.
▶To disconnect the Soundbar from the Bluetooth device
Press the →(SOURCE) button on the remote control or the (→) button on the product's top panel to switch from BT to another mode or turn off the Soundbar.
- The connected Bluetooth device will wait a certain amount of time for a response from the Soundbar before terminating the connection. (Disconnection time may differ, depending on the Bluetooth device)

- In Bluetooth connection mode, the Bluetooth connection will be lost if the distance between the Soundbar and the Bluetooth device exceeds 5m.
- The Soundbar automatically turns off after 25 minutes in the Ready state.
More About Bluetooth
Bluetooth is a technology that enables Bluetooth-compliant devices to interconnect easily with each other using a short wireless connection.
- A Bluetooth device may cause noise or malfunction, depending on usage, if:
- A part of your body is in contact with the receiving/transmitting system of the Bluetooth device or the Soundbar.
- It is subject to electrical variation from obstructions caused by a wall, corner, or office partition.
- It is exposed to electrical interference from same frequency-band devices including medical equipment, microwave ovens, and wireless LANs.
- Pair the Soundbar with the Bluetooth device while they are close together.
- The further the distance between the Soundbar and Bluetooth device, the worse the quality is. If the distance exceeds the Bluetooth operational range, the connection is lost.
- In poor reception areas, the Bluetooth connection may not work properly.
- The Bluetooth connection only works when it is close to the unit. The connection will be automatically cut off if the Bluetooth device is out of range. Even within range, the sound quality may be degraded by obstacles such as walls or doors.
- This wireless device may cause electric interference during its operation.
USING THE SAMSUNG AUDIO REMOTE APP
Installing the Samsung Audio Remote App
To control the HW-J470 with your smart device via the Samsung Audio Remote app, download the Samsung Audio Remote App from the Google Play store.
Market search : Samsung Audio Remote

Launching the Samsung Audio Remote App
Launch the Samsung Audio Remote app by touching the app's icon on your smart device, and then following the instructions in the app.
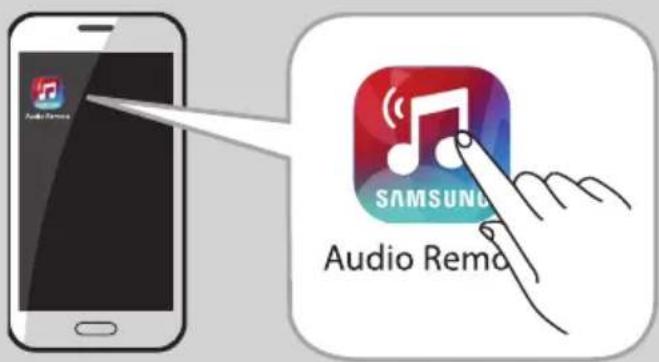

- The Samsung Audio Remote app is supported only on smart devices running Android OS 3.0 or higher.
TV SOUNDCONNECT
You can enjoy TV sound through your Soundbar when it is connected to a Samsung TV that supports the TV SoundConnect function.
▶ Connecting a TV to the Soundbar
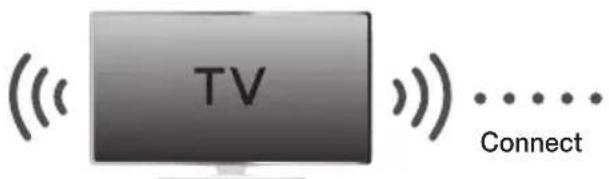
-
Turn on the TV and Soundbar.
-
Open the menu of the TV.
- Move to Speaker Settings on the "Sound" tab.
-
Set the "Add New Device" to "On".
-
Press the (→) button on the main unit's top panel or the → (SOURCE) button on the remote control to select the TV mode.
-
On the TV, a message asking whether to enable the TV SoundConnect function appears. "[Samsung] Soundbar" is also displayed on the TV screen.
-
Select
using the TV remote to finish connecting the TV and Soundbar.

- Switching the Soundbar's mode from TV to another mode automatically terminates TV SoundConnect.
- To connect the Soundbar to another TV, the existing connection must be terminated.
- To terminate the existing connection, press and hold the ▶II button on the remote for 5 seconds. To connect to the other TV, follow Steps 1 through 4 above.

- The TV SoundConnect (SoundShare) function is supported by some Samsung TVs released from 2012 on. Check whether your TV supports the TV SoundConnect (SoundShare) function before you begin. (For further information, refer to the TV's user manual.)
- If your Samsung TV was released before 2014, check the SoundShare setting menu.
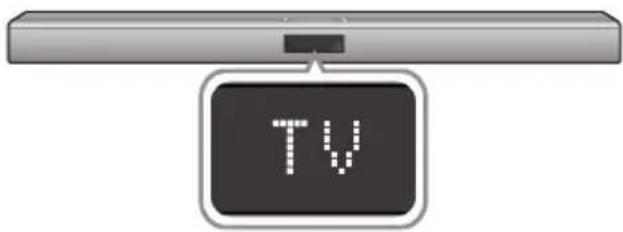
- If the distance between the TV and Soundbar exceeds 5m, the connection may not be stable or the audio may stutter. If this occurs, relocate the TV or Soundbar so that they are within operational range, and then re-establish the TV SoundConnect connection.

- TV SoundConnect Operational Ranges: -Recommended pairing range: within 50cm. -Recommended operational range: within 5m.
- The Play/Pause, Next, Prev buttons are not operable in TV SoundConnect mode.
▶ Using the Bluetooth POWER On function
The Bluetooth POWER On function is available after you have successfully connected the Soundbar to a Bluetooth compatible TV using TV SoundConnect. When the Bluetooth POWER On function is ON, turning the connected TV on or off will turn the Soundbar's power on and off as well.
- Connect the TV to your Soundbar using the TV SoundConnect function.
-
Press the Bluetooth POWER button on the Soundbar remote. "ON/OFF-BLUETOOTH POWER" appears on the Soundbar's display.
-
ON-BLUETOOTH POWER : The Soundbar turns on and off when you turn the TV on or off.
- OFF-BLUETOOTH POWER : The Soundbar only turns off when you turn the TV off.

- This function is supported by some Samsung TVs released from 2013 on.
USB
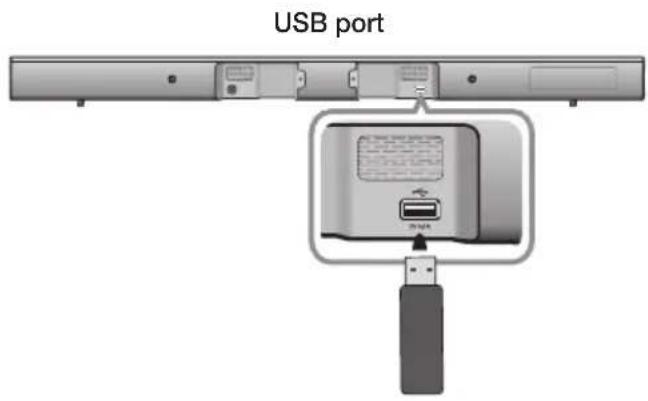
You can play music files located on USB storage devices through the Soundbar.
ENG
- Connect the USB device to the USB port on the back of the product.
- Press the (→) button on the main unit's top panel or the → (SOURCE) button on the remote control to select the USB mode.
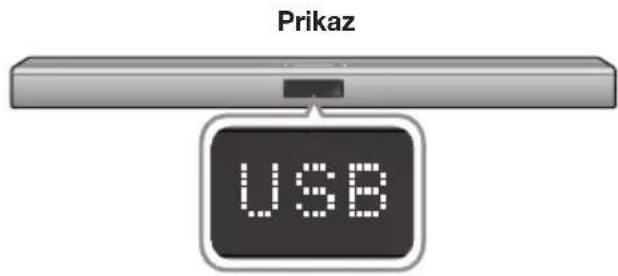
-
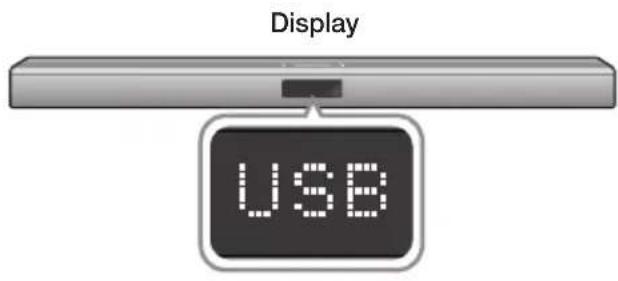
USB appears on the display screen.
-
The Soundbar connection to the USB device is complete.
- The Soundbar automatically turns off (Auto Power Off) if no USB device has been connected for more than 25 minutes.
▶ Before you connect a USB device
Be aware of the following:
- If the file name of a file or folder on a USB device exceeds 10 characters, it is not displayed on the Soundbar's display.
- This product may not be compatible with certain types of USB storage media.
- The Soundbar supports the FAT16 and FAT32 file systems.
-The NTFS file system is not supported.
- Connect USB devices directly to the USB port of the product. Otherwise, you may encounter a USB compatibility problem.
- Do not connect multiple storage devices to the product via a multi-card reader. It may not operate properly.
• Digital camera PTP protocols are not supported. - Do not remove the USB device while it is transferring files.
- DRM-protected music files (MP3, WMA) from commercial web sites cannot be played.
• External HDDs are not supported.
• Mobile phone devices are not supported.
- File Format Type Compatibility list:
| Format Codec | Sampling Rate | Bitrate | |
| *.mp3 | MPEG 1 Layer2 | 16KHz ~ 48KHz | 80kbps~320kbps |
| MPEG 1 Layer3 | |||
| MPEG 2 Layer3 | |||
| MPEG 2.5 Layer3 | |||
| *.wma | Wave_Format_MSAudio1 | 56kbps~128kbps | |
| Wave_Format_MSAudio2 | |||
| *.aac | AAC | 16KHz ~ 192Kbps | 48kbps~320kbps |
| AAC-LC 128kbps~192Kbps | |||
| HE-AAC | 24KHz ~ 96KHz | 48kbps~64kbps | |
| *.wav | - | 16KHz ~ 18Kbps | up to 3000kbps |
| *.ogg | OGG 1.1.0 50kbps~50Kbps | ||
| *.flac | FLAC 1.1.0, FLAC 1.2.1 | 16KHz ~ 96KHz | up to 3000kbps |
SOFTWARE UPDATE
natural_image
Diagram of a device with an attached USB port and a screen showing internal components (no text or symbols)Samsung may offer updates for the Soundbar's system firmware in the future.
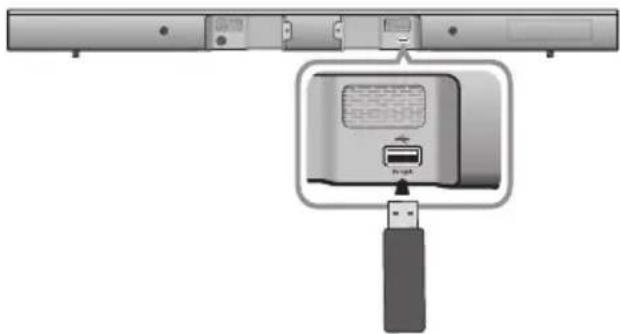
If an update is offered, you can update the firmware by connecting a USB device with the firmware update stored on it to the USB port on your Soundbar.
Note that if there are multiple update files, you must load them onto the USB device singly and use them to update the firmware one file at a time.
Please visit samsung.com or contact the Samsung call centre to receive more information about downloading updates files.

- The HW-J470 has a DUAL BOOT function. If the firmware fails to update, you can update the firmware again

- Insert a USB device containing the firmware update into the USB port on the main unit.
- Updating firmware may not work properly if audio files supported by the Soundbar are stored in the USB storage device.
- Do not disconnect the power or remove the USB device while updates are being applied. The main unit will turn off automatically after completing the firmware update.
- After the update, all settings are reset to their factory default settings. We recommend you write down your settings so that you can easily reset them after the update.
Note that updating firmware resets subwoofer connection too. If connection to the subwoofer is not established automatically after resetting, refer to page 14.
If the firmware fails to update, we recommend formatting the USB device in FAT16 and trying again.
- Once the software update is complete, turn off the product and then press and hold the (
▶II ) button on the remote control for more than 5 seconds. "INIT" appears on the display and the unit is powered off. The upgrade is complete. - Do not format the USB device in the NTFS format. The Soundbar does not support the NTFS file system.
- Depending on the manufacturer, some USB devices may not be supported.
TROUBLESHOOTING
Before requesting service, please check the following.
| The unit will not turn on. | |
| • Is the power cord plugged into the outlet? | → Connect the power plug to the outlet. |
| A function does not work when the button is pressed. | |
| • Is there static electricity in the air? | → Disconnect the power plug and connect it again. |
| Sound is not produced. | |
| Is the Mute function on?Is the volume set to minimum? | → Press the(Mute) button to cancel the Mute function.→ Adjust the Volume. |
| The remote control does not work. | |
| Are the batteries drained?Is the distance between the remote control and main unit too far? | → Replace with new batteries.→ Move closer to the unit. |
| The TV SoundConnect (TV pairing) failed. | |
| Does your TV support TV SoundConnect?Is your TV firmware the latest version?Does an error occur when connecting?Reset the TV mode and connect again. | → TV SoundConnect is supported by some Samsun TVs released from 2012 on. Check your TV to see if it supports TV SoundConnect.→ Update your TV with the latest firmware.→ Contact the Samsung Call Centre.→ Press and hold the button for 5 seconds to reset the TV SoundConnect connection. |
| The red LED on the subwoofer blinks and the subwoofer is not producing sound. | |
| • Your subwoofer may not be connected to the main body of the product. | → Try to connect your subwoofer again. (See Page 14) |
| The subwoofer drones and vibrates noticeably. | |
| Try to adjust the vibration of your subwoofer. | →Press the WOOFER button on your remote control to adjust the subwoofer's volume level (between SW-12 and SW+6. See page 10.) . |
APPENDIX
SPECIFICATIONS
| Model name | HW-J470 |
| GENERAL | USB 5V/0.5A | ||
| Weight | Main Unit 1.6 kg | ||
| Subwoofer | 4.6 kg | ||
| Surround Speaker 0.31 kg | |||
| Rear (Surround) AMP (SWA-7000S) | 0.74 kg | ||
| Dimensions(W x H x D) | Main Unit 957.5 x 59.5 x 66.5 mm | ||
| Subwoofer | 179 x 361 x 299.5 mm | ||
| Surround Speaker | 95 x 116.4 x 74 mm | ||
| Rear (Surround) AMP (SWA-7000S) | 50.0 x 200.0 x 132 mm | ||
| Operating Temperature Range +5 °C to +35 °C | |||
| Operating Humidity Range 10 % to 75 % | |||
| AMPLIFIER | Rated Output Power | Main Unit 80W/CH x 2, 3ohm, THD=10%, 1KHz | |
| Subwoofer | 140W, 3ohm, THD=10%, 100Hz | ||
| Rear (SWA-7000S) | 80W/CH x 2, 3ohm, THD=10%, 1KHz | ||
| S/N Ratio (Analogue Input) 65 dB | |||
| Separation (1kHz) 65 dB | |||
* S/N ratio, distortion, separation, and usable sensitivity are based on measurements using AES (Audio Engineering Society) guidelines.
* Nominal specification
- Samsung Electronics Co., Ltd reserves the right to change the specifications without notice.
-Weight and dimensions are approximate.
- For the power supply and Power Consumption, refer to the label attached to the product.
※Open Source License Notice
- For further information on Open Sources used in this product, please visit the website: http://opensource.samsung.com
- To send inquiries and requests regarding open sources, contact Samsung via Email (oss.request@samsung.com).
CE!
Hereby, Samsung Electronics, declares that this equipment is in compliance with the essential requirements and other relevant provisions of Directive 1999/5/EC.
The original Declaration of Conformity may be found at http://www.samsung.com, go to Support >
Search Product Support and enter the model name.
This equipment may be operated in all EU countries.
Contact SAMSUNG WORLD WIDE
If you have any questions or comments relating to Samsung products, please contact the SAMSUNG customer care Centre.
| Area Contact Centre 📞 Web Site | ||
| ■Europe | ||
| AUSTRIA | 0800 - SAMSUNG (0800 - 7267864) | www.samsung.com/at/support |
| BELGIUM 02-201-24-18 | www.samsung.com/be/support (Dutch)www.samsung.com/be_fr/support (French) | |
| BOSNIA 051 331 999 | www.samsung.com/support | |
| BULGARIA 07001 33 11 , sharing cost | www.samsung.com/bg/support | |
| CROATIA 062 726 786 | www.samsung.com/hr/support | |
| CZECH 800 - SAMSUNG (800-726786) | www.samsung.com/cz/support | |
| DENMARK 70 70 19 70 | www.samsung.com/dk/support | |
| FINLAND 030-6227 515 | www.samsung.com/fi/support | |
| FRANCE 01 48 63 00 00 | www.samsung.com/fr/support | |
| GERMANY | 0180 6 SAMSUNG bzw.0180 6 7267864*(0,20 €/Anruf aus dem dt.Festnetz, aus dem Mobilfunkmax. 0,60 €/Anruf) | www.samsung.com/de/support |
| CYPRUS | 8009 4000 only from landline, toll free | www.samsung.com/gr/support |
| GREECE | 80111-SAMSUNG (80111 726 7864) only from land line(+30) 210 6897691 from mobileand land line | |
| HUNGARY | 0680SAMSUNG (0680-726-786)0680PREMIUM (0680-773-648) | http://www.samsung.com/hu/support |
| ITALIA 800-SAMSUNG (800.7267864) | www.samsung.com/it/support | |
| Area Contact Centre 📞 Web Site | ||
| LUXEMBURG 261 03 710 | www.samsung.com/support | |
| MONTENEGRO | 020 405 888 | www.samsung.com/support |
| SLOVENIA | 080 697 267090 726 786 | www.samsung.com/si/support |
| NETHERLANDS | 0900-SAMSUNG (0900-7267864)(€ 0,10/Min) | www.samsung.com/nl/support |
| NORWAY | 815 56480 | www.samsung.com/no/support |
| POLAND | 0 801-172-678* lub +48 22607-93-33 **(całkowity koszt połączenia jak za1 impuls według taryfy operatora** (koszt połączenia według taryfyoperatora) | www.samsung.com/pl/support |
| PORTUGAL | 808 20 7267 | www.samsung.com/pt/support |
| ROMANIA | 08008 SAMSUNG (08008 7267864) TOLL FREE No. | www.samsung.com/ro/support |
| SERBIA | 011 321 6899 | www.samsung.com/rs/support |
| SLOVAKIA | 0800 - SAMSUNG(0800-726 786) | www.samsung.com/sk/support |
| SPAIN 0034902172678 | www.samsung.com/es/support | |
| SWEDEN | 0771 726 7864 (SAMSUNG) | www.samsung.com/se/support |
| SWITZERLAND | 0848 726 78 64(0848-SAMSUNG) | www.samsung.com/ch/support(German)www.samsung.com/ch_fr/support(French) |
| U.K | 0330 SAMSUNG (7267864) | www.samsung.com/uk/support |
| EIRE | 0818 717100 | www.samsung.com/ie/support |
| LITHUANIA | 8-800-77777 | www.samsung.com/lt/support |
| LATVIA | 8000-7267 | www.samsung.com/lv/support |
| ESTONIA 800-7267 | www.samsung.com/ee/support | |
[Correct disposal of batteries in this product]
(Applicable in countries with separate collection systems)
This marking on the battery, manual or packaging indicates that the batteries in this product should not be disposed of with other household waste at the end of their working life. Where marked, the chemical symbols Hg, Cd or Pb indicate that the battery contains mercury, cadmium or lead above the reference levels in EC Directive 2006/66. If batteries are not properly disposed of, these substances can cause harm to human health or the environment.
To protect natural resources and to promote material reuse, please separate batteries from other types of waste and recycle them through your local, free battery return system.

Correct Disposal of This Product (Waste Electrical & Electronic Equipment)
(Applicable in countries with separate collection systems)
This marking on the product, accessories or literature indicates that the product and its electronic accessories (e.g. charger, headset, USB cable) should not be disposed of with other household waste at the end of their working life. To prevent possible harm to the environment or human health from uncontrolled waste disposal, please separate these items from other types of waste and recycle them responsibly to promote the sustainable reuse of material resources.
Household users should contact either the retailer where they purchased this product, or their local government office, for details of where and how they can take these items for environmentally safe recycling.
Business users should contact their supplier and check the terms and conditions of the purchase contract. This product and its electronic accessories should not be mixed with other commercial wastes for disposal.
natural_image
Illustration of various symbols including a prohibition sign, sun, spray bottle, magnet, and document (no text or labels)natural_image
Diagram showing a prohibition symbol emitting radiating light rays toward a shaded dome (no text or labels)natural_image
Diagram of a mechanical component with a circular component inserted into a curved slot (no text or symbols)natural_image
Diagram of a mechanical component with a circular component and directional arrows, no visible text or symbolsnatural_image
Diagram showing two mechanical clips with rotational arrows indicating motion (no text or symbols)natural_image
Diagram of a cable or connector with internal components and directional arrows indicating motion (no text or symbols)Fixation murale de la Soundbar
natural_image
Illustration of a hand holding a cylindrical mechanical component with an upward arrow indicating force or motion (no text or symbols present)
natural_image
Pure electrical circuit symbol for a switch or connector (no text or labels)
▶Bluetooth POWER on (Bluetooth POWER)
natural_image
Diagram of a device with ports and an attached USB port, showing no text or symbolsnatural_image
Illustration of weather-related symbols including a prohibition sign, sun, magnet, and cartoon character (no text or labels)natural_image
Illustration of a prohibition symbol emitting radiating light rays toward a shaded dome (no text or symbols)OBERES/VORDERES BEDIENFELD
natural_image
Diagram of a mechanical device with a circular component and base components (no text or symbols)natural_image
Diagram of a mechanical device with a rotating component and base plate (no text or symbols)natural_image
Diagram showing two mechanical clamping or lifting mechanisms with rotational arrows, no text or symbols presentnatural_image
Diagram of a cylindrical device with internal components and directional arrows indicating motion (no text or symbols)natural_image
Illustration of a hand holding a cylindrical device with an upward arrow indicating motion (no text or symbols)
natural_image
Pure electrical circuit symbol for a switch or connector (no text or labels)
▶Bluetooth POWER on (Bluetooth POWER)
natural_image
Diagram of a device with ports and an attached USB port, showing no text or symbolsnatural_image
Illustration of weather-related symbols including a prohibition sign, sun, magnet, and cartoon character (no text or labels)natural_image
Diagram showing a prohibition symbol emitting radiating light rays toward a shaded dome (no text or labels)(Auto Power Link: imp. predef. OFF, ON-Anynet+ / OFF-POWER LINK o OFF-Anynet+ / ON-POWER LINK).
natural_image
Diagram of a mechanical component with a circular component and curved base, no visible text or symbolsnatural_image
Diagram of a mechanical device with a circular component and directional arrows, no visible text or symbolsnatural_image
Diagram showing two mechanical clamping or lifting mechanisms with rotational arrows, no text or symbols presentnatural_image
Diagram of a USB cable connector with two curved arrows indicating rotation or disassembly (no text or symbols present)natural_image
Illustration of a hand holding a cylindrical object with an upward arrow, no text or symbols present
natural_image
Pure electrical circuit symbol for a switch or connector (no text or labels)
▶Bluetooth POWER on (Bluetooth POWER)
natural_image
Diagram of a device with ports and an attached USB port, showing no text or symbolsnatural_image
Illustration of various symbols including a prohibition sign, sun, magnet, and cartoon characters (no text or labels)natural_image
Illustration of a prohibition symbol emitting radiating light rays toward a shaded dome (no text or symbols)natural_image
Diagram of a mechanical component with a circular component and base, no visible text or symbols
natural_image
Diagram of a mechanical component with a circular component and directional arrows, no visible text or symbolsnatural_image
Diagram showing two mechanical clamping or lifting mechanisms with rotational arrows, no text or symbols presentnatural_image
Diagram of a USB cable connector with two circular components and directional arrows indicating assembly (no text or symbols)natural_image
Illustration of a hand holding a cylindrical device with an upward arrow indicating force or movement (no text or symbols present)
flowchart
graph LR
    A["Głośnik surround (L)"] --> B["Device Interface"]
    C["Głośnik surround (P)"] --> D["Device Interface"]
natural_image
Pure electrical circuit symbol for a switch or connector (no text or labels)
▶Bluetooth POWER on (Bluetooth POWER)
natural_image
Diagram of a device with ports and an attached USB port, showing no text or symbolsnatural_image
Diagram showing a prohibition symbol emitting radiating light rays toward a spherical object (no text or labels)natural_image
Illustration of various symbols including a prohibition sign, sun, spray bottle, and cartoon character (no text or labels)natural_image
Diagram of a mechanical component with a circular component inserted into a curved base (no text or symbols)natural_image
Diagram of a mechanical device with a rotating knob and directional arrows, no text or symbols presentnatural_image
Diagram showing two mechanical clamping or lifting mechanisms with rotational arrows, no text or symbols presentnatural_image
Diagram of a cable or connector with arrows indicating assembly or movement, no text or symbols presentnatural_image
Illustration of a hand holding a cylindrical mechanical component with an upward arrow indicating force or motion (no text or symbols present)
natural_image
Pure electrical circuit symbol for a switch or connector (no text or labels)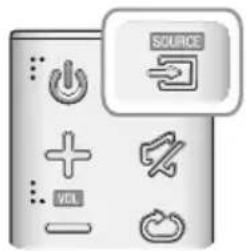
▶Bluetooth POWER on (Bluetooth POWER)
natural_image
Diagram of a device with ports and an attached USB port, showing no text or symbolsnatural_image
Illustration of weather-related symbols including a prohibition sign, sun, magnet, and cartoon characters (no text or labels)natural_image
Diagram showing a prohibition symbol emitting radiating light rays toward a shaded object (no text or labels)WOOFER (BASOVÝ REPRODUKTOR)
natural_image
Diagram of a mechanical device with a rotating disk and base plate (no text or symbols)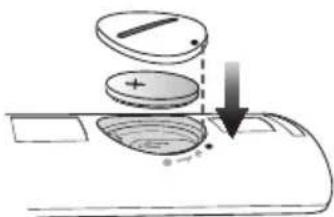
natural_image
Diagram of a mechanical component with a circular component and directional arrows, no visible text or symbols-
Použite vhodnú mincu, aby ste otočili kryt priečinka na batérie dial'kového ovládania proti smeru otáčania hodinových ručičiek a mohli ho odpojit' tak, ako je zobrazené na vyššie uvedenom obrázku.
-
Vložte 3V lítiovú batériu. Pri vkladaní batérie sa uistite, že kladný (+) pól smeruje nahor. Umiestnite kryt batérie a zarovnajte značky '●' vedl'a seba podl'a znázornenia na obrázku.
-
Kryt priečinka na batérie dial'kového ovládania upevnite na svojom mieste otáčaním vhodnou mincou až do krajnej polohy.
INŠTALÁCIA
INŠTALÁC IA STENOVEJ MONTÁŽNEJ SÚPRAVY
natural_image
Diagram showing two mechanical clamping or lifting mechanisms with rotational arrows, no text or symbols presentnatural_image
Diagram of a USB cable connector with two circular components and directional arrows indicating rotation (no text or symbols)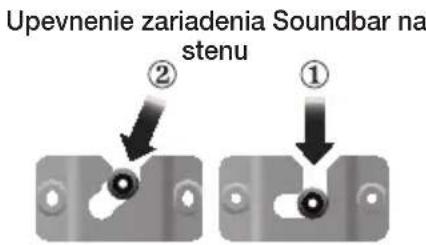
natural_image
Illustration of a hand holding a cylindrical object with an upward arrow, no text or symbols present
natural_image
Pure electrical circuit symbol for a switch or connector (no text or labels)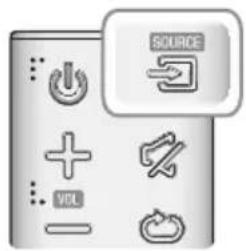
| Režim Vstupu Displej | |
| Optický digitálny vstup | D.IN |
| Vstup AUX | AUX |
| Vstup HDMI | HDMI |
| Režim BLUETOOTH | BT |
| TV SoundConnect | TV |
| Režim USB | USB |
▶Bluetooth POWER on (Bluetooth POWER)
Ked' je funkcia Bluetooth Power On zapnutá a zariadenie Soundbar je vypnuté, potom ak sa v minulosti spárované zariadenie Bluetooth pokúsi spárovat' s produktom Soundbar, produkt Soundbar sa automaticky zapne.
natural_image
Diagram of a device with ports and an attached USB port, showing no text or symbolsnatural_image
Illustration of various symbols including a prohibition sign, sun, spray bottle, magnet, and cartoon character (no text or labels)natural_image
Diagram showing a prohibition symbol emitting radiating light rays toward a shaded surface (no text or labels)natural_image
Diagram of a mechanical component with a circular component and base, no visible text or symbolsnatural_image
Diagram of a mechanical device with a rotating component and base, showing no text or symbols.natural_image
Diagram showing two mechanical clips with rotational arrows indicating motion (no text or symbols)natural_image
Diagram of a USB cable connector with arrows indicating rotation and disassembly (no text or symbols)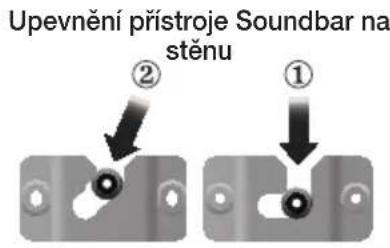
natural_image
Illustration of a hand holding a cylindrical device with an upward arrow indicating motion (no text or symbols)
natural_image
Gray square button with a white arrow icon, no text or symbols present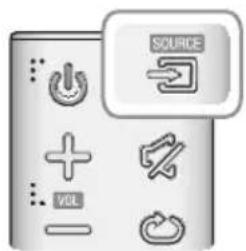
▶Bluetooth POWER on (Bluetooth POWER)
Preverite, ali električna napeljava v vašem domu ustreza podatkom na identifikacijski nalepki na hrbtni strani naprave. Napravo namestite na vodoravno in čvrsto podlago (pohištvo) z ustreznim prostorom za prezračevanje 7–10 cm. Prezračevalne reže ne smejo biti pokrite. Naprave ne postavljajte na ojačevalnik ali drugo opremo, ki se segreva. Naprava je namenjena za neprekinjeno uporabo. Če želite napravo v popolnoma izklopiti, izvlecite vtič iz omrežne vtičnice. Napravo izklopite iz omrežne vtičnice, će je dlje časa ne boste uporabljali.
natural_image
Illustration of weather-related symbols including a prohibition sign, sun, magnet, and raindrops (no text or labels)natural_image
Diagram of a mechanical or electronic component with a circular component inserted into a curved housing (no text or symbols visible)natural_image
Diagram of a mechanical component with a circular component and directional arrows, no visible text or symbols- Z ustreznim kovancem zasukajte pokrov baterije daljinskega upravljalnika v desno, kolikor daleč gre, da ga pritrdite.
NAMESTITEV
NAMESTITEV STENSKEGA NOSILCA
natural_image
Two mechanical clamping or lifting mechanisms with dashed arrows indicating motion (no text or symbols)- Pritrdite stensko držalo in vijake na označena mesta.
- Levi in desni nosilec sta različnih oblik. Pazite, da ju pravilno namestite.
natural_image
Diagram of a cable connector with two curved arrows indicating rotation or movement (no text or symbols present)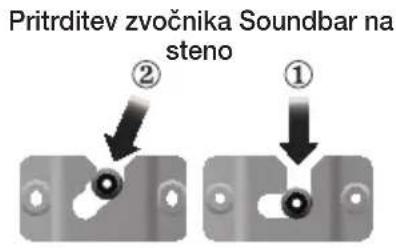
natural_image
Illustration of a hand holding a cylindrical mechanical component with an upward arrow indicating force or motion (no text or symbols present)
natural_image
Pure electrical circuit symbol for a switch or connector (no text or labels)
| Vhodni način Prikaz | |
| Optični digitalni vhod | D.IN |
| Vhod AUX | AUX |
| Vhod HDMI | HDMI |
| Način BLUETOOTH | BT |
| TV SoundConnect | TV |
| Način USB | USB |
▶Bluetooth POWER on (Bluetooth POWER)
S
natural_image
Diagram of a device with ports and an attached USB port, showing no text or symbolsnatural_image
Illustration of weather-related symbols including a prohibition sign, sun, magnet, and cartoon characters (no text or labels)natural_image
Illustration of a prohibition symbol emitting radiating light rays toward a shaded dome (no text or symbols)natural_image
Diagram of a mechanical component with a circular component inserted into a housing (no text or symbols)natural_image
Diagram of a mechanical component with a circular component and directional arrows, no text or symbols present.natural_image
Diagram showing two mechanical clips with rotational arrows indicating motion (no text or symbols)natural_image
Diagram of a USB cable connector with two curved arrows indicating rotation or disassembly (no text or symbols present)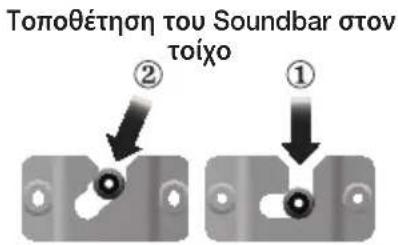
natural_image
Illustration of a hand holding a cylindrical device with an upward arrow indicating force or motion (no text or symbols present)
natural_image
Pure electrical circuit symbol for a switch or connector (no text or labels)
natural_image
Diagram of a device with ports and an attached USB port, showing no text or symbolsSubwoofer wireless/modul wireless SWA-7000S
natural_image
Diagram showing a prohibition symbol emitting radiating light rays toward a shaded dome (no text or labels)natural_image
Illustration of various symbols including a prohibition sign, sun, magnet, and cartoon characters (no text or labels)natural_image
Diagram of a mechanical component with a circular component and base, no visible text or symbols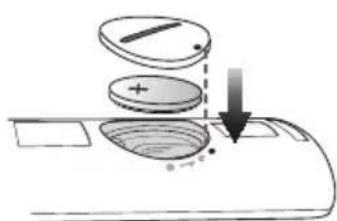
natural_image
Diagram of a mechanical device with a rotating component and base plate (no text or symbols)natural_image
Diagram showing two mechanical clamping or lifting mechanisms with rotational arrows, no text or symbols presentnatural_image
Diagram of a cable connector with arrows indicating rotation and disassembly (no text or symbols)natural_image
Illustration of a hand holding a cylindrical device with an upward arrow indicating motion (no text or symbols)
flowchart
graph LR
    A["Boxă surround (S)"] --> B["Device"]
    C["Boxă surround (D)"] --> D["Device"]
Modul receiver wireless

natural_image
Pure electrical circuit symbol for a switch or connector (no text or labels)
natural_image
Diagram of a device with ports and an attached USB port, showing no text or symbolsnatural_image
Illustration of various symbols including a prohibition sign, sun, magnet, and cartoon characters (no text or labels)natural_image
Diagram showing a prohibition symbol emitting radiating light rays toward a shaded object (no text or labels)natural_image
Diagram of a mechanical component with a circular component and base, no visible text or symbolsnatural_image
Diagram of a mechanical device with a rotating component and base, showing no text or symbols.natural_image
Diagram showing two mechanical clamping or lifting mechanisms with rotational arrows, no text or symbols presentnatural_image
Diagram of a USB cable connector with two curved arrows indicating rotation or disassembly (no text or symbols present)natural_image
Illustration of a hand holding a cylindrical mechanical component with an upward arrow indicating force or motion (no text or symbols present)
natural_image
Pure electrical circuit symbol for a USB drive (no text or labels)
| Режим на въвеждане Дисплей | |
| Оптичен цифров вход D.IN | |
| AUX вход AUX | |
| HDMI вход HDMI | |
| BLUETOOTH режим BT | |
| TV SoundConnect TV | |
| USB режим USB | |
natural_image
Diagram of a device with ports and a central port, showing no text or symbolsOsigurajte da AC mrežni napon u vašem domu bude u skladu sa nalepnicom na zadnjoj ploči proizvoda. Proizvod instalirajte horizontalno, na odgovarajućoj podlozi (nameštaj), tako da oko njega ima dovoljno prostora za ventilaciju 7\~10 cm. Uverite se da otvori za ventilaciju nisu pokriveni. Ne stavljajte uređaj na pojačala ili drugu opremu koja može da se zagreje. Ovaj uređaj je namenjen za stalnu upotrebu. Da biste u potpunosti isključili uređaj, isključite AC priključak iz zidne utičnice. Isključite uređaj ako ne nameravate da ga koristite u dužem vremenskom periodu.
Za vreme grmljavine izvucite mrežni utikač iz utičnice. Pikovi napona zbog grmljavine mogu oštetiti uređaj.
natural_image
Illustration of various symbols including a prohibition sign, sun, spray bottle, magnet, and money bag (no text or labels)Zaštitite proizvod od vlage (tj. vaza) i prevelike toplote (npr. kamin) ili opreme koja stvara jaka magnetna ili električna polja. Iskopčajte mrežni kabl iz mrežnog izvora (utičnice) ako uređaj ne funkcioniše pravilno. Ovaj proizvod nije namenjen za industrijsku upotrebu. Ovaj proizvod koristite samo za ličnu upotrebu.
natural_image
Diagram showing a prohibition symbol emitting radiating light rays toward a shaded object (no text or labels)Ne izlažite uređaj direktnom sunčevom zračenju ili drugim izvorima toplote. To može da dovede do pregrevanja i kvara uređaja
Baterije koje se koriste sa ovim proizvodom sadrže hemikalije koje su štetne po okolinu. Ne stavljajte baterije u kućni otpad. Vodite računa da baterije (instaliran komplet baterija ili baterije) ne izlažete prevelikoj toploti, poput sunčeve svetlosti, vatre ili sličnom. Nemojte kratkospajati, rastavljati niti previše zagrevati baterije. Postoji opasnost od eksplozije ako su baterije nepravilno zamenjene. Stavljajte samo baterije istog ili ekvivalentnog tipa.
SADRŽAJI
2 KARAKTERISTIKE
2 Karakteristike
natural_image
Diagram of a mechanical device with a rotating disk and base plate (no text or symbols)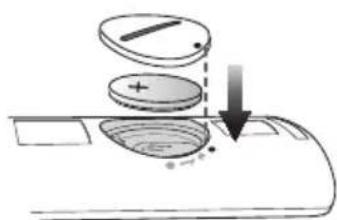
natural_image
Diagram of a mechanical component with a circular component and directional arrows, no visible text or symbols-
Upotrebite novčić da okrenete poklopac odeljka za baterije daljinskog upravljača u smeru suprotnom od kretanja kazaljki sata da biste ga uklonili, kao što je prikazano na gornjoj slici.
-
Umetnite litijumsku bateriju od 3 V. Prilikom umetanja baterije držite pozitivan (+) pol tako da bude okrenut nagore. Stavite poklopac baterije i poravnajte oznake '●' jednu pored druge, kao što je prikazano na gornjoj slici.
-
Upotrebite novčić da okrenete poklopac odeljka za baterije u smeru kretanja kazaljki sata do kraja, kako biste ga pričvrstili.
INSTALACIJA
INSTALIRANJE ZIDNE KONZOLE
natural_image
Diagram showing two mechanical clamping or mounting mechanisms with rotational arrows indicating motion (no text or symbols)- Pričvrstite zidne držače i zavrtnje na predviđena mesta.
- Levi i desni držači su različitog oblika. Proverite da li ste ih pravilno postavili.
natural_image
Diagram of a USB cable connector with two circular components and directional arrows indicating rotation (no text or symbols)Zidna montaža Soundbar uređaja
- Pričvrstite dva zavrtnja držača u otvorima za zavrtnje na poledini glavnog kućišta Soundbar uređaja, jedan na levoj i jedan na desnoj strani.
- Postavite zavrtnje držača na poleđini Soundbar uređaja u žlebove zidnog nosača. Radi bezbedne instalacije, obavezno gurnite zavrtnje držača u žlebove do kraja.
INSTALIRANJE KONZOLE BEZ KORIŠĆENJA ŠABLONA ZA INSTALACIJU ZIDNOG NOSAČA
natural_image
Illustration of a hand holding a cylindrical device with an upward arrow indicating motion (no text or symbols)
- Kablove za napajanje glavnog uređaja, subwoofera i SWA-7000S priključite u AC zidnu utičnicu.
- Malim šiljatim predmetom pritisnite taster ID SET na zadnjoj strani subwoofera i SWA-7000S i držite ga pritisnutim 5 sekunde.
- Indikator PRIPRAVNOSTI se iskliučuje, a indikator VEZE (plava LED dioda) brzo treperi.
- Dok je glavni uređaj isključen (u režimu PRIPRAVNOSTI), pritisnite i držite taster (lsklj. zvuk) na daljinskom upravljaču 5 sekundi.
- Na displeju Soundbar uređaja se pojavliuje poruka ID SET.
- Da biste završili povezivanje, uključite napajanje glavnog uređaja dok plava LED dioda subwoofera i SWA-7000S treperi.
natural_image
Gray square button with a white arrow icon, no text or symbols present
| Mod ulaza Displej | |
| Optički digitalni ulaz D.IN | |
| AUX ulaz AUX | |
| HDMI ulaz HDMI | |
| BLUETOOTH režim BT | |
| TV SoundConnect TV | |
| USB režim USB | |
natural_image
Diagram of a device with an attached USB port and cable, showing no text or symbolsOsigurajte da napajanje izmjeničnom strujom u vašem domaćinstvu odgovara identifikacijskoj naljepnici koja se nalazi na poledini proizvoda. Proizvod postavite vodoravno na prikladnu površinu (namještaj) s dovoljno prostora za ventilaciju 7\~10 cm. Pobrinite se da ventilacijski otvori ne budu prekriveni. Ne postavljajte jedinicu na pojačala ili drugu opremu koja se grije. Ova jedinica dizajnirana je za neprekidnu uporabu. Za potpuno isključivanje jedinicu izvucite strujni utikač iz zidne utičnice. Ako ne namjeravate upotrebljavati jedinicu dulje vrijeme, izvucite utikač.
Za vrijeme olujnog nevremena izvucite utikač za napajanje izmjeničnom strujom iz zidne utičnice. Vršni naponi zbog munja mogu oštetiti uređaj.
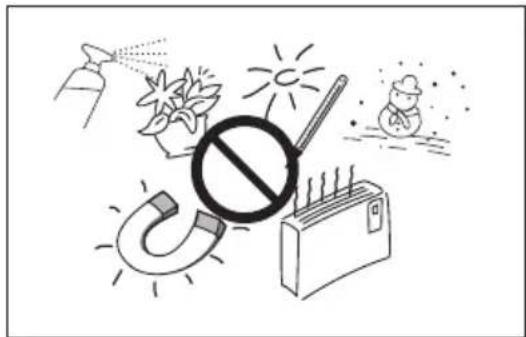
natural_image
Illustration of various symbols including a prohibition sign, sun, magnet, and cartoon characters (no text or labels)natural_image
Diagram showing a prohibition symbol emitting radiating light rays toward a shaded circular object (no text or labels)Baterije koje se koriste uz ovaj proizvod sadrže kemikalije koje su štetne za okoliš. Ne odlazite baterije s otpadom kućanstva. Upozorenje da baterije (paket baterija ili instalirane baterije) neće biti izložene prekomjernoj toplini poput sunčeve svjetlosti, vatre ili slično. Nemojte kratko spajati, rastavljati, ili pregrijavati baterije. Ako se baterija ne zamijeni ispravno, postoji opasnost od eksplozije. Zamijenite baterije samo s jednakom ili istom vrstom.
SADRŽAJ
2 ZNAČAJKE
2 Značajke
natural_image
Diagram of a mechanical component with a circular component inserted into a curved surface (no text or symbols)- Da biste uklonili poklopac baterije daljinskog upravljača, kovanicu umetnite u utor na poklopcu i okrećite je ulijevo kako je prikazano iznad, a zatim poklopac uklonite.
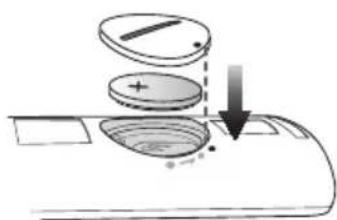
- Umetnite litijsku bateriju od 3 V. Prilikom umetanja baterije pozitivan pol (+) mora biti usmjeren prema gore. Vratite poklopac za bateriju i poravnajte oznake '●' jednu uz drugu kako je prikazano iznad.
natural_image
Diagram of a mechanical component with a circular component and directional arrows, no visible text or symbolsnatural_image
Diagram showing two mechanical clips with rotational arrows indicating motion (no text or symbols)natural_image
Diagram of a USB cable connector with two curved arrows indicating rotation or disassembly (no text or symbols present)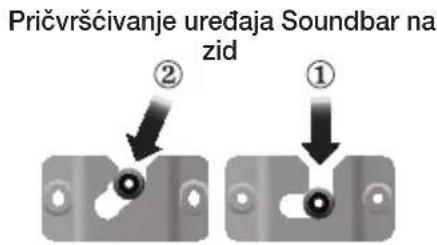
- Pričvrstite dva vijka kroz otvore na držaču sa stražnje strane glavnog ležišta Soundbara, jedan s lijeve i jedan s desne strane.
- Umetnite vijke držača na stražnjoj strani Soundbara u otvore zidnog nosača. Kako bi montirani uređaj bio siguran, obavezno ugurajte vijke do kraja otvora u žlijebu.
INSTALIRANJE NOSAČA BEZ KONZULTIRANJA VODIČA ZA MONTIRANJE NA ZID
natural_image
Illustration of a hand holding a cylindrical device with an upward arrow indicating motion (no text or symbols)
- Ne vješajte ništa na montiranu jedinicu i spriječite njezino izlaganje udarcima ili padanje.
- Dobro pričvrstite jedinicu na zid kako ne bi pala. Ako jedinica padne, može izazvati ozljede ili oštećenje proizvoda.
- Nakon montaže jedinice na zid, osigurajte da dijete ne može povući niti jedan od spojnih kabela, jer bi jedinica mogla pasti.
- Za najkvalitelniji učinak montaže zidnog nosača instalirajte sustav zvučnika najmanje 5 cm ispod TV uređaja ako je TV montiran na zid.
- Ako jedinicu ne montirate na zid, zbog vlastite sigurnosti montirajte je na sigurnu ravnu površinu s koje ne može pasti.
VEZE

- Nemojte priključivati kabel za napajanje ovog proizvoda ili televizora u zidnu utičnicu dok međusobno ne povežete sve komponente.
- Prije premještanja ili postavljanja proizvoda provjerite je li napajanje isključeno, a kabel za napajanje izvučen iz utičnice.
POVEZIVANJE SUBWOOFERA I SWA- 7000S NA GLAVNU JEDINICU
AUTOMATSKO POVEZIVANJE SUBWOOFERA I SWA-7000S
Povezivanje ID-eva bežičnog modula SWA-7000S i subwoofera izvodi se tvornički. Subwoofer i SWA-7000S treba povezati (bežično povezivanje) na glavnoj jedinici automatski kada uključite glavnu jedinicu, subwoofer, i SWA-7000s.
- Kad subwoofer i SWA-7000S budu potpuno povezani, plavi LED indikator veze na subwooferu i SWA-7000S prestaju treptati.
- Kabele za napajanje glavnog uređaja, subwoofera i SWA-7000S uključite u zidnu utičnicu izmjenične struje.
- Malim šiljatim predmetom pritisnite i zadržite gumb ID SET na poledini subwoofera i SWA-7000S tijekom 5 sekundi.
- Indikator STANJA ČEKANJA se isključuje, a indikator VEZE (plava LED lampica) brzo trepti.
- Dok je glavna jedinica isključena (u STANJU ČEKANJA), pritisnite i zadržite tipku indikator (Isključi ton) na daljinskom upravljaču 5 sekundi.
- Na zaslonu uređaja Soundbar prikazuje se poruka ID SET.
-
Za dovršetak povezivanja uključite napajanje glavne jedinice dok plava LED lampica na subwooferu i SWA-7000S treperi.
-
Glavna jedinica, subwoofer i SWA-7000S sada bi trebali biti povezani (spojeni).
- Indikator veze (plava LED lampica) na subwooferu i SWA-7000S trebali bi svijetliti u kontinuitetu. Ne bi trebali biti treptati.
- Ako indikatori veze ne svijetle plavo, proces povezivanja nije uspio. Isključite glavnu jedinicu i počnite iznova od koraka 2.

- Prije premještanja ili postavljanja proizvoda obavezno isključite napajanje, a kabel za napajanje izvucite iz utičnice.
- Ako se glavna jedinica isključi, bežični subwoofer bit će u stanju čekanja, a LED lampica stanja čekanja STANDBY na gornjoj strani će se uključiti nakon to indikator veze (plava LED lampica) bude treptao 30 sekundi.
- Ako upotrebljavate uređaj koji koristi istu frekvenciju (2.4GHz/5GHz) kao Soundbar pokraj Soundbara, interferencija može uzrokovati prekidanje zvuka.
- Najveća udaljenost prijenosa bežičnog signala od glavne jedinice i subwoofera te glavne jedinice i uređaja SWA-7000S je oko 10m, ali može varirati ovisno o radnom okruženju. Ako se između glavne jedinice i bežičnog subwoofera ili glavne jedinice i uređaja SWA-7000S nalazi armirano-betonski ili metalni zid, sustav možda uopće neće raditi zato što bežični signal ne prolazi kroz metal.
- Ako glavna jedinica ne uspostavi bežičnu vezu, slijedite korake od 1 do 5 na prethodnoj stranici i pokušajte ponovno postaviti vezu između glavne jedinice, bežičnog subwoofera i uređaja SWA-7000S.

- Antena za bežični prijam ugrađena je u bežični subwoofer i uređaj SWA-7000S. Obje jedinice držite dalje od vode i vlage.
- Za optimalan doživljaj slušanja na području oko bežičnog subwoofera i uređaja SWA-7000S ne smiju se nalaziti nikakve prepreke.
SPAJANJE ZVUČNIKA ZA ZVUČNO OKRUŽENJE
flowchart
graph LR
    A["Zvučnik za zvučno okruženje (L)"] --> B["Modul bežičnog prijamnika"]
    C["Zvučnik za zvučno okruženje (D)"] --> B
    B --> D["Output"]

natural_image
Gray square button with a white arrow icon, no text or symbols present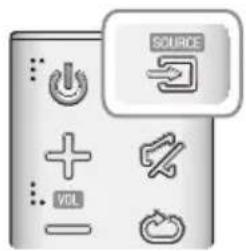
| Način ulaza Zaslon | |
| Optički Digitalni ulaz | D.IN |
| Ulaz AUX | AUX |
| Ulaz HDMI | HDMI |
| BLUETOOTH Način | BT |
| TV SoundConnect | TV |
| USB Način | USB |
natural_image
Diagram of a device with ports and an attached USB port, showing no text or symbols
- FEATURES
- TV SoundConnect
- HDMI
- Wireless Subwoofer/SWA-7000S Wireless Module
- Multi-function Remote Control
- USB Host Support
- Bluetooth Function
- Using the Samsung Audio Remote App
- LICENSES
- DOLBY. DIGITAL
- dts® 2.0 Channel
- SAFETY INFORMATION
- SAFETY WARNINGS
- CAUTION
- PRECAUTIONS
- CONTENTS
- GETTING STARTED
- DESCRIPTIONS
- INSTALLATION
- CONNECTIONS
- FUNCTIONS
- TROUBLESHOOTING
- APPENDIX
- WHAT'S INCLUDED
- BEFORE READING THE USER'S MANUAL
- ▶ Icons used in this manual
- ▶ Safety Instructions and Troubleshooting
- ▶Speaker Components
- TOP / FRONT PANEL
- REAR PANEL
- REMOTE CONTROL
- SOURCE
- Mute
- Repeat
- Skip Forward
- SOUND CONTROL
- AUTO POWER
- INSTALLING THE BATTERY IN THE REMOTE CONTROL
- INSTALLING THE WALL MOUNT
- INSTALLATION PRECAUTIONS
- INSTALLING THE BRACKET WITHOUT REFERRING TO THE WALL-MOUNT INSTALLATION GUIDE
- DETACHNING THE SOUNDBAR FROM THE WALL MOUNTS
- CONNECTING THE SUBWOOFER AND SWA-7000S TO THE MAIN UNIT
- CONNECTING THE SUBWOOFER AND SWA-7000S AUTOMATICALLY
- CONNECTING SUBWOOFER AND SWA-7000S MANUALLY
- CONNECTING AN EXTERNAL DEVICE USING AN HDMI CABLE
- HDMI IN
- and
- HDMI OUT (TV)
- HDMI OUT (ARC)
- CONNECTING AN EXTERNAL DEVICE USING AUDIO (ANALOG) CABLE OR OPTICAL (DIGITAL) CABLE
- AUX IN
- or
- OPTICAL IN
- FUNCTIONS
- INPUT MODE
- ARC (HDMI OUT)
- BLUETOOTH
- ▶To connect the Soundbar to a Bluetooth device
- ▶Bluetooth POWER on (Bluetooth POWER)
- ▶To disconnect the Bluetooth device from the Soundbar
- ▶To disconnect the Soundbar from the Bluetooth device
- More About Bluetooth
- Installing the Samsung Audio Remote App
- Launching the Samsung Audio Remote App
- ▶ Connecting a TV to the Soundbar
- ▶ Using the Bluetooth POWER On function
- USB
- ▶ Before you connect a USB device
- SOFTWARE UPDATE
- TROUBLESHOOTING
- APPENDIX
- SPECIFICATIONS
- ※Open Source License Notice
- CE!
- Contact SAMSUNG WORLD WIDE
- [Correct disposal of batteries in this product]
- (Applicable in countries with separate collection systems)
- Correct Disposal of This Product (Waste Electrical & Electronic Equipment)
- OBERES/VORDERES BEDIENFELD
- WOOFER (BASOVÝ REPRODUKTOR)
- INŠTALÁCIA
- INŠTALÁC IA STENOVEJ MONTÁŽNEJ SÚPRAVY
- NAMESTITEV
- NAMESTITEV STENSKEGA NOSILCA
- Subwoofer wireless/modul wireless SWA-7000S
- SADRŽAJI
- KARAKTERISTIKE
- INSTALACIJA
- INSTALIRANJE ZIDNE KONZOLE
- INSTALIRANJE KONZOLE BEZ KORIŠĆENJA ŠABLONA ZA INSTALACIJU ZIDNOG NOSAČA
- SADRŽAJ
- ZNAČAJKE
- INSTALIRANJE NOSAČA BEZ KONZULTIRANJA VODIČA ZA MONTIRANJE NA ZID
- VEZE
- POVEZIVANJE SUBWOOFERA I SWA- 7000S NA GLAVNU JEDINICU
- AUTOMATSKO POVEZIVANJE SUBWOOFERA I SWA-7000S
- SPAJANJE ZVUČNIKA ZA ZVUČNO OKRUŽENJE
Brand : SAMSUNG
Model : HWJ470
Category : Pregnant