
POWXG1032 - Saw PowerPlus - Free user manual and instructions
Find the device manual for free POWXG1032 PowerPlus in PDF.

| Product type | Multi-function chainsaw |
| Brand | PowerPlus |
| Model | POWXG1032 |
| Rated voltage | 230-240 V |
| Rated frequency | 50 Hz |
| Rated power | 900 W |
| Guide bar length | 300 mm |
| Oil tank capacity | 0.1 L |
| Chain speed | 9.5 m/s |
| Cable length | 0.35 m |
| Carbon brush motor | Yes |
| Adjustable angle | Yes |
| Automatic oil pump | Yes |
| Shaft diameter | 32.6 mm |
| Chain type | Powerplus |
| Soft grip handle | Yes |
| Shaft type | Telescopic |
| Folded shaft length | 1055 mm |
| Extended shaft length | 1610 mm |
| Sound pressure level | 94 dB(A) |
| Sound power level | 108 dB(A) |
| Vibration | 7.7 m/s² (K=1.5) |
| Protection class | Class II (double insulation) |
| Intended use | Occasional domestic use |
| Warranty | 36 months |
Frequently Asked Questions - POWXG1032 PowerPlus
User questions about POWXG1032 PowerPlus
0 question about this device. Answer the ones you know or ask your own.
Ask a new question about this device
Download the instructions for your Saw in PDF format for free! Find your manual POWXG1032 - PowerPlus and take your electronic device back in hand. On this page are published all the documents necessary for the use of your device. POWXG1032 by PowerPlus.
USER MANUAL POWXG1032 PowerPlus
2 BESCHRIJVING (FIG. 1)
15 PROBLEEMOPLOSSING
This model is intended for infrequent use by homeowners, cottagers, and campers, and for such general applications as clearing, pruning, cutting firewood, etc. They are not intended for prolonged use. Not suitable for professional use.

WARNING! Read this manual and general safety instructions carefully before using the appliance, for your own safety. Your power tool should only be passed on together with these instructions.
2 DESCRIPTION (FIG 1)
- Rear grip
- Front grip
- Front finger guard
- Saw chain
- Guide bar cover
- Guide bar
- Power cable
- Bucking spike
- Safety lock-off button
- Cable hook
- ON/OFF switch
-
Oil tank cap
-
Oil gauge
- Chain wheel
- Guide bolt
- Auxiliary handle
- Rotating knob
- Locking lever
- Shoulder strap
- Locking knob for length adjustment
- Allen key and storage
- Motor
- Head protect
- Telescopic bar
3 PACKAGE CONTENT LIST
Remove all packing materials
Remove remaining packaging and transit supports (if existing)
Check the completeness of the packing content
Check the appliance, the power cord, the power plug and all accessories for transportation damages.
Keep the packaging materials as far as possible till the end of the warranty period. Dispose it into your local waste disposal system afterwards.

WARNING Packing materials are no toys! Children must not play with plastic bags! Danger of suffocation!
1 Chainsaw
1 Telescopic bar
1 Auxiliary handle
1 Handle press board
1 Manual

When parts are missing or damaged, please contact your dealer.
4 SYMBOLS
In this manual and/or on the machine the following symbols are used:
| ! | Denotes risk of personal injury or damage to the tool. | Wearing of protection against noise advised | |
| Read manual before usage | Wearing of protection goggles advised. Wear protective helmet | ||
| Wear protective helmet | Wear protective gloves | ||
| Wear safety cut through resistant shoes with safety sole and steel toe. | Electrical hazard, keep at least 10m distance away from electrical power lines. | ||
| Never operate the machine in the rain or in damp or wet conditions. Moisture is an electrical shock hazard. | Keep bystanders away | ||
| Remove plug from the mains immediately if the cable is damaged or cut | Remove plug from the mains before doing any work on the chainsaw | ||
| Class. II -Double insulated | In accordance with essential applicable safety standards of European directives |
5 GENERAL POWER TOOL SAFETY WARNINGS
Read all safety warnings and instructions. Failure to heed warnings and follow instructions may result in electric shock, fire and/or serious injury. Keep safety warnings and instructions for future reference. The term "power tool" in the safety warnings refers to your mains-operated (corded) power tool or battery- operated (cordless) power tool.
5.1 Working area
- Keep working area clean and well lit. Untidy and dark areas can lead to accidents.
- Do not operate power tools in potentially explosive surroundings, for example, in the presence of inflammable liquids, gases or dust. Power tools create sparks which may ignite the dust or fumes.
- Keep children and bystanders at a distance when operating a power tool. Distractions can cause you to lose control of it.
5.2 Electrical safety

Always check that the power supply corresponds to the voltage on the rating plate.
- Power tool plugs must match the outlet. Never modify the plug in any way. Do not use adapter plugs with earthed power tools. Unmodified plugs and matching outlets will reduce the risk of an electric shock.
- Avoid body contact with earthed surfaces such as pipes, radiators, kitchen ranges and refrigerators. There is an increased risk of an electric shock if your body is earthed.
- Do not expose power tools to rain or wet conditions. If water gets inside a power tool, it will increase the risk of an electric shock.
- Do not damage the cord. Never use the cord for carrying, pulling or unplugging the power tool. Keep the cord away from heat, oil, sharp edges or moving parts. Damaged or entangled cords increase the risk of an electric shock.
- When operating a power tool outdoors, use an extension cable suitable for outdoor use. Using a cord suitable for outdoor use reduces the risk of an electric shock.
- If operating a power tool in a damp location is unavoidable, use a power supply protected by a residual current device (RCD). Using an RCD reduces the risk of an electric shock.
5.3 Personal safety
- Stay alert, watch what you are doing and use common sense when operating a power tool. Do not use a power tool when you are tired or under the influence of drugs, alcohol or medication. A moment of inattention when operating a power tool may result in serious personal injury.
- Use safety equipment. Always wear eye protection. Using safety equipment such as a dust mask, non-skid safety shoes, a hard hat, or hearing protection whenever it is needed will reduce the risk of personal injury.
- Avoid accidental starts. Ensure the switch is in the off position before inserting the plug. Carrying power tools with your finger on the switch or plugging in power tools when the switch is in the on position makes accidents more likely.
- Remove any adjusting keys or spanners before turning on the power tool. A spanner or key left attached to a rotating part of the power tool may result in personal injury.
- Do not reach out too far. Keep your feet firmly on the ground at all times. This will enable you retain control over the power tool in unexpected situations.
- Dress properly. Do not wear loose clothing or jewellery. Keep your hair, clothing and gloves away from the power tool. Loose clothes, jewellery or long hair can become entangled in the moving parts.
If there are devices for connecting dust extraction and collection facilities, please ensure that they are attached and used correctly. Using such devices can reduce dust-related hazards.
5.4 Power tool use and care
- Do not expect the power tool to do more than it can. Use the correct power tool for what you want to do. A power tool will achieve better results and be safer if used in the context for which it was designed.
- Do not use the power tool if the switch cannot turn it on and off. A power tool with a broken switch is dangerous and must be repaired.
- Disconnect the plug from the power source before making adjustments, changing accessories, or storing power tools. Such preventive safety measures reduce the risk of starting the power tool accidentally.
- Store power tools, when not in use, out of the reach of children and do not allow people who are not familiar with the power tool or these instructions to operate it. Power tools are potentially dangerous in the hands of untrained users.
POWXG1032 EN
- Maintain power tools. Check for misalignment or jammed moving parts, breakages or any other feature that might affect the operation of the power tool. If it is damaged, the power tool must be repaired. Many accidents are caused by using poorly maintained power tools.
- Keep cutting tools sharp and clean. Properly maintained cutting tools with sharp cutting edges are less likely to jam and are easier to control.
- Use the power tool, accessories and cutting tools, etc., in accordance with these instructions and in the manner intended for the particular type of power tool, taking into account the working conditions and the work which needs to be done. Using a power tool in ways for which it was not intended can lead to potentially hazardous situations.
5.5 Service
- Your power tool should be serviced by a qualified specialist using only standard spare parts. This will ensure that it meets the required safety standards.
6 SAFETY INSTRUCTIONS AND ACCIDENT PREVENTION
The safety instructions must be observed when using the chainsaw. For your own safety and the safety of others, please read this information carefully before using the chainsaw and keep it in a safe place for reference.
Use the chain saw only to saw wood or objects made of wood. Any other types of use are at your own risk and could be dangerous. The manufacturer cannot be held liable for damage caused by improper or incorrect usage.
To prevent the incorrect handling of the chainsaw, please read the operating instructions in their entirety before using the chainsaw for the first time. All the information on the handling of the chainsaw is relevant to your personal safety. Ask a professional to show you how to use the chainsaw!
- Before plugging in, check the plug and cable for damage. If damage is discovered, have it repaired by a specialist immediately.
- Never use a damaged cable, connection or plug or a power cable which does not comply with the requirements. If the cable is damaged or severed, unplug immediately.
Always wear goggles and protective gloves when working with the chainsaw. - To prevent injury, wear tight-fitting clothes and safety boots.
- To prevent damage to your hearing, wear earmuffs. Helmets with a visor are particularly advantageous.
- Make sure you have a firm footing when working with the chain saw.
- Keep your place of work tidy.
- To prevent electric shock, avoid contact with earthed parts.
Always pull the plug out of the power socket before doing any work on the chainsaw.
Only plug in when the chainsaw is switched off. - The chainsaw must be used only by one person at a time. All other persons must stay clear of the chainsaw's area of swing. Children and pets in particular must be kept well away at all times.
The saw must not be touching anything when it starts up. - Hold the chainsaw firmly in both hands when working with it.
- The chain saw must not be operated by children and young people. The only exception to this prohibition are young persons of 16 years and over who can use the chain saw under supervision as part of their training. Lend the saw only to those persons who are familiar with this type of chainsaw and know how to handle it. Always pass on the operating instructions together with the chainsaw.
- Make sure the chain saw is stored in a place inaccessible to children.
- The saw may be operated only by persons who are rested and in good health, i.e. in a good physical condition. If you start to tire, have a break in time. The chainsaw should not be used after the consumption of alcohol.
-
Never expose the chainsaw to rain or bad weather. Make sure there is enough light at the place of work. Do not use power tools in the vicinity of combustible liquids or gases.
-
If the chainsaw is not being used for a while, it must be set aside in such a way that no other person is endangered.
Before making a cut, always set the claw stop before you start to saw. - Remove the chainsaw from the wood only with the saw chain still running. Anyone who saws without a stop can be pulled forwards.
- Never use the chainsaw when standing on a ladder, in a tree or in any other unstable places. Do not saw with one hand.
- The power cable must always be behind the saw operator.
- The power cable must always lead away from the rear of the chainsaw.
- Use only original accessories.
- Chainsaws used outdoors must be connected up to an earth-leakage circuit-breaker.
- Do not overload your power tools. They run best and safest within given range of capacity.
- Always use the correct power tool. Do not use low-powered chainsaws for heavy jobs.
- Use the cable only for its proper purpose. Never carry your electric tool by its cable. Do not use the cable to pull the plug out of the socket. Protect the cable from heat, oil and sharp edges.
- Extension cables out doors
- Use only authorized and accordingly labelled extension cables outdoors.
- Use a strong support when sawing converted timber and thin branches. Do not stack the timber and do not have it held by a second person or with your foot.
- Logs must be secured in position.
- On sloping ground, always work facing upwards.
- When cross-cutting always set the claw stop against the timber you want to saw
- Always set the claw stop before cross-cutting. Only then switch on the chainsaw and start sawing into the wood. Pull the chainsaw upwards at the rear and lead the direction with the front grip. Use the claw stop as a fulcrum. To reposition for further cutting, interrupt the sawing process and exert a slight pressure on the front grip. Pull the saw back a little, position the claw stop further down the cut and pull up the rear grip.
- Pull the saw out of the wood only when the saw chain is running.
- If you carry out several cuts, switch off the chain saw in-between.
- Plunge cuts and horizontal cuts may only be carried out by professionals.
- For horizontal cuts, position the smallest possible angle. This requires extreme caution, as the claw stop can not be applied in this case.
- If the chain gets stuck when sawing with the upper side it may be thrust towards the operator. For this reason you should saw wherever possible with the bottom side, as the chainsaw will then be thrust away from the body towards the wood.
- Pay extra attention when cutting splintered wood. Sawed off pieces of wood may be catapulted in any direction (risk of injury!)
- Do not use the chainsaw to remove nails or similar objects.
- When lopping off branches, the chain saw should be supported wherever possible against the trunk, Do not cut with the tip of the guide bar.
- Leave branch lopping work should be carried out by trained personnel! Risk of injury!
- Pay special attention to branches under tension. Do not cut through freely suspended branches from underneath.
- Never stand on the trunk when loping off branches.
- The chainsaw should not be used for forest work, i.e. for felling and lopping off branches in the forest. Because of the cable connection the saw operator does not have the necessary mobility and his safety is not guaranteed!
Always stand to the side of the tree being felled. - When the tree is being felled, watch out for falling branches when stepping back.
- On slopes the saw operator should stand to the upper or left or right side the trunk or lying tree, never to the bottom side.
- Watch out for trunks rolling towards you. Kick-back!
POWXG1032 EN
- The power saw is likely to recoil if the tip of the guide bar (especially the top quarter) accidentally touches wood or any other solid objects. In this case the saw will move uncontrolled and will be hurled towards the operator at full power (risk of injury!).
- When working with the chain saw, protective gloves, suitable shoes, leg protectors, eye protectors and ear protectors should be used.
- If the work involves any risk of head injury, a safety helmet must be worn When cutting down trees and cutting off branches of felled or fallen trees, in addition a face protector should be worn.
- Always pull the plug from the socket outlet before attempting to check or adjust the chain or to correct some fault and whenever moving one workplace to another.
- Never switch on the chain saw unless you have a firm hold of the tool. a secure footing and are sure that the guide bar and saw chain are not touching anything.
Always hold the saw with both hands (right hand on rear handle, left hand on handle. - Never saw above shoulder height, while standing on a ladder or In a tree or in any other insecure position.
- When sawing timber that has split, take particular care that no small pieces of wood are broken off and thrown by the saw chain.
- During breaks, the saw should be laid down in such a way that there is no risk of injury to anyone from the saw chain.
- The chain saw should never be lent to or be allowed to come into the hands of persons who are not familiar with the use of such a tool. The operating Instructions should also go with the saw.
7 KICKBACK
In order to prevent kick-back, please follow these safety instructions:
- Never start cutting with the tip of the guide bar!
- Never cut with the tip of the guide bar! Be careful, when continuing cuts you are already working on!
Always start cuts with the chainsaw already running! - Make sure that the saw chain is always properly sharpened.
- Never cut through more than one branch at a time! When lopping off branches, be careful not to touch any other branches.
- When cross-cutting, pay attention to trunks standing very close to each other. If possible use a saw-horse.
8 TRANSPORTING THE CHAINSAW
Before transporting the chainsaw, always remove the plug from the power socket and slide the chain guard over the rail and chain. If several cuts are to be performed with the chain saw, the saw must be switched off between cuts.
9 BEFORE STARTING UP
- The voltage and current supply must comply with the ratings on the type plate.
- Before commencing work, always check that the chainsaw works properly and is safe to operate.
- Check also that the chain lubrication and the oil gauge are in good working order. When the oil lever is approx. 5mm from the bottom mark, you must top up with oil. When the oil level is higher you can work without worry.
- Switch on the chain saw and hold it above the ground. Be careful not allow the chainsaw to touch the ground. For safety reasons it is best to keep a clearance of at least 20~cm . If you now see growing traces of oil, the chain lubrication system is working correctly. If there are no traces of oil at all, try cleaning the oil outlet, the upper chain tensioning borehole and the oil duct, or contact your Customer Service. (Be sure to read the section "Filling in chain oil and chain lubrication" on this point).
- Check the chain tension and retention, if necessary (see the section "Chain tensioning and adjustment check" on this point).
10 INSTRUCTIONS FOR CUTTING
See fig 1
10.1 Tree logging
See fig 2
10.2 Branches removal
See fig 3
10.3 Trunk trimming
See fig 4
Second and third picture are ways to prevent blocking of the chain and blade.
11 STARTING UP THE MACHINE
See fig 5

Stop the tool and unplug the power plug before performing any cleaning, inspection, maintenance or other works on the tool.

Never attach the strap diagonally across your shoulder and your breast, but rather place it on one of your shoulders. In this way you can remove the tool quickly from your body in case of danger.
Disconnect your gardening tool from the power supply.

After adjustment make sure that the angle adjustment buttons have returned to their initial positions. Otherwise the tool cannot start.

Do not connect to power supply until assembly is complete, Failure to comply could result in accidental starting and possible serious personal injury.
11.1 Assembly of chain bar and chain
See fig 6
Repeat tensioning of new chain after approx. 5 cuts. Check chain tensioning regularly.
Note: the saw chain may droop slightly on the lower part of bar. This is normal.
Note: the guide bar retaining nuts are installed only hand tight at this point because saw chain adjustment is required. Follow instructions in section saw chain tension adjustment.
Warning: always wear heavy duty gloves when handling saw chain or making saw chain adjustments
11.2 Chain tensioning and adjustment check
See fig 7
Note: if chain is difficult to rotate on guide bar or if it binds, too much tension has been applied. This requires minor adjustment as follows:
Loosen the bar retaining nuts so they are finger tight. Decrease tension by turning the bar adjustment screw counter clockwise slowly. Move chain back and forth on bar. Continue to adjust until chain rotates freely, but fits snugly. Increase tension by turning bar adjustment screw clockwise.
When saw chain has proper tension, hold nose of bar in the uppermost position and tighten the 2 bar retaining nuts securely.

Caution: a new saw chain stretches, requiring adjustment after as few as 5 cuts. This is normal with a new chain, and the interval between future adjustments will lengthen quickly.

Caution: if saw chain is too loose or too tight, the sprocket, bar, chain, and crankshaft bearings will wear more rapidly. Study Fig. 12 for information concerning correct cold tension (A), correct warm tension (B), and as a guide for when saw chain needs adjustment (C).
11.3 Check of the chain oil level
See fig 8 and "9 BEFORE STARTING UP"
12 OPERATION
12.1 To start
See fig 9.

WARNING: Never start or operate the saw unless the bar and chain are properly installed.

Caution: while the saw is cutting, be sure the chain and bar are being properly lubricated.
- To switch the machine on push the lock-off button and the on/off switch trigger at the same time.
12.2 To stop
See fig 10

Chain runs out briefly after switching off.
Do not adjust the chain lubrication system unless the motor has been turned off.
- To switch the machine off, release the on/off switch trigger.
13 SAW CHAIN SHARPENING
See fig 11
14 CLEANING AND MAINTENANCE

Always pull the plug out of the power socket before doing any work on the chainsaw!
- Keep the cooling vents on the motor housing clean and unobstructed at all times.
- Only the maintenance work described in these operating instructions may be carried out. Any other maintenance work must be carried out by our Customer Service.
- Do not modify the power saw in any way as this could jeopardize its safety.
- Should the chainsaw fail despite our careful manufacturing and inspection procedures, have it repaired by an authorized Customer Service work-shop.
14.1 Guide bar maintenance
Frequent lubrication of the guide bar (railed bar which supports and carries the saw chain) sprocket tip is required. Proper maintenance of the guide bar, as explained in this section, is essential to keep your saw in good working condition.
14.2 Sprocket tip lubrication:

Caution: the sprocket tip on your new saw has been pre-lubricated at the factory. Failure to lubricate the guide bar sprocket tip as explained below will result in poor performance and seizure, voiding the manufacturer's warranty.
Lubrication of the sprocket tip is recommended after 10 hours of use or once a week, which ever occurs first. Always thoroughly clean guide bar sprocket tip before lubrication.
Tools for lubrication:
The lube gun is recommended for applying grease to the guide bar sprocket tip. The lube gun is equipped with a needle nose tip which is necessary for the efficient application of grease to the sprocket tip.
To lubricate sprocket tip:

Warning: wear heavy duty work gloves when handling the bar and chain.
Note: it is not necessary to remove the saw chain to lubricate the guide bar sprocket tip. Lubrication can be done on the job.
Clean the guide bar sprocket tip.
- Using the lube gun (optional), insert needle nose into the lubrication hole and inject grease until it appears at outside edge of sprocket tip.
- Rotate saw chain by hand. Repeat lubrication procedure until the entire sprocket tip has been greased.
14.3 Guide bar maintenance:
Most guide bar problems can be prevented merely by keeping the chain saw well maintained. Insufficient guide bar lubrication and operating the saw with chain that is too tight will contribute to rapid bar wear. To help minimize bar wear, the following guide bar maintenance procedures are recommended.

Warning: always wear protective gloves during maintenance operations. Do not carry out maintenance when the engine is hot.
14.4 Chain sharpening:
Chain sharpening requires special tools to ensure that cutters are sharpened at the correct angle and depth. For non-experienced users of the chain saw, we recommend to have the chain sharpened by a specialist in any authorised service.

Warning: when having wrong sharpened chain, there may occur a higher danger of kickback.
-
To sharpen the saw chain, use the suitable sharpening tools:
-
round chain file
file leading
chain measuring calibre.
These tools can be bought in any specialised stores.
- To gain well shaped sawdust particles, use sharp chain. If there appears wooden powder, you must sharpen the saw chain.

Warning: all cutting teeth must be similarly long. Different length of the teeth can cause rough run of the chain or its rupture, as well.
- Minimum length of the teeth must be 4mm . If they are shorter, remove the saw chain.
- Angles, which the teeth are under, must be followed.
- To sharpen the chain basically, make 2 to 3 pulls of the file from the inside out.

Warning: after 3 to 4 of your sharpening of the cutting teeth, have the saw chain sharpened in any authorised service. They will sharpen the depth limiter as well, which provides the distance.
Chain sharpening

Warning: a sharp chain produces welldefined chips. When your chain starts to produce sawdust, it is time to sharpen.
- After every 3-4 times the cutters have been sharpened you need to check the height of the depth gauges and, if necessary, lower them using the flat file and template supplied optional, then round off the front corner.

WARNING: Proper adjustment of the depth gauge is as important as proper sharpening of the chain.
14.5 Guide bar
The bar should be reversed every 8 working hours to ensure uniform wear. Keep the bar groove and lubrication hole clean using a bar groove cleaner. Check the bar rails frequently for wear and, if necessary,

Warning: never mount a new chain on a worn sprocket or self-aligning ring.
Bar wear - turn guide bar frequently at regular intervals (for example, after 8 hours of use), to ensure even wear on top and bottom of bar.
Oil passages - oil passages on the bar should be cleaned to ensure proper lubrication of the bar and chain during operation.

Note: the condition of the oil passages can be easily checked. If the passages are clear, the chain will automatically give off a spray of oil within seconds of starting the saw.your saw is equipped with an automatic oiler system.
14.6 Chain maintenance
Chain tension:
Check the chain tension frequently and adjust as often as necessary to keep the chain snug on the bar, but loose enough to be pulled around by hand.
Breaking in a new saw chain:
A new chain and bar will need chain readjustment after as few as 5 cuts. This is normal during the break-in period, and the interval between future adjustments will begin to lengthen quickly.

Warning: never have more than 3 links removed from a loop of chain. This could cause damage to the sprocket.
Chain lubrication:
Always make sure the automatic oiler system is working properly. Keep the oil tank filled with good quality chain oil.
Adequate lubrication of the bar and chain during cutting operations is essential to minimize friction with the guide bar.
Never starve the bar and chain of lubricating oil. Running the saw dry or with too little oil will decrease cutting efficiency, shorten saw chain life, cause rapid dulling of chain, and lead to excessive wear of bar from overheating. Too little oil is evidenced by smoke or bar discoloration.
Chain sharpening:
For the inexperienced chain saw user, we recommend that the saw chain be professionally sharpened by the nearest professional service center. If you feel comfortable sharpening your own saw chain, special tools are available from the professional service center.
15 TROUBLESHOOTING
| FAULT | CAUSE | REMEDY |
| Motor does not run | No electricity | Check socket, cable and plug . |
| Damaged cable: Have repaired by Customer Service. It is prohibited to patch the cable with insulating tape . | ||
| Damaged switches have to be replaced by a Customer Service workshop. | ||
| Running out of carbon brush | Change the carbon brush, ask a Customer Service workshop | |
| Poor cutting performance | Blunt chain | Sharpen the chain |
| Chain tension | Chain wrongly fitted | |
| Check that the chain is fitted correctly | Check the chain tension | |
| Saw works only with difficulty | Chain tension | Check the chain tension |
| Chain jumps off sword | ||
| Chain becomes hot | Chain lubrication | Check oil level |
| Check Chain lubrication |
16 TECHNICAL DATA
| Rated voltage | 230-240V |
| Rated frequency | 50Hz |
| Rated power | 900W |
| Bar size | 300 mm |
| Cable length | 0.35m |
| Oil tank capacity | 0.1L |
| Chain speed | 9.5m/s |
| Carbon brush motor | Yes |
| Adjustable angle | Yes |
| Automatic chain oiler | Yes |
| Shaft diameter | 32.6mm |
| Chain type | Powerplus |
| Soft grip | Yes |
| Shaft type | Telescopic |
| Shaft length | 1055mm |
| Extended shaft length | 1610mm |
17 NOISE
Noise emission values measured according to relevant standard. (K = 3)
Acoustic pressure level LpA
94 dB(A)
Acoustic power level LwA
108 dB(A)

ATTENTION! Wear hearing protection when sound pressure is over 85 dB(A).
aw (Vibration):
7,7 m/s²
K = 1.5m / s^2
18 STORAGE
Keep your chain saw in a safe place. The unused chainsaw should be stored clean, on a flat surface and in a dry place which is inaccessible to children.
19 WARRANTY
This product is warranted for a 36-month period effective from the date of purchase by the first user.
- This warranty covers all material or production flaws excluding: batteries, chargers, defective parts subject to normal wear & tear such as bearings, brushes, cables, and plugs, or accessories such as drills, drill bits, saw blades, etc.; damage or defects resulting from maltreatment, accidents or alterations; nor the cost of transportation.
- Damage and/or defects resulting from inappropriate use also do not fall under the warranty provisions.
We also disclaim all liability for any bodily injury resulting from inappropriate use of the tool.
- Repairs may only be carried out by an authorised customer service centre for Powerplus tools.
- You can always obtain more information at the number 00 32 3 292 92 90.
- Any transportation costs shall always be borne by the customer, unless agreed otherwise in writing.
- At the same time, no claim can be made on the warranty if the damage of the device is the result of negligent maintenance or overload.
- Definitely excluded from the warranty is damage resulting from fluid permeation, excessive dust penetration, intentional damage (on purpose or by gross carelessness), inappropriate usage (use for purposes for which the device is not suitable), incompetent usage (e.g. not following the instructions given in the manual), inexpert assembly, lightning strike, erroneous net voltage. This list is not exhaustive.
- Acceptance of claims under warranty can never lead to the prolongation of the warranty period nor commencement of a new warranty period in case of a device replacement.
Devices or parts which are replaced under the warranty therefore remain the property of Varo NV.
- We reserve the right to reject a claim whenever the purchase cannot be verified or when it is clear that the product has not been properly maintained. (Clean ventilation slots, carbon brushes serviced regularly, etc.).
- Your purchase receipt must be kept as proof of date of purchase.
- Your appliance must be returned undismantled to your dealer in an acceptably clean state, (in its original blow-moulded case if applicable to the unit), accompanied by proof of purchase.
20 ENVIRONMENT
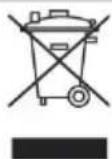
Should your appliance need replacement after extended use, do not discard it with the household rubbish but dispose of it in an environmentally safe way. Waste produced by electrical machine items should not be handled like normal household rubbish. Please recycle where recycle facilities exist. Check with your Local Authority or retailer for recycling advice.
21 DECLARATION OF CONFORMITY


VARO - Vic. Van Rompuy N.V. - Joseph Van Instraat 9 - BE2500 Lier - BELGIUM, declares that,
Product: Chain saw - Pruner combination
trade mark: POWERplus
model:POWXG1032
is in conformity with the essential requirements and other relevant provisions of the applicable European Directives, based on the application of European harmonized standards. Any unauthorized modification of the apparatus voids this declaration.
European Directives (including, if applicable, their amendments up to the date of signature);
2011/65/EU
2014/30/EU
2006/42/EC
2000/14/EC
Annex V LwA
Measured
104dB(A)
Guaranteed
108dB(A)
European harmonized standards (including, if applicable, their amendments up to the date of signature);
EN60745-1:2009
EN60745-2-13:2009
EN ISO 11680-1:2011
EN55014-1:2017
EN55014-2:2015
EN IEC 61000-3-2:2019
EN61000-3-3:2013
Keeper of the Technical Documentation: Philippe Vankerkhove, VARO - Vic. Van Rompuy N.V.
The undersigned acts on behalf of the company CEO,
Philippe Vankerkhove
Regulatory Affairs - Compliance Manager
28/09/2021
Regulatory Affairs - Compliance Manager
28/09/2021
1 UTILIZACAO PREVISTA 3
2 DESCRIÇÃO (FIG. 1) 3
3 LISTA DE CONTEUDO DA EMBALAGEM. 3
4 SIMBOLOS. 4
5 PROCEDIMENTOS GERAIS DE SEGURANCA 4
5.1 Area de trabajo 4
5.2 Seguranca eltrica 5
5.3 Seguranta personal 5
5.4 Manuseamento e lavoro de ferramentas eletricas com precauacao 5
5.5 Assistance Tecnica 6
6 INSTRUÇÉS DE SEGURANÇA E PREVENÇÂO DE ACIDENTES 6
7 PRECAUÇOES DE SEGURANÇA CONTRA RECUOS 9
8 TRANSPORTAR A MOTOSERRA ELETRICA 9
9 ANTES DE COMEÇAR 9
10 INSTRUÇÉS PARA CORTE 9
10.1 Corte de arvores 9
10.2 Remover ramos 9
10.3 Aparar troncos 9
11 INICIAR A MAQUINA 10
11.1 Montar a barra de corrente e corrente 10
11.2 Verificacao da tension da corrente e ajuste 10
11.3 Verifique o nivel de oleo da corrente 11
12 OPERACAO 11
12.1 Ligar 11
12.2 Parar 11
13 AFIAR A CORRENTE DA SERRA 11
14 LIMPEZA E MANUTENCAO 11
14.1 Manutenao da barra guia 11
14.2 Lubrificacao da ponta do carreto: 12
14.3 Manutenção da barra guia: 12
- Para desligar a boaquina, solte o interruptor on/off.
13 AFIAR A CORRENTE DA SERRA
Ver fig. 11.
14 LIMPEZA E MANUTENÇA O

14 RENGJØRING OG VEDLIKEHOLD

Verktoy for smoring:
Viz obr.8&9PRDSPUSTENIM
12 PROVOZ
12.1 Na zacatek
Viz obr. 9.

15 RIESENIE PROBLEMOV
CbxpaHraBaTe MexaHn3npaHnTe IHCTpyMeHTN, KOINTo He Ce N3NOJ3BaT, DaJIeYOT DOCTbN Ha Deua Hr No3BOJRABaTe Ha INuca, He3aNo3HaTN C MexaHn3npaHnTe IHCTpyMeHTN INHACToIuTE IHCTpyKcUN Da pa6OyT C IHCTpyMeHTA. MexaHn3npaHnTe IHCTpyMeHTN ca ONaCHN B pbUeTe Ha Heo6yHeN Notpe6nteN.
IopndbpaKeTe MexaHn3npaHnTe HNCTpyMeHTn. PpOBepBaTe r3 pa3eHTpnpaHe nnn 3aJxHa He Ha DnKxeUHTe Ce yactn, CuynBaHe Ha Yactn nnDpyrO cbctoHne, Koeto MoKe Da OKaKe BnnaHne Bbpxy pa6oTaT ha MexaHn3npaHnTe IHCTpyMeHTn. Ako MexaHn3npaHnT INCTpyMeHT ce NOBpeNi, peMOHTpaHnTe ro npde Da ro n3no13BaTe. MHoro INHCJeHTn ca npedn3BnKaHn OT HeDo6pe NODbpxaHn MexaHn3npaHn INCTpyMeHTn.
- PndbpxaTe pexeHte nHcTpmeHTn ocTpn n B do6po cBcTOHne. IpaBnHO PndbpxaHte pexeHn HcTpmeHTn c ocTpn pexeHp b6Obe e no-MaNko BepoTHo da ce 3akNeIAT n Ce KOHTPOINpA T NO-NECHO.
I3no3BaTe MexaHn3npaHn HNCTpyMeHT, npHaJnxKHOCTte, CmHeMITE pe3u N T.H. B CbOTBETCTBne C Te3n INHCTpyKUIN NO HaunHa, PpeBnDeH 3a CbOTBeTHnB MEXaHn3npaHn INHCTpyMeHT, KaTO nMaTe PpeBnD pa60THnTE ycNoBn I pa6oTaT, KOrTo Tp8Ba Da ce N3BbPUn. I3no3BaHeTo Ha MexaHn3npaHn INHCTpyMeHT 3a OnpaCIn, pa3nUHN OT Te3N, 3a KOnTO e PpeDHa3NaueH, MoKe Da DoBeDe Do onaCha cnTyauu.
5.5 Cepeu3Ho 06cnyxgahe
OcnrypeTe cepBn3HO 6cIyXbaHe Ha Baun MExaHn3napa HNCTpyMeHT cMo OT KBaJInΦnUpaH TexHnK, KOTo n3NoJ3Ba cMo IeHTnHn pe3epBn YacTn. Toba ue rapaHTnpoNDbpKaHeTo Ha 6e3OnaChocCTTa Ha MexaHn3napaH NHCPTpyMeHT.
6 INHCTPYKUIN 3A BE3OJACHOCT IN IPEIOTBPATRAHE HA 3JIOJOLYKN
HCTpykunTe 3a 6e30nachocT Tp8Ba Da 6bDat CnA3BAn npu ynoTpe6a Ha Bepnxn Htpnoh. 3a BaWata co6ctBeHa 6e30nachocT n 6e30nachocTt ha ocTaHaNITE, MoJ npOyTeTe Ta3n INOpMaun BHNMaTeHNO ppei Da N3NON3BaTe Bepnxn TpNoH n 3ana3eHa 6e30nacho MRCTo 3a cnpaBKN.
I3noJ3BaIe BepxHnI TpnoH cAmo 3a p3aHe Ha IbPBO HnHa IbPBeHn PpeMeTn. BcUKN DpyrtnIOBeyyOTpe6a ca Ha BAu CO6CTBeH pNCK n Moat da 6bDat onacn. He moke da ce TbpCn OTROBOPHOCT OT npOn3BOIDTeJIa 3a UeTI npNUHEnO T HeNoDxOJa a Nn HnpabNJHa yNtpe6a.
3a npedotbpaTBAHe Ha HnpaBnHTo bOpabeHe C BepxHn TpnoH, MoJI npOeTepebotte nHCTpyKuB TgXHaT a cIIOCT npEi Da n3PON3BaTe BepxHn TpnoH 3a PbBnT. Ljata nHopMaunr OTHOCHO BopaeHeTO C BepxHn TpnoH e CBp3aHa C BaShaTaNmuHa 6e3oNaChOcT. POMoneTe npocecnoHaJIncT da BN NOKaKe KaK Da n3POn3BaTeBepxHn TpnoH!
- Прди вкарвае на сиencela в контакта поверете за повера сенина и кабena. Ако OTКпөгЕ NOВрда, осичypete He3a6abeh peMOHT OT cneциаJINT.
He n3non3BaIte HnKora nobpeDen Ka6en, cbeDInHHeNe nn 7eNcEe nn 3axpaHbAa Ka6en, KOTo He OTROBapra Ha n3nCKBaHnTa 3a 6e3OnacHocT. Ako Ka6enbTe nOBpeDen nn npOTpuT, n3BaTe e enceHa He3a6abHo.
BHHarHocTeOuHaI npEpa3Hn pbKaBuI npi pa6To c BepKHNr TpnoH.
3a npedotbpaTbaHe Ha HapaHbHaHnHocTe pIbTHO npnraun dpexn npeDna3Hn o6yBkn.
3a npedotbpaTbaHe Ha yBpeKdHa Ha clyxa HocTe aHTnfoH. Kacknte c Ko3npka ca oco6eHO npenmyeeCTBO.
-
Ybepete ce, ye cTe CTbHnH 3dpaBO Ha KpaKaTa CN, KOraTo pa6OTnte C BepnxHn TpnoH.
-
PoiDlbpkaIte YIcTo pa60THOTo CN MRACTO.
3a npedotbpaTBAHe Ha TOKOB yad, n36yBaIe KOHTaKTA Cbc 3a3EmH YuACTn.
BnHa n3TeJnIe ⅢeCena O T KOHTaKTa Ha 3axpaHbAHeTo npEn Da n3BbPWBaTe HraKaBn pa6OTn NO BepnxHnT PNOH.
BkapBaIte uenceJa cAmo. KOraTo BepnKHNrT TpnoH e N3KJIIOyeH.
BepxHnT TpnoH Tp6Ba Da 6bJe H3NoJ3BaH cAmO OT eHNO JIne eHOBpeMeHHo. Bcunn Dpyu nn Ta Tp6Ba Da CToT HaCTpaHn OT 30HaTa Ha 3aBbPtaHe Ha BepxHn TpnoH. Deata n Domauhnte IIO6mUu No-KOHKeTHo Tp6Ba Da 6bDat DbpXaHn daJeu NO BCsKO BpeMe.
TpnoHbT He Tpr6Ba Da DOKOCBa Hnio, KOrato 6bJe NcHaT.
-ДрьжTe Bepиня TrpoH 3dpaBO C DBeTe CN pBue, KOraTo pa6OTte C Hero.
C BepnKnHr TpnoH He Tp86Ba Da pa6oTt Deua Nm MnaDeJx. EdnHCTBeHOT O3KnIOueHHe 3a Ta3n 3a6paHa ca MnaDeXKeTe HAD 16 roDnH N KOnTO n3NoI3BaT BepnKnHr TpnoH NOd Ha3Op KaTo YAcT OT TExHO ToByeHne. IpeOcTaBnTe TpNOHa cAmO Ha TaKnBa Nua, KOnTO ca 3aNo3HaTu C To3N TnB BepnKeH TpNOH N 3HaT KaK Da 6opabrt C Hero. BInHar npedabaite pa6oTHNe IHCTpykUIN 3aeDnO C BepnKnHr TpNOH.
OcnrgpeTe cBxpaHeHneTo Ha BepnKnHa MRCTo HeIOCTbNHO 3a Deua.
C TpnoHa Tpr6Ba Da pa6oTcAmO Xopa, KOnTo Ca OTNoUHaHn N B Do6po 3dpabe, T.e. B Do6po fN3nuecko CbctOarHne. Ako 3aNouHete Da ce yMOpBaTe, NouHete cn HabpeMe. BepNXnrt TpnoH He Tpr6Ba Da 6bDe N3NoJ3BaH cNeD KOHCymaun Ha aIKOXoI.
He n3naarTe BepKnHa TpOH Ha Bb3eIcTBnETo Ha IbXd Nn IIOo BpeMe. YBepTe ce, ye pa60THOTo MAcTO e DOCTaTbUHO OCBTeHo. He n3no3BaIte eJekTPoHnHCTpyMeHTne B 6n3OCT Do 3aJaIMN TeYHOCTn IIN Ra3OBe.
Ako BepnKnHrT pnoH Hma Da 6bJe n3NoJ3BaH 3a MaNko, ToI Tp8Ba Da 6bJe octaBeH HactpaH No TaBb Haun, Ye da He 3actpaWaba Dpyr Xopa.
IpeDn Da n3BbPunTe p3aHe, BnHarn HacTpoBaNrTe naLcEbnr OpranHnHTeN npEn da 3anoHHe Ta peKeTe.
- 13BaKdAaTe BepnXHn TpnoH OT bPBoTo cAmO, aKO ToI OUe pa6OTn. BceKn, KoITOpexKe 6e3 orpaHnHTeN, MoKe da 6bDe n3DbpNaH HAnpei.
He n3no3BaIte HNKORA BepnKTHr TpNOH, KOraTO CTe 3actaHa Ha cTbJI6a, Ha IbpBO nn HA BCuKN DpyrN HeCTa6uJHm MeCTa. He pexKeTe c eHa pbka.
3axpaHbauT ka6eI Tp6Ba BnHaI da e 3aI pa60THka.
3axpaHbuaT Ka6eT Tp8Ba BnHaN Da ce OTBexJa OTKbM 3aHaTa CtpaHa Ha TpnoHa.
- 3non3BaIte cmo opunHaHn npUnaJxHocTn.
BepnKn TpnoHn n3noJ3BaHn Ha oTkpuTo Tpr6Ba Da 6bDaT Cbbp3aHn KbM npekbcBau Ha BepnRaTa CpeuV YTeuKn Ha 3a3eMaBaHeTO.
He npetobapBaIte BaunTe eNeKtpOnHCTpyMeHTn. Te pa6oTn Hau-dOpe n Hau- 6e30nachocb B yka3aHnpa6oTeHN daHa3OH.
BnHaN n3NoJ3BaIe TnpaBUNHna eNeKtpOnHcTpymeHT. He n3noJ3BaIe BepVKN TpNOHN C HnCKa MOUHOCT 3a TeXKn pa6OTn.
-
3aHbTaKabEa cmo 3a HeROBTO npedHa3NaeHne. He npenacrTe HNKOrBaunn eIekTPOINHCTpyMeHT C HerOBn Ka6eJ. He 3aHn3BaTe Ka6eJa 3a da n3dbpnaTe UeNCEJa OT KOHTAKTa. 3aUNTe Ka6eJa OT TOnnHa, MacIO N OCTpn Pb6OBe.
-
YdJIxNteJHn Ka6eHn 3a pa6oTa Ha oTKpIto. N3noJ3BaIte cAmO pa3peUeHn n CbOTBeTHO 0603HaueHn YdJIxNteJHn Ka6eHn 3a pa6oTa Ha oTKpIto.
-
I3noI3BaIte 3dpaba onopa, KORATO pexeTe pereHepupaHa nTbPecnHa n TbHKn KIOHn. He HATpyINBaIte nbpBecnHaTa Ha Kyn N He KapaiTe BTOpN YOBek Da r Dbpxn nn He r 3aDpbkaIte C kpaK.
Heo6pa6oTeHnT MaTePnaJ Tp6Ba Da 6bJe 3acToOpEn.
Bbpxy haknohen Tepeh BnHar npa6oTeC nue KbM BnCOkata qacT.
- Pn HnpeHNO p3aHe BnHaN NOCTABYTe NaIeBn OrpaHnHTeN cpeUy DbPBOTo, KOEtO nCKaTe Da peKeTe
BnHaH noctabraIte naIeBna orpaHnHTe IpeDn HanePepHo p3aHe. CaMo torBa BkIOUbAte BepNXHn TpnoH n 3anOuaTe Da pexKeTe DbpBOTo. N3DbpNaIte BepXHHn TaHO HArOpE B 3aHaTata qact N ro HacoYe c npedHaTa pbKoXBaTKa. N3NoJ3BaIte NaIeBn OrpaHnHTe KaTO onOpHa Toyka. 3a HOBO no3uOnHnpAte 3a CneBaIo p3aHe, PpeKbcHeTe Ipoceca Ha p3aHe n ynpaxHeTe Nek HATNCK Bbpxy npedHaTa pbKoXBaTKa. N3TerIeTe TpnoHa MaIKo Ha3ad, no3uOnHnpAte PaIaeBna OrpaHnHTe OSe No-HaONy n 3terIeTe HarOpE 3aHaT a PbKOXBaTKa.
- I3TeTnIe TpnoHa OT dIpbTO cAmO, KOraTo BepNXHnT TpnoH pa6OTn.
Ako n3BbPbBaTe HAKOJIKO Cpe3a, n3KJIIOuBAIte BepNXHnTpnoH MeXdy TxA.
Bp3BaHnI XOpN3OHTaHn Cpe3OBe MoarTa 6bDaT N3BbPbBaHn CaMo OT npocecnoHaJIInCTn.
3a xopn3oHTaHn Cpe3OBe n03nIOHpaIte Ha Hau-MaIKN Bb3MOxEh bI. ToBa I3NCKBa N3KIOUHTeHOBHMaHHe, Tb KaTO NaJIeBnTOrpaHNUHTeJ He MoKe Da 6bJe I3PON3BAH B TO3N clyaI.
Ako Bepurata 3aceDne npn p83aHe c rohpata ctpaHa, TMy MoKe Da OTCKOuN KbMa pa6oTHnka. Nopadn Ta3n npuHnHa Tp8Ba Da peKeTe, KOrato e Bb3MOxHo, CdoHNaTaCTpaHa, Tb' KaTO Toraba BepKHNrT TpNOH Ie OTCKOuN O6paTHO Ha TJIOTO BN KbM DbPBOTo.
O6bphete NOBnueHO BHMaHne npn p3aHe Ha pa3eNeHO DbpBO. OTP3aHn napyTa OT DbpBOTo MORAT Da 6bDat N3CTpeJHn BB BcKa Nocoka (pNCK OT HapaHaBaHe)!
He n3noJI3BaIte BepNXHn TpNOH 3a OTCpaHbAhe Ha NiPOHn IIN NIO6HN ppeDMeTn.
- Ipn KactpeHe Ha KIOHn BepNXHnT TpnoH Tp6Ba Da 6bJe NoDnpyn, KOraTo e Bb3MOxHo, Bbpxy CTBOna. He pexKeTe C Bbpxa Ha HappaBnBaUaTa ShHa.
KactppeHTo Ha KIOHn Tp6Ba Da 6bDe N3BbpueHo OTo oByeH nepcoHa! Puck ot HapaHBAhe!
O6bPHeTe cneuaHNO BnMaHne Ha KNoHnte noHnpeXeHne. He pexTe cbo6oHOBnCnKIOHn OTdoJy.
He 3acTabaIte HNKORA Bbpxy CTbOJa, KOraTo KaCTpnte KNOHn.
BepnKnT TpnoH He Tp6Ba Da 6bJe n3non3BaH 3a DbpBOIO6NB, T.e. 3a ceyeHe KacTepeHe Ha KIOHn B ropata. Iopadn Ka6eHNHATA Bpb3ka pa6oTeuNt C TpNOHa HMa Heo6xOIMATA MO6NJHOCT N HerOBATA 6e3OnaCHOCT He e rapaHTnpaHa!
BnHaN 3actaBaIte OTCTpaHn Ha OTCuHaHTo DbpBO.
- Пи OTCичане На ДьрВО BHHIMaВaIte 3a падци КLOHи, KORATo OTOCTbINBaTe Ha3aД.
-Пи На Клони рабошугс TprnoHa Tрябв Дд acTaBa OTKbM rOpHata JЯВa NIN DЯСHa CTpaHa Ha CTBOJa NIN JERHaNoTo DbpBO, HNKORA OTO DOJHaTc TpaHa.
BHHMaBaTe 3a CTBOJIOBe TbPkAJIaIc Ce KbM Bac. OTCKaUaHe!
-
EneKtpnuecknT TpnoH e CkNoHeN KbM OTcKaUaHe, aKO BbPxbT Ha HApPaBnaBaUaTa UHa (ocObeHo rOpHaT a YeTBbPt) cnyauHIO DOKOCHe DbPBO NIN dpyrN TBbpDn npEdMeTu. B To3n cnyauT TpnoHbT ige Ce pnpdBxN HeKoHTpoNpyeMo n ige OTCKOn KbM pa60THnka c nbJNa cnila (pnck OT hapaHraBaHe)!
-
Pn pa6Oa C BepKHNr TpnoH Tpr6Ba Da n3PON3BaTe PpeDna3Hn PbKaBnC, NOxOJaU O6yBk, PpeDna3HTeJN 3a KpaKaT, 3aUnTa 3a OuTe n aHTufoH.
Ako pa6oTata BkIIOUba pICK OT HapaHbAhe Ha IJIaBata, Tp6Ba Da Hocnte npedna3Ha kacka. Ako ceye Te DpbBeTa n KAcTpne KNOH Ha OTP3aHn nn NaHAn DbpBeTa, B DObnHeHne Tp6Ba Da HOCnte 3aUHTa 3a NUCETO.
BnHaru n3TerIyIe 7e enceLa ot KOHTaKaT a nped Na ce onntaTe da npOBepuTe nn nperynpate Bepurata Nnn Da Kopunpate HkoHn3npabHOCT IN BuHaR, KOrato Ce npNDnKBaTe OT eDHO Macto Ha dpyro.
He n3KIOUByTe HIKORA BepxHnra TpnoH, aKO He dIbpxNte 3dpaBO IHCTpyMeHTa, He cTe CTbIIIN CNrypHO Ha KpaKaTa Cn I He cTe yBepEN, Ye HAnpabNraBaaata ShHa n BepxHnra TpnoH He DoKOCBaT Hnso.
BnHaI npbXTe TpnoHa c DBeTe cn Pbue (JaChaTa pbKa Bbpx y 3aHaTa pbKoXBaTKa, JraBaT a pbKa Bbpx y pbKoXBaTKa 2).
He pexkete HIKORA HaBncounHaTa Ha pameHaTa cn, 3actaHaHn Ha cTbI6a nn Ha DbpBO nnn BvB BCsKa dpyra Hecnrypha no3a.
- Pn p3aHe Ha IbPBeCInHa, KOrTo e pa3eNeHa, BHMaBte Oco6eHo 3a OTyIbAHeTo n3XbPJIaHcTo Ha MaJIKN NapYe Ta IbPBO OT BepNXHn TpNOH.
- Pn cnnpaHn TpnoHbT Tp6Ba Da 6bJe OCTaBn No TaKbB HauH, Ye da Hma PNCK OT HapaHbAHe Ha HNKOro OT BepNXHn TpNOH.
BepnHnT TpnoH He Tp6Ba Da 6bJe npeOTCTbNbaH nn Da ce No3BOJRA nonaHaTo My B pueTe Ha Xopa, KOnTO He ca 3aNo3HaTc C yNoTpe6aTa Ha TaKbB INCTpyMeHT. PaobTHnTE IHCTpykCm CBIO Tp6Ba Da 6bDat npeOCTABHn 3aeDHO CTPOHa.
7 PEPIN3HIMEPKNCPEUOTCKAHAHETO
3a da npedotbpatnte otckaayane, moa cneBaIte Te3n IHCTpykun 3a 6e3onacnoct:
Hikora He 3anoBaIte da pexTe c Bbpxa Ha HnpaBnaBaIaTa UHa!
Hnkora He pexkete C Bbpxa Ha HnpaBnaBaataa HnHa! BnMaBaTe, KOrato npoDbJIkaBaTe cpe3OBe, no KonTo Beue cTe pa60TnI.
Bunharu 3anoBaIte Da peKeTe C Beue pa6oTeu BepnKeH TpnoH!
YBepBaTe ce, Ye Bepurata Ha TpuHa e BuHarn npaBnHo 3aToyeHa.
He pexkete HnKora nobuee ot eINH KNoH Ha BeHNbX! Ppi KaCTpeHe Ha KNoHn BHIMabaTe Da He DOKOCHete HKOJ dpyr KNOH.
- Pn HAnpeHrO p3aHe BHNMaBaIe 3a CTBOJIOBe pa3NOJOKeHN MHOro 6JIIN3o eINH Do Dpyr. Ako e BB3MOXHO, n3NoI3BaIte Marape 3a p3aHe.
8 TPAHCIOPTIPOAHE HA BEPNUKHNA TPNOH
Ipei TpaHcnpTnpaHe Ha BepxHnra TpnoH BuHaHn 3BaXdaTe Te eCenTa OTOKtKaTn Ipb3raTe BepxHn npedna3nteBbpxy peIcata n Bepurata. Ako Tpr6Ba da 6bDaT N3BbPseHn HAKoJIPO pr3AHn C BepxHnra TpnoH, TpnoHbT Tpr6Ba da 6bDe n3KIOuBaH Mekdy p3aHnraTa.
9 PPEI INYCK
HansehenTo n ToKbT Ha 3axpaHbaHeTo Tp6Ba Da CbOTBeTCTBat Ha daHHnTe OT TINOBATA Ta6eJka.
- Праздддддддддддддддддддддддддддддддддддддддддддддддддддддддддддддддддддддддддддддддддддддддддддддддддддд徴а
-празлнги e 6e3onaceH 3a pa6ota.
IpoBepTe CbIo N daIIN Cma3BaHeTo Ha BepnraTa I MacJIeHnT INDnKATOp ca B Do6pO pa60HO cbCToRHe. Ako NoCTyeTo 3a MacNoTo e Ha OKoIO 5 MM OT DoNHaTa MapKnPOBka, Tp6Ba Da doJeete MacNo. Ako HNBOTO Ha MacNoTO e NO-BnCOKO, MoKeTe da pa60NTe 6e3 npITecHeHn.
BknHcyTe BepxHn TpnoH n To dpbXte HaTpeHa. BnImaBaTne BepxHnT TpnoH da He DOKoche Tepena. OT cbo6paXeHn 3a 6e30nacHOCT e Hau-Do6pe Da ce NODpbXa pa3ctOHHne OT noHe 20 cm. Ako cerA BnXdaTe HapactBaUc CneDN OT MacNo, CNCTemaTa 3a Cma3BaHe Ha Bepurata pa6OT npABuINHO. Ako n3o6UO HMA CneDN OT MacNO, ONNTaIte Ce Da NouchTtE MaCHeHn N3XoDeH OTBOP, TOpHnT OTBOP 3a HATraHe Ha Bepurata n MacHeHn KaHaN nn Ce CbPKeTe C BaUNr NOTpe6nteLckn cepBn3. (Ipoyetete pa3dEn ,PiJIHeHe Ha MacNo 3a Bepurata n Cma3BaHe Ha Bepurata" 3a TO3N BbIpc).
- Поберете НатягенTo Ha Bepurataи 3aДьржанeto,akoe Heo6xOДIMо(BuK pa3dJI "11.2 Поберka Ha HataЯнeto Ha Bepurataи Perynipahe" 3a To3n Bbnpoc).
10 INHCTPYKUIN 3A PRA3AHE
Bux qur. 1.
10.1 Pn3aHe Ha dbpeema
Bux qnr. 2.
10.2 OmcmpaHaeHa Ha KnoHu
Bux qur. 3.
10.3 NocmBaHe Ha dbHepu
Bux qn. 4.
Btopata n TpeTata qnrypu noka3BaT hauHH 3a npedotbpaTbaHe Ha 6nokupaHe H Bepurata n 3b6nte.
11 CTAPTIPAHE HA MAUNHATA
Bux qn. 5.

Cnpete nHCTpyMeHTa n 3BaTe Te ceneJa OT eJektpo3axpaHbaHeTo, npedn da n3BbPwBaTe KaKBOTO n Da 6nNo NOuNCtBAHe, HnCneKcua, noDpBkKa nn Dpyr na p60Tu No nHCTpyMeHTa.

He noctabraye HNKORA pembka dnarohaJHO npe3 pamOTO n bpynte cn, a ro noctabete Bbypx yedno OT pameHaTa cn. NTo3n HaunH ue moxete da CHEMeTe HHCTpyMeNTa 6bp3O OT TAnOTo CN B CnyaH Ha onachocT.

Pa3kaYeTe cBor rpaHnckn HnctpyMeHT OT eNeKtpo3axpaHbaHeTo.

Cnepeynipane ce ybepeTe, ye 6yToHnte 3a perynipaHe Ha bIbJa ca BbpHaTn B TexHnte PpBOHaayanH No3uHN. B npotnbEn cnyaH INcTpymeHTbT He MoKe Da Ctaptnpa.

He cBbP3BaIe KbM eJekTpO3axpaHbaHeTo, DOKaTO He 3aBbPunTe crNo6BaHeto. Hecna3BaHeto Ha TOBa MoKe Da DoBeDe Do CTapTnpaHe No HEBHMaHne N Bb3MOxHO cepNo3HO HapaHBAHe Ha Xopa.
11.1 Cao68aHe Ha uuHama Ha cepuzama u cepuzama
Bux qur. 6.
IobtopeHaTaraHeTo Ha HOBaTa Bepura cJeD okono 5 oTp3BaHn. IpoBepraBaTe nepNoDnUHO HATraHeTo Ha Bepurata.
3a6eJekka: Bepurata Ha TpnoHa MoKe Da yBnCHe JeKO KbM DoJHaTa YacT Ha UHaTa. ToBa e HopMaJIHo.
3a6eJexka: raiknTe 3a 3akpenBaHe Ha HappaBnaBaaTa aHnHa ce 3aTgRaT Ha pKa B To3N MOMENT, 3aOTo e Heo6xOdImo peryInpAne Ha Bepurata Ha TpNoHa. CJeDbaTe INhCTpyKcUInTe B pa3deJa 3a peryInpAne Ha HatraHeTo Ha Bepurata Ha TpNoHa.

IpeynpeXeHne: BnHarn HocTe pBkABuCn C BnCOKa 3aunTa, KOraTo 6opabnte c Bepurata Ha TpnoHa IIN npabnte perylnpoBKn Ha Bepurata Ha TpnoHa
11.2 Pnosepka Ha Hamraanemo Ha cepuzama u pezynupahe
BnKΦnT.7.
3a6eJexka: ako Bepurata Ce Bbptn Tpydno no HanpaBnaTa uHa nHa nKn aKO 3acJa, npInloKeHo e TBbpe RoIyMo HaTgAHe. ToBa n3NcKba JeKO perylnpaeNo cJeHNH naHH:
Pa3xIa6eTe raiKITE 3akpenBaun npoФnla, TaKa Da 6bDaT 3aTeHaTu Ha pka. HamaTe HAraHeTo KaTO 3aBbPTnTE BnTa 3a peRyInpae Ha uHata 6abHO o6paTHo Ha yacobNkoBATA cTpeJka. IpeMeCTe Beprata HAnpei Ha3ad no uHnHata. IpoDbLnKeTe da peRyInpate, DOKATO Beprata 3anOuHe Da ce Bbptn Cbo6oJHo, Ho npinra do6pe.
YBeHnueTe HaTgAHeTo KaTO 3aBbPTtE BnHTa 3a peryInpaHe Ha uHaTa NO YacOBHnKOBaTa CTpeNka.
Korato Bepnata Ha TpnoHa e npabnHn Ho HaterHa, 3aPbXTe Bbpxa Ha uHa Ta B Ha-TopHa n03uia n 3aTeHete Do6pe 2-Te raikn 3akpenBaun uHaata.

BHMaHHe: HObTa Bepura Ha TpnoHa ce pa3TЯRa, KOeTo n3NcKBa peryInpaHe cAmo CJIeD 5-TO pIzAHe. ToBa e HopMaJHo 3a HOBa Bepura m INHTepBaJIbT MExd y 6bDeuNTe peryInpOBKn 6bP3O ue ce yIbJxN.

BHHMaHHe: ako Bepurata Ha TpnoHa e TBbpDe xJa6aBa nIIN TBbpDe HaterHata, BepnKHOTo KOJeNo, uHHata, Bepurata N KOJHOBNTe Naepu Ie ce n3HocrT no-6bP3o. PperneJaTe 12 3a INHOpMaun OTHOCHO npabUNHO TOydeHo HArahe (A), npabUNHOTo TonNo HArahe (B) n KaTO cnpaBA 3a TOBa, Kora Bepurata Ha TpnoHa ce HykDae ot perynipahe (C).
11.3 Ppoeepka Ha Hueomo Ha Macnomo Ha eepuzama
BnKΦnR.8&"9IpeDnIyCK"
12 PABOTA
12.1 3a cmapupaHe
Bux qur. 9.

PNEyPEXEHN: He cTaptnpaTe nH pa6oTe HNKora c TpnoHa, aKo uHaTa N BepnraTa He ca npaBUNHO IHCTaHnpaHn.

BHMaHHe:doKaTo TpNoHbT pExe ce yBepTe, Ye BepnRaTa u ShHaTa ca npaBnHc Cma3aHn.
3a da BKNIOUHTe MaunHaTa, HATNCHeTe OTKNIQUBaUNa 6yToH IN npeBKNIOUBAteTnA 3a BKn./n3Kn. eNHOBPemEHNO.
12.2 3a cnupaHe
BnKΦnR.10.

BepnraTa cnpa ckopo cnei n3KJIouyBaHeto.
He peryiipaTe cnctemata 3a cma3BaHe Ha BepnraTa, aKO dBnraTeJrT He e n3KIOUeH.
3a da n3KJIIOHTe MaunHaTa, OTNcHTe npeBKNIOUbaTeTn 3a BKn./n3KJ.
13 3ATOUBAHE HA BEPNΓATA HA TPNOHA
BnK cun. 11.
14 NOUHCTBAHE I NOIDPbJKA

Bunhar n3ternne tce enceeta ot KOHTaKta npeDn da n3BbPwBaTe HkaKaBa pa6ota no BepxHnra TpnoH!
- PoiDJIbPjXaIte OTBOpHTe 3a OxJaXdAHe Ha eJIeKTpOMOTopa NcCTn HEBb3IpEYrTCTBaHIN NO BcAko BpEmE.
MoKe Da 6bDe n3nBnHraBaHa cAmo pa6oTata no NODpBXkata ONcaHa B Te3n pa6OTn HNCTpyKcHn. BcKa dpyra pa6oTa no NODpBXkA Tp6Ba da 6bDe n3BbPseHa OT HaINr NOITpe6bTeENCK cepBu3.
He MoDnΦuNpaTe eNeKtpnueckn TaHNO HnKaKBb HaunH, 3aTO TOBa Ue 3actpaUN HeROBata 6e3OpaCHOCT.
Pn noBpeHa HbepnHa BnpeKn HaHnTe BnMaTeHn npOeDpyn 3a npOn3BOoCTBO n NOdpbXka, pEmOHtnpaIte rB yNbHOMoUeH NOTpe6nteckn cepBu3.
14.1 NodpBka Ha HanpaJraaama wHa
Heo6xOIMO e yeCTO Cma3BaHe Ha BbpxOBTe Ha 3b6HTe Ha BepnKHO 3b6HO KOJIeNo Ha HaprabnaBaaata uHa (npocnblT, KoITo nOaBpKa u Hocn Bepnrata Ha TpnoHa). IpaBnHATA noDpBxxKa Ha HaprabNaBaaata uHa, KaKTo e pa3rCHeBO T03n pa3dE, e peSwaba#a 3a noDlbpxaHe Ha TpnoHa B do6po pa60THo cbCTOHNHe.
14.2 Cma3BaHe Ha peXeUama Yacm Ha BepuxHomo 3b6Ho KOJIeNo

BHHMaHHe: pexeata Ta qact Ha BepnXHOTo 3b6HO KOJIeNo Ha Baunr HOB TpnoH e cMa3aHa npeDbapntEnHO BbB a6pnKaTaNko He cMaKeTe pexeata Ta qact Ha BepnxHOTo 3b6HO KOJIeNo Ha HAnpaBnBaUaTa uHNa, KaKTo e o6rCheHo no-dony, ue ce CTnRHe do lowa pa6Ota n 3aDnPaHe, KOeTo anyInpa rapaHcunraTHa npOn3BOdnteJr.
Cma3BaHeTo Ha pexeUaTa qact Ha BepnKHO 3b6Ho KOJIeO ce npenOpBvBa cneI 25 yaca
H3NoJ3BaHe Hnn BeNbX B CeIMuCaTa, KOEt Oce Cnyu No-paHO. BuHaH nouchBaIte
rpnKINBO HapabnBaUaTa UInHa Ha pexeUaTa qact Ha BepnKHO 3b6Ho KOJIeO npedi
Cma3BaHe.
HctpymeHTn 3a Cma3BaHe
HxekTopbT 3a Cma3BaHe ce npenopbUba 3a npnlarA He rpec Bbpxy pekeuata qact Ha BepnxhO 3b6HO KOJIeNo HA HnpaBnBaUaTa UHa. HxekTopbT 3a Cma3BaHe e OobpyDbAH C nIOBnDEH BpX Ha HoCA, KoETo e Heo6xoDmO 3a epeKTNBHO npnlarA He Ha rpec Bbpxv pekeuata qact Ha BepnxhO 3b6HO KOJIeNo.
3a da cmakepexeetaTHa BepnKHO KOJeno:

IpeynpeXeHHe: HocTe pBkABu3a TeKKn ycNoBnHa pa6Ota, KOrato 6opabnte C uHaTaN Bepurata.

3a6eJexka: He e Heo6xOJMo Da CBaJIte BepnraTa Ha TpNoHa, 3a Da CmaKeTe pexeUata YaCT Ha BepnxHOTo 3b6Ho KOJeNo Ha HanpaBJIBaUaTAt uHa. Cma3BaHeTo MoKe Da ce HApPaBn Ha MAcTO.
IOnyHCTepeXeHATAaCTHaBepnKHO3b6HOKOJIeNOHaHapPabnaHATAuHHa.
Kato n3no3BaTe nHKeTopa 3a Cma3BaHe (nO n36Op), nBXHeTe nIOBnDnHn HOC B OTbopa 3a Cma3BaHe n INHKeTnpaIte rpec, DOKATO Tc Ce IORBN Ha BbHnHa KpaHa Pexeata YAcT Ha BEpNXHOTo 3b6HO KOJENO.
Bbptete BepnraTa Ha TpnoHa Ha pbka. NObTopeTe npOceca Ha Cma3BaHe, DOKaTO cIaNaTapeXeuaTayact Ha BepNXHOTo 3b6HO KOJeNo 6bJe Cma3aHa.


- BESCHRIJVING (FIG. 1)
- DESCRIPTION (FIG 1)
- PACKAGE CONTENT LIST
- SYMBOLS
- GENERAL POWER TOOL SAFETY WARNINGS
- Working area
- Electrical safety
- Always check that the power supply corresponds to the voltage on the rating plate.
- Personal safety
- Power tool use and care
- POWXG1032 EN
- Service
- SAFETY INSTRUCTIONS AND ACCIDENT PREVENTION
- KICKBACK
- TRANSPORTING THE CHAINSAW
- BEFORE STARTING UP
- INSTRUCTIONS FOR CUTTING
- Tree logging
- Branches removal
- Trunk trimming
- STARTING UP THE MACHINE
- Assembly of chain bar and chain
- Chain tensioning and adjustment check
- Check of the chain oil level
- OPERATION
- To start
- To stop
- SAW CHAIN SHARPENING
- CLEANING AND MAINTENANCE
- Guide bar maintenance
- Sprocket tip lubrication:
- Tools for lubrication:
- To lubricate sprocket tip:
- Guide bar maintenance:
- Chain sharpening:
- Chain sharpening
- Guide bar
- Chain maintenance
- Chain tension:
- Breaking in a new saw chain:
- Chain lubrication:
- Chain sharpening:
- NOISE
- ATTENTION! Wear hearing protection when sound pressure is over 85 dB(A).
- STORAGE
- WARRANTY
- ENVIRONMENT
- DECLARATION OF CONFORMITY
- AFIAR A CORRENTE DA SERRA
- LIMPEZA E MANUTENÇA O
- PROVOZ
- Na zacatek
- Cepeu3Ho 06cnyxgahe
- INHCTPYKUIN 3A BE3OJACHOCT IN IPEIOTBPATRAHE HA 3JIOJOLYKN
- PEPIN3HIMEPKNCPEUOTCKAHAHETO
- TPAHCIOPTIPOAHE HA BEPNUKHNA TPNOH
- PPEI INYCK
- INHCTPYKUIN 3A PRA3AHE
- Pn3aHe Ha dbpeema
- OmcmpaHaeHa Ha KnoHu
- NocmBaHe Ha dbHepu
- CTAPTIPAHE HA MAUNHATA
- Cao68aHe Ha uuHama Ha cepuzama u cepuzama
- Pnosepka Ha Hamraanemo Ha cepuzama u pezynupahe
- Ppoeepka Ha Hueomo Ha Macnomo Ha eepuzama
- PABOTA
- 3a cmapupaHe
- 3a cnupaHe
- 3ATOUBAHE HA BEPNΓATA HA TPNOHA
- NOUHCTBAHE I NOIDPbJKA
- NodpBka Ha HanpaJraaama wHa
- Cma3BaHe Ha peXeUama Yacm Ha BepuxHomo 3b6Ho KOJIeNo
- HctpymeHTn 3a Cma3BaHe
Brand : PowerPlus
Model : POWXG1032
Category : Saw