
ErgoMixx MSM67190 - Blender BOSCH - Free user manual and instructions
Find the device manual for free ErgoMixx MSM67190 BOSCH in PDF.




| Brand | Bosch |
| Model | ErgoMixx MSM67190 |
| Product type | Immersion blender (hand blender) |
| Power supply | Mains, electric power cord |
| Speed | Continuous speed adjustment from low (•) to high (12) via wheel, additional high-speed button |
| Main functions | Blending, whisking, chopping, slicing, grating |
| Included accessories | Blending foot, whisk with gear attachment, mixing bowl, universal blade, support disc with inserts (coarse/fine slicing, medium/coarse grating), lid, pusher |
| Blade material | Stainless steel |
| Mixing bowl | Plastic, dishwasher safe |
| Blending foot | Dishwasher safe or brush clean under water |
| Whisk and gear attachment | Whisk dishwasher safe, gear attachment wiped with damp cloth |
| Multifunction accessories (bowl, blade, discs, inserts) | Dishwasher safe (except lid) |
| Base unit | Do not immerse, clean with damp cloth |
| Safety | Overload protection, automatic shut-off in case of overheating, sharp blades, do not immerse base unit, use with hot liquids limited to <80°C |
| Warranty | Conditions according to country of purchase (local distributor) |
| Recommended use | Preparation of common household quantities, soft to medium-hard foods, soups, sauces, purees, mayonnaise, drinks, chopping, slicing, grating |
Frequently Asked Questions - ErgoMixx MSM67190 BOSCH
User questions about ErgoMixx MSM67190 BOSCH
0 question about this device. Answer the ones you know or ask your own.
Ask a new question about this device
Download the instructions for your Blender in PDF format for free! Find your manual ErgoMixx MSM67190 - BOSCH and take your electronic device back in hand. On this page are published all the documents necessary for the use of your device. ErgoMixx MSM67190 by BOSCH.
USER MANUAL ErgoMixx MSM67190 BOSCH
Congratulations on the purchase of your new BOSCH appliance. In doing so, you have opted for a modern, high-quality domestic appliance. You can find further information about our products on our web page.
Contents
For your safety 10 Overview 12 Operation 13 Cleaning 15 Troubleshooting (MSM67.) 16 Recipes and tips 16 Instructions on disposal 16 Warranty conditions 16
For your safety
Before use, read these instructions carefully in order to become familiar with important safety and operating instructions for this appliance.
If the instructions for correct use of the appliance are not observed, the manufacturer's liability for any resulting damage will be excluded.
This appliance is designed for processing normal household quantities in the home or similar quantities in non-industrial applications.
Non-industrial applications include e.g. use in employee kitchens in shops, offices, agricultural and other commercial businesses, as well as use by guests in boarding houses, small hotels and similar dwellings.
Use the appliance for processing normal quantities of food for domestic use.
The appliance is only suitable for cutting or mixing food. It must not be used for processing other objects or substances.
Please keep the operating instructions in a safe place. If passing on the appliance to a third party, always include the operating instructions.
A General safety instructions
Electric shock risk
The appliance must not be used by children.
The appliance and its power cord must be kept away from children. Appliances can be used by persons with reduced physical, sensory or mental capabilities or lack of experience and knowledge if they have been given supervision or instruction concerning use of the appliance in a safe way and if they understand the hazards involved.
Children shall not play with the appliance.
Connect and operate the appliance only in accordance with the specifications on the rating plate. Only use indoors.
Do not use the appliance if the power cord and/or appliance are damaged.
Always disconnect the appliance from the supply if it is left unattended and before assembling, disassembling or cleaning.
Do not place the power cord over sharp edges or hot surfaces.
To prevent injury, a damaged power cord must be replaced by the manufacturer or his customer service or a similarly qualified person.
Only our customer service may repair the appliance.

Safety instructions for this appliance
Risk of injury
Electric shock risk
Do not use the hand blender with damp hands and do not operate it at no load.
Do not immerse the appliance in liquid above the blender foot-base unit connection point. Never immerse the base unit in liquids and do not clean in the dishwasher.
Caution when processing hot liquids. Liquids may splash during processing.
Never place blender foot on hot surfaces or use in very hot food.
Leave hot food to cool down to at least 80 °C before processing with the blender! Before using the hand blender in a cooking pot, take the pot off the hotplate.
Risk of injury from sharp blades/rotating drive!
Before replacing accessories or additional parts that move during operation, switch off the appliance and disconnect it from the power supply.
Never grip the blade in the blender foot. Never clean the blades with bare hands. Use a brush.
Never grip the blades of the universal blade. Grip the universal blade only by the edge of the plastic handle.
Exercise particular caution when handling the attachments!
Note the shape and location of the insert when inserting it into the carrier disc. Take hold of the carrier disc only by the designated recessed grips.
Do not place fingers in the feed tube. Only use the pusher when adding more ingredients.
When working with the multifunction accessory, the base unit may be switched on only when the lid has been attached and screwed on tight.
Do not touch the blade with bare hands. Clean them with a brush.
Important!
Operate the hand blender with original accessories only.
Do not attach or remove accessories until the base unit is at a standstill.
Never insert the whisk into the base unit without the gear attachment.
Never immerse the gear attachment in liquids and do not clean it under flowing water or in the dishwasher.
Never work with the hand blender/blender foot in the bowl of the multifunction accessory.
The blender jug is not suitable for use in the microwave.
The bowl of the multifunction accessory is not microwave-safe.
Never immerse the lid of the multifunction accessory in liquids and do not wash it in the dishwasher.
Recommendation: Never switch on the appliance for longer than necessary to process the ingredients.

Explanation of the symbols on the appliance or accessory

Caution! Rotating tools.
Do not place fingers in the feed tube.
Overview
Please fold out the illustrated pages.
Fig. A
1 Base unit 2 Power cord 3 Speed control
Operating speed can be adjusted steplessly between the lowest (●) and highest (12) speed (only in conjunction with button 4a).
4 ON button
a Controllable speed (with speed control 3)
b Turbo speed
The hand blender remains switched on as long as an On button (a or b) is pressed.
The turbo speed is used for the universal cutter (if included in delivery).
5 Release buttons
To remove the blender foot, simultaneously press both release buttons.
6 Blender foot
Attach the blender foot and lock into position.
7 Blender blade
8 Blender jug
Using the blender jug will prevent the ingredients from splashing.
9 Lid
Place the lid on the blender jug to keep in the processed food.
Whisk:
10 Whisk
11 Gear attachment
Multifunction accessory:
12 Bowl
13 Universal blade
14 Carrier disc for disc inserts
15 Disc inserts
a) Slicing attachment - coarse b) Slicing attachment - fine c) Shredding insert - medium d) Grating disc insert - coarse
16 Lid with gears
17 Pusher
Operation
Warning!
The bottom of the receptacle which you use must not have any bumps or recesses.
Before using the appliance for the first time, clean all parts of it.
Blender foot
The blender foot is suitable for blending mayonnaise, sauces, mixed drinks, baby food, cooked fruit and vegetables.
For puréeing soups.
It is recommended to use the supplied blender jug. However, other suitable receptacles can also be used.
Fig. 3
- Completely unwind the power cord.
- Place the blender foot on the base unit and lock into position.
- Insert the mains plug.
- Place food in the blender jug or another tall receptacle. The appliance works better if there is some liquid in the ingredients.
- Set the required speed with the speed control (Fig. E-5).
It is recommended to use a low speed setting for liquids, hot food and for mixing (e.g. muesli in yoghurt).
The high speed settings are recommended for the processing of more solid foods.
- Firmly hold the hand blender and jug.
- Firmly hold the hand blender and jug. Switch on the hand blender by pressing the required On button. When switching on the hand blender, hold it at a slight angle to prevent it from "sticking" to the bottom of the blender jug. The hand blender remains switched on as long as the On button is pressed. To prevent the ingredients from splashing, do not press the On button until the blender foot has been immersed in the ingredients.
Always switch off the hand blender before taking it out of the processed food.
- Release the On button after processing. After using the appliance:
- Remove mains plug.
- Press the release buttons and remove the blender foot from the base unit.
Whisk
The whisk is suitable for whipping cream, beating egg whites and milk froth (from hot (max. 70°C) and cold milk (max. 8°C) as well as for preparing sauces and desserts.

Risk of scalding!
When processing hot milk, use a tall, narrow receptacle for blending. Hot milk may splash and scald you.
Fig.
- Put ingredients into the blender jug.
- Place the gear attachment on the base unit and lock into position.
- Insert the whisk into the gear attachment and lock into position.
Warning!
Never insert the whisk into the base unit without the gear attachment (Fig. C-3).
- Insert the mains plug.
- Set required speed using the speed control (recommendation: high speed).
- Grip base unit and blender jug and press required On button.
- Release the On button after processing.
After using the appliance:
- Remove mains plug.
- Press the release buttons and remove the base unit from the gear attachment.
- Remove the whisk from the gear attachment.
Multifunction accessory
The multifunction accessory is suitable for cutting and shredding food.

Risk of injury from sharp blades/rotating drive!
While the appliance is operating, never place fingers in the mixing bowl. Always use the pusher for adding ingredients. After switching off, the drive continues running for a short time. Change tools only when the drive is at a standstill. When working with the multifunction accessory, the base unit may be switched on only when the lid has been attached and screwed on tight.
Warning!
Multifunction accessory must be completely assembled before use!
Caution!
Before cutting meat, remove gristle, bones and sinews.
The multifunction accessory is not suitable for cutting very hard food (coffee beans, radishes, nutmeg) and frozen food (fruit, etc.).
Universal blade
For cutting meat, hard cheese, onions, herbs, garlic, fruit, vegetables, nuts, almonds. Always observe the maximum quantities and processing times in the table (Fig. ⑥).

The blade is sharp and can cause injury!
Never grip the blades of the universal blade.
Take hold of the universal blade by the plastic handle only.
Do not touch blade with bare hands.
Clean them with a brush.
Fig. D
- Place bowl on a smooth and clean work surface.
- Insert universal blade. Add food.
Warning!
Universal blade must be upright in the bowl so that the lid fits correctly (Fig. D-3).
- Place lid on the bowl and turn all the way anti-clockwise. If there are larger quantities of ingredients in the bowl, it may take a little more effort to attach the lid. If required, turn the three-winged coupling on the underside of the lid into the correct position.
- Place the base unit on the attachment and lock into position.
- Insert pusher.
- Insert the mains plug.
- Hold the base unit and universal cutter firmly and switch on the appliance (turbo speed).
- To add more ingredients, release the On button. Wait until the tool comes to a standstill.
- Remove the pusher and add ingredients through the feed tube.
- Release the On button after processing.
After using the appliance:
- Remove mains plug.
- Press the release buttons and remove the base unit from the attachment.
- Turn lid clockwise and remove from the bowl. Take hold of the universal blade by the plastic handle and take out.
Carrier disc with disc inserts
Slicing attachment - coarse
Set speed control to low speed for cutting: cucumbers, carrots, potatoes.
Slicing attachment - fine
Set speed control to low speed for cutting: cucumbers, carrots, beetroot, zucchini.
Shredding insert - medium
Set speed control to high speed for shredding: apples, carrots, cheese, cabbage.
Grating disc insert - coarse
Set speed control to high speed for grating: potatoes for dumplings, potato pancakes; fruit and vegetables for raw vegetable salad. Always observe the maximum quantities and processing times in the table (Fig. 6).

The blade is sharp and can cause injury!
Exercise particular caution when handling the attachments! Note shape and location of the insert when inserting it into the carrier disc. Take hold of carrier disc by the designated recessed grips only. Do not place fingers in the feed tube. Only use the pusher when adding more ingredients.
Caution!
The disc inserts must not be used for cutting very hard foods (Parmesan cheese, chocolate).
The disc inserts are only partly suitable for processing fibrous foods (leek, celery, rhubarb).
Fig. 1
- Place bowl on a smooth and clean work surface.
- Insert the required insert into the carrier disc. Note the form and the location (Fig. 3-1)! Take hold of carrier disc by the recessed grips and insert into the bowl.
- Place lid on the bowl and turn all the way anti-clockwise.
- Place the base unit on the attachment and lock into position.
- Insert the mains plug.
- Set the required speed with the speed control.
- Hold base unit and multifunction accessory firmly and switch appliance on.
- Put ingredients to be cut or shredded through the feed tube.
- When adding contents which are to be sliced or shredded, apply only light pressure to the pusher.
Warning!
Empty the bowl before it becomes so full that the cutting or grating contents reach the carrier disc.
- Release the On button after processing. After using the appliance:
- Remove mains plug.
- Press the release buttons and remove the base unit from the attachment.
- Turn lid clockwise and remove from the bowl.
- Grip the carrier disc by the recessed grips and lift out of the bowl.
- Turn the carrier disc over and carefully press out the insert from the underside (Fig. 3).
Cleaning
Base unit and tools
Warning!
Never immerse the base unit in liquids and do not clean in the dishwasher.
Do not use a steam cleaner!
Surfaces may be damaged. Do not use abrasive cleaning agents.
If processing e.g. red cabbage or carrots, the plastic parts will become discoloured by a red film which can be removed with a few drops of cooking oil. Pull out the mains plug! - Wipe the base unit with a damp cloth and then wipe dry. - The blender jug can be cleaned in the dishwasher. Clean the blender foot in the dishwasher or with a brush under running water. - Dry the blender foot in an upright position (blender blade face up) so that any trapped water can run out.
Whisk
Warning!
Never immerse the gear attachment in liquids and do not clean under flowing water or in the dishwasher.
The whisk can be cleaned in the dishwasher. - Wipe the gear attachment with a damp cloth only.
Multifunction accessory
Warning!
Never immerse the lid of the multifunction accessory in liquids and do not wash in the dish washer.
- Wipe lid with a damp cloth only or rinse briefly under running water.
- Bowl, universal blade, carrier discs and disc inserts are dishwasher-proof.
- Do not wedge plastic parts in the dishwasher as they could warp.
Troubleshooting
Fault Remedial action
Appliance switches off during use.
The overload protection feature has been activated.
- Switch off the appliance and pull out the mains plug.
- Leave the appliance to cool down for approx. 1 hour in order to deactivate the overload protection device.
- Switch on appliance again.
If the fault cannot be eliminated, please contact customer service.
Recipes and tips Mayonnaise
Tool: Blender foot
1 egg (egg yolk and egg white)
1 tbs. mustard
1 tbs. lemon juice or vinegar
200-250 ml oil
Salt, pepper to taste
Ingredients must be at the same temperature!
- Put the ingredients in the jug.
- Place hand blender in the bottom of the jug and switch on (turbo speed) until the mixture emulsifies.
- Slowly raise the switched on blender as far as the upper edge of the mixture and lower again until the mayonnaise is ready.
Tip: According to this recipe you can also make mayonnaise with egg yolk only. However, use only half the amount of oil.
Vegetable soup
Tool: Blender foot
300 g potatoes
200 g carrots
1 small stick of celery
2 tomatoes
1 onion
50 g butter
2 I water
Salt, pepper to taste
- Skin and seed the tomatoes.
- Chop up cleaned and washed vegetables and sauté in the hot butter. Add water and salt.
- Leave to cook for a good 20–25 min.
Take the pan off the cooker. Puree the soup in the pan with the blender. Season with salt and pepper.
Crêpes dough
Tool: Blender foot
250 ml of milk
1 egg
100 g flour
25 g melted cooled butter
- Put all ingredients in the jug in the indicated sequence and blend to a smooth dough.
Blended milk drinks
Tool: Blender foot
1 glass of milk, 6 large strawberries or 10 raspberries or 1 banana (sliced). Put the ingredients in the jug and blend. Add sugar to taste. Tip:
For a milk shake add a scoop of ice cream or use very cold milk.
Instructions on disposal
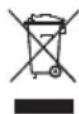
This appliance is identified according to the European guideline 2012/19/EU on waste electrical and electronic equipment - WEEE.
The guideline specifies the framework for an EU-wide valid return and re-use of old appliances.
Please ask your dealer or inquire at your local authority about current means of disposal.
Warranty conditions
The guarantee conditions for this appliance are as defined by our representative in the country in which it is sold.
Details regarding these conditions can be obtained from the dealer from whom the appliance was purchased.
The bill of sale or receipt must be produced when making any claim under the terms of this guarantee.
a) Cutting insert - coarse b) Cutting insert - fine c) Grating insert - medium d) Slicing disc insert - coarse
16 Lid with drive
17 Pusher
Operation
Note!
Cutting insert - fine
The speed control is set to low speed for cutting: cucumber, carrots, beetroot, zucchini.
Medium heat setting
Subject to change.
Salt and pepper to taste
Ingredients must be at the same temperature!
Salt and pepper to taste
1 banana (sliced)
A mixture of meats, hard cheese, onions, aromatic herbs, garlic, fruits, vegetables, nuts, hazelnuts, almonds.
Pay attention to the settings and processing times in the table (figure).

Risk of burns from hot surfaces
Never place your hands near the blades of the general-purpose knife.
Do not touch the blade with bare hands.
When using the blender
Figure D
Read the instructions carefully before using the appliance. Keep it out of reach of children. Do not immerse in food.
Poooox?
Appliances can be used by persons with reduced physical, sensory or mental capabilities or lack of experience and knowledge if they have been given supervision or instruction concerning use of the appliance in a safe way and understand the hazards involved. Children shall not play with the appliance.
Crepe batter
Tools: Blending attachment
250 ml milk
1 egg
100 g flour
Do not operate the hand blender with wet hands and do not run it without load.
Do not immerse the appliance in liquid above the blender shaft's maximum immersion line. Never immerse the motor unit in liquid and do not wash it in a dishwasher.
Be careful when processing hot liquids.
The blades may splash during processing.
Never place the blender shaft on hot surfaces and do not use it to process very hot products.
Hot products must be cooled to 80 °C or lower before blending. When using the hand blender in a pot, keep the pot stable.
Risk of injury from sharp blades/rotating drive!
Before starting any work on the device, make sure it is disconnected from the electrical network.
Never touch the knife or the blender.
Never touch them with your hands. Use the pusher.
Never touch the universal knife. The universal knife can only be taken by the handle.
Be especially careful when working with the inserts! Pay attention to the shape and placement of the insert during insertion into the disc for cutting strips. The disc for cutting strips can only be used with the protective cover for gripping.
Do not insert your hand into the feed opening.
Use only the pusher.
Do not insert your hand into the feed opening.
Short circuit
Please unfold the pages with illustrations.
Illustration A
1 Main unit 2 Power cord 3 Speed regulator of the robot. The speed is adjustable from minimum (●) to maximum (12) number of revolutions (only together with the button). 4 On/off button a Adjustable speed (with speed regulator 3)
b Turbo speed
The blender runs while the on/off button (a or b) is pressed. Turbo speed is used for the universal chopper (if included in the delivery set).
5 Press the blender button to safely press the blender button. 6 Install and secure the blender blade. 7 Blender blades
8 Blender cup
Working in the blender cup allows you to avoid splashes of products.
9 Lid
Install the lid on the blender cup before processing products.
Drainage spout:
10 Spout for draining 11 Stand for the device
Multifunctional device:
12 Bowl 13 Universal blade
14 Disc for attaching inserts 15 Inserts in the disc
a) Insert for chopping - coarse b) Insert for chopping - fine c) Insert for shredding - medium d) Grating insert - coarse
16 Lid with pusher 17 Pusher
Controls
Warning!
The bottom of the container used must be free of bulges or protrusions.
- The blender is intended for household use.
Blender jug
The blender jug is intended for mixing soups, sauces, cocktails, liquid food, boiled fruits and vegetables. For making puree soups.
During operation it is recommended to use the blender jug included in the delivery set. You can also use other suitable containers.
Figure B
- Unwind the power cord completely. Install the blender jug on the main unit and secure it. Insert the plug into the socket. Fill the blender jug with products up to the maximum capacity mark. The blender functions better if the products intended for processing are slightly warm.
Set the required number of revolutions using the speed regulator (Figure B-5).
Whisk attachment
The whisk attachment is intended for whipping eggs, whites, and milk in a jug (hot (max. 70°C) and cold milk (max. 8°C)), as well as for making sauces and desserts.

Danger of burns!
When processing hot milk, use a high container. Hot milk may splash and cause burns.
Figure
Fill the blender jug with products. Install the drive attachment on the main unit and secure it. Insert the whisk attachment into the drive attachment and secure it.
Attention!
Never insert the whisk attachment into the main unit without the drive attachment (Figure A-3).
Set the number of revolutions using the revolutions counter (recommended: high number of revolutions). Turn the main block and blender lid clockwise and press the ON button. - After processing, release the ON button.
Operation:
Unplug from the outlet. Press the release buttons and remove the main block from the drive attachment. Remove the bowl from the drive attachment.
Multi-function attachment
The multi-function attachment is intended for cutting and shredding products.

Danger of injury with sharp blades/rotary drive!
Never insert your hands into the bowl during operation. Use the pusher to prepare ingredients. After switching off, the drive continues to run for a short time. The attachments can only be removed after the drive has stopped. During operation with the multi-function attachment, the main block can only be removed when the locking mechanism is installed and closed.
Warning!
Use the multi-function attachment only when fully assembled.
Caution!
Before use, remove cartilage, bones, and tendons from the meat. The multi-function attachment is not suitable for processing very hard products (e.g., coffee beans, horseradish, nutmeg) and frozen products (e.g., fruits).
Universal
Be especially careful when working with attachments! Pay attention to the shape and position of the attachment when inserting it into the disc for attaching attachments. The disc for attaching attachments can only be held by the appropriate handle. Do not insert your hands into the feed chute. Use only the pusher for preparation.
Caution!
Processing very hard products (e.g., Parmesan cheese, chocolate) with attachments in the disc is not allowed.
The appliance is intended for processing fibrous products (onions, celery, rhubarb).
Figure E
Set the device on a flat and clean work surface. Insert the insert into the disc for attaching inserts. Pay attention to the shape and position of the insert (Figure E-1)! - Disc for attaching inserts: take it by the handle and insert it into the bowl. Place the lid on the bowl and turn it counterclockwise until it stops. Place the main unit on the drive and lock it. Insert the plug into the socket. Set the desired number of revolutions using the speed regulator. Hold the main unit and the multifunctional attachment, then pull out the attachment. - For slicing or shredding products, load them through the feed tube. - Process the products for slicing or shredding with the pusher, without pressing hard.
Attention!
Empty the bowl before the products to be sliced or shredded fill it up to the disc for attaching inserts.
- After processing, pull out the plug.
Cleaning:
Remove the plug from the socket. Press the release buttons and remove the main unit from the drive. Turn the lid clockwise and remove it from the bowl. Take the disc for attaching inserts by the handle and remove it from the bowl. - Turn the disc for attaching inserts over and remove the insert from below (Figure).
Description
Main unit and attachments
Attention!
Never immerse the main unit in liquid and do not wash it in the dishwasher.
Do not use abrasive cleaners! Scratches may appear on the surfaces. Do not use harsh abrasive agents for cleaning.
When processing, e.g., red cabbage or carrots, plastic parts may become discolored; this can be removed with a few drops of cooking oil.
Remove the plug from the socket! - Wipe the main unit with a damp cloth, then dry it. The blender jug can be washed in the dishwasher. The blender jug base can be washed in the dishwasher or under running water with a brush. The blender jug base should be stored upright (with the blades facing up) so that water that has entered the interior can drain.
ybara!
Never immerse the appliance, cord, or plug in water or other liquids.
Wipe the appliance with a damp cloth. - Only wipe the cord with a dry cloth.
Multi-function attachment
ybara!
Never immerse the multi-function attachment in water or wash it in a dishwasher.
Wipe the attachment with a damp cloth or briefly rinse it under running water. - The universal attachment can be used for various inserts and for inserting into the dishwasher. Do not put plastic parts in the dishwasher, as they may deform.
Troubleshooting
Fault Remedy Fault
Correct use during operation.
Protection against overheating.
Unplug the appliance and pull the plug out of the socket. - Let the appliance cool down for about 1 hour to reset the overheating protection. Then plug it in again.
If you cannot remedy the fault, please contact the service department.
Recipes and tips
Hack: blender blade
1 egg (yolk and white)
1 tbsp vinegar
1 tbsp lemon juice or vinegar
200-250 ml oil
salt, pepper to taste
Ingredients must be at room temperature!
Place ingredients into the jar. Lower the blender blade to the bottom of the jar and turn on (turbo mode), until the mixture emulsifies. Lift the blender blade to the top edge of the mixture and lower it again, repeating until the mayonnaise is ready.
Tip: With this recipe you can also make mayonnaise only from yolks. In that case, use only half the amount of oil.
Vegetable soup
Attachment: blender blade 300 g potatoes 200 g carrots 1 small celery root 2 tomatoes 1 onion 50 g butter 2 l water salt, pepper to taste Remove the skin from the tomatoes and remove the seeds.
- Cut the vegetables into small pieces and wash them. Sauté them in hot butter.
- Add water and salt. Cook everything for 20-25 minutes. Remove the pot from the stove. Using the blender, puree the soup in the pot. Season with salt and pepper.
Dough for dumplings
Sauce: Mixer blade
250 ml milk
1 egg
100 g flour
25 g melted cooled butter
Add all ingredients to the bowl in the specified order and mix until a homogeneous dough forms.
Milkshake
Sauce: Mixer blade
1 cup milk
6 egg whites
or
10 almonds or
1 banana (cut into pieces)
Add all ingredients to the bowl and mix with the blender.
- Add sugar to taste.
Iopada:
To prepare the milkshake, take cold milk or take very cold milk.
Recommended use
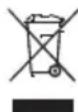
This device is marked in accordance with the European Union Directive 2012/19/EU on waste electrical and electronic equipment (WEEE).
Warranty conditions 140
The manufacturer is not responsible for damages arising from failure to follow the instructions for proper use of the device.
This device is intended for processing food products in quantities typical for household use in domestic or similar conditions and is not designed for commercial use. Use in household conditions includes, for example: use in kitchens for employees of shops, offices, agricultural and other industrial enterprises, as well as use by guests of hotels, small hotels and similar establishments.
Do not immerse the blender attachment with wet hands and do not plug it in when it is empty.
Do not immerse the device in liquid above the place where the blender attachment connects to the main unit. Never immerse the main unit in liquid and do not wash it in a dishwasher.
Never insert the whisk for beating into the main unit without the reducer attachment. Never immerse the reducer attachment in liquid and do not wash it under running water or in a dishwasher.
Never use the immersion blender/blender attachment in multi-functional containers.
The blender cup is not suitable for use in a microwave oven.
The multi-functional container is not suitable for use in a microwave oven.
Never immerse the lid of the multi-functional container in liquid and do not wash it in a dishwasher.
It is recommended not to leave the appliance switched on longer than necessary for processing food.

Understanding the symbols on the appliance and accessories

Caution! Rotating blades.
Do not put your hand into the filling opening.
Complete overview
Please open the pages with illustrations.
Illustration A
1 Main unit 2 Power cord 3 Speed control Working speed is set continuously from the lowest (●) to the highest (12) speed (only together with the switch).
4 On/off switch
a Variable speed (with speed control) b Turbo speed
The motor remains switched on until the switch (a or b) is pressed.
Turbo speed is used for universal chopping (if included in the delivery).
5 Unlock buttons
Do not touch the blades with bare hands.
For cleaning, use a brush.
- Place the mixing bowl on a flat, clean work surface. Insert the universal blade. Load the ingredients.
Warning!
The universal blade must be positioned exactly in the center of the mixing bowl so that the lid closes correctly (Figure -3).
- Place the lid on the mixing bowl base and turn it counterclockwise until it stops.
If the mixing bowl already contains a large quantity of ingredients, placing the lid may be somewhat difficult. If necessary, turn the three-pronged insert from the underside of the lid into the correct position.
- Install the main unit onto the drive shaft and lock it.
Insert the pusher. Insert the plug into the socket. Firmly hold the main unit and the universal blade, and switch on the appliance (Turbo speed). - To add ingredients, release the switch. Wait until the blade stops. - Remove the pusher and load ingredients through the feed tube. - After processing, release the switch.
After use:
- Remove the plug from the socket. Press the release button and remove the main unit from the drive shaft.
- Turn the lid clockwise and remove it from the mixing bowl.
- Take the universal blade by its plastic handle and remove it.
Set the speed control to high speed for chopping: onions, carrots, cheese, white cabbage.
Set the speed control to high speed for pureeing: potatoes for puree, potato pancakes; raw fruits and vegetables for salads.
It is essential to observe the maximum quantity and processing time indicated in the table (Figure).

Danger of injury with sharp knives!
It is necessary to observe special caution when handling inserts! Pay attention to the shape and position of the insert when installing it in the disc for securing inserts. The disc for securing inserts can only be held by the recesses provided for gripping. Do not put your hand into the feed opening. When pushing, use only the pusher.
Caution!
Processing very hard products (Parmesan cheese, chocolate) with inserts in the disc is not allowed.
Inserts in the disc are only conditionally suitable for processing fibrous products (leeks, celery, rhubarb).
Figure A
- Place the mixing bowl on a flat and clean work surface. Insert the desired insert into the disc for securing inserts. Pay attention to the shape and position of the insert (Figure E-1)! Take the disc for securing inserts by the recesses for gripping and insert it into the mixing bowl.
- Place the lid on the mixing bowl and turn it counterclockwise until it stops.
- Place the main unit on the attachment and secure it. Insert the plug into the socket.
- Set the desired number of revolutions using the speed regulator.
- Hold the main unit with multifunctional accessories and switch on the appliance. Load the products for slicing or chopping through the feed opening.
- Slightly push the products for slicing or chopping with the pusher.
Attention!
The mixing bowl should be emptied before it is filled to such an extent that the sliced or chopped products start to come out over the disc for securing inserts.
- After processing, release the switch button.
Operating instructions:
- Unplug the appliance from the outlet. Press the release buttons and remove the main unit with the attachment.
- Turn the lid counterclockwise and remove it from the mixing cup. Take the insert disc by the tabs for gripping and pull it out of the mixing cup.
- Turn the insert disc over and carefully push the insert out from the bottom side (Figure F).
Cleaning
Main unit with attachment
Attention!
Never immerse the main unit in liquids and do not wash it in a dishwasher.
Do not use a steam cleaner! The surfaces of the appliance may be damaged. Do not use abrasive cleaning agents.
If discoloration occurs, e.g., from carrot juice on plastic parts, it can be removed with a few drops of cooking oil. - Unplug the appliance from the outlet! - Wipe the main unit with a damp cloth, then dry it. - The blender jar can be washed in a dishwasher. Wash the blender base in a dishwasher or with a brush under running water. Place the blender base to dry in an upright position (with the opening facing up) so that water inside can drain out.
Whisk attachment
Attention!
Never immerse the reducer attachment in liquids and do not wash it under running water or in a dishwasher.
The whisk for whipping can be washed in a dishwasher. - The reducer attachment should only be wiped with a damp cloth.
Multifunctional accessories
Attention!
Do not damage the lid of the multi-functional attachments. Do not wash in the dishwasher.
The lid should be wiped with a damp cloth or briefly rinsed under running water. Dishwasher detergent, universal cleaner, and descaling agents can be used in the dishwasher. Do not place mass-produced parts in the dishwasher between dishes, as they may deform.
Help with troubleshooting
Fault
Remedy
The appliance switches off during use.
Overload protection has been activated.
Switch the appliance off and unplug it. To reset the overload protection, let the appliance cool down for about 1 hour. Then switch the appliance on again.
If the fault cannot be remedied, please contact the service department.
Recipes recommended by us
Attachment: Blender blade
1 egg (yolk and white)
1 tbsp mustard
1 tbsp lemon juice or vinegar
200-250 ml vegetable oil, salt and pepper to taste
Ingredients must be at the same temperature!
Load ingredients into the beaker. - Install the immersion blender at the bottom of the beaker, turn it on (turbo speed) and do not lift it until the mixture is emulsified. Slowly raise the running blender to the surface of the mixture and lower it again until the mayonnaise is ready.
Recommendation: For this recipe, you can also make mayonnaise only from egg yolks. In this case, use only half of the indicated amount of vegetable oil.
Vegetable soup
Recipe: Blender blade 300 g potatoes 200 g carrots 1 small piece of celery 2 tomatoes 1 onion 50 g butter 2 cups
salt, pepper to taste
Peel the tomatoes and remove the seeds. Cut the peeled and washed vegetables into small pieces and simmer in melted butter. - Add water and salt. Boil everything for 20-25 minutes. Remove the pan from the heat. Using the blender, puree the soup in the pan. - Add salt and pepper to taste.
Pancake batter
Recipe: Blender blade
250 ml milk
1 egg
100 g flour
25 g melted, cooled butter
Load all ingredients in the specified order into the beaker. Beat them with the blender until a homogeneous batter is formed.
Milkshake cocktail
Recipe: blender
1 glass of milk, 6 large strawberries, 10 mint leaves or 1 banana (cut into slices). Load the ingredients into a glass and blend using the blender. - Add sugar to taste.
Recommendation:
To prepare a milkshake, add sugar and ice cream. Use very cold milk.
Disposal instructions
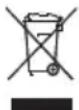
This machine is marked in accordance with the requirements of the European Union Directive 2012/19/EU regarding waste electrical and electronic equipment (WEEE).
This directive provides the rules for the collection and disposal of end-of-life appliances, applicable within the European Union.
You can obtain information on proper disposal from your dealer or local authorities in your area of residence.
Warranty conditions
This appliance is covered by the warranty conditions defined by our representative in the country where the appliance was purchased. You can obtain information about the warranty conditions at any time from your specialized store where you purchased the appliance, or by contacting our representative directly in the corresponding country. The warranty conditions for Germany and addresses can be found on the last pages of the manual.
In addition, the warranty conditions are also stated on the specified website. In any case, to obtain warranty service, it is necessary to present a document confirming the purchase.
We reserve the right to make changes.


Addresses of service centers on the territory of Russia for the maintenance of household appliances http://www.bosch-bt.ru
| AKAHAKH, HU KABIKAN, POMOCEK, 55016, D. Harapohu np. 12, 36, 19, (3902) 28-85-44 |
| ALMEMBETBCK, OOO Amellembo, Cerebrec, 52370, D. Harapohu np. 12, 36, 19, (3902) 28-85-44 |
| AMRHEK, OOO Amellembo, Cerebrec, 52370, D. Harapohu np. 12, 36, 19, (3902) 28-85-44 |
| AMRHEK, OOO Amellembo, Cerebrec, 52370, D. Harapohu np. 12, 36, 20-31 |
| AMRHEK, OOO Amellembo, Cerebrec, 52370, D. Harapohu np. 12, 36, 21-23 |
| AMRHEK, OOO Amellembo, Cerebrec, 52370, D. Harapohu np. 12, 36, 22-23 |
| AMRHEK, OOO Amellembo, Cerebrec, 52370, D. Harapohu np. 12, 36, 23-24 |
| AMRHEK, OOO Amellembo, Cerebrec, 52370, D. Harapohu np. 12, 36, 24-25 |
| AMRHEK, OOO Amellembo, Cerebrec, 52370, D. Harapohu np. 12, 36, 26-27 |
| AMRHEK, OOO Amellembo, Cerebrec, 52370, D. Harapohu np. 12, 36, 28-29 |
| AMRHEK, OOO Amellembo, Cerebrec, 52370, D. Harapohu np. 12, 36, 30-40 |
| AMRHEK, OOO Amellembo, Cerebrec, 52370, D. Harapohu np. 12, 36, 31-32 |
| AMRHEK, OOO Amellembo, Cerebrec, 52370, D. Harapohu np. 12, 36, 32-34 |
| AMRHEK, OOO Amellembo, Cerebrec, 52370, D. Harapohu np. 12, 36, 35-36 |
| AMRHEK, OOO Amellembo, Cerebrec, 52370, D. Harapohu np. 12, 36, 37-38 |
| AMRHEK, OOO Amellembo, Cerebrec, 52370, D. Harapohu np. 12, 36, 39-40 |
| AMRHEK, OOO Amellembo, Cerebrec, 52370, D. Harapohu np. 12, 36, 40-42 |
| AMRHEK, OOO Amellembo, Cerebrec, 52370, D. Harapohu np. 12, 36, 42-44 |
| AMRHEK, OOO Amellembo, Cerebrec, 52370, D. Harapohu np. 12, 36, 44-46 |
| AMRHEK, OOO Amellembo, Cerebrec, 52370, D. Harapohu np. 12, 36, 46-48 |
| AMRHEK, OOO Amellembo, Cerebrec, 52370, D. Harapohu np. 12, 36, 48-49 |
| AMRHEK, OOO Amellembo, Cerebrec, 52370, D. Harapohu np. 12, 36, 48-50 |
| AMRHEK, OOO Amellembo, Cerebrec, 52370, D. Harapohu np. 12, 36, 48-51 |
| AMRHEK, OOO Amellembo, Cerebrec, 52370, D. Harapohu np. 12, 36, 48-52 |
| AMRHEK, OOO Amellembo, Cerebrec, 52370, D. Harapohu np. 12, 36, 48-53 |
| AMRHEK, OOO Amellembo, Cerebrec, 52370, D. Harapohu np. 12, 36, 48-54 |
| AMRHEK, OOO Amellembo, Cerebrec, 52370, D. Harapohu np. 12, 36, 48-55 |
| AMRHEK, OOO Amellembo, Cerebrec, 52370, D. Harapohu np. 12, 36, 48-56 |
| AMRHEK, OOO Amellembo, Cerebrec, 52370, D. Harapohu np. 12, 36, 48-57 |
| AMRHEK, OOO Amellembo, Cerebrec, 52370, D. Harapohu np. 12, 36, 48-58 |
| AMRHEK, OOO Amellembo, Cerebrec, 52370, D. Harapohu np. 12, 36, 48-60 |
| AMRHEK, OOO Amellembo, Cerebrec, 52370, D. Harapohu np. 12, 36, 48-61 |
| AMRHEK, OOO Amellembo, Cerebrec, 52370, D. Harapohu np. 12, 36, 48-62 |
| AMRHEK, OOO Amellembo, Cerebrec, 52370, D. Harapohu np. 12, 36, 48-63 |
| AMRHEK, OOO Amellembo, Cerebrec, 52370, D. Harapohu np. 12, 36, 48-64 |
| AMRHEK, OOO Amellembo, Cerebrec, 52370, D. Harapohu np. 12, 36, 48-65 |
| AMRHEK, OOO Amellembo, Cerebrec, 52370, D. Harapohu np. 12, 36, 48-66 |
| AMRHEK, OOO Amellembo, Cerebrec, 52370, D. Harapohu np. 12, 36, 48-67 |
| AMRHEK, OOO Amellembo, Cerebrec, 52370, D. Harapohu np. 12, 36, 48-68 |
| AMRHEK, OOO Amellembo, Cerebrec, 52370, D. Harapohu np. 12, 36, 48-69 |
| AMRHEK, OOO Amellembo, Cerebrec, 52370, D. Harapohu np. 12, 36, 48-70 |
| AMRHEK, OOO Amellembo, Cerebrec, 52370, D. Harapohu np. 12, 36, 48-71 |
| AMRHEK, OOO Amellembo, Cerebrec, 52370, D. Harapohu np. 12, 36, 48-72 |
| AMRHEK, OOO Amellembo, Cerebrec, 52370, D. Harapohu np. 12, 36, 48-73 |
| AMRHEK, OOO Amellembo, Cerebrec, 52370, D. Harapohu np. 12, 36, 48-74 |
| AMRHEK, OOO Amellembo, Cerebrec, 52370, D. Harapohu np. 12, 36, 48-75 |
| AMRHEK, OOO Amellembo, Cerebrec, 52370, D. Harapohu np. 12, 36, 48-76 |
| AMRHEK, OOO Amellembo, Cerebrec, 52370, D. Harapohu np. 12, 36, 48-77 |
| AMRHEK, OOO Amellembo, Cerebrec, 52370, D. Harapohu np. 12, 36, 48-78 |
| AMRHEK, OOO Amellembo, Cerebrec, 52370, D. Harapohu np. 12, 36, 48-80 |
| AMRHEK, OOO Amellembo, Cerebrec, 52370, D. Harapohu np. 12, 36, 48-81 |
| AMRHEK, OOO Amellembo, Cerebrec, 52370, D. Harapohu np. 12, 36, 48-82 |
| AMRHEK, OOO Amellembo, Cerebrec, 52370, D. Harapohu np. 12, 36, 48-83 |
| AMRHEK, OOO Amellembo, Cerebrec, 52370, D. Harapohu np. 12, 36, 48-84 |
| AMRHEK, OOO Amellembo, Cerebrec, 52370, D. Harapohu np. 12, 36, 48-85 |
| AMRHEK, OOO Amellembo, Cerebrec, 52370, D. Harapohu np. 12, 36, 48-86 |
| AMRHEK, OOO Amellembo, Cerebrec, 52370, D. Harapohu np. 12, 36, 48-87 |
| AMRHEK, OOO Amellembo, Cerebrec, 52370, D. Harapohu np. 12, 36, 48-88 |
| AMRHEK, OOO Amellembo, Cerebrec, 52370, D. Harapohu np. 12, 36, 48-89 |
| AMRHEK, OOO Amellembo, Cerebrec, 52370, D. Harapohu np. 12, 36, 49 |
| AMRHEK, OOO Amellembo, Cerebrec, 52370, D. Harapohu np. 12, 36, 50 |
| AMRHEK, OOO Amellembo, Cerebrec, 52370, D. Harapohu np. 12, 36, 51 |
| AMRHEK, OOO Amellembo, Cerebrec, 52370, D. Harapohu np. 12, 36, 52 |
| AMRHEK, OOO Amellembo, Cerebrec, 52370, D. Harapohu np. 12, 36, 53 |
| AMRHEK, OOO Amellembo, Cerebrec, 52370, D. Harapohu np. 12, 36, 54 |
| AMRHEK, OOO Amellembo, Cerebrec, 52370, D. Harapohu np. 12, 36, 55 |
| AMRHEK, OOO Amellembo, Cerebrec, 52370, D. Harapohu np. 12, 36, 56 |
| AMRHEK, OOO Amellembo, Cerebrec, 52370, D. Harapohu np. 12, 36, 57 |
| AMRHEK, OOO Amellembo, Cerebrec, 52370, D. Harapohu np. 12, 36, 58 |
| AMRHEK, OOO Amellembo, Cerebrec, 52370, D. Harapohu np. 12, 36, 59 |
| AMRHEK, OOO Amellembo, Cerebrec, 52370, D. Harapohu np. 12, 36, 60 |
| AMRHEK, OOO Amellembo, Cerebrec, 52370, D. Harapohu np. 12, 36, 61 |
| AMRHEK, OOO Amellembo, Cerebrec, 52370, D. Harapohu np. 12, 36, 62 |
| AMRHEK, OOO Amellembo, Cerebrec, 52370, D. Harapohu np. 12, 36, 63 |
| AMRHEK, OOO Amellembo, Cerebrec, 52370, D. Harapohu np. 12, 36, 64 |
| AMRHEK, OOO Amellembo, Cerebrec, 52370, D. Harapohu np. 12, 36, 65 |
| AMRHEK, OOO Amellembo, Cerebrec, 52370, D. Harapohu np. 12, 36, 66 |
| AMRHEK, OOO Amellembo, Cerebrec, 52370, D. Harapohu np. 12, 36, 67 |
| AMRHEK, OOO Amellembo, Cerebrec, 52370, D. Harapohu np. 12, 36, 68 |
| AMRHEK, OOO Amellembo, Cerebrec, 52370, D. Harapohu np. 12, 36, 69 |
| AMRHEK, OOO Amellembo, Cerebrec, 52370, D. Harapohu np. 12, 36, 70 |
| AMRHEK, OOO Amellembo, Cerebrec, 52370, D. Harapohu np. 12, 36, 60 |
| AMRHEK, OOO Amellembo, Cerebrec, 52370, D. Harapohu np. 12, 36, 61 |
| AMRHEK OOO Amellembo, Cerebrec, 52370, D. Harapohu np. 12, 36, 62 |
| AMRHEK OOO Amellembo, Cerebrec, 52370, D. Harapohu np. 12, 36 |
| AMRHEK OOO Amellembo, Cerebrec, 52370, D. Harapohu np. 12, 36 |
| AMRHEK OOO Amellembo, Cerebrec, 52370, D. Harapohu np. 12, 36 |
| AMRHEK OOO Amellembo, Cereb rec, 52370, D. Harapohu np. 12, 36 |
| AMRHEK OOO Amellembo, Cerebrec, 52370, D. Harapohu np. 12, 36 |
| AMRHEK OOO Amellembo, Cerebrec, 52370, D. Harapohu np. 20 |
| AMRHEK OOO Amellembo, Cerebrec, 52370, D. Harapohu np. 12 |
| AMRHEK OOO Amellembo, Cerebrec, 52370, D. Harapohu np. 12 |
| AMRHEK OOO Amellembo, Cerebrec, 52370, D. Harapohu np. 12 |
| AMRHEK OOO Amellembo, Cerebrec, 52370, D. Harapohu np. 12 |
| AMRHEK OOO Amellembo, Cerebrec, 52370, D. Harapohu np. 12 |
| AMRHEK OOO Amellembo, Cerebrec, 52370, D. Harapohu np. 12 |
| AMRHEK OOO Amellembo, CERec, 52370 |
| AMRHEK OOO Amellembo, CERec, 52370 |
| AMRHEK OOO Amellembo, CERec, 52370 |
| AMRHEK OOO Amellembo, CERec, 52370 |
| AMRHEK OOO Amellembo, CERec, 52370 |
| AMELIAKHEK, OOO Amellembo, CERec, 52370 |
| AMELIAKHEK, OOO Amellembo, CERec, 52370 |
| AMELIAKHEK, OOO Amellembo, CERec, 52370 |
| AMELIAKHEK, OOO Amellembo, CERec, 52370 |
Information about household appliances manufactured under the control of the Bosch concern in accordance with the requirements of the legislation on technical regulation and the legislation on the protection of consumer rights of the Russian Federation
Products: juicers, mixers, blenders, electric knives, coffee machines, coffee grinders
Trademark: Bosch
ATTENTION! The product range is constantly updated. Products undergo mandatory certification procedures in accordance with current legislation. Information on current certificates of conformity, product range, and actual assortment can be obtained from LLC "Vse Bytovaya Tekhnika", address: Moscow, 119071, st. Malaya Kaluzhskaya 19, bldg. 1, phone (495) 737-2777, fax (495) 737-2798. Confirmation of product conformity by the certification body "Rostest-Moscow", accreditation certificate ROS RU.0001.10.AA46, address: Moscow, 117418, Nakhimovsky Prospekt 31, phone (499) 129-2600. For products sold during the validity period of the conformity certificate, this certificate remains valid for their supply, sale, and use (application) during the service life established in accordance with Article 18 of the RF Law on Consumer Rights Protection.
The operational documentation provided by the manufacturer for the products may include this information, instructions (manual) for operation, and information on warranty and service conditions.
Product marking is carried out by the manufacturer on a type plate, on the packaging, or directly on the product packaging, and can also be done by other methods that ensure clear and visual presentation of information about the product at points of sale.


Products whose compliance with mandatory requirements is confirmed by Russian certificates in the GOST R system, or by unified documents of the Customs Union, are marked with the conformity mark.
Products that have passed the conformity assessment procedure in accordance with the requirements of the technical regulations of the Customs Union are marked with a unified mark of circulation of products on the market of the member states of the Customs Union.
Operational documentation for products is provided in Russian. Operational documentation in the state language of a member state of the Customs Union, other than Russian, can be obtained free of charge from the trade organization - resident of the corresponding member state of the Customs Union, if available and in accordance with legal requirements.
Information about the product range presented in this section can be requested by phone at the toll-free hotline (800) 200-2961, and is also available on the manufacturer's website www.bosch-bt.ru.
| Мо德尔 | Альбашений ТIN | Сергшкоatingо НOMeр ДaБыдч Дe�STВЕТdo | Сtrпа- нз�овить | ||
| Рergштоюн HOMeр ДaБыдч Дe�STВeTdo | |||||
| Соковский | |||||
| MCP3000 CNZP3 | C-DE.Aя46.B.001025 12 | 11.12 11.11.17 Слобеня | |||
| MES20A0 | CNCJ03 | C-DE.Aя46.B.00372 | 24.01.12 | 23.01.17 | Китай |
| MES20C0 | CNCJ03 | C-DE.Aя46.B.00372 | 24.01.12 | 23.01.17 | Китай |
| MES20G0 | CNCJ03 | C-DE.Aя46.B.00372 | 24.01.12 | 23.01.17 | Китай |
| MES3000 CNCJ03 | C-DE.Aя46.B.00372 | 24.01.12 23.01.17 | Китай | ||
| Эльстореги | |||||
| MAS4201N | CNAS11ST1 | C-DE.Aя46.B.00290 | 22.12.11 | 21.12.16 | Турая |
| MAS4601N | CNAS11EV1 | C-DE.Aя46.B.00290 | 22.12.11 | 21.12.16 | Турая |
| MAS6200N | CNAS12 | C-DE.Aя46.B.00290 | 22.12.11 | 21.12.16 | Турая |
| MAS9101N | AS9ST | C-DE.Aя46.B.00391 | 06.02.12 | 05.02.17 | Турая |
| Минсеры, блидеры | |||||
| MFQ3010 | CNHR19 | C-DE.Aя46.B.00378 | 27.01.12 | 26.01.17 | Слобеня |
| MFQ3020 | CNHR19 | C-DE.Aя46.B.00378 | 27.01.12 | 26.01.17 | Слобеня |
| MFQ3520 | CNHR17 | C-DE.Aя46.B.00378 | 27.01.12 | 26.01.17 | Слобеня |
| MFQ3532 | CNHR18 | C-DE.Aя46.B.00378 | 27.01.12 | 26.01.17 | Слобеня |
| MFQ3533 | CNHR18 | C-DE.Aя46.B.00378 | 27.01.12 | 26.01.17 | Слобеня |
| MFQ3540 | CNHR18 | C-DE.Aя46.B.00378 | 27.01.12 | 26.01.17 | Слобеня |
| MFQ3550 | CNHR18 | C-DE.Aя46.B.00378 | 27.01.12 | 26.01.17 | Слобеня |
| MFQ3555 | CNHR18 | C-DE.Aя46.B.00378 | 27.01.12 | 26.01.17 | Слобеня |
| MFQ3560 | CNHR18 | C-DE.Aя46.B.00378 | 27.01.12 | 26.01.17 | Слобеня |
| MFQ3580 | CNHR18 | C-DE.Aя46.B.00378 | 27.01.12 | 26.01.17 | Слобеня |
| MFQ4020 | CNHR22 | C-DE.Aя46.B.00378 | 27.01.12 | 26.01.17 | Слобеня |
| MFQ4070 | CNHR22 | C-DE.Aя46.B.00378 | 27.01.12 | 26.01.17 | Слобеня |
| MFQ4080 | CNHR22 | C-DE.Aя46.B.00378 | 27.01.12 | 26.01.17 | Слобеня |
| MMB1001 | CNSM03ST | DE.Aя46.B03924 | 29.11.11 | 28.11.14 | Турая |
| MMB2001 | CNSM03EV | DE.Aя46.B03924 | 29.11.11 | 28.11.14 | Турая |
| MMR0801 | CNCM13ST1 | DE.Aя46.B03893 | 23.11.11 | 22.11.14 | Слобеня |
| MMR08A1 | CNCM13ST1 | DE.Aя46.B03893 | 23.11.11 | 22.11.14 | Слобеня |
| Модь | АлобагонныйTNП | Сергфikат сointbetctbng | Стравая-нзготовпь | |||
| Релострацонный homopр | Да та вдачи | Дeйстуч | До | |||
| Минсеры,бlenдеры | ||||||
| MMR1501 CNCM18ST2 DE.A46.B03893 | 23.11.11 22.11.14 Clogobenvia | |||||
| MMR15A1 CNCM18ST2 DE.A46.B03893 | 23.11.11 22.11.14 Clogobenvia | |||||
| MSM6150 CNHR8 | C-DE.A46.B.00377 26 | 01.12 25.01.17 Clogobenvia | ||||
| MSM6250 CNHR8 | C-DE.A46.B.00377 26 | 01.12 25.01.17 Clogobenvia | ||||
| MSM6252 CNHR8 | C-DE.A46.B.00377 26 | 01.12 25.01.17 Clogobenvia | ||||
| MSM6253 CNHR8 | C-DE.A46.B.00377 26 | 01.12 25.01.17 Clogobenvia | ||||
| MSM6260 CNHR8 | C-DE.A46.B.00377 26 | 01.12 25.01.17 Clogobenvia | ||||
| MSM6270 CNHR8 | C-DE.A46.B.00377 26 | 01.12 25.01.17 Clogobenvia | ||||
| MSM6280 CNHR8 | C-DE.A46.B.00377 26 | 01.12 25.01.17 Clogobenvia | ||||
| MSM6300 CNHR8 | C-DE.A46.B.00377 26 | 01.12 25.01.17 Clogobenvia | ||||
| MSM6600 CNHR8 | C-DE.A46.B.00377 26 | 01.12 25.01.17 Clogobenvia | ||||
| MSM66050RU CNHR25 | C-DE.A46.B.00552 | 12.05.12 11.05.17 Clogobenvia | ||||
| MSM66130 CNHR25 | C-DE.A46.B.00552 | 12.05.12 11.05.17 Clogobenvia | ||||
| MSM66150RU CNHR25 | C-DE.A46.B.00552 | 12.05.12 11.05.17 Clogobenvia | ||||
| MSM6700 CNHR8 | C-DE.A46.B.00377 | 26.01.12 25.01.17 Clogobenvia | ||||
| MSM67140RU CNHR25 | C-DE.A46.B.00552 | 12.05.12 11.05.17 Clogobenvia | ||||
| MSM67160RU CNHR25 | C-DE.A46.B.00552 | 12.05.12 11.05.17 Clogobenvia | ||||
| MSM67170 CNHR26 | C-DE.A46.B.00552 | 12.05.12 11.05.17 Clogobenvia | ||||
| MSM67PE CNHR13 | C-DE.A46.B.00377 | 26.01.12 25.01.17 Clogobenvia | ||||
| MSM67SPORT CNHR26 | C-DE.A46.B.00552 | 12.05.12 11.05.17 Clogobenvia | ||||
| MSM6A50 CNHR10 | C-DE.A46.B.00377 | 26.01.12 25.01.17 Clogobenvia | ||||
| MSM6B100 CNHR1 | C-DE.A46.B.00377 | 26.01.12 25.01.17 Clogobenvia | ||||
| MSM6B150 CNHR1 | C-DE.A46.B.00377 | 26.01.12 25.01.17 Clogobenvia | ||||
| MSM6B250 CNHR1 | C-DE.A46.B.00377 | 26.01.12 25.01.17 Clogobenvia | ||||
| MSM6B300 CNHR1 | C-DE.A46.B.00377 | 26.01.12 25.01.17 Clogobenvia | ||||
| MSM6B500 CNHR1 | C-DE.A46.B.00377 | 26.01.12 25.01.17 Clogobenvia | ||||
| MSM6B700 CNHR1 | C-DE.A46.B.00377 | 26.01.12 25.01.17 Clogobenvia | ||||
| MSM7400 CNHR21 | C-DE.A46.B.00377 | 26.01.12 25.01.17 Clogobenvia | ||||
| MSM7500 CNHR20 | C-DE.A46.B.00377 | 26.01.12 25.01.17 Clogobenvia | ||||
| MSM76PRO CNHR21 | C-DE.A46.B.00377 | 26.01.12 25.01.17 Clogobenvia | ||||
| MSM7700 CNHR21 | C-DE.A46.B.00377 | 26.01.12 25.01.17 Clogobenvia | ||||
| MSM7800 CNHR23 | C-DE.A46.B.00377 | 26.01.17 25.01.17 Clogobenvia | ||||
| Кухонные komбайны | ||||||
| MCM2050 CNCM18ST C-DE.A46.B.00718 | 27.06.12 26.06.17 Clogobenvia | |||||
| MCM2054 CNCM18ST C-DE.A46.B.00718 | 27.06.12 26.06.17 Clogobenvia | |||||
| MCM2150 CNCM18ST C-DE.A46.B.00718 | 27.06.12 26.06.17 Clogobenvia | |||||
| MCM4000 CNCM20 | C-DE.A46.B.00718 | 27.06.12 26.06.17 Clogobenvia | ||||
| MCM4100 CNCM20 | C-DE.A46.B.00718 | 27.06.12 26.06.17 Clogobenvia | ||||
| MCM4200 CNCM20 | C-DE.A46.B.00718 | 27.06.12 26.06.17 Clogobenvia | ||||
| MCM5514 CNCM56 | DE.A46.B09372 | 27.10.10 26.10.13 Clogobenvia | ||||
| MCM5525 CNCM56 | DE.A46.B09372 | 27.10.10 26.10.13 Clogobenvia | ||||
| MCM5529RU | CNCM56 | DE.A46.B09372 | 27.10.10 26.10.13 Clogobenvia | |||
| MCM5530 CNCM57 | DE.A46.B09372 | 27.10.10 26.10.13 Clogobenvia | ||||
| MCM5540 CNCM57 | DE.A46.B09372 | 27.10.10 26.10.13 Clogobenvia | ||||
| MCM62020 CNCM30 | C-DE.A46.B.00808 | 02.08.12 01.08.17 Clogobenvia | ||||
| MCM64051 CNCM30 | C-DE.A46.B.00808 | 02.08.12 01.08.17 Clogobenvia | ||||
| MCM68840 CNCM30 | C-DE.A46.B.00808 | 02.08.12 01.08.17 Clogobenvia | ||||
| MCM68885 CNCM30 | C-DE.A46.B.00808 | 02.08.12 01.08.17 Clogobenvia | ||||
| MUM4406 | CNUM5ST DE.A46.B09372 | 27.10.10 26.10.13 Clogobenvia | ||||
| MUM4855 | CNUM5ST DE.A46.B09372 | 27.10.10 26.10.13 Clogobenvia | ||||
| MUM4856EU | CNUM5ST DE.A46.B09372 | 27.10.10 26.10.13 Clogobenvia | ||||
| MUM52131 CNUM50 | DE.A46.B09372 | 27.10.10 26.10.13 Clogobenvia | ||||
| MUM54240 CNUM51 | DE.A46.B09372 | 27.10.10 26.10.13 Clogobenvia | ||||
| MUM54251 CNUM51 | DE.A46.B09372 | 27.10.10 26.10.13 Clogobenvia | ||||
| MUM56340 CNUM51 | DE.A46.B09372 | 27.10.10 26.10.13 Clogobenvia | ||||
| MUM8400 CNCM1ST1 | C-DE.A46.B.00718 | 27.06.12 26.06.17 Clogobenvia | ||||
| MUM84MP1 CNCM1ST1 | C-DE.A46.B.00718 | 27.06.12 26.06.17 Clogobenvia | ||||
| MUM86R1 | CNCM11ST1 | C-DE.A46.B.00718 | 27.06 | 12 26.06.17 Clogobenvia | ||
| Коремоли | ||||||
| MKM6000 | KM13 | C-DE.A46.B.00733 03.07 | 12 02.07.17 Clogobenvia | |||
| MKM6003 | KM13 | C-DE.A46.B.00733 03.07 | 12 02.07.17 Clogobenvia | |||
a.
:
a#i aLio! i:Sc (U) 1bI bI Jgau
1.12 15
J 1
Therefore, a < 1 or a > 1
4g81Lao:UaJiaoJg31120
aJILgSJIggsyL2012/19/EG
a < lg a < |a - lg a| < 1 lg 1

(waste electrical and electronic equipment - WEEE)
jg21eJyjwylgllllUaIcLgLilloo
S3-21 sIJI J5 gIgIoloi 0o oIaW81g aSIgIWI
aL aaleil cLogell Jgaa 5
aie 1gimll ojgs81 no yalsill aJlLw81
aaii aia jgaiaaiaii auii i
(a) ( a - 1) ( b2 + 1) > 0
| JL |
| JL |
| JL |
| JL |
| JL |
| JL |
| JL |
| JL |
| JL |
| JL |
| JL |
| JL |
| JL |
| JL |
| JL |
| JL |
| JL |
| JL |
| JL |
| JL |
| J L |
| J L |
| J L |
| J L |
| J L |
| J L |
| J L |
| J L |
| J L |
| J L |
| J L |
| J L |
| J L |
| J L |
| J L |
| J L |
| J L |
| J L |
| J L |
| J L |
| JL |
| J L |
| J L |
| J L |
| J L |
| J L |
| J L |
| J L |
| J L |
| J L |
| J L |
| J L |
| J L |
| J L |
| J L |
| J L |
| J L |
| J L |
| J L |
| JL |
| JL |
| J L |
| J L |
| J L |
| J L |
| J L |
| J L |
| J L |
| J L |
| J L |
| J L |
| J L |
| J L |
| J L |
| J L |
| J L |
| J L |
| J L |
| JL |
| J L |
| JL |
| J L |
| J L |
| J L |
| J L |
| J L |
| J L |
| J L |
| J L |
| J L |
| J L |
| J L |
| J L |
| J L |
| J L |
| J L |
| J L |
| J L |
| JL |
| JL |
| JL |
| J L |
| J L |
| J L |
| J L |
| J L |
| J L |
| J L |
| J L |
| J L |
| J L |
| J L |
| J L |
| J L |
| J L |
| J L |
| J L |
| JL |
| J L |
| J L |
| JL |
| J L |
| J L |
| J L |
| J L |
| J L |
| J L |
| J L |
| J L |
| J L |
| J L |
| J L |
| J L |
| J L |
| J L |
| J L |
| J L |
| JL |
| J L |
| JL |
| JL |
| J L |
| J L |
| J L |
| J L |
| J L |
| J L |
| J L |
| J L |
| J L |
| J L |
| J L |
| J L |
| J L |
| J L |
| J L |
| J L |
| JL |
| JL |
| J L |
| JL |
| J L |
| J L |
| J L |
| J L |
| J L |
| J L |
| J L |
| J L |
| J L |
| J L |
| J L |
| J L |
| J L |
| J L |
| J L |
| J L |
| JL |
| JL |
| JL |
| JL |
| J L |
| J L |
| J L |
| J L |
| J L |
| J L |
| J L |
| J L |
| J L |
| J L |
| J L |
| J L |
| J L |
| J L |
| J L |
| JL |
| J L |
| J L |
| J L |
| JL |
| J L |
| J L |
| J L |
| J L |
| J L |
| J L |
| J L |
| J L |
| J L |
| J L |
| J L |
| J L |
| J L |
| J L |
| J L |
| JL |
| J L |
| J L |
| JL |
| JL |
| J L |
| J L |
| J L |
| J L |
| J L |
| J L |
| J L |
| J L |
| J L |
| J L |
| J L |
| J L |
| J L |
| J L |
| J L |
| JL |
| J L |
| JL |
| J L |
| JL |
| J L |
| J L |
| J L |
| J L |
| J L |
| J L |
| J L |
| J L |
| J L |
| J L |
| J L |
| J L |
| J L |
| J L |
| J L |
| JL |
| J L |
| JL |
| JL |
| JL |
| J L |
| J L |
| J L |
| J L |
| J L |
| J L |
| J L |
| J L |
| J L |
| J L |
| J L |
| J L |
| J L |
| J L |
| J L |
| JL |
| JL |
| J L |
| J L |
| JL |
| J L |
| J L |
| J L |
| J L |
| J L |
| J L |
| J L |
| J L |
| J L |
| J L |
| J L |
| J L |
| J L |
| J L |
| J L |
| JL |
| JL |
| J L |
| JL |
| JL |
| J L |
| J L |
| J L |
| J L |
| J L |
| J L |
| J L |
| J L |
| J L |
| J L |
| J L |
| J L |
| J L |
| J L |
| J L |
| JL |
| JL |
| JL |
| J L |
| JL |
| J L |
| J L |
| J L |
| J L |
| J L |
| J L |
| J L |
| J L |
| J L |
| J L |
| J L |
| J L |
| J L |
| J L |
| J L |
| JL |
| JL |
| JL |
| JL |
| JL |
| JL |
| JL |
| JL |
| JL |
| JL |
| JL |
| JL |
| JL |
| JL |
| JL |
| JL |
| JL |
| JL |
| JL |
| J J |
Therefore {1,2,3} ∪ {1,4} ∪ {2,4}
i
JLLI no aeeall bxtl gjglg jy
gJlI aJIj 1c g,(LwU) acluJI
pabll 1
Therefore {lg} = {ln} =
aall jolg1 yL eji
aiaai allao abogpplxwnly Jscn
山
gijgjAaLuee aLuee oLoLi
3g jglg21 aJluie 1011 gJw Jue sCg
g
gJ10aiaLgco8(sgo1olxjyS
111111111111
j
1
Jg81 j0 Jl g plal pcc 1agill a
slo sioi Igebii puc uug Jilgaw glo
gjg21 allwic g
gJ 1
aJx 8! Jgill aai bii pcc
slll no Jla: a bvo JLa a hia
jua 1
1
pI pI pI pI pI pI pI pI pI pI pI pI pI pI pI pI pI pI pI pI pI pI pI pI pI pI pI pI pI pI pI pI pI pI pI pI pI pI pI pI pI pI pI pI pI pI pI pI
aaiinipn 1g jg
gJ 1
a 1
a a b g 11 J L a a b o JLa a
Luwio sLo 3 o
Therefore, a_3 = 3/2 a_2, a_4 = 3/2 a_3.
((Turbo)
Therefore, the area of triangle OBC equals the area of triangle ABC plus the area of triangle BOC.
100

102 : y = 2( x - 1)
∴ SΔOBC = 1/2 · CO · BC = 1/2 × CD × 5
a i = 1/2( a 1 + a 2 + a 3)
a 1c L 2S y 3 f 4b = ①②③④ l 5c : loaic 21.c : y = y 1y2
∴ pk - 1 100 + 2( p - 1)
1
2! aillbgl 2eill golg1 goll paoiwl po
a>glcIgai:go aS yao aiJai aLs 9gSi loaic
∴ S ΔOBC = S ΔCOD + SΔBOC
1
∴ S = 1 S = 2
sacg jaaal g aai all yjaua
a70 1
8 8
g pai gll ogbl aobblg cialal all 11s
alebaji a,g aLgj
∴ SΔOBC = 1/2 · OB · BC = 1/2 × 5 × 5 = 45/2
∴ S ΔOBC = S ΔCOD + S ΔBOC - S ΔBOC
Therefore, 3g > 1 or 2 × 20 = 1
G
00
1
y
(-3)
Therefore, g(x) = h'(x) - ln p(x) = h(x) - ln p(x) - 2h(x)
(4)
15
- -
16
sol 17
1
51 × 13 ① ∴ Lig ≤ 0 w1 ≥ 1
1
B
15 15
∴ lg.1 = 2/3
A. ωgωfωf
1
∴ + = 1 可以
Therefore, a|lg| = |a - b| = 1
()
11 11
(1)

6
7
Therefore, S_ΔAPQ = S_ΔAQP + S_ΔQPQ
10
11
12
14
15 15
A a
1
2
3
| ar-1 | oSioLwJj |
| ar-3 | aOlc oj b |
| ar-3 | bXl jI w plsiW |
| ar-4 | jlgdl aI bii |
| ar-7 | Jbll alljX cilai |
| ar-7 | cilaiig ciaag |
| ar-8 | aIgill aI g |
| ar-8 | laI gill aJ g |
| jlg#lglg#lglg#lglg#lglg#lglg#lglg#lglg#lglg#lglg#lglg#lglg#lglg#lglg#lglg#lglg#lglg#lglg#lglg#lglg#lglg#lglg#lglg#lglg#lglg#lglg#lgl# |
| BOSCH #5,## ## |
| # |
| # |
| # |
| # |
| # |
| # |
| # |
| # |
| # |
| # |
| # |
| # |
| # |
| # |
| # |
| # |
| # |
| # |
| # |
| # |
| # |
| # |
| # |
| # |
| # |
| # # |
| ### |
DE Germany
AE United Arab Emirates
BSH Home Appliances FZE
Round About 13,
Plot Nr MO-0532A
Jebel Ali Free Zone - Dubai
Tel.: 04 881 4401
mailto:service.uae@bshg.com
www.bosch-home.com/ae
Republic of Albania, Albania
AERTECH SH.P.K.
Rruga Qemal Stafa
Pallati ri perball Prokuroris se
Pergjithshme
Hyrja C Kati 10
Tirana
Tel.: 066 206 47 94
mailto:g.volina@aertech.al
HEATHERTON, Victoria 3202
Tel.: 1300 368 339
mailto:bshau-as@bshg.com
www.bosch-home.com.au
BA Bosna i Hercegovina, Bosnia-Herzegovina
"HIGH" d.o.o
Gradačka 29b
71000 Sarajevo
Info-Line: 061 100 905
Fax: 033 213 513
mailto:delicnanda@hotmail.com
BE Belgique, Belgie, Belgium BSH Home Appliances S.A.
European Trade Center Building,
5th floor
1784 Sofia
Tel.: 02 892 90 47
Fax: 02 878 79 72
mailto:informacia.servis-bg@
bshg.com
www.bosch.home.bg
BH Bahrain,
Khalaifat Company
Manama
Tel.: 017400553
mailto:service@khalaifat.com
BY Belarus, Minsk
LLC "BSH Household Appliances"
Tel.: 495 737 2961
mailto:mok-kdhl@bshg.com
CH Switzerland, Suisse, Svizzera, Switzerland
BSH Hausgeräte AG
+17 snt/min (alv 23%)
FR France
BSH Electroménager S.A.S.
To arrange an engineer visit, to order spare parts and accessories or for product advice please visit www.bosch-home.co.uk or call
*Calls from a BT landline will be charged at up to 3 pence per minute. A call set-up fee of up to 6 pence may apply.
GR Greece. EAAAC
BSH Ikiakes Siskeves A.B.E.
Central Branch Service
17 km E.O. Athinon-Lamias &
Potamou 20
14564 Kifisia
Unit 1 & 2. 3rd Floor
North Block, Skyway House
3 Sham Mong Road
Tai Kok Tsui, Kowloon
Hong Kong
Tel.: 2565 6151
Fax: 25656681
mailto:bosch.hk.service@bshg.com
www.bosch-home.cn
HR Hrvatska, Croatia
BSH kučni urežaji d.o.o.
Kneza Branimira 22
10000 Zagreb
Tel.: 016403609
Fax: 01 640 36 03
mailto:informacije.servis-hr@
bshg.com
www.bosch-home.com/hr
www.bosch-home.com/hu
IE Republic of Ireland
BSH Home Appliances Ltd.
Unit F4, Ballymount Drive
Ballymount Industrial Estate
Walkinstown
Dublin 12
Service Requests,
Spares and Accessories
Tel.: 01450 2655
Fax: 01450 2520
www.bosch-home.co.uk
IL Israel,
C/S/B Home Appliance Ltd.
Uiel Building
2 Hamelacha St.
Industrial Park North
71293 Lod
Tel.: 089777222
Fax: 08 9777 245
mailto:csb-serv@zahav.net.il
www.bosch-home.co.il
IN India, Bharat
BSH Customer Service Front Office
Shop No.4, Everest Grande,
Opp. Shanti Nagar Bus Stop,
Mahakali Caves Road, Andheri East
Mumbai 400093
IS Iceland
Smith & Norland hf.
Noatuni 4
105 Reykjavik
Tel.: 0520 3000
Fax: 0520 3011
www.sminor.is
IT Italia, Italy
www.bosch-home.com/it
KZ Kazakhstan, Kazakhstan
IP Turebekov Yerzhan
Nurmanovich
Jangeldina str. 15
Shimkent 160018
Tel.: 0252 31 00 06
mailto:evrika_kz@mail.ru
LB Lebanon,
Teheni, Hana & Co.
Boulevard Dora 4043 Beirut
P.O. Box 90449
Jdeideh 1202 2040
Tel.: 01 255 211
mailto:Info@Teheni-Hana.com
LT Lithuania
Senuku prekybos centras UAB
Jonavos g. 62
44192 Kaunas
Tel.: 0372 12146
Fax: 0372 12165
www.senukai.lt
LU Luxembourg
BSH electromagens S.A.
13-15 ZI Breedeweues
1259 Senningerberg
Tel.: 26349 300
Fax: 26349 315
mailto:lux-service.electromenager@
bshg.com
www.bosch-home.com/lu
LV Latvija, Latvia
General Serviss Limited
Bullu street 70c
1067 Riga
Tel.: 07424137
mailto:bt@olimpeks.lv
Elkor Serviss
Brivibas gatte 201
1039 Riga
Tel.: 067 0705 20; -36
Fax: 067 0705 24
mailto:demoservice@elkor.lv
www.servisacentrs.lv
MD Moldova
S.R.L. "Rialto-Studio"
str. I. Lyceum 98
2012 Chisinau
Tel./Fax: 022 23 81 80
mailto:bosch-md@mail.ru
ME Crna Gora, Montenegro
Elektronika komerc
UI.Slobode 17
84000 Bijelo Polje
Tel./Fax: 050 432 575
Mobil: 069324812
mailto:ekobosch.servis@
t-com.me
MK Macedonia, MaKeDoHnja
GORENEC
Jane Sandanski 69 lok.3
1000 Skopje
Tel.: 022454600
Mobil: 070697463
mailto:gorenec@yahoo.com
MT Malta
Oxford House Ltd.
Notabile Road
Mriehel BKR 14
Tel.: 021 442 334
Fax: 021 488 656
www.oxfordhouse.com.mt
MV Raajeyge Jumhooriyyaa, Maledives
Lintel Investments
Ma. Maadheli, Majeedhee Magu Malé
Tel.: 0331 0742
mailto:mohamed.zuhuree@
lintel.com.mv
NL Nederland, Netherlands
Unit F 2, 4 Orbit Drive
Mairangi Bay
Auckland 0632
Tel.: 094770492
Fax: 094772647
mailto:bshnz-cs@bshg.com
www.bosch-home.co.nz
PL Polska, Poland
OOO "BSH Bytovaya Tekhnika"
Service from the manufacturer
SA Kingdom Saudi Arabia,
BSH Home Appliances
Saudi Arabia L.L.C.
Bin Hamran Commercial Centr.
6th Floor 603B
Jeddah 21481
Tel.: 800 124 1247
mailto:service.ksa@bshg.com
www.bosch-home.com/sa
SE Sverige, Sweden
BSH Hushållsapparater AB
Landsvägen 32
169 29 Solna
Tel.: 0771 11 22 77 local rate
mailto:Bosch-Service-SE@
bshg.com
www.bosch-home.se
SG Singapore, 新加坡
BSH Home Appliances Pte. Ltd.
TECHPLACE I and
Mo Kio Avenue 10
Block 4012 #01-01
569628 Singapore
Tel.: 6751 5000
Fax: 6751 5005
mailto:bshsgp.service@bshg.com
www.bosch-home.com.sg
SI Slovenia, Slovenia
BSH Hisni aparati d.o.o.
Litostrojska 48
1000 Ljubljana
Tel.: 01 583 07 01
Fax: 01 583 08 89
www.bosch-home.com/tr
4th floor, No. 112 Sec 1
Chung Hsiao E Road
Taipei ROC 100
Tel.: 02 2321 6222
mailto:Bosch@achelis.com.tw
UA Ukraine, Ukraine
TOB "BCX NóbyoBa Texhika"
Tel.: 044 490 2095
mailto:bsh-service.ua@bshg.com
gama-electronics.com
XS Srbija, Serbia
BSH Kućni aparati d.o.o.
Milutina Milankovica 11a
11070 Novi Beograd
Tel.: 011 205 23 97
Fax: 011 205 23 89
mailto:informacije.servis-sr@bshg.com
bshg.com
www.bosch-home.rs
ZA South Africa
BSH Home Appliances (Pty) Ltd.
15th Road Randjespark
Private Bag X36, Randjespark
1685 Midrand-Johannesburg
Tel.: 086 002 6724
Fax: 086 617 1780
mailto:applianceserviceza@
bshg.com
www.bosch-home.com/zai
bosch-infoteam@bshg.com


- CONTENTS
- FOR YOUR SAFETY
- A GENERAL SAFETY INSTRUCTIONS
- ELECTRIC SHOCK RISK
- SAFETY INSTRUCTIONS FOR THIS APPLIANCE
- RISK OF INJURY
- IMPORTANT
- EXPLANATION OF THE SYMBOLS ON THE APPLIANCE OR ACCESSORY
- OVERVIEW
- FIG. A
- OPERATION
- WARNING
- BLENDER FOOT
- FIG
- WHISK
- RISK OF SCALDING
- MULTIFUNCTION ACCESSORY
- RISK OF INJURY FROM SHARP BLADES/ROTATING DRIVE
- CAUTION
- UNIVERSAL BLADE
- THE BLADE IS SHARP AND CAN CAUSE INJURY
- FIG. D
- CARRIER DISC WITH DISC INSERTS
- SLICING ATTACHMENT - COARSE
- SLICING ATTACHMENT - FINE
- SHREDDING INSERT - MEDIUM
- GRATING DISC INSERT - COARSE
- CLEANING
- BASE UNIT AND TOOLS
- TROUBLESHOOTING
- FAULT REMEDIAL ACTION
- RECIPES AND TIPS MAYONNAISE
- VEGETABLE SOUP
- CRÊPES DOUGH
- BLENDED MILK DRINKS
- INSTRUCTIONS ON DISPOSAL
- WARRANTY CONDITIONS
- CUTTING INSERT - FINE
- MEDIUM HEAT SETTING
- RISK OF BURNS FROM HOT SURFACES
- FIGURE D
- POOOOX
- CREPE BATTER
- SHORT CIRCUIT
- ILLUSTRATION A
- CONTROLS
- BLENDER JUG
- FIGURE B
- WHISK ATTACHMENT
- DANGER OF BURNS
- FIGURE
- ATTENTION
- MULTI-FUNCTION ATTACHMENT
- DANGER OF INJURY WITH SHARP BLADES/ROTARY DRIVE
- UNIVERSAL
- FIGURE E
- DESCRIPTION
- FAULT REMEDY FAULT
- RECIPES AND TIPS
- DOUGH FOR DUMPLINGS
- MILKSHAKE
- RECOMMENDED USE
- UNDERSTANDING THE SYMBOLS ON THE APPLIANCE AND ACCESSORIES
- COMPLETE OVERVIEW
- ON/OFF SWITCH
- UNLOCK BUTTONS
- DANGER OF INJURY WITH SHARP KNIVES
- FIGURE A
- MAIN UNIT WITH ATTACHMENT
- MULTIFUNCTIONAL ACCESSORIES
- HELP WITH TROUBLESHOOTING
- FAULT
- REMEDY
- RECIPES RECOMMENDED BY US
- PANCAKE BATTER
- MILKSHAKE COCKTAIL
- DISPOSAL INSTRUCTIONS
- INFORMATION ABOUT HOUSEHOLD APPLIANCES MANUFACTURED UNDER THE CONTROL OF THE BOSCH CONCERN IN ACCORDANCE WITH THE REQUIREMENTS OF THE LEGISLATION ON TECHNICAL REGULATION AND THE LEGISLATION ON THE PROTECTION OF CONSUMER RIGHTS OF THE RUSSIAN FEDERATION
- DE GERMANY
- AE UNITED ARAB EMIRATES
- REPUBLIC OF ALBANIA, ALBANIA
- BA BOSNA I HERCEGOVINA, BOSNIA-HERZEGOVINA
- BE BELGIQUE, BELGIE, BELGIUM BSH HOME APPLIANCES S.A
- BH BAHRAIN
- BY BELARUS, MINSK
- CH SWITZERLAND, SUISSE, SVIZZERA, SWITZERLAND
- FR FRANCE
- GR GREECE. EAAAC
- HR HRVATSKA, CROATIA
- IE REPUBLIC OF IRELAND
- IL ISRAEL
- IN INDIA, BHARAT
- IS ICELAND
- IT ITALIA, ITALY
- KZ KAZAKHSTAN, KAZAKHSTAN
- LB LEBANON
- LT LITHUANIA
- LU LUXEMBOURG
- LV LATVIJA, LATVIA
- MD MOLDOVA
- ME CRNA GORA, MONTENEGRO
- MK MACEDONIA, MAKEDOHNJA
- MT MALTA
- MV RAAJEYGE JUMHOORIYYAA, MALEDIVES
- NL NEDERLAND, NETHERLANDS
- PL POLSKA, POLAND
- SA KINGDOM SAUDI ARABIA
- SE SVERIGE, SWEDEN
- SG SINGAPORE, 新加坡
- SI SLOVENIA, SLOVENIA
- UA UKRAINE, UKRAINE
- XS SRBIJA, SERBIA
- ZA SOUTH AFRICA
Brand : BOSCH
Model : ErgoMixx MSM67190
Category : Blender