TVIP11561 - Surveillance Camera ABUS - Free user manual and instructions
Find the device manual for free TVIP11561 ABUS in PDF.
| Technical Features | Details not available |
|---|---|
| Usage | Details not available |
| Maintenance and Repair | Details not available |
| Safety | Details not available |
| General Information | Details not available |
Frequently Asked Questions - TVIP11561 ABUS
User questions about TVIP11561 ABUS
0 question about this device. Answer the ones you know or ask your own.
Ask a new question about this device
Download the instructions for your Surveillance Camera in PDF format for free! Find your manual TVIP11561 - ABUS and take your electronic device back in hand. On this page are published all the documents necessary for the use of your device. TVIP11561 by ABUS.
USER MANUAL TVIP11561 ABUS
natural_image
Line drawing of a device with concentric circles and labeled 'ABUS' (no other text or symbols)
Security Tech Germany
natural_image
Line drawing of a device front panel with circular and rectangular buttons, labeled 'ABUS' at bottom (no other text or symbols)Scope of delivery 19
Warnings 20
Overview 21
Network connection 23
Hardware installation 29
Français
natural_image
Line drawing of a device front panel with circular and rectangular buttons, labeled 'ABUS' at bottom (no other text or symbols)


Security Tech Germany
Warnhinweise

Security Tech Germany
natural_image
Line drawing of a hand using a probe to connect to a laptop with a remote control (no text or symbols)natural_image
Line drawing of a hand inserting a router to a laptop and connected to a remote control unit (no text or symbols)natural_image
Line drawing of a hand inserting a device into a router (no text or symbols)Hardwareinstallation
1
natural_image
Line drawing of a cabinet with two doors and a top-mounted device (no text or symbols)2
text_image
34 mmnatural_image
Line drawing of a device with concentric circles and labeled 'ABUS' (no other text or symbols)
Security Tech Germany
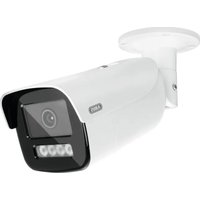
Wi-Fi 1080p indoor camera with alarm function: TVIP11561
This quick start guide describes the initial installation steps for your network camera.
In-depth information can be found in the user guide, which can be downloaded via the IP Installer or from the abus.com homepage.

Security Tech Germany
Scope of delivery
Wi-Fi 1080p indoor camera with alarm function
- Camera mount
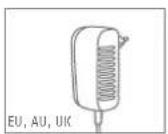
• Power supply unit (incl. EU, AU, UK) - 1 m network cable
• Installation materials - Quickstart guide
· CD
natural_image
Line drawing of a device with circular and rectangular buttons, labeled 'ABUS' at bottom (no other text or symbols)


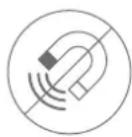
Warnings
Keep strong magnetic fields away from the network camera.
Ensure an uninterrupted power supply when operating with a permanent power source.
Keep liquids away from the camera.

Only operate the network camera with a suitable power source.

Make sure that the network camera is mounted securely.
Only operate the network camera in the ambient conditions recommended by the manufacturer.

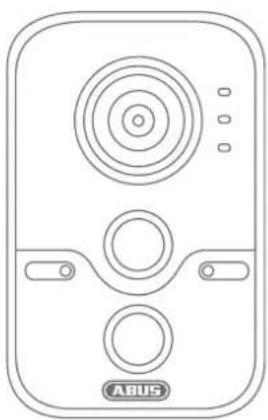
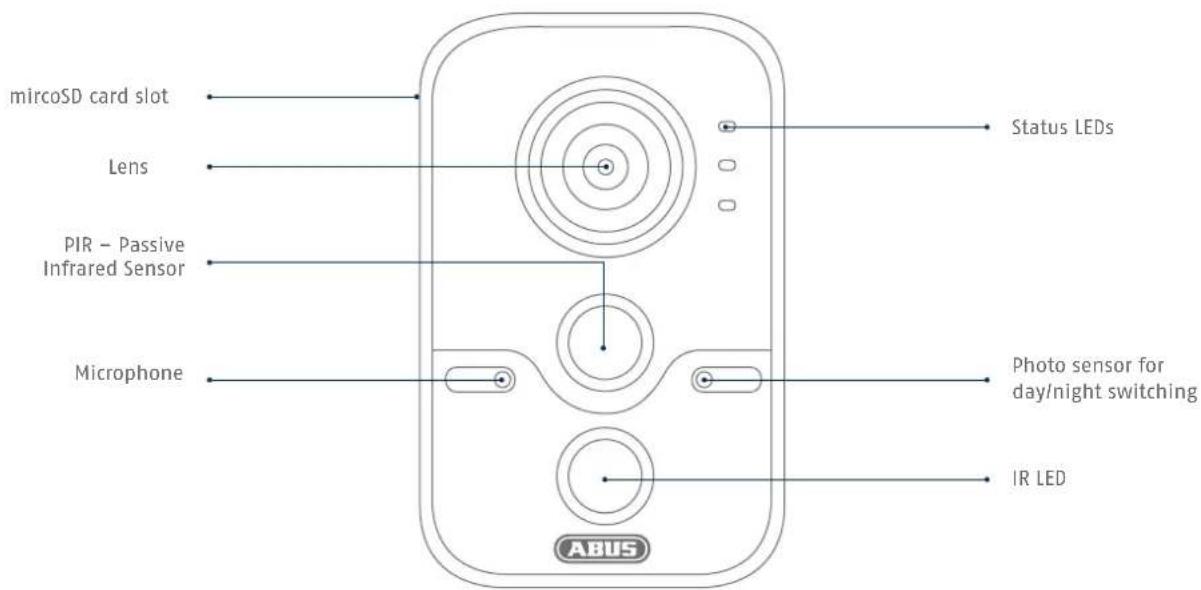
Overview
text_image
mircoSD card slot Lens PIR - Passive Infrared Sensor Microphone Status LEDs Photo sensor for day/night switching IR LED ABUS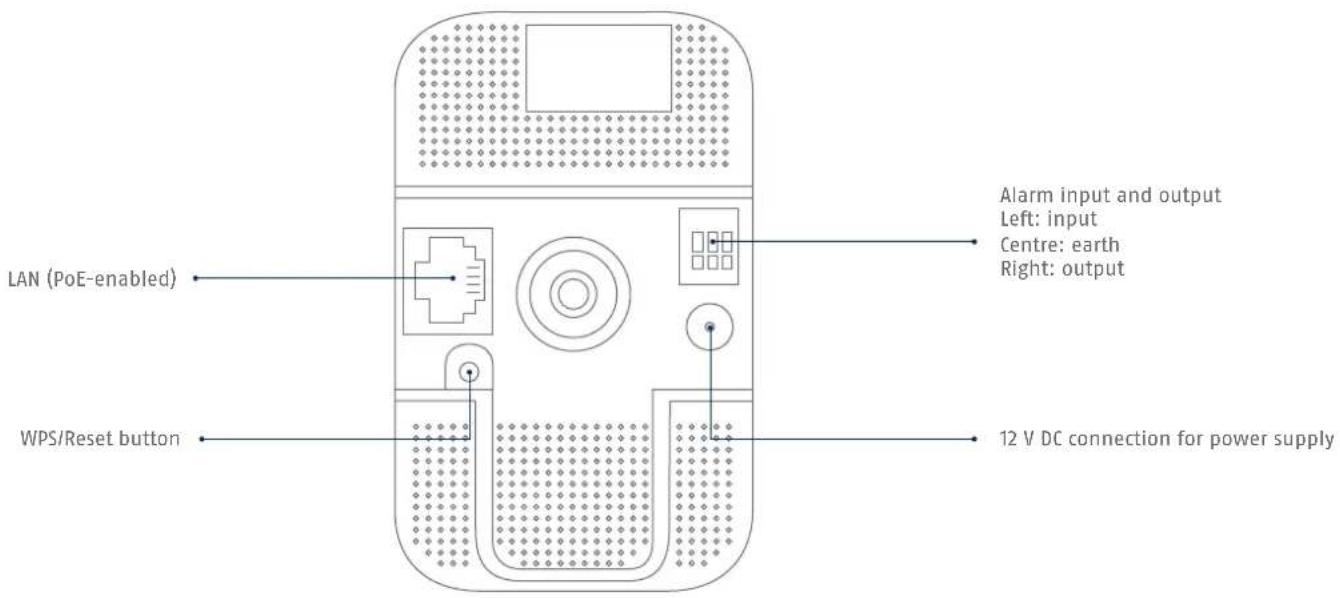
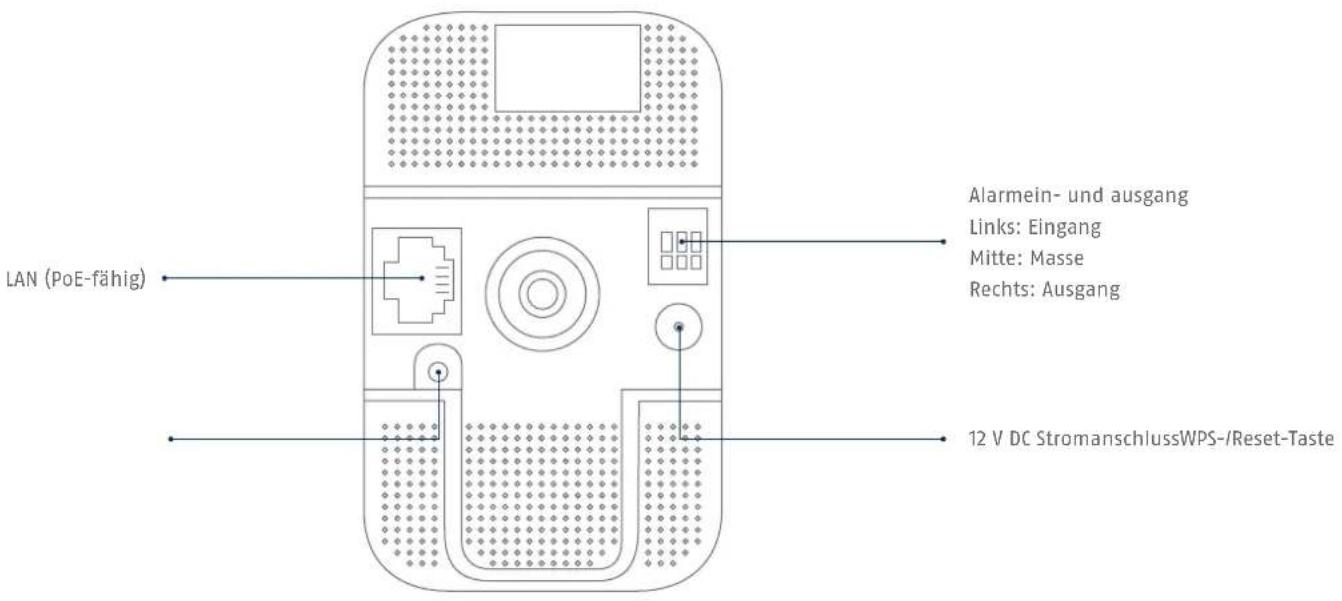
text_image
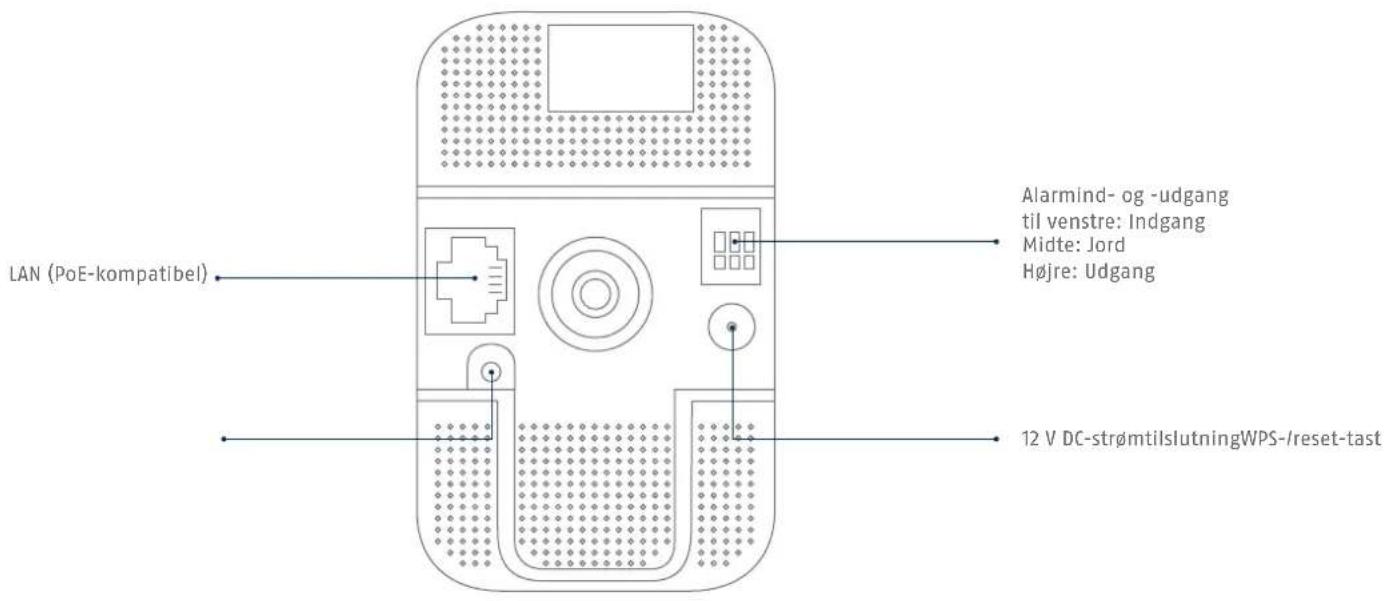
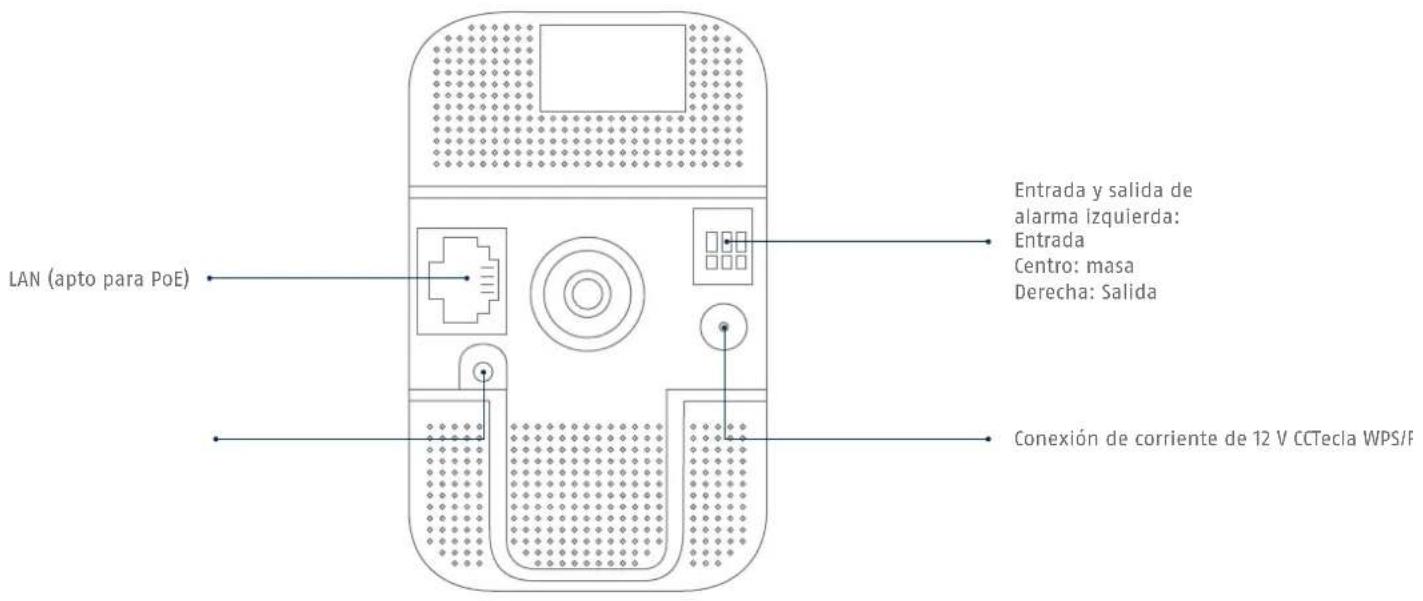
LAN (PoE-enabled) WPS/Reset button Alarm input and output Left: input Centre: earth Right: output 12 V DC connection for power supply
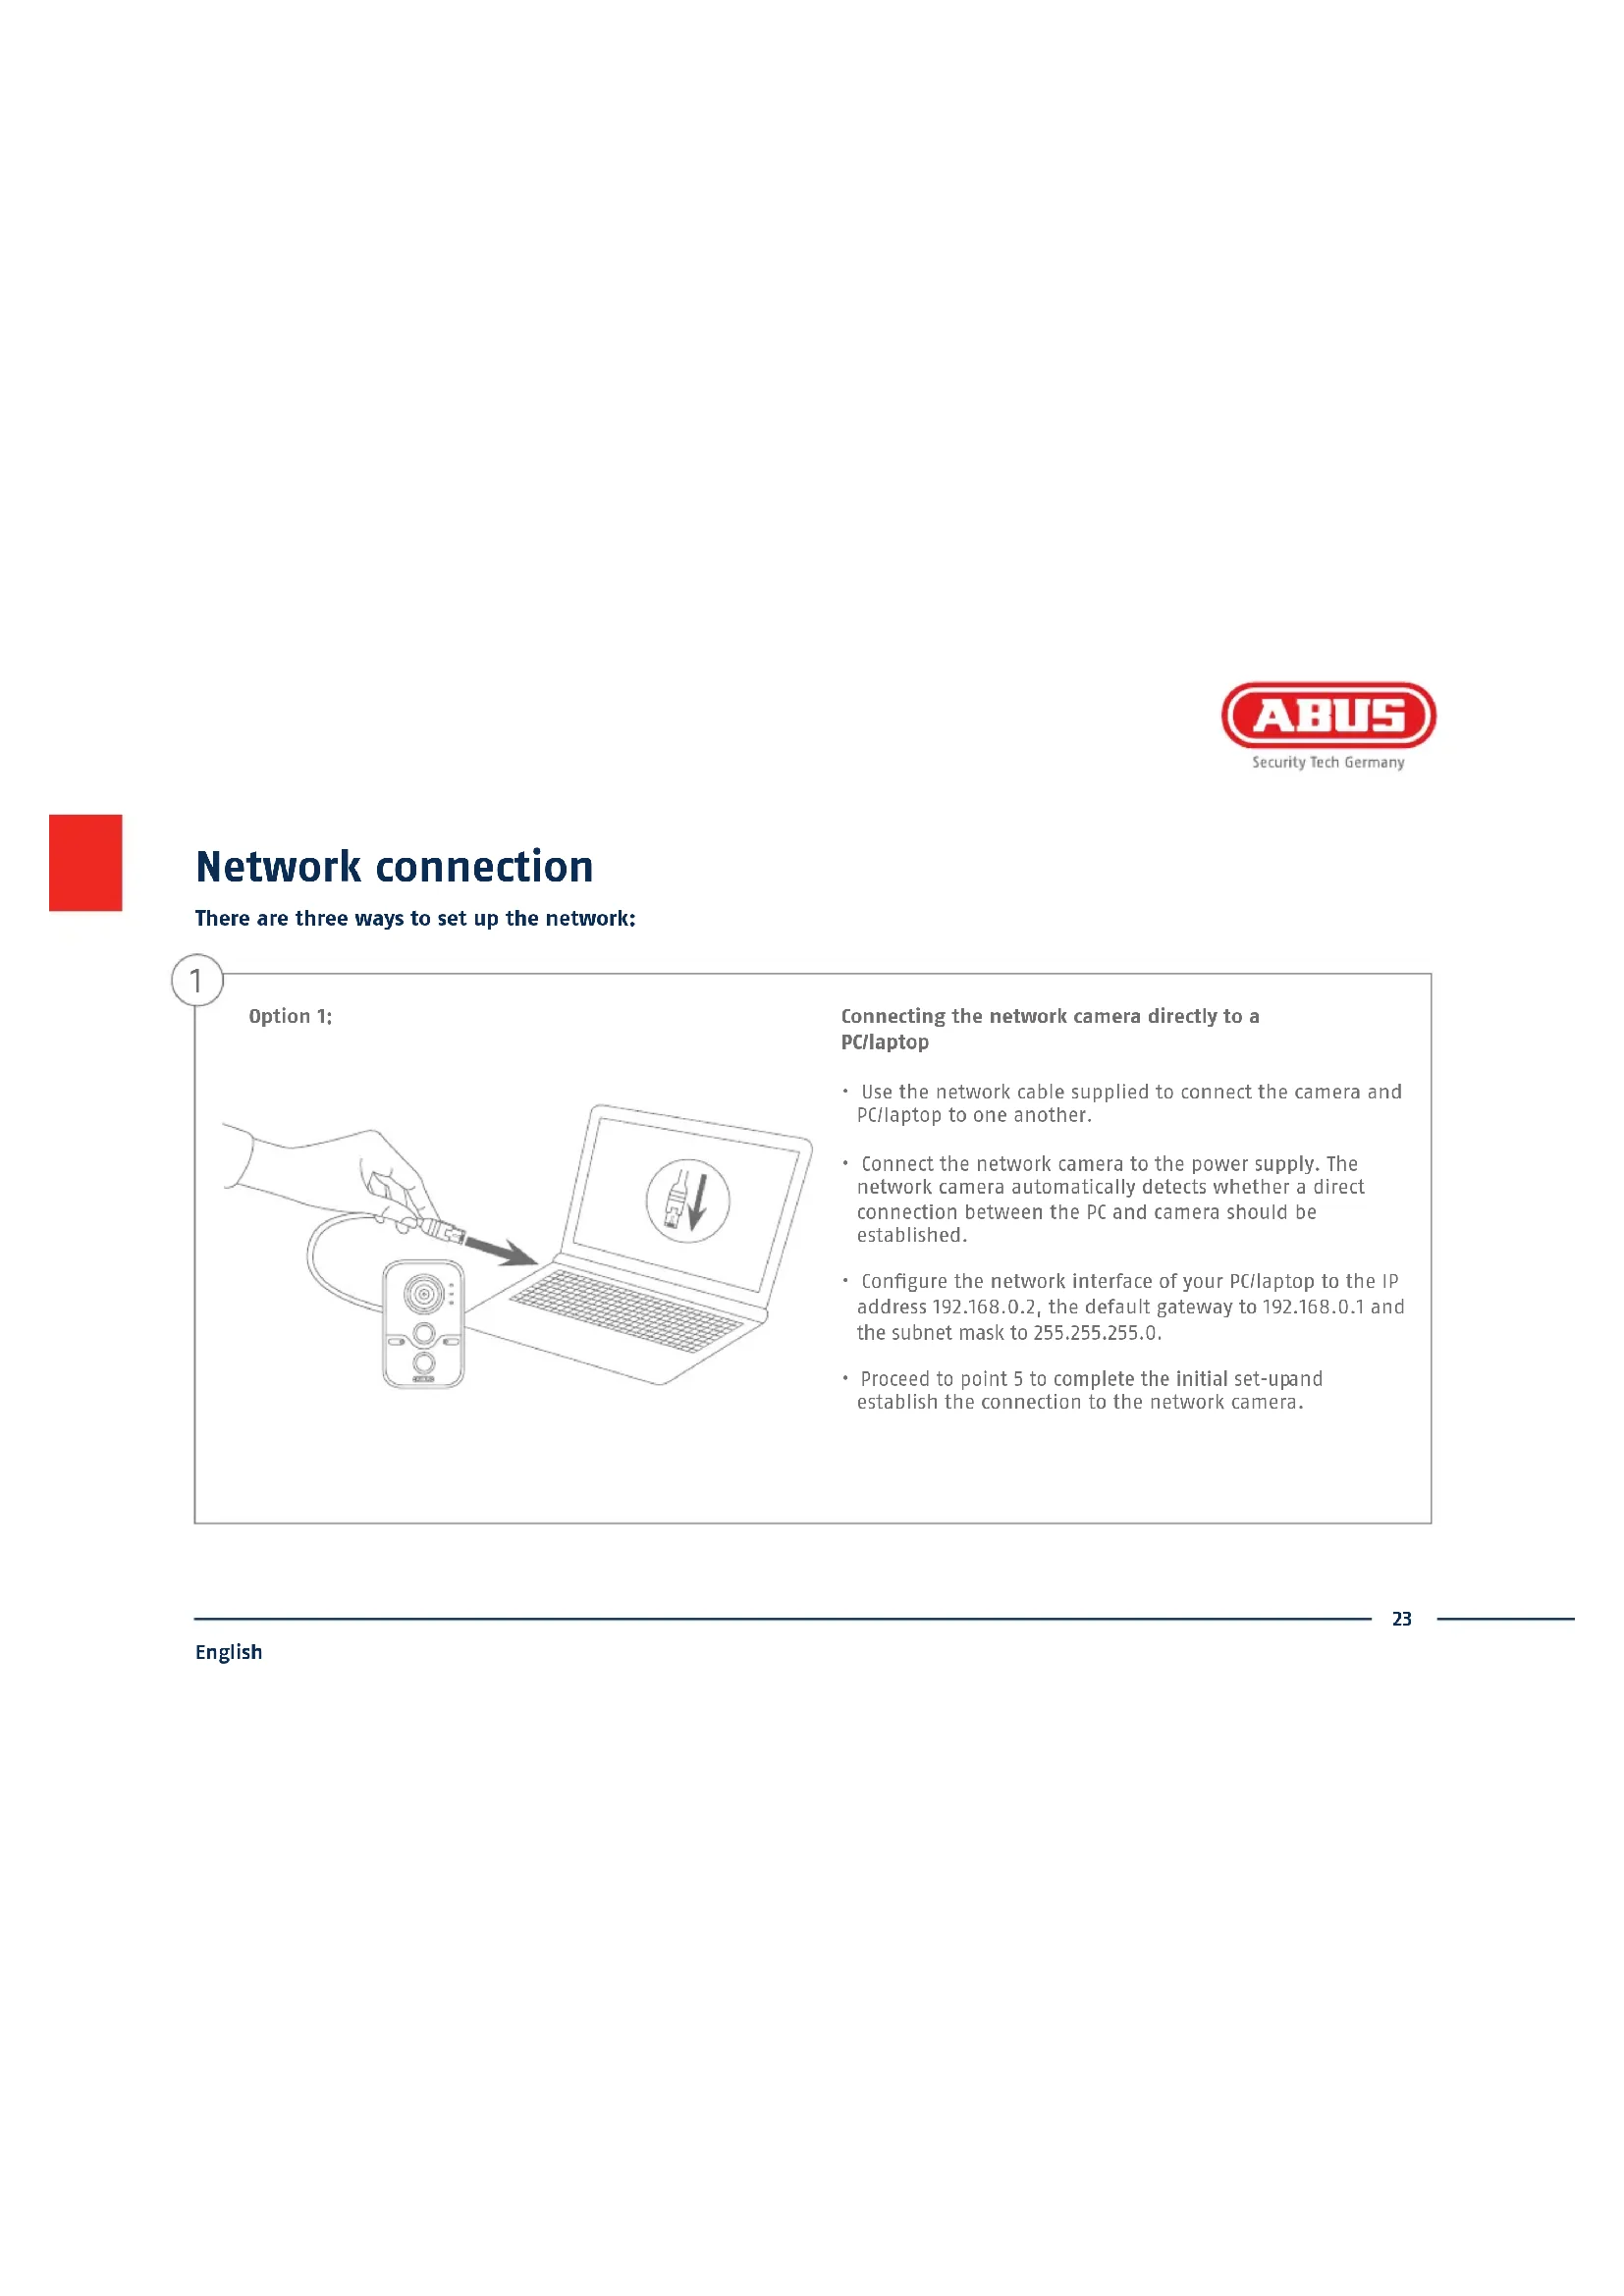
Network connection
There are three ways to set up the network:
1
Option 1:
natural_image
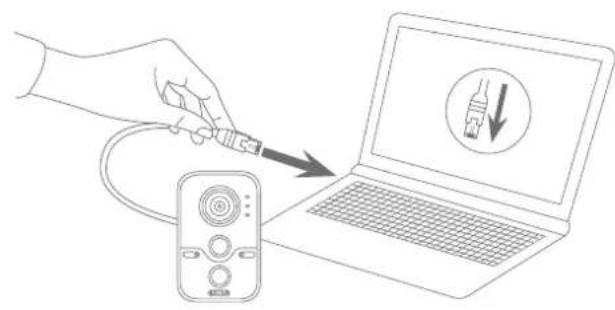
Line drawing of a hand using a probe to connect to a laptop screen with a USB symbol (no text or labels)Connecting the network camera directly to a PC/laptop
- Use the network cable supplied to connect the camera and PC/laptop to one another.
- Connect the network camera to the power supply. The network camera automatically detects whether a direct connection between the PC and camera should be established.
- Configure the network interface of your PC/laptop to the IP address 192.168.0.2, the default gateway to 192.168.0.1 and the subnet mask to 255.255.255.0.
- Proceed to point 5 to complete the initial set-up and establish the connection to the network camera.
2
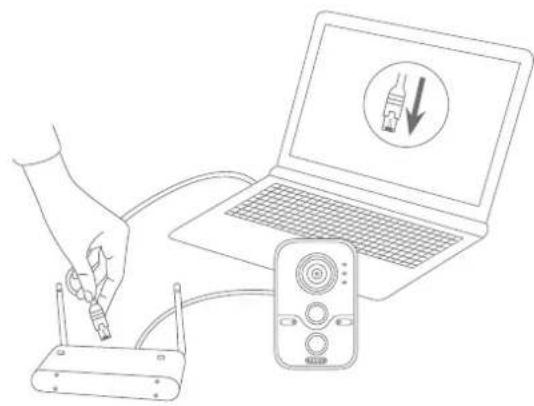
Option 2: Connecting the network camera to a router/switch
natural_image
Line drawing of a hand using a router to connect to a laptop and a remote control device (no text or symbols)- Connect your PC/laptop to the router/switch.
- Connect the network camera to the router/switch.
- Connect the network camera to the power supply.
- If a DHCP server is available on your network (IP address is assigned automatically via the router), set the network interface of your PC/laptop to "Obtain an IP address automatically".
- If no DHCP server is available, configure the network interface of your PC/laptop to 192.168.0.2, the default gateway to 192.168.0.1 and the subnet mask to 255.255.255.0.
- Proceed to point 5 to complete the initial set-up and establish the connection to the network camera.

3
Option 3:
natural_image
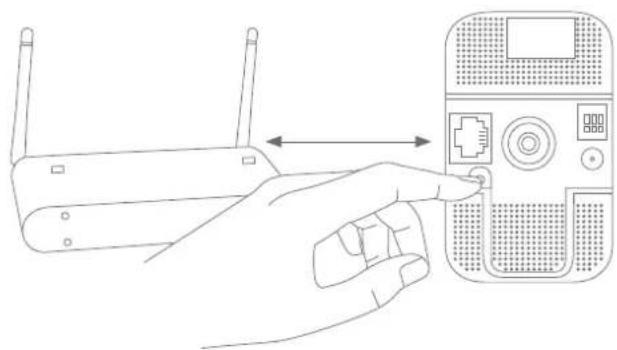
Line drawing of a hand inserting a device into a router (no text or symbols)Wi-Fi setup via WPS
- Connect the network camera to the power supply.
- Press the WPS button on your router.
- Press the WPS button on the network camera within 2 minutes for approx. 10 seconds.
- The Wi-Fi connection between the router and camera is now established.
4
Activate automatic port releases with "UPnP"
Fritz!Box:
- Call up the user interface of the Fritz!Box.
- Click on "Settings".
- Click on "Advanced settings"/"System"/"Network settings" or "Network"/"UPnP" if necessary.
- Activate the option "Transmit status information via UPnP" and "Permit changes to the security settings via UPnP".
- Save the settings by pressing "Apply".
D-Link:
- In the main router menu, click on the "Advanced" item.
- Click on the "Advanced network" item.
- Activate the UPnP item.
Netgear:
- Click on UPnP in the main menu of the browser interface under "Advanced".
• Automatic device configuration via UPnP can be activated and deactivated.

5
text_image
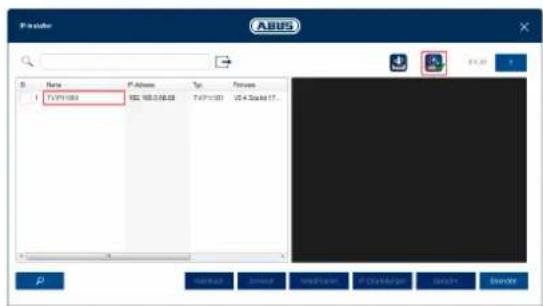
ANSI File Name P-Access Sp Process TVP1000 USB3.06.08 TVP1000 USB3.06.08 USB3.06.08 USB3.06.08 USB3.06.08 USB3.06.08 USB3.06.08 USB3.06.08 USB3.06.08 USB3.06.08 USB3.06.08 USB3.06.08 USB3.06.08Accessing the network camera for the first time
- The network camera is accessed for the first time using the ABUS IP Installer.
- You can find the program on the CD-ROM included or on our abus.com homepage. Install the program on your PC and then run it.
• After the installation wizard is started, the IP Installer searches for all the network cameras and video servers connected in your network. - Check whether the latest version of the IP Installer is installed. To do so, check the highlighted icon in the image on the left.
- Double click to call up the web interface of the camera to be set up.
ABUS
Password assignment
User
installer
Password
......
(二)
The password must consist of
8 to 15 digits. The password
should include a combination
of numeric, small and capital
letters and special characters
At least two types of
combinations should be used
Confirm
......
Save
Password assignment
- No administrator password is set prior to delivery. The administrator user name "installer" is set prior to delivery.
- First enter a password that meets the specified requirements and confirm it. Then click on "Save".
- The camera's web interface is then displayed automatically.
- The next time you call up the web interface, you will be asked to identify yourself with the user name and your password.
- You can then change the administrator name in the user settings
- You can write down the password you used here, then keep the quickstart guide in a safe place:

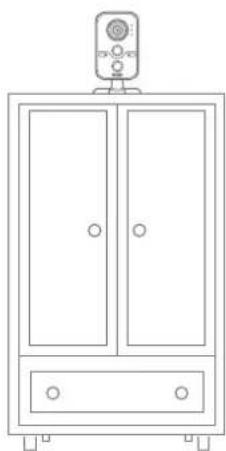
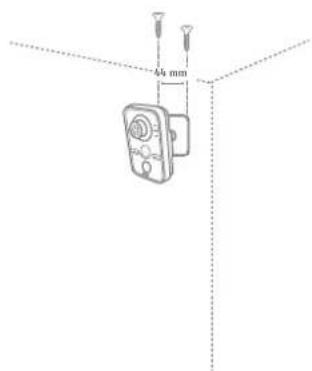
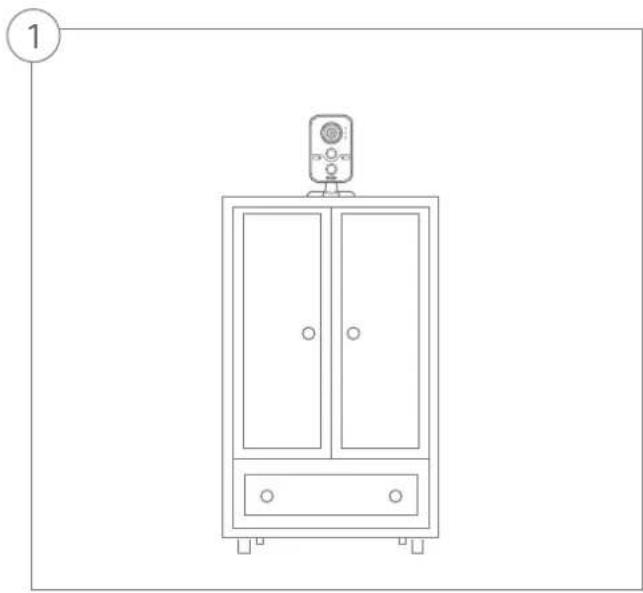
Hardware installation
natural_image
Line drawing of a cabinet with a mounted sensor or meter on top, no text or symbols presentFree-standing installation or wall mounting are possible.

text_image
2 44 mm
natural_image
Line drawing of a device with concentric circles and labeled 'ABUS' (no other text or symbols)
Security Tech Germany
natural_image
Line drawing of a device front panel with circular and rectangular buttons, labeled 'ABUS' at bottom (no other text or symbols)


Avertissements
natural_image
Line drawing of a hand holding a probe to connect to a laptop screen with a switch symbol (no text or labels)natural_image
Line drawing of a hand inserting a router to a laptop and connected to a remote control unit (no text or symbols)natural_image
Line drawing of a hand inserting a device into a router (no text or symbols)natural_image
Line drawing of a cabinet with two doors and a top-mounted device (no text or symbols)natural_image
Line drawing of a device with concentric circles and labeled 'ABUS' (no other text or symbols)
Security Tech Germany

Security Tech Germany
Leveringsomvang
natural_image
Line drawing of a device with circular and rectangular buttons, labeled 'ABUS' at bottom (no other text or symbols)


Waarschuwingen
natural_image
Illustration of a hand using a probe to connect a remote control device to a laptop screen, with no text or symbols present.natural_image
Line drawing of a hand inserting a router to a laptop and connected to a remote control (no text or symbols)
Security Tech Germany
3
Variant 3:

natural_image
Line drawing of a hand inserting a device into a router (no text or symbols)WLAN-instelling via WPS

Security Tech Germany
natural_image
Line drawing of a cabinet with two doors and a top-mounted device (no text or symbols)natural_image
Line drawing of a device with concentric circles and labeled 'ABUS' (no other text or symbols)
Security Tech Germany
natural_image
Line drawing of a device front panel with circular and rectangular buttons, labeled 'ABUS' at bottom (no other text or symbols)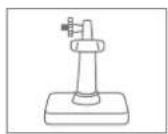


Security Tech Germany

Security Tech Germany
text_image
Diagram showing a hand using a probe to connect to a laptop screen with a warning symbol and a remote control device.natural_image
Line drawing of a hand using a router to connect to a laptop and a remote control device (no text or symbols present)natural_image
Line drawing of a hand inserting a device into a router (no text or symbols)Hardwareinstallation
1

natural_image
Line drawing of a cabinet with two doors and a top-mounted device (no text or symbols)natural_image
Line drawing of a device with concentric circles and labeled 'ABUS' (no other text or symbols)
Security Tech Germany
WLAN 1080p inomhuskamera med larmfunktion: TVIP11561

Security Tech Germany
Leveransomfång
WLAN 1080p inomhuskamera med larmfunktion
natural_image
Line drawing of a device with circular and rectangular buttons, labeled 'ABUS' at bottom (no other text or symbols)


Varningar

Security Tech Germany
Nätverksanslutning
natural_image
Line drawing of a hand using a probe to connect to a laptop screen with a USB symbol (no text or labels)natural_image
Line drawing of a hand using a router to connect to a laptop and a remote control device (no text or symbols)natural_image
Line drawing of a hand inserting a device into a router (no text or symbols)
Security Tech Germany
natural_image
Line drawing of a cabinet with two doors and a top-mounted control unit (no text or symbols)natural_image
Technical line drawing of a mechanical component with two protruding pins and a 54 mm dimension label (no text or symbols beyond measurement)
natural_image
Line drawing of a device with concentric circles and labeled 'ABUS' (no other text or symbols)
Security Tech Germany
natural_image
Line drawing of a device front panel with circular and rectangular buttons, labeled 'ABUS' at bottom (no other text or symbols)


Security Tech Germany

natural_image
Line drawing of a hand inserting cables into a laptop with a remote control device nearby (no text or symbols)natural_image
Line drawing of a hand inserting a router to a laptop and connected to a remote control unit (no text or symbols)natural_image
Line drawing of a hand inserting a device into a router (no text or symbols)natural_image
Line drawing of a cabinet with two doors and a top-mounted device (no text or symbols)natural_image
Line drawing of a device with concentric circles and labeled 'ABUS' (no other text or symbols)
Security Tech Germany
natural_image
Line drawing of a device with circular and rectangular buttons, labeled 'ABUS' at bottom (no text or symbols on main body)


Avvertenze
natural_image
Line drawing of a hand using a probe to connect to a laptop screen with a USB symbol (no text or labels)natural_image
Line drawing of a hand inserting a router to a laptop and connected to a remote control (no text or symbols)natural_image
Line drawing of a hand inserting a device into a router (no text or symbols)natural_image
Line drawing of a cabinet with a mounted sensor or meter on top, no text or symbols present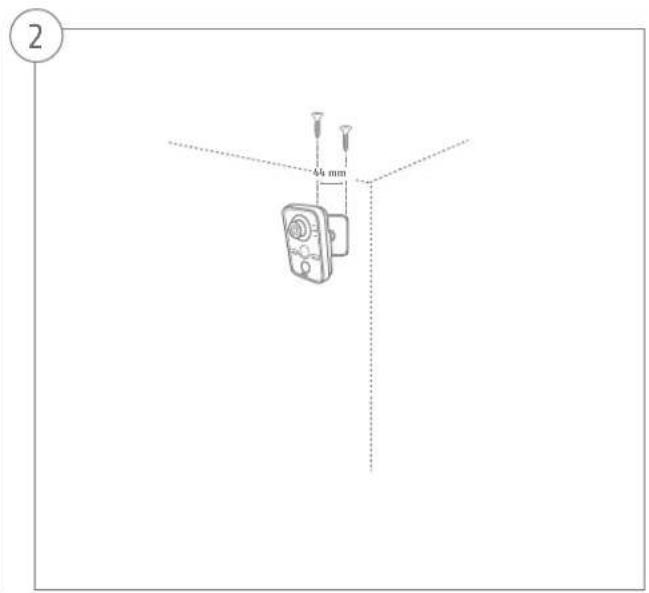
text_image
2 4 mmnatural_image
Line drawing of a device with concentric circles and labeled 'ABUS' (no other text or symbols)
Security Tech Germany
natural_image
Line drawing of a device front panel with circular and rectangular buttons, labeled 'ABUS' at bottom (no text or symbols on main body)


Advertencias

Security Tech Germany
natural_image
Line drawing of a hand holding a probe to connect to a laptop screen with a USB symbol (no text or labels)natural_image
Line drawing of a hand using a router to connect to a laptop and a remote control device (no text or symbols present)natural_image
Line drawing of a hand inserting a device into a router (no text or symbols)
Security Tech Germany