
553598 - Baby products BESAFE - Free user manual and instructions
Find the device manual for free 553598 BESAFE in PDF.
| Product type | Infant car seat group 0+ for babies, usable as a baby lounger |
| Brand | BeSafe |
| Model | iZi Go (ref. 553598) |
| Standard | UN/ECE R44 (group 0+, 0-13 kg) |
| Child weight | 0 to 13 kg (from birth to approximately 12-15 months) |
| Installation | Rear-facing with iZi Go ISOfix base or vehicle's 3-point seat belt |
| Dimensions (L x W x H) | Approximately 66 x 44 x 56 cm (estimated) |
| Seat weight | Approximately 4.5 kg (estimated) |
| Power supply | None (car seat without electronics) |
| Main features | Height-adjustable 5-point harness, retractable sun visor, removable and adjustable baby cushion, magnets to keep harness open, carry handle, stroller compatibility (modular system) |
| Care and cleaning | Clean with a soft cloth and warm water. Do not use harsh products. The fabric cover is washable (except foam parts). |
| Safety | Prohibited to install on a front seat with an active airbag. Support leg mandatory. Green visual indicators for correct installation. Maximum use 7 years. Replace after an accident. |
| Spare parts and repairability | Replacement cover available from BeSafe. Harness and buckles not replaceable separately. 24-month warranty. |
| General information | User manual in 98 pages available in 27 languages. Usable as a baby lounger until the child can sit up unassisted. |
Frequently Asked Questions - 553598 BESAFE
User questions about 553598 BESAFE
0 question about this device. Answer the ones you know or ask your own.
Ask a new question about this device
Download the instructions for your Baby products in PDF format for free! Find your manual 553598 - BESAFE and take your electronic device back in hand. On this page are published all the documents necessary for the use of your device. 553598 by BESAFE.
USER MANUAL 553598 BESAFE
natural_image
Line drawing of a person wearing a seatbelt, viewed from the side (no text or symbols)
Group 0+

Max. weight 13 kg

Age 0-12 mths
ECE R44-04
SCANDINAVIAN SAFETY

1

14

20

26

3R

44

50

56

62

68

74

ac

86

52

98

104

110

116

122

134

140

146

152

158

164

170

176

187

193

199


natural_image
Illustration of a mechanical component with no visible text or symbols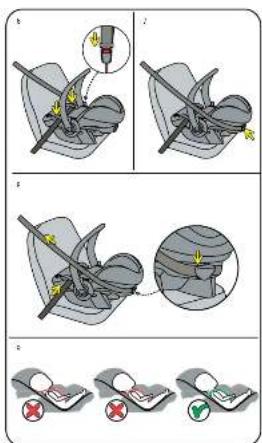

65 cm 5 months
< 60 cm
0-4 month
60-65 cm 4-5 months
Thank you for choosing BeSafe iZi Go
It is important that you read this user manual BEFORE installing your seat. Incorrect installation could encourage your child.
I Vital information
• The child seal MUST NOT be installed in a front
passenger seat WITH AN ACTIVATED AIRBAG.
12.50 can be installed repairing on 27-65 inch base or can be installed nextwing with a 3-point car part, no
according to UK/LCL Regulation No.16 or other equivalent
standards
- 121 Go is approved for group O-, rearward-facing from 0-15 kg
- The Partnership Relationship must always be solved when the child is first seen.
• The harness swaps must be ignored without blocks and cut finished.
• The shoulder paws verlüm magnets. Magnets can influence
- The first agreement with the persons of
• Protect only part of the child's body which is exposed to the sun.
• Removes the baby fashion (that corn par) when the child is taller.
ther 60 cm or over 4 months.
• Remove the baby cushion (hallam part) and handy bunge (upper
per) when the clinic is late than 65 on, or over 6 months. After an accident, the seat must be replaced. Although it
uncarnosed, if you were to have another accident, the seal into no
be able to protect your child to the lead to which it was designed.
- Prevent the seal from becoming trapped or weighed down by large coat and/or champing door.
• Make sure you can be so much than one
• Make sure you Limit it to find a man or her brother with him, but and your child (1 cm).
- DO NOT attempt to dismentle, modify or add any part to the seat.
Warranty will be sold. Poor original parts or accessories are used. Never leave your credit unreported in the case.
• Make sure all passengers are informed about h
child in case of emergency.
• Make sure luggage or other objects are properly secured. Unsecured
luggage may cause severe injuries to children and adults in case of accidents.
Однозанх
- Never use the sea. Manual ice cover. The cover is safely saline and may only be replaced by an original BeSafe cover.

• Do not use any aggressive cleaning products; these may harm the construction material of the cost.
construction material of the seal
- Seesie excise at child scale should not be bought, 5 tons second-hand.
- KEEP this user manual for letter use with the seat.
• DO NOT use the seat for longer than 7 years. Due to aging, the
quality of the materials may change.
1 Warnings (FN 12750 2009) using
the seat as a reclined cradle
• Do not use the web as recipes grade noca
your child can sit, urandee.
• This seat is not intended for prolonged periods of sleeping.
• It is dangerous to use this seal on an elevated surface.
• (in doubt), result is the car and manufacturer of the other.
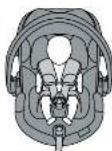
Preparing to install
- Carrying handle (1a)
- Head cushion (1b)
- Handle release buttons (2x) (1c)
- Shoulder straps (2x) (1d)
• Hip belt hook (2x) (1e)
• Baby cushion (1f) - Harness buckle (1g)
- Sun canopy (1h)
- Pushchair release handles (4x) (1i)
- Shoulder belt hook (1j)
• Harness height adjuster (1k) - Pushchair adapter housing (11)
Installation of the seat on the ISOfix base
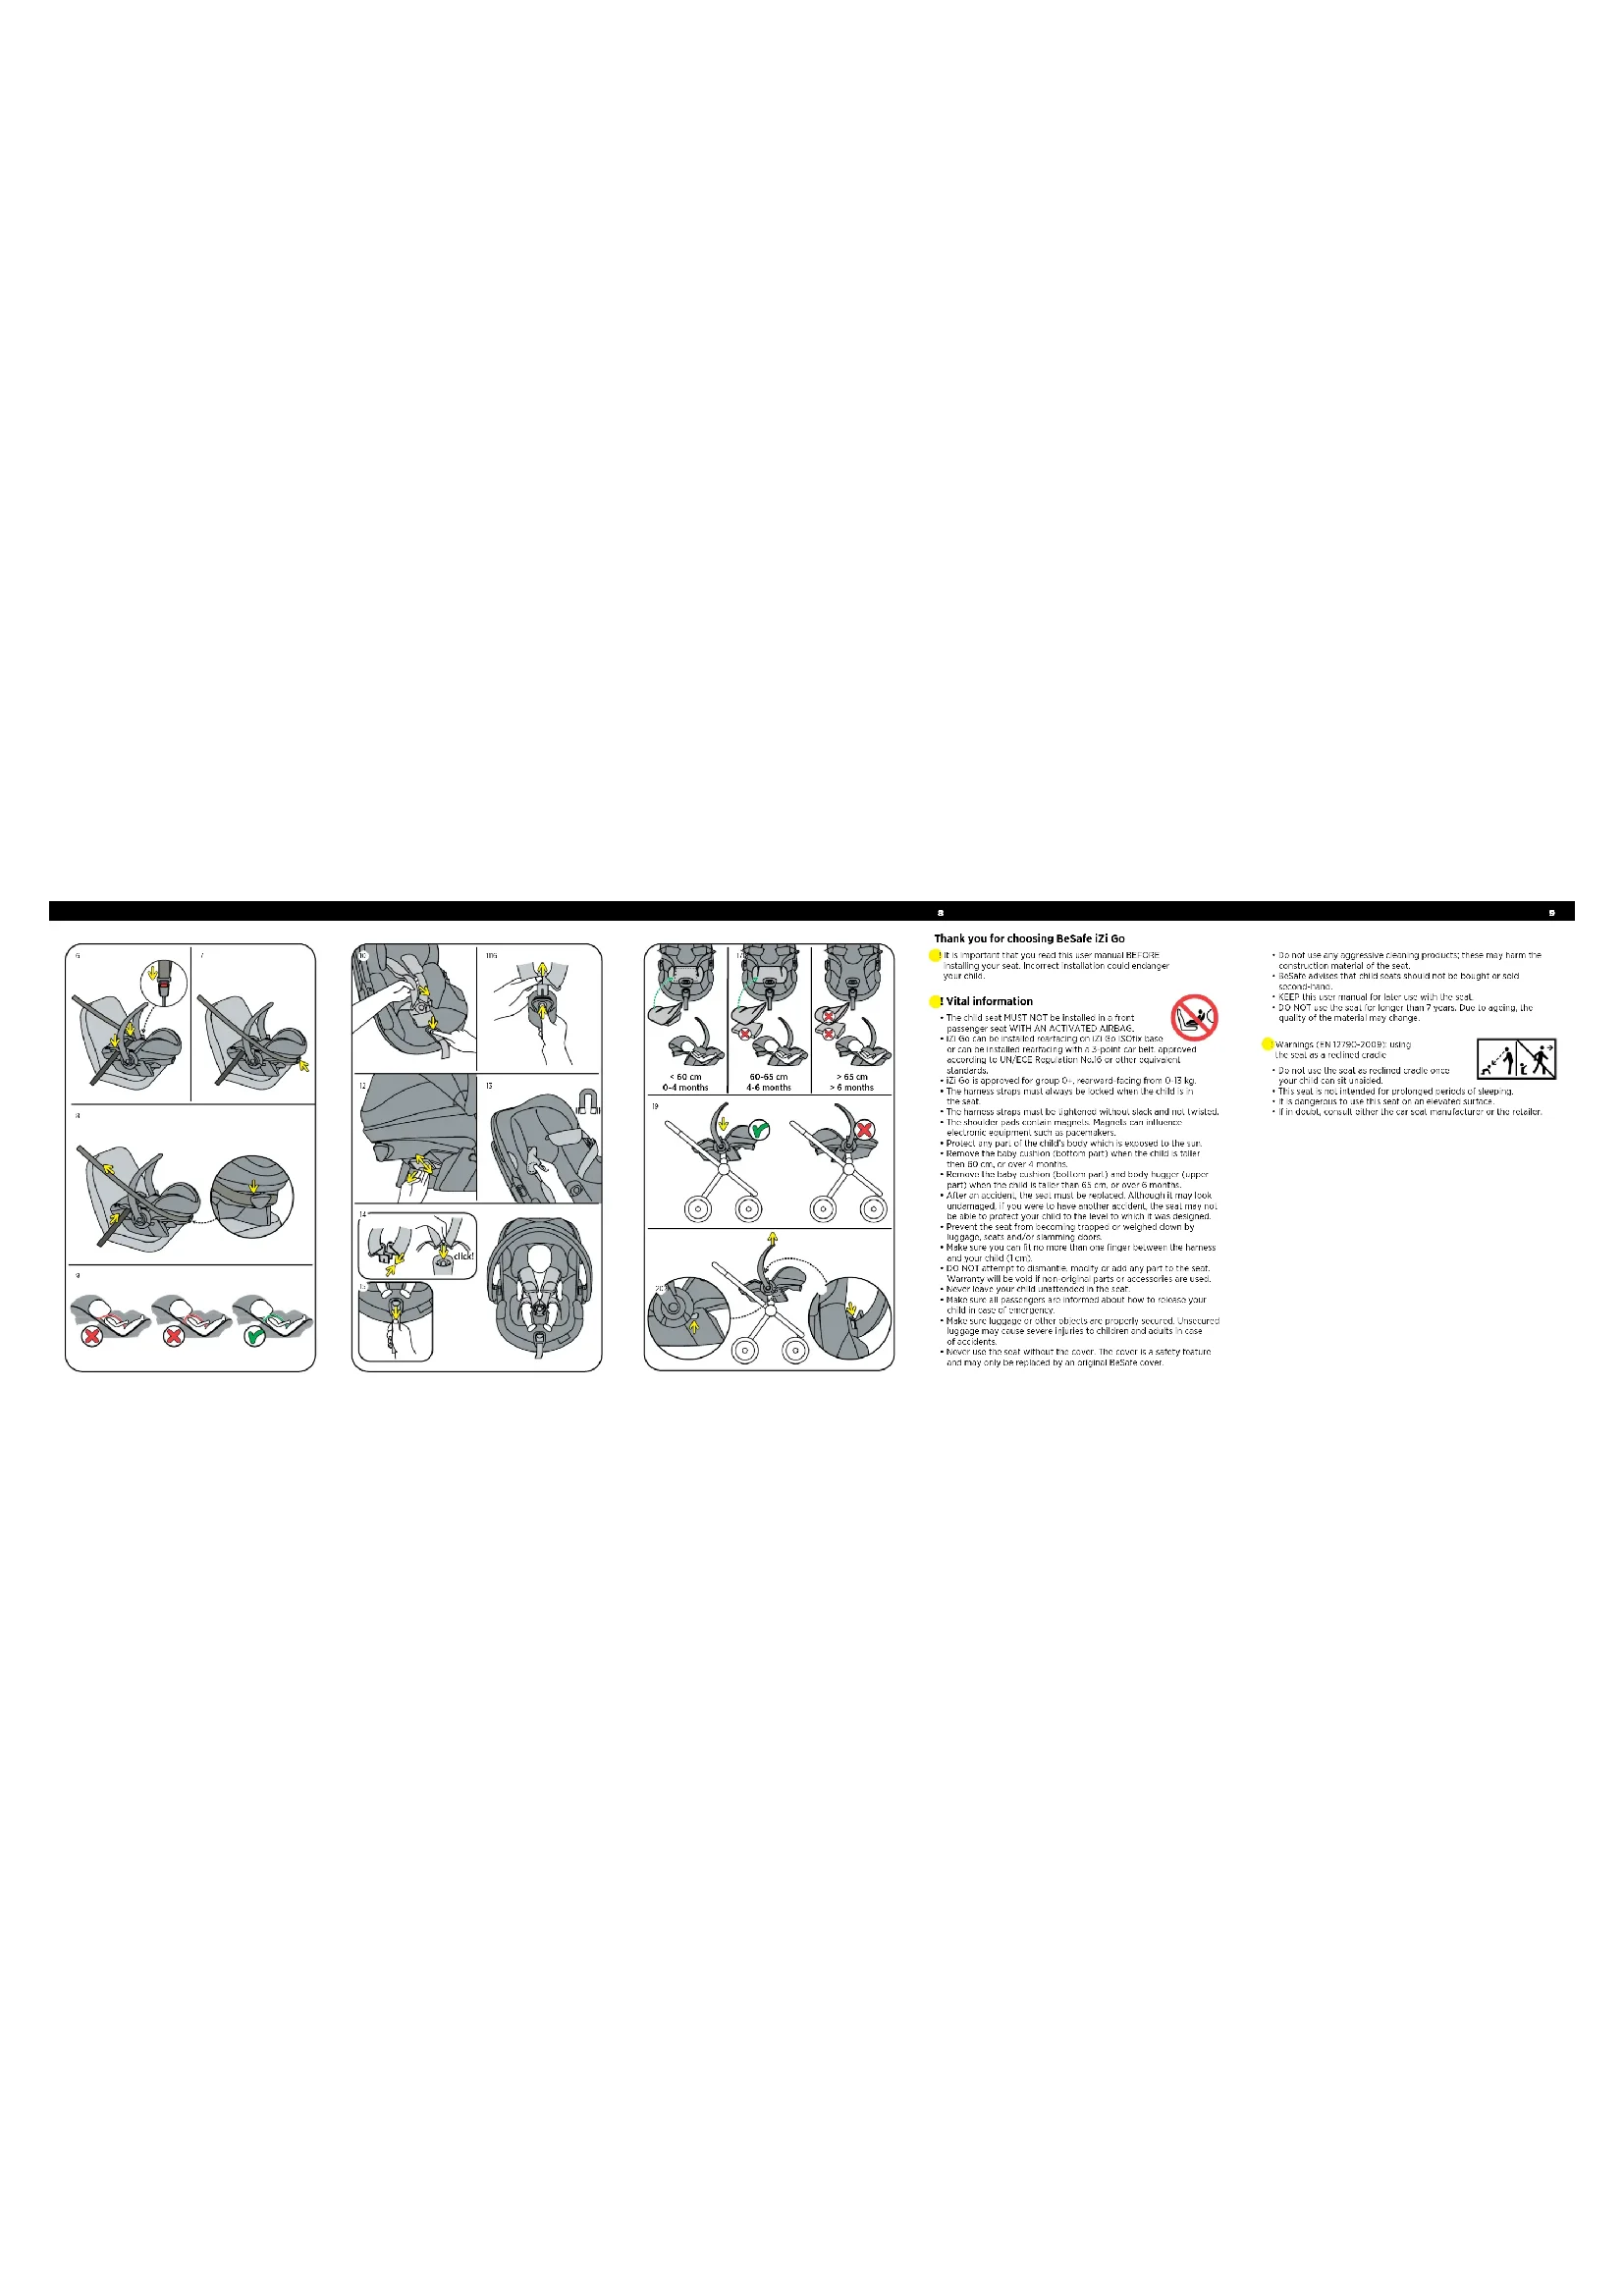
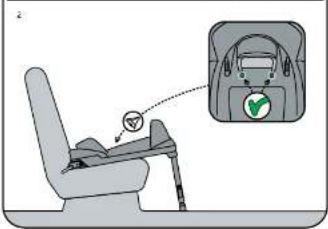
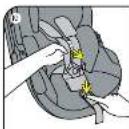
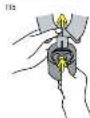
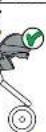
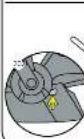
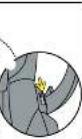
- Always check if the ISOfix indicators are green, before positioning the seat on the base. (2)
- Position the seat in the correct position on the base until it clicks with the base and the indicator at the front shows green. (3)
- Leave the carrying handle up in the carrying position.
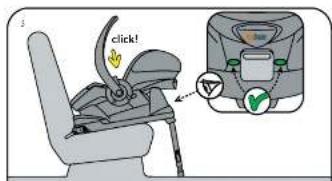
- When the seat is positioned rearfacing on the back seat of the vehicle, you should, if possible, push the front seat of the vehicle backwards, so that it is in contact with the child seat. If it is not possible to obtain contact with the child seat, push the back rest of the front seat of the vehicle forward as far as possible. (4)
Removal of the seat of the ISOfix base
- The seat can be taken off by pulling the seat release handle at the front of the base.
Belt installation
- Position the seat on the vehicle seat. Make sure the carrying handle is up in the carrying position. (5)
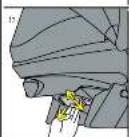
- Guide the hip belt of the 3-point-belt over the blue sections under the hip belt hooks and fasten the seat belt with a 'click'. (6)
- Guide the shoulder belt over the blue section through the shoulder belt hook at the rear side of the seat shell. (7)
- Tighten the 3-point belt by pulling the belt through the hip belt hooks and through the shoulder belt hook until it is as tight as possible. (8)
- Leave the carrying handle up in carrying position.
Positioning of the child
- Check that the shoulder strap slots are level with your child's shoulders. (9)
- Pull the shoulder straps up while pressing the button of the central adjuster. (10)
- Open the harness buckle. (11)
- The height of the shoulder straps and the head cushion can be adjusted by pulling the release handle upwards at the back of the seat and pulling the handle up or down. (12)
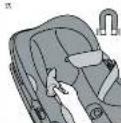
- Position the shoulder straps over the marking at the sides of the seat to use the magnets to keep the harness open while you position the child. (13)
- When the child is positioned, place the shoulder straps over the child's shoulders and close the buckle: CLICK! (14)
- Pull the harness strap through the central adjuster in the direction of the arrow straight up/forwards. Continue pulling until the harness is a comfortable but a firm fit. (15)
- You can protect your child against the sun by raising the sun canopy.
Baby cushion
The baby cushion offers extra comfort for young babies. As baby grows the thickness of the baby cushions can be adjusted.
• 0-4 m (16)
• 4-6 m (17)
• 6 m + (18)
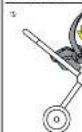
Using the iZi Go with a pushchair
The iZi Go can be installed on a range of pushchairs. For a complete list check www.besafe.com
Installation on a pushchair
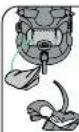
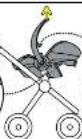
- Align the stroller adapter housings above the adapters of the pushchair and push straight down, click! (2x) (19)
Removing from a pushchair
- Move the carrying handle into carrying position.
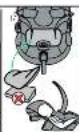
- Push the pushchair release levers up at both sides while lifting the seat vertically from the pushchair. (20)
- You can also release the seat from the pushchair by pushing the release levers beside the carrying handle towards the front of the car seat. (21)
Removing and refitting the cover
- Do take care when you remove the cover, as re-fitting the cover is done in reverse.
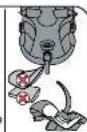
! Warning: potential misuse
- The child seat MUST NOT be installed in a front passenger seat WITH AN ACTIVATED AIRBAG.
- The floor support must always be used. Make sure that the floor support is fully pushed down.
- Make sure the indicators are green before you drive.

Guarantee
- Should this product prove faulty within 24 months of purchase due to materials or manufacturing fault, except covers and harness straps, please return it to the original place of purchase.
- The guarantee is only valid when you use your seat appropriately and with care. Please contact your retailer, they will decide if the seat will be returned to the manufacturer for repair. Replacement or return cannot be claimed. The guarantee is not extended through repair.
- The guarantee expires: when there is no receipt, when defects are caused by incorrect and improper use, when defects are caused by abuse, misuse or negligence.
Takk for at du valgte BeSafe iZi Go

- Thank you for choosing BeSafe iZi Go
- I Vital information
- Preparing to install
- Installation of the seat on the ISOfix base
- Removal of the seat of the ISOfix base
- Belt installation
- Positioning of the child
- Baby cushion
- Using the iZi Go with a pushchair
- Installation on a pushchair
- Removing from a pushchair
- Removing and refitting the cover
- ! Warning: potential misuse
- Guarantee
- Takk for at du valgte BeSafe iZi Go
Brand : BESAFE
Model : 553598
Category : Baby products