Easy Travel - Iron TAURUS - Free user manual and instructions
Find the device manual for free Easy Travel TAURUS in PDF.
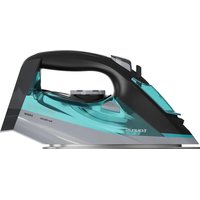
| Product Type | Travel Iron |
| Brand | Taurus |
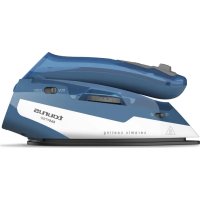
| Model | Easy Travel |
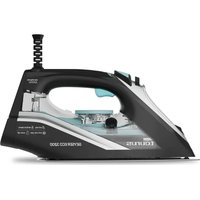
| Soleplate | Non-stick Ceramic |
| Power Supply | Dual Voltage Selector (120 V / 230 V) |
| Water Tank Capacity | MAX level (see manual) |
| Ironing Functions | Dry, Steam, Steam Burst, Vertical |
| Folding Handle | Yes, for easy storage |
| Indicator Light | Indicates heating and temperature maintenance |
| Temperature Control | Yes, with settings for synthetics, silk/wool, linen |
| Steam Control | Yes, adjustable steam flow |
| Steam Burst Button | Yes, for extra steam |
| Vertical Use | Yes, for curtains and clothes on hangers |
| Domestic Use | Yes, non-professional |
| Cleaning | Damp cloth, do not immerse |
| Descaling | Every 6 to 12 weeks depending on water hardness |
| Safety | Thermostat, auto shut-off (not specified), hot surface indicator |
| Included Accessories | None mentioned |
Frequently Asked Questions - Easy Travel TAURUS
User questions about Easy Travel TAURUS
0 question about this device. Answer the ones you know or ask your own.
Ask a new question about this device
Download the instructions for your Iron in PDF format for free! Find your manual Easy Travel - TAURUS and take your electronic device back in hand. On this page are published all the documents necessary for the use of your device. Easy Travel by TAURUS.
USER MANUAL Easy Travel TAURUS
Easy travel (Ver III)
Distinguido paciente:
Easy travel (Ver III)
Dear customer,
Many thanks for choosing to purchase a TAURUS brand product.
Thanks to its technology, design and operation and the fact that it exceeds the strictest quality standards, a fully satisfactory use and long product life can be assured.
- Read these instructions carefully before switching on the appliance and keep them for future reference. Failure to follow and observe these instructions could lead to an accident.
SAFETY ADVICE AND WARNINGS
- The appliance must be used and placed on a flat, stable surface.
- When the appliance is placed on its support, make sure that the surface on which it is placed is stable.
- This is a travel iron and it is not intended or designed for regular use.
- Never leave the appliance unattended while it is connected to the supply mains.
- This appliance can be used by children aged from 8 years and above and persons with reduced physical, sensory or mental capabilities or lack of experience and knowledge if they have been given supervision or instruction concerning use of
the appliance in a safe way and understand the hazards involved.
- Cleaning and user maintenance shall not be made by children unless they are supervised.
- Keep the appliance and its cord out of reach of children less than 8 years of age.
- This appliance is not a toy. Children should be supervised to ensure that they do not play with the appliance.
- Do not use the appliance if it has fallen on the floor, if there are visible signs of damage or if it has a leak.
- Unplug the appliance from the mains before refilling the water tank.
- The temperature of the accessible surfaces may be high when the appliance is in use.
-
If the connection to the mains has been damaged, it must be replaced, take the appliance to an authorised technical support service. Do not attempt to disassemble or repair the appliance by yourself in order to avoid a hazard.
-
Ensure that the voltage indicated on the rating label and the voltage selected on the voltage selector matches the mains voltage before plugging in the appliance.
-
Connect the appliance to a base with an earth socket withstanding a minimum of 16 amperes.
-
The appliance's plug must fit into the mains socket properly. Do not alter the plug. Do not use plug adaptors.
- Do not leave the appliance out in the rain or exposed to moisture. If water gets into the appliance, this will increase the risk of electric shock.
- Do not force the power cord. Never use the power cord to lift up, carry or unplug the appliance.
- Do not allow the power cord to hang or to come into contact with the hot surfaces of the appliance.
- Check the state of the power cord. Damaged or tangled cables increase the risk of electric shock.
- Do not touch the plug with wet hands.
- Do not use the appliance if the cable or plug is damaged.
- If any of the appliance casings breaks, immediately disconnect the appliance from the mains to prevent the possibility of an electric shock.
- Do not touch the heated parts of the appliance, as it may cause serious burns.
USE AND CARE:
- Fully unroll the appliance's power cable before each use.
- Use the appliance handle, to catch it or move it.
To keep the non-stick treatment in good condition, do not use metal or pointed utensils on it. - Respect the MAX level indicator. (Fig.1).
- Disconnect the appliance from the mains when not in use and before undertaking any cleaning task.
- This appliance is for household use only, not professional, industrial use.
- Store this appliance out of reach of children and/or persons with physical, sensory or reduced mental or lack of experience and knowledge.
- Do not store or transport the appliance if it is still hot.
- Keeping the iron in its housing support at maximum temperature for too long time, may cause its colour change, which will not affect the correct working order of the appliance.
- For a correct operation, keep the soleplate in proper conditions does not operate over metal objects (ironing board metal parts, buttons, zips etc.).
-
It is advisable to use distilled water, especially if the water in your area contains clay or if it is "hard" (containing lime or magnesium).
-
Check that the lid is closed properly before starting the appliance.
- Never leave the appliance connected and unattended if is not in use. This saves energy and prolongs the life of the appliance.
- Never rest the appliance into a surface while in use.
- Do not use the appliance on any part of the body of a person or animal.
- Do not use the appliance with pets or animals.
- Turn the thermostat control to the minimum (MIN) setting. This does not mean that the iron is switched off permanently.
SERVICE:
- Any misuse or failure to follow the instructions for use renders the guarantee and the manufacturer's liability null and void.
DESCRIPTION
A Steam blast button
B Filling spout
C Ceramic soleplate
D Pilot light
E Dual voltage selector
F Steam regulator
G Steam flow and temperature regulator
H Foldable handle button
INSTRUCTIONS FOR USE
BEFORE USE:
- Remove the appliance's protective film.
- Ensure that the selected tension on the voltage selector coincides with the tension of the mains.
- To eliminate the smell given off by the appliance when used for the first time, it is recommended to have it on at full power for 2 hours in a well-ventilated room.
Prepare the appliance according to the function you wish to use.
VOLTAGE SELECTOR:
- The appliance has a voltage selector control, situate the selector according to the type of voltage available in the mains where the appliance is to be connected. (Fig.2).
FILLING WITH WATER:
- It is essential to have filled the deposit with water to be able to work with steam.
- Open water inlet lid.
- Fill the deposit taking care to observe the MAX
level (Fig.1).
- Close water inlet lid.
USE:
- Unroll the cable completely before plugging it in.
- Connect the appliance to the mains.
- Slide the thermostat control to the desired temperature position.
The pilot light (D) comes on. - Do not use temperatures higher than those indicated on the garments to be treated.
- Temperature for synthetic fibres (Polyester, Nylon...).
-
- Temperature for silk and wool.
- Temperature for cotton. (Minimum temperature for steam ironing)
- Max Temperature for linen.
- If garment has various kinds of fibres, select the temperature for the fibre that requires the lowest temperature. (For example, select the temperature for polyester for an article made out of 60% polyester and 40% cotton).
- Wait until the pilot light has gone out which will indicate that the appliance has reached an adequate temperature.
- During the appliance's use the pilot light will come on and off automatically, indicating the heating elements are working, and therefore maintaining the desired temperature.
DRY IRONING:
- The appliance has an option to dry ironing (without steam). To use this option turns on only the iron switch.
STEAM IRONING:
- It is possible to iron with steam whenever the deposit is filled with water and the adequate temperature is selected.
FORDABLE HANDLE:
- By pressing the button (H) the handle is folded for an easy storage.
STEAM BLAST:
- This function proportions extra steam for eliminating wrinkles.
-
Press the steam blast button (A). Wait a few seconds until vapour penetrates the fibres of the garment before pushing the button again. For optimum steam quality, do not apply more than three successive blasts.
-
The steam blast button has to be pressed repeatedly to release the first shot.
VERTICAL STEAMING:
- It is possible to iron hanging curtains, items of clothing on his hanger, etc. To do so, follow the instructions:
- Select the maximum temperature of the iron, while turning the temperature regulator of the iron in a clockwise direction.
- Move the iron in a top to bottom direction while pressing the steam control (A). Important: for cotton and linen, it's recommended to put the iron base in contact with the material. For other more delicate fibres, it's recommended to keep the iron base at some centimetres of distance.
ONCE YOU HAVE FINISHED USING THE APPLIANCE:
- Select the minimum position (MIN) using the thermostat control.
- Unplug the appliance from the mains.
- Remove the water from the inside of the appliance.
- Clean the appliance.
PRACTICAL RECOMMENDATIONS:
- Classify the garments into groups by ironing temperature. The appliance heats up more quickly than it cools down, therefore, to avoid accidents, minimise energy consumption and optimise time, it is advisable to start off ironing items that require lower temperatures and progress to those that need higher temperatures.
- Pure wool fabrics (100%) can be ironed with the iron set to steam. Select a high steam temperature and place a cotton cloth between the iron's metal surface and the garment.
CLEANING
- Disconnect the appliance from the mains and allow it to cool before undertaking any cleaning task.
- Clean the equipment with a damp cloth with a few drops of washing-up liquid and then dry.
- Do not use solvents, or products with an acid or base pH such as bleach, or abrasive products, for cleaning the appliance.
- Never submerge the appliance in water or any other liquid or place it under running water.
HOW TO DEAL WITH LIME SCALE INCRUSTATIONS:
- For the appliance to work correctly it should be kept free of limescale or magnesium incrustations caused by the use of hard water.
- To avoid this kind of problem it is advisable to use distilled water.
- To prevent this kind of problem, we recommend the use of water with low lime or magnesium mineralisation.
However, if it is not possible to use the kind of water recommended above, you should periodically remove the limescale from the appliance: - Every 6 weeks if the water is "very hard".
- Every 12 weeks if the water is "hard".
- To do so, we recommend the use of the specific product for this kind of appliance, which can be found in specialised shops and authorised technical services.
- A specific anti-lime scale product should be used on this kind of product.
- Homemade solutions are not recommended in the decaling of this appliance, such as the use of vinegar.
ANOMALIES AND REPAIR
Take the appliance to an authorised technical support service if product is damaged or other problems arise. Do not attempt to disassemble or repair the appliance yourself as this may be dangerous.
FOR EU PRODUCT VERSIONS AND/OR IN CASE THAT IT IS REQUESTED IN YOUR COUNTRY:
ECOLOGY AND RECYCLABILITY OF THE PRODUCT
- The materials of which the packaging of this appliance consists are included in a collection, classification and recycling system. Should you wish to dispose of them, use the appropriate public recycling bins for each type of material.
- The product does not contain concentrations of substances that could be considered harmful to the environment.

This symbol means that in case you wish to dispose of the product once its working life has ended, take it to an authorised waste agent for the selective collection of Waste from Electric and Electronic Equipment (WEEE).

This symbol means that surface could to get hot during the use
This appliance complies with Directive 2014/35/EU on Low Voltage, Directive 2014/30/EU on Electromagnetic Compatibility, Directive 2011/65/EU on the restrictions of the use of certain hazardous substances in electrical and electronic equipment and Directive 2009/125/EC on the ecodesign requirements for energy-related products.
François
Easy travel (Ver III)
Cher Client,
Easy travel (Ver III)
Easy travel (Ver III)
Egregio cliente,
Easy travel (Ver III)
Caro cliente:
Obrigado por ter adquirido um eletrodométrico da marca TAURUS.
Easy travel (Ver III)
Geachte klant:
Easy travel (Ver III)
Szanowny Kliencie,
NAPATHPHSEIEI PINTH XPHSH:
Bebaiowtei oTe exTe aapieoeioa ta uikaoakeuaiaac Tou poiovtoc.
Bébaiwθeite otn taon tou exete eπiαeεi otov etiayoea taonc ouptinTTEI μe TnV taon Tou diktou.
Tia va aTOPOUYETn MUPOWIA TOU EKTEI IN OUKEUN TIV TIPWTN QOPA, OUVIOTATAI VA T N 0eOETe OE AETOUPYIA OTN MEVIOT NEPOKPQIA YIA 2 WpEs, SE WmuTIO TOn AEpiETAI KAla.
- PpoToIaOte Tn OuKeun avaloya e Tn Aetoupyia Tou έλeTe va TpaypaTOnIoNaeTe.
ENIAOFEA TAEH
H ouokun diaotei diakottn eTIAoync taonc, toTOeTnote Tov EIIAOyac OTn 0eON TIOU evdekivutai yia To EIOC ts TaON TIOU dIATHEa tOtv pizou tou peuatoC otou aouvdeEei n ouokun. (X.2).
TEMIMEMA ME NEPO:
Eivai aTapaiTnTo va exTe ymuoi Tn deqauv n e vepoia va uTopoeTe va xpnoiopoioeTe atuo.
-AvoiTE TO KATTAKI TO OTOJIOU YEMIIOATOSC.
- 8eaeyn, uyn utepaivovtac to Eπiεdo MAX (Σx.1)
Kλείστε Μακαί τοῦ στόμιου γεμίσματος.
XPHH:
Easy travel (Ver III)
YBaXaEmbIK KIneHT!
Blaoradapm Bac 3a Bb6op npnbopa Toproboi MapKn TAURUS. OH BblnoHEn C npimHeHnem nepeoBbIX TexHOJOrN, IMeET 3JIerAHTbI nn3aH, HAnExKHyO KOHCTpyKcUIO NpBeBbIaET Han60nee Tpe6oBaTeNbHbIE CTaHdApTbI KaueCTBa, YTO oecneuT NOHoe COOTBeTCTBVE BaUM Tpe6oBaHnM INpoDOnKtEhBbI cPOK cIyK6bl.
BHNMaTeIbHo npOHTne 3Tu INHCTpyKuIO nepeD BKNIOUeHMe mJIeKTPoPnp6opa n coXpaHnTE ee dJa NcNoIb3OBAHnB 6yDuEeM. HeHaJNExKaUee Co6JIIODeHne 3ToI INHCTpyKUIM MOKeT 6bITb npUHHoH HeCuaCTHO CnyaJ.
ИНСТРУКЦЯ NOTEXHINKEBE3ОПACHOCTN
- UTo6bI nCNoJIb3OBaTb npu6Op,
eRo HuxHo yCTaHOBnTb
Ha poBHyIO n yCTOuNByIO
NOBepXHOCTb;
Korda Bbl CTaBNTe npnbop Ha nOcTaBky, y6eIntecb, YTO NOBepxHocTb YBJIaETcYyCToINBOI. - ΘTOДОPOЖнь yTHor, NO3ToMy OH He npedHa3HaueH dIЯ peRyIaRHO nCNoIb3OBAHnI.
- HnkOrda He octabJnTe np6op 6e3 npncMoTpa, ecn OH NODKJIIOUeH K cETN.
-ДаHHoe yCTpoIcTBo MOKeT ИСПОЛьЗOBaTBСЯ DeTbMn Стapшe 8 ЛeТ, ЛицamN C ОгразнчeHHbIMN ФИЗЧЕСКIMN, СЕнсOPнБIMN ИЛN УМСТВЕHHbIMN ВОЗМоЖHOCTЯМN, a ТAKKE
JIucaMn,He ObIaIouzIMN COOTBETCTBYUOzIM ONbITOM IIN 3HaHnA MNI,TOJbKO NOD PnCMOTpOM INI NOCJe IPOBEdeHnIHCTpykTaJa NO 6e3OpacHOMy NCIOJIb3OBaHnIO yCTpoiCTBa N C NOHMaHnEM CBraHHbIX C Hm ONaCHOCTeN.
-ДeТи He ДОЛЖны ВыINОЛНЯТь
ЧИСТКУ ИЛN yXaЖиВaТь 3a
Прибором 6e3 ПпсмOTpa
Стapшиx.
XpaHnte npnbop n ero ka6ebbBHe doCraemoctn deTeiMnaDwe 8 neT.
- 3TOT np6op He yBnEeTcnyrpyko. Heo6xOIMO CNeIHTb 3a DeTbMn, YTO6bl OHn He nrrpaNN C Hm.
He donyckaetcnaOJb30BaTb np6op nocne naDeHnHa noI,ecnHa HEm imMeOTc BNDMbIe CJIebl NOBpeJdeHn IIN npOTEuKa.
- OTKJIHOnHTe npIbOp OT ceTeBOI pO3eTKI npeEd TeM, KaK BHOBb HAnOJHnTb pe3epByap dJa BOdBi.
TeMnepeAtpa NOBepxHocTn BKIOUeHHoro 3JIeKTPoPnp6Opa MoXeT 6bITb OueHb rOpAyei;
- Повржденьи се teBOI shHyp NOДлжNT 3amHe B aВТОпЗOBaHHOM cepBиСHOM ceHTpe. He donyckaetcra pa3bnpaTb nII peMOHTnpoBaTb np6Op, noCKOJIbky 3TO He6e3OnaCHO;
-Перд Tem КАнДКЛЮЧИТь npибор K cetN, y6eINTEcB, YTO yka3aHHoe Ha 3TNKeTke HappxeHne И happxeHne, Bbl6paHHoe Ha peryIaTope HappxeHnA, COOTBeTCTByeT HappxeHnIO 3JIeKTPocETN.
-ПоДКЛЮЧNTе ЗЛЕКТрОпРиБОр К 3a3eMЛeHHоу po3eTKe, paccHTaHHoH Na TOK He MeHee 16 amNep.
Cetebar Bnka DoJxHa NODXoNDtB K PO3eTke. He DOnyckaetc BHOCTb N3MeHeHnB BnIKy ceTeBOrO shypa.He DOnyckaetc TaKKe IcNoJIb30BaTb NepexoHNKn dIra PO3eTKN;
He octabJyTe np6op nOДdoxJdEM nIN BO BnaxHom MeCTe. EcIn B np6op nonaTe BOda, 3TO MOKeT cTaTB npuHOnnopaxKeHn 3JIeKTPueCKm TOKOM;
He npiklaBbAte Cny K Whpy nTahn. He donyckaetc NcnoNb30BaTb Whyp nTahn, YTO6bl NOHMaTb INN nepeHocntb 3JIeKTPoPn6Op, BbHMaTb BNkY n3 pO3eTKn, NotaHyB 3a WHyp;
He donyckaetc, TTo6bI ceTeBoi shyp CBeuBacra nn KacaIc ropaux qacte npubopa;
- ПоберпсocToHne uHypa nHTAHn. NOBpeKdEHHb HnN 3anyTaHHb UHyp MoKeT 6bITb npuHHO npaKeHn 3JIeKtpnueckm TOKOM.
- He npikacaiTecb K BnIke BnaXhblm pykam.
He IonyckaetcAeknnyaTnpoBaTb 3NeKTPponpN6Op c NOBpeXdEHHbIM UHypom NIN BUNKO INTaHna.
- npn JIO6OM NOBpeXeHIN KOpnyca 3JIeKTPoPn6Opa HeMeIeHNO OTKIIouHTe erOOTcTn, YTO6bI He DOnyCTNtB nopaxKeHn 3JIeKTPuYeCKIM TOKOM;
- He TporaIte HarpBaHouIeNcEaJCTn np6opa, TAK KAK 3TO MOKET BbI3BaTb Cepbe3HbIE OXKOrn.
NcPONb3OBAHNE UXOD
- NpePeK KaKDbIM IcNoJIb3OBAHnEM IOnJIHOCTbIO pa3BOpaHbAaTe CeTeBOI Ka6eJIb;
-Дяпегемецни удержаня риборансponьут eero pyky.
-ДяТOrO,чTo6blaHTInpnpurapHoe NOKpbITNe COxpaHЯNOCb BXopoWEM COCToHn,He IcNoJIb3yIte MeTaJIINueCKne nIIu OCTpIe KxOHHbIe npHaIaNEXKHOCTN. - C6nIaIte yka3aTeIb ypoBn MAX (Pnc.1)
- OToeHnHTe 3NeKtpnpn6op ot cetn nocne nCNoJIb3OBAHnI INI dJI eTO uCTKn;
3TOT npin6op npedHa3HaueH TOJbKO nIaDOMaUSHero, a He npocecnoHaJIbHOrO nn
PpOMbIuJIeHHOrO IcNoJIb3OBaHnI;
XpaHNTe 3TOPT np6Op BHe DOcRAEmocTn DeTei n/nn JnC OrpaHnueHHbIMn Fn3NueCKm, CeHCOPHbIMn NIn YMCTBEHHbIMN BO3MOxHOCTaMn, a TaKKe Tex, KTo He 3HaKOM C npaBnIaMn erO nCNoJIb3OBAHn;
He DonyckaetcXpaHntb NpepeBO3ntb 3neKtpponpnpB B ropyem coCToHn;
- Ecni BkIIOueHHbI Ha MaKcImaJIbHyIO TEMnepaTyPy yTHor B TeUeHne CInuKOM DOIrrO BoMeHn HaxoINTCra Ha NODCTaBKe, erO UBeT MoKet N3MeHNtbcr, YTO He NOBNIReT Ha npabNbHyIO pa60Tu np6opa.
-Дя npabnblho pa6bI np6bopa coxpaHnTe nOdoBBy np6bopa B doJXHom COCToHN: He nCnoJIb3yIe np6bOp Ha MetaIIuuecknx 06naT8 (MeTaIIuueckne yactn rJaIINbHOJ IOCKN,pyROBNUcbl,MOJHN,IV.T.D.)
- PeKOMeHnyeTcNcNoB3OBAbT bInCTnIINpOBaHHyO BODy,OCo6eHHo,ecnI TAm,TrE Bbl HaxoDITcB,BODa CoepKNT rINHy nI IN ECnI OHa JxecTkAra (CoepKNT N3BeCTb nIIMarHn).
-Перд ВКлоченm npnbopa ybeintecb,чTo Kpbiuka 3aKpbiTa DOJXHBIM o6pa30M.
He octabnIte BKNIOUeHHbI 3JIeKTpOpnp6Op 6e3 npncMOtpa.3To coXpaHIT 3JIeKTpOaHEprnIO n npoJNT cpoK erO cnYk6bl;
- He KnaIte paBoTaIOUm np6Op Ha NOBepxHocTb;
- He npKacaiTecb pa6ooye noBepxHocTbIO yTOra K TeNy NJN K JKNBOTHBIM;
-He donyckaetcnaonb30BaT np6op nra 6cbnykBAHn DOmaWHNX KINBOTbIX.
ycTaHOBnTe TepMoCTaB MmHImaJIbHoE (MIN) noJoxHe. 3To He o3HaayeT, yTo 3JeKtponp6Op 6yDeT BbIKIoueH BOO6Ie.
CEPBNUCHOE OBCJUYKUBAHNE:
JIIO6oe HnnpaBnIbHoe nCnOJIb3OBaHne nn Heco6IIOJeHHe NHCtpyKcN aBTOMaTNUeCKn npINBOJNT K aHHyJIIpOBaHNIO rapaHTMN IN CHRTNUO OTBETCTBeHHOCTN IPOUN3BOJNTeJI.
ONICAHNE
A Khonka Bbinycka napa
B 3aJIINBHOe OTBepCTne
C Kepamuuecka nooWba
D CBetOBO INHINKAtOp
E BoHnH nepeKnOuateIb HapJxHeH
F Perynatop napa
G PerynTop paccxOda n TempepaTypbI npa
H Khonka cknaDbBaHnra pyuKn
HCTPYKUNIPO 3KCPJYATAUIN
NEPEDNCIOJIb3OBAHHEM:
CHIMMTE 3aunTHyU nIeHKy c np6opa;
- Y6eIntecb, yTO BbIbpaHHoe HAnpJxKeHne Ha peryIaTope HAnpJxKeHnca COOTBeTcTByeT HAnpJxKeHnO 3JIeKTpocEtN.
-ПипервOM BKЛIOUeHnnp6Op BbIeJIeT 3anax.PekomeHdyetc BKIOuHTb erO ha NOIHyMOUHOCtB Ha 2 Yaca B XopoWo npOBeTpNBaEMoKOMHaTe.
- noIroTOBbTe 3JIeKToPnpn6Op K pa6oTe.
NEPEKJIIOUATEENb HANPRAXKEHINr:
- Pnp6op NMeETФyHKUIO peryIuropoBaHnHa npJxKeHn; yCTaHOBtE nepeKlIOuAteNb B COOTBeTCTBnC TINOM Ha npJxKeHn 3JIeKTpOcEtN, K KOTOpoi BBi CoBupaTeCb NOkKnOHTb np6op. (Pnc.2)
3ANIBKA BOIbI:
- UTO6bI NcNoB30BaTb nap, HxKHO 3aNtB BODy;
- OTkpoIe KpbIuKy 3aJIbHOrO OTBepCTnJ.
3aene Te Body B pe3epByap, KOHTpOInpyra, TTo6bI He npeBicntb Metky MAX (pnc. 1). - 3akpoTe KpbuKy 3aJIbHOrO OTBepCTnI.
NCHONJIb3OBAHNE:
- PoiHocTbIO pa3BepHInTe Ka6eInb nepei NOKJIIOUHeHHEm K CeTN.
-ПоdkлючITE npn6op K cetN. - yctaHObITE TepMOCTaB HHyXHOE NOJIOKeHHe;
- BKJIIOHTcK KOHTpOJIbHbI INHdUkAToP (D).
He npeBbIaIte TemnepaTpy, yka3aHHyIO Ha npblke Odekbl. - TemnepaTypa Дя СИNTeTNUeCKNX TkaHei (ПОЛиэтep, HeJIOH...);
- ● - TempepaTpaДЯшелkaишерсн
- ●● ● TemnepaTpya Дя Xлпога (Mннмальнаг TemnepaTpya Дя Глжкс Napom)
- MaKcImaIbHaj TeMnepaTypa IJIa IbHJHO6JIbI
- Ecni TkaHb IMMeT CNOXHbI COCTaB, yCTaHOBnTe TEMnepaTy pI dIy HAn6OJIe e YyBCTBnTeJIbHbIX BOJOKOH. (Ecni, HApPIMep, TKAHb CoepKNT 60% NOINcTepa I 40% XIONKa, ycTaHOBnTe TEMnepaTyp, KaI dIy NOINcTepa);
-Подождente,пoka BыклioчNTС ИДиКaTOp,ТУуka3ыBaeТ Ha HarpeBdo HuxKHOI TemnepaTpybl.
BoBpemIcNoB3OBAHnI np6opa CBeTOBOI INDnKATOP BkInOuaeTcN I BbIKIOuAeTcABTOMaTNueckN, YTO yKa3bIBaet Ha pa60Ty HArpeBaTeJIbHbIX 3IeMeHTOB NO NODepXaHnHO Heo6xOIMoTEmnpaTpybl.
CYXOE JIAJXEHBe:
-Пибор ИмeelФункцю cyxoro rnaxeHnra (6e3 nCnoIb3OBaHnna napa).ДЯ nCnoIb3OBaHnna 3ToI ΦyHKcII npocTo BkInouHTe pni6bp.
NAPOBOE TIAJXEHbe:
MOXHO INaIbTb CnapOM,ecINBpe3epByape IMeETcR BODa N BBIbpaHa COOTBeTCTByIOUaA TEMNEpPaTypa.
CKIADHARyUKA:
-Пинжати Кноги(H) рчka сложиТсдя уdo6HOrO xpaHeHn.
HHTEHCNBbIyBbIyCKNAPA:
-3TaФyHKUINIPO3BOJRAETpa3rnaIDNTbCKnADKINoDAueydoONHHTeBHO napa;
- HaxMnte KHONky noaynapa (A). NpOdoJnte HeCKoNbKO cekyH, YTo6bI Bnara npOHKnB BOJOKHa, n CHOBA HaxMnte KHONky.ДЯ ONTImaJIbHOro OTnapUBaHnHe HaXIMaIte KHONky 6oJee Tpex pa3 noJpy;
- Khonky napoperynlaTopa Heo6xOIMO Haximatb Heckolbko pa3, YTo6bl npOn3oUna nOdaça napa B nepBbI pa3.
BEPTIKAJbHOE OTNAPUBAHNE:
- MoXHo pa3rIaxNtBaTb BnCzUne 3aHaBeckn, OdEJy Ha nIeYnKax N T. D. DnA 3ToR:
Bb6epnteHa yTore MaKcImMaIbHyTo TemnepaTpy, nobopauHbapeyIaTOp TemnepaTpyb I HaprabHeHHIO YacOBOn CTpeJIke.
-ПомениTe noJoxeHne yTHoA n3 BepTnKaJIbHOro B rOpu3OHTaIbHoe, KOrda HaxmaeTe KhoNky noaunnapa (A).BaXHo: DnA xIOnKa INbHa peKoMeHdyetc, YTo6bl yTHor KOHTaKTIpoBaN C MaTePnaIOM.ДЯ 6OJee UyBCTBnTEJIbHOro MaTePnaIa yTHor HxJHo yDepxNBaTb Ha HeKOTOPom pacCTOHN.
PONCNE INCNOJIb3OBAHNIA:
- YctaHOBuTE MInHmAlbHyIO (MIN) TempepaTypy TepMoCTata.
- OTKIIOHTe np6Op OT cETN.
- ydaJInte BOy n3 pe3epByapa;
OuNCTnTe np6Op.
IIPAKTNUECKNE PEKOMEHDAUINIIONCIOJIb3OBAHNUO:
PacnpedeHnTe OndJy Ha rpynnbI B COOTBETCTBnC TempeatypoJ dJaTgnaKeHn. Pnp6op HarpeBaetc 6bictpee, Yem OxJaXdaeTcra, N03TomY, TTO6bl N36ExKaTb HechactThbIX CnyaEB, yMeHbWntb Notpe6JIeHN 3Heprn I ONTNIM3NPOBaTb BpeMpa6Obl, peKOMeHdyEe TaHaTaB C TnaKeHn Beuei, KOToPbIe Tpe6bHT Hn3KoN Tempeatypbl TnaKeHn, a 3aTeM TnaDnTb Te, dJa KToOpbIX Heo6xOdima Boonee BBICOKaTtempeatypa.
- UncToUepeTbIe TkaHn (100%) MoXHo rnaHTb, nCNoJIb3y aФyHKuIIO noaHu npa. BbIbepnte camyo BbICOKyIO TemnepaTyP npa I NOCTeJIInTe XJIoNtAto6yMaKHy IO TkaHb MeKdy MeTaJIInueckOINOBepxHOCTbIO yTHOra N OdExdoI.
OuHCTKA
OTCOEINHHTe np6op OT cETn nocne NcNoIb3OBaHnry, YTO6bl OH OCTbln nepei YNCTKO.
OuNCTIe np6op, nCNoJIb3yBnJaXHyIO TkaHb N HeCKoJIbKO KaJeMb YnCTraUeJ XnIDKOCTN,a 3aTEM CyxyIO TkaHb.
He donyckaetc nCnOJIb3OBaTb pactBopnteHnn npOdykTbHa OCHOBE KNCJOTb HIN C BbICOKm ypoBhem pH, HanpImep, OTBeJIbBaTeNb, a TaKKe abpa3NBhIe YNCTaUne BeueCTBa.
- He nomeuauTe 3neKtpponpB B Ody INHUYU XnDKoCTb, a TaKKe IOn CTpyu BObl.
OuNCTKA OTJIOXEHNI:
-Дяправиьног рабовь в пиборе He Должно 6ытВ OTлохени И Накши,КOTOPbie 6ра3уOTсЯ OTИСПОЛБ3OBAHЯ C JecETKOI BOДО;
- 4To6bI n36eKaatb 3Tnx npo6Jem, peKOMeHnyeTcra NcNoB3OBaTb INCTUINPiPOBaHHyO BODy.
- TTo6bI npEynpeHnTb 06pa3OBaHne HaKnPi peKOMeHnyETcNcNOJb3OBA Tb BODy C Hn3KM CoepKaHnEM MNHepaNoB;
B INPTOBHOM Cnyae,ecn HET BO3MOXHOCTN NcNoIb3OBA Tb TaKyIO BDOy,peKOMeHNdyeTcR nepnoDnueckn ydaJIaTb HaKnIb:
- KaKdIbe 6 HeJeIb, ecN BODa OueHb JKeCTKa;
- KaKdIe 12 HeJeIb, ecNn BOa JKeCTKa;
- 4TO6bl CdeIaTb 3TO, peKOMeHnyeTcR
NcNoB3OBaTb CneuJaHbHOeCpeDCTBO
TaNx np6OpOB, KOtOpoe MOxHO
HaTN B CneuaJn3IPOBaHHbIX MaRa3NuHax N
yNOHOMOeHHbIX TexHueckNX LcHTpax.
-ДяудаленянakINHHyXHOICNOJb3OBaTb CneuaJIbHOe cpeDCTBO;
- INCIOJIb3OBAbT DOMaUHHe CpeIcTBA, TaKHe KaK YKCyc, He peKOMeHdyeTc.
HENCIPIPABHOCTN I PEMOHT
B Cnyuae HeNCnpaBHOCHT OTHecNTe 3NeKTPoPn6Op B cepBncbI ueHtp. He nbTaIaTeCb camOCToTEnbHO peMOHTIpOBaTb 3NeKTPoPn6Op - 3TO MOKeT 6bITb onaCHO;
ДЛЯ ИЗДЕПИВ BEPCN И/NПИ, ECЛИ 3TOGO TPE6BYET 3AKOHODATENBCTBO BAWEI CTPAHE:
3KOJIOJN I BTOPNUHOE NCIOJIb3OBAHNE
- MaTePnaJIbI yNAKOBKn npN6opa npHIMaOTcR cnCTeMoN c6opa n COptNPOBKn MaTePnaJIOB dЯ BTOpUHOrO INx NcNoJIb3OBaHn. dЯ yTUN3aCn INcNoJIb3yIte 6blTOBbie KOHTeHepbldЯ KaKDoTtNa Mycopa.
B IN3deJINH HET BeIeCTB B KOHcEHTpaIaIax, KOToPbIe CHTaTcR BpeHbIMn DnIg OKpyKaIOUeN cpebl.

3TOT 3HaQoK O3HaQaEeT, YTO Nocne OKOHuaHncaPoka cIyXbI dIy yTIN3aunn 3JIeKtponpnbopa OTHeCITe erO B NyHKT c6opa 3JIeKtpnuecknx n 3JIeKtpoHHbIX OTxOIOB (WEEE)

TOT CUMBOJ O3Haayet, YTO NOBepxHOCTb MOKET CNbHO HArpeBaTcB BO Bpem IcNoJIb3OBAHnI.
3TOT np6op BbIOHHeB COOTBETCTBnC
DInpeKTHBOI NO Hn3KOBOJbTHOMy O6OpyIOBaHIO
2014/35/EU, DInpeKTHBOI NO 3NeKTPomarHHTHO
COBMeCTNMOCTn 2014/30/EU, DInpeKTHBOI
2011/65/EU, OrpaHnUBAIOSeI NcNoJIb3OBAHne
HEKOToPbIX ONaCHbIX BeIeCTB B 3JIeKTPuYeCKOM
n 3JIeKTPoHHOM O6OpyIOBaHNI, a TaKKe
DInpeKTHBOI 2009/125/EC nO 3KoJOrHueCKM
Tpe6OBaHnM K N3DeJIINrM, NOTpe6JIHOUIIM
3HeprnIO.
Româna
HEN3ПРABHOCTN I PEMOHT
B cnuyaHa Hen3npaBHOCT, MoJr OTHeceTe ypeDa B OTOpN3npaH cepBn3 3a TEXHuecko obcnykBaHe. MoJr He ce ONITbAte Da pa3rIIO6yBaTe ypeDa Hn Da rO nonpaBTe - TOBa e OnaCHO.
OPA3BAHE HA OKOJIHATA CPEIAPEULKINPAHE HA I3DEJNETO.
- MaTePnAnIte, OT KOnTO ce CbCTOu ONaKOBkata Ha To3n eNeKTPOpyPe, Ca BKJIIOUeHn B CnCTema 3a TReXHOTo Cb6nPaHe, KLnACnФuCnPaHe n peuNKnIpaHe. Ako JeJaTe Da ce OCBo6oDnte OT TReX, N3NON3BaIte ObSeCTBeHInTe KOHTeHepn, PnproDeHn 3a BCEKn OTDeJeH BnD MaTePnAnl.
B npodykta Hma KOHcHTpaunn Ha BeueCTBa, KOnTO MoT a Da ce CMrTa BpeHN 3a OKoHaTa CpeDa.
To3n CmB0n O3NaUaBa, Ye aKO JeNaeTe Da ce ocBO6oNtE ot ypeJa, cNei KaTo EKcIIOaTauNOHHnT My XNBOT e N3TEkbl, Tp8bFa da ro npdaTe no NOxOJaH aHuH HaΦnpMa 3a
npepa6oTka Ha OTNaIbUc,OTOpu3npaHa 3a pa3dEInHO cb6upaHe Ha OTHOCHO TNaIbUc OT eNeKtpuecko n eNeKtpoHNO obOpyDbaHe (OEO).

To3n CmB0J O3Haayaba, Ye NOBbpxHocTTa MoKeJa ce 3aRpee no Bpeme Ha n3IOJI3BaHeTO Ha ypeia.
HactoIypeN3nblHraBdIpeKTHBa 2014/35/UE 3a Hnckn HaPpeKeHn, IpeKTHBa 2014/30/UE 3a eNeKtpomarHeTNo 2011/65/EU 3a OrpaHnueHnTa npu ynoTppeBa Ha HraKo 0npedeHn Onachn BeEcTBa B eEeKtpueckn n eEeKtpoHHn anapatn n C dIpeKTHBa 2009/125/ CE 3a n3nCKBaHnraTa 3a ekOJorHuen dn3aHn, npINOxHM KbM n3deJIy, CBbp3AHn c eHeprHy.
joll jia
jzai jia zai jia zai
13.13.13.13.13.13.13.13.13.13.13.13.13.13.13.13.13.13.13.13.13.13.13.13.13.13.13.13.13.13.13.13.13.13.
a a 1
gaaa aaiia Jgaiia 15g ay aaii bllgill gjbj jao yaiy jao aaiy jao ci 15j ai jayil iie
.(FFEW) 4.1g5y1g2y1g3y1g

Jooaill 1 jaoa 1 j oj 1

jolgo pioiul 93 jgo UF/011.4g gig gabilaggygl gill UF/7/1.4g gig jaoaill UGFU/01.4g jgall
ailllll llll lglal lllllllllllllllllllllllllllllll
jzlll jzll lolz glzll jz
jglal jalbgl sbllg gao oolus jslslyu afo yogagj jglal d jy
lo pao lae ge gao jao jaoai jao
jglg jnss g joe jgl de jgalld pnn
ygl ydl ygl yd jgld Jaxy
a a a a a a a a a a a a a a a a a a a a a a a a a a a a a a a a a a a a a
(1julgl aalil jolll 2000000000000000000000000000000000000000000000
aaii jaoj 1000 1000 1000
aill 10000000000000000000000000000000000000000000000
:31
01gS1 123456789010112345678901011234567890
[ : y = \frac{1}{2}{x}^{2} - {4x} + 3]
a 100000000000000000000000000000000000000000
jaiolgso
Easy Travel (Ver III)
:0g
wglall aalll ltaa jgaa slj
jgl jg 100000000000000000000000000000000000000000
oJlJzOyIg JdJI pue 1. JzAubj 3 4 5 6 7 8 9 0 10 11 12 13 14 15 16 17 18
do xlll 1j
yog gao zha jia jia jia jia jia jia
golil plu wul glaa o jw g jw g jw j
aJySJI aJzJI aJyJggo JgJoLsIJI aJgJgJgJI
gaii i 1
Jusw y 1y jn wulib 1y 1y 1y 1y 1y 1y 1y 1y 1y 1y 1y 1y 1y
Aaie aai jbi jblzbi Igic gug aiol aaij bji jglll
1
A 1
ydsdo ydo ydo ydo ydo ydo ydo ydo ydo ydo ydo ydo ydo ydo ydo ydo ydo ydo ydo ydo ydo ydo ydo ydo ydo ydo ydo ydo ydo ydo ydo ydo ydo ydo ydo ydo ydo ydo ydo ydo ydo ydo ydo
Bg y 1y jy 1y
:alilgul
jglu ygysl jll lalu loyj 1Jz
jglal Jao jolj waij Jaoi
0ofoa 100000000000000000000000000000000000
(1. gif).xAM 3g2a61 a0x5 o1s 5 p
aaii aiee iie eae
gaii jgi jiaiuW ujgl aig jjiil JiaiuW jglu lui
aagabg aagaa gai g d aalgl g aannll g aanl l g jolil jolil jolil jolil jolil jolil
Ioluljy jis dlalgljglalbdo y
a 1000000000000000000000000000000000000000000
...ylll jySgSll gIgIe JitI IaIe Ie IaIe Ie Iae Ie Iae Ie
gagaae gagaae 1aegaae gaae gaae gaae gaae gaae gaae gaae gaae gaae gaae gaae gaae