ExtremeCap 910 - Video Capture Card AVERMEDIA - Free user manual and instructions
Find the device manual for free ExtremeCap 910 AVERMEDIA in PDF.

User questions about ExtremeCap 910 AVERMEDIA
0 question about this device. Answer the ones you know or ask your own.
Ask a new question about this device
Download the instructions for your Video Capture Card in PDF format for free! Find your manual ExtremeCap 910 - AVERMEDIA and take your electronic device back in hand. On this page are published all the documents necessary for the use of your device. ExtremeCap 910 by AVERMEDIA.
USER MANUAL ExtremeCap 910 AVERMEDIA
natural_image
Top-down view of a portable electronic device with no visible text or symbols on the body (pure diagram)English Русский
Deutsch Polski
Français Česky
Italiano Magyar
Español Română
Português
Português do Brasil
Quick Guide
European Union Directives conformance statement

Class B
This product is herewith confirmed to comply with the requirements set out in the Council Directives on the Approximation of the laws of the Member States relating to Electromagnetic Compatibility Directive 2014/30/EU, Directive Erp 2009/125/EC.
Responsible manufacturer:
AVerMedia Technologies, Inc.
No. 135, Jian 1st Rd., Zhonghe Dist., New Taipei City 23585, Taiwan
TEL: +886-2-2226-3630
European Community contact:
AVerMedia Technologies Europe B.V.
Kwartsweg 50, 2665 NN, Bleiswijk, The Netherlands
Technical Support: http://solutions.avermedia.com/
FCC NOTICE (Class B)

This device complies with Part 15 of the FCC Rules. Operation is subject to the following two conditions: (1) this device may not cause harmful interference, and (2) this device must accept any interference received, including interference that may cause undesired operation.
Federal Communications Commission Statement
NOTE- This equipment has been tested and found to comply with the limits for a Class B digital device, pursuant to Part 15 of the FCC Rules. These limits are designed to provide reasonable protection against harmful interference in a residential installation. This equipment generates, uses and can radiate radio frequency energy and, if not installed and used in accordance with the instructions, may cause harmful interference to radio communications. However, there is no guarantee that interference will not occur in a particular installation. If this equipment does cause harmful interference to radio or television reception, which can be determined by tuning the equipment off and on, the user is encouraged to try to correct the interference by one or more of the following measures:
• Reorient or relocate the receiving antenna.
- Increase the separation between the equipment and receiver.
- Connect the equipment into an outlet on a circuit different from that to which the receiver is connected.
- Consult the dealer or an experienced radio/television technician for help.
CAUTION ON MODIFICATIONS
To comply with the limits for the Class B digital device, pursuant to Part 15 of the FCC Rules, this device must be installed in computer equipment certified to comply with the Class B limits. All cables used to connect the computer and peripherals must be shielded and grounded. Operation with non-certified computers or non-shielded cables may result in interference to radio or television reception.
Changes and modifications not expressly approved by the manufacturer or registrant of the equipment can void your authority to operate the equipment under Federal Communications Commission rules.
Responsible manufacturer:
AVerMedia Technologies, Inc.
No. 135, Jian 1st Rd., Zhonghe Dist., New Taipei City 23585, Taiwan
TEL: +886-2-2226-3630
USA Office contact:
AVerMedia Technologies U.S.A.
47358 Fremont Blvd., Fremont, CA 94538
Technical Support: http://solutions.avermedia.com/
CAN ICES-3 (B)/NMB-3(B)
Canada - Canada Industry Canada (IC) Labelling Requirements
Every manufacturer or importer shall ensure import or before offering for sale, as appropriate, that each unit of the type that they offer for sale bears, in a location convenient for inspection, a permanent label or marking containing (in French and English), the following statement:
ICES-003 (Interference - Causing Equipment Standards)
"This class B digital apparatus complies with Canadian ICES-003."
The mark of crossed-out wheeled bin indicates that this product must not be disposed of with your other household waste. Instead, you need to dispose of the waste equipment by handing it over to a designated collection point for the recycling of waste electrical and electronic equipment. For more information about to drop off your waste equipment for recycling, please contact your household waste disposal service or the where you purchased the product.
GOST-R Certification (Russia)

AB02
No POCC TW. AB02.B09025
Срок действия с
- Read these instrucons.
- Keep these instrucons.
- Pay aenon to all warnings.
- Follow all instrucons.
- Do not use this apparatus near water.
- Clean only with dry cloth.
- Do not block any venlaon openings. Install in accordance with the manufacturer's instrucons.
- Do not install near any heat sources such as radiators, heat registers, stoves, or other apparatus (including amplifiers) that produce heat.
- Do not defeat the safety purpose of the polarized or grounding-type plug. A polarized plug has two blades with one wider than the other. A grounding type plug has two blades and a third rounding prong. The wide blade or the third prong is provided for your safety. If the provided plug does not t into your outlet, consult an electrician for replacement of the obsolete outlet.
- Protect the power cord from being walked on or pinched particularly at plugs, convenience receptacles, and the point where they exit from the apparatus.
- Only use the aachments/accessories specied by the manufacturer.
- Unplug this apparatus during lightning storms or when unused for long periods of me.
- Refer all servicing to qualified service personnel. Servicing is required when the apparatus has been damaged in any way, such as power-supply cord or plug is damaged, liquid has been spilled or objects have fallen into the apparatus, the apparatus has been exposed to rain or moisture, does not operate normally, or has been dropped.
WARNING
To prevent re or shock hazard do not expose the unit to rain or moisture. Dangerously high voltages are present inside the unit. Do not open the unit. Refer servicing to qualified personnel only.
Disclaimer
All the screen shots in this documentation are only example images. The images may vary depending on the product and software version. Information presented in this documentation has been carefully checked for reliability; however, no responsibility is assumed for inaccuracies. The information contained in this documentation is subject to change without notice.
Copyright
© 2014 by AVerMedia Technologies, Inc. All rights reserved.
No part of this document may be reproduced or transmitted in any form, or by any means (Electronic, mechanical, photocopy, recording, or otherwise) without prior written permission of AVerMedia Technologies, Inc.
Information in this document is subject to change without notice. AVerMedia Technologies, Inc. reserves the right to modify, change, improve or enhance its products and to make changes in the content without obligation to notify any person or organization of such changes. Please visit solutions.avermedia.com to get the updates of the operation and use of AVerMedia products.
"AVerMedia" is a trademark and logo of AVerMedia Technologies, Inc. Other trademarks used herein for description purpose only belong to each of their companies. Made in Taiwan (Expect Accessories).
Picture shown may vary from actual product
A. ExtremeCap 910
B. Quick Installation Guide
C. Power Adapter
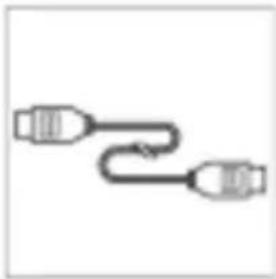
D. HDMI Cable
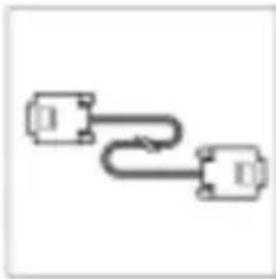
E. VGA Cable
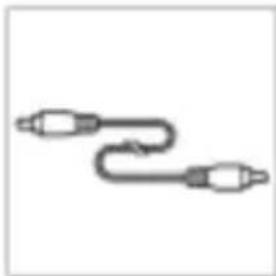
F. 3.5 mm Audio Cable
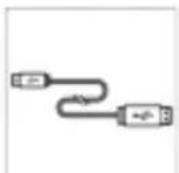
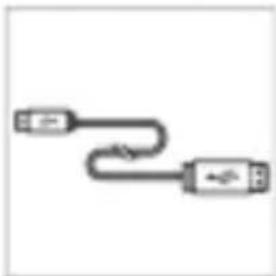
G. Mini USB Cable
English - 1
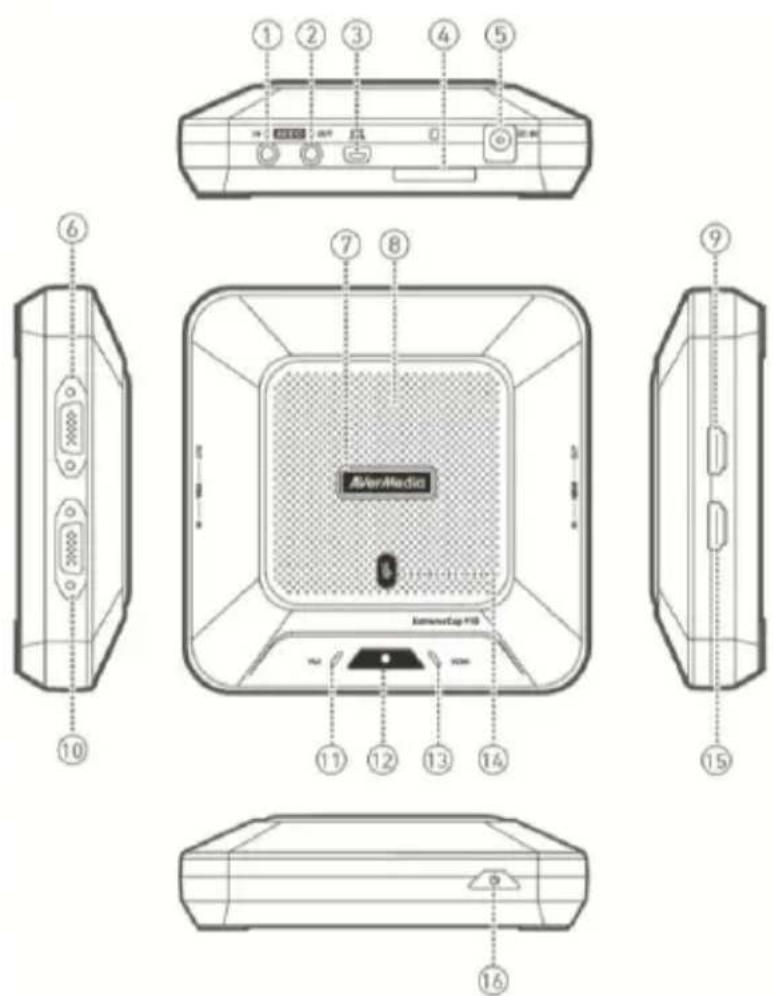
2 Hardware
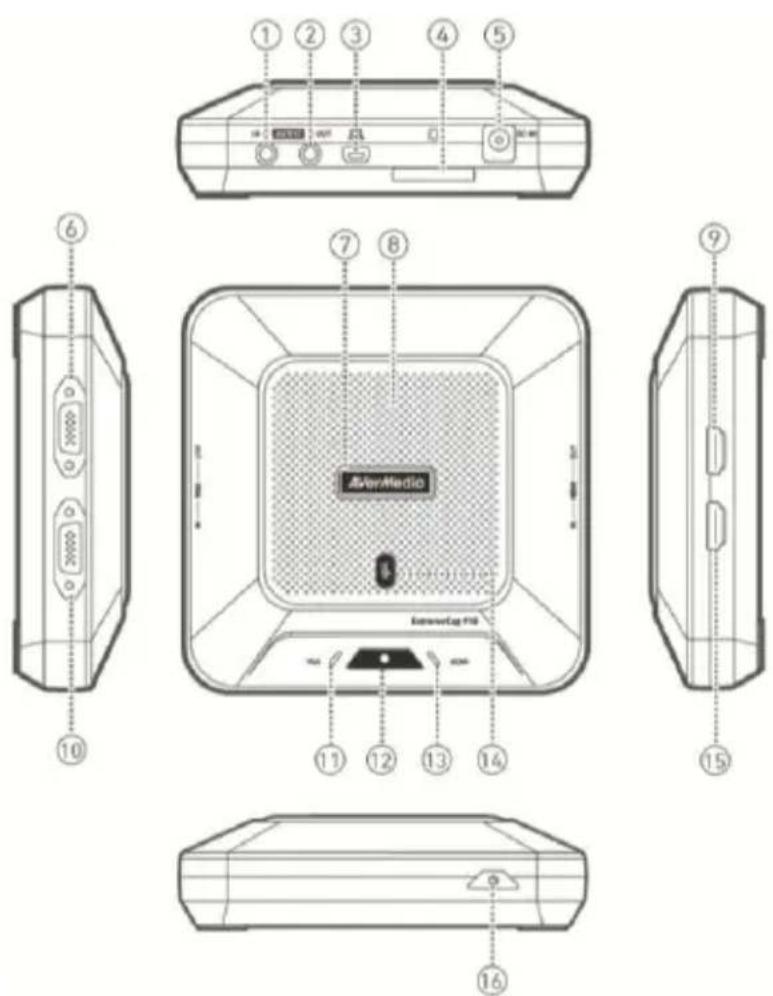
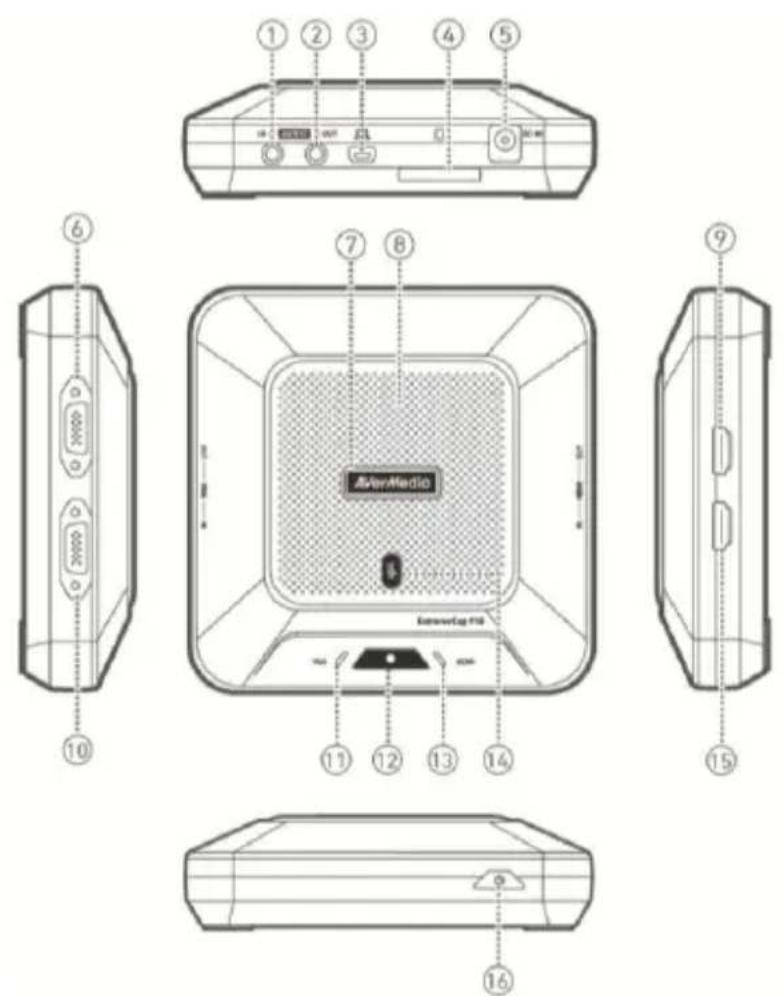
2.1 Names of Parts
text_image
1 2 3 4 5 6 7 8 9 10 AverMedia 11 12 13 14 15 16- AUDIO IN
- AUDIO OUT
- Mini USB Port
- SD Card Slot
- DC IN
- VGA OUT
- Status Indicator
- Microphone
- HDMI OUT
- VGA IN
- VGA Indicator
- Record Button / Indicator
- HDMI Indicator
- Mute Button / Indicator
- HDMI IN
- Power Button
English - 2
2.2 Getting Started
Step 1: Connect the device to an AC outlet and a video source. Insert an SD card*. (Refer to Chapter 3.2–3.4 for details.)
Step 2: Press to turn on the device and wait for to stop flashing.
- Ready to record voice when AVerMedia turns solid Green.
- Ready to record voice and screen when AVerMedia turns solid Green and VGA or HDMI turns solid Green.
Step 3: Press to start recording.
* A FAT32-formatted SD card is required.
Troubleshooting
| Indication | Cause | Action |
| VGA [IMAGE] [IMAGE] [IMAGE] [IMAGE] [IMAGE] [IMAGE] [IMAGE] [IMAGE] [IMAGE] [IMAGE] [IMAGE] [IMAGE] [IMAGE] [IMAGE] [IMAGE] [IMAGE] [IMAGE] [IMAGE] [IMAGE] [IMAGE] [IMAGE] [IMAGE] [IMAGE] [IMAGE] [IMAGE] [IMAGE] [IMAGE] [IMAGE] [IMAGE] [IMAGE] [IMAGE] [IMAGE] [IMAGE] [IMAGE] | SD Card Issue | Insert an SD card or free up more space. |
| VGA [IMAGE] [IMAGE] [IMAGE] [IMAGE] [IMAGE] [IMAGE] [IMAGE] [IMAGE] [IMAGE] [IMAGE] [IMAGE] [IMAGE] [IMAGE] [IMAGE] [IMAGE] [IMAGE] [IMAGE] [IMAGE] [IMAGE] [IMAGE] [IMAGE] [IMAGE] [IMAGE] [IMAGE] [IMAGE] [IMAGE] [IMAGE] [IMAGE] [IMAGE] [IMAGE] [IMAGE] [Image] [Image] [Image] [Image] [Image] [Image] [Image] [Image] [Image] [Image] [Image] [Image] [Image] [Image] [Image] [Image] [Image] [Image] [Image] [Image] [Image] [Image] [Image] [Image] [Image] [Image] [Image] [Image] [Image] [Image] [Image] [Image] [Image] [Image, Image] [Image] [Image] [Image] [Image] [Image] [Image] [Image] [Image] [Image] [Image] [Image] [Image] [Image] [Image] [Image] [Image] [Image] [Image] [Image] [Image] [Image] [Image] [Image] [Image] [Image] [Image] [Image] [Image] [Image] [Image] [Image] [Image] [Image], [Image] [Image] [Image] [Image] [Image] [Image] [Image] [Image] [Image] [Image] [Image] [Image] [Image] [Image] [Image] [Image] [Image] [Image] [Image] [Image] [Image] [Image] [Image] [Image] [Image] [Image] [Image] [Image] [Image] [Image] [Image] [Image] [Image] | Signal Error | Check the cable connection, adjust the source resolution, or wake up the source device. |
2.3 LED Indications and Button Functions
| Task | VGA | HDMI | AVerMedia | ||
| Booting | Off | Off | Off | Flashes Green | |
| Ready to Record Voice | Off | Off | Off | Solid Green | |
| Recording Voice | Off | Off | Solid Red | Solid Green | |
| Ready to Record Voice + Screen | Solid Green | or | Solid Green | Off | Solid Green |
| Recording Voice + Screen | Solid Green | or | Solid Green | Solid Red | Solid Green |
| No SD Card / SD Card Full / Low Space | Flashes Green | Flashes Green | Flashes Red | Solid Green | |
| Signal Error * | Off | Off | Current Indication | Solid Green | |
| Updating Firmware | Flashes Green | Flashes Green | Off | Solid Green | |
| Detecting Sound | Current Indication | Current Indication | Off | Green: Moderate Red: Loud |
* A signal error can occur in the following situations:
- No signal
- HDCP signal
- Unsupported resolution
- PC or tablet in sleep mode
Check your cable connection, adjust the source resolution or wake up the source device to solve these issues.
Capturing protected content like HDCP is not supported; if video source is HDCP-protected, images will not show properly.
Status
Mute
Unmute
Solid Red
Off
Button
Functions
Press to turn on the device.
Press and hold for 4 seconds to turn off the device.
Press to start recording, press again to stop recording.
Press to mute, press again to unmute.
Press and hold to start sound test, release to stop.
turns Red when the surrounding sound is too loud. *
* Excessive sound can cause recording distortion. When the Status Indicator turns Red constantly, lower the volume or move the device further away from the sound.
3 Installation
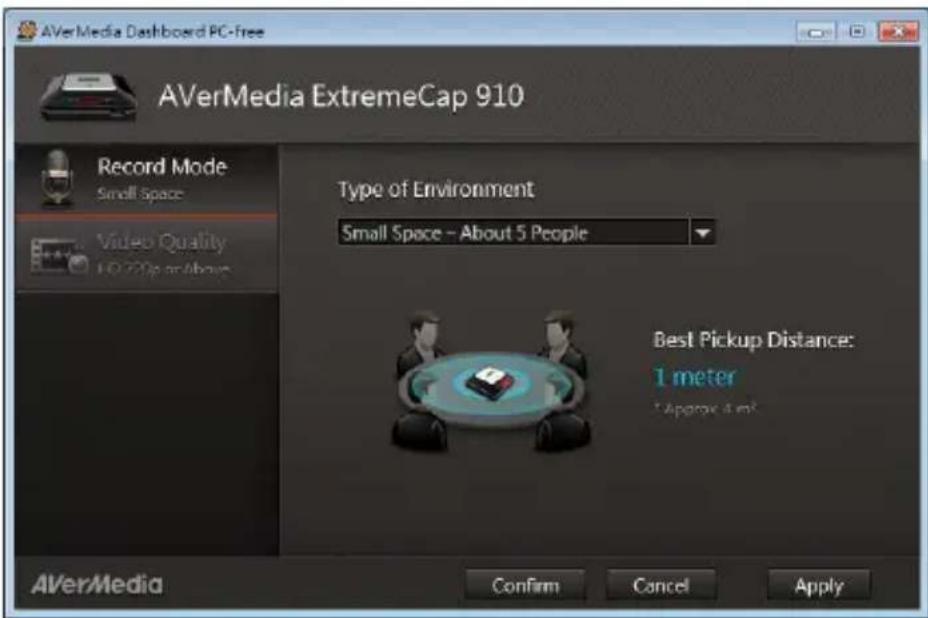
3.1 Video Quality and Recording Setup
AVerMedia Dashboard PC-Free helps users to set their desired video quality and environment. You can download the software and driver at www.avermedia.com.
Step 1: Connect the mini USB port 📄 on the device to a PC using the included mini USB cable.
Step 2: Power on the device. Install the ExtremeCap 910 Driver and run AVerMedia Dashboard PC-Free on the PC.
Step 3: Choose your settings. Click Confirm to save the settings. Disconnect the device from the PC before use.
text_image
AVerMedia Dashboard PC-free AVerMedia ExtremeCap 910 Record Mode Small Space Video Quality 10.270p or above Type of Environment Small Space - About 5 People Best Pickup Distance: 1 meter * Approx 4 m² AVerMedia Confirm Cancel ApplyEnglish - 6
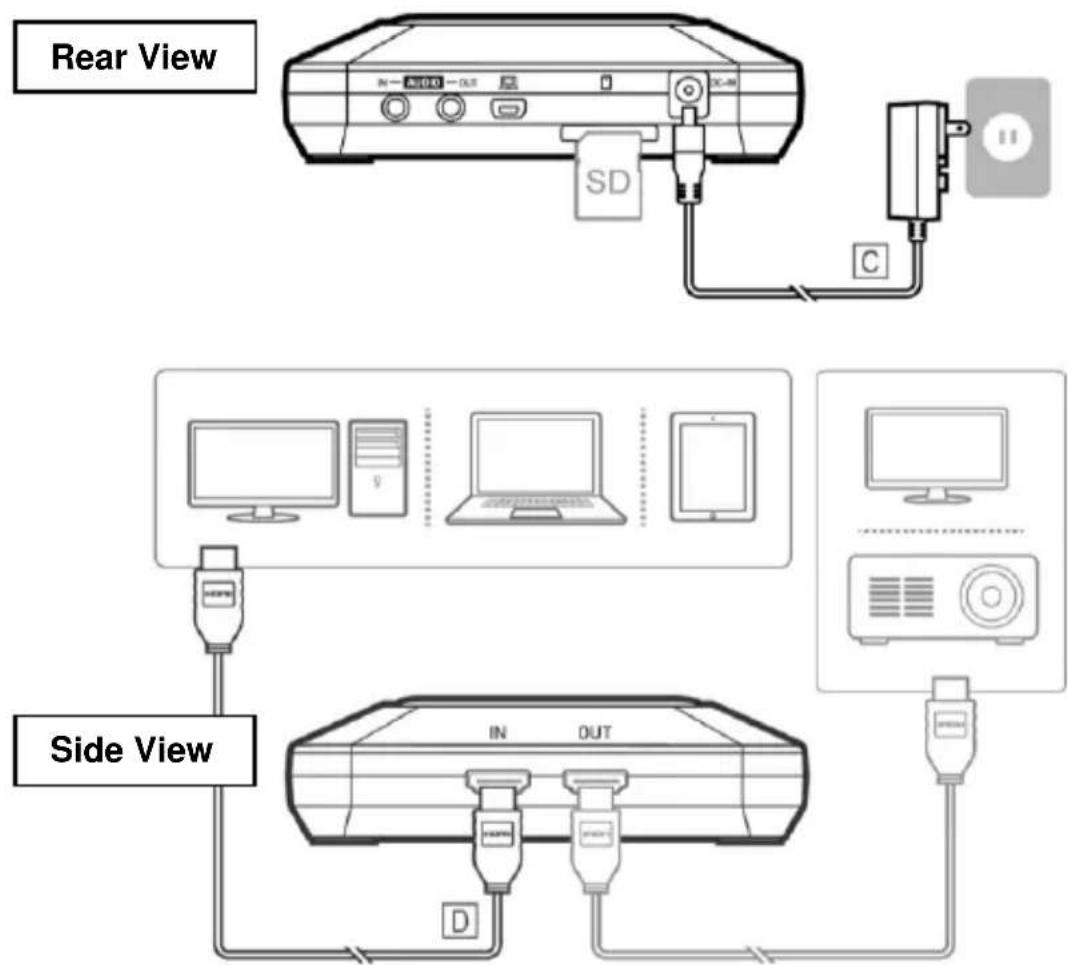
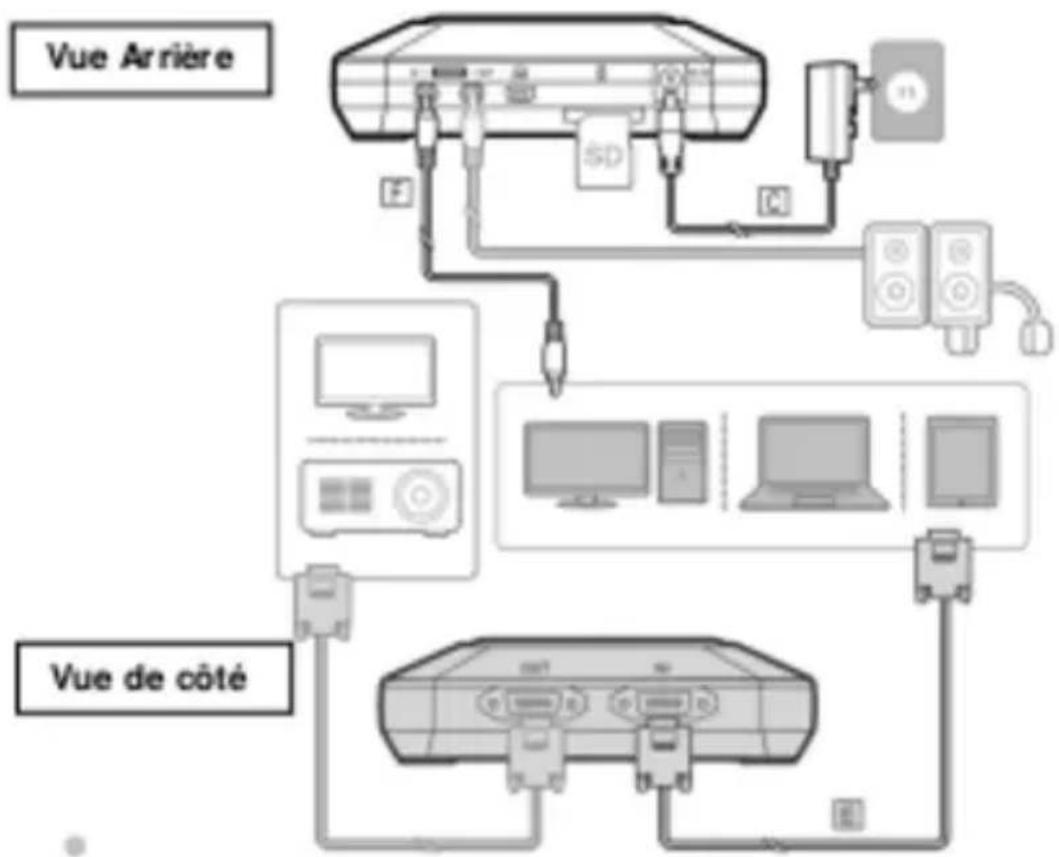
3.2 Connect via VGA Cable
Rear View
Side View
☐ Only the items marked with alphabets are supplied.
☐ Speakers or headphones are optional.
The video input and output must be of the same type.
We recommend turning on your device before connecting a video source to avoid signal errors. Disconnect and reconnect the source cable if signal error occurs.
English - 7
3.3 Connect via HDMI Cable
flowchart
graph TD
    A["Monitor"] -->|Rear View| B["PC"]
    B --> C["Switch C"]
    C --> D["Computer"]
    D --> E["Laptop"]
    E --> F["Smartphone"]
    F --> G["Monitor"]
    G --> H["PC"]
    H --> I["Switch D"]
    I --> J["Computer"]
    J --> K["Smartphone"]
English - 8
3.4 Connect via DVI to HDMI Converter
Rear View
Side View
For computers without an HDMI port, use a DVI-to-HDMI cable or converter. Also connect your PC to the AUDIO IN port via the 3.5 mm audio cable.
Select "Duplicate" mode on your PC to ensure screen is recorded. For more information, please refer to the FAQ at www.avermedia.com
Do not disconnect the power cable or remove the SD card during recording.
English - 9
Quick Installation Guide
English - 10
F. Câble Audio 3.5 mm
G. Câble Mini USB
Français – 1
2 Matériel
2.1 Noms des Parties
text_image
AVerMedia Dashboard PC-Free AVerMedia ExtremeCap 910 Record Mode Small Space Video Quality HSD 220pt in Aerospace Type of Environment Small Space – About 5 People Best Pickup Distance: 1 meter • Apply as 4 sec AVerMedia Confirm Cancel ApplyFrançais - 6
3.2 Brancher via un Câble VGA
flowchart
graph TD
    A["Vue Arrière"] --> B["Server"]
    B --> C["Audio Device"]
    C --> D["Monitor"]
    D --> E["Switch"]
    B --> F["Interface with F, SD, C"]
    F --> G["Computer"]
    G --> H["Laptop"]
    H --> I["Router"]
    I --> J["Switch"]
    J --> K["Monitor"]
    K --> L["Laptop"]
    L --> M["Router"]

text_image
Technical diagram of a device front panel with labeled parts including Esteredia and Xerox, showing internal layout and component positioning.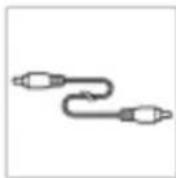
F. Cable Audio 3.5 mm
Españo
2 Hardware
2.1 Partes
natural_image
Top-down view of a square electronic device with a central display and control buttons (no text or symbols visible)A. ExtremeCap 910
text_image
Quick Guide —natural_image
Simple line drawing of a U-shaped connector with a connector and terminal block (no text or symbols)natural_image
Illustration of two USB connectors with a lightning bolt between them (no text or symbols)D. Cabo HDMI

natural_image
Pure electrical circuit lines without any symbolsE. Cabo VGA
natural_image
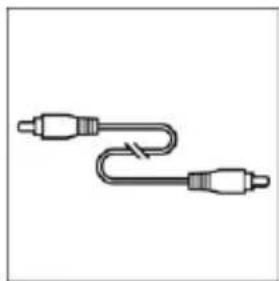
Simple line drawing of two connected audio/video cables (no text or symbols)F. Cabo Á udio 3.5 mm

natural_image
Illustration of two USB connectors with a U-shaped cable (no text or symbols)G. Cabo Mini USB
2 Hardware
2.1 Nomes das Partes

text_image
1 2 3 4 5 6 7 8 9 10 AverMedia 11 12 13 14 15 16- ENTRADA DE ÁUDIO
- SAÍ DA DE ÁUDIO
- Porta Mini USB
- Slot SD Card
- ENTRADA DC
- SAÍ DA VGA
- Indicador de Status
- Microfone
- SAI DA HDMI
- ENTRADA VGA
- Indicador VGA
- BNotão Gravar / Indicador
- Indicador HDMI
- Botão Mudo / Indicador
- ENTRADA HDMI
- Botão Liga / Desliga
text_image
AVerMedia Dashboard PC-free AVerMedia ExtremeCap 910 Record Mode Small Space Video Quality 10.720p or above Type of Environment Small Space - About 5 People Best Pickup Distance: 1 meter * Approve 4 m² AVerMedia Confirm Cancel ApplyРусский – 6
text_image
AVerMedia Dashboard PC-Free AVerMedia ExtremeCap 910 Record Mode Small Space Video Quality HD: 328pt on Altvise Type of Environment Small Space – About 5 People Best Pickup Distance: 1 meter * Approx. 4 m² Confirm Cancel Apply AVerMediapolski - 6
text_image
AVerMedia Dashboard PC-Free AVerMedia ExtremeCap 910 Record Mode Small Space Video Equality HD 220p or Above Type of Environment Small Space - About 5 People Best Pickup Distance: 1 meter * Approx. 4 m² AVerMedia Confirm Cancel ApplyČesky - 6
text_image
AVerMedia Dashboard PC-free AVerMedia ExtremeCap 910 Record Mode Small Space Video Quality 10.220p or above Type of Environment Small Space - About 5 People Best Pickup Distance: 1 meter *Approve 4 m² AVerMedia Confirm Cancel ApplyMagyar - 6
natural_image
Simple diagram of a square container with internal components, no text or symbols present.A. ExtremeCap 910
text_image
Quick Guide —natural_image
Simple line drawing of a handheld electronic device with a coiled cable and connector (no text or symbols)c. Alimentator
natural_image
Simple line drawing of two connected USB connectors (no text or symbols)D. Cablu HDMI
natural_image
Simple diagram of two connected blocks with a curved line (no text or symbols)E. Cablu VGA
natural_image
Simple line drawing of two connected cylindrical objects with a curved arm (no text or symbols)F. Cablu Audio 3.5mm
natural_image
Simple line drawing of two USB connectors with a curved cable (no text or symbols)G. Cablu Mini USB