
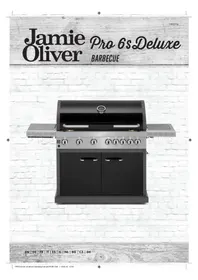
Dome 80 - Oven Jamie Oliver - Free user manual and instructions
Find the device manual for free Dome 80 Jamie Oliver in PDF.
| Product type | Garden wood-fired oven |
| Brand | Jamie Oliver |
| Model | Dome 80 |
| Weight | Approx 200 kg |
| Inner diameter | 80 cm (estimated) |
| Material | Refractory clay |
| Maximum air temperature | 350°C |
| Maximum floor temperature | 450°C |
| Fuel | Dry hardwood (moisture content < 20%) |
| Box contents | Prefabricated oven, flue pipe, metal stand, 2 removable handles, door with thermometer, pizza peel, brush, manual |
| Seasoning required | Yes (6 to 8 hours, gradual increase from 50°C to 350°C) |
| Preheating time for pizza | Approx 30 minutes |
| Cooking types | Pizza, bread, roasts, fish, vegetables |
| Maintenance | Sweeping ashes, cleaning flue, no chemicals |
| Safety | Do not use indoors, hot surfaces, do not use flammable liquids, keep away from children |
| Frost resistance | Down to -12°C (tested) |
| Spare parts available | Thermometer, door, handles, flue pipe |
| Warranty | Conditional on adherence to seasoning process |
| Assembly | Metal stand to be assembled (tools not provided) |
Frequently Asked Questions - Dome 80 Jamie Oliver
User questions about Dome 80 Jamie Oliver
0 question about this device. Answer the ones you know or ask your own.
Ask a new question about this device
Download the instructions for your Oven in PDF format for free! Find your manual Dome 80 - Jamie Oliver and take your electronic device back in hand. On this page are published all the documents necessary for the use of your device. Dome 80 by Jamie Oliver.
USER MANUAL Dome 80 Jamie Oliver
natural_image
Black-and-white photo of a wooden stove with coal piles inside, placed on a brick wall (no text or symbols visible)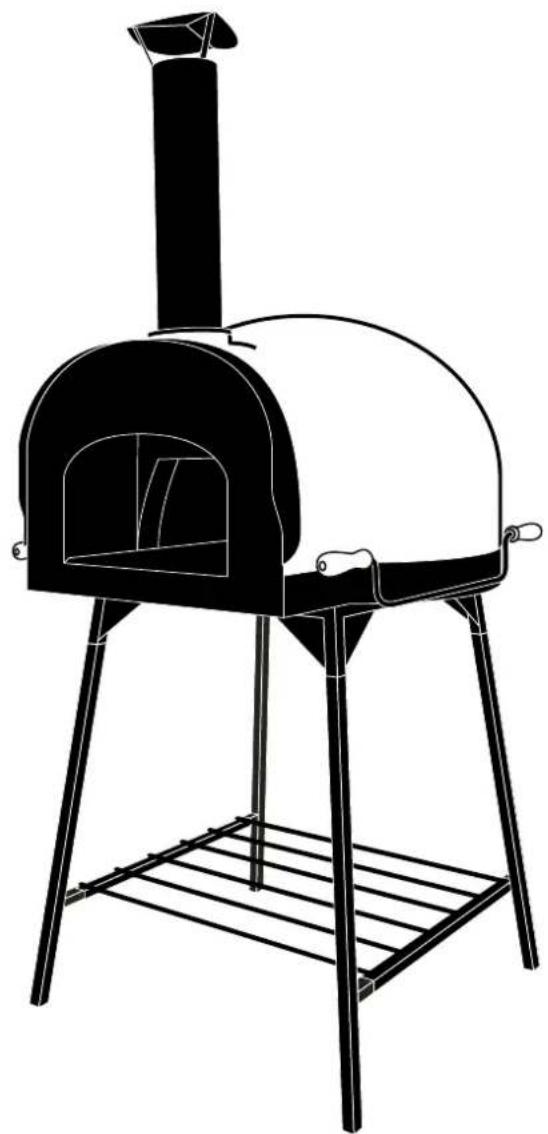
natural_image
Line drawing of a traditional outdoor stove with a large lid and metal frame (no text or symbols)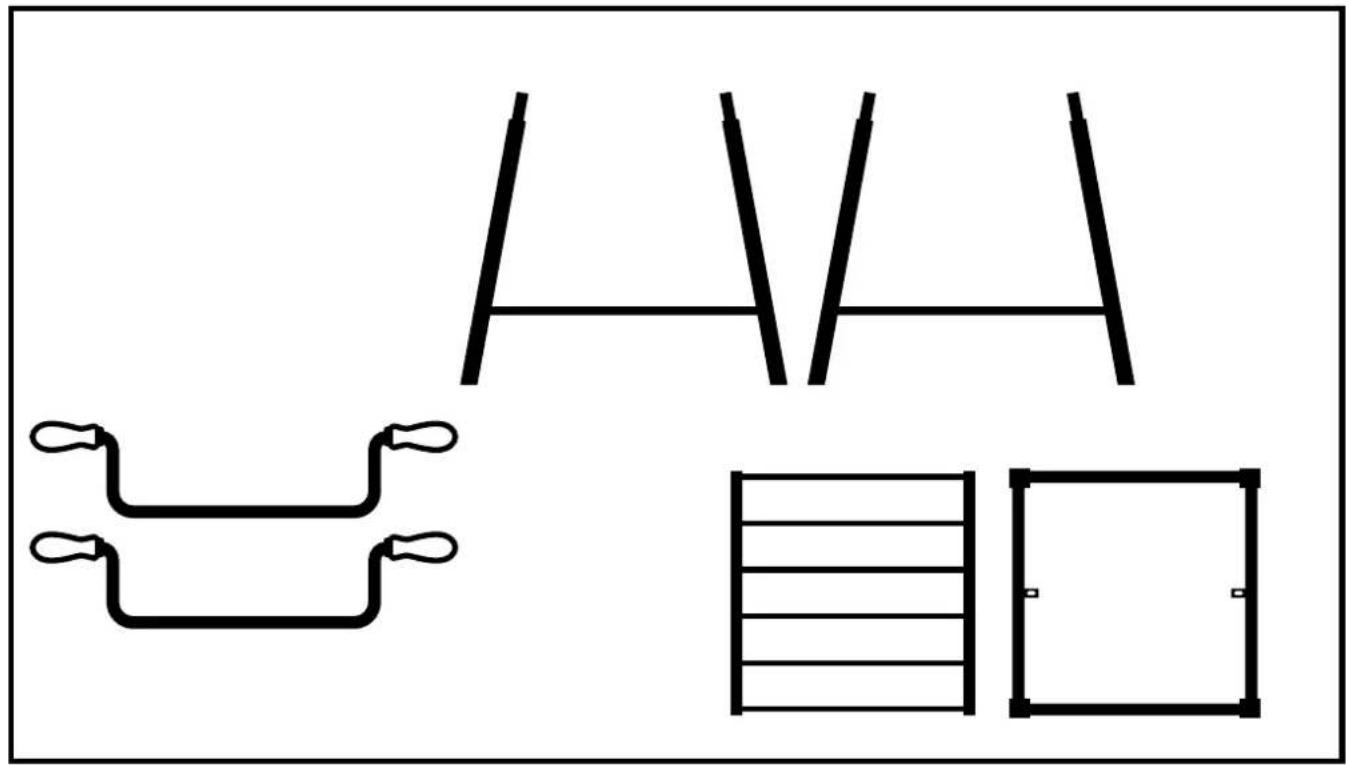
natural_image
Pure electrical circuit lines without any symbols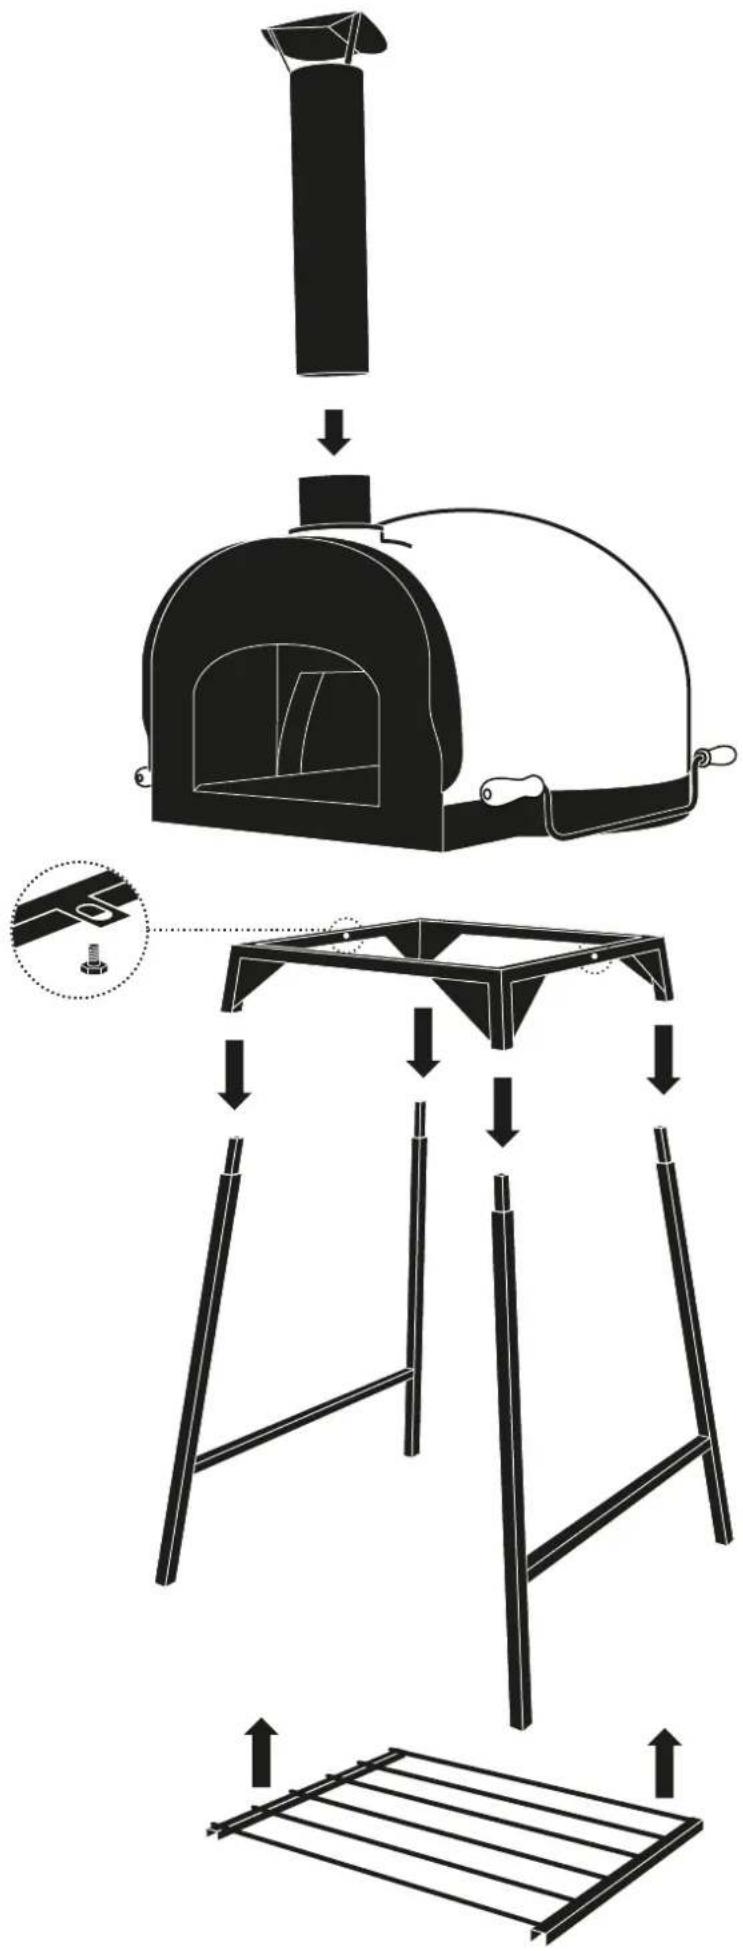
Jamie Oliver
natural_image
Line drawing of a traditional outdoor stove with a large lid and metal frame (no text or symbols)| EN | 6 |
| DE | 14 |
| FR | 22 |
| IT | 30 |
| PL | 38 |
| CZ | 46 |
| SK | 54 |
| RO | 62 |
| BG | 70 |
| SI | 78 |
| DK | 86 |
| EE | 94 |
| ES | 102 |
| FI | 110 |
| GR | 118 |
| HR | 126 |
| HU | 134 |
| IL | 142 |
| LT | 150 |
| LV | 158 |
| NL | 166 |
| NO | 174 |
| PT | 182 |
| RS | 190 |
| RU | 198 |
| SE | 206 |
| TR | 214 |
| UA | 222 |
IMPORTANT - WARNING
READ ALL INSTRUCTIONS BEFORE INSTALLING AND USING THE APPLIANCE. FAILURE TO FOLLOW INSTRUCTIONS MAY RESULT IN PROPERTY DAMAGE, PERSONAL INJURY OR EVEN DEATH.
FOLLOW the instructions for curing the wood-fired oven. Failure to follow the curing instructions can cause damage to the oven, and will void the warranty.
ALWAYS ensure that children and pets are kept at a safe distance from the wood-fired oven, both during and after operation. We suggest children under the age of 16 should be supervised when using the oven.
ALWAYS ensure the oven is sited on a level base. The stand MUST NOT tilt.
DO NOT modify the wood-fired oven in any way from the manufacturer's design and specification.
DO NOT use the wood-fired oven indoors.
DO NOT block the flue pipe.
ONLY USE untreated, well-seasoned, dry hard wood with a moisture content of less than 20%.
DO NOT attempt to burn rubbish in the wood-fired oven.
DO NOT use any type of flammable liquids or fuels (including, but not limited to: firelighter fluid, petrol, diesel, kerosene, oil or any other flammable chemical compound) at any time to start or maintain a fire.
BEWARE of very high internal temperatures. The mouth of the wood-fired oven and inside the oven will get VERY hot so take care when using it. We recommend a maximum air temperature of 350^ C particularly for prolonged use. At this temperature the clay in the floor and dome will most likely be in excess of 450^ C.
DO NOT place unprotected hands or arms inside the wood-fired oven during and after operation. If any burns or scalds occur, immerse in cold water immediately and seek medical advice.
ENSURE you use long oven gloves and mitts to handle pots and tools, and take care while handling.
DO NOT remove burning logs or embers from the wood-fired oven during or after use.
DO NOT allow the oven to become extremely wet. If your oven becomes wet, follow the curing instructions to dry it out properly before use.
DO NOT use water to calm or extinguish a fire in the wood-fired oven, except in an emergency.
ENSURE all tools, materials, pots and pans used in the wood-fired oven are appropriate for high temperatures in excess of 450^ C.
DISPOSE of ash in an appropriate bin, add it to compost or spread it on the garden as a nutrient. Take appropriate action to avoid inhaling any ash or dust.
SAVE AND KEEP THESE INSTRUCTIONS TO HAND SO YOU CAN REFER TO THEM
TABLE OF CONTENTS
- What's in the box?
- How to set up your wood-fired oven
- How to cure your wood-fired oven
- How to care for your wood-fired oven
- How to light a fire
- Cooking
- Top troubleshooting tips

natural_image
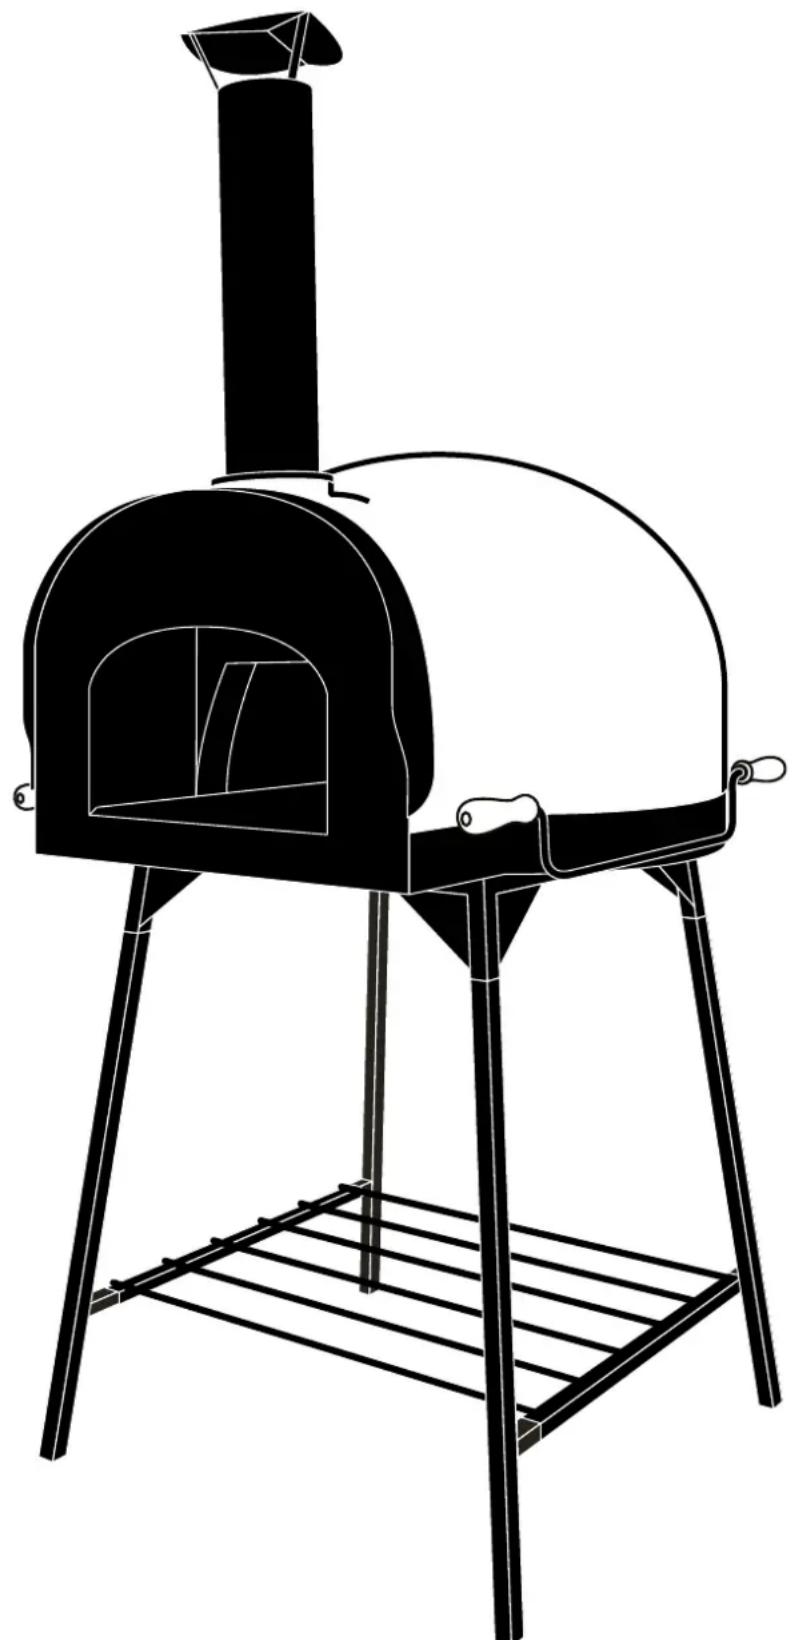
Line drawing of a traditional-style outdoor stove with a large dome-shaped lid and metal frame (no text or symbols)1. WHAT'S IN THE BOX?
Remove the manual from the box.
Check all parts of the box against the contents list:
- Precast - oven (x1)
• Metal flue pipe (x1)
• Metal stand in pieces
• Set of removable handles (x2)
• Metal plate door with hole for thermometer* (x1)
• Metal stand for thermometer* (x1) - Changeable thermometer* (x1)
- Pizza peel and brush set (x2 tools)
- Manual including instructions for stand assembly, curing process, lighting fires.
* One thermometer is supplied, which can be used in either the door (for example when bread baking) or in the stand for reading air temperature in the oven. It is inter-changeable between both. When used in the free stand, position it in the mouth 10-15cm from the front of the oven NOT inside the oven.
2. HOW TO SET UP YOUR WOOD-FIRED OVEN
- Follow the assembly instructions on pages 2 and 3.
- Check that everything is secure using an adjustable spanner.
- Decide where to place your stand. It needs to be on a hard and level surface, preferably in a concrete, tiled or decked area, which can easily hold the total weight of the oven (that's a hefty 200 kilos).
- WARNING there is a risk of toppling if not sited level or if sited on soft ground.
- RECOMMENDATION There is a slight risk of heavy force from behind knocking the oven over. We recommend sit-ing the oven up against a wall, fence or hedge.
• DO NOT LEAN AGAINST THE OVEN - Make sure the oven is at a safe distance from any flammable surfaces and that there is enough space around the flue pipe for smoke to disperse.
3. HOW TO CURE YOUR WOOD-FIRED OVEN
Follow this guide when your oven is new or if it becomes very wet.
You'll need:
- Wax firelighters. Do not use standard white firelighters as they contain chemicals that may get into the oven floor and affect the flavour of your food. Never use lighter fluid to start or refresh a fire.
- Hardwood kindling (such as oak, ash, beech, cherry, apple, pear, hawthorn or olive) or kiln-dried hardwood with a moisture content of less than 20%. Hardwood produces the most heat and less ash. Softwood has an unpleasant smell, and painted or treated wood can give off toxic fumes.
Your wood-fired oven is made from heat-resistant clay, but the water used to form the clay must be cooked out before your oven can be put into use. This process is called curing. The first step involves drying the water out of the clay and the second is tempering the clay. This is achieved by lighting several small fires inside the oven, over a period of one to three days, gradually increasing the oven temperature.
We recommend a total of 6 to 8 hours of curing, starting at a temperature of 50^ C and increasing the temperature at approximately 25^ C per hour (use the thermometer in the stand provided). This can be done either in one long burn or over two to three days. Start with a small kindling fire and slowly build up to a bigger fire using one or two small logs, approximately 2.5cm wide and 30cm long.
Although this is unlikely to happen, make sure you do not overheat the oven, as it can cause cracks in the components. (Don't worry if small hairline cracks appear in the surface of the clay – this is completely normal.)
Simple steps to curing your wood-fired oven:
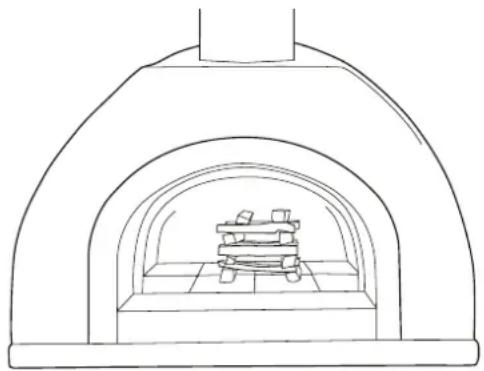
- Place a firelighter in the centre of the round part of the oven floor and stack small pieces of kindling around it to form a tower (see image on following page).
- Light the fire.
- Once the kindling has caught fire, slowly add small pieces of hardwood logs.
- The curing fire should be kept alight for at least three hours on the first day and for a longer period on the second day.
- Generally you will only need to cure your oven once. If, however the oven hasn't been used for a long period or has become wet, it is advisable to start with a smaller fire 3 to 4 hours beforehand to warm up the oven before you establish a large hot fire.
4. HOW TO CARE FOR YOUR OVEN
- You do not need to clean the oven with cleaning products because the high temperatures will kill any germs and bacteria. Any food spillages will simply be burnt to ashes, which you can sweep out later.
- After each use, or when ash has built up too much, allow the ash to cool then sweep it out of the oven with a metal brush into a suitable metal container. Afterwards, you can use the cooled ash as a fertilizer for your garden.
- Never throw water into the oven as this could damage its components.
- It's a good idea to clean the flue pipe every now and then. Use a brush to loosen any soot stuck inside the pipe or underneath the rain cap.
• Metal components can be resprayed with heat-resistant paint, e.g. BBQ paint available at DIY stores.
5. HOW TO LIGHT A FIRE
The centre burn
- We recommend the use of smaller pieces of log (approx. 30cm long and 4-6cm in diameter will give the optimum conditions for cooking and using the wood-fired oven). Please note, a vigorous fire with large flames will not equate to higher internal temperatures and a better cooking result. You do not need a large flame or a large fire to build the heat in your oven. Prolonged large flames could damage the steel front.
- Place two pieces of kindling lengthwise (pointing from the front of the oven to the back) in the centre of the oven, then place one firelighters in between them.
- Place two pieces of kindling across the first two pieces, then repeat with another two lengthwise and another two across until you have built a tower that is five or six rows high.
- Place two small hardwood logs against the tower, then light the firelighters.
- WARNING A fire too close to the front of the oven can cause a permanent separation of the metal. Place your logs near the mouth of the oven a few minutes before you need to use them. This will help them to ignite quickly when you place them on the fire.
natural_image
Line drawing of a traditional arched furnace or stove with internal shelves (no text or symbols)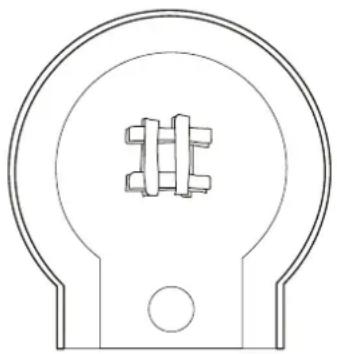
natural_image
Pure technical line drawing of a mechanical component with no text or symbolsThe perimeter burn
- Using a long-handled metal brush, push the burning logs and hot coals back to one side of the oven (use whichever side you prefer but it's a good idea to alternate after each use so that you get even wear).
- Nudge the logs together so they are overlapping, one on top of the other. If you have lost the flame, add another firelighter.
- If you need to, place the oven door on the foremost floor section beneath the arch opening at an angle, with one side open about 4 inches. This will block any wind and stop the smoke from rolling out until the oven reaches its ideal temperature.
Why you want a perimeter burn for cooking
- The heat will circulate in the oven instead of escaping out the front.
- It is easier to sweep the floor from side to side than from front to back and, in the same way, to move the food around the oven.
HANDY TIP... Place your logs near the mouth of the oven a few minutes before you need to use them. This will help them to ignite quickly when you place them on the fire.
6. COOKING
To cook in your wood fired-oven, simply bring the oven to its maximum temperature then let it cool down until it reaches your ideal cooking temperature. This is called regulating the oven. The ideal cooking temperature will depend on what you're planning to cook:
- Pizza (300°C to 350°C optimism air temperature)
Build up a large bed of glowing embers and maintain a large rolling flame (you will need to add smaller pieces of wood approximately every 10-20 minutes to keep it going). The floor should read about 400^ on your handheld thermometer. There shouldn't be any visible black carbon build-up on the dome and the flames should reach the middle of the oven. Bake your pizza on the oven floor, right next to the fire. Always leave the door off the oven when baking pizza.
- Roasting (150°C to 220°C optimum air temperature)
Prep your oven to reach high pizza temperatures to sear meat (cover your food to protect it from burning) and then allow the temperature to drop for slow roasting. You'll want a medium sized bed of embers and a small flame about 2 to 4 inches high (without any visible black on the dome). If you're roasting for less than an hour, you can leave the oven door off. If longer, you can position the door inside the arch to help control the heat (experiment with the exact placement of the door so that the fire does not go out or keep too much smoke inside the oven). If you need more heat, add more wood to the fire and open the door more. Push your food further into the oven if you want it to benefit from more heat, or bring it forward if you want it to cool down.
• Baking (floor temp)
Prep your oven to reach pizza oven temperatures then allow the temperature to drop for baking. The idea is to bake using the heat retained in the oven dome and floor. You don't want a live flame but some glowing embers are fine. Position the door inside the arch to completely close the oven. A floor temperature of 400^ C works well for baked pastas, casseroles or fruit cobblers. Simply place your dish in the oven and close the door. If there are glowing embers in the oven, keep the door open a crack so that the inside of the oven doesn't get smoky. It may be a good idea to place your dish on a trivet or inverted sheet pan, so it doesn't overcook.
- Bread oven (floor temp)
To maintain the baking temperature, keep the oven door closed for 30 minutes, then open it to check the floor temperature. If the oven is too hot, leave the door off for 10 minutes, then put the door back in place for a further 5 minutes before checking the temperature again. Bake your bread on a floured tray.
7. TOP TROUBLESHOOTING TIPS
Q1. My fire keeps going out, what am I doing wrong?
Make sure the oven door is removed to allow a free flow of air. Closing the door restricts the oxygen supply and will extinguish a fire within a few minutes.
Q2. Can I position the oven indoors or inside my garage?
No. The oven must never be positioned in an enclosed area because the smoke and fumes must be allowed to escape properly.
Q3. Why is my pizza base sticking to the oven floor?
First of all, remember to sprinkle the pizza peel with flour and make sure your preparation area is floured well. Don't wait too long to cook after adding your topping to the dough as it could start to soak it up and become sticky. Make sure you don't have any holes or thin spots in your pizza base as these can allow moisture to penetrate and cause sticking.
Q4. Why am I getting lots of black smoke?
Make sure you are using properly seasoned hardwood, ideally with a moisture content of less than 20%. This type of wood burns hotter for longer periods and produces very little smoke and ash.
Q5. Can I use normal firelighters?
No. All firefighters should be free from kerosene or other additives that may soak into the floor of the oven and, in turn, taint the taste of your food.
Q6. How long will the oven take to heat up before I can cook a pizza?
The oven should take about 30 minutes to heat up to pizza-making temperature. The size and length of the fire will determine the temperature of the oven. The oven is at its optimum when all of the black carbon has burned off.
Q7. How can I tell what temperature my oven is operating at?
Simply use the thermometer included with your wood-fired oven. When used in free stand, position it in the mouth 10-15cm from the front of the oven NOT inside the oven. You can also buy infrared thermometers and other types of thermometers to give you exact readings. However, once you have used the oven and experimented with it, you will get a "feel" for the temperature.
Q8. How do I put the fire out?
Simply close the oven door. This will block the oxygen supply to the fire, extinguishing it in just a few minutes.
Q9. Is this oven only good for cooking pizza?
No. The oven can be used for pizza, bread, meats, fish and vegetables. A wood-fired oven can cook anything a conventional oven can. The main difference is that this oven can reach temperatures higher than 450^ C.
Q10. Can I cook meats and fish directly on the oven floor?
We recommend that meat and fish or any dish that will produce fat or liquid from cooking should be placed in a container to avoid tainting the oven floor.
Q11. Is the oven frost-proof?
The oven has been tested by the manufacturer to be frost proof at -12^ . However, we recommend using the waterproof outer cover which is available for additional protection.
Q12. Is the oven weatherproof?
The oven has been manufactured to be waterproof, however persistent wetting will affect the oven and moisture will be absorbed. We recommended using a raincover.
Q13. If I haven't used my oven for awhile, will it still be okay to use?
Absolutely, although it's a good idea to light a small fire to slowly warm the oven before you want to start cooking to "cure" your oven again.
Q14. If my oven is wet, will it still be okay to use?
If you haven't used it for a couple of months or the weather has been persistently wet, it might be a good idea to light a small fire 3 to 4 hours before you want to start cooking to "cure" your oven again.
Q15. Can I paint my oven a different colour?
The colour of the oven is produced during the manufacturing process. This oven can be repainted using breathable masonary paint.
Q16. Can I move my oven when there is a fire burning in it?
No. This is extremely dangerous.
Q17. Can I leave the carrying handles attached to the oven?
We recommend removing the handles so people don't accidentally bump into them.
Q18. Will the flue pipe be safe to touch when the oven is working?
No. The flue pipe can retain heat for long periods of time even after the fire has gone out.
natural_image
Line drawing of a traditional outdoor stove with a large lid and metal frame (no text or symbols)DE
1. WAS IST IM KARTON?
natural_image
Line drawing of a traditional outdoor stove with a large dome-shaped lid and metal frame (no text or symbols)FR
1. QU'Y A-T-IL DANS LA BOÎTE ?
FR
natural_image
Line drawing of a traditional arched furnace or stove with stacked bricks inside (no text or symbols)
natural_image
Pure technical line drawing of a mechanical component with no text or symbolsL'allumage du tour
natural_image
Line drawing of a traditional outdoor stove with a large dome-shaped lid and metal frame (no text or symbols)natural_image
Line drawing of a traditional arched furnace with stacked bricks inside (no text or symbols)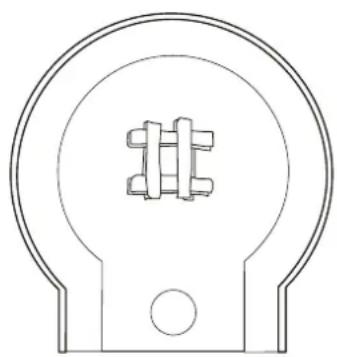
natural_image
Pure technical line drawing of a mechanical component with no text or symbolsIl fuoco laterale
natural_image
Line drawing of a traditional-style outdoor stove with a curved lid and metal frame (no text or symbols)
1. CO ZNAJDUJE SIĘ W OPAKOWANIU?
natural_image
Line drawing of a traditional-style outdoor stove with a large dome-shaped lid and metal frame (no text or symbols)1. CO OBSAHUJE BALENÍ?
natural_image
Technical line drawings of two architectural or mechanical components, one showing a curved arch with internal components and the other a symmetrical bracket (no text or symbols)Obvodové hoření
natural_image
Line drawing of a traditional outdoor stove with a large dome-shaped lid and metal frame (no text or symbols)1. ČO JE OBSAHOM BALENIA?
natural_image
Line drawings of two architectural or mechanical components: a dome-shaped opening with internal structural elements and a flanged circular base with cross-shaped cutouts (no text or symbols)Obvodový oheň
natural_image
Line drawing of a traditional outdoor stove with a large lid and metal frame (no text or symbols)RO
1. CE CONTINE CUTIA?
natural_image
Line drawing of a traditional outdoor stove with a large dome-shaped lid and metal frame (no text or symbols)natural_image
Line drawings of two architectural or mechanical components: a dome-shaped chamber with internal structural elements and a flanged circular base (no text or symbols)Периметър на горене
natural_image
Line drawing of a traditional outdoor stove with a large lid and metal frame (no text or symbols)1. KAJ JE V ŠKATLI?
natural_image
Line drawing of a traditional arched furnace with stacked bricks inside (no text or symbols)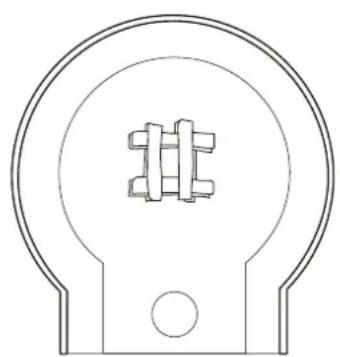
natural_image
Pure technical line drawing of a mechanical component with no text or symbolsGorenje na robu
natural_image
Line drawing of a traditional outdoor stove with a large dome-shaped lid and metal frame (no text or symbols)
1. HVAD ER DER I KASSEN?
natural_image
Line drawing of a traditional clay stove with arched roof and internal stove (no text or symbols)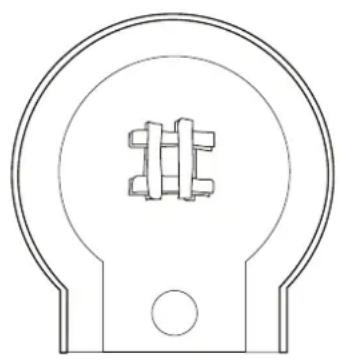
natural_image
Pure technical line drawing of a mechanical component with no text or symbolsnatural_image
Line drawing of a traditional outdoor stove with a large lid and metal frame (no text or symbols)1. MIS ON KOMPLEKTIS?
Eemaldage karbist kasutusjuhend
natural_image
Line drawings of two architectural or mechanical components: a dome-shaped chamber with internal structural elements and a flanged circular opening with a grid-like symbol (no text or labels)natural_image
Line drawing of a traditional outdoor stove with a large dome-shaped lid and metal frame (no text or symbols)4. CÓMO CUIDAR SU HORNO
natural_image
Line drawing of a traditional arched furnace with stacked bricks inside (no text or symbols)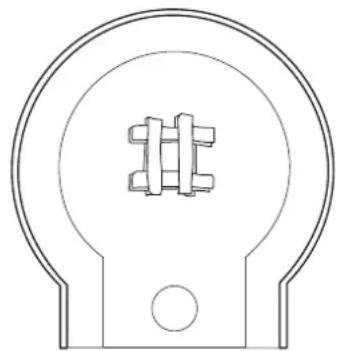
natural_image
Pure technical line drawing of a mechanical component with no text or symbolsnatural_image
Line drawing of a traditional outdoor stove with a large dome-shaped lid and metal frame (no text or symbols)1. PAKKAUKSEN SISÄLTÖ
natural_image
Technical line drawing of two architectural or mechanical components: a dome-shaped chamber with internal shelves and a flanged base, and a circular housing with internal structural elements (no text or symbols)Tuli sivustalla
natural_image
Line drawing of a traditional-style outdoor stove with a large lid and metal frame (no text or symbols)
natural_image
Technical line drawings of two architectural or mechanical components with internal structural elements (no text or symbols)GR
natural_image
Line drawing of a traditional outdoor stove with a large lid and metal frame (no text or symbols)1. ŠTO SE NALAZI U KUTIJI?
Izvadite priručnik za uporabu iz kutije.
natural_image
Line drawing of a traditional-style outdoor stove with a large dome-shaped lid and metal frame (no text or symbols)1. A DOBOZ TARTALMA
natural_image
Line drawing of a traditional stove with a wooden stove inside, no text or symbols present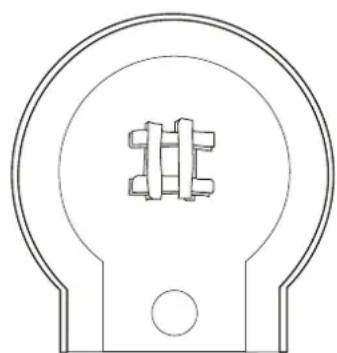
natural_image
Pure technical line drawing of a mechanical component with no text or symbols
Égés a külső szélen
natural_image
Line drawing of a traditional-style outdoor stove with a large dome-shaped lid and metal frame (no text or symbols)
?תְקָרִים אַלְהָם.1
natural_image
Line drawing of a traditional arched furnace with stacked bricks inside (no text or symbols)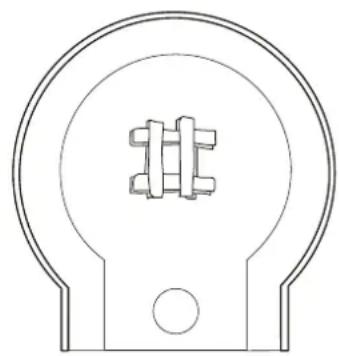
natural_image
Pure technical line drawing of a mechanical component with no text or symbolsתְקַרָה בְּרָה
?הכלההוּרָהוּרָהוּרָהוּרָהוּרָהוּרָהוּרָהוּרָהוּרָהוּרָהוּרָהוּרָהוּרָהוּרָהוּרָה:4
?הכלההוּרָהוּרָהוּרָהוּרָהוּרָהוּרָהוּרָהוּרָהוּרָהוּרָהוּרָהוּרָהוּרָהוּרָהוּרָה
?הכלההוּרָהוּרָהוּרָהוּרָהוּרָהוּרָהוּרָהוּרָהוּרָהוּרָהוּרָהוּרָהוּרָהוּרָהוּרָה:51
natural_image
Line drawing of a traditional-style outdoor stove with a curved lid and metal frame (no text or symbols)1. KAS DĚŽĚJE?
natural_image
Line drawings of two architectural or mechanical components: a dome-shaped opening with internal structural elements and a flanged circular base with cross-shaped cutouts (no text or symbols)Perimetrinis degimas
natural_image
Line drawing of a traditional outdoor stove with a large dome-shaped lid and metal frame (no text or symbols)1. KAS IR ŠAJĀ KASTĒ?
natural_image
Line drawing of a traditional arched furnace with stacked bricks inside (no text or symbols)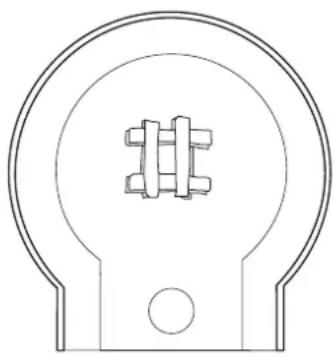
natural_image
Pure technical line drawing of a mechanical component with no text or symbolsUguns degšana pa perimetru
BELANGRIJK- WAARSCHUWING
LEES EERST ALLE INSTRUCTIES VOORDAT U DE OVEN INSTALLEERT EN GEBRUIKT HET NIET VOLGEN VAN DE INSTRUCTIES KAN LEIDEN TOT SCHADE AAN EIGENDOMMEN, PERSOONLIJK LETSEL OF DE DOOD
natural_image
Line drawing of a traditional outdoor stove with a large dome-shaped lid and metal frame (no text or symbols)1. INHOUD VAN DE DOOS?
natural_image
Line drawing of a traditional arched furnace with internal shelves (no text or symbols)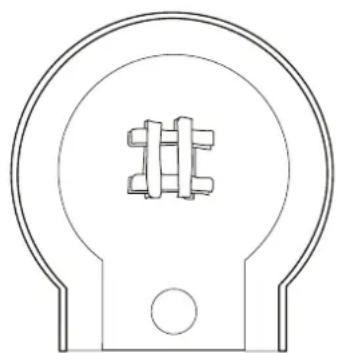
natural_image
Pure technical line drawing of a mechanical component with no text or symbolsnatural_image
Line drawing of a traditional outdoor stove with a large dome-shaped lid and metal frame (no text or symbols)1. HVA INNEHOLDER ESKEN?
natural_image
Line drawing of a traditional stove with a tiered stove inside (no text or symbols)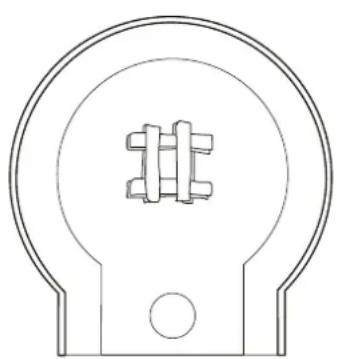
natural_image
Pure technical line drawing of a mechanical component with no text or symbolsSidevarme
natural_image
Line drawing of a traditional outdoor stove with a large dome-shaped lid and metal frame (no text or symbols)1. O QUE ESTÁ NA CAIXA?
natural_image
Line drawings of two architectural or mechanical components: a dome-shaped chamber with internal structural elements and a flanged circular base (no text or symbols)natural_image
Line drawing of a traditional outdoor stove with a large dome-shaped lid and metal frame (no text or symbols)1. ŠTA SE NALAZI U KUTIJI?
Uklonite uputstvo iz kutije.
natural_image
Line drawing of a traditional arched furnace or stove with internal shelves (no text or symbols)
natural_image
Pure technical line drawing of a mechanical component with no text or symbolsPeriferna vatra
natural_image
Line drawing of a traditional-style outdoor stove with a large lid and metal frame (no text or symbols)natural_image
Line drawing of a traditional stove with a wooden stove inside (no text or symbols)
natural_image
Pure technical line drawing of a mechanical component with no text or symbolsОгонь по периметру
INNEHÅLLSFÖRTECKNING
natural_image
Line drawing of a traditional-style outdoor stove with a dome-shaped lid and metal frame (no text or symbols)1. VAD INNEHÅLLER LÅDAN?
natural_image
Technical line drawings of two architectural or mechanical components with internal structural elements (no text or symbols)natural_image
Line drawing of a traditional-style outdoor stove with a dome-shaped lid and metal frame (no text or symbols)1. KUTU İÇERIĞİ
natural_image
Line drawing of a traditional stove with a wooden stove inside (no text or symbols)
natural_image
Pure technical line drawing of a mechanical component with no text or symbolsÇevresel ateş
natural_image
Line drawing of a traditional outdoor stove with a large lid and metal frame (no text or symbols)natural_image
Line drawing of a traditional arched furnace with internal shelves (no text or symbols)
natural_image
Pure technical line drawing of a mechanical component with no text or symbolsВогонь по периметру
HK Unit 1204B, 12/F. Tower B, New Mandarin Plaza 14 Science Museum Road Tsimshatsui East Kowloon Hong Kong.
tel: +852 3105 1113 fax: +852 3105 1114 info@merison.com
UK 1st Floor The Drying House 471 Kirkstall Road Leeds West Yorkshire United Kingdom LS4 2QD
tel: +44 113 430 1605 info@merison.com
AUS Level 3 188 Coventry Street (P.O. Box 5096) South Melbourne 3205 Victoria Australia tel: +61 (0)3 9690 6830 fax: +61 (0)3 9690 6895 mvidor@merison.com
merison.com
.Copyright 2016 Jamie Oliver Licensing Limited © Jamie Oliver is a registered trademark. Manufactured distributed, imported and sold under licence by merison
Say hello to us at: jamieoliverovens.com
Made in Italy
Find out more: jamieoliver.com

- Jamie Oliver
- IMPORTANT - WARNING
- SAVE AND KEEP THESE INSTRUCTIONS TO HAND SO YOU CAN REFER TO THEM
- TABLE OF CONTENTS
- WHAT'S IN THE BOX?
- HOW TO SET UP YOUR WOOD-FIRED OVEN
- HOW TO CURE YOUR WOOD-FIRED OVEN
- You'll need:
- Simple steps to curing your wood-fired oven:
- HOW TO CARE FOR YOUR OVEN
- HOW TO LIGHT A FIRE
- The centre burn
- The perimeter burn
- Why you want a perimeter burn for cooking
- COOKING
- TOP TROUBLESHOOTING TIPS
- Q1. My fire keeps going out, what am I doing wrong?
- Q2. Can I position the oven indoors or inside my garage?
- Q3. Why is my pizza base sticking to the oven floor?
- Q4. Why am I getting lots of black smoke?
- Q5. Can I use normal firelighters?
- Q6. How long will the oven take to heat up before I can cook a pizza?
- Q7. How can I tell what temperature my oven is operating at?
- Q8. How do I put the fire out?
- Q9. Is this oven only good for cooking pizza?
- Q10. Can I cook meats and fish directly on the oven floor?
- Q11. Is the oven frost-proof?
- Q12. Is the oven weatherproof?
- Q13. If I haven't used my oven for awhile, will it still be okay to use?
- Q14. If my oven is wet, will it still be okay to use?
- Q15. Can I paint my oven a different colour?
- DE
- WAS IST IM KARTON?
- QU'Y A-T-IL DANS LA BOÎTE ?
- FR
- L'allumage du tour
- Il fuoco laterale
- CO ZNAJDUJE SIĘ W OPAKOWANIU?
- CO OBSAHUJE BALENÍ?
- Obvodové hoření
- ČO JE OBSAHOM BALENIA?
- Obvodový oheň
- CE CONTINE CUTIA?
- Периметър на горене
- KAJ JE V ŠKATLI?
- Gorenje na robu
- HVAD ER DER I KASSEN?
- MIS ON KOMPLEKTIS?
- CÓMO CUIDAR SU HORNO
- PAKKAUKSEN SISÄLTÖ
- Tuli sivustalla
- GR
- ŠTO SE NALAZI U KUTIJI?
- A DOBOZ TARTALMA
- Égés a külső szélen
- ?תְקָרִים אַלְהָם.1
- תְקַרָה בְּרָה
- KAS DĚŽĚJE?
- Perimetrinis degimas
- KAS IR ŠAJĀ KASTĒ?
- Uguns degšana pa perimetru
- BELANGRIJK- WAARSCHUWING
- INHOUD VAN DE DOOS?
- HVA INNEHOLDER ESKEN?
- Sidevarme
- O QUE ESTÁ NA CAIXA?
- ŠTA SE NALAZI U KUTIJI?
- Periferna vatra
- Огонь по периметру
- INNEHÅLLSFÖRTECKNING
- VAD INNEHÅLLER LÅDAN?
- KUTU İÇERIĞİ
- Çevresel ateş
- Вогонь по периметру
Brand : Jamie Oliver
Model : Dome 80
Category : Oven