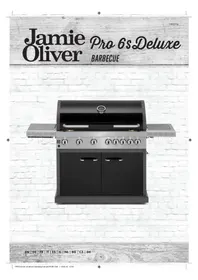
Pro 6 Deluxe - Barbecue Jamie Oliver - Free user manual and instructions
Find the device manual for free Pro 6 Deluxe Jamie Oliver in PDF.

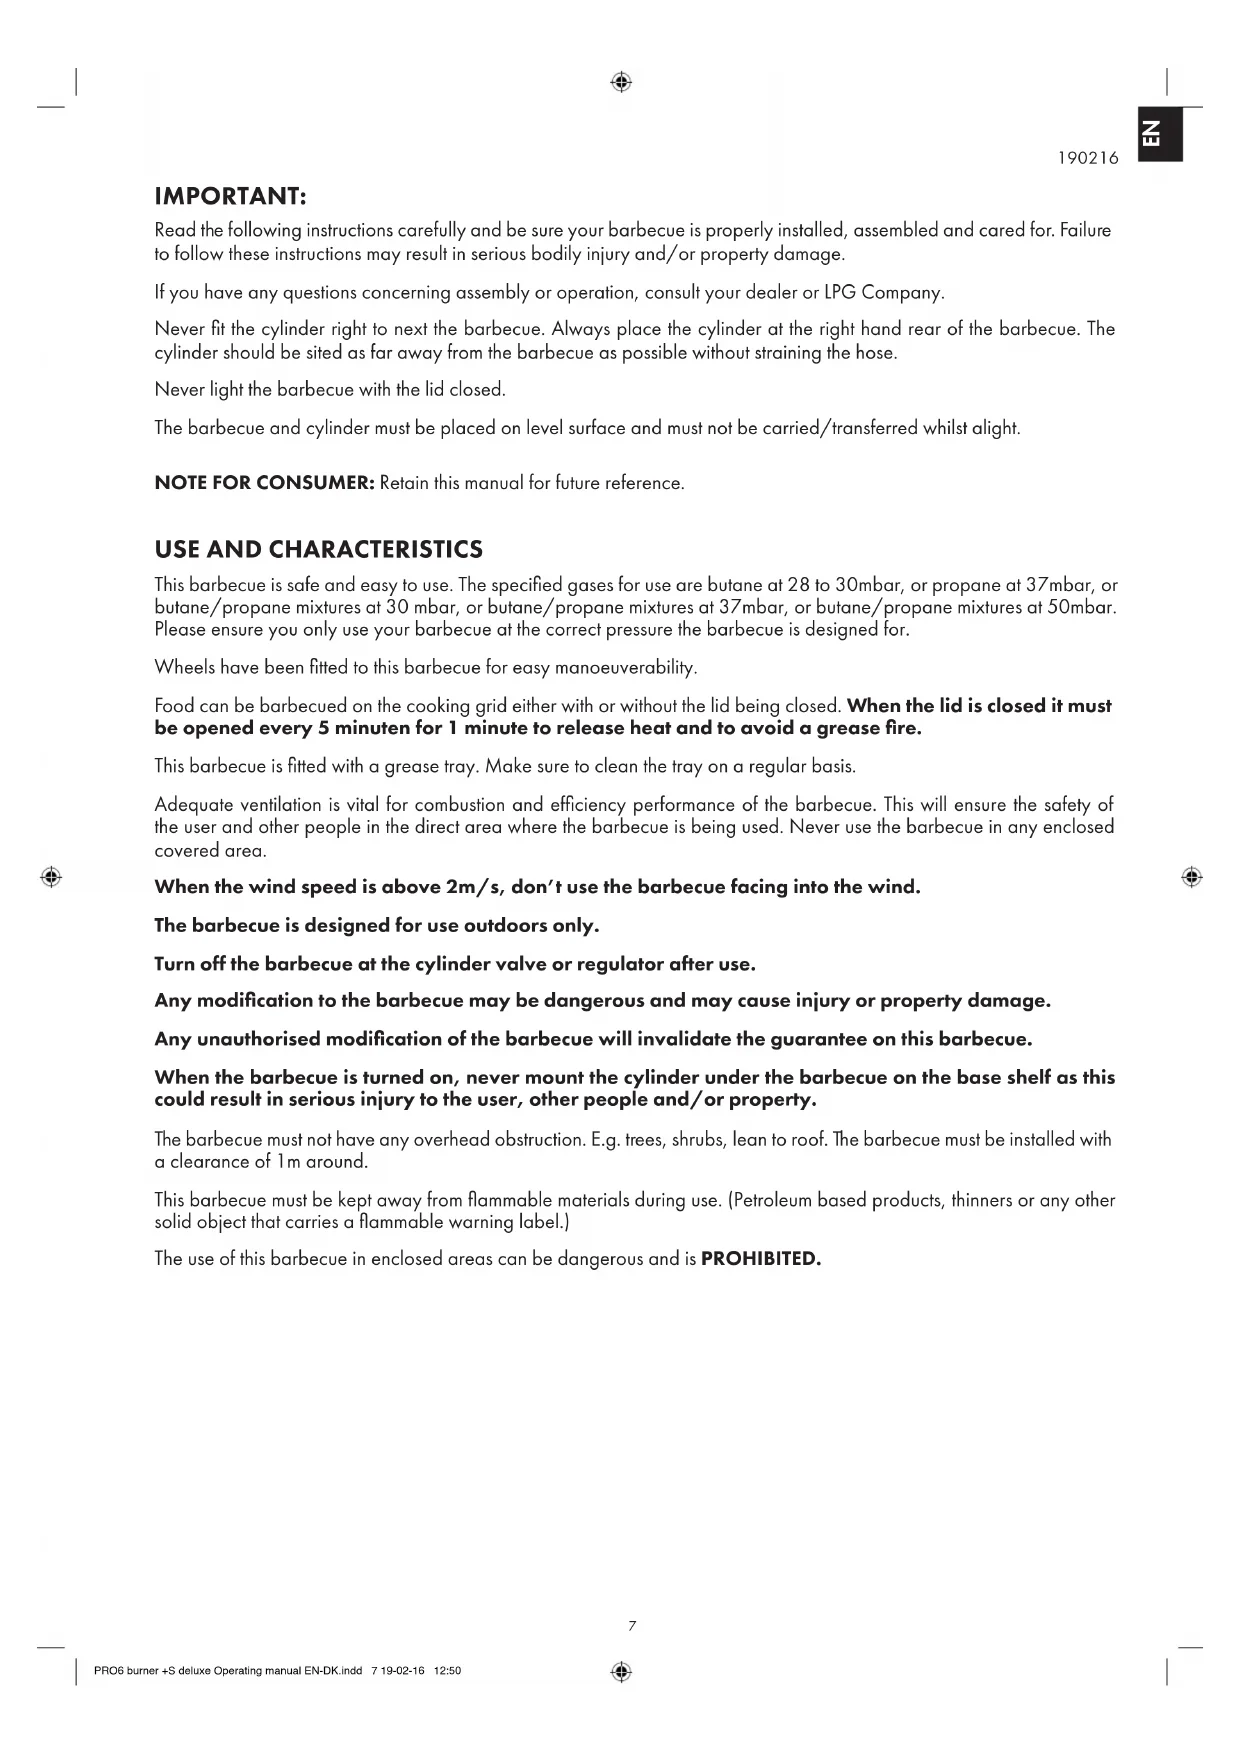


| Product Type | Gas Barbecue |
| Brand | Jamie Oliver |
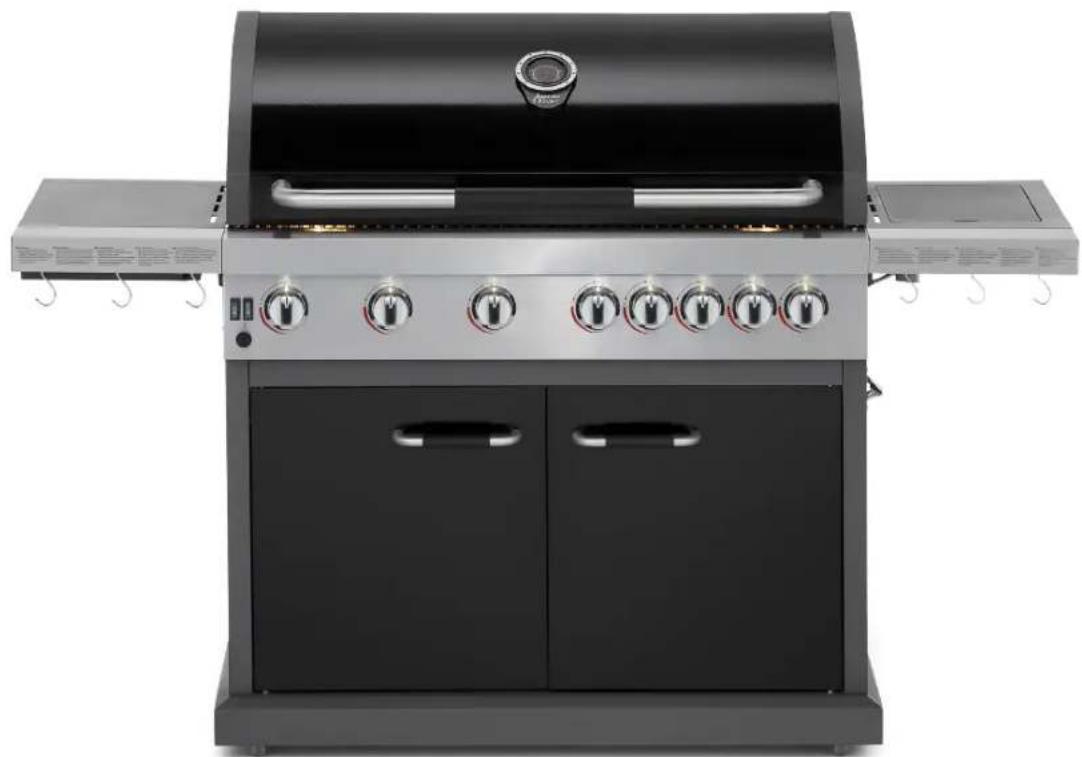
| Model | Pro 6 Deluxe |
| Number of burners | 6 main burners, 1 side burner, 1 rear burner (total 8) |
| Gas supply | Butane, Propane or LPG mixture |
| Gas pressure | 28-30 mbar (butane), 37 mbar (propane), 30/37/50 mbar (mixtures) |
| Total power | 28.5 kW (2072 g/h) |
| Usage | Outdoor only |
| Ignition | By spark (AA battery not included) and manual ignition |
| Lighting | LED for the oven and front panel |
| Mobility | Wheels for easy movement |
| Rear burner | For use with rotisserie |
| Grease drip tray | Yes, removable for cleaning |
| Cleaning | Mild detergent or baking soda, avoid abrasive cleaners |
| Burner warranty | 10 years on burner tubes |
| Chassis warranty | 5 years |
| Grid warranty | 3 years |
| Ignition warranty | 2 years |
| Other parts warranty | 1 year |
| Max gas bottle dimensions | Diameter 310 mm, height 500 mm |
| Safety | Open the hood before ignition, do not move while operating, turn off gas after use |
Frequently Asked Questions - Pro 6 Deluxe Jamie Oliver
User questions about Pro 6 Deluxe Jamie Oliver
0 question about this device. Answer the ones you know or ask your own.
Ask a new question about this device
Download the instructions for your Barbecue in PDF format for free! Find your manual Pro 6 Deluxe - Jamie Oliver and take your electronic device back in hand. On this page are published all the documents necessary for the use of your device. Pro 6 Deluxe by Jamie Oliver.
USER MANUAL Pro 6 Deluxe Jamie Oliver
EN | DE | FR | IT | ES | IL | NL | BG | CZ | DK
190216
Jamie Oliver
Pro 6s deluxe
BARBECUE
EN 5
DE 15
FR 25
IT 35
ES....45
IL 55
NL 65
BG 75
CZ 85
DK....95
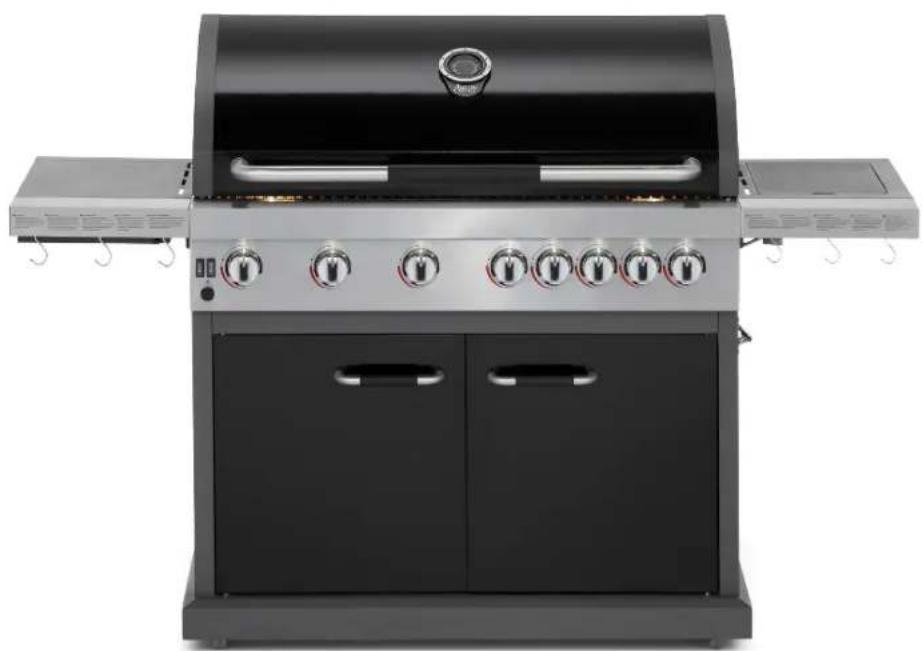
190216



Jamie Oliver
OPERATING INSTRUCTIONS FOR THE GAS BARBECUE GRILL
Description: Gas Barbecue Grill
Type of Gas: Butane, Propane, LPG
! WARNING
FOR YOUR SAFETY
FOR OUTDOOR USE ONLY
(OUTSIDE ANY ENCLOSURE)
190216
Z
Read these instructions carefully and ensure that your barbecue is properly installed, assembled, maintained and serviced in accordance to these instructions. Failure to follow these instructions may result in serious bodily injury and/or property damage. If you have any questions concerning the assembly or operation of this barbecue, please consult your dealer, your gas supplier, the manufacturer, agent or check www.jamieoliverbbq.com for support.
Notes to the user:
"USE OUTDOORS ONLY".
"READ THE INSTRUCTIONS BEFORE USING THE BARBECUE".
"WARNING: ACCESSIBLE PARTS MAY BE VERY HOT. KEEP YOUNG CHILDREN AWAY."
"DO NOT MOVE THE BARBECUE DURING USE".
"TURN OFF THE GAS SUPPLY AT THE GAS CYLINDER AFTER USE."
TECHNICAL INFORMATION
| MODEL NO.: PRO 6 DELUXE (6 burner + SB + BB) | |||||
| DESCRIPTION: | SIX BURNERS WITH SIDE BURNER AND BACK BURNER GAS BARBECUE GRILL | ||||
| TOTAL HEAT INPUT:(ALL GAS CATEGORIES) | 28.5kW (2072g/h) | CE 0359-16PIN:0359CO1390 | |||
| GAS CATEGORY: □I | 3+(28-30/37) | □I3B/P(30) | □I3B/P(50) | □I3B/P(37) | |
| TYPES OF GAS: Butane Propane LPG GAS | MIXTURES | ||||
| GAS PRESSURE: 28-30 mbar 37 mbar 30 | mbar 50mbar 37 mbar | ||||
| INJECTOR SIZE main: | 0.92 mm | 0.92 mm | 0.82 mm | 0.88mm | |
| INJECTOR SIZE side: | 0.76 mm | 0.76 mm | 0.67 mm | 0.72 mm | |
| INJECTOR SIZE back: | 0.95 mm | 0.95 mm | 0.83 mm | 0.90 mm | |
| USE OUTDOORS ONLY.READ THE INSTRUCTIONS BEFORE USING THE BARBECUE.WARNING: ACCESSIBLE PARTS MAY BE VERY HOT. KEEP YOUNG CHILDREN AWAY.THIS BARBECUE MUST BE KEPT AWAY FROM FLAMMABLE MATERIALS DURING USE. DO NOT MOVE THE BARBECUE DURING USE.TURN OFF THE GAS SUPPLY AT THE GAS CYLINDER AFTER USE.DO NOT MODIFY THE BARBECUE.OPEN OVEN HOOD BY SILICON SLEEVE ONLY. NEVER TOUCH THE METAL HANDLE OF THE APPLIANCE WHILE COOKING AS IT IS VERY HOT. | |||||
| Country of Destination:□I3+(28-30/37)BE, CH, CY, CZ, ES, FR, GB, GR, IE, IT, LT, LU, LV, PT, SK, SI.□I3B/P(30)BE, CY, DK, EE, FI,FR, HU, IT, LT, NL, NO, SE, SI, SK, RO, HR, TR, BG, IS, LU, MT, CZ.□I3B/P(50)AT, CH, DE, SK, CZ.□I3B/P(37)PL | |||||
IMPORTANT:
Read the following instructions carefully and be sure your barbecue is properly installed, assembled and cared for. Failure to follow these instructions may result in serious bodily injury and/or property damage.
If you have any questions concerning assembly or operation, consult your dealer or LPG Company.
Never fit the cylinder right to next the barbecue. Always place the cylinder at the right hand rear of the barbecue. The cylinder should be sited as far away from the barbecue as possible without straining the hose.
Never light the barbecue with the lid closed.
The barbecue and cylinder must be placed on level surface and must not be carried/transferred whilst alight.
NOTE FOR CONSUMER: Retain this manual for future reference.
USE AND CHARACTERISTICS
This barbecue is safe and easy to use. The specified gases for use are butane at 28 to 30mbar, or propane at 37mbar, or butane/propane mixtures at 30 mbar, or butane/propane mixtures at 37mbar, or butane/propane mixtures at 50mbar. Please ensure you only use your barbecue at the correct pressure the barbecue is designed for.
Wheels have been fitted to this barbecue for easy manoeuvability.
Food can be barbecued on the cooking grid either with or without the lid being closed. When the lid is closed it must be opened every 5 minutes for 1 minute to release heat and to avoid a grease fire.
This barbecue is fitted with a grease tray. Make sure to clean the tray on a regular basis.
Adequate ventilation is vital for combustion and efficiency performance of the barbecue. This will ensure the safety of the user and other people in the direct area where the barbecue is being used. Never use the barbecue in any enclosed covered area.
When the wind speed is above 2m/s, don't use the barbecue facing into the wind.
The barbecue is designed for use outdoors only.
Turn off the barbecue at the cylinder valve or regulator after use.
Any modification to the barbecue may be dangerous and may cause injury or property damage.
Any unauthorised modification of the barbecue will invalidate the guarantee on this barbecue.
When the barbecue is turned on, never mount the cylinder under the barbecue on the base shelf as this could result in serious injury to the user, other people and/or property.
The barbecue must not have any overhead obstruction. E.g. trees, shrubs, lean to roof. The barbecue must be installed with a clearance of 1 m around.
This barbecue must be kept away from flammable materials during use. (Petroleum based products, thinners or any other solid object that carries a flammable warning label.)
The use of this barbecue in enclosed areas can be dangerous and is PROHIBITED.
INSTRUCTIONS FOR USE
Follow these instructions carefully to avoid seriously damaging your barbecue and causing injury to yourself and to property.
- Assemble the barbecue following the assembly instructions carefully.
- Connect the gas hose to the barbecue. Connect the regulator to the hose.
- Connect the regulator to the cylinder valve following the regulator instructions supplied with the regulator.
- Turn all of the control knobs to the 'O' position before turning on the gas supply to the barbecue.
- Operate the regulator in accordance with the instructions supplied with the regulator.
- Plug on the power cord.

Press the button 'I' to turn on the burner box oven lights. Press the button 'O' to turn off the burner box oven lights.

Press the button 'I' to turn on the front panel LED lights.
Press the button 'O' to turn off the front panel LED lights.
- Battery of pulse ignition installation (AA alkaline battery not included)
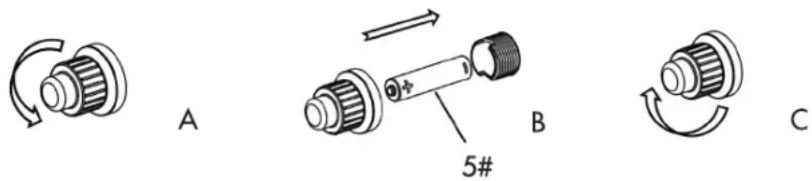
- Use the back burner when cooking with the rotisserie.
Lighting Instructions: Main Burners
- Open the lid before lighting.
- Connect the gas cylinder to the barbecue following the instructions supplied with the regulator.
- Turn all the control knobs to the 'O' position.
- Turn ON the gas supply at the cylinder or regulator switch following the regulator connection and operating instructions. Check the cylinder to regulator connection and hose to barbecue hose inlet connection for leakage using soapy water. Any leakage will show as bubbles in the area of the leak. If a leak is found, do not use the barbecue. Consult your gas or barbecue supplier for advice.
- To light the left hand burner, push down and turn the left burner control knob anti-clockwise to the 90° position (full rate position). An audible click will be heard, this should light the burner. Check that the burner is alight. If the burner has not lit, repeat this process.
- If the burner has not lit after two attempts, turn OFF the gas tap and wait 5 minutes before retrying the ignition sequence.
- When the burner has lit, the burner rate can be adjusted by pushing down and turning the knob anti-clockwise to any position between the full and low rate position.
- Light the remaining burners from left to right in sequence.
- To turn OFF the barbecue, turn the cylinder valve handle or regulator switch to the 'O' position by following the regulator instructions. Once the burners have extinguished turn all the control knobs to the 'O' position.
- Turn OFF the gas supply at the cylinder or regulator switch.
Warning: If any burner fails to ignite, turn the control knob to the 'O' position (clockwise) and also turn the cylinder valve off. Wait five minutes before attempting to relight.
Side burner lighting instructions (If applicable):
- Once the grill burner has been lit, the side burner can be lit by following the instructions below.
- Open the side burner lid before lighting the side burner and turn the side burner control knob to the 'O' position.
- Push down the side burner control knob and keep pressing whilst turning anti-clockwise to the full rate position, an audible click will be heard, this will light the burner. If the burner does not light, repeat this process.
- If the burner has not lit after two attempts, turn OFF the gas tap, wait 5 minutes and then repeat step 3 in main burner lighting instructions.
- When the burner has lit, the burner rate can be adjusted by pushing down and turning the knob anti-clockwise to any position between the full and low rate position.
- To turn the barbecue side burner off, turn the cylinder valve or regulator switch to the 'O' position and then turn all of the control knobs on the barbecue clockwise to the 'O' position until the flames have been extinguished
Warning: If the burner fails to ignite, turn the control knob to the 'O' position (clockwise) and also turn the cylinder valve off. Wait five minutes before attempting to relight with ignition sequence.
BACK BURNER LIGHTING INSTRUCTIONS:
- Check the battery of pulse ignition is available.
- Once the grill burner has been lit, the back burner can be lit by following the instructions below.
- Open the lid before lighting.
- Turn the back burner control knob to the '7 position and push the button '7
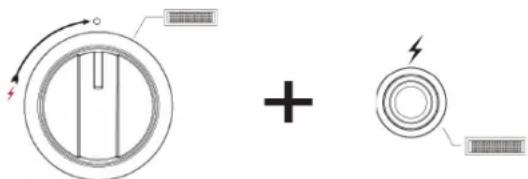
- If the burner has not lit after two attempts, turn OFF the gas tap and wait 5 minutes before retrying the ignition sequence
- When the back burner has lit, the rear burner rate can not be adjusted by pushing down.
- To turn OFF the barbecue, turn the cylinder valve handle or regulator switch to the 'O' position by following the regulator instructions. Once the burners have extinguished turn all the control knobs to the 'O' position.
Warning:
- If the burner fails to ignite, turn the control knob to the 'O' position (clockwise) and also turn the cylinder valve off. Wait five minutes before attempting to relight with ignition sequence.
- Shut off the back burner while main burners and side burner opening in a full rate.
MANUAL IGNITION
If necessary this barbecue can be lit manually.
Main Burners
- Open the lid before lighting.
- Light a 90mm barbecue match and hold close to the burner located on the far left of the barbecue.
- Turn the left burner control knob to the full rate position. The burner will light from the match.
- Once the left burner is lit, the burner next to it can be turned on.
- Light remain burners from left to right.
- When the burner has lit, the burner rate can be adjusted by push down and turn the knob anti-clockwise to any position between the full and low rate position.
Side burner (If applicable):
- Open the lid before lighting.
- If igniter fails to spark, use a match to light burner.
After use, close the gas supply by either turning OFF the switch on the regulator or turning OFF the cylinder valve.
In the event of light back whilst the barbecue is in use. Turn all the controls, cylinder valve and regulator switch to the 'O' position. Wait 5 minutes before attempting to relight the barbecue. If the problem persists after relighting, consult your gas dealer, or the store where you purchased the barbecue, or a qualified gas engineer for assistance or repair. Never try to fix the problem yourself as this could result in serious injury and/or property damage.
The recommended pot size to use on the side burner should be around 180\~220mm.
Clean the barbecue of excess fat, before storage, with a damp cloth using a mild detergent solution as the cleaning agent.
Store the barbecue in a clean dry environment.
Do not store your gas cylinder indoors. Store in a well ventilated area away from direct sunlight
CONNECTING THE GAS CYLINDER TO THE BARBECUE
This barbecue is only suitable for use with low-pressure butane or propane gas and fitted with the appropriate low-pressure regulator via a flexible hose. The hose should be secured to the regulator and the barbecue with hose clips/nut. This barbecue is set to operate a 28 mbar regulator with butane gas or a 37mbar regulator with propane gas or a regulator with butane/propane mixture at 37mbar or a regulator with butane/propane mixture at 50mbar or a regulator with butane/propane mixture at 30mbar. Use a suitable regulator certified to BSEN 16129. Please consult your LPG dealer for information regarding a suitable regulator for the gas cylinder.
BEFORE USE PLEASE CHECK FOR LEAKS
Never check for leaks with a naked flame, always use a soapy water solution
TO CHECK FOR LEAKS
Make 2-3 fluid ounces of leak detecting solution by mixing one part washing up liquid with 3 parts water. Ensure the control valve is off.
Connect the regulator to the cylinder and ON/OFF valve to the burner, ensure the connections are secure then turn ON the gas.
Brush the soapy solution on to the hose and all joints. If bubbles appear you have a leak, which must be fixed before use.
Retest after fixing the fault. Turn off the gas at the cylinder after testing.
If the detected leak can not be fixed, do not attempt to fix the leak but consult your gas dealer.
REGULATOR AND HOSE
Use only regulators and hose approved for LPG at the above pressures (See Page 2). The life expectancy of the regulator is estimated at 10 years. It is recommended that the regulator is changed within 10 years of the date of manufacture.
The use of the wrong regulator or hose is unsafe; always check that you have the correct items before operating the barbecue.
The hose used must conform to the relevant standard for the country of use. The length of the hose must be 1.5 meters (maximum). A worn or damaged hose must be replaced. Ensure that the hose is not obstructed, kinked, or in contact with any part of the barbecue other than at its connection.
The hose should not be twisted or kinked when attached to the gas cylinder. No part of the hose should touch any part of the barbecue. Site the cylinder to the left hand side and behind the barbecue at the maximum distant permitted by the hose length.
STORAGE OF THE Barbecue
Storage of a barbecue indoors is only permissible if the cylinder is disconnected and removed from the barbecue. When the barbecue is not to be used for a period of time it should be stored in a dry dust free environment.
GAS CYLINDER
The maximum diameter and the maximum height of the cylinder is 310 mm and 500 mm as shown in (Fig.1).
Fig.1
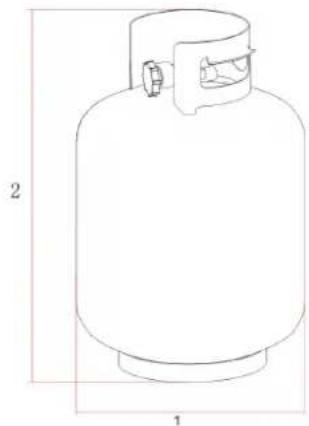
Key
1: maximum diameter
2: maximum height
The gas cylinder should not be dropped or handled roughly! If the barbecue is not in use, the cylinder must be disconnected. Replace the protective cap on the cylinder after disconnecting the cylinder from the barbecue.
Cylinders must be stored outdoors in an upright position and out of the reach of children. The cylinder must never be stored where temperatures can reach over 50°C. Do not store the cylinder near flames, pilot lights or other sources of ignition. DO NOT SMOKE.
Pay attention when putting the cylinder to the cylinder hole, ensure the hose connected to the cylinder does not touch the hot surface-heat-resisted plate. Make sure the cylinder stays in place during operation. Never put a spare cylinder in the same cylinder enclosure. Never block access to the cylinder valve.
Warning: Shut off the gas cylinder if you smell gas.
CLEANING AND CARE
CAUTION: All cleaning and maintenance should be carried out when the barbecue is cool and with the fuel supply turned OFF at the gas cylinder.
CLEANING
"Burning off" the barbecue grill bars after every use (for approx 15 minutes) will keep excessive food residue to a minimum.
OUTSIDE SURFACE
Use mild detergent or baking soda and hot water solution. Non-abrasive scouring powder can be used on stubborn stains, then rinse with water.
If the inside surface of the barbecue lid has the appearance of peeling paint, baked on grease build up has turned to carbon and is flaking off. Clean thoroughly a strong hot soapy water. Rinse with water and allow to completely dry. NEVER USE OVEN CLEANER
INTERIOR OF BARBECUE BOTTOM
Remove residue using brush, scraper and/or cleaning pad then wash with a soapy water solution. Rinse with water and allow to dry.
PLASTIC SURFACES
Wash with a soft cloth and hot soapy water. Rinse with water. Do not use abrasive cleaners, degreasers or a concentrated barbecue cleaner on plastic parts.
COOKING GRID
Use mild soapy water. Non-abrasive scouring powder can be used on stubborn stains then rinse with water.
GREASE TRAY
Please do not open the grease tray during use.
When cleaning the grease tray, pull out the grease tray first.
CLEANING THE BURNER ASSEMBLY
Turn the gas OFF at the control knob and disconnect the cylinder.
Remove cooking grate and flame tamers when cold.
Clean the burner with a soft brush or blow clean with compressed air and wipe with a cloth.
Clean any clogged ports with a pipe cleaner or stiff wire (such as an opened paper clip).
Inspect burner for any damage (cracks or holes). If damage is found, replace with a new burner. Reinstall the burner, check to ensure that the gas valve orifices are correctly positioned and secured inside the burner inlet (venturi).
In some cases your barbecue will light back because of an insect crawling inside the burner venturi or a spider spinning its web inside the burner. This can be fixed by using a bottle brush inserted through the burner venturi and pushing through over the burner length. If condition persists consult your gas dealer.
SERVICING
Your gas barbecue should be serviced annually by a competent registered person.
MORE INFORMATION
Check for more information or instruction video's on our website jamieoliverbbq.com
Jamie Oliver
JAMIE OLIVER GAS BBQ GUARANTEE
In addition to the store guarantee from which this product was purchased, Jamie Oliver BBQ agrees that if any defect in materials or workmanship appears in the product within the given guarantee after the original date of customer purchase, it will issue replacement parts.
This applies only if the barbecue has been subject to:
a. Normal domestic use on domestic premises.
b. Has not been subject to alterations or repairs carried out by unauthorized persons.
c. Has been stored in dry conditions throughout the winter.
d. The barbecue has not been damaged.
e. There is a valid receipt as proof of purchase.
f. Registered for guarantee purposes as per the instructions.
Given guarantee per element of the gas barbecue;
• Jamie Oliver burner tubes warranty 10 year
• Jamie Oliver frame warranty 5 year
• Jamie Oliver lid warranty 3 year
• Jamie Oliver grill warranty 3 year
• Jamie Oliver ignition warranty 2 year
• All remaining parts
1 year
This warranty does not cover:
a. Parts affected by rust, corrosion, oxidation or discoloration which may occur due to moisture or overheating.
b. Labour, or labour related charges.
c. Normal wear and tear and scratches or unblocking of pipes.
d. Negligent use or misuse of the product.
e. Use of the wrong fuel/gas.
f. Use, contrary to operating instructions included in the instruction manual.
g. Regulator, hose and clips.
h. Consumable parts eg: batteries (when applicable).
This warranty does not affect a customer's statutory rights in any way. The warranty is globally applicable
Jamie Oliver BBQ reserves the right to modify this product without notice. If the model is no longer available we will discuss an alternative replacement or settlement.
Only by registering within 30 days from date of purchase will the guarantee be valid for up to ten years for some parts. To benefit from the GUARANTEE register on-line on www.jamieoliverbbq.com, or complete the mandatory sections under REGISTER NOW on the separate sheet, and post to Jamie Oliver BBQ Registration.
To make a claim download the claim form from www.jamieoliverbbq.com, or write to Jamie Oliver BBQ Helpline, Einsteinweg 5, 3752 LW Bunschoten, PO Box 214, 3750 GE Bunschoten, The Netherlands. to receive a form.
The claim will require:
a. Legible copy of the purchase/sales receipt (showing purchase date, model name and store).
b. Barbecue model name & number.
c. Purchase date.
d. Store name & location / or other, eg: on-line.
e. Photographs of all the damaged parts listed in your claim.
Please keep this document in a safe place.
190216
Jamie Oliver
! WARNING
FÜR IHRE SICHERHEIT
NUR ZUM AUSSENGEBRAUCH
Legende
! ATTENTION
POUR VOTRE SÉCURITÉ
DESTINÉ À UN USAGE EXTÉRIEUR UNIQUEMENT
(EN DEHORS DE TOUT ESPACE CLOS)
Légende
AVVERTENZA:
Legenda
ADVERTENCIA
PARA SU SEGURIDAD
SÓLO PARA USO EXTERIOR
(EN ESPACIOS AL AIRE LIBRE)
Leyenda
הכלה!
בִרְשָׁה בַרְשָׁה
.הכלההוּרָהוּרָהוּרָהוּרָהוּרָהוּרָהוּרָהוּרָהוּרָהוּרָהוּרָהוּרָהוּרָהוּרָהוּרָה
www.jamieoliverbbq.com
.noitartsigeR, RegisRTER NOW
⚠ WAARSCHUWING
VOOR UW VEILIGHEID
ENKEL VOOR GEBRUIK BUITENSHUIS
Sleutel
1: maximale diameter
2: maximale hoogte
ПРЕДУПРЕЖДЕНИЕ
ЗА ВАША БЕЗОПАСНОСТ
УРЕДЪТ ДА СЕ УПОТРЕБЯВА САМО НА ОТКРИТО
Легенда
VAROVÁNÍ
PRO VAŠI BEZPEČNOST
POUZE K VENKOVNÍMU POUŽITÍ
(VNĚ MÍSTNOSTÍ)


Legenda
Gastype: Butan, propan, LPG
190216
! ADVARSEL
FOR DIN SIKKERHED
KUN TIL UDEND∅RS BRUG
(UDEN FOR ETHVERT INDELUKKE)
OPBEVARING AF APPARATET
Reference
Visit Jamie's FOGO Chanel on YouTube for great recipes
please go to www.jamieoliverbbq.com and register your barbecue to get up to 10 years guarantee
- JAMIE OLIVER
- PRO 6S DELUXE
- BARBECUE
- OPERATING INSTRUCTIONS FOR THE GAS BARBECUE GRILL
- NOTES TO THE USER
- IMPORTANT
- USE AND CHARACTERISTICS
- INSTRUCTIONS FOR USE
- LIGHTING INSTRUCTIONS: MAIN BURNERS
- SIDE BURNER LIGHTING INSTRUCTIONS (IF APPLICABLE)
- BACK BURNER LIGHTING INSTRUCTIONS
- WARNING
- MANUAL IGNITION
- MAIN BURNERS
- SIDE BURNER (IF APPLICABLE)
- CONNECTING THE GAS CYLINDER TO THE BARBECUE
- BEFORE USE PLEASE CHECK FOR LEAKS
- TO CHECK FOR LEAKS
- REGULATOR AND HOSE
- STORAGE OF THE BARBECUE
- GAS CYLINDER
- KEY
- CLEANING AND CARE
- CLEANING
- OUTSIDE SURFACE
- INTERIOR OF BARBECUE BOTTOM
- PLASTIC SURFACES
- COOKING GRID
- GREASE TRAY
- CLEANING THE BURNER ASSEMBLY
- SERVICING
- MORE INFORMATION
- JAMIE OLIVER GAS BBQ GUARANTEE
- THIS APPLIES ONLY IF THE BARBECUE HAS BEEN SUBJECT TO
- GIVEN GUARANTEE PER ELEMENT OF THE GAS BARBECUE
- THIS WARRANTY DOES NOT COVER
- THE CLAIM WILL REQUIRE
- LEGENDE
- LÉGENDE
- ЛЕГЕНДА
- LEGENDA
- OPBEVARING AF APPARATET
- REFERENCE
Brand : Jamie Oliver
Model : Pro 6 Deluxe
Category : Barbecue