RA282 - Sports smartwatch OREGON SCIENTIFIC - Free user manual and instructions
Find the device manual for free RA282 OREGON SCIENTIFIC in PDF.
Frequently Asked Questions - RA282 OREGON SCIENTIFIC
User questions about RA282 OREGON SCIENTIFIC
0 question about this device. Answer the ones you know or ask your own.
Ask a new question about this device
Download the instructions for your Sports smartwatch in PDF format for free! Find your manual RA282 - OREGON SCIENTIFIC and take your electronic device back in hand. On this page are published all the documents necessary for the use of your device. RA282 by OREGON SCIENTIFIC.
USER MANUAL RA282 OREGON SCIENTIFIC
Outbreaker Sailor Compass / Outbreaker Sailor Compass Medium Model: RA202 / RA282 User Manual
TABLE OF CONTENTS
Introduction 2
Key Features 3
Watch 3
LCD Display 4
Getting Started 4
Unpack the Watch 4
Turn ON the Watch (First-Time Use Only) 5
Batteries 5
Switch between Main Modes 6
Using the Clock 7
Set the Clock / Calendar / Temperature Unit 7
ViewClockDisplays 8
Set the Daily Alarm / Time Zone / Keypad Tone 8
AlarmSound 9
Turn the Alarm Sound OFF 9
Activate/Deactivate the Alarm 9
Using the Altimeter-Barometer 9
About the Altimeter-Barometer 9
Set the Altitude 10
Altitude Bar Chart 10
View Altitude Displays 1
Set the Altitude Alarm / Sea Level / Weather Icor... 12
Using the Sailing Timer 13
About the Sailing Timer 13
Set the Sailing Time 13
Sailing Timer Sound Alert 15
Sea Level Pressure Display 15
Using the Compass 16
About the Compass 16
Set the Compass Sensor Calibration 17
View Compass Displays 17
Set the Bearing Tracking System 18
Set the Declination 19
Set the True North Calibration 20
I o Iurn the Bearing Tracking / Declination /
True North Calibration ON / OFF 20
Backlight 20
Keypad Lock 20
Specifi cations 21
Warnings and Care Instructions 22
About Oregon Scientific 23
INTRODUCTION
Thank you for selecting the Oregon Scientific™ Outbreaker Sailor Compass / Outbreaker Sailor Compass Medium (RA202 / RA282) watch as your product of choice. This precision device includes the following features:
- Highly accurate chronometer clock with calendar and backlight
Digital compass - Adjustable declination angle
- Compass sensor calibration
True north calibration - Bearing tracking system
- Sailing timer with laps - Counts up and down
- Altitude measurement with alarm alert and bar chart display
- Barometric pressure measurement with sea level line chart display
- Temperature measurement
- Weather forecast with 4 displays
Water resistant up to: - 50 metres RA202
- 30 metres RA282
Daily alarm
This manual contains important safety and care information, and provides step-by-step instructions for using this product. Read the manual thoroughly, and ke it in a safe place in case you need to later refer to it.
IMPORTANT
- The measurement functions built into the RA202 / RA282 are not meant to substitute professional measurement or industrial precision devices. Value produced by this watch should be considered a reasonable representations only
- When engaging in mountain climbing or other activities in which losing your way can create a dangerous or life-threatening situation, always be sure to use a second compass to confirm direction readings
- Oregon Scientific assumes no responsibility for any loss, or any claims by third parties that may arise through the use of this watch
KEY FEATURES
WATCH
RA202 RA282
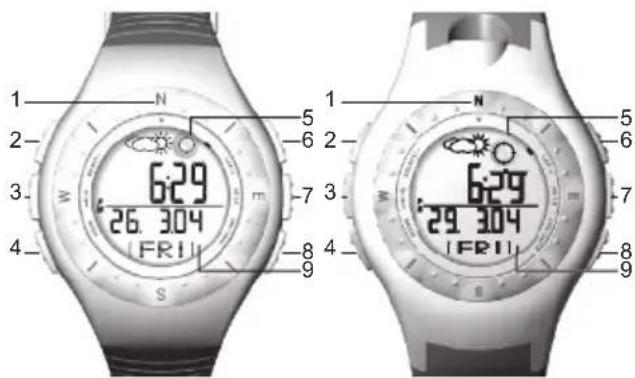
- N/S/E/V: Cardinal points - north, south, east and west.
- SELECT / : View screen displays within a ma mode; decrease setting value; reactivate compass sensor.
- /: Turn ON backlight for 3 seconds; lock / unlock the keypad.
- MODE: Switch to another display; quick exit during any setting mode.
- Bubble level: Use to position watch on a level plane.
- LAP/+: Iake a lap; Increase setting value
- ST/SP: Start / stop timer and stopwatch
- FUNC / SET: Enter setting mode; select another setting option; confirm setting value; reload the time pre-set value.
- LCD display.
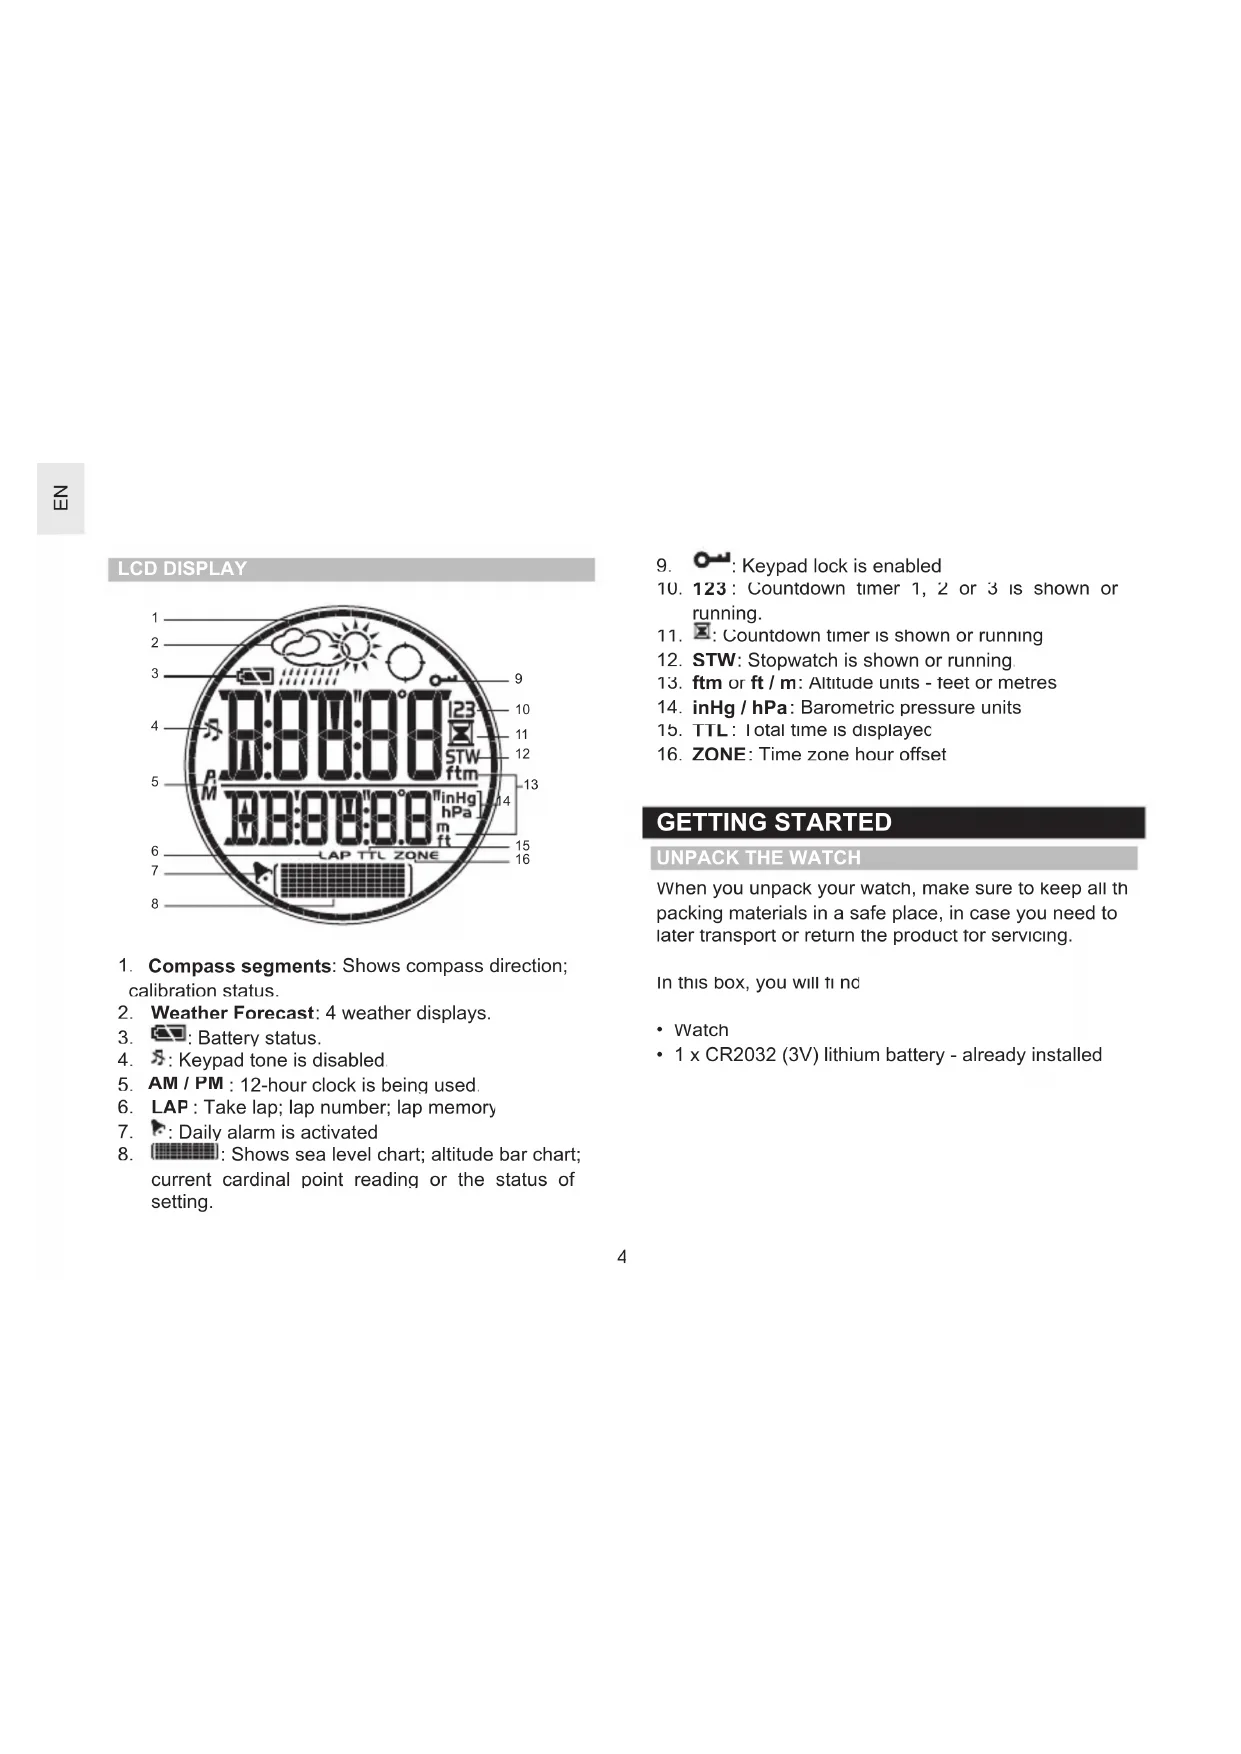
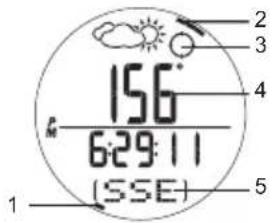
LCD DISPLAY
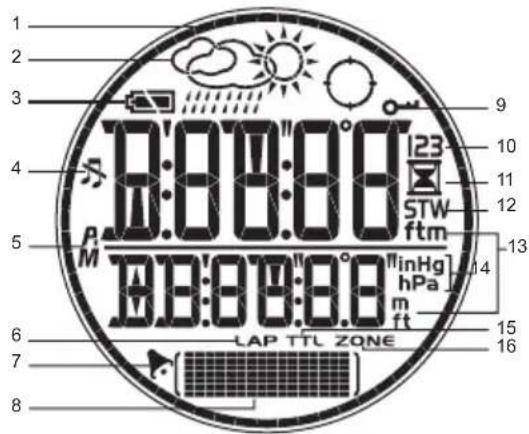
- Compass segments: Shows compass direction; calibration status.
- Weather Forecast: 4 weather displays.
- Battery status.
- S:Keypad tone is disabled.
- AM / PM : 12-hour clock is being used
- LAP: Take lap; lap number; lap memory
- F: Daily alarm is activated
-
: Shows sea level chart; altitude bar chart; current cardinal point reading or the status of setting.
-
: Keypad lock is enabled
-
123: Countdown timer 1, 2 or 3 is shown or running.
- : Countdown timer is shown or running
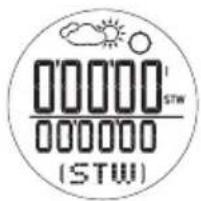
- STW: Stopwatch is shown or running
- ftm or ft / m: Altitude units - feet or metres
- inHg / hPa: Barometric pressure units
- TTL: Total time is displayed
- ZONE: Time zone hour offset
GETTING STARTED
UNPACK THE WATCH
When you unpack your watch, make sure to keep all the packing materials in a safe place, in case you need to later transport or return the product for servicing.
In this box, you will find
Watch
- 1 x CR2032 (3V) lithium battery - already installed
TURN ON THE WATCH (FIRST-TIME USE ONLY)
Press any key for 2 seconds to activate the LCD display
BATTERIES
The watch uses a 1 x CR2032 lithium battery, which has already been installed. See below for battery warnings.
| LOW BATTERY ICON | DESCRIPTION |
| The watch battery is low | |
| -- Appears when the battery is too low to operate the sensor. “- - ” is shown instead of temperature, altitude, barometer and compass values. The bar and line charts will also be | |
NOTE Heavy use of the backlight, altitude alarm and sailing timer will reduce the battery service life significantly.
If you need to replace the battery, we highly recomm

To replace the watch battery
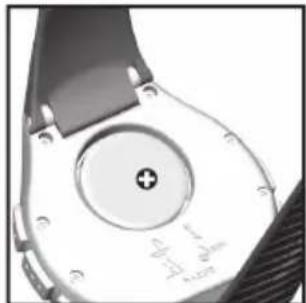
- Locate the battery compartment on the back of the watch.
- Using a coin, as shown above, twist the compartment lid counter-clockwise until it clicks out of place.
- With your finger, remove the old battery
- Insert the new battery with the + side upwards.
- Replace the battery compartment lid by twisting it clockwise until it is firmly in place
NOTE When you replace the batteries it is important to re-calibrate the magnetic sensor and altitude or sea level. (See "Set the Altitude" or "Set the Altitude Alarm Sea Level / Weather Icon" section.)
IMPORTANT
Non-rechargeable and rechargeable batteries must be disposed of properly. For this purpose special containers are provided for non-rechargeab and rechargeable battery disposal at communal collection centres.
- Batteries are extremely dangerous when swallowed! Therefore, keep batteries and the article away from infants. If a battery has been swallowed seek immediate medical advice
- The batteries supplied must not be recharged, reactivated by any other means, dismantled, put int fire or short-circuited
SWITCH BETWEEN MAIN MODES
There are 4 main modes: Clock, Altimeter-Barometer, Sailing Timer and Compass. Each main mode displays banner screen telling you which mode you are entering After 1 second the banner screen is automatically replaced by the main mode screen.
Press MODE to switch between the 4 main modes.
| MODE BANNER MAIN MODE | ||
| CLOCK | TIME | 629 26.304 (FRI) |
| ALTI-BARC | ALTI | 155. 62911 (……… |
| MODE | ER MAIN MODE | |
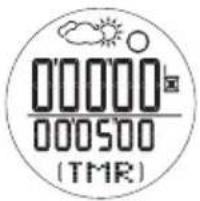
| SAILING TIMER | SAIL | 000001 SW 000000 (STW) |
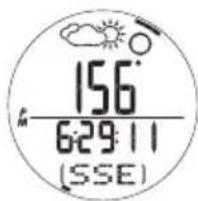
| COMPASS | COMP | 156 62911 (SSE) |
USING THE CLOCK
SET THE CLOCK /CALENDAR / TEMPERATURE
The real-time clock is the default display for the watch.
To set the clock
- Press MODE to switch to Clock Mode
- Press and hold SET until the first setting bit ashes
- Press +or - to change the setting Hold to speed through the option PressSET to confirm the setting and move on to the next one.
- Repeat step 3 to change other settings for this mode
The order of the clock settings is:
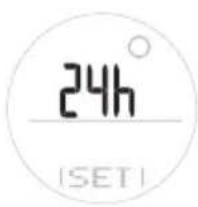
12/24 hour clock format
·Hour
- Minute
Year
- DD:MM or MM:DD date format
Month
Day
- Temperature Unit - ^ C/^ F
NOTE The clock is programmed with a 50-year autocalendar, which means you do not need to reset the date and date each month.
VIEW CLOCK DISPLAYS
Within the Clock Mode there are 7 different screer displays. To switch between them
- Press MODE to navigate to the Clock Mode.
- Press SELECT to scroll through the different clock screen displays
| Clock with Date Clock with Seconds Altitude | ||
| 6:29 26.304 (FRI) | 6:29 03 (FRI) | 6:29 155. (FRI) |
| Clock with Sea Level Pressure T | Clock with Loca mer | Clock with |
| 6:29 30.18 (~~) | 6:29 2959 (LOC) | 6:29 02358 (FRI) |
Clock with Temperature
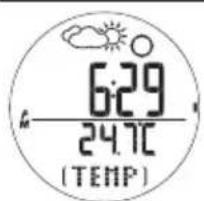
NOTE When wearing the watch, the temperature measured could be affected by body heat. To acquire an accurate temperature reading, remove the watch from your wrist and wait for about 15 minutes before taking the
SET THE DAILY ALARM / TIME ZONE / KEYPAD
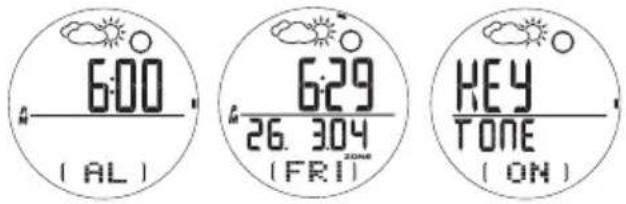
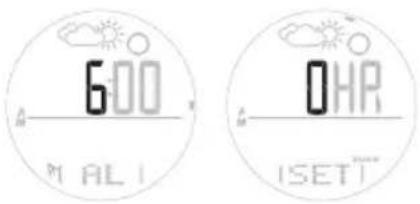
From any of the 7 clock screen displays you can se the:
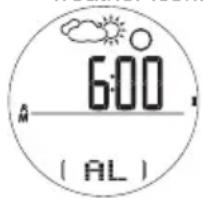
- Daily Alarm - When activated the alarm will go off daily at the set time
- Time Zone Offset - Offsets the time setting when you are in a different time zone (+/- 23 hours)
-
Keypad Tone - When set to ON the keypad w sound when pressed
-
Press FUNC to select daily alarm, time zone o keypad tone.
- Press and hold SEI to enter setting mode for the daily alarm and time zone only
- Press + to change the setting.
- Press SET to confirm the setting. Once the setting complete the display will return to the previous clock display screen
ALARM SOUND
The alarm will sound for 1 minute and the backlight will flash for the first 10 second:
TURN THE ALARM SOUND OFF
Press any key to turn the alarm sound OFF. The alarm will automatically reset itself unless you deactivate it.
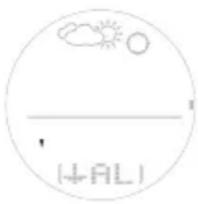
ACTIVATE/DEACTIVATE THE ALARM
Press MODE to navigate to Clock Mode. Pre SET, then press +to activate or deactivate the alarm. shows when the alarm is activated.
USING THE ALTIMETER-BAROMETER
ABOUT THE ALTIMETER-BAROMETER
The altimeter measures altitude in either metres or feet. The watch is equipped with an intelligent barometer that determines altitude by the built-in sensor with the advanced Baro-compensation technology. The sensor can also distinguish the differences between pressure caused by the changes in physical altitudes and pressu caused by weather conditions. This smart distinction eliminates discrepancies and makes the altimeter reading more accurate than most of the average device available on the market.
SET THE ALTITUDE
- Press MODE to switch to Altimeter-Barometer Mode.
- Press and hold SET until the first setting fl ashes
- Press + or - to change the setting Hold to speed through the option Press SET to cont rm the setting and move on to the next one.
- Repeat step 3 to change other settings for this mode
The order of the altitude settings is:
- Altitude unit - metres / feet
Altitude height
I do effectively set the altimeter you need to know the correct altitude. To do this
- Obtain a topographical map; find your location and its related altitude reading.
OR
- Set the sea level pressure on your watch.
IMPORTANT
- This unit employs a semiconductor pressure sensor that could be affected by temperature change. While taking the altitude measurement, ensure that the unit is not exposed to sudden temperature changes.
- It is recommended to calibrate the altitude or sea level pressure regularly to maintain the accuracy of the watch.
ALTITUDE BAR CHART
The altitude bar chart at the bottom of the display shows the altitude history. It consists of / rows and 14 columns.
The latest reading is entered in the right hand column and always at the height of the 4th row. I therefore, all the other readings will adjust their position to reflect the latest reading.
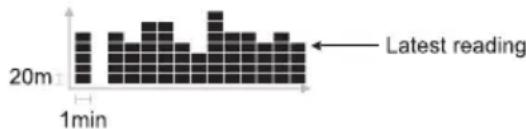
NOTE 1 row = 20m (20m = 65.6ft)
1 column = 1 min
Look at your watch to see what your current altitute level is, then look at the bar chart to see the changes in altitude. See the table below for how to read the bar chart in more detail.
| 20m 1min | 1. Altitude level 400m. User walking on a fl at roa |
| 20m 1min | 2. Altitude level 420m. (Increase of 20m) |
| 20m 1min | 3. Altitude level 380m. (Decrease of 40m) |
| 20m 1min | 4. Altitude level 480m. (Increase of 100m) |
| 20m 1min | 5. Altitude level 380m. (Decrease of 100m) |
VIEW ALTITUDE DISPLAYS
Within the Altimeter-Barometer Mode there are 5 different altitude screen displays. To switch between them
- Press MODE to navigate to the Altimeter-Barometer Mode.
- Press SELECT to scroll through the different altitud screen displays.
| Altitude with Altitude Clock Sea Level | de with Altitude with Local Pressure | |
| 155 62911 | 155 30.18 | 155 2959 (LOC) |
| Altitude with Altitude with lmer Temperature | ||
| 155 02358 | 155 24.7C (TEMP) | |
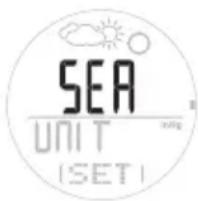
SET THE ALTITUDE ALARM / SEA LEVEL / WEATHER
From any of the 5 altitude screen displays you can set the:
- Altitude Alarm - Select alarm to activate above or below your setting; set altitude alarm
Sea Leve - Select unit hPa or inHg; set sea level -
Weather Icon - 1 of 4 displays to choose from
-
Press FUNC to select altitude alarm, sea level or weather icon.


- Press + to change the setting.
- Press SET to confirm the setting
ALTIITUDE ALARN
The ascending or descending altitude alarm will be turned on when the set altitude is reached during an ascent or descent respectively
Press any key to stop the alarm sound. If the set value reached again, the alarm will be re-activated
NOTE Setting the altitude affects the sea level pressure.
SEA LEVEL
For an accurate reading, you must first calibrate the sea level pressure. Once the sea level pressure is calibrated the altitude will automatically calibrate to the reference altitude using the built-in auto-calibration function
When you set the sea level on your watch it adjusts the altimeter to the current altitude. Information on the current sea level pressure can be found in newspapers, local news and radio reports, or on the Internet
NOTE It is necessary to re-calibrate the sea level pressure or altitude if the product is placed in a pressurised cabinet such as an aeroplane
WEATHER FORECAST
This product forecasts the weather for the next 12 to 24 hours within a 30 - 50km (19-31 mile) radius. The weather forecast is based on barometric pressure trend readir
| SUNNY PA CLOUDY | RTLY CLOUDY | RY RAINY | |
NOTE If the watch is subjected to fluctuating altitude levels the weather forecast may disappear. Simply start the same altitude for 5 minutes and the weather forecast will reappear
NOTE The manufacturer is not responsible for any inconveniences caused by faulty weather forecast
The sailing timer has 3 countdown timers and a stopwatch
- Timer 1 - User-selectable timer / Stopwatch
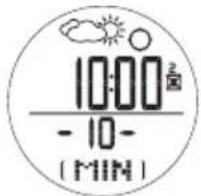
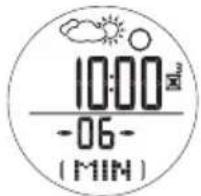
Timer 2 - 10 minute countdown timer - Timer 3 - 5 minute countdown timer
The countdown timers have sound alerts to help you track time at the start of a race. And, a single key press is all it takes to make quick adjustments to the timer i.e. press +or -to increase or decrease your timer to the nearest minute. It is also equipped with a lap timer
SET THE SAILING TIMER
I o change the sailing timer settings
- Press MODE to navigate to Sailing Timer Mode.
- Press and hold SET to reset the previous timer you were using. Press and hol SET again to enter setting mode where you can select any timer

- Press + or - to choose 1 of the 3 timers, then press SET to select it
- If you are in timer 1 (user-selectable countdown timer) setting, use + or - to enter the values you require. If you want to use the stopwatch function, simply change all values to zero
Once you have set the timer you wish to use, you can perform the following functions:
| TIMER 1, 2, 3 / INSTRUCTION STOPWATCH | |
| Start / stop Press | ST / SP |
| Pause / resume Press | ST / SP |
| Edit time while press + or - to make the timer increase or / decrease to the nearest minute | |
| Reset timer / stopwatch | Stop timer / stopwatch. Press and hold SET |
| Save lap Press (lap function can only be used in stopwatch mode) memory has capacity for 99 readings or 99 hrs, 59 mins | LAP while the stopwatch is running NOTE The stopwatch and lap time are stored in the same memory. Th capacity for 99 readings or 99 hrs, 59 mins |
| View total time / 1 lap memory | 1. Stop timer / stopwatch. Press SET to view memory record 33 | Stw 28.204 (R1 1) |
| 2. Press memory records | + or -to scroll through |
| 3. The latest memory will show as “M 1” | |
| 4. Press OR | SET to view total time |
| 5. Press | + or -to view lap time (at least 1 lap must have been take |
| Delete 1 memory record or all records | 1. Stop timer / stopwatch 2. Pres:SET to view memor record 3. The latest memory will show as “M1 |
| 4. Press record you wish to view 5. Press and hold 6. Press or all records 7. Press and hold | + or - to select the memory SET + or - to delete 1 memory SFT to confirm |
NOTE When any countdown timer has reached zero, it will beep and automatically start to count up in stopwatch timer.
NOTE In the Sailing Timer Mode, only one of the timers can be used at a time.
SAILING TIMER SOUND ALERT
The countdown timer advises you of the countdown status with a series of beeps.
| COUNTDOWN TIME AT THE: SOUND ALERT | |
| 10th, 9th, 8th, 7th, 6th min 2 beeps | |
| 5thmin 5 sets of 2 beeps | |
| 4th, 3rd, 2ndmin 2 beeps | |
| 60th- 5thsec Continuous beeps | |
| 50th, 40th, 30th, 20th, 10th sec 2 beeps | |
| 9th- 'slicsec | 1 beep each sec |
| 0 sec | 1 long beep |
SEA LEVEL PRESSURE DISPLAY
The sea level history can be viewed as a measurement reading in hPa / inHg or as a line chart. It consists of 7 rows and 14 columns
The latest reading is entered in the right hand column and always at the height of the 4th row. Therefore, all the other readings will adjust their position to reflect the latest reading
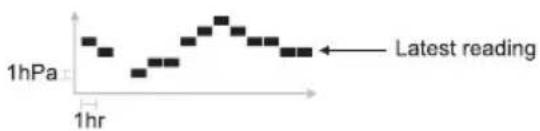
NOTE 1hPa=0.02953inHg
Look at your watch to see what your sea level pressure is, then look at the line chart to see the changes pressure. See the table below for how to read the line chart in more detail
| 1hPa 1hr | 1. Sea pressure level 5hPa |
| 1hPa 1hr | 2. Sea pressure level 6hPa. (Increase of 1hPa) |
| 1hPa 1hr | 3. Sea pressure level 4hPa. (Decrease of 2hPa) |
| 1hPa 1hr | 4. Sea pressure level 9hPa, (Increase of 5hPa) |
| 1hPa 1hr | 5. Sea pressure level 4hPa, (Decrease of 5hPa) |
USING THE COMPASS
ABOUT THE COMPASS
The compass shows the bearing in degrees together with 16 cardinal points. The outer circumference of the display consists of 60 segments, which graphically show the bearing, (one lit segment indicates North, three lit segments indicate South). The bubble shows you when the compass is fl at so you can take an accurate reading
Simply look directly over the bubble and position t small bubble in the centre of the circle.
- North
- South
- Bubble
- Bearing
5.Cardinal point
The compass display is active for 30 seconds at a time After this, the compass will go into power saving mode and "---" will appear on the display. To re-activate the compass, press SELECT.
NOTE Always take bearings in the open air, not inside buildings, tents, caves, or other shelters
NOTE Compass readings should be performed away from magnetic materials. Avoid large magnetic objects, power lines, loudspeakers, electric motors etc. If the compass is exposed to large magnetic forces reset the calibration.
SET THE COMPASS SENSOR CALIBRATION
Ihe compass should be calibrated:
Before you use it for the first time.
- When the battery is replaced.
Before you leave for an extended outdoor activity.
- Whenever it is exposed to a strong magnetic source, extreme cold weather, or you suspect that the environmental conditions have affected the compass readings.
- If you notice that the compass is not showing the direction correctly.
I o set the compass sensor calibration
- Press MODE to switch to Compass Mode.
- Press and hold SET until you see the screen opposite.
- Rotate the watch counterclockwise at the same speed as the segments that are moving around the circumference. The rotation is finished when you have completed 1 1/4 turns and the screen display opposite appears


NOTE For successful calibration, it is important to hold the compass level during the calibration process. Simp lay it on a flat surface such as an over-turned drinking glass on a table.
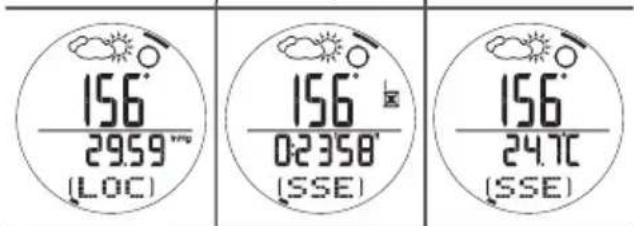
VIEW COMPASS DISPLAYS
Within the Compass Mode there are 5 different compass screen displays. To switch between them
- Press MODE to navigate to the Compass Mode.
- Press SELECT to scroll through the different compass screen displays.
Compass with Compass with Compass with Clock Altitude Sea Level
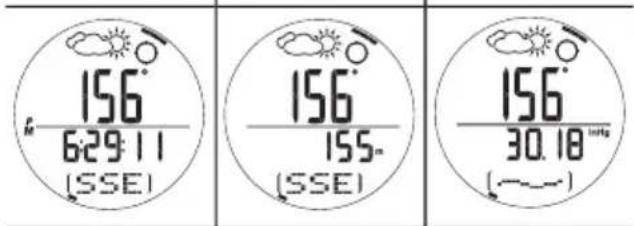
Compass with Compass with Compass with Local Pressure Timer Temperature
From any of the 5 compass screen displays you can set the:
- Bearing Tracking System - Select ON / OFF; set bearing
- Declination - Select ON / OFF; set declination angle
True North Calibration - Select ON/OFF; set true north calibration
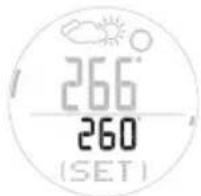
SET THE BEARING TRACKING SYSTEM
The bearing tracking system can be set to lock or specific bearing you wish to follow. By locking the beam you can see when you deviate from your course and he much you need to correct it to get back on track.
- In any compass display screen press SET until the screen opposite appears.

- Press and hold SET to enter setting mode.
The top number shows your previous locked bearing.
The bottom flashing number shows your current bearing.
- Move the compass until the bearing you wish to loci is displayed and press SELECT.
- Press SEI to confirm the setting
- To fine-tune the bearing, press +or -
- Press SET to lock the setting.
- In the Compass Mode, the locked value will appear at the bottom of the display instead of the cardinal reading
Once the bearing tracking system has been set, tl compass segments on the display will show how ta you deviate from your locked course. See the example below
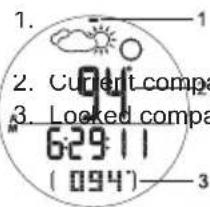
The locked bearing is 94^ and the current bearing is 94^
1. Your locked bearing is 94° and your curre
your current bearing is 120^
2. Current-compass bearing 3. Locked compass bearing
The compass segments now show the angle between your locked bearing and your current bearing. Here for you need to change the direction you are on to get bac onto your locked bearing course.
SET THE DECLINATION
Declination is the angle between where a compass needle points (magnetic North Pole) and the true North Pole. The declination angle can vary from 0-30 degrees East (E) or West (W) and can be found on most maps or on the Internet.
When you set the declination angle on the compass, you compensate for the difference between true north and magnetic north. This makes the compass reading more accurate.
- In any compass display screen press SEI until the screen opposite appears.

- Press and hold SET to enter setting mode.

- Press + or - to change the setting.
- Press SET to confirm
SET THE TRUE NORTH CALIBRATION
When you do not know the declination angle, the true north calibration function can be used to compensate for the difference between magnetic and true north. All you need to know is the direction of true north (this can be found from landmarks in your immediate vicinity). Setting the true nort calibration makes the compass reading more accurate.
To set the true north calibration:
- In any compass display screen press SET until the screen opposite appears.
- Press and hold SET to enter setting mode.
- Turn the compass to the position of true north and press SET.

NOTE If the declination function is turned ON, the true north function is automatically turned OFF and vice-versa.
TO TURN THE BEARING TRACKING / DECLINATION / TRUE NORTH CALIBRATION ON / OFF
In any compass display screen press SET. Press + to toggle between ON / OFF.
BACKLIGHT
To turn the backlight ON for 3 seconds:
- Press
- Press any other key while the light is on and it will extend the light time by another 3 seconds.
NOTE The backlight does not work when the low battery icor is shown and will return to normal once the batteries are replaced.
KEYPAD LOCK
To turn the keypad lock ON or OFF
- Press and hold for 2 seconds to toggle between ON and OFF. When it is set to ON the icon will appear on the display
SPECIFICATIONS
| TYPE DESCRIPTION | |
| CLOCK | |
| Time format 12 hr / 24 hr | |
| Date format DD / MM or MM / DD | |
| Year format 2001-2050 (auto-calendar) | |
| Alarm Daily alarm | |
| TIMER 1 | |
| User-selectable 99:59:59 (hr:min:sec)countdown timer | |
| TIMER 2 | |
| Countdown timer 00:10:00 (hr:min:sec) | |
| TIMER 3 | |
| Countdown timer 00:05:00 (hr:min:sec) | |
| TIMER 1, 2, 3 | |
| Stopwatch / lap 99 readings / 99:59:59(hr:min:sec) | |
| THERMOMETER | |
| Measuring range -10°C-60°C (14°F-140°F) | |
| Resolution 0.1°C / 0.2°F | |
| ALTIMETER | |
| Altitude display range -400 to 9000 m(-1312 to 29520 ft) | |
| Altitude setting -400 to 900 m (-1312 to 29520 ft) | |
| Resolution 1 m / 3 ft | |
| BAROMETER | |
| Local air pressure display range 8.86 to 32.48 inHg | 300 to 1100 hPa, |
| Local air pressure resolution | 1 hPa / 0.01 inHg |
| Sea level pressure display 26.58 to 32.48 inHg | 900 to 1100 hPa / |
| Sea level pressure setting 26.58 to 32.48 inHg | 900 to 1100 hPa / |
| Sea level pressure resolution | 1 hPa / 0.01 inHc |
| Weather forecast indication and rainy | Sunny, partly cloudy, cloudy |
| POWER | |
| Watch battery | 1 x CR2032 3V lithium |
| OPERATING ENVIRONMENT | |
| Operation temperature | -10°C-60°C (14°F-140°F) |
| Storage temperature | -20°C-70°C (-4°F-158°F) |
| Water resistant 30 m / 98 ft (RA282) | 50 m / 164 ft (RA202) |
WARNING AND CARE INSTRUCTIONS
To ensure you receive the maximum benefit from using this product, please observe the following guidelines:
- Clean the product with a soft, slightly moistened cloth. Do not use abrasive or corrosive cleaning agents, such as gasoline, chlorine, perfume, alcohol, hair spray, etc., as these may cause damage
- Avoid pressing the keys with wet fingers, under water or in heavy rain, as this may allow water to gain en into the electrical circuitry
- Do not subject the product to excessive force, shock, dust, temperature changes or humidity. Nev expose the product to direct sunlight for extended periods. Such treatment may result in malfunction
- Do not tamper with the internal components. Doing so will terminate the product warranty and may cause damage. The main unit contains no user-serviceab parts.
- Do not touch the exposed electronic circuitry, as there is a danger of electric shock
-
Do not scratch hard objects against the LCD display as this may cause damage.
Take precautions when handling all battery types. -
Remove the batteries whenever you are planning to store the product for a long period of time.
- When replacing batteries, use new batteries as specified in this user manual
- Do not use in hot water.
- When disposing of this product, do so in accordance with your local waste disposal regulations
ABOUT OREGON SCIENTIFIC
Visit our website www.oregonscientific.com) to learn more about Oregon Scientific products such as digital cameras; MP3 players; children's electronic learning products and games; projection clocks; health and fitness gear; weather stations; and digital and conferer phones. The website also includes contact information for our customer care department in case you need to reach us, as well as frequently asked questions and customer downloads.
We hope you will find all the information you need on our website, however if you'd like to contact the Oregon Scientific Customer Care department directly, please visit: www2.oregonscientific.com/service/support
OR
Call 949-608-2848 in the US.
For international enquiries, please visit: www2.oregonscientific.com/about/international/default.asp
Oregon Scientific
Outbreaker Sailor Compass /
Outbreaker Sailor Compass Medium
Model: RA202 / RA282
User Manual
© 2005 Oregon Scientific. All rights reserved
086L003677-018
Outbreaker Sailor Compass / Outbreaker Sailor Compass Medium Modell: RA202 / RA282 Bedienungsanletitung
INHALTSVERZEICHNIS
Einleitung 2
Uber Oregon Scientific 24
EINLEITUNG
HOHEN-SAULENDIAGRAMM
NOTA 1 riga = 20m (20m = 65.6ft)
1 colonna = 1 min
OPMERKING 1hPa=0.02953inHg
INNEHÄLLSFÖRTECKNING
Introduction 2
Huvudfunctional 3
Klocka 3
LCD display 4
Att Komma Igang 4