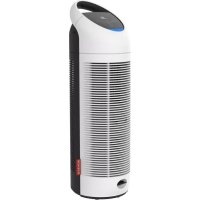
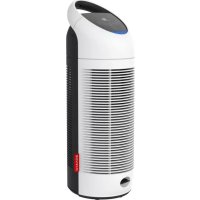
2055D - Air purifier BONECO - Free user manual and instructions
Find the device manual for free 2055D BONECO in PDF.
| Product type | Air purifier and humidifier |
| Brand | Boneco |
| Model | 2055D |
| Dimensions (L x W x H) | 360 x 360 x 360 mm |
| Weight (empty) | 5.9 kg |
| Power supply | 230 V / 50 Hz |
| Power consumption | 20 W |
| Humidification rate | 300 g/h |
| Recommended area | Up to 50 m² (125 m³) |
| Water tank capacity | 4.5 L |
| Water tray capacity | 2.5 L |
| Noise level | < 25 dB(A) |
| Main functions | Purification by pre-ionization and rotating discs, cold evaporation humidification, silent night mode, built-in hygrostat (adjustable 30-70%), automatic shut-off when tank is empty (model D) |
| Antibacterial protection | Ionic Silver Stick (ISS) silver-based, lifespan > 1 year |
| Maintenance and cleaning | Clean the tank and tray every 2 weeks, discs every 4 weeks, housing and fan 1-2 times per year |
| Safety | Automatic shut-off at low water level, unplug before maintenance, protection against additives in water (warranty void if used) |
| Spare parts and repairability | Original parts available: humidification discs, Ionic Silver Stick, water tank, tray; repair by specialist |
| General information | CE certification, compliant with directives 73/23/EEC, 89/336/EEC and 92/31/EEC |
Frequently Asked Questions - 2055D BONECO
User questions about 2055D BONECO
0 question about this device. Answer the ones you know or ask your own.
Ask a new question about this device
Download the instructions for your Air purifier in PDF format for free! Find your manual 2055D - BONECO and take your electronic device back in hand. On this page are published all the documents necessary for the use of your device. 2055D by BONECO.
USER MANUAL 2055D BONECO
Instructions for use (17-28)
Zubehor Ionic Silver Stick
Ersatzleile
Instructions for use
en
Foreword
Congratulations on purchasing the BONECO 2055 / BONECO 2055D Air Washer!
Did you know that excessively dry indoor air
- dries out mucous membranes and causes chapped lips and stinging eyes?
promotes infections and diseases of the respiratory tract? - leads to weariness, tiredness and poor concentration?
- is a burden on pets and houseplants?
promotes the formation of dust and increases the electrostatic charge of textiles made from synthetic fibres, carpets and synthetic floors? - damages furnishings made from wood, especially parquet floors?
- makes musical instruments go out of tune?
General
The indoor climate is generally pleasant when the relative humidity is between 40 and 60% . Air humidification is especially sensible in winter, but does not replace the regular airing of living spaces.
Safety instructions
- Read the instructions for use carefully before putting the appliance into operation, and keep in a safe place for later reference.
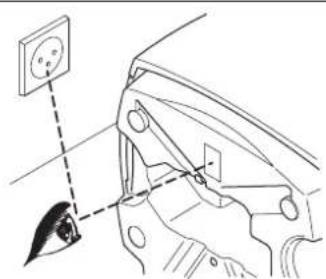
- Connect the appliance to an AC supply only with a voltage that corresponds to the rating plate on the unit.
- Only use the air humidifier in living spaces and within the specified technical data. Incorrect use may be dangerous to health and life.
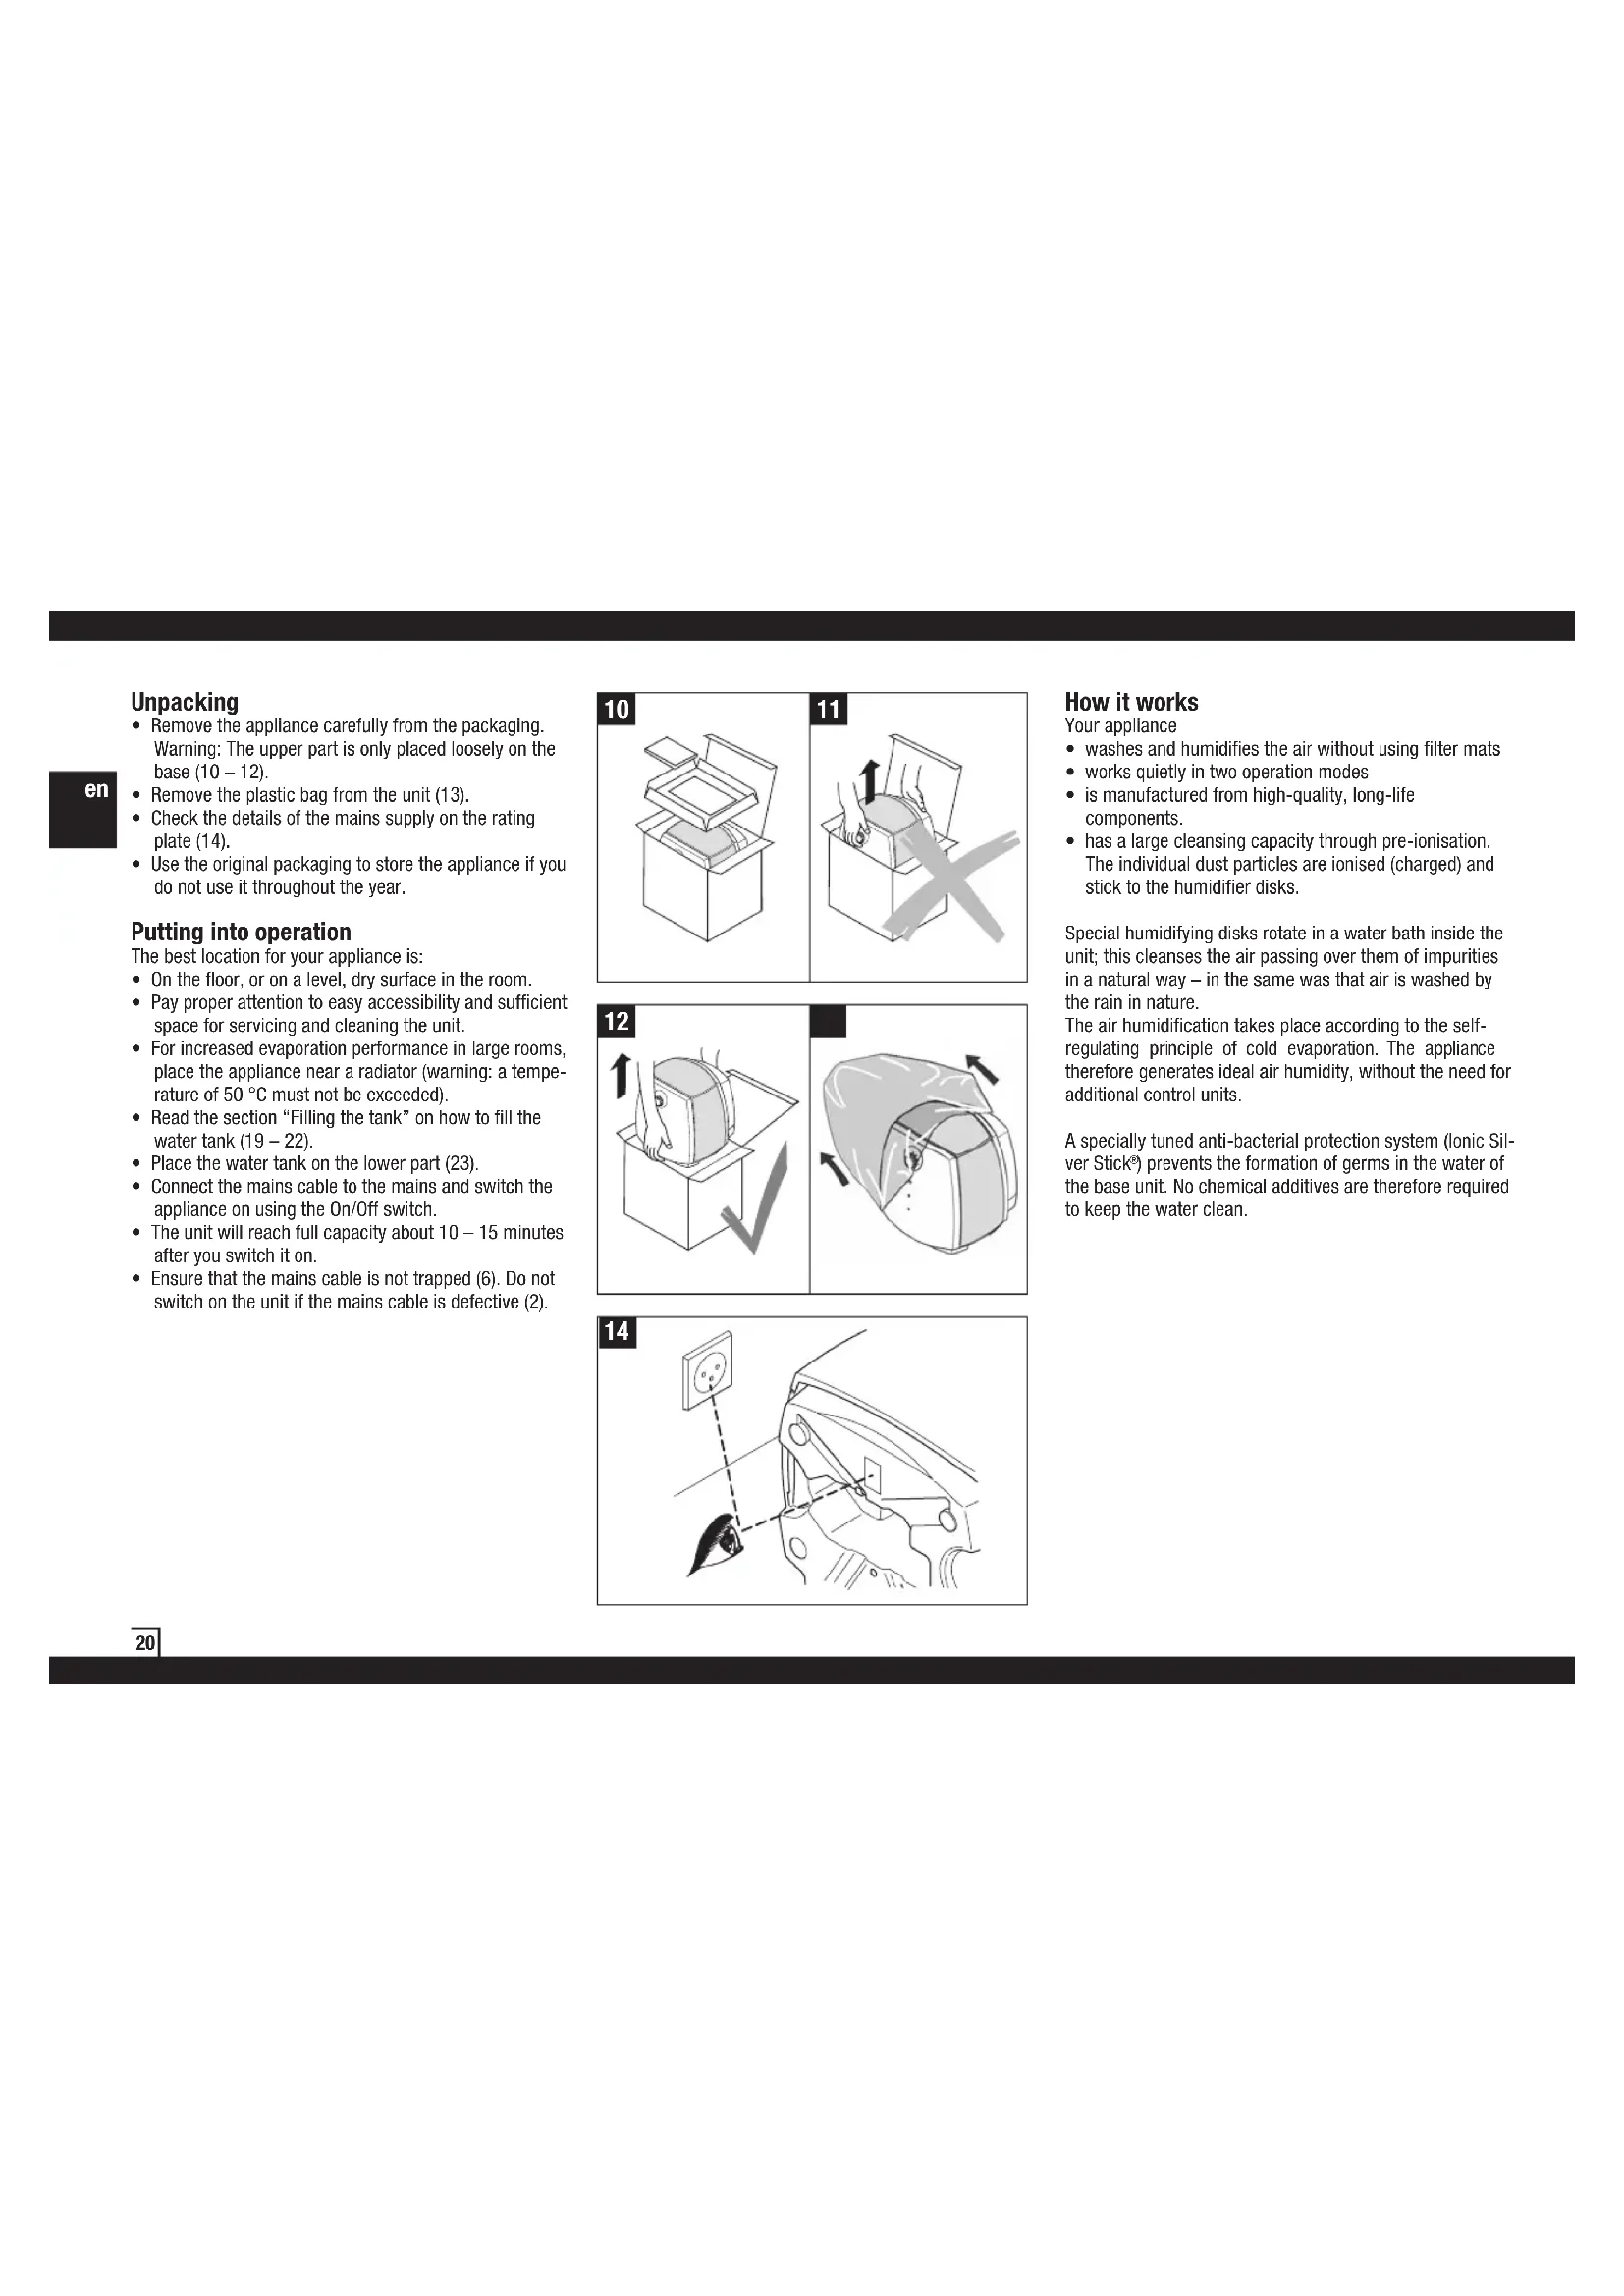
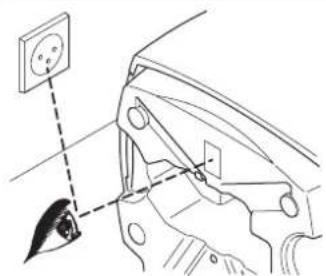
Children cannot recognise the dangers associated with the use of electrical devices. For this reason, always supervise children when they are in the vicinity of the air humidifier (Fig. 1). - Persons who have not familiarised themselves with the instructions for use, as well as children and persons under the influence of medicines, alcohol or drugs, must not operate the unit, or do so only under supervision.
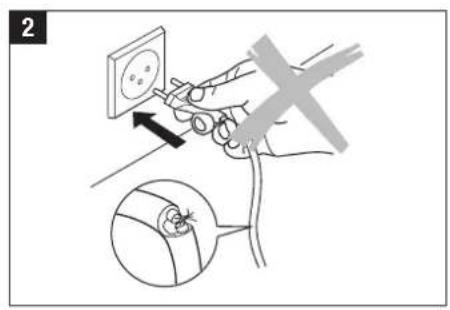
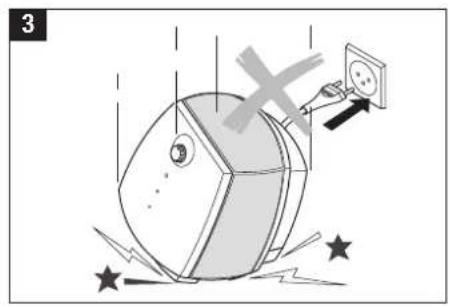
- Never use the appliance if a cable or plug is damaged (2), after the unit malfunctions or if it has fallen to the floor (3), or has been damaged in any other way.
- The air humidifier may only be put into operation in a completely assembled state.
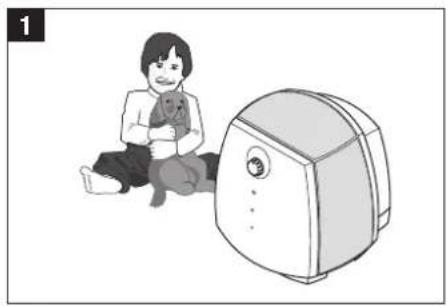
- Repairs to electrical appliances may only be carried out by specialist technicians (4). Non-specialist repairs can pose significant hazards to the user.
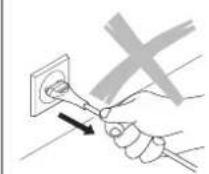
- The power plug must be removed from the mains socket each time the water tank is filled/emptied, before each cleaning session, before each assembly/disassembly of individual parts and before each relocation of the appliance.
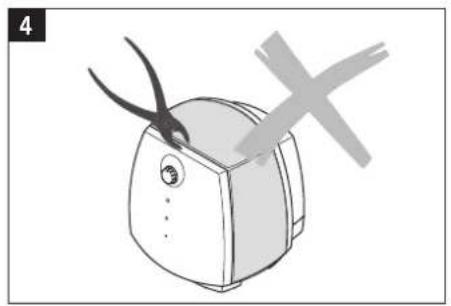
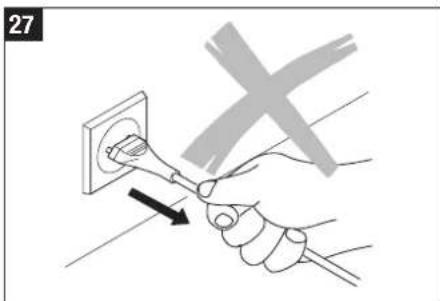
- Never remove the power plug from the mains socket by pulling on the cable or with wet hands.
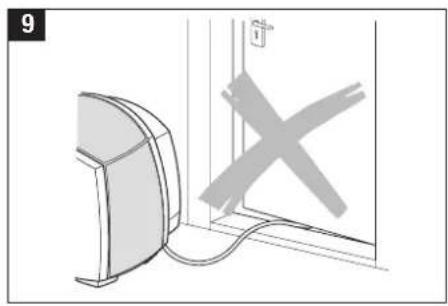
- Place the air humidifier on a level, dry surface only (5). We cannot accept any claims for damage arising from incorrect placing of the unit.
- Never immerse the base in water or other liquids.
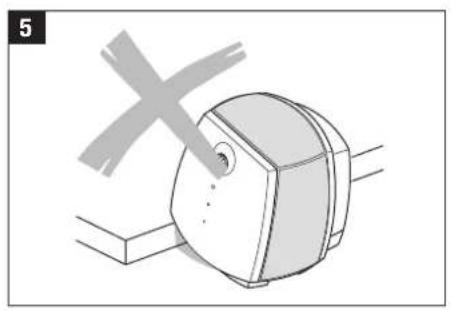
- Place the unit so that it cannot be knocked over.
-
Remove the power plug when the appliance is not in use.
-
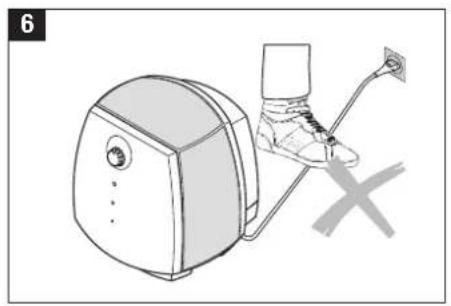
Do not cover the cable with a carpet or other objects. Place the unit so that you cannot trip over the cable (6).
- Do not operate the appliance in rooms containing flammable goods, gases or vapours.
- Do not place the appliance in the rain, and do not use it in damp rooms.
- Do not insert any foreign objects into the unit.
- Ensure that the air inlet is unobstructed at all times.
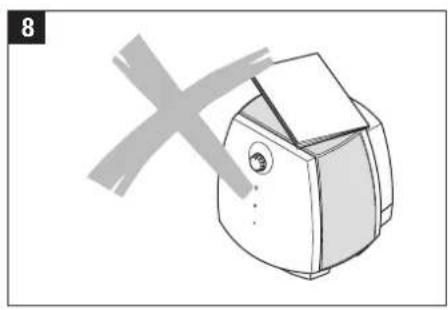
- Never sit on the unit, and do not place any objects on it (8).
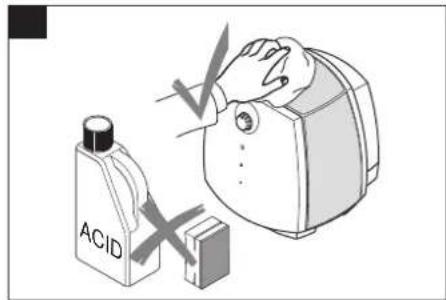
- When fragrancing the air, use the fragrance container provided (also see section „Use of fragrances“). Do not add any additives such as essential oils directly into the water tank or the water base. These additives will damage your appliance! Appliances that are damaged by additives are excluded from the warranty.
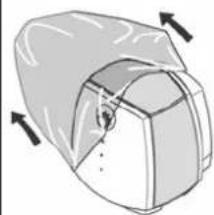
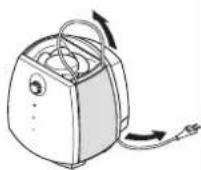
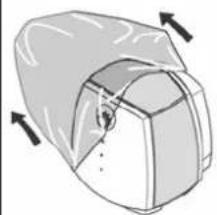
Unpacking
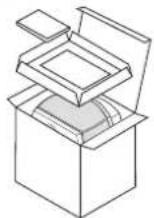
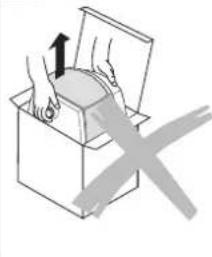
- Remove the appliance carefully from the packaging. Warning: The upper part is only placed loosely on the base (10 - 12).
- Remove the plastic bag from the unit (13).
-
Check the details of the mains supply on the rating plate (14).
-
Use the original packaging to store the appliance if you do not use it throughout the year.
Putting into operation
The best location for your appliance is:
- On the floor, or on a level, dry surface in the room.
- Pay proper attention to easy accessibility and sufficient space for servicing and cleaning the unit.
- For increased evaporation performance in large rooms, place the appliance near a radiator (warning: a temperature of 50^ must not be exceeded).
- Read the section "Filling the tank" on how to fill the water tank (19 - 22).
- Place the water tank on the lower part (23).
- Connect the mains cable to the mains and switch the appliance on using the On/Off switch.
The unit will reach full capacity about 10-15 minutes after you switch it on.
- Ensure that the mains cable is not trapped (6). Do not switch on the unit if the mains cable is defective (2).
10
11

12

m = 311

14
How it works
Your appliance
- washes and humidifies the air without using filter mats
- works quietly in two operation modes
- is manufactured from high-quality, long-life components.
- has a large cleansing capacity through pre-ionisation. The individual dust particles are ionised (charged) and stick to the humidifier disks.
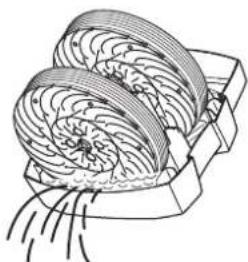
Special humidifying disks rotate in a water bath inside the unit; this cleanses the air passing over them of impurities in a natural way - in the same was that air is washed by the rain in nature.
The air humidification takes place according to the self-regulating principle of cold evaporation. The appliance therefore generates ideal air humidity, without the need for additional control units.
A specially tuned anti-bacterial protection system (Ionic Silver Stick) prevents the formation of germs in the water of the base unit. No chemical additives are therefore required to keep the water clean.
Description of the appliance
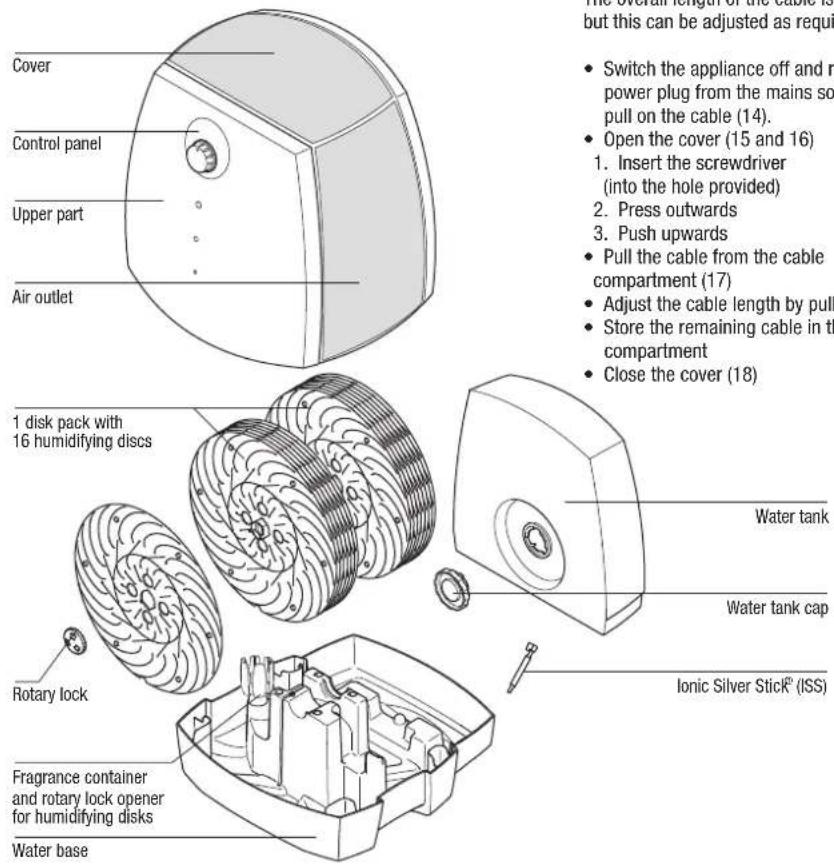
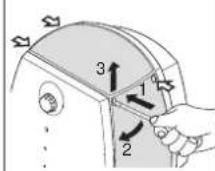
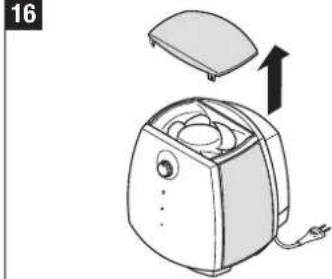
Adjusting the cable length
The overall length of the cable is approx. 2m but this can be adjusted as required.
- Switch the appliance off and remove the power plug from the mains socket. Do not pull on the cable (14).
-
Open the cover (15 and 16)
-
Insert the screwdriver (into the hole provided)
- Press outwards
- Push upwards
Pull the cable from the cable compartment (17) - Adjust the cable length by pulling/pushing
- Store the remaining cable in the cable compartment
- Close the cover (18)

14
15
16
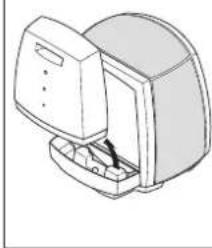
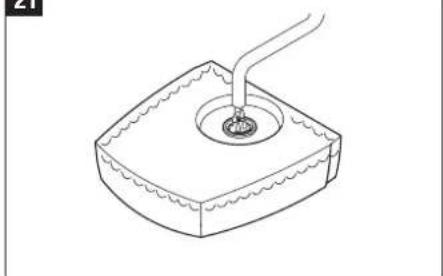
Filling the tank

Do not operate the appliance when the water tank is empty!
- Remove the water tank (19).
- Ensure that there are no foreign objects in the water tank.
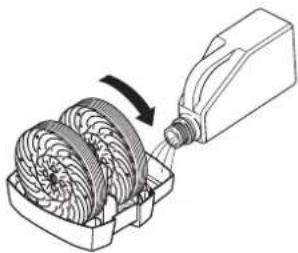
- Remove the water tank cap from the tank (20). Fill the tank with fresh, cold tap water (21). Fully close the bayonet seal to prevent the water tank from leaking (22). Place the water tank on the water base (23). Do not add any additives to the water!
- Do not pressurise the water tank, e.g. by filling it with carbonated mineral water.
- Connect the mains cable to the mains and switch the appliance on.
The 2055D (digital) unit is fitted with an automatic cutoff switch. As soon as the water tank is empty, the unit switches off automatically. The empty indicator illuminates (also see section "Operation 2055D"). This function is not available on the 2055 unit.
19
20
21
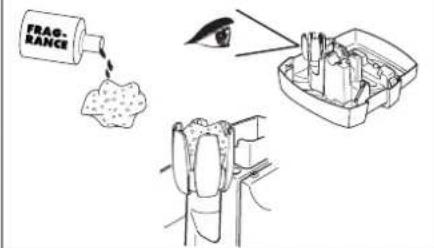
Use of fragrances
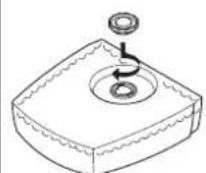
The base contains a special fragrance container (24). Wadding soaked with fragrance can be placed in this container. Place fragrances only in the container provided! Water additives (e.g. essential oils, fragrances, water conditioners) must NOT be used in the tank or anywhere else in the appliance! Even a small amount can damage the plastic or cause cracks. The material is not suitable for the use of additives. One drop is enough to damage the water tank and therefore render the unit unusable. Appliances that are damaged by additives are excluded from the warranty. The fragrance container is also used as a tool for opening the rotary locks of the humidifying disks. To learn more about removing the disks, refer to section „Cleaning the humidifying disks".
22
23
m = 311
Water quality maintenance
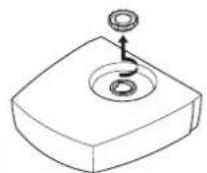
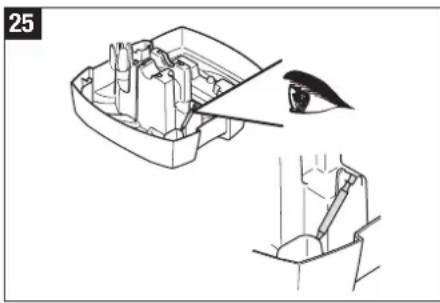
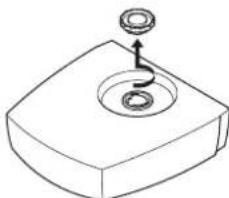
The innovative ionic Silver Stick (25) uses the proven antibacterial properties of silver, thereby keeping the water free of bacteria and germs. The ISS gives off silver ions into the water over a period of more than one year. It is self-renewing and requires no maintenance. The position of the ISS in the appliance can be seen in Fig. 25. First, switch the unit off.
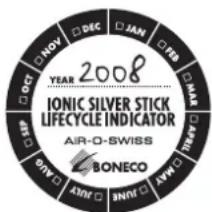
Lifecycle indicator
Your appliance comes with a standard lifecycle indicator on the back of the upper part for changing the Ionic Silver Stick. To remind yourself of when you put the ISS into operation, please cross the current month on the indicator and write the current year on the line provided.
Operating 2055 Operating 2055D
A) Rotary switch
Connect the appliance to the mains and turn rotary switch A to position C or D as required. To switch the appliance off, turn the rotary switch to position B.
B) Switching on/off
If the rotary switch is in position B, the appliance is switched off.
C) Normal mode
If you select position C, then normal mode is set, and the appliance reaches maximum humidity output.
D) Night mode
If you turn the rotary switch to position D, the appliance works in night mode and is especially quiet.
E) Operating light
The green light (LED) (F) illuminates when the appliance is switched on.
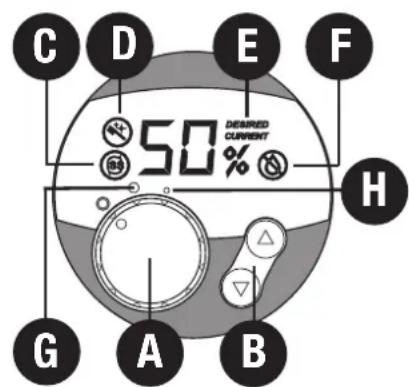
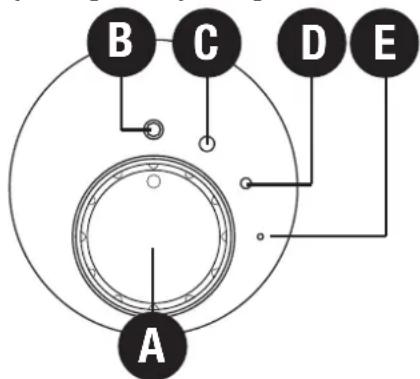
A) Switching on/off
Turn rotary switch A from the OFF position to position H or G as required. Position H is especially quiet (night mode). Position G (normal mode) achieves maximum humidity output. As soon as the appliance is switched on, the display shows the current relative air humidity. The measurement is accurate to +/- 5% .
B) Setting the humidity output
The appliance is fitted with a hygrostat. This measures the relative air humidity and automatically switches the appliance off when the desired value is reached. When switching the unit on using the rotary switch (A), the desired value is preset to 55% .
The desired value can be adjusted in steps of 5% by pressing button B. While selecting the humidity output, the desired value is blinking. The word DESIRED appears on the display (E). The setting for the relative humidity ranges from a minimum of 30% to a maximum of 70% . A relative humidity of between 40 and 60% is recommended. After a few seconds, the display automatically changes
to show the current value (CURRENT) (E). Upon reaching the desired relative humidity, the unit automatically switches off (display shows DESIRED and CURRENT) (E). If the desired relative humidity falls, the appliance automatically switches on again.
Quick display of current relative humidity
When the unit is switched off (mains cable is connected, rotary switch to OFF setting), the current relative humidity can be shown in the display by briefly pressing one of the B buttons. This display automatically goes out after a few seconds.
C) Change Ionic Silver Stick
The letter C in the display indicates that the ionic Silver Stick (ISS) must be changed. The symbol remains visible until both B buttons are pressed and held down for approx. 5 seconds.
D) Cleaning the appliance
The letter D in the display indicates that the appliance must be cleaned. The letter remains visible until both B buttons are pressed and held down for approx. 5 seconds.
E) Current/Desired Display
If DESIRED appears on the display, the value in % next to it signifies the desired relative humidity, i.e. the desired value is shown. If the display shows CURRENT, then the current relative humidity is shown.
F) Automatic switch-off "Tank empty"
The water quantity is easy to see thanks to the transparent water tank. The display on the appliance also shows when the unit should be refilled with water. If the water level falls below the minimum quantity, the appliance automatically switches off. A red blinking symbol (F) appears on the display. When water is added, symbol F goes out and the appliance continues operating.
Warning: When lifting the upper part off the base, the appliance also switches off. In this case, the red blinking F symbol will also appear on the display. Only when the upper part is replaced on the base does symbol F go out and the appliance continues operating.
Cleaning/maintenance
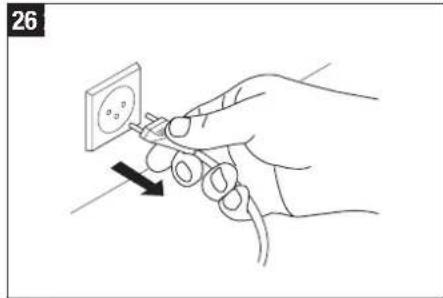
Switch the appliance off and remove the power plug from the mains socket before you clean the appliance (26).
- Regular cleaning is a precondition for hygienic, trouble-free operation.
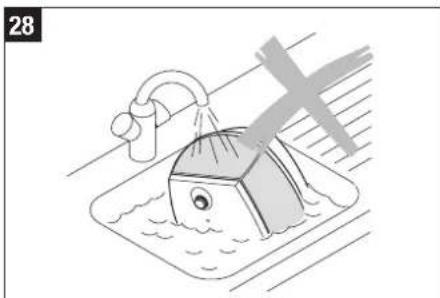
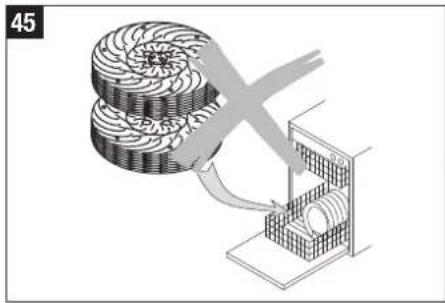
The appliance can be disassembled for cleaning in a few moves. - Never submerge the entire unit in water (28).
- The unit must be completely emptied and cleaned, if it has been filled with water for longer than a week without being used.
Recommended cleaning intervals
The recommended cleaning intervals depend on the air and water quality, as well as operating times. A thin film of lime scale on the disks actually increases the humidity output!
- once to twice a year: upper part of housing and fan
every 2 weeks: water tank and base
every 4 weeks: humidifying disks
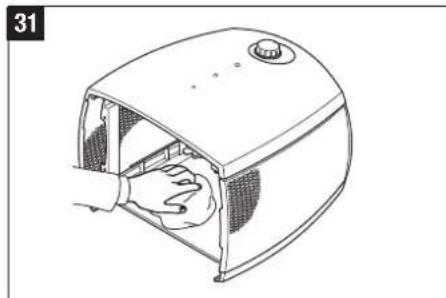
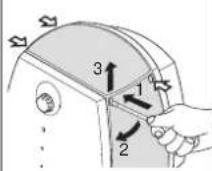
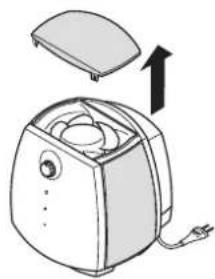
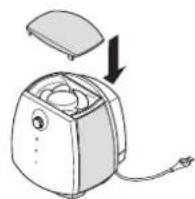
Cleaning the upper part of the housing
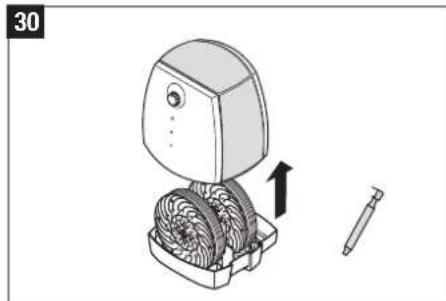
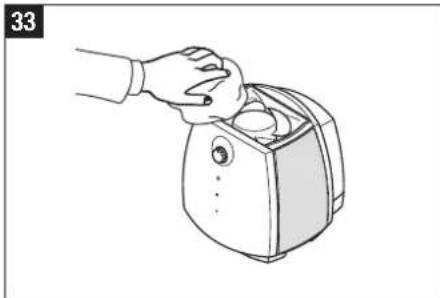
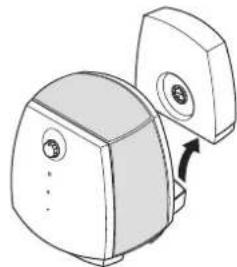
Remove the upper part of the unit (30) and wipe out thoroughly once to twice a year with a damp cleaning cloth (31).
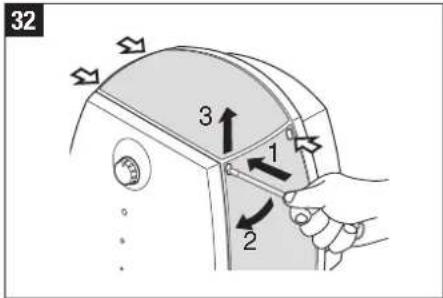
Cleaning the fan
The cover can be removed from the upper part of the unit (32). Under this cover is the fan (33), which can be cleaned with a damp cleaning cloth as required.
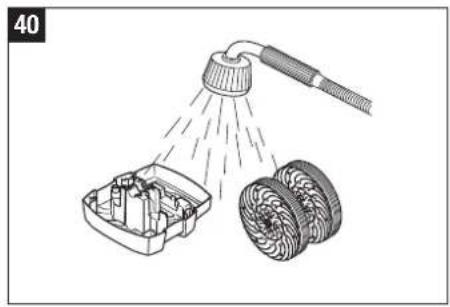
Cleaning the water tank and base (every 2 weeks)
- Lift the water tank out of the unit, open the water tank cap and clean the tank (33 - 35).
- Lift the upper part of the unit off the base and remove the ionic Silver Stick (36).
- Fill the base with water, pour in a commercial decalcification agent and allow to work;
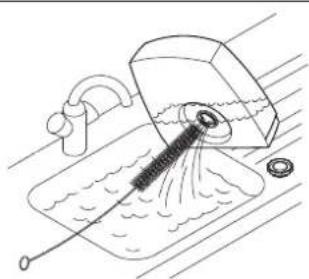
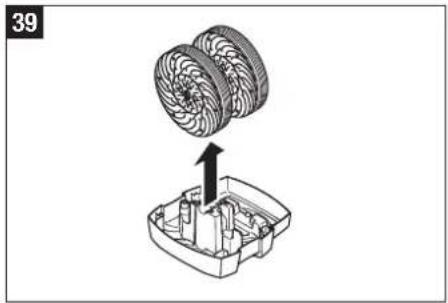
Rotate the disk assembly a few times by hand (37). - Empty the water base (38), remove the disk assembly (39) and rinse (40).
- Remove deposits from the base using a plastic or wooden brush and a diluted, commercial washing-up detergent (41).
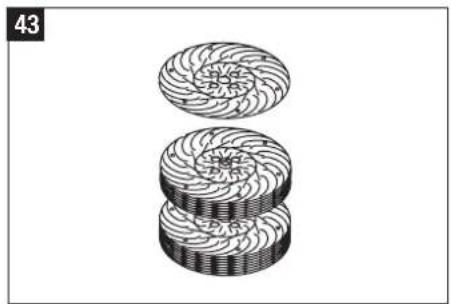
Cleaning the humidifying disks (every 4 weeks)
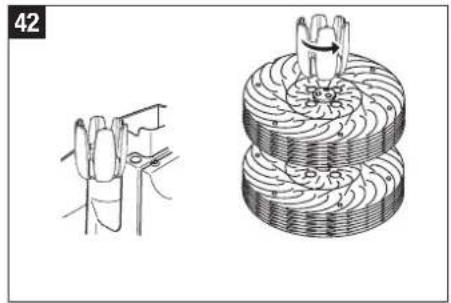
A thin film of lime scale on the disks actually increases the humidity output! To clean, unscrew the individual humidifying disks from each other. Rotary locks (toothed wheels) can be easily removed using the multifunctional fragrance container (42).
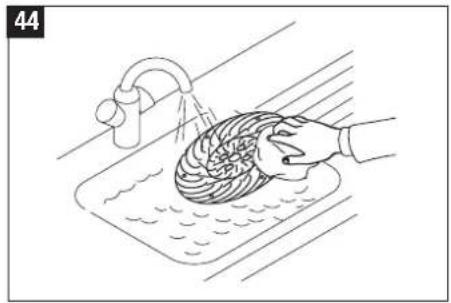
Next, the disks can be washed individually (43-44).
The toothed wheel can only be assembled in one position.
After cleaning, reassemble the appliance in the reverse sequence. Note: rotary locks have two rest positions. Warning Do not overtighten!
33
34
35

36
37
38

Storing the appliance when not in use for an extended period
Clean the appliance as described, allow to dry completely and store it in a dry place, preferably in the original packaging and away from excessive heat. Remove the bayonet seal from the water tank and store separately to protect the seal.
Disposal
Give your decommissioned air humidifier to your dealer for proper disposal. For other disposal options, please refer to your local authority.

Warranty
The warranty conditions are established by our country representative. Should any problems arise with the air humidifier, despite strict quality checks, please contact your specialist dealer (in confidence) sounds a bit odd. Services under the warranty can only be performed upon presentation of the original purchase receipt.
The appliance is CE certified and complies with the Low Voltage Directive 73/23/EEC, and the Electromagnetic Compatibility Directives 89/336/EEC and 92/31/EEC.
Technical specifications
Mains voltage 230V / 50Hz
Power consumption 20 W
Humidity output 300g / h
Suitable for rooms up to 50 m ^2/125 m^3
Water capacity (Water tank) 4.5 Liter
Water capacity (Water base) 2.5 Liter
Dimensions 360× 360× 360mm
Weight (empty) 5.9kg
Operating noise level
< 25 dB(A)
Accessories
Ionic Silver Stick
Spare parts
The spare parts depicted in the "Description of the appliance" section can be obtained from your specialist dealer and installed in the unit by yourself. Only original manufacturer's parts may be used. All other repairs must be carried out by a specialist or customer service. This also applies to a defective mains cable.
Trouble shooting
| Problem | Possible cause | What to do |
| Appliance does not work | Power plug not inserted | Connect power plug to the mains socket Tum rotary switch to position 1 or 2 |
| No water in the water tank | Fill with water | |
| Brushing noise | Disk assembly is not correctly inserted in the water base. | Insert the disk assembly correctly |
| Disks warped | Replace disks | |
| No humidity | No water in the water base | Fill the water tank |
Spcifications techniques
m = 311

14
Werking
Dit toestel
Ionic Silver Stick (ISS)
14
15
16
17
18
Llenado con agua

m = 311
14
Funktionsprincip
Din apparatus

m = 311

14
Funktionsprincip
Din befugter:

m = 311
14