
WG707E - Lawn mower WORX - Free user manual and instructions
Find the device manual for free WG707E WORX in PDF.

| Product type | Corded electric lawn mower |
| Brand | Worx |
| Model | WG707E |
| Rated voltage | 220-240 V ~ 50/60 Hz |
| Rated power | 1400 W |
| Cutting width | 36 cm |
| Cutting height range | 20 to 70 mm (6 positions) |
| Grass bag capacity | 40 L |
| Weight | 12.4 kg |
| Double insulation | Yes |
| Sound pressure level (turbo mode) | 79 dB(A) |
| Sound pressure level (silent mode) | 69.8 dB(A) |
| Sound power level | 93 dB(A) |
| Measured vibration | 2.67 m/s² (K=1.5 m/s²) |
| Operating modes | Silent and Turbo |
| Cutting functions | Bagging, mulching, rear discharge |
| Bag full indicator | Yes (mechanical indicator on bag) |
| Cutting height adjustment | Central lever (6 notches) |
| Handle | Foldable with cam lever, adjustable height |
| Safety device | Safety key, lock button, safety flap |
| Blade type | Steel, replacement recommended after 50 h or 2 years |
| Blade maintenance | Regular cleaning, check bolts |
| Included accessories | Grass bag, mulching insert, safety key, cable clips, blade key |
| Intended use | Private lawns |
| Warranty | 2 years (subject to legal conditions) |
Frequently Asked Questions - WG707E WORX
User questions about WG707E WORX
0 question about this device. Answer the ones you know or ask your own.
Ask a new question about this device
Download the instructions for your Lawn mower in PDF format for free! Find your manual WG707E - WORX and take your electronic device back in hand. On this page are published all the documents necessary for the use of your device. WG707E by WORX.
USER MANUAL WG707E WORX
- Not all the accessories illustrated or described are included in standard delivery.
TECHNICAL DATA
Description WORX Electric Lawn Mower
Type WG707E(705-719-designation of machinery, representative of Electric rotary mower)
| Rated voltage 220-240V~50/60Hz |
| Rated power 1400W |
| Cutting width 36cm |
| Cutting height 20-70mm |
| Cutting height positions 6 |
| Grass collection capacity 40L |
| Protection class |
| Machine weight 12.4kg |
NOISE AND TECHNICAL DATA
| A weighted sound pressure L | pA: 79dB(A)--TURBO mode KpA: 3dB(A) |
| LpA: 69.8dB(A)--QUIET mode KpA:3dB(A) | |
| A weighted sound power L | wA: 93dB(A) |
| Wear ear protection when sound pressure is over | 80dB(A) |
| Typical weighted vibration | 2.67m/s2K=1.5m/s2 |
ACCESSIONS
Spanner 1
Grass collection bag 1
Mulching plug 1
Lock cam lever 2
Cable clip 2
We recommend that you purchase your accessories from the same store that sold you the tool. Use good quality accessories marked with a well-known brand name. Choose the type according to the work you intend to undertake. Refer to the accessory packaging for further details. Store personnel can assist you and offer advice.
GENERAL POWER TOOL SAFETY WARNINGS

WARNING: Read all safety warnings and all instructions. Failure to follow
the warnings and instructions may result in electric shock, fire and/or serious injury.
Save all warnings and instructions for future reference.
- This appliance is not intended for use by persons (including children) with reduced physical, sensory or mental capabilities, or lack of experience and knowledge, unless they have been given supervision or instruction concerning use of the appliance by a person responsible for their safety.
- Children should be supervised to ensure that they do not play with the appliance.
If the supply cord is damaged, it must be replaced by the manufacturer, its service agent or similarly qualified persons in order to avoid a hazard.
TRAINING
a) Read the instructions carefully. Be familiar with the controls and the proper use of the equipment;
b) Never allow children or people unfamiliar with these instructions to use the lawnmower. Local regulations can restrict the age of the operator;
c) Never mow while people, especially children, or pets are nearby;
d) Keep in mind that the operator or user is responsible for accidents or hazards occurring to other people or their property.
PREPARATION
a) While mowing, always wear substantial footwear and long trousers. Do not operate the equipment when barefoot or wearing open sandals;
b) Thoroughly inspect the area where the equipment is to be used and remove all objects which can be thrown by the machine;
c) Before using, always visually inspect to see that the blades, blade bolts and cutter assembly are not worn or damaged. Replace worn or damaged blades and bolts
in sets to preserve balance.
d) On multi-bladed machines, take care as rotating one blade can cause other blades to rotate
OPERATION
a) Mow only in daylight or in good artificial light;
b) Avoid operating the equipment in wet grass, where feasible;
c) Always be sure of your footing on slopes;
d) Walk, never run;
e) For wheeled rotary machines, mow across the face of slopes, never up and down;
f) Exercise extreme caution when changing direction on slopes;
g) Do not mow excessively steep slopes;
h) Use extreme caution when reversing or pulling the lawnmower towards you;
i) Stop the blade(s) if the lawnmower has to be tilted for transportation when crossing surfaces other than grass, and when transporting the lawnmower to and from the area to be mowed;
j) Never operate the lawnmower with defective guards, or without safety devices, for example deflectors and/or grass catchers, in place;
k) Switch on the motor carefully according to instructions and with feet well away from the blade(s);
I) Do not tilt the lawnmower when switching on the motor, except if the lawnmower has to be tilted for starting In this case, do not tilt it more than absolutely necessary and lift only the part which is away from the operator;
m) Do not put hands or feet near or under rotating parts. Keep clear of the discharge opening at all times;
n) Never pick up or carry a lawnmower while the motor is running;
o) Stop the motor and disconnect the plug from the mains
-
Before checking, cleaning or working on the lawnmower;
-
After striking a foreign object, inspect the lawnmower for damage and make repairs before restarting and operating the lawnmower;
-
If lawnmower starts to vibrate abnormally (check immediately);
MAINTENANCE AND STORAGE
a) Keep all nuts, bolts and screws tight to be sure the equipment is in safe working condition;
b) Check the grass catcher frequently for wear or deterioration;
c) Replace worn or damaged parts for safety.
d) Be careful during adjustment of the machine to prevent entrapment of the fingers between moving blades and fixed parts of the machine.
WARNING:
- Not to use the lawnmower if the cords are damaged or worn.
- Not to connect a damaged cord to the supply or touch a damaged cord before it is disconnected from the supply. A damaged cord can lead to contact with live parts.
- Not to touch the blades before the machine is disconnected from the supply and the blades have come to a complete stop.
- To keep extension cords away from the blades. The blades can cause damage to the cords and lead to contact with live parts.
- To disconnect the supply (i.e, pulling the plug from the socket)
- Whenever leaving the machine unattended,
- Before clearing a blockage,
- Before checking, cleaning or working on the machine,
- After striking a foreign object,
- Whenever the machine starts vibrating abnormally.
- To carefully read the instructions for the safe operation of the machine;
- Recommendations:
- To connect the machine only to a supply circuit protected by a residual current device (rcd) with a tripping current of not more than 30mA .
SYMBOLS

Read instruction handbook before operation this machine
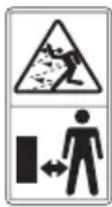
Keep bystanders away.
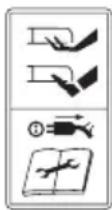
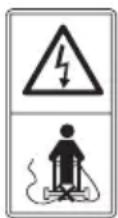
Beware of sharp blades. Blades continue to rotate after the motor is switched off.
Remove plug from mains before maintenance or if cord is damaged.
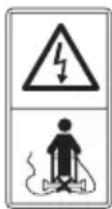
Keep the supply flexible cord away from the blades.

Blade continues to rotate after the machine is switched off. Wait until all machines components have completely stopped before touching them.

Double Insulation
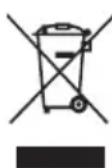
Waste electrical products should not be disposed of with household waste. Please recycle where facilities exist. Check with your Local Authority or retailer for recycling advice.
INTENDED USE
This product is intended for domestic lawn mowing.
ASSEMBLY
IMPORTANT! Before you assemble the lawn mower, check the accessories according above information, make sure the accessories are completed.
1. FITTING THE HANDLE (See Fig. A1-A5)
1) Remove the screws (X 2)(a) on the both side of deck. (See Fig. A1)
2) Insert the Lower Handle (8) into the holes on the deck provided. (See Fig. A2)
3) Secure with the screws provided.(See Fig.A2)
4) Attach the Upper Handle (6) with the bolts and Lock Cam Lever (7) to the Lower Handle. (See Fig. A3)
5) Tightening the two Lock cam levers. Check that the handle is FULLY secured. The cam lever pressure can be adjusted by adjusting the lock cam lever (7) clockwise/ counter-clockwise. DO NOT OVER TIGHTEN. (See Fig. A4)
NOTE: Ensure the bolts are fully inserted through the handles before fitting the handle knobs.
6) Attach the Cable Clips (2) provided, to the upper and lower handle. Insert the cable into the clips ensuring there is enough cable slack. (See Fig. A5)
2. GRASS COLLECTION BAG ASSEMBLY
Connect the grass box handle to the box top as shown in Fig B1-B4.
Step 1. Press the front of the handle briefly. (See Fig. B2)
Step 2. Then push it forward. (See Fig. B2)
Step 3. Push down the back of the handle. (See Fig. B2)
Step 4. Finally, clip the plastic clips over the metal frame. (See Fig. B3)
WARNING: Don't fit the handle in reversed direction. Fit the handle as shown in Fig B1.
3. GRASS COLLECTION BAG FITTING (See Fig.C1,C2,C3)
1) Switch off the mower and Unplug from the mains—Wait for the blade to come to a complete STOP.
2) Raise the Safety Flap (9) and hold it up, ensure that the Mulching Plug(12) has been removed.
3) Pick up the Grass Collection Bag by the handle, and position the Grass Collection Bag on the lower hooks (a) on the mower deck (See Fig. C2).
4) Release the safety guard to lock the grass bag into position. Ensure the Grass Collection Bag is installed securely (See Fig. C3).
NOTE: Depress the grass bag slightly to ensure that it is completely installed.
4. REMOVING/EMPTYING
Hold the Grass Collection Bag, lift the Safety Flap (9) and hold up. Remove the Grass Collection Bag.
WARNING: Always check the safety flap can close the discharge outlet tightly before using. Never lift the Safety Flap when the lawn mower is being used without fitted grass bag.
OPERATION
1. STARTING AND STOPPING (See Fig. D, E) STARTING
Connect the plug to the mains and switch ON. The switch box is provided with a lockoff button to prevent accidental starting.
With one hand press and hold the Safety Button (5), with the other hand squeeze the Switch Lever (1) towards the handle, and release the Safety Button. The machine is now started; wait until the product is at full speed before cutting the grass. Then use both your hands to hold the Switch Lever to keep it running.
STOPPING
Release the Switch Lever.
2. HOW TO MOW
For cutting convenience, it may be best to start mowing at a point close to the power supply and to work your way away from the supply.
Mow the lawn at a right angle from the power supply and place the power cable to side which has already been cut.
NOTE: The motor is protected by a safety cut out which is activated when the blade becomes jammed or if the motor is overloaded.
When this occurs stop, remove the plug from the power supply.
Release the switch lever,
Clear any obstruction, then restart it.
If the mower cuts out again increase the
height of cut to reduce the load on the motor.

WARNING! When mowing do not allow
the motor to labor particularly in heavy
conditions. When the motor labors the speed of the motor drops and you will hear a change in the motor sound, when this occurs, stop mowing, release the switch lever and raise the height of cut. Failure to do so could damage the machine.
3. GRASS BAG FILLING INDICATOR(3) (See Fig. F)
To remind you immediately to empty when the grass bag is full, the mower provides an indicator on the top of bag to show the collection status. And you can follow as below:
Empty status: flap floats (a)

Fully status: flap falls down (b)

4. INSTALLING MULCHING PLUG (12) (See Fig. G)
1) Switch off the mower and Unplug from the mains, and wait for Blade(14) to come to a complete stop.
2) Raise the safety guard and hold it up.
3) Slide the Mulching Plug into the discharge opening until it is firmly in contact with the deck.
4) Release safety guard and ensure it is properly closed.
5. REMOVIDING MULCH PLUG (See Fig. G)
To remove the Mulching Plug so that you can collect the grass follow the steps listed below:
1) Switch off the mower and Unplug
from the mains, and wait for Blade to come to a complete stop.
2) Raise the safety guard and hold it up.
3) Grasp the middle of the plug, lift and pull out the Mulching Plug completely.
4) The safety guard is spring loaded. When you release it, the guard will return to the closed position.
6. REAR DISCHARGE (See Fig. H)
The mower provides a rear discharge function, so that you can mower without bag collection. The debris will be discharged from the rear chute.
7.WORK MODE DIAL(15) (See Fig. I) Status1: QUIET mode

Select QUIET mode when mowing in everyday conditions, removing approximately 20mm of grass at a time.
Status2: TURBO mode

Set the dial to TURBO mode when cutting dense or overgrown grass.
IMPORTANT! The TURBO function is only activated when mowing. When select TUROB or Quiet mode, the motor speed will have a change when mowing
8. ADJUSTING THE CUTTING HEIGHT (See Fig. J)

WARNING! STOP REALEASE THE
SWITH LEVER, UNPLUG TOOL, AND
WAIT FOR BLADE TO COME TO A COMPLETE STOP .The blades continue to rotate after the machine is switched off, a rotating blade can cause injury.
CAUTION: Do not touch rotating blades.
The lawn mower can be set to 6 cutting heights between 20mm and 70mm . For this purpose, move the cutting height adjustment lever outwards then adjust to the preferred position
9. MULCHING MOWING TIPS
While mulching, your new mower is designed to cut the grass clippings into small pieces and distribute them back into the lawn. Under normal conditions, the mulched grasses will
biodegrade quickly to provide nutrients to the lawn.
Please review the following recommendations for optimum mulching performance.
1) Avoid mowing when the grass is wet from rain or dew. Wet grass may form clumps which interfere with the mulching action and reduce runtime. The best time to mow grass is in the late afternoon when the grass is dry and the newly cut area will not be exposed to direct sunlight.
2) For best mulching performance, set the cutting height to remove about one third of the grass blade length, ideally no more than 38mm at one time. If the lawn is overgrown, it may be necessary to increase the cut height to reduce the pushing effort and prevent overloading the motor. For extremely heavy mulching, it is advisable to first cut at a high cut height setting, and then re-cut to the final cut height. Otherwise, make narrower cuts and mow slowly.
3) For best performance, keep the mower housing free of built-up grass. From time to time turn off mower and wait for the blade to come to a complete stop. Using an object such as a stick, wipe out any accumulation of grass in the blade area. Be careful of the sharp edges of the blade. Clean often in wet, new grass, and always after every use.
4) Certain types of grass or grass conditions may require that an area be mulched a second time to fully disperse the grass throughout the lawn. If cutting a second time, it is advisable to cut perpendicular (across) the first cut pattern. DO NOT CHANGE CUT PATTERN IN ANY WAY THATWOULD CAUSE MOWING DOWN A HILL.
5) Change your cutting pattern from week to week. This will help prevent matting and graining of the lawn.
MAINTENANCE

WARNING: Stop the mower and unplug the tool before performing maintenance.
NOTE: To ensure long and reliable service, perform the following maintenance procedures regularly. Check for obvious defects such as a loose, dislodged or a
damaged blade, loose fittings and hardware, and worn or damaged components. Check that the covers and guards are all undamaged and are correctly attached to mower. Carry out any necessary maintenance or repairs before operating mower. If the mower should happen to fail despite regular maintenance, please call our customer helpline for advice.
BLADE(14) MAINTENANCE (See Fig. K1, K2)
WARNING: Never carry out any assembly operations or adjustments
with the power connected to the mower.
Always ensure that the power button is in the off position and that the power plug is disconnected from the supply.
Always handle the blade with care-sharp edges could cause injury use gloves.
Follow these procedures to remove and replace the blade. You will need garden gloves (not provided) and a spanner wrench to remove the blade. Hold the Blade and unscrew the Blade Bolt (13) anticlockwise using a spanner wrench. Remove Blade and attach a new one to the blade bolt.
Ensure that the blade is properly positioned as seen in Fig.K1, then firmly tighten the bolt. Do not over tighten.
Renew your metal blade after 50hrs mowing or 2 years, which ever is the sooner-regardless of condition.
If the blade is cracked or damaged replace it with a new one.
STORAGE: (See Fig. L)
Stop the mower and unplug the tool.
Clean the exterior of the machine thoroughly using a soft brush and cloth. Do not use water, solvents or polishes. Remove all grass and debris, especially from the ventilation slots.
Turn the machine on its side and clean the blade area. If grass cuttings are compacted in the blade area, remove with a wooden or plastic implement.
Store the machine in a dry place. Do not place other objects on top of the machine.
To aid storage, release the handle cam lever, and rotate or fold the upper handle.
You could carry the mover by Carry Handle (10). Ensure cables are not stuck or entangled when folding or unfolding upper handles. do not drop the handles.
TROUBLE SHOOTING
| Symptom Possible | cause Remedy | |
| Machine fails to operate | Power turned offMains socket faultyExtension cable damagedFuse faulty/blownMower in long grassMotor protector has activated | Turn power onUse another socketInspect cable, replace if damagedReplace fuseIncrease height of cut and tiltmowerRelease the switch lever, Clear any obstruction, increase height of cut, then restart it |
| Machine functions intermittently | Extension cable damagedMachines internal wiring damagedMotor protector has activated | Inspect cable, replace if damagedContact Service AgentRelease the switch lever, Clear any obstruction, increase height of cut, then restart it |
| Machine leaves raggedFinish or motor labours | Height of cut too lowCutting blade bluntUnderside of machine badly cloggedBlade fitted upside down | Increase height of cut(see“ADJUSTING THE CUTTING hEighth” )Replace blade(see“Blade Maintenance”)Clean machine (see “Storage”)Refit blade correctly (see“Blade Maintenance”) |
| Cutting blade not rotating while machine switched on | Cutting blade obstructedBlade nut/bolt loose | Clear obstructionTighten blade nut/bolt |
| Excessive vibration/noise | Blade nut/bolt looseCutting blade damaged | Tighten blade nut/boltReplace blade |
ENVIRONMENTAL PROTECTION

Waste electrical products should not be disposed of with household waste. Please recycle where facilities exist. Check with your Local Authority or retailer for recycling advice.
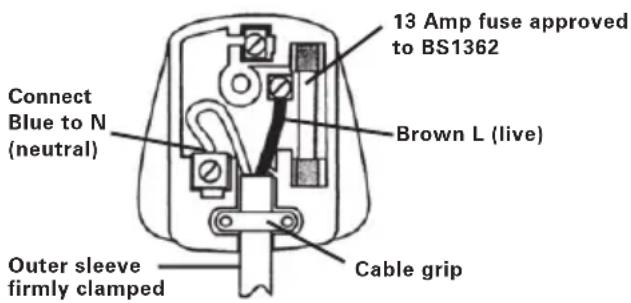
PLUG REPLACEMENT (UK & IRELAND ONLY)
If you need to replace the fitted plug then follow the instructions below.
IMPORTANT
The wires in the mains lead are colored in accordance with the following code:
Blue - Neutral
Brown - Live
As the colors of the wires in the mains lead of this appliance may not correspond with the coloured markings identifying the terminals in your plug, proceed as follows. The wire which is coloured blue must be connected to the terminal which is marked with N. The wire which is coloured brown must be connected to the terminal which is marked with L.
WARNING: Never connect live or neutral wires to the earth terminal of the plug. Only fit an approved 13A BS1363/A plug and the correct rated fuse.
NOTE: If a moulded plug is fitted and has to be removed take great care in disposing of the plug and severed cable, it must be destroyed to prevent engaging into a socket.
EC DECLARATION OF CONFORMITY
We, POSITEC Germany GmbH Theodor-Heuss-Ring 1-3 50668Koln
Declare that the product, Description
WORX Electric lawn mower Type WG707E (705-719-designation of machinery, representative of Electric rotary mower)
Function Mowing grass
Complies with the following Directives, EC Machinery Directive 2006/42/EC EC Low Voltage Directive 2006/95/EC EC Electromagnetic Compatibility Directive 2004/108/EC Noise Emission in the Environment by Equipment for Use Outdoors Directive 2000/14/EC amended by 2005/88/EC
Conformity assessment procedure as per Annex VI. Measured Sound Power Level 90.9dB(A) TURBO mode 80.3dB(A) QUIET mode Declared Guaranteed Sound Power Level 93dB(A)
The notified body involved
Name: Intertek Testing & Certification Ltd
Address: Davy Avenue, Knowlhill, Milton Keynes, MK5 8NL
Standards conform to, EN 60335-1 EN 60335-2-77 EN 62233 EN ISO 3744 EN 55014-1 EN 55014-2 EN 61000-3-2 EN 61000-3-3
The person authorized to compile the technical file,
Name Russell Nicholson
Address Positec Power Tools (Europe)
Ltd, PO Box 152, Leeds, LS10 9DS, UK
2011/12/14
Leo Yue
POSITEC Quality Manager
Name: Intertek Testing & Certification Ltd
Anschrift: Davy Avenue, Knowlhill, Milton Keynes, MK5 8NL
Normen:
EN 60335-1 EN 60335-2-77
EN 62233 EN ISO 3744
EN 55014-1 EN 55014-2
EN 61000-3-2 EN 61000-3-3
Levier decameverrouillage 2
Serre cable 2
Nom: Intertek Testing & Certification Ltd
Adresse: Davy Avenue, Knowlhill, Milton Keynes, MK5 8NL
Et conforme aux normes:
EN 60335-1 EN 60335-2-77
EN 62233 EN ISO 3744
EN 55014-1 EN 55014-2
EN 61000-3-2 EN 61000-3-3
Responsible qualite POSITEC
Ltd, PO Box 152, Leeds,LS10 9DS,UK

2011/12/14
Leo Yue
MANUTENÇAO DA LÁMINA (Ver K1, K2)

Cumpre as següntes directivas
Directiva EC respeitant a Maquinas
2006/42/EC
Nome: Intertek Testing & Certification Ltd
Morada: Davy Avenue, Knowlhill, Milton
Keynes, MK5 8NL
Endereço Positec Power Tools (Europe) Ltd, PO Box 152, Leeds, LS10 9DS, UK

2011/12/14
Leo Yue
Gestor de Qualidade POSITEC
ALGEMENE VEILIGHEIDS WAARSCHUWINGEN VOOR VERMOGENSMACHINE

WAARSCHUWING! Lees alle
6. ACHTERAFVOER (Zie H)
Naam: Intertek Testing & Certification Ltd
Adres: Davy Avenue, Knowlhill, Milton Keynes, MK5 8NL
Standaards in overeenstemming met,
EN 60335-1 EN 60335-2-77
EN 62233 EN ISO 3744
EN 55014-1 EN 55014-2
EN 61000-3-2 EN 61000-3-3
Navn:Intertek Testing & Certification Ltd
Adresse: Davy Avenue, Knowlhill, Milton Keynes, MK5 8NL
Standarder i overensstemmelse med:
EN 60335-1 EN 60335-2-77
EN 62233 EN ISO 3744
EN 55014-1 EN 55014-2
EN 61000-3-2 EN 61000-3-3
PO Box 152, Leeds, LS10 9DS, UK


2011/12/14
Leo Yue
Nimi: Intertek Testing & Certification Ltd
Osoite: Davy Avenue, Knowlhill, Milton
Keynes, MK5 8NL
VEDLIKEHOLD OG LAGRING
KNIV-VEDLIKEHOLD (Se K1, K2)
Navn: Intertek Testing & Certification Ltd
Adresse: Davy Avenue, Knowlhill, Milton Keynes, MK5 8NL
Namn: Intertek Testing & Certification Ltd
Adress: Davy Avenue, Knowlhill, Milton Keynes, MK5 8NL
Standarder overensstammer med
EN 60335-1 EN 60335-2-77
EN 62233 EN ISO 3744
EN 55014-1 EN 55014-2
EN 61000-3-2 EN 61000-3-3
Adress Positec Power Tools (Europe)Ltd, PO Box 152, Leeds,LS10 9DS,UK


2011/12/14
Leo Yue
POSITEC Kvalitetsdirektor
| 1. AÇMA/KAPAMA KOLU |
| 2. KABLO KLIPSLERI |
| 3. ÇIM TORBASI DOLUM GÖSTERGESİ |
| 4. ÇIM TOPLAMA TORBASI |
| 5. EMNIYET DüğMESİ |
| 6. ÜST KOL |
| 7. DIRSEK KILIDI KOLU |
| 8. ALT KOL |
| 9. GÜVENLIK KAPAGI |
| 10. TAŞIMA KOLU |
| 11. MOTOR KAPAGI |
| 12. SAMAN GIRİSİ (G’Ye Bakınüz) |
| 13. BIÇAK CIVATASI (K1’Ye Bakınüz) |
| 14. BIÇAK (K1’Ye Bakınüz) |
| 15. ÇALİŞMA MODU KADRANI (I”Ye Bakınüz) |
2. ÇİM BİçME HAKKINDA İPUÇLARI
DEPOLAMA: (L'Ye Bakiniz)
- Yetkili kurum:
Adi: Intertek Testing & Certification Ltd
Adres: Davy Avenue, Knowlhill, Milton Keynes, MK5 8NL
Standartlar asaigidakilere uygundur:
EN 60335-1 EN 60335-2-77
EN 62233 EN ISO 3744
EN 55014-1 EN 55014-2
EN 61000-3-2 EN 61000-3-3
SYNTHPHSEH AENIIADAS (AeITK1, K2)
NPOEIAONOIHsI Mny EKTEAEITE
TOTe LEITOUpyies OuvapmoAoyno n
puOmuicis ME Tn mnxavn OuvdeEvev n OTnv
TAPoxn Tpofoosiaac. Na diaoopaiaTe
TAVTA OTI TO KOUPTI LEITOUpyiac Eivai OTn
TheaATVEpyoTIOINc KAI TO QIC EIVAI
ATTOUVDEEVEVO ATO TNV TPOFOOSIA. Na
XEPiCZEATE NAVTA Tn LEITIDA ME TPOOxH -oi
KOVPTEPECS AIXUECS TNC MTPOV VA TPOKAeouv
TPAUATIOPO -VA XPNOIOTIOIEITE YAVTIA.
Akoauhote TIG TAPAKATW DIAIKAOIECS YIA VA
aPAPeOeTE KAI VA AVTKATAOTNOETN LEITIDA.
Oa XPeIAOTeTE YAVTIA KNTTou (Dv TAPEXovTaI)
KAI KLEIDI PE AYKIOTPO YIA VA aPAPeOeTE Tn
LETTDA.KpatnoTE Tn LEITIDA 14) KAI EEBOWTe
TO MavdaLo TNS LEITIDAC 13) apiotepootpopa
XPNIOTIOIWVtAc To KLEIDI PE AYKIOTPO.
ApaipoeTn i a kai eapmuoTe mia kaivoupi a
OTo maVdaLo Tns i a c
Siyoupeute ot n aeTia evai oot a
tiooetnuev noTWC paivetai OTO x. K1 kai otn
ouvexia oipTe to avdaLo.MHN ZIIFRETE
YNEPBOAIKA.
Na avaveewvete Tn melaikn aeTia aTio 50 wpeKoupema n eTa aTIO 2 xpOVA, oTOIOBNTa aTc ta duo ouuEi vwpitepa avEapntta aTTO Tc ouvHkeC.
1. CBOPKA PYKOKTKN (Cm. A1-A5)
1) YdaIte BnHTbI (X 2) c obEnx CTOpOH KpbIshKn. (Pnc. A1)
2) BCTaBbTe HIXHIOI pyKoTky (8) B OTBepCTnB KpbIuKe, npEynCMOTpeHHbIe dIy 3TOrO. (Pnc.A2)
3) 3aФИКСИРУTe c nOMOuIbIO nMEHOUxCBy BnHTOB. (Pnc. A2)
4)ПикpenTe BepxHIOpyKoTky (6) c NOMOuBIO 6oNTOB IN 3aOpHoro KpIBOINHeHOrO pIyara (7) K HnXHeI pyKoTKe (9). (Pnc. A3)
5) 3aTaNHTe o6a 3anOpHbIX KpNBOJIHHeiHbIXpbIyara. Y6eIITecb, yTo pyKoRTka3aФNKcnpOBAHa HADJIEXKAUIM O6PA3OM.
Будte octopoxнbl npn obpaueHn c ocTpbIMN ne3BnAIM. Ne3Bn npoDOnJaOT bpaaatbca HeKOTOpoe BpemI NOcNE OTKJIIOUeHn DAIBaTeJr. BbIHMaIte BNIKy n3 po3ETKn pepeI npOBeDeHnEM O6CnykBaHn IIN B CNYaep NOBpeKdEHN Ka6eJnNTAHn.
I36eraTe cOpNKoCHOBeHnra ngkoKOrKa6eNaC ne3BnAaMn.

B0HnHa n3OJaIa
OTXOdbI 3NEKtpoTeXHnueckoINpoDyKcHn He cJeDyETyTNI3NPOBaTb C6bITOBbIMNOTXODaMn. OHIOJXHbI 6bITbDOCTaBnEHb IMeCTHbI CEHTpyTNI3aCmN DnAHaJIeXaUeInpepepa60TKn.

CepTnФнкaT COOTBeTCTBnI FOCT P
Давленье npикима 3anopньх КрИВОЛнeньx рыагов можно OTperулпoboTb c nOMOцьIO 3anopHoro КрИВОЛнeнHorO рычara (7), врашая ERO NO YacOBОN CTpeLKe NIInpOTиB YacOBОN CTpeLKn. HE 3ATЯгNBАITE СЛNWKOM CnIbHO. (Pnc. A4)
PIMMEYAHNE: Ppejde yem yCTaHOBtB pyuKN pyKoTOK, y6eIntecb, yTO 6oNTbl IONHOCTbIO BCTaBJIeHbI B PYKoTKn.
6) YcTaHOBnTe npnlaeMbIe Ka6eJIbHbIe 3aXmbl (2) Na BepxHeN HIXHeN pyKoTKe. 3aKpeNITe Ka6eJIb B Ka6eJIbHbIX 3aXImax, oCTaNB DoCTaTOUHbI 3aIac BucraYeO Ka6eJIa. (Pnc.A5)
2. CBOPKA MELIKA ДЛЯ CBOPA TPABbl
YcTaHOBnTe pyUky TpaBOc6OpHnKa B BepxHey c6OpHnKa, kak nokaHa Ha Pnc. B1-B4.
1: CJIeRka HaxMnte Ha nepeHIOU qactb
pyk. (Pnc.B2)
War2. 3aTeM haxmnte pyky Bnepei.(Pnc.B2)
Uar3. Onyctnte 3aandHIOu qactb pyuKn. (Pnc.B2)
Uar4. B 3aBepseHne 3aueJKNHTe INaCTMaCCOBbIe 3aXIMbl Ha metaJIInuecko pame. (Pnc.C3)
I PPEyPPEKDEHNE: 3anpeuaetc yctaHaBnBaTb pyky B o6paTHOM HnpaBJeHH. YcTaHOBNTe pyky TaK, KaK noka3aHo Ha Pnc.B1.
3. YCTAHOBKA MEUKA ДлЯ TPABbl (Pnc. C1, C2, C3)
1) BbIKJIOUHTe KOCINKy, DOXDNTEcB OCTaHOBKn ne3Bn.
2)ПоднIMITE npeOxpaHNTbHyTO 3acNoHky n, ydepxnBa eE NOHrToN, y6eHITecb, yTO 6bIJa ydaHeA BCTaBka dIy MyJbUnpOBaHn.
3) Bo3bMnte MeWOk dIa TpaBbI 3a pyKu npa3MeCTnTe erO Ha HxKHX KpOcKax (a) Ha deKe KocNKn. (Pnc. C2)
4) Ocbo6oDHTe 3aunTHbIKoKxUJn 3ambikaHnMa MeuKa dIy TpaBbIB HyxHOM nOIOXeHN. IpOBepbTe HaedXHOCTb yCTaHOBKn MeuKa dIy TpaBbIy. (Pnc.C3)
7. INEPEKJIIOUATEJIb PEXHMOB PA6OTbl (Cm. I)
CocToaHne1:peKIM MAIOI MOUHOCTN

Bb6epnte pexm MAIOI MOUHOCTn npnpa6oTe B o6bHbIX ycNoBnx dIy cKaunBaHHnpimepno 20MM TpaBbl 3a Odn npoXoJ.
CocToHnE2: Pexm noBbIeHHoNCKopoCTN

YCTAHOBNTe nepeKIOUaTeIb B NOIOXeHne peKIMa IOBbIeHHo CKOpOCTn,ecJIH Heo6xOdIMO CKOCITb rCyTu IIN nepepocuTo TpaBy.
BAXHOE PIPMEUAHNE!ФyHKLIN
IOBbIeHHoN CKOpOCTn aKTHBnpyETcT OJIbKO npi DBHXeHnn. Pn BbIbope pexnma IOBbIeHHoN CKOpocTN mIIM MAIOH MOUHOCHTIN YacToTa BpaueHna DBnraTeJn 3MeHNTcBO BpeMn DBHXeHn.
8. PEGYINPOBKA BbICOTbl PE3AHNA (Cm.J)
PNEynpExKdEHNIE PEP
PEYINPOBKOIBICOTbI,OCaHOBNTEcB, OTNCTNEpbUar BbIKIOHATeJI NIOOJNTe DO NONHO OCTaHOBNMOTopa.Ie3BnI pOdoJXaOT BpaataBCa NOcNe BbIKIOUeHENMaUNHbI,a BpauiooeeCJe3Bne MoKeT npNBecTN K TpaBMnPOBaHHO.
IPEDOCTEPEXHEHHeKacaiTecb Bpaauuuxxrae3Bn.
Tg30HOKOcNkMa MoKet HAcTpAnBaTbCra Ha 6 BbICOT pe3Kn MeJy 20MM n 70MM.ДЯ 3TOrO nepeDbHbTe pbIur peRyInpOBKn BbICOTbl pe3aHnHa npKy, a 3aTeM OTpeRyInpPyIe B JEAEMoe NOLOKeHne.
9. COBETbI NO CKAUINBAHNUO CMYJIbUPOBAHNEM
Pn MyIbUHPOBaHN BaHa HOB aKocNlKa cnpoeKTIPOBaHa TaK, YTo6bl pa3pe3aTb 6pe3Kn TpaBb Ha MaJIeHbKHe KycOcKN I pacnPdeJrTa bIX O6paTHo No ra3OHy. Pn HOpMaJIbHbIX ycIOBnx, MyIbUHPOBaHHa Tpaba 6yDet 6bICTPo pa3JaRaTbCRe cTeCTBeHHbIM 6pa3OM n Cha6XaTB Ra3OH NITaTeJIbHbIM BeUeCTBaMn.
O3HaKOMbTecb, noXaIyIcTa, c HIXKeCJIeDyUOuIMN peKoMeHdaCuIaMn dIpy ONITMaJIbHOrO MyJbUHPOBaHnI.
1) ɪsərəiTe ckaɪnBaHnɪya, kɔrɪda Tpɑba Mokpər nocne doʊkjɪnɪn pɔcbl. Mokpər
TpaMoKeT O6pa3OBbIbAtb NyKn, PpeTCTByOuNcE MylbHnPoBaHnIO n CHnxAouNc E Bpem pa60tbl.
HannyumBpeMeHmIgKaunBaHn TpaBbIraBnEeNo3DHeeNocLeo6eHHOe, KOrdaTpabaCyXaNcKoWeHHaNPOouaHb He 6ydetNonadTbNO npMble CoJHeuHbIe Lyu.
2)ДЯнлушero MylbchpoBaHn yCTaHOBtE BbICOTy pe3AHnДЯУDAJIeHn npIMepHO OJHOI TpeTn DIIINbI TpaBUNKn, B nJeane He 6OJee 38MM 3a OJIN pa3. EcIn ra3OH nepepocuH,TO MOKeT OKa3aTbcr Heo6XoIMbIM YBeJIuHTb BbICOTy cpe3a ДЯ CHIXKeHn BByTAJIKNBAIOUeTo yCUnn I npEdOTBpaUeHn NepeRpy3Kn MoTopa.B CNYaue KpaIHe 3aTpUdHeHHOro MylbChIpOBaHn, peKOMeHdyETcra ChauAna CkaUINBaTb Ha BepxHem 3HaueHn BbICOTbI Cpe3a,a 3aTEM NOBTOPHO CkaUINBaTb Do KOHeuHOB BbICOTbl. B npOTNBOM Clyuae DeNaTe 6OJee y3Kne cpe3bl N CkaUINBaYTe MeDJIeHNO.
3)Для lyuwxx xapaKTepeNtIK Ounuaite KOpnyc Kocnilkn OT HarpOMOJdeHn TpaBbl. PernoDnueeCKn BbIKIooaIte Kocnilky n DoXnidaTecb NOnHO OCTaHOBKn Ne3BnA. Pocne 3TOrO BbIHbTe KJIIOUc6e3ONaCHOCTN n IpeBepHIne Tocnilky Ha 6OK. IcNoJIb3yra KaKo-Ⅱn6o ObBeKT Tnna NaIKN, ydaIInTe cKoPHeHnRA TpaBbl Ha NIOCKOCTN Ne3BnA. OcTeperaTecb OCTpbI KpOMOK Je3BnA. OUnuaiTe YacTo B MOKpoi, CBexKe TpaBe i BCerDa NocNe KaKdOrO NcNoJIb3OBAHnI.
4)ДЯнЕКOTOpbIX TINOB TpaBbI NIN COCTOaHn TpaBbIMoKET NOTpe6oBaTbcS, YTO6bl NIOUaDb MyIbYuPObaNacb NOBTOpHO dJa NOnHOro pa36paCsbBAHn TpaBbI NO ra3OHy. Pn IOBTOpHOM cKaUHbAHn peKOMeHdyTeC rpe3aTb NeppeHdNkUyraPHo (nonepek) nepBoi cxembl cKaUHbAHn. HIKOΓDA HE I3MEHЯITE CXEMY CKAUHBAHn 3TO BvDET Bbl3bIBATb CKAUHBAHNE BHn3 PO CKHOHY.
5)Измени Te CBOU CXemy CkaunBaHnuepe3 kaxdyu HeJeIIO.3To 6yDet CnocO6CTBOBaTb npedOTBpaUeHHo MaTupOBaHnru IN TEKCTypuPoBAHnra30Ha.
OBCJnyxmbAHNE

PNEyPExKDEHHe:OctaHOBnTe Kocnky n CHmnte KJIou
6e3oNaChOCTn nepeI cbeMOM Meoka dJIa TpaBbl.
PIMMEAHNE:ДЯ obecneeyHn IpoJONKITeBHO nHaJeXHcNcYKbI, peryIaRHO BblONHnIte CneDyUOuNe IpoUeDpybI no OBCnyKINBAHHo. Y6eIInTeCb, yTO OTCyTCTBYOT 3aMeTHbIe DeΦeKTbI, KaK HApPIMep CBO6OHDHe, CMeueHHoe nII NOBpeKdEHHoe ne3BVe, 6oNTaIOUaIcR apMaTypa II IN 3HOWeHHbIe IIIN IOBpeKdEHHbIe KOMNoHEHTbI. Y6eIInTeCb, yTO Bce KpbIshN I ORpaXdEHHa He NOBpeKdEHHI INpABINbHO 3aKpeNJIeHbI Ha KocNIke. IpoBoDInte Bce Heo6xOdMble OBCnyKINBaHHa II IN peMOHTbI Ipeed 3KcNpyatauNeH KocNIkn. EcNI KocNIka 6yDeT HeNCnpaBHOH HeCMOTpr Ha peryIaRHOe O6cnyKINBaHHe, NoXaJIyNcTa o6paTtECb B HaSH ZeHTp OBCnyKINBaHHa KIneHTOB 3a NOMouBu.
OBCLNYKBAHNEJI3BnA (Cm.K1,K2)
PPEyPExKDeHNE: HkoIa He npoBOnTe c6opky nIn peYIpObKy npN BkHouEHHom NITAHIN r3OHOKCnIKN.
Bcerda npOBepaTe, yTo BbIKNoUaTeIb nITaHnnapeBeDeH b noOKeHne "BbIKn," a BNkaKa6eJnNTaHnA OTCoEINHeHa OT 3NeKTPnueCKoP03tKn. BybTe ocTOpOxHbI npn o6paueHnCJe3BnEM: ocTpblc KpaMOryT HaHeCTN TpaBMy.1CnoJIb3yIte 3aunTHbIe nepaATKn. BbINOHNTE cJeDyUOuNE npOeDypbl DnA ChrTnAn yCTaHOBKn Je3BnA. DnA ChrTnA Je3BnA NOTpe6byOTc caIOBblc NepuaTkn IraeHbInKnIOU, He BXoJaUe B KOMnEKT. YdepXNBaHa MeTe Je3BnE (14), OTBnHTnte raay (13)npOTNb YacOBOn CTpeJIKN C NOMouBo raeHOROKlOua.CHMInTe Je3BnE uYCTaHOBNTe HOBOeJe3BnE Ha 6oNT Je3BnA. Y6eInTEcb B TOM, qTOJe3BnE npABnIbHO yCTaHOBJeHO, KaN OKA3aHOHa pnc.K1, 3aTe mPiOTHO 3aTaNHTe 6oNT.
HE 3ATYBAAITE BOJTCNNUKOM CNJIbHO.
O6HOBnIe MeTaNJIuYeCKoe Je3BVe He3aBnCmO OT eFO COCToHnC nHTepBaJOM 50 Yacob pa6oTb IIN 2 rOda, B 3aBNCMocTn OT TORO, KaKoe co6bITne HAcTyIIT paHbIe.
B clyuae pactpecknBaHnI nn NobpeKdEHHJIe3BnJ 3aMeHHTe erO HObbIM.
XPAHEHNE: (CM. L)
OcTaHOBnTE Kocnky N Bcerga BbIHMaIte KIOUc 6e3oNaCHOCTN.
TuaTeIbHO OunuauTe BHeUHIOIO NOBepxHOCTb MaUNHbIC NOMOuBu MOrKoI UeTKN TKAHN.
He nCnoJIb3yIte BODy, pAcTBOpNTeJIu nn noI npOn. YdaIte BCIO TpaBy u MycOp, B OOCo6eHHOCTn 3B EHTNJIaUIOHbIX UeJIeJ.
IpeBepHnTe MaunHy Ha e6oK n OunchTe 0bnactb ne3Bn. Ecnn o6pe3kn TpaBbl co6npaHTc B o7nactn ne3Bn, To ydaHnTe nx C NOMOuIO DepeBAAHHORO IIN PnactIKOBORO npncnoc6nHeNIA.
XpaHnTe MaunHy B cyxom MeCTe. He cTaBbTe npytne oBeKtbl Ha Bepx MaunHbl.
He CneDyeT yTNJN3npoBaTb C 6blTOBbIMN
OTXoAMN. OHn DOJXHbI 6bITb DOCTaBneHbI
B MeCTHbI ΚeHTp yTnIn3aunn dJa HaNJIeKaUeJ nepepa6oTKn.
EC DEKJIAPAUÇN A COOTBETCTBNY
Mbl,
POSITEC GERMANY GMBH
606pyoBAnu 2006/95/EC
2000/14/EC n3MeHeHa 2005/88/EC
- PpoceDypa OueHKn COOTBeTCTBnB COOTBeTCTBnC PnploKeHne VI
-Измерений уpoBEHB 3ByKOBOI MOUHOCN:
90.9a5 (A) PeXMM NOBbIeHHoN cKOpocTH
80.3aB (A) pexm MAIOI MOUHOCTN
- 3aBnEHHbI rapaHTnpoBaHHbI ypOBeHb
3BYKOBOI MOUHOCTN: 93aE(A)
- YnOJIHOMOeHHbI OpraH, IMEIOUIN OTHOWeHne
Hann Mehoanne: Intertek Testing & Certification Ltd
Adpec:Davy Avenue, Knowlhill, Milton Keynes, MK5 8NL
CTaHdapTbI COOTBeTCTByHT CJIeDyUOeMy
EN 60335-1 EN 60335-2-77
EN 62233 EN ISO 3744
EN 55014-1 EN 55014-2
EN 61000-3-2 EN 61000-3-3
Пицoc npabOM KOMnIIpOBaHЯ ДаHHOrO
TEXHnueckoro paaila,
IMRA: Russell Nicholson
Ampec: Positec Power Tools (Europe)Ltd,
PO Box 152, Leeds,LS10 9DS,UK

2011/12/14
Leo Yue
MeneJKepe no KaueCTBy POSITEC


Copyright © 2012, Positec. All Rights Reserved.