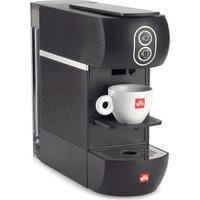
Latte Premio LP15 - Milk frother ILLY - Free user manual and instructions
Find the device manual for free Latte Premio LP15 ILLY in PDF.
| Product type | Milk frother |
| Brand | Illy |
| Model | Latte Premio LP15 |
| Dimensions (H x W) | 254 x 360 mm |
| Weight | 3.34 kg |
| Power supply | 220-240 V ~ 50/60 Hz |
| Max power | 1000 W |
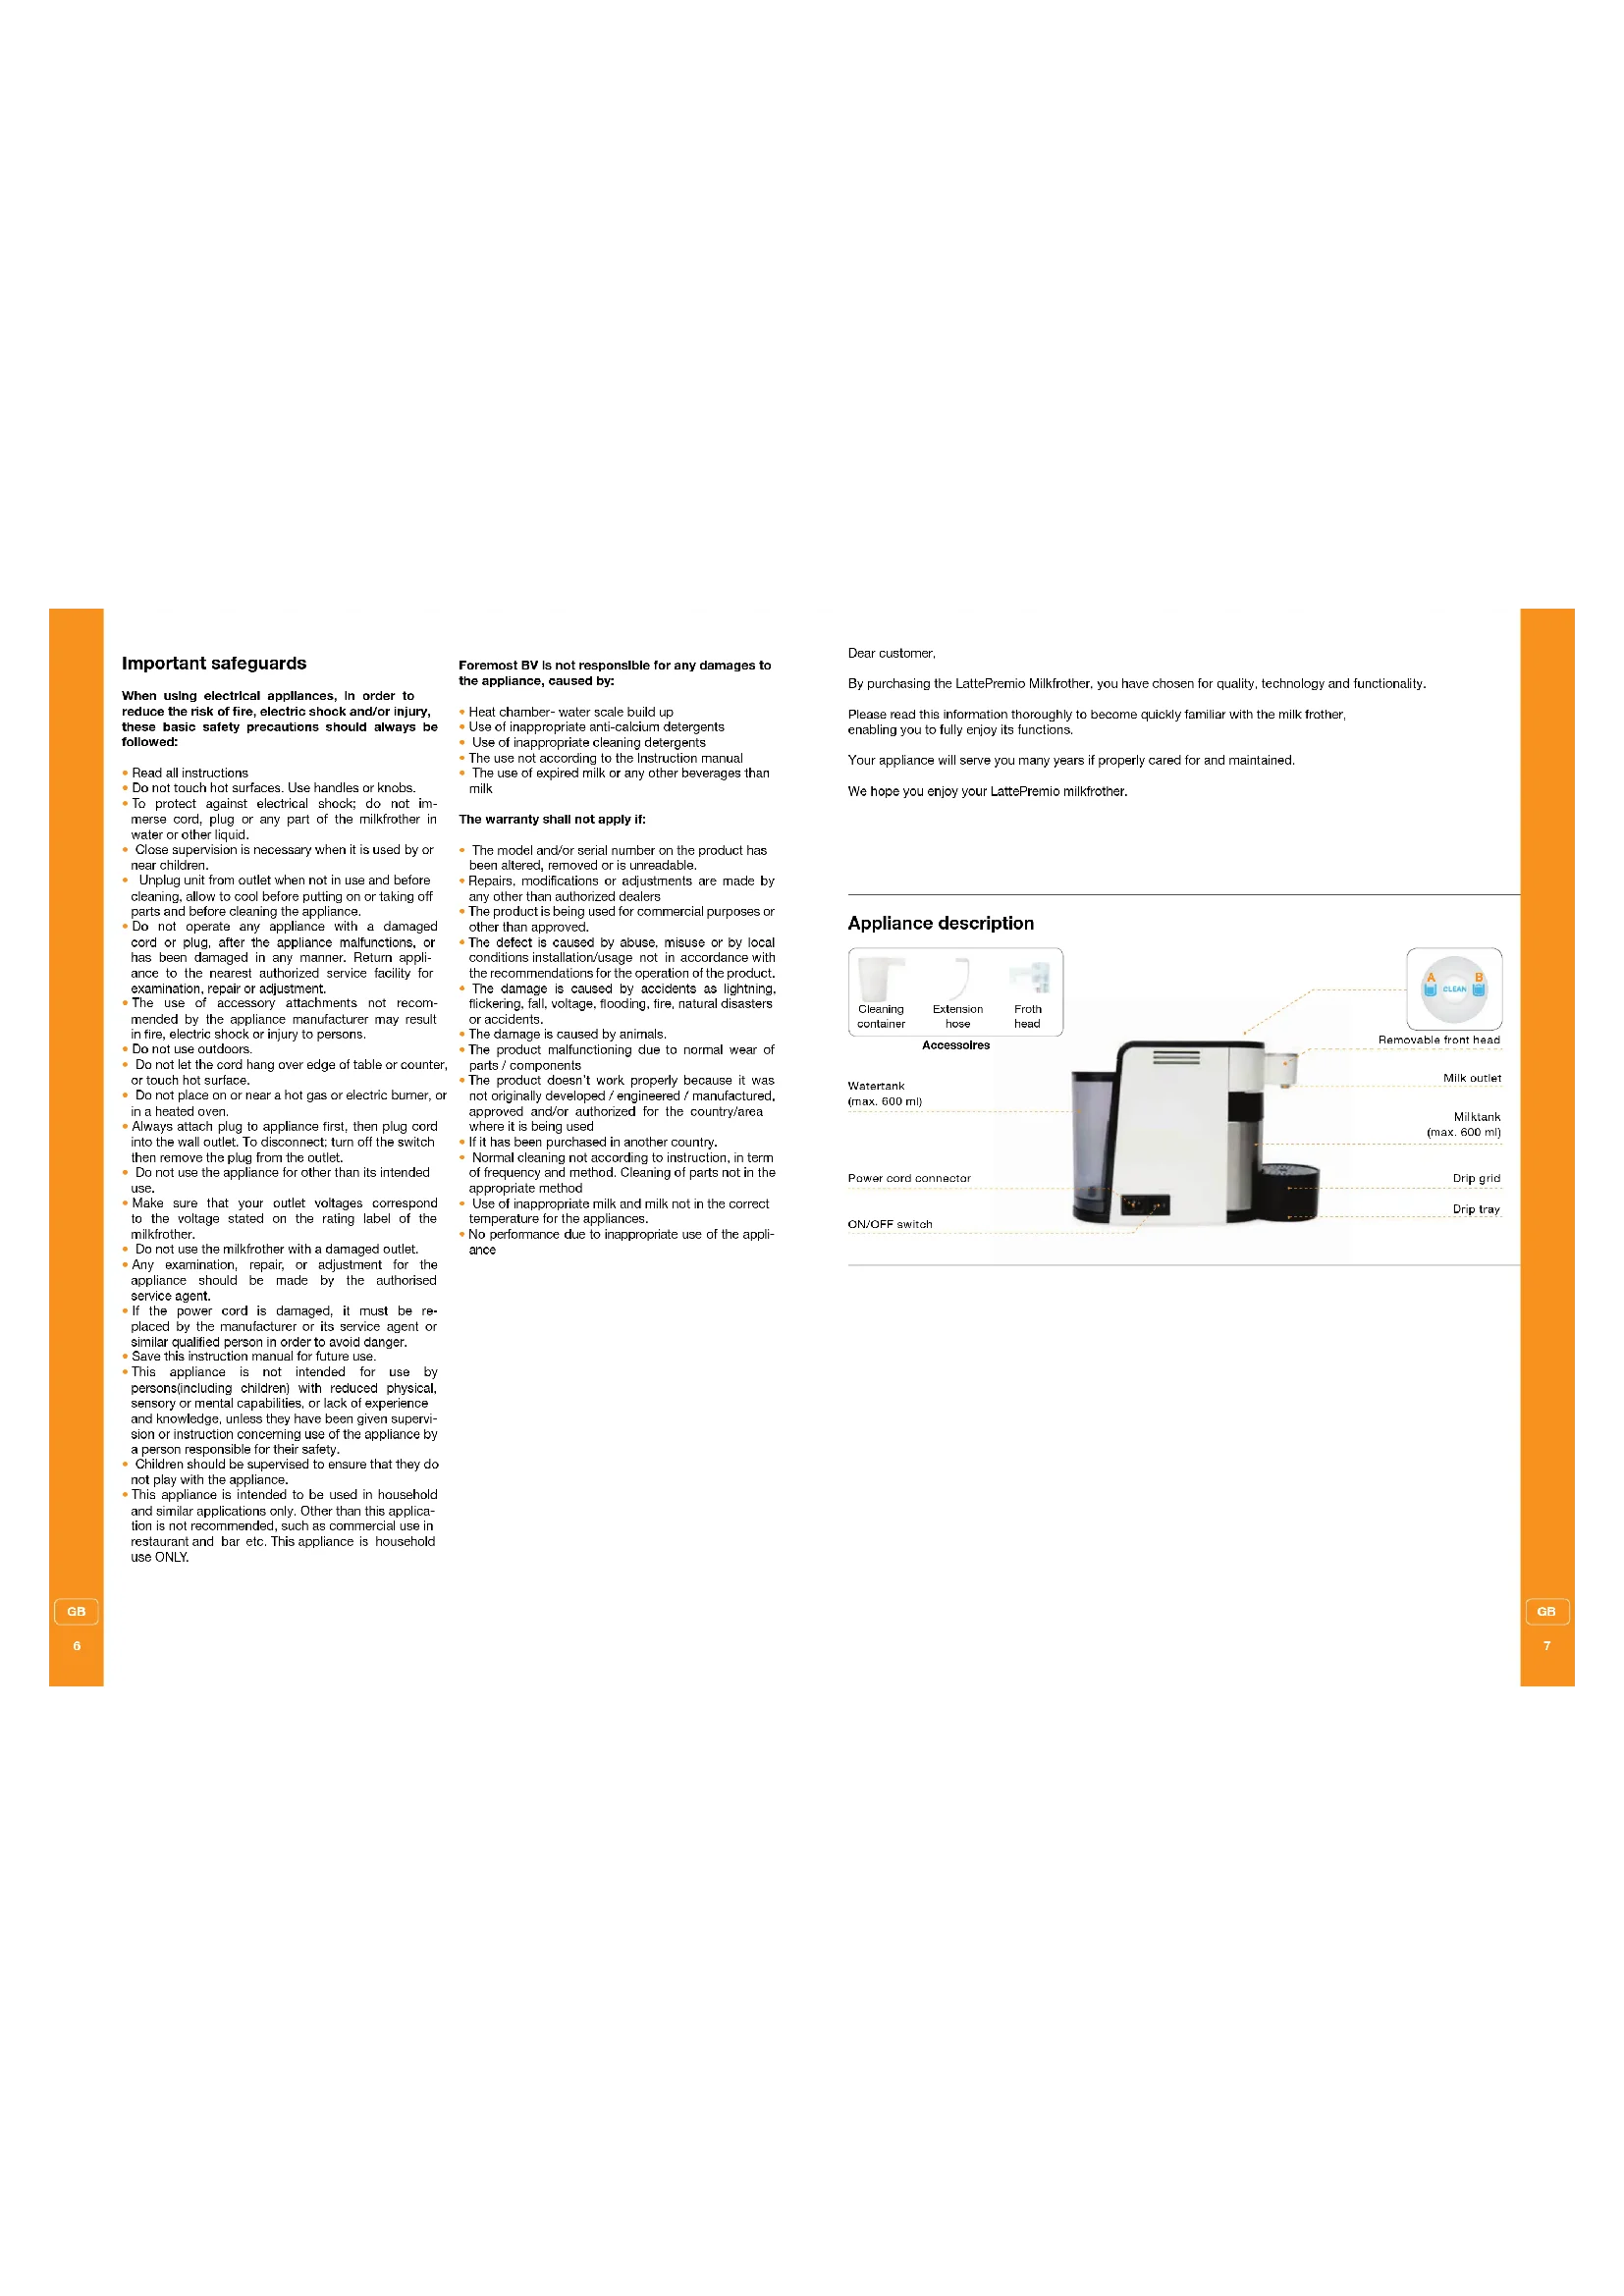
| Water tank capacity | 600 ml |
| Milk tank capacity | 600 ml |
| Main functions | Heating, frothing, cappuccino, caffè latte, latte macchiato |
| Duration programming | 5 to 60 seconds for heating and frothing |
| Energy saving mode | Automatic after 5 minutes (adjustable up to 30 min) |
| Cleaning programs | Quick (30 s) and long (60 s) |
| Descaling | Every 3 months or 300 cycles |
| Protection function | Safety shutdown in case of overheating or tank removal |
| Use | Domestic use only |
| Cable length | 1.5 m |
| Included accessories | Cleaning cup, extension hose |
Frequently Asked Questions - Latte Premio LP15 ILLY
User questions about Latte Premio LP15 ILLY
0 question about this device. Answer the ones you know or ask your own.
Ask a new question about this device
Download the instructions for your Milk frother in PDF format for free! Find your manual Latte Premio LP15 - ILLY and take your electronic device back in hand. On this page are published all the documents necessary for the use of your device. Latte Premio LP15 by ILLY.
USER MANUAL Latte Premio LP15 ILLY
Perfect frothed milk within seconds
GB
Operating Instructions
NL
GebruIkaanwiJzIing
DE
Bedienungsanleitung
FR
Cappuccino 9
Caffe Latte/Hot milk 9
Latte macchiato 9
Increasing capacity 9
- Programming the fill up level / default time 10
Heating 10
Frowning 10 Reset to factory settings 10 - Energy saving mode 10
-
Protection function 11
-
Cleaning the Appliance 11
Before the cleaning process 11
Cleaning programs 11
- Descaling 12
Decalcification 12 - Troubleshooting 13
- Storage / Disposal 13
- Technical data 13
Important safeguards
When using electrical appliances, in order to reduce the risk of fire, electric shock and/or injury, these basic safety precautions should always be followed:
Read all instructions
- Do not touch hot surfaces. Use handles or knobs.
- To protect against electrical shock; do not immerse cord, plug or any part of the milkfrother in water or other liquid.
- Close supervision is necessary when it is used by or near children.
- Unplug unit from outlet when not in use and before cleaning, allow to cool before putting on or taking off parts and before cleaning the appliance.
- Do not operate any appliance with a damaged cord or plug, after the appliance malfunctions, or has been damaged in any manner. Return appliance to the nearest authorized service facility for examination, repair or adjustment.
- The use of accessory attachments not recommended by the appliance manufacturer may result in fire, electric shock or injury to persons.
Do not use outdoors
- Do not let the cord hang over edge of table or counter, or touch hot surface.
- Do not place on or near a hot gas or electric burner, or in a heated oven.
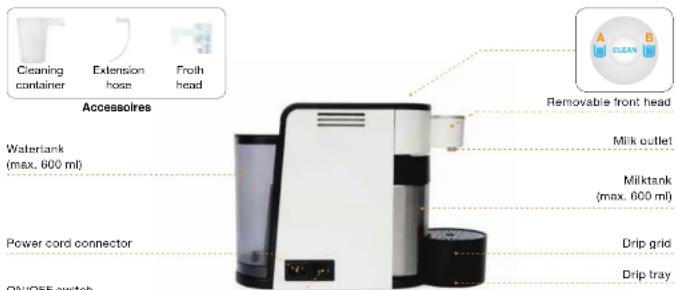
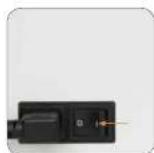
- Always attach plug to appliance first, then plug cord into the wall outlet. To disconnect; turn off the switch then remove the plug from the outlet.
- Do not use the appliance for other than its intended use.
Make sure that your outlet voltages correspond to the voltage stated on the rating label of the milkbrother.
- Do not use the milkfrother with a damaged outlet.
- Any examination, repair, or adjustment for the appliance should be made by the authorised service agent.
- if the power cord is damaged, it must be replaced by the manufacturer or its service agent or similar qualified person in order to avoid danger.
- Save this instruction manual for future use.
- This appliance is not intended for use by persons (including children) with reduced physical, sensory or mental capabilities, or lack of experience and knowledge, unless they have been given supervision or instruction concerning use of the appliance by a person responsible for their safety.
Children should be supervised to ensure that they do not play with the appliance.
This appliance is intended to be used in household and similar applications only. Other than this application is not recommended, such as commercial use in restaurant and bar etc. This appliance is household use ONLY.
Foremost BV is not responsible for any damages to the appliance, caused by:
- Heat chamber- water scale build up
- Use of inappropriate anti-calcium detergents
-
Use of inappropriate cleaning detergents
The use not according to the Instruction manual -
The use of expired milk or any other beverages than milk
The warranty shall not apply If:
- The model and/or serial number on the product has been altered, removed or is unreadable.
Repairs, modifications or adjustments are made by any other than authorized dealers
The product is being used for commercial purposes or other than approved. - The defect is caused by abuse, misuse or by local conditions installation/usage not in accordance with the recommendations for the operation of the product.
- The damage is caused by accidents as lightning, flickering, fall, voltage, flooding, fire, natural disasters or accidents.
The damage is caused by animals. -
The product malfunctioning due to normal wear of parts / components
-
The product doesn't work properly because it was not originally developed / engineered / manufactured, approved and/or authorized for the country/area where it is being used
If it has been purchased in another country.
- Normal cleaning not according to instruction, in term of frequency and method. Cleaning of parts not in the appropriate method
- Use of inappropriate milk and milk not in the correct temperature for the appliances.
- No performance due to inappropriate use of the appliance
Dear customer,
By purchasing the LattePremio Milkrother, you have chosen for quality, technology and functionality.
Please read this information thoroughly to become quickly familiar with the milk frother, enabling you to fully enjoy its functions.
Your appliance will serve you many years if properly cared for and maintained.
We hope you enjoy your LattePremio milkfrother.
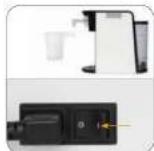
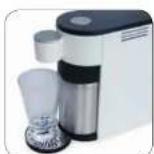
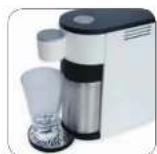
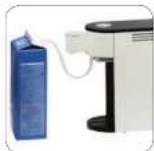
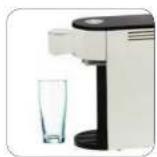
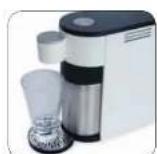
Appliance description
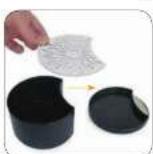
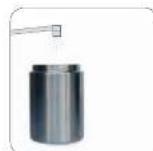
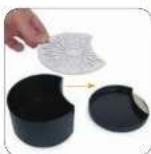
Before the first use or after a longer period of non-use

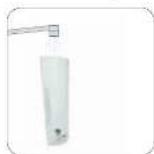
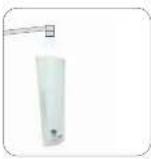
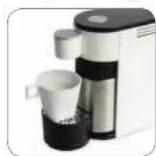
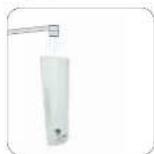
Fill water tank with fresh water (max. 600 ml)

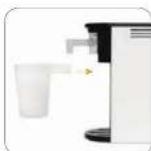
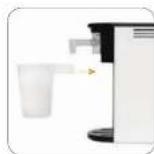
Place cleaning cup
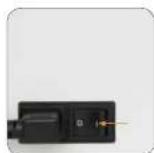
Plug into mains & switch the appliance on
Run cleaning program (see chapter: cleaning)


Heating up
Ready
NOTE

- Do not use sparkling water or distilled water in water tank. Use ordinary tapwater, or still bottled water when living in a hard water area.
- Do not place the appliance in direct sunlight, near oven or other hot surfaces to prevent the milktemperature in the milktank to increase.
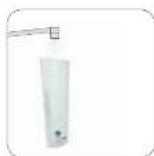
Daily, before use

Fill water tank with fresh water (max. 600 ml)

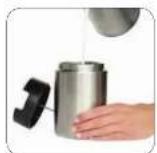
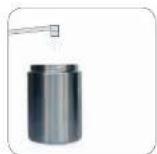
Fill milk tank with cold fresh Switch the appliance on milk (min. 200 ml / max. 600 ml)
Switch the appliance on

NOTE

- Milk must be stored in the refrigerator at 4^ before use.
In order to keep the milk fresh we recommend to refresh the milk in the milktank every hour. - For best frothed milk performance we recommend to run the appliance once in frothing function with milk in order to remove any air and water out of the frothhead
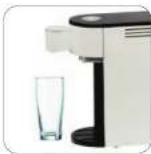
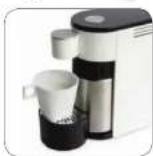
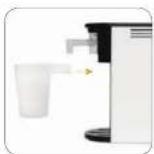
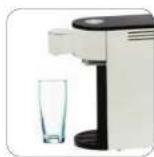
Preparation
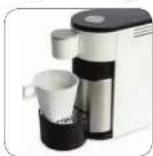
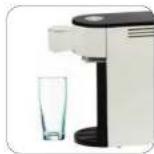
Cappuccino Caffe Latte / Hot milk
Place cup on drip tray

Press button B Place cup on drip tray Press button A
drip tray Press button A
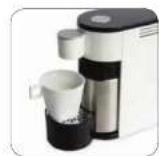
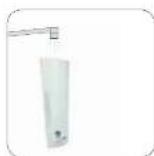
Latte Macchiato
Replace high drip tray for low drip tray
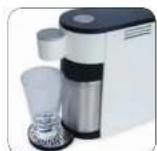
Place a Macchiato glass underneath the milk outlet

Press button B
NOTE
If not in use: store milktank into refrigerator
- Temperature: Hot milk: approx. 50^ , Milkfoam: approx. 60^
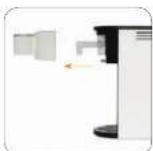
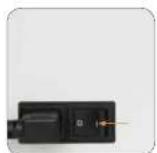
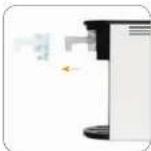
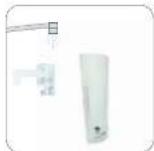
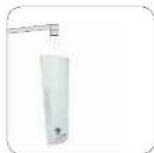
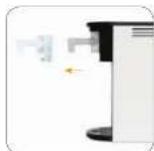
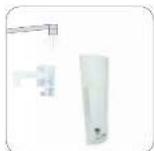
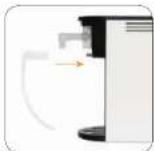
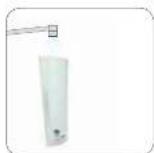
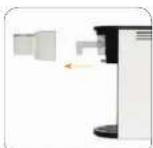
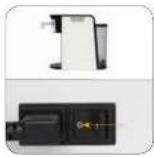
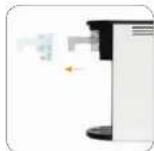
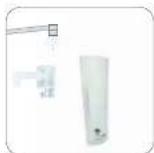
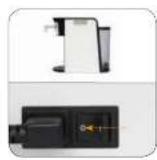
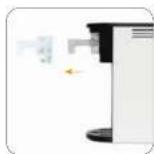
Increasing capacity
Remove front cover
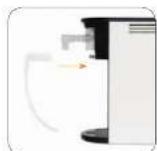
Attach extension hose Place extension hose in external container / milkcarton
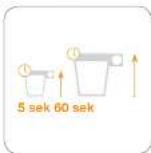
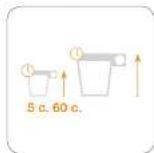
Programming the fill up level / default time
Heating (default time 30 sec./approx.120 ml hot milk)
Press A for approx. 3 seconds until it flashes

Press A again to set the cup volume
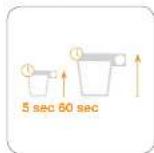
Setting range cup volume 5 - 60 seconds
Frothing (default time 20 sec./approx.100 ml foam & milk)

Press B for approx. 3 seconds until it flashes

Press B again to set the cup volume
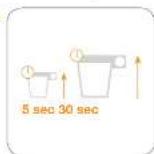
Setting range cup volume 5 - 30 seconds
4.3 Reset to factory settings
Press both buttons simultaneously for 3 seconds
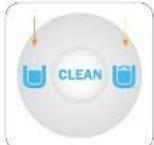
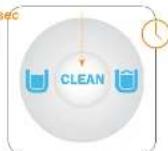
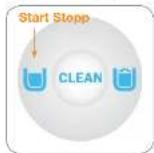
Energy saving mode
After 5 minutes of NON using the appliance, the appliance will automatically switch into energy-saving mode. The buttons will light up alternately.
- By pressing either one of the buttons, the appliance will resume in normal function mode.
- The energy-saving mode time can be changed from 5 minutes (factory default time) to 30 minutes. For 5 minutes setting: press and hold button A and switch on power until all buttons light up. - For 30 minutes setting: press and hold button B and switch on power until all buttons light up.
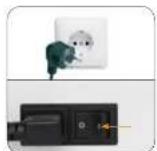
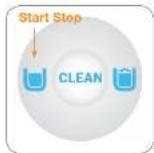
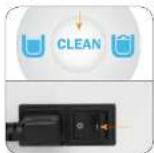
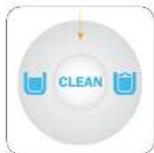
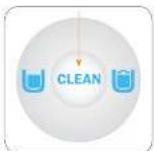
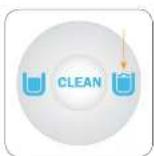
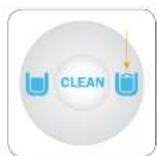
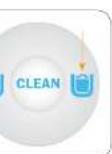
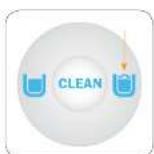
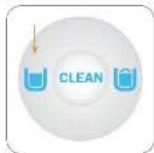
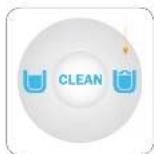
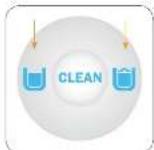
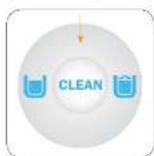
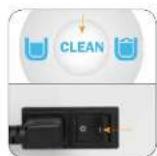
Protection function
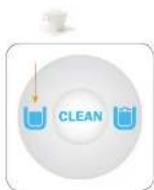
The CLEAN button will flash fast when the front cover or the milktank will be removed from the appliance.
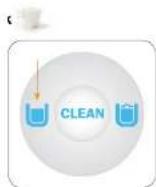
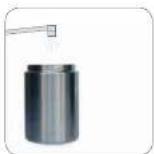
Cleaning the appliance
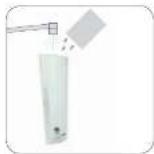
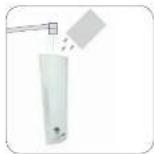
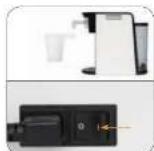
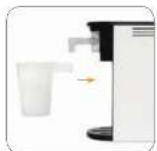
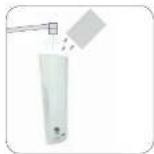
Before starting the cleaning process
Fill water tank with fresh water (max. 600ml )
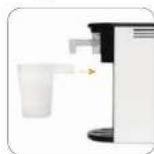
Take out the milktank and place cleaning cup
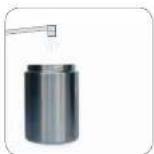
Fill the milk tank with water for thorough cleaning (min. 200ml / max. 600ml )
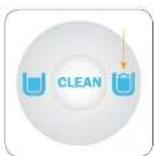
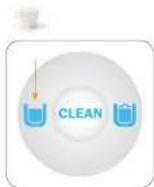
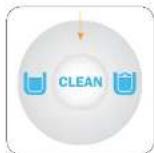
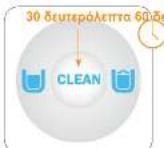
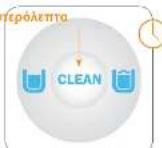
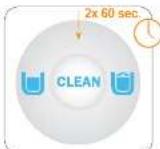
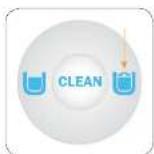
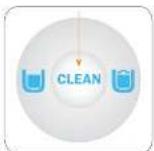
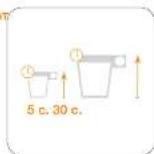
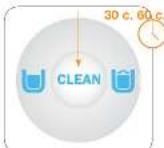
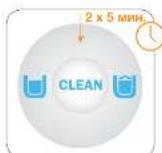
This appliance has two cleaning programs: short clean & long clean
The application is as follows:
Long clean x2 Short clean
Before the first use
After long period of non-use
- When appliance not in use
Before the first use every day
- Between each cup if the less than 30 minutes.

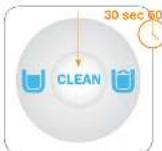
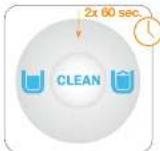
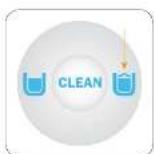
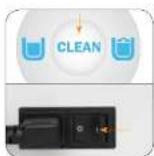
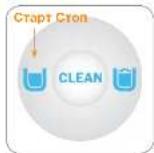
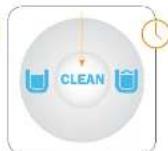
Press the button once for a short program (30 seconds)
Hold the button for
2 sec to start a lang program (60 seconds)
NOTE
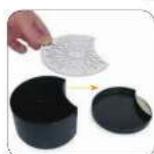
- It is compulsory to clean the front cover and the froth head in water after the LONG CLEAN program, for hygienic purposes. The milk tank and suction pipe must be cleaned after use. It is recommended to immerse them in warm water overnight.
Cleaning the outside of the appliance
Remove the plug from the outlet before cleaning the appliance.
Wipe outside with a soft, dry cloth, after the appliance is cooled down. Never use metal polish!
The removable items are NOT dishwasher safe

Dscaling
NOTE
- Run decalcification every 3 months or after 300 cycles.
Total run time is 5 mins at a water temperature of 65^ - Start the decalcification program only when the appliance is COILD (CLEAN button lights up). Decalcification program will not start if appliance is HOT (All buttons light up)
Preparation

Switch off the appliance and remove all accessories
Fill water tank and add decalater to recommended ratio on box

Place large glass or container underneath the milkoutlet
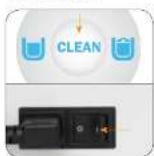
Decalcification
Hold down the clean button and switch on power until all buttons light up
When CLEAN button lights up the appliance is ready for decal cycle Press CLEAN button

After decalcycle clean and refill water tank (keep appliance switched on)
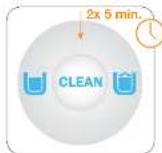
Press CLEAN button once for 5 min, run with tap water. Run 2 times
NOTE
Make sure there is no descaler left in water tank.
After decalcification & rinse process, switch off the appliance to exit the decalcification mode.
Switch appliance off, remove water tank and froth head
Clean the water tank and froth head under tap water
Attach froth head and cleaning cup and switch appliance on
Run the 'Long clean' program at least 2 times. After this the appliance is ready for use
Troubleshooting
Faults Possible cause Repairs
Indicator lights do not flash after switching on the appliance No milk flow · Water tank empty
not in socket or power card sector
- Front cover not attached properly
Connect plug
-
Suction pipe from milk tank lid not assembled
-
Connect suction pipe to lid from milk tank
Button B flash fast - The appliance is overheated - Switch appliance off until it is
Button A flash fast - Environment is too cold.
Less than 5 degree ^ C
- Place the appliance to room temp environment. If button A still flashes fast contact service center.
NOTE
If you cannot solve the problem following the steps outlined above, please contact the customer service.
SUNSET guster [sw]
Storage / Disposal
图
If you do not need the appliance for an extended period of time, allow it to cool down and clean the appliance as described in the chapter Cleaning and Care to prevent mould formation. Mould fungus represents a health risk and stains may develop on the unit which can no longer be removed. Electric and electronic end-of-life appliances often still contain valuable materials. However, they also contain hazardous substances which were required for their proper function and safety. If disposed of with regular household waste or treated incorrectly they can pose a risk to human health and the environment.
NOTE
- Use the collecting station in your municipality to return electrical and electronic end-of-life appliance for recycling. Obtain the information required, if necessary, from your city hall, your waste disposal company or your dealer.
- Render the appliance unusable before disposal. Make sure your end of life appliance is stored safely away from children until hauled away.
Technical data
| Dimensions (W x H) | 254 x 360 mm | |
| Approx. weight | 3.34 kg | |
| Operating voltage | 220-240 V | |
| Frequency | 50 - 60 Hz | |
| Power consumption | 1000 W | |
| Length of cable | 1,5 m | |
| Watertank | 600 | ml |
| Milktank | 600 | ml |
NL
Inhoudsopgave
Cher client/che re cliente,
Place a Macchiato glass,
underneath the milk outlet.
Premere it tasto B

Apaiaopate to Soxio toou ydxacto kai tonobetion to qianfai nekabapou
Gamma to oxo yoiyakotokue vepyo ievan mAnpKaBapmio (raouyoyoto 200ml/1960to 600 ml)
Autn ouakuei exi du npoyapmu a Kaapou ouvtoo kaepio & kaepioe myaicis
Hepapayoun touc exa wos eig
Kaapiaopjcpeyansdiapkiasx2vtooskaepios
Iipv any my npom yhohn
Meo aao kpaia pmo oynxpno
Oro n ouoekei neb xnpnoeioa
210 eoae npepeaein yhohn
KoEe pao Tny TpoTn XpOy
Mea afo Koe napaAua oav npkexvduoc
XPOV PTepeopao 30 kTae.
Prratrto rtaKpco iaopaia ivia eva oivio npovma (30 deupeAeT
Kapnterata ToTnApo
TtTnEVO yio >2
DeTPOeTOAHTY vio
KcNtWTe EEv yEvAToTRO
TPOyPoAQU (60
DeTPOeAToTTG)
EHMEIO2TE
Zuvatra va Kaopkei Tto pOoTNO KALUUA KA TO tAOIOI To apoiip ME Vepo MeTo TPOOyA OAKU RA KApapaiu YAI AoyUc LVEWIG TO Doxiaou To yalakios K a ot alauwoc avappopnnp npttna va Kaopapovit meta oTO koe xpon. Suavatra va ta BuiCte OE CetO VEpa Kota Tl diakpna TNC vuytac.
KaBapiaoTOUgWtepikouTns auKEunC
Apaiaepte to buaa amo mympia piv ro KaBapioa oqakeun
Kounitote to egeapok o eva aauakoc, oteyovravopao noukeun cxkpuoe. Mnyxpanpoiaeite tote uuaatiknptaaalaa
Ta aonupeva tnpara dev nevovta 10nauvtip mow
Apaalatwn
ZHMEIOZTE
Kavte apalton k0e 3 pvec n e fo 300 kouoc.
O uvoiokxpoovc aeiaupyic eivai 5 aiae Bepokpaoia vpu 65° C
- Ezekvijto Tn tripyapua aiaotoueuanu ovo ot u oukeun kivai ooi (no tKrpo Klen tracmpaue ovauveo). To tripyapua nio tioaoueuanu dev fa Ezekvijto oe u oukeun (Ola) (Ola to kouimui ouvapeva)
Ppoetopaaia

ATTEVEPOYTOEOTI INOKEURK KAI caiapaiertai OAO ta eaojimura
Feliote to doxyloVeo kai Tpooboe to apaamko kata in ouviatjev avovayia oto kouri
Tomato/Inova mycetDA morni hoxsia katua amt a toraou oya yaoKoc
Apaatwoon
KpOHTaI mrrnEvo To mRIOPO cna KAV EVOYOTHO T OOUKOWU WsOu VAOVQOA Yo KAOMJU
Oroly to triktjco CLEAN ovauu uoukceiv eliva tloiu via tv kokka ncs apakadunv, triktjto triktjco CLEAN
Mata tov kuo ta ng amatapuanongkabapitae kalayacjutre thn decayu veyoo (Dthnnrtn tnc uoueok eKeupolya)
ZHMEIQZE
Baeiabaeiae on dey eae aotnivie apaoaikto sto doxio tou vepoe.
Merd nry biaiaeaiae m ananmianrnnn, & o f yaiya, amaneyonrnnn en mukauh y va bye rno amn m karnpua
AtepeyotyoIaTeIe IoukeuI, aapePeTo To doxie vepo kai To otpo Tou aoopo
Kaiapate To Boxie vepa Ke To Tnou To apappu kau ta 1n Bpua
PaoaopaeTo TAOIIOU AappooKai TO pAnCai Kaapouoai KAI EeyPOITOTI KOUKEUI
EtoaoueToe Toxopocua Tou Kooepooy PruyaoTnC biokoeA ToayatoTou 2 opeC. Mta aOnu n oukouei Evou Eou Tp xprno
Avtietwion TpoBnqatuw
Baaes naoav aia Etnokues
Onootevee evetieev nevo aoeonnoe mte eevvovnnoon noou
To Bojua Sev elva omr npiga r to kaskdojo puroto
Suvb60eTm npCi
Kaiaaon yalaKTOC To doxfo tou vepou eld
Kier renjong program (see kapital: renjong)

Oppvaming


Ferdig

OBS!
Bruk ilkte gildrente vann er stdestlert vann i vanntanken. Bruk vanlig tapevann, er stille flaskevann his du bor i et ornade med hardt vann.
- Plasser like apparatei 1 direkte solly, i naeheten av oyn eiler andre varme overlifter for a hinde at milkenv temperaturei milkank ekar.
Daglig, for bruk
Fyll vannlanten dc friski vann (maks. 600 ml)
Fyll meik tanken med kald kersak meik (min. 200 ml / meals, 600 ml)
Slà pà apparate!

OBS!
Melk ma oppbevares kjoleskap ved 4^ for bruk.
For a holde melken frisk anbefaler vi a legge melk i milktank hver time.
For opnabestekummelt mel, anbefalarvi kjore maskinen en gangiskumme funkason med malk for afjermo luft og uarn ut av sukumu hodeit
Forberedelse
Cappuccino Caffe Latte/Varmelk
Plasserkoppenpa
dryppakalen
Trykk pa knappen B Plasser koppen pa
dryppskalen
Trykk pa knappen A
Latte Macchiato
Byth yea drypksaksen for lav drypaksaksen
Pliasser en Macchiato glass under meik utelope
Trykk pa knappen B

Hvis ikke er i bruk: lagre milktank inn i kjoleskapat
- Temperature: Hot milk: ca. 50^ , milk skim: 60^
Okt kapasiteten

Fjem frontdekselet
Fest forlengerslange Plasser forlengerslance i ytre
beholder / meikakartong

Programmere fylle opp nivaet / default tid
Oppvarming (default tid 30 sek. / ca. 120 ml varm melk)

Tryk A for ca. 3 sekundertil det blinker

Trykä A ijgen for a sette kopenhagen volume
Stelle kopp volum pa 50-60 sekundar
Tu at mulken tank on glasser rengongkoppen
Fyll mekl tank man davn for grundig renjongir (minst 200 ml / maks. 600 ml)
Dette apparatet har to rengjering programmer: kort ren og lang ren
Foremost BV is not responsible for any damages to the appliance, caused by:
Tryck A for ca. 3 seconds under stills det blinkar
Place large glass or
Trainer Under the milk outlet
Kalkinpolisto
Pida Puhudista - painiketka
aiahaja ja kyojta virko
kumnes kaiki painikkeot
sytyvat.
Cappuccino Caffe Latte / Hot milk

Anbring kop pa drypakke

Tryk pA B Anbring kop pa drybakke Tryk pa A
Latte Macchiato
Rengoring at ydersiden at apparattel
BCTABTBE MANKY JINH CNTCKI

PnBnBnBnBnBnBnBnBnBnBnBnBnBnBnBnBnBnBnBnBnBnBnBnBnBnBnBnBnBnBnBnBnBnBnBnBnBnBnBnBnBnBnBnBnBnBnBnBnBnBn
PpOeBaTeIaPpO pAMMy IyIaTcKnPiPbOpaCm [CM] rAByIcNtKaPiPbOpa

Harpee


TOTOBO
BHIMAHNE
He KnoBnOyTe 3aRnpoBbAHy IIOI dactHINPOBbAHy BOY bEMCKOTI bNDBoI. PmENHEe BDOIPOBaDHy IIOI BYIKNPOBbAHy HReBbAHOHy IEOI BDOIPOBaDHy BDOI CIIaMIXKOMKKTKBA.
He naoepaee 0o3oeaeTbno pnpnBcFOHbNtHyXe, YoCTaHbNtBaTe PnPbOg paoM cDyoxkoAor TpOeHHuOBxOCTMbY, BoIbEXbKaBnOBbHbUHmTBMpepybMonKbE BMOKOTB DMRMONc.
Kaxdbn DeHb, nepeh Hauanom McnoB3oBaHn
ZaHnHnHnE MckOcHbIyBnBbYBaOpOBoBHO BNOH (he Bonne 600 mJ)

3aHnHnHnHnHnHnHnHnHnHnHnHnHnHnHnHnHnHnHnHnHnHnHnHnHnHnHnHnHnHnHnHnHnHnHnHnHnHnHnHnHnHnHnHnHnHnHnHnHnHnH
Bkncnnpbop

HarpeB

TOrOBO
BHIMAHNE
- Ipeep nnonb0aHnem MoIOKo DoIIXHO xpaHnBc H XOIOAINbHnke np4 ^ C
TTO,TO6bMonOoBnPbOpE BcERda6bno CBekmpeKOMeHnyemMeHTbero EeKaHO.
DnHJyIeBO BcNHeHSBnMO JIOKPeKoMeKoJeYMe HpeaIOJIb3BoEeMnPpOBeA pR08BCTTcDkH JIKN BcNHeHSBnIMTOI TOO, YOObu DaIyImB OBDxQx K NOVBy IIOHOOBaOyOoBtoIOTOBNK.
PnpuroToBJeHne
KannyHNO Jatte/Topayee Monoko
NoctabBe Taiky Hnno

HaxMMTE KHOKky 5 NoCT

noDnO
HaxMMTE KHOKNY A
Jatte MaKaNaTo
3AMNHOTIE FLYBOKO NODDON MEGKIN
Noctaba tatackan for Maharato
nongbu yinxohoe osetephe
HaxMMTe KhoNky B
BHIMAHHE
- Ecn npbop He honnbayetra, depxmye mKoc7 gn monoka B xonodnBnke
- Temnaparypatropno Monoka:ok.50°C,neha:60°C
YbenueHne o6bema npn6opa
Chinmua HnpnepnHko KpHkyu

Bctabte paatmertnhnnn

PANJAKHTA DpyrKoH KauHU WNAHTB BHEUHO BKMOCTB

Hacpoika noidaBaemoro obbema N BpeMeHH npnroTOBneHna
HarpBaHHa (ctHaapThbIe Bpem: 30 c., o6bem ropqero MoKo: OK. 120 M)
KaHMMte y UepeKbAeTbe KhoNkx A 3 c., nckBa OHa Hn HHeT MOpTBe
Hankmotive kohony Auee paa, 3y0b6 HcTpOHT b0ebam qauu
YCTBHONBITE oBbEM b npndan 5-60 ceky-d
IINBCNEHBAHNA (CTAHdAPThbIE BpEMr: 20 c., o6bem MoNOKa NneBb: OK. 100 mN)
Hakmtey u yepkrkivhe B Khoikky E 3 c., noka OH He HnHET MOPrBt

KHMMTAE XHONKY B EHA
paa, TQbBbA HCTPOM
06bEM YUAN
Yctohacobite obsev 6 m npedjaox 5-30 cekyhd
4.3 C6poc HAcTpoek
Hokkaido Hekkaido 06e Kki Kekkaido 3c.
Pexn3heproc6epexeHn
Eckn kKIOeHHHnnpIb6P He 3y8cTc, 9eep 3 MHyt OH OTAMTHeCKN neepdtB PekHM hhepeoCekHeHH. KhoJI pI aO tMy 4yAotapocn nonepMeHHo.
E E E E E E E E E E E E E E E E E E E E E E E E E E E E E E E E E E E E E E E E E E E E E E E E E E E E E E E E E E E E E E E E E E E E E E E E E E E E E E E E E E E E E E E E E E E E E E E E E E E E E
ФункцябзогнocTи
Eclnpeepnn Kpkiu HkMoctB 1mJ MIOKc yduHOTC3 K np60pa, KOHc CLEAN HauHHeaBb6ctpo MoRr.
YncTk npnbopa
Ipeep qncTkoi
3aIJIHcJIe IMKIOCTy IINI BODAYI KHTOY BODI (He 0000)
Wahnekeite EMKOTCHJ BDMH I BACTBATE WAKKY JIHNKTCK
3BONHTHE MBNKOTs DMBI MOKLA BADB (H) MEHBE 200 MM, HJ 500EH 600 MM
DAnHHb np6op ochaueh DByMa npOrpammmn: nnHHoN KOpOTKoN.
PpOpaMmblnnoB3yOTcB HNOKeCneDyOnx CnyAax:
DHHHAR uCTKx2 KOpOTKAR uCTK
PepedpnpbMncn03oBHaHmpeWbOpa Pocne pnpdoxNtbnHOrO xpaHHBA
KoJrpaVnpB HmncnBcTcTa
B KOJIeHnDn, noocnHdNkctyUaTAL3
EkejHeHbN, nped Hauonom kcnnyatau.
Mexpy dmyaBnAkkamn Hmrtkx, cnnnHTpean
Mexpy DnHn Bollue 30 Mh.
Haxmte KhoKny OHHn paa, TbOHe HauHT KApOTkyo nporpammy (30 c.)
Hakimyute V. Nekchikov KHANKY 50neee 2 c, TOB6 HAI-8TINHHIYN pnparmaya (60 c)
BHIMAHWE
B IENXN NTRHHe, NOOKOHANINPORpAMMBI
DHHHOH NCTK, HEOEADNOPOPNONCKATs
HepdHIOO KPHUHX NHOHOEPaQyIO
RONBOY B OBOEEMKOTB DMOKNA Tpy6k
KHE CIEDYEET MHTS NOCNEHOTBO8AHNA
PEKOMEDyERTCOCTABTNTK HA HOH B TETONIO
BOAE.
HcTka HapyKbix NoBepxHocTe npBopa
PepaHcTKoBbHbTeBnky n03 po3ETK.
Kak toh kpo hpiob octbhtn, npotrte erc cyxow mokk beroukbu. He noh syitc bcpctbaa nna
13BnEkaemie Hs npbopa detaHHE npedhaaHaeHb Iraa cHb nocydooeHm MaHHe.
YdaJIeHHe HAKINN
BHIMAHUE
PpOpaTe DekalbHauaKaXdte 3 MeoAa Hn KaXdte 300 mKnobapTo np6opa.
TnIy TmHApTaYbAaBc6-CpOoKHeHtBHeCpaBBeTeKHa-5MnH Hahat, DekaNuaHauuMOxHO KAK TOHOOPD OCTNHET (CABOTCH KHDOKCA CLEAN. ECM DNDOPGUE
Harpet (ROPAT BCE KHONK), nporpaMaN DEKAIbUNA HnHaHTcTc.
NoroTOBka
OknKIOHnTpeNpIcK
yIyIaJIeNTe BcE
PnIyIaJIeNKeXHOT
KanbHaun

HokkMITE H yekDcBtte KhoKy CLEAN, bckKhTte npooK. JdKtte, KhoK a3gOrpTBCB KhoKm
32AnmHnHeMeXcMbI, 13nNnNnNnNnNnNnNnNnNnNnNnNnNnNnNnNnNnNnNnNnNnNnNnNnNnNnNnNnNnNnNnNnNnNnNnNnNnNnNnNnNnNnNnNnNnNnNnNnNnNn
KAK Tohko Honokai CLEAN Aigoporn, PnpOpb SuSyet Rot08 K Denkai huiHain. HAnMakte k Honokai CYAN
NCTABTSE BOBJHON TAKSHI INI DYQYRO BMCKCTS PND BMTCYKHOB OETFCEPH
Pocne DieKlnnHaHua BbMOTe EMKCTb DInB BoDyI aNtHIOEe CHOba? (PnRcOp He BbKNOHae)
HAKIMTEKHNKNY CLEAN INPPOBADITI 2JKNHA NO5MHTC NCTO BOD
BHIMAHME
一 Y 巴 巴 巴 巴 巴 巴 巴 巴 巴 170BEMKIOEHOBOCTOBCPCEDBIYDANHINHAKIMN.
(2)IPOKCHIKHIHKIHKIIHKIIHKIIHKIIHKIIHKIIHKIIHKIIHKIIHKIIHKIIHKIIHKIIHKIIHKIIHKIIHKIIHKIIHKIIHKIIHKIIHKIIHKIIHKIIHKIIHKIIHKIIHKIIHKIIHKIIHKIIHKIIHKIIHKIIHKIIHKIIHKIIHKIIHKIIHKIIHKIIHKIIHKIIHKIIHKIIHKIIHKIIHKIIHKIIHKIIHK
OTKNO=HTNEP#OOP,XANBKBTEEMKOCbTbN BACDNI INHOOOBAPQHUYO TOIOOKY
a a a a a a a a a a a a a a a a a a a a a a a a a a a a a a a a a a a a a a
1
yblnueaillluljy0
3 3
()
m = 311

j 10000000000000000000000000000000000000000000000
x
y

10000000000000000000000000000000000000000000000000
jia jia xie xie yu hao xue

s#i#i j#j#i#
i#
all all 2017, 2018, all all 2019, all 2020
jia hao jia hao liang jia liang
1
y
()
S11.40 2000 1000000000000000000000000000000000000000000000000000