H130 - Humidifier QLIMA - Free user manual and instructions
Find the device manual for free H130 QLIMA in PDF.
| Product Type | Humidifier |
| Brand | Qlima |
| Model | H130 |
| Supply Voltage | 220-240 V / 50 Hz |
| Output Voltage | 24 V |
| Power Consumption | 16 W |
| Tank Capacity | 1.6 L |
| Max. Vaporization Output | 130 ml/h |
| Dimensions (tall head) | 180 x 180 x 460 mm |
| Dimensions (short head) | 180 x 180 x 300 mm |
| Net Weight | 1.25 kg |
| Capacity Levels | 3 (low, medium, high) |
| Integrated Timer | 2, 4 or 6 hours |
| Auto Shut-off | When tank is empty |
| Spray Heads Supplied | 2 (tall and short) |
| Recommended Water Type | Water with hardness from 40 to 75 mg/L calcium carbonate |
| Maintenance | Daily cleaning of ultrasonic element and tank; regular descaling |
| Safety | Do not add essential oils; do not use without water; do not immerse |
| Warranty | 2 years |
Frequently Asked Questions - H130 QLIMA
User questions about H130 QLIMA
0 question about this device. Answer the ones you know or ask your own.
Ask a new question about this device
Download the instructions for your Humidifier in PDF format for free! Find your manual H130 - QLIMA and take your electronic device back in hand. On this page are published all the documents necessary for the use of your device. H130 by QLIMA.
USER MANUAL H130 QLIMA
Congratulations with the purchase of your humidifier. You have acquired a high quality product which will give you many years of pleasure, if you use it responsibly. Please read the user's manual first in order to ensure the optimum life span of your humidifier. On behalf of the manufacturer, we provide a two-year warranty on material- or manufacturing defects.
Enjoy your humidifier.
Yours sincerely,
PVG Holding B.V.
Customer Service Department
1 PLEASE READ THE USER'S MANUAL FIRST.
2 IF YOU HAVE ANY DOUBTS, CONSULT YOUR DEALER.
GB
58
CONTENTS
- Safety
- Installation
- Operation
a. Capacity settings, on and off
b. Set timer
c. Switch off timer
d. Empty water reservoir
4.Warnings
5. Maintenance
6. Faults
7. Technical Specifications
8. Guarantee Terms and Conditions
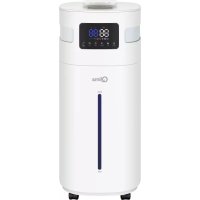
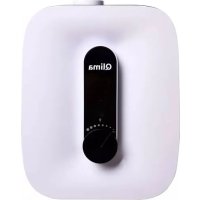
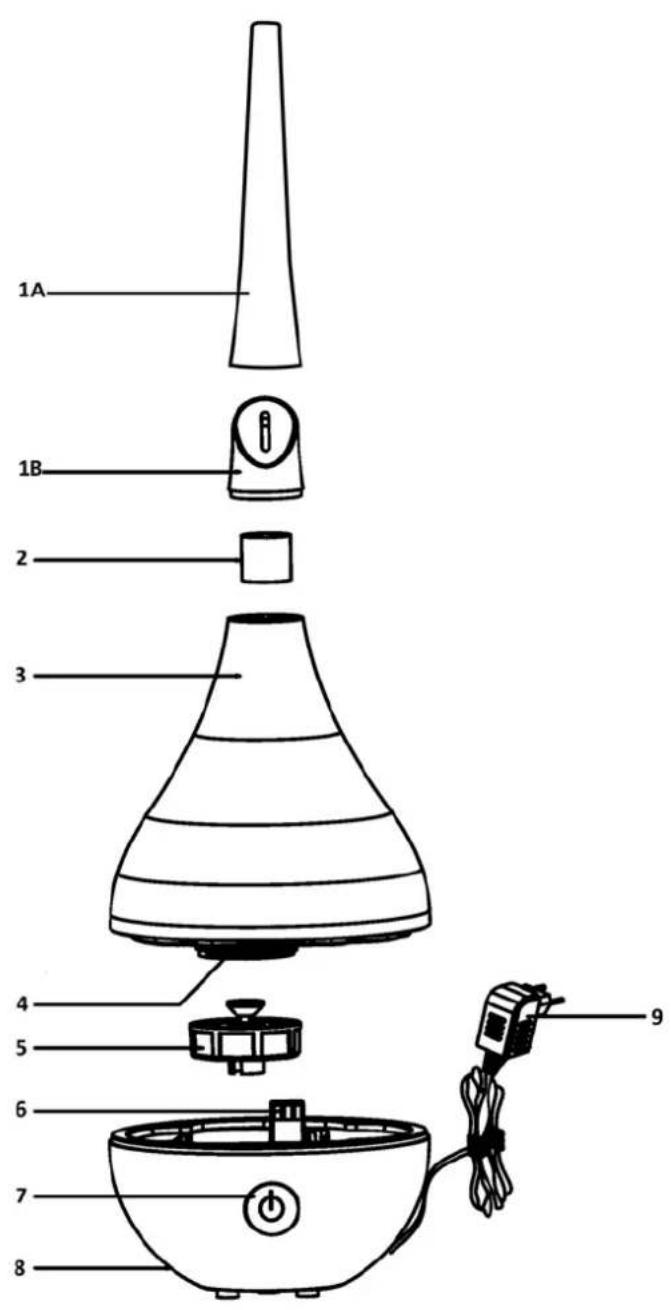
IMPORTANT COMPONENTS
Cold spray nozzle (1A: long / 1B: short)
Cold mist spreader
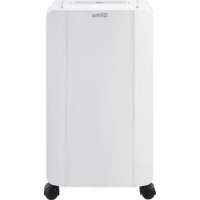
Water reservoir
Water reservoir fillermouth
Screw cap
Air supply to mist nozzle
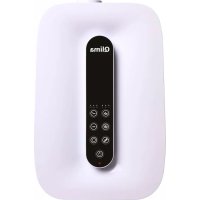
Control button
8 Ultrasonic evaporating unit
9 Transformer
1. SAFETY
- Read this user manual carefully before you using the appliance and keep it for future reference.
- The installation must be completely in accordance with local regulations, ordinances and standards.
- This product is only suitable for use a humidifier in normal indoor household operations.
- The appliance is suitable for mains voltages ranging from 220-240V / 50Hz.
- The capacity of the humidifier depends on the temperature and the humidity in the room.
- This appliance is not intended for use by persons (including children) with reduced physical, sensory or mental capabilities, or lack of experience and knowledge, unless they have been given supervision or instruction concerning use of the appliance by a person responsible for their safety.
- The electricity supply to the device must be checked by a recognized professional if you have any doubts regarding the compatibility.
- Always take the plug out of the socket when the device is not in use.
- Do not insert objects into the openings of the device.
- Keep the spraying mouth from directly facing furniture or electronic equipment to avoid damage.
- Never turn on when waterless.
- Never move the appliance when there's water inside.
-
Never submerge the product in water or other fluids.
-
Due to the emission of steam care should be taken when using the appliance.
- Tap water can only be used when the hardness of the water is between 40 and 75mg of Calcium Carbonate per litre. Water with a higher level of Calcium Caronate will likely cause scaling inside the product and/or on surfaces or items surrounding the product (f.e. furniture). Hard water can cause the product to be damaged and to break. This is not covered by the warranty.
- Use a de-scaling fluid to remove scaling.
- To prevent legionella infections, it is necessary to replace the water in the water tank at least once a week.
- Never turn on the unit, when the water in the water tank is in there for over a week.
- Do not add other fluids to the (demineralised) water to the water container. Fluids like aroma oils could cause damage to the product.
- This appliance can be used by children aged from 8 years and above and persons with reduced physical, sensory or mental capabilities or lack of experience and knowledge if they have been given supervision or instruction concerning use of the appliance in a safe way and understand the hazards involved.
Children shall not play with the appliance. - Cleaning and user maintenance shall not be made by children without supervision.
2. INSTALLATION
1 Place the moisturiser on a sturdy, even surface.
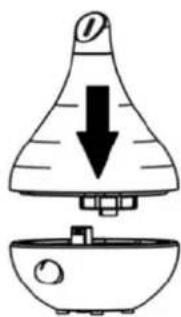
2 Remove the water reservoir by lifting it up. Screw the filler cap from the bottom of the reservoir and remove it.
3 Fill the reservoir with suitable water. Only use water with a hardness rating between 40 and 75mg of calcium carbonate per litre.

4 Tight the filler cap again. Ensure that the cap is tight and does not leak.
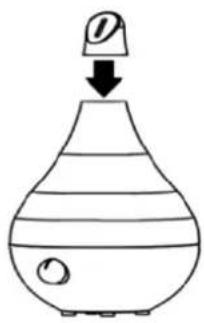
5 Replace the water reservoir on the moisturiser.
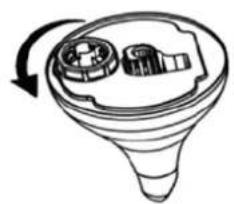
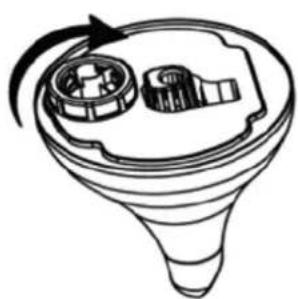
Place of the two supplied cold mist spray nozzles on the tops of the water reservoir.
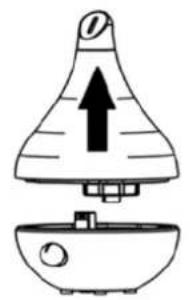
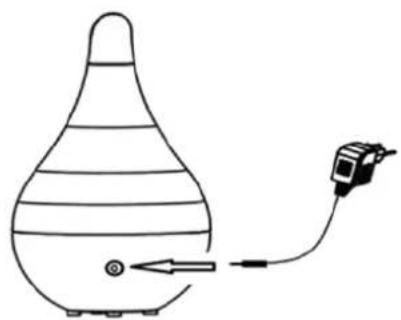
7 Connect the plug of the adapter cord to the adapter socket on the moisturiser (indicated by the arrow).
8 Check that the wall socket has the correct voltage for the moisturiser.
9 Connect the adapter to the power supply by plugging it into the wall socket.
The moisturiser is now ready for use.
3. OPERATION
A. SWITCHING ON AND OFF AND CHANGING THE SETTINGS.
The moisturiser is turned on by pressing the control button on the front of the device.
The moisturiser has three moisturising settings which can be set using the control button.
a. By pressing the control button once it will light up red. The moisturiser operates at its lowest setting.
b. By pressing the control button it will light up green. The moisturiser operates at its medium setting.
c. By pressing the control button a third time it will light up blue. The moisturiser operates at its highest setting.
d. Switch the device off by pressing the control button again when it is running at its highest capacity (blue).
| Press Control Button | Control Button Colour Setting | |
| 1x Red Low | ||
| 2x Green Medium | ||
| 3x Blue High | ||
| 4x - Switched off |
Overview table for switching to the various moisturising settings.
B. SET THE TIMER
The moisturiser has a built in timer that can be set to switch off after 2,4, or 6 hours. The timer can be set for the lowest, middle and highest setting.

TAKE CARE
If the timer function is switched on then the settings can no longer be modified. Choose the desired setting before activating the timer.
Press the control button and keep it depressed (for about 3 seconds) once the moisturiser is running, until the control button starts to flash. The timer function is now activated and the moisturiser will switch off automatically after 2 hours.
2 By pressing the control button again (control button will flash green twice) the moisturiser will be set to switch off after 4 hours.
3 By pressing the control button once again (control button will flash blue twice) the moisturiser will be set to switch off after 6 hours.
4 By pressing the control button once again (control button will flash red twice) the moisturiser will default to switch off after 2 hours.
| Press Control Button | Button Flashes 2x uitschakeltijd | |
| Hold depressed for 3 seconds | Red 2 hours | |
| Once Green 4 hours | ||
| Twice | Blue 6 hours | |
| Three times | Red Back to 2 hours | |
Overview table for switching to the various moisturising settings.

TAKE CARE
Once the timer function is switched on then the settings can no longer be modified. Choose the desired setting before activating the timer.
C. SWITCH OFF TIMER
By pressing the control button and holding it depressed for 3 seconds the timer function is switched off, it will give a short beep.
D. EMPTY WATER RESERVOIR
The control button will flash for 10 seconds if the water reservoir is empty. Simultaneously the moisturiser will emit a beep. The moisturiser will automatically turn off. Full the water reservoir as described in the installation chapter and switch the moisturiser on again.

TAKE CARE
When removing the water reservoir drops of water at the bottom of the reservoir could cause water damage. Dry the bottom of the water reservoir before moving it.

TAKE CARE
When removing the water reservoir from the moisturiser all settings will be lost.
4. WARNINGS
1 Never fill the water reservoir with water hotter than 30^
2 Never fill the reservoir through the mist nozzle.
3 Ensure that the filler cap of the reservoir is not leaking. Close the filler cap tightly.
4 Ensure that the device and the reservoir are always clean. Remove any dirt before using the device.
5 Do not position the outlet of the cold mist nozzle too close to equipment, furniture etc. to avoid water damage.
6 Check the actual air humidity regularly in the room to prevent any damage to furniture, equipment etc. from a too high humidity.
5. MAINTENANCE
Unplug the adapter from the wall socket before carrying out any maintenance, so that the device is dead.
1 Clean the ultrasonic evaporation element and the water reservoir with a soft cloth. Then rinse the water reservoir well with tap water and dry the ultrasonic evaporation element with a soft cloth.
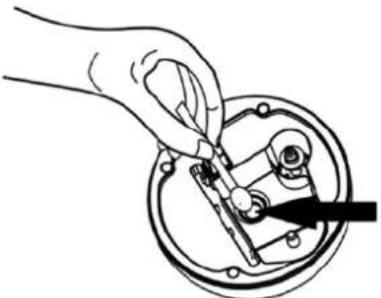
2 Clean the ultrasonic element every time you fill the water reservoir (indicated by arrow). Carefully remove any calcium and other deposits with the supplied brush.
3 Regularly clean the outside of the moisturiser with a slightly damp soft cloth.
Regularly clean the filter in the filler cap.
6. FAULTS
| Fault Cause Solution | ||
| Indicator light fails to light up when pressing the control button. | Missing power supply. Restore the power supply. | |
| Indicator light is on and the device emana-tes air but no mist. | The water reservoir is empty Fill | the water reservoir |
| The water level sensor is not being detected. | Position the bottom of the water reservoir correctly so that the sensor is detected. | |
| Clean the level float. | ||
| Mist with unpleasant smell | Water reservoir not clean | Open the filler cap and leave it open for 12 hours. Clean the tank and fill it with clean water. |
| Mist level remains low | There are calcium deposits on the ultrasonic element | Clean the ultrasonic element and fill the water reservoir with clean water. |
| Mist is leaking from the water reservoir | The bottom of the water reservoir is not connected properly. | Position the bottom of the water reservoir properly. |
7. TECHNICAL SPECIFICATIONS
| Model H 130 | ||
| Mains 220-240/50Hz | ||
| Output voltage 24V | ||
| Electrical consumption 16 W | ||
| Capacity water container 1.6 l | ||
| Maximum evaporation capacity 130 ml | ||
| Dimensions mm (w x d x h) | 180x180x460 long evaporation nozzle | 180x180x300 short evaporation nozzle |
| Net weight 1.25 KG | ||
8. CONDITIONS OF WARRANTY
There is a two-year warranty on your humidifier from the date of purchase. All material or manufacturing defects will be repaired free of charge. The following applies:
- All claims for compensation, including consequential damage, will not be entertained.
- Any repairs or replacement of components during the warranty period will not result in an extension of the warranty period.
- The warranty will expire if any alterations have been made, not genuine components have been fitted or if the humidifier has been repaired by a third party.
- Components subject to normal wear and tear, such as the air filter, are not covered by the warranty.
- The warranty is only valid on presentation of the original, unaltered, and date stamped purchase receipt.
- The warranty does not cover damage caused by actions that deviate from those as described in the user's manual or by neglect.
- Transportation costs and the risks involved during the transportation of the humidifier or components shall always be for the account of the purchaser.
To prevent unnecessary expenses, we recommend that you always carefully read the user's manual first. If this does not provide a solution, take the humidifier to your distributor for repair.
Do not dispose of electrical appliances as unsorted municipal waste, use separate collection facilities. Contact your local government for information regarding the collection systems available. If electrical appliances are disposed of in landfills or dumps, hazardous substances can leak into the groundwater and get into the food chain, damaging your health and well-being. When replacing old appliances with new once, the retailer is legally obligated to take back your old appliance for disposal at least for free of charge.


INTERNET
In order to better be able to be of service to you the most recent version of the user, installation and/or service guide can be downloaded from www.qlima.com.
Egregio ignore, gentile signora,
C. DEAKTIVERE TIDSINNSTILLING
Distributed in Europe by PVG Holding B.V.
Benotigen Sie weitere Informationen oder treten Probleme auf, besuchen Sieitte unsere Website www.qima.com, oder setzen sie sich mit unserem Kundendienst in Verbindung (Telefonnummer auf www.qima.com).
For alle yderligere opysninger ell er ved eventuelle problemer med apparatet henvises til www.qlima.com ell det lokale Kundecenter (telefonumre findes i www.qlima.com).
Si necesita informacion o si Tiene algo problema, visite nuestra pagina Web www.qlma.com, o pongase en contacto con el service客户提供 (hallar a el numero de téléphone en www.qlma.com).
Si you souhaitez obtenir des informations supplémentaires ou si you rencontrez un probleme, rendez-vous sur notre site Web (www.qlima.com) ou contactez notre service client (vous trouvezEZ l'adresse et numero de telephone sur www.qlima.com).
FIO Jos haluat huoltoapua, lisatietoja tai laitteen kanssa tulee ongelmia, tutustu verkkosivustoon oositteessa www.qlima.com tai kysy nuvoa PVG kuluttajapalvelukesukksesta (www.qlima.com).
If you need information or if you have a problem, please visit the our website (www.qlima.com) or contact our sales support (you find its phone number on www.qlima.com)
Per informazioni e in caso di problemi, visitate il site Web www.qlima.com oppure contattate il Centro Assistenza Clienti (per conoscere il numero di Telefono, consultate www.qlima.com).
Hvis du trenger informasjon, ell hvis du har et problem med produktet, kan du gtil nettsidene www.qlima.com. Alternativt kan du kontakte med PVG' forbrukertjeneste (telefonnurnmeret i www.qlima.com).
Nls u informatie nodig hebit of als u een probleem hebit, bezoek dan de once website (www.qlima.com) of neem contact op met de afdeling sales support (adres en telefoon op www.qlima.com).
Se necessitar de informacoes ou se tiver problemas, visite o Web site www.qlima.com ou contacte o Centro de Assistencia (nuno r de telone o www.qlima.com)
W przypadku problemów i welu uzyskania szczegówych informaci odwiedź strone internetowej Qlima dostepna pod adresem www.qlima.com lub skontaktuj sie z Centrum kontaktkowy Qlima (www.qlima.com)
Om du behover service aller information aller har problem med apparaten kan du besoka www.qlma.com eller kontakta Qlma kundtjanst (du hittar Telefonumret pa www.qlima.com).
Cze zite dadtne informacie, obici sptno mesto podjetna na naslovu wwwqlima.com aliPokliite na telefonsko (wwwqlima.com).
Daha fazla bilgiye ihtiayc duyaransiz veya bir sorunla karsilasiraniz, www.qlma.com adesindeki Qlma Internet sitesini ziyaret edin veya ükenizde bulunan Qlma musteri merkeziyle iletim kurun (telefon numarasini: www.qlma.com).