
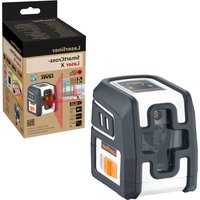
PowerCrossLaser 8 S - Laser level Laserliner - Free user manual and instructions
Find the device manual for free PowerCrossLaser 8 S Laserliner in PDF.
| Product type | Laser level |
| Brand | Laserliner |
| Model | PowerCrossLaser 8 S |
| Dimensions (W x H x D) | 130 x 225 x 130 mm |
| Weight (with battery) | 1.6 kg |
| Power supply | Rechargeable Li-ion battery |
| Operating time (all lasers on) | Approx. 8 h |
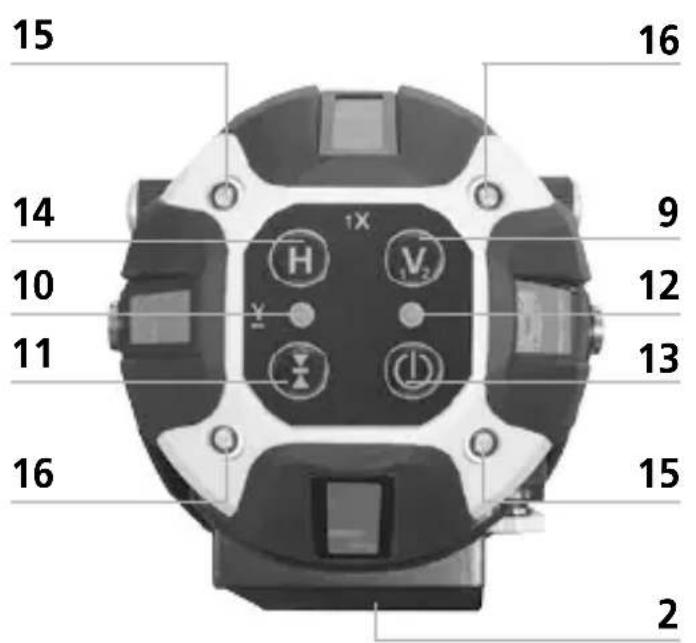
| Charging time | Approx. 6 h |
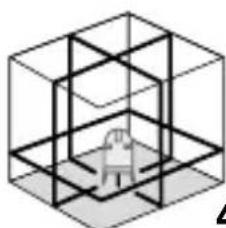
| Number and direction of lasers | 4 horizontal lines (360°), 4 vertical lines, 1 plumb laser |
| Self-leveling range | 3° |
| Accuracy | ± 1 mm / 10 m |
| Wavelength | Lines: 635 nm, Plumb: 650 nm |
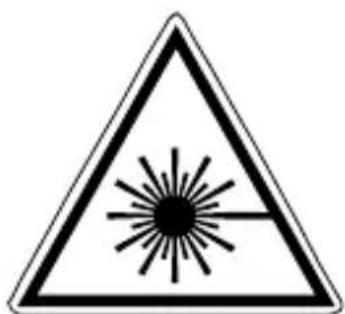
| Laser class | 2M, power < 5 mW (lines); 2, ≤ 1 mW (plumb) |
| Main functions | 8-line cross laser, self-leveling, motorized tilt, IR remote control, receiver mode, transport lock, Anti-Shake |
| Operating temperature | 0°C to +50°C |
| Storage temperature | -10°C to +70°C |
| Maintenance and cleaning | Clean with a soft, dry cloth. Do not use solvents. |
| Safety | Do not look into the beam. Keep out of reach of children. Use only with the supplied charger. |
| Repairability / Spare parts | Contact Umarex-Laserliner customer service. |
Frequently Asked Questions - PowerCrossLaser 8 S Laserliner
User questions about PowerCrossLaser 8 S Laserliner
0 question about this device. Answer the ones you know or ask your own.
Ask a new question about this device
Download the instructions for your Laser level in PDF format for free! Find your manual PowerCrossLaser 8 S - Laserliner and take your electronic device back in hand. On this page are published all the documents necessary for the use of your device. PowerCrossLaser 8 S by Laserliner.
USER MANUAL PowerCrossLaser 8 S Laserliner
Read the operating instructions and the enclosed brochure „Guarantee and additional notices" completely. Follow the instructions they contain. Safely keep these documents for future reference.
High-precision cross-line laser with 8 ultra bright laser lines and plumb laser
- Homogeneous 360^ laser line: The 4 horizontal laser diodes project a homogeneous laser line. This enables the device to be used like a rotary laser.
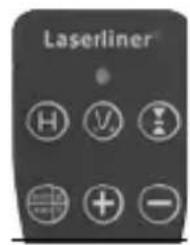
- IR remote control allows the manual slope function for aligning inclines to be controlled. The relevant axes are visually displayed via LEDs.
- A simple, precise plumb function is afforded by the additional plumb laser at the bottom and the laser cross at the top.
- Out-Off-Level: is indicated by optical signals when the unit is outside its self-leveling range.
- The pivoted housing can be turned with a vernier adjustment mechanism and a horizontal circle to permit exact positioning of laser lines.
- Automatic levelling range 3^ , accuracy 1mm / 10m .
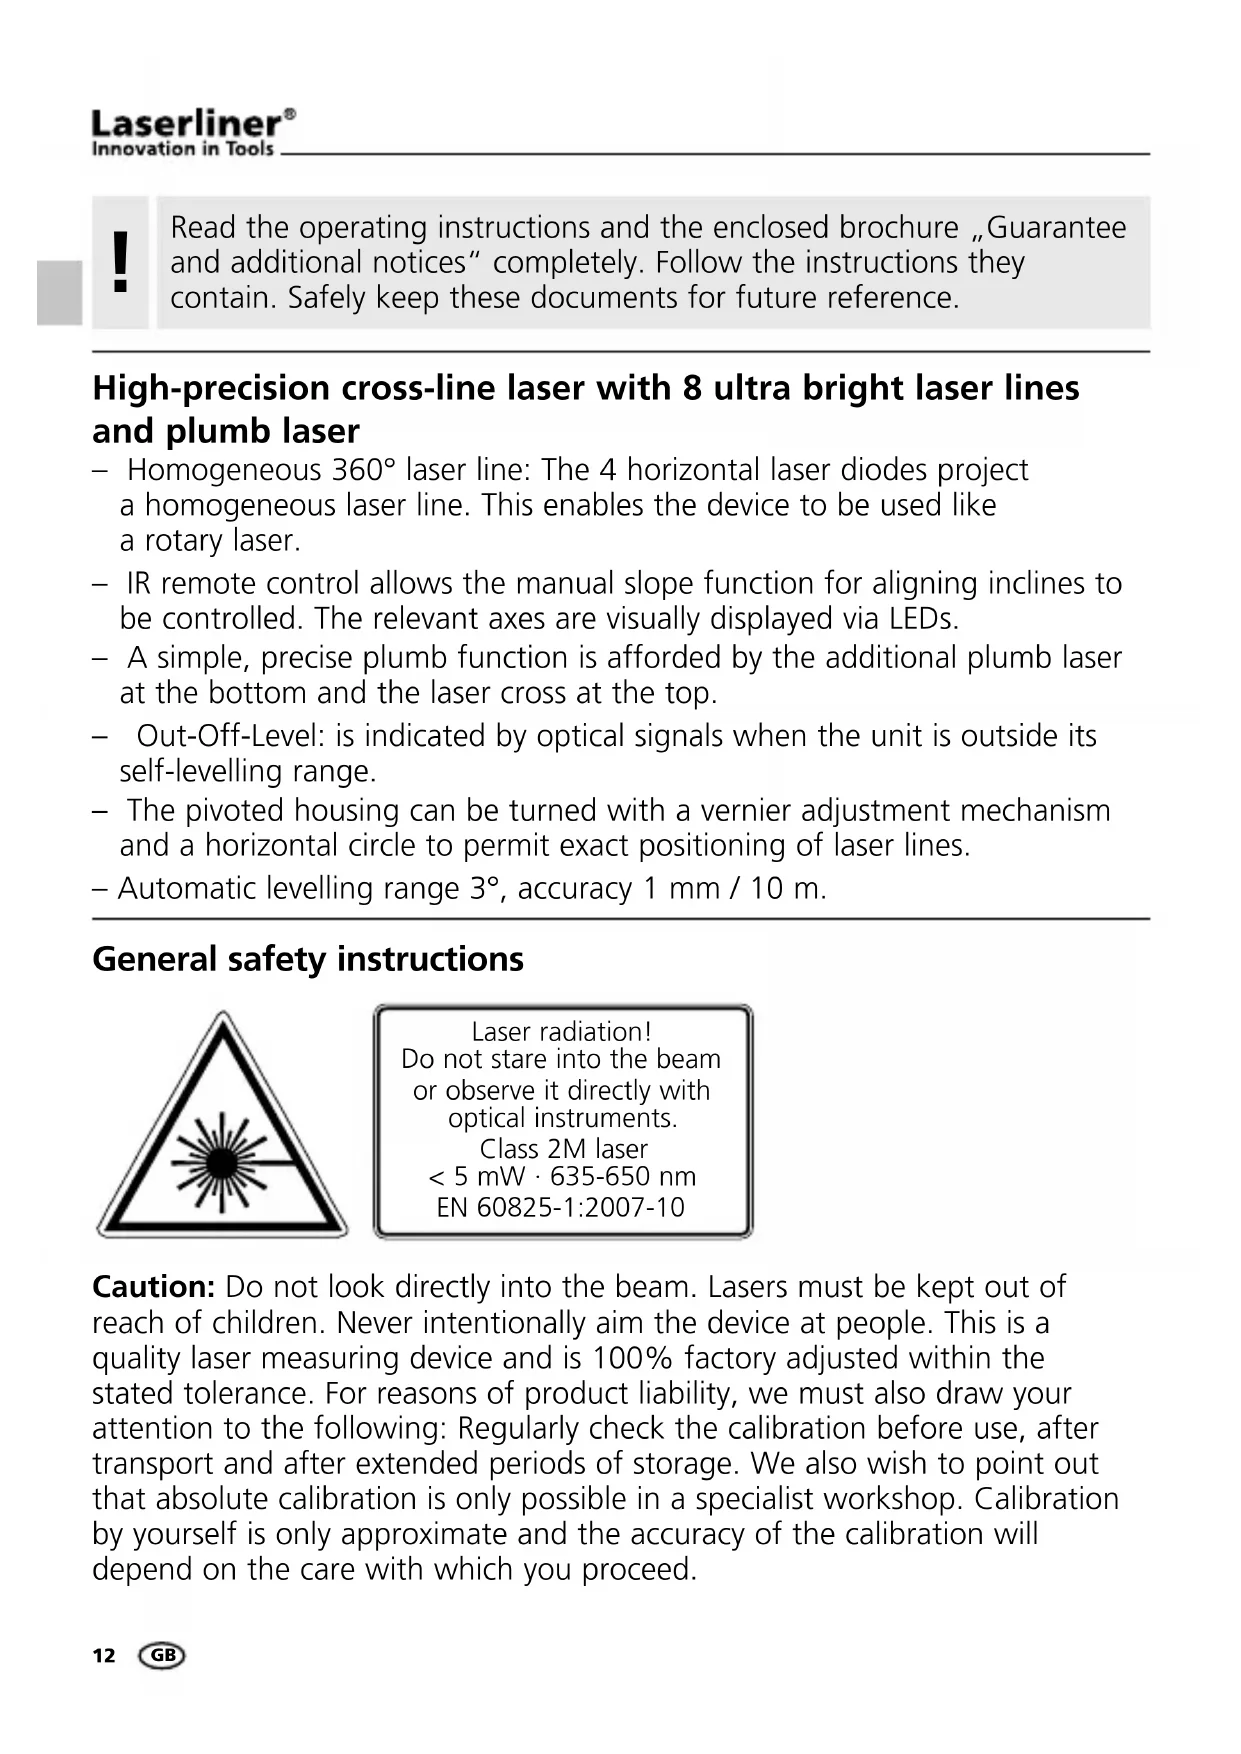
General safety instructions
Caution: Do not look directly into the beam. Lasers must be kept out of reach of children. Never intentionally aim the device at people. This is a quality laser measuring device and is 100% factory adjusted within the stated tolerance. For reasons of product liability, we must also draw your attention to the following: Regularly check the calibration before use, after transport and after extended periods of storage. We also wish to point out that absolute calibration is only possible in a specialist workshop. Calibration by yourself is only approximate and the accuracy of the calibration will depend on the care with which you proceed.
Special product features
SENSOR AUTOMATIC
Electronic vials and positioning motors controlled by temperaturestable sensors for automatic alignment of devices. The device is brought into initial position and aligns itself autonomously.

ANTI SHAKE
This function is automatically enabled when the sensor automatic is switched on. This easily enables the horizontal or vertical levelling at a required hight, for instance in connection with a crank tripod or wall mount. Also, the laser can be used on vibrating surfaces and in windy conditions.
Transport LOCK: The device is protected by a special motor
brake during transport.

verBright+
Laser diodes of the highest performance class produce extremely
bright laser lines. They remain visible even on surfaces at great distances or on dark surfaces as well as under bright ambient light conditions.

RX-READY technology enables line lasers to be used even in
unfavourable light conditions. The laser lines pulsate at a high frequency and this can be picked up by special laser receiversover long distances.
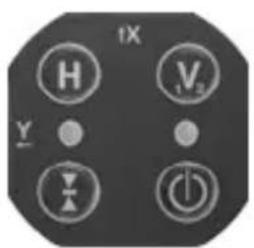
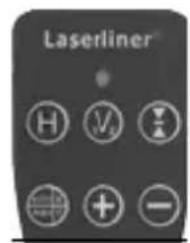
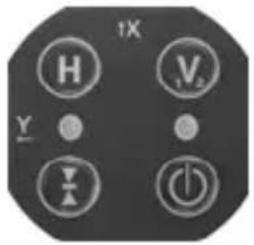
Number and direction of the lasers
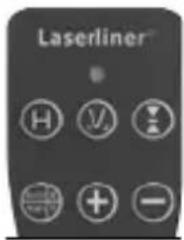
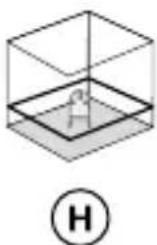
H = horizontal laser V = vertical laser D = downpoint S = Slopefunction

4H 4V 1DS
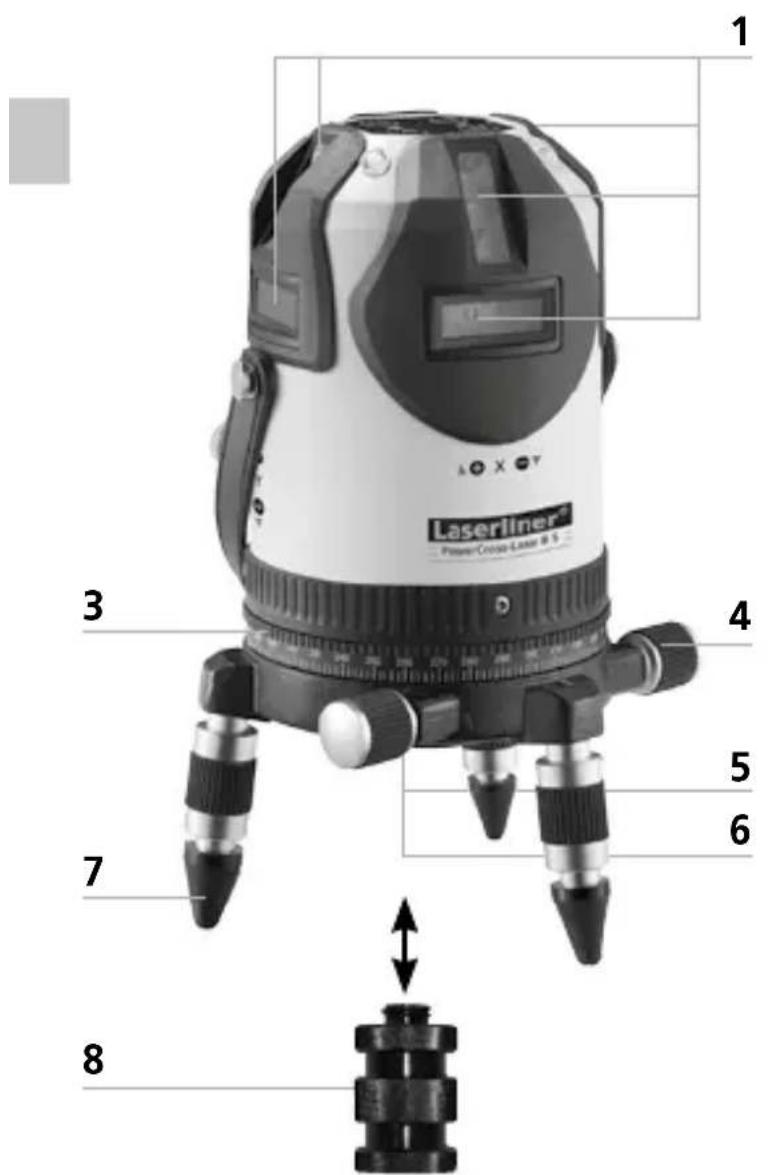
1 Laser emitting window
2 Lithium-ion rechargeable battery (detachable)
3 360^ horizontal circle
4 Vernier adjustment
5 5 / 8'' thread (underside)
6 Window for plumb laser (underside)
7 Adjustable feet with removable rubber caps
8 Adapter for crank tripods and teleskopic stands
9 Vertical laser lines
10 LED Hand receiver mode
11 Hand receiver mode
12 LED status indicator / automatic mode (LED blinks during set-up phase)
13 ON/OFF button
14 Horizontal laser lines
15 LEDs green: X-axis active
16 LEDs red: Y-axis active
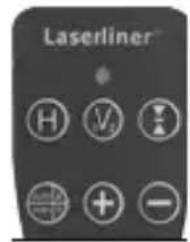
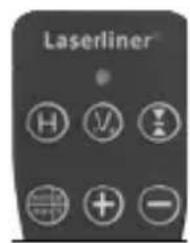
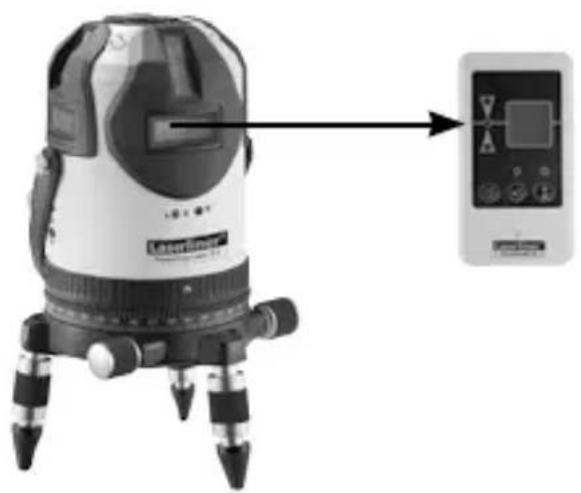
PowerCross-Laser 8 S
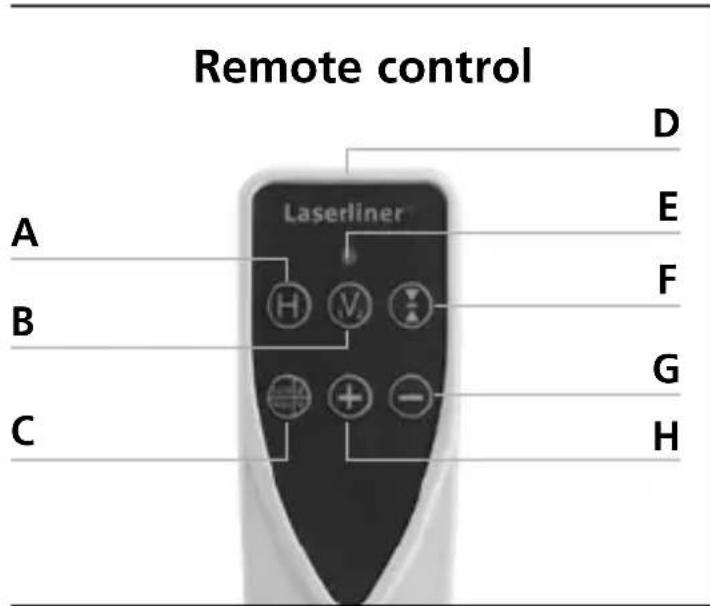
A Horizontal laser lines
B Vertical laser lines
C auto/man function / Incline X/Y axes
D Infrared signal emitter
E LED status indicator
F Hand receiver mode
G Move X/Y axes
H Move XY axes
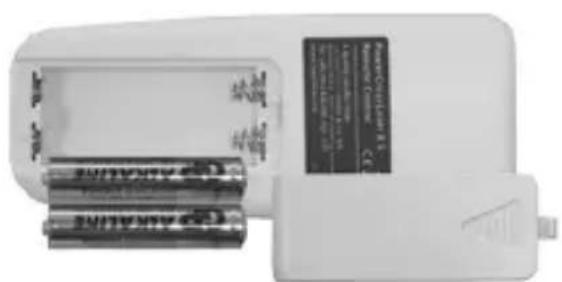
Use of lithium-ion rechargeable battery
Before using the laser for the first time, insert the battery in the device and fully charge (at least 6 hours). Connect the battery charger to charge the battery. The LED of the battery pack lights red while the battery is charging. When the LED changes to green, charging is complete. When the laser lines blink slowly, the battery is low. In that case, recharge the battery. The rechargeable battery can either be charged when it is not inserted in the device or when the device is in use.

- The battery may only be charged with the battery charger provided and used only in this laser device. Any other use may cause injury or fire.
- Make sure there are no conductive objects in the vicinity of the battery contacts. Short-circuiting of these contacts can cause burn injuries or fire.
- Do not open the rechargeable battery. This could cause short-circuits.
Insert batteries into the remote control
- Observing the correct polarity.
2Positioning laser lines
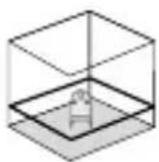
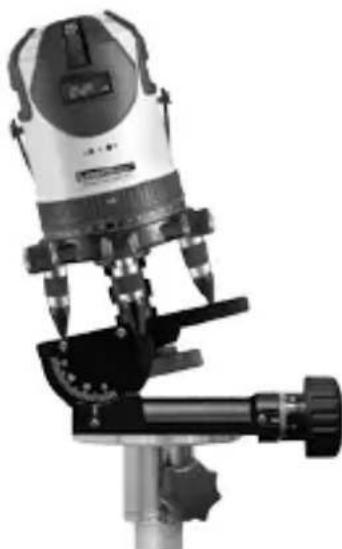
The top section of the laser unit can be turned on the plinth to align the lasers approximately. Precise positioning can then be done with the Vernier adjustment (4). The adjustable feet (7) allow the device to be positioned on sloping surfaces.
The freely rotatable horizontal circle (3) makes it easy to turn the device to the required angle. Simply set the scale to zero, then rotate the device to the angle you want.

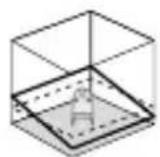
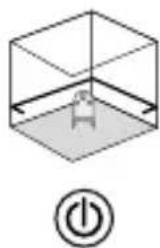
3Horizontal and vertical levelling
Switch the laser device on. The automatic sensor is now active and will level the laser device automatically. As soon as device-levelling is completed and the auto LED illuminates continuously, horizontal or vertical object levelling can be carried out. Maximum accuracy is attained when device-levelling is completed.
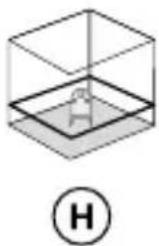
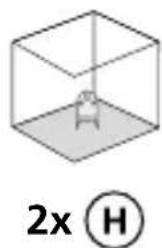
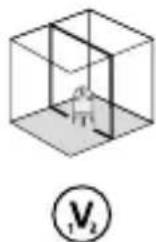
Lasers can be switched on and off individually with the H or V1/2 buttons (press buttons briefly).


If the unit is placed at an excessive angle (out of its 3^ range), the lasers will blink. Align the device using the adjustable feet (7) or place on a more level surface.
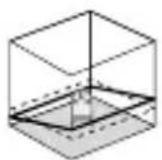
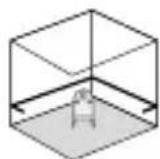
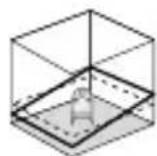
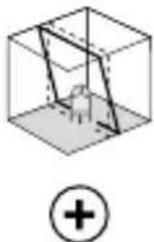
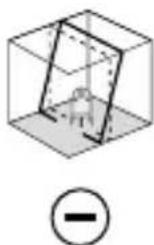
4 slope function up to max. 3^
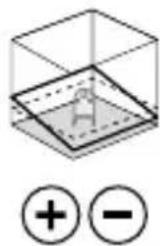
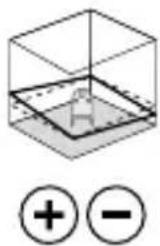
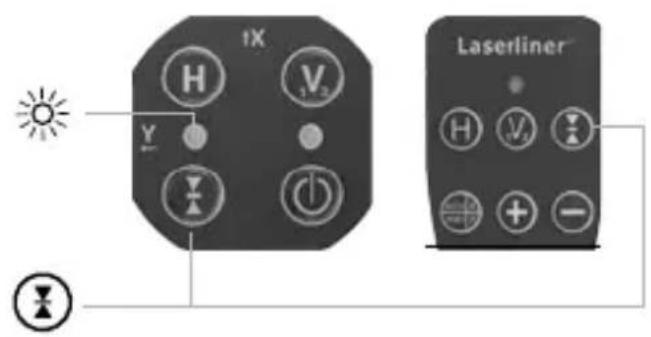
Activation of the slope function deactivates the automatic sensor. In addition, press the auto/man button until the LEDs of the x-axis (15) light up. Motor-driven adjustment of the slope can now be carried out. Hold the plus or minus buttons down continuously to adjust slope. When the lasers blink, the maximum slope range has been reached. The X/Y button (pressed briefly) is used to switch between axes. Refer to the illustrations below.
!
For the slope function, laser lines are no longer aligned to the horizontal or vertical plane. This is a specific peculiarity of adjusted laser lines. To reinstate horizontal or vertical levelling, deactivate the slope function. To do so, switch the device off and back on or keep the auto/man button pressed until the laser lines move automatically.
Horizontal levelling adjustment up to a max. of 3^ (X, Y axis)
Adjustment of the X axis up to a max. of 3^
The LEDs of the X-axis (15) light up in green.


Adjustment of the Y axis up to a max. of 3^
The LEDs of the Y-axis (16) light up in red.


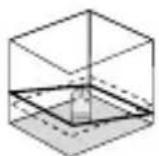


Adjustment of X/Y axes
The LEDs of the X-axis (15) light up in green.
The LEDs of the Y-axis (16) light up in red.


Adjust vertical slope, to a max. of 3^ (Z axis)


D slope function >3^
Steeper slopes can be set using the angle plate, which is available as an optional extra (product ref. 080.75). To this end you need to use a crank tripod, such as the 300~cm professional crank tripod, product ref. 080.34. Refer to the illustrations below.
TIP: Set the angle plate to the zero position and allow the device to align itself automatically. Then press the auto/man button to switch the automatic sensor off. Finally, incline the device to the angle you require.
Slope adjustment >3^
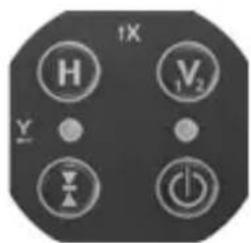


hand receiver mode
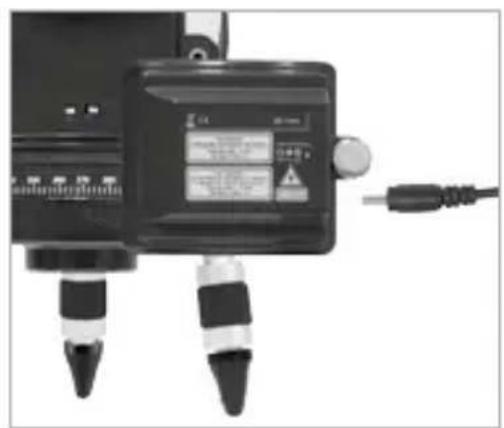
Optional: Working with the laser receiver RX
Use an RX laser receiver (optional) to carry out levelling at great distances or when the laser lines are no longer visible.
To work with a laser receiver, switch the line laser into hand receiver mode with the Hand receiver mode button (11). The laser lines will now pulsate with high frequency, making the laser lines darker. The laser receiver RX can detect these pulsating laser lines.
Hand receiver mode can be used for horizontal or vertical levelling as well as for slope functions.

Follow the operating instructions of the corresponding laser receiver.
EU directives and disposal
This device complies with all necessary standards for the free movement of goods within the EU.
This product is an electric device and must be collected separately for disposal according to the European Directive on waste electrical and electronic equipment.
Further safety and supplementary notices at:
www.laserliner.com/info
Preparing the calibration check:
It is possible for you to check the calibration of the laser. To do this, position the device midway between 2 walls, which must be at least 5 metres apart. Switch the device on (LASER CROSS ON). The best calibration results are achieved if the device is mounted on a tripod.

The automatic sensor must be active in order to check calibration and to complete device-levelling. See Section „Horizontal and vertical levelling" about this.
- Mark point A1 on the wall.
- Turn the device through 180^ and mark point A2. You now have a horizontal reference between points A1 and A2.

Performing the calibration check:
- Position the device as near as possible to the wall at the height of point A1.
- Turn the device through 180^ and mark point A3. The difference between points A2 and A3 is the tolerance.
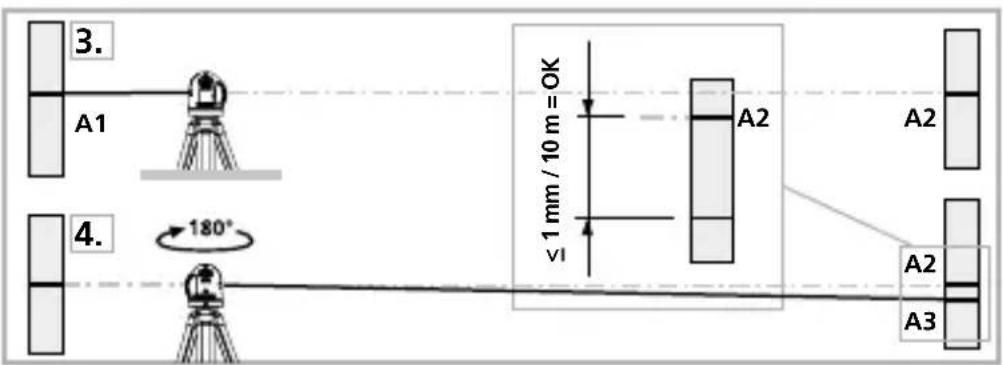

When A2 and A3 are more than 1mm / 10m apart, an adjustment is necessary. Contact your authorised dealer or else the UMAREX-LASERLINER Service Department.
Checking the vertical line: Position the device about 5m from a wall. Fix a plumb bob with a line of 2.5m length on the wall, making sure that the bob can swing freely. Switch on the device and align the vertical laser to the plumb line. The precision is within the specified tolerance if the deviation between the laser line and the plumb line is not greater than ± 1.5mm .
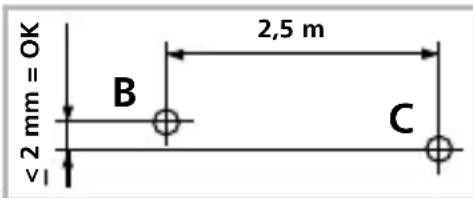
Checking the horizontal line:
Position the device about 5m from a wall and switch on the cross laser. Mark point B on the wall. Turn the laser cross approx. 2.5m to the right and mark point C. Check whether the
horizontal line from point C is level with point B to within ± 2mm . Repeat the process by turning the laser to the left.

Regularly check the adjustment before use, after transport and after extended periods of storage.
| Technical data | |
| Self-levelling range 3° | |
| Precision ± 1 mm / 10 m | |
| Laser wavelength linelaser / plumb laser 635 nm / 650 nm | |
| Laser class / line laser output power 2M / < 5 mW | |
| Laser class / plumb laser output power 2 / ≤ 1 mW | |
| Power supply Lithium-ion rechargeable battery | |
| Battery operating time (all lasers on) approx. 8 h | |
| Battery recharging time approx. 6 h | |
| Weight (incl. rechargeable battery) 1,6 kg | |
| Dimensions (W x H x D) 130 x 225 x 130 mm | |
| Operating temperature 0°C ... + 50°C | |
| Storage temperature -10°C ... + 70°C | |
| Subject to technical alterations 04/2014 | |
!
- High-precision cross-line laser with 8 ultra bright laser lines and plumb laser
- General safety instructions
- Special product features
- SENSOR AUTOMATIC
- ANTI SHAKE
- verBright+
- Number and direction of the lasers
- PowerCross-Laser 8 S
- Use of lithium-ion rechargeable battery
- Insert batteries into the remote control
- 2Positioning laser lines
- 3Horizontal and vertical levelling
- slope function up to max. 3^ °
- Horizontal levelling adjustment up to a max. of 3° (X, Y axis)
- Adjustment of the X axis up to a max. of 3°
- Adjustment of the Y axis up to a max. of 3°
- Adjustment of X/Y axes
- Adjust vertical slope, to a max. of 3° (Z axis)
- D slope function >3°
- Slope adjustment >3°
- hand receiver mode
- Optional: Working with the laser receiver RX
- EU directives and disposal
- Preparing the calibration check:
- Performing the calibration check:
- Checking the horizontal line:
Brand : Laserliner
Model : PowerCrossLaser 8 S
Category : Laser level