PCES 1008 - Coffee machine PROFICOOK - Free user manual and instructions
Find the device manual for free PCES 1008 PROFICOOK in PDF.
| Product Type | Espresso and Cappuccino Coffee Machine |
| Brand | ProfiCook |
| Model | PCES 1008 |
| Power Supply | 230 V~, 50 Hz, 1000 W |
| Pressure | 15 bar |
| Water Tank Capacity | 1.5 liters |
| Net Weight | Approx. 4.7 kg |
| Dimensions (approx.) | 30 x 25 x 35 cm |
| Coffee Type | Ground coffee (espresso) |
| Main Functions | Espresso, cappuccino, steam nozzle, cup warming plate |
| Push Buttons | ON/OFF, PUMP/STANDBY, STEAM/ESPRESSO |
| Indicator Lights | Status light (on), heating light (temperature reached) |
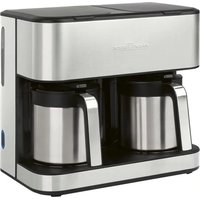
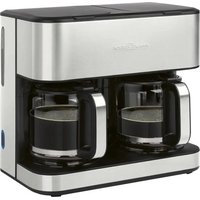
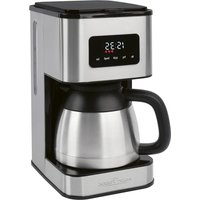
| Included Parts | Filter holder, 2 filter baskets (1 cup and 2 cups), tamper spoon/key, removable tank, detachable steam pipe, nozzle cover, drip tray |
| Maintenance | Clean parts with soapy water, regular descaling |
| Safety | Automatic shutdown (via button), overheat protection, hot surface |
| Housing Material | Plastic, stainless steel (hot parts) |
| Intended Use | Domestic and similar (shop kitchen, office) |
Frequently Asked Questions - PCES 1008 PROFICOOK
User questions about PCES 1008 PROFICOOK
0 question about this device. Answer the ones you know or ask your own.
Ask a new question about this device
Download the instructions for your Coffee machine in PDF format for free! Find your manual PCES 1008 - PROFICOOK and take your electronic device back in hand. On this page are published all the documents necessary for the use of your device. PCES 1008 by PROFICOOK.
USER MANUAL PCES 1008 PROFICOOK
Location of Controls 3
General Safety Instructions 56
Special safety information for this unit 57
Intended use 57
Supplied parts. 57
Unpacking the appliance 57
Controls 58
Instructions 58
Placement 58
Push Buttons (10/11/12) 58
Electric Connection. 58
On/Off 58
Operation 58
Attach / Detach Filter Holder 58
First Use / Bleeding 59
Making Espresso 59
Making Cappuccino 60
Cleaning 62
Group Head And Rubber Seal 62
Accessories 62
Decalcification 62
Storage. 63
Troubleshooting 63
Technical Data 64
Disposal -
Meaning of the "Wheelie Bin" Symbol 65
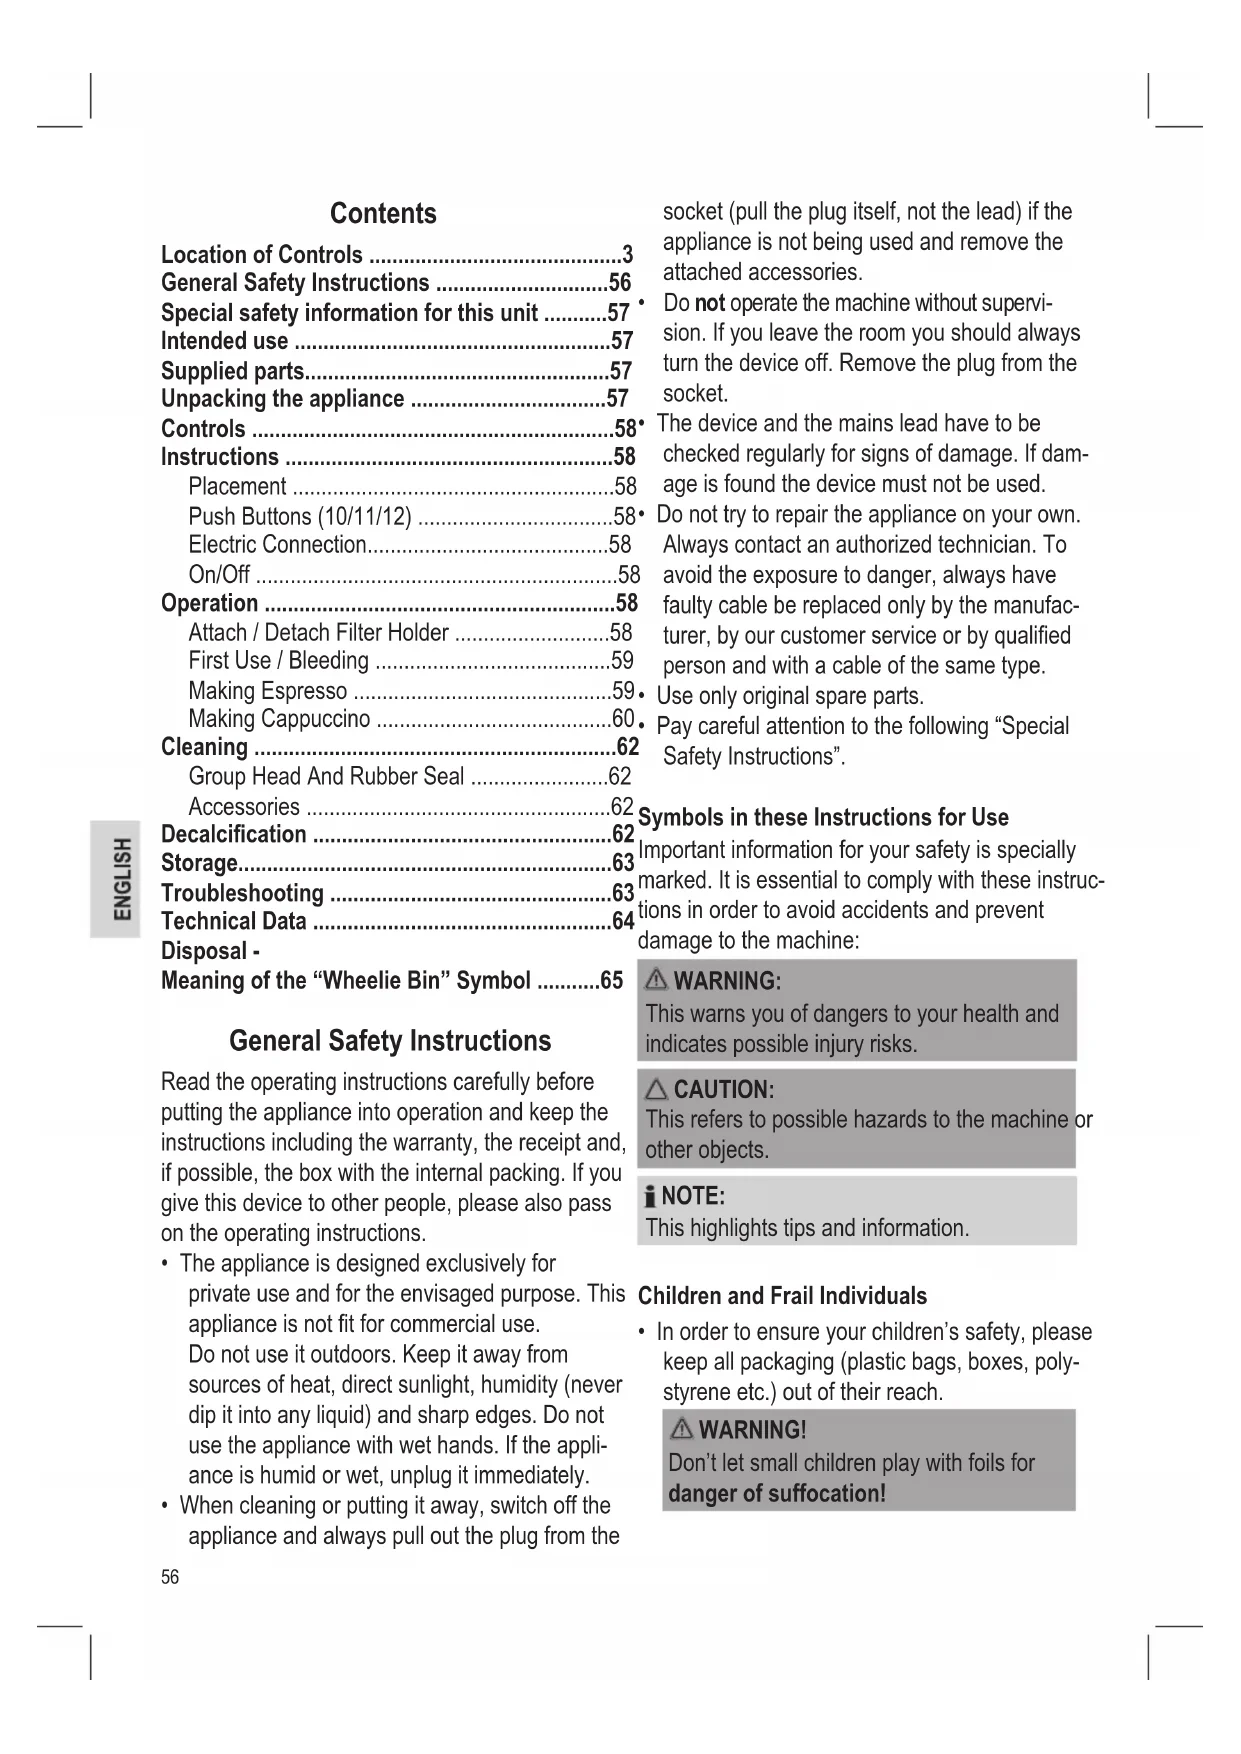
General Safety Instructions
Read the operating instructions carefully before putting the appliance into operation and keep the instructions including the warranty, the receipt and, if possible, the box with the internal packing. If you give this device to other people, please also pass on the operating instructions.
- The appliance is designed exclusively for private use and for the envisaged purpose. This appliance is not fit for commercial use.
Do not use it outdoors. Keep it away from sources of heat, direct sunlight, humidity (never dip it into any liquid) and sharp edges. Do not use the appliance with wet hands. If the appliance is humid or wet, unplug it immediately.
- When cleaning or putting it away, switch off the appliance and always pull out the plug from the
socket (pull the plug itself, not the lead) if the appliance is not being used and remove the attached accessories.
Do not operate the machine without supervision. If you leave the room you should always turn the device off. Remove the plug from the socket.
The device and the mains lead have to be checked regularly for signs of damage. If damage is found the device must not be used.
- Do not try to repair the appliance on your own.
Always contact an authorized technician. To avoid the exposure to danger, always have faulty cable be replaced only by the manufacturer, by our customer service or by qualified person and with a cable of the same type.
- Use only original spare parts.
Pay careful attention to the following "Special Safety Instructions".
Symbols in these Instructions for Use
Important information for your safety is specially marked. It is essential to comply with these instructions in order to avoid accidents and prevent damage to the machine:
WARNING:
This warns you of dangers to your health and indicates possible injury risks.
CAUTION:
This refers to possible hazards to the machine or other objects.
NOTE:
This highlights tips and information.
Children and Frail Individuals
In order to ensure your children's safety, please keep all packaging (plastic bags, boxes, polystyrene etc.) out of their reach.
WARNING!
Don't let small children play with foils for danger of suffocation!
- This device is not intended to be used by individuals (including children) who have restricted physical, sensory or mental abilities and/or insufficient knowledge and/or experience, unless they are supervised by an individual who is responsible for their safety or have received instructions on how to use the device.
Children should be supervised at all times in order to ensure that they do not play with the device.
Special safety information for this unit
WARNING: Risk of burns!
Group head, filter holder, steam nozzle and cup tray get very hot during operation.
Take hold of the filter holder only at the handle.
- Do not touch group head, steam nozzle and cup tray! Let these parts cool down before cleaning.
- Do not point the steam jet towards yourself or other persons. Place a container under the steam nozzle (6).
WARNING:
Ensure that no humidity enters the casing. Risk of electric shock.
CAUTION:
- Do not use the appliance without water.
- Fill the water tank (3) only with cold water.
-
Only use potable water. Do not use carbonated water (sparkling mineral water).
-
Ensure that the filter holder (18) is secure and properly locked during operation, since this appliance works under pressure.
- Do not move the appliance during operation.
Intended use
This appliance is intended to make espresso and cappuccino.
It is intended for the use in private households and similar applications such as in staff kitchens of shops, offices and similar work places.
It is not intended for the following applications:
- in agricultural properties;
- for guests in hotels, motels and other residential facilities;
in B&Bs.
It may only be used in the manner described in this instruction manual. The appliance may not be used for commercial purposes.
Any other use is considered as not intended and may lead to damage of property or even to personal injury.
The manufacturer assumes no liability for damage which may occur through incorrect use.
Supplied parts
1 Espresso machine
1 removable water tank
1 attachable steam pipe
1 Steam nozzle cover
1 Filter holder
1 1-cup filter insert
1 2-cup filter insert
1 Drip tray grid
1 Drip tray
1 Measuring spoon / tamper / spanner
Unpacking the appliance
- Remove the packaging of the appliance.
- Remove all packaging material such as plastic film, filler material, cable ties and box packaging.
- Check that all the parts are in the box.
NOTE:
There may still be dust or production residues on the appliance. We recommend that you clean the appliance as described under "Cleaning".
Controls
Figure A
1 Tab to open the water tank lid
2 Water tank lid
3 Water tank
4 Steam control knob
5 Water level gauge
6 Steam nozzle with cover
7 Drip tray
8 Drip tray compartment
9 Drip tray grid
10 ON/OFF push button
11 PUMP / STANDBY push button
12 STEAM / ESPRESSO push button
13 Status indicator lamp
14 Heater indicator lamp/
15 Warming plate / cup tray
16 Filter insert for 1 cup
17 Filter insert for 2 cups
18 Filter holder
19 Filter safeguard
20 Measuring spoon / tamper / spanner (1 part, 3 functions)
Instructions
Placement
- Place the appliance on a stable and level surface.
- Due to rising heat and vapours do not operate the appliance under wall cabinets.
- Do not place the appliance in close proximity to a gas or electric stove or any other heat source.
Push Buttons (10/11/12)
These push buttons have the following functions when locked in place or disengaged:
| Switch Engaged Disengaged | |
| 10 ON OFF | |
| 11 PUMP STANDBY | |
| 12 STEAM ESPRESSO | |
Electric Connection
- Ensure that your mains power corresponds with the specifications of the appliance. The specifications are printed on the type label.
- Check the push button settings! Push buttons (10/11/12) must be disengaged.
- Connect the mains cable to a properly installed and earthed 230V 50Hz wall outlet.
On/Off
- Engage push button (10) in ON position to switch the appliance on. The status indicator lamp lights up. The appliance starts heating up. The warming plate (15) heats up.
- The Indicator lamp / lights up as soon as the necessary brewing temperature is reached.
NOTE:
The indicator lamp turns on and off during operation. This is normal and indicates that the temperature is thermostat-controlled and maintained.
- Disengage push button (10) in OFF position to switch the appliance off.
Operation
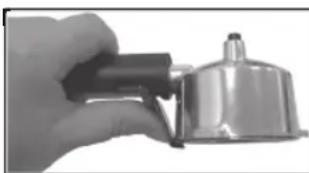
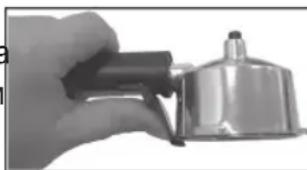
Attach / Detach Filter Holder
- Hold the handle at the left edge of the appliance to attach the filter holder (see Fig. B on page 3). Insert the three guide tabs in the group head recesses. With the handle pull the filter holder to the right hand side to the middle of the appliance. Ensure that the filter holder is well secured in the group head.
- Pull the filter holder to the left to detach from the group head.
WARNING: Danger of burns!
After brewing the metal parts of filter holder and filter insert are hot.
First Use / Bleeding

CAUTION:
Bleed the appliance before first use and after a longer period of non-use. Do not use coffee grounds during this process!
- Check the push button settings! All push buttons (10/11/12) must be disengaged.
- Connect the mains cable to a properly installed and earthed 230V 50Hz wall outlet.
- Ensure that the drip tray (7) is in place in the drip tray compartment (8).
- The drip tray grid (9) must cover the compartment with the arrows pointing towards the casing.
- Fold up the lid at the tab (1) to fill the water tank (3).
- Fill the water tank with clean, fresh water to the MAX marking. Close the lid again.
- Remove the filter holder (18) from the group head.
- Engage push button (10) in ON position to switch the appliance on. The status indicator lamp (13) lights up. The appliance starts heating up. The warming plate (15) heats up.
- Swivel out the steam nozzle (6). Ensure that the steam pipe is properly attached.
- Place a suitable container (heat-resistant / approx. 500ml ) under the steam nozzle.
- Turn the steam control knob (4) all the way towards ^ .
- Press push button (11) to turn on the pump. Pumping starts.
- Turn off the pump after water is evenly emitted from the steam nozzle. Push button (11) is in STANDBY position.
- Close the steam control knob towards "".
- Empty the container and place it under the group head.
- Press push button (11) to turn on the pump. The water flow starts. Let all water from the water tank run through. Turn off the pump to empty the container.

WARNING: Danger of burns!
The water inside the container is hot.
- You have now finished the bleeding process. Fill the water tank to the MAX marking. Repeat points 10 through 16 twice to clean the appliance on the inside. Let more water flow through the steam nozzle. Now the appliance is ready to use.
Making Espresso
- Check the push button settings! All push buttons (10/11/12) must be disengaged.
- Connect the mains cable to a properly installed and earthed 230V 50Hz wall outlet.
- Press the ON/OFF switch to switch the appliance on. The status indicator lamps lights up. The appliance starts heating up. The warming plate (15) heats up.
i NOTE:
Use the warming plate to pre-heat your cup(s).
- Ensure that the drip tray is in place in the drip tray compartment.
- The drip tray grid must cover the compartment with the arrows pointing towards the casing.
- Fold up the lid at the tab to fill the water tank.
- Fill the water tank with the desired amount of clean, fresh water. The water level must be between the MIN and MAX markings. Close the lid again.
- Remove the filter holder from the group head.
- Select a filter insert (16/17). Place the insert in the filter holder. Ensure that the filter safeguard is not upright.
Recommendations for optimum coffee treats:
9.1. Attach the filter holder with filter insert without espresso grounds. Brew the first cup with water only to get the appliance up to optimum operating temperature.
9.2. Place the cup with the hot water on the warming plate.
9.3. Now prepare your fist espresso. WARNING: Metal parts of filter holder and filter insert are hot.
- Fill the filter insert with espresso grounds. Use the supplied measuring spoon (20). Observe the MAX marking in the filter insert. Spread the espresso grounds evenly and push down slightly with the tamper (20). Clean the edge of the filter holder.
- Attach the filter holder to the group head. Ensure that the filter holder is properly attached in the group head.
- The necessary brewing temperature is reached as soon as the indicator lamp lights up. Place your pre-heated cup(s) under the group head exactly on the two holes you can see in the drip tray grid.
- Press the PUMP push button. The hot water is forced through the filter.
NOTE:
- This process does not end automatically!
-
If the indicator lamp (14) turns off the water is no longer hot enough. Interrupt brewing and turn off the pump. Wait until the indicator lamp lights up again. Now continue making espresso.
-
Stop the brewing process by turning off the pump when the desired amount of espresso is in your cup(s): Press push button (11) to STANDBY position.
- Remove the cup(s).
NOTE:
Remove the filter holder every time after making espresso. In this way you extend the lifetime of the group head's rubber seal.
- Remove the filter holder from the group head.
- Empty and refill the filter to brew another cup of espresso.
WARNING:
Metal parts of filter holder and filter insert are hot.
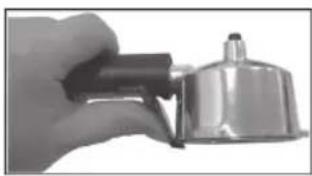
- Flap the filter safeguard (19) up. Push the filter
safeguard with you thumb towards the filter insert while turning the filter holder around (see Fig.).
- Tap the coffee grounds out of the filter insert. Use a spoon, if necessary. Rinse the remaining coffee grounds with hot water out of the filter insert.
- Check the water level in the water tank before making the next cup of espresso. Follow points 9 through 16 as described above.
- To stop operation switch the appliance off. Push button (10) is in OFF position.
Making Cappuccino
Generally cappuccino consists of one-third coffee, one-third hot milk and one-third frothed milk.
The milk froth should not be firm enough to be shaped with a spoon. It should be creamy, such as not completely whipped cream, of a viscous texture.
For the preparation you need in addition
- a larger, bellied cup (approx. 180 ml), in which you make the espresso;
- a small frothing jug with spout (e.g. 0.3 l);
- a small, heat-resistant container;
- cold milk with at least 3.5% fat content.
To make cappuccino you first have to make the.
espresso. Follow the instructions under "Making
Espresso" points 1 through 16.
Froth the milk as follows:
WARNING: Danger of scalding!
Escaping steam can cause injuries. During the heating process hot steam/water can escape from group head and/or steam nozzle!
- Ensure that the steam control knob (4) is set to " = " position before activating the steam function.
-
Do not direct the steam nozzle towards persons.
Always place a container under the steam nozzle (6). -
Ensure that push button (11) is in STANDBY position.
- Swivel out the steam nozzle (6). Ensure that the steam pipe is properly attached. Attach the steam nozzle cover all the way on the steam nozzle.
- Place a heat-resistant container under the steam nozzle.
- Fill the jug half with cold milk.
- Press push button (12) to STEAM Position. Wait until the indicator lamp lights up.
- Briefly open the steam control knob (4) towards "every time before using the frothing function to drain collected condensate. The appliance is ready to use if only steam escapes.
- Place your milk jug with the milk under the steam nozzle.
- Lift the jug so that the steam nozzle sits just under the milk surface.
NOTE:
Do not place the steam nozzle in the centre of the jug but close to the inner wall. This position is important for the milk to get into whirling motion. We recommend using the spout as guide for the steam nozzle.
- Slowly open the steam control knob (4) towards "4" until the desired amount of steam is set. Slightly move the jug up and down. Close the steam control knob towards " " after the milk has frothed to the desired volume approx. 50%
NOTE:
- To further heat up the milk insert the steam nozzle all the way to the bottom of the jug. Ensure that the milk does not start boiling. In this case the foam will collapse.
-
The water is no longer hot enough if the indicator lamp (14) turns off during frothing. Turn the steam control knob towards " - Wait until the indicator lamp lights up again. Now continue frothing the milk.
-
To remove the last coarse air bubbles knock the milk jug after frothing carefully on the tabletop (as if you would set it down a bit hard). Swivel the milk jug slightly around. This helps to mix the foam after frothing. Now waste no time. Pour the frothed milk slowly into the espresso.
- Swivel the milk jug slightly around while pouring the frothed milk slowly into the espresso.
NOTE:
- With a few artful movements you can draw designs into the foam.
-
Sprinkle cocoa powder or cinnamon to taste on the foam.
-
IMPORTANT: Clean the steam nozzle immediately after every use! When closing the steam control knob a vacuum is created within seconds, which draws some milk into the steam nozzle. Place your heat-resistant container under the steam nozzle. Open the steam control knob briefly for a shot of steam to flush milk residue out of the steam nozzle. Wipe the steam nozzle with a damp cloth.
- Press push button (12) to ESPRESSO position to turn the steam function off.
- To stop operation switch the appliance off. Push button (10) is in OFF position.
Cleaning
WARNING:
- Before cleaning, always remove the mains plug and wait until the device has cooled down.
- Do not immerse the device in water. Otherwise this might result in an electric shock or fire.
CAUTION:
- Do not use a wire brush or any abrasive items.
-
Do not use any acidic or abrasive detergents.
-
Clean the casing with a slightly damp cloth without detergents.
Group Head and Rubber Seal
Wipe group head and rubber seal with a damp cloth. Use a soft nylon brush to remove stubborn residues. Dry with a soft cloth.
Accessories
Wash filter holder, filter inserts, drip tray grid, drip tray, measuring spoon, water tank, steam nozzle pipe and steam nozzle cover in warm sudsy water. Use a soft nylon brush, if necessary. Rinse with clean water. Dry all parts with a soft cloth.
CAUTION:
These parts are not dishwasher-safe. Heat and aggressive detergents can cause distortion and decolouration.
Water Tank
- Open the lid to remove the water tank. Pull the tank with both hands up and out. Replace the tank after cleaning and drying.
NOTE:
The water tank has two hooks.
- Hook the water tank into the two eyelets of the appliance.
- Press the water tank slightly down for the valve to open.
Steam Nozzle
- Clean steam nozzle, attached pipe and cover immediately after use. Dry milk residue is difficult to clean.
WARNING:
The steam nozzle is hot immediately after use!
- Remove the cover. Use the small grip. Turn slightly for easy removal. Use a damp cloth to hold the steam nozzle with one hand!
- Use the spanner (20) to remove the small pipe from the steam nozzle. See Fig. C on page 3. Turn the spanner clockwise.
- Leave pipe and cover for some time in the warm sudsy water. In this way milk residue is easily removed.
- Wipe the steam nozzle on the appliance with a damp cloth.
NOTE:
Fill a container with hot water to remove dry residue. Place the container under the steam nozzle, so that it is submerged.
After cleaning replace pipe and cover on the steam nozzle. Place a heat-resistant empty container under the steam nozzle. Operate the appliance as instructed under "Making Cappuccino" points 5 and 6. After cleaning the steam nozzle is again ready to use.
Decalcification
Scale deposits put the functionality of your appliance at risk. It is necessary to decalcify the appliance regularly. The intervals depend on use frequency and water hardness.
Decalcify with a commercial decalcifier for coffee machines.
- Dose as instructed on the packaging or on the instruction leaflet.
- Operate the appliance as instructed for making espresso until the tank is empty. Let the solution flow through the group head (without filter holder).
WARNING:
- Rinse the water tank and let one full tank fresh water flow through the group head to rinse out the decalcifier residues.
- Do not use this water for making espresso.
Storage
- Clean the appliance as instructed. Let the accessories dry completely.
- We recommend that you keep the appliance in the original packaging if the appliance will be not used for long periods.
- Always keep the appliance out of the reach of children in a dry, well ventilated place.
Troubleshooting
| Problem Possible cause Solution | ||||
| The appliance does not function. | The appliance has no power supply. | Test the socket with another appliance. | ||
| Plug in the mains plug correctly. | ||||
| Check the main circuit breaker. | ||||
| The appliance is faulty. Contact our service center or a specialist. | ||||
| No coffee output. Switch the appliance off! | ||||
| The water tank is empty. Fill the water tank with fresh water. | ||||
| The water tank is not properly attached; the valve is not open. | Press the tank slightly down for the valve to open. | |||
| The holes in the filter holder and the group head outlet are blocked. | Clean filter holder, filter and group head outlet. | |||
| Air entrapped in the heating circuit. | Generate steam as instructed under "Making Capuccino". Open the steam control knob all the way towards 4". | |||
| The coffee grounds are too fine or compressed too much. | Loosen the coffee grounds. Spread it evenly and only slightly compress with the tamper. | |||
| Scale deposits in the appliance. | Decalcify the appliance as instructed. | |||
| The pump is noisy. Switch the appliance off. | ||||
| The water tank is empty. Fill the water tank with fresh water. | ||||
| The water tank is not properly attached; the valve is not open. | Press the tank slightly down for the valve to open. | |||
| Air entrapped in the water circuit. | Bleed the appliance as instructed under "First Use Bleeding". | |||
| Espresso escapes at the filter holder edge. | Stop the brewing process! | |||
| The filter holder is not properly attached or is not enough closed. | Attach the filter holder properly as instructed under "Attach / Detach Filter Holder". | |||
| Too much coffee grounds in the filter insert. | Remove excess coffee grounds. Observe the MAX marking in the filter insert. | |||
| Coffee grounds residues on the rubber seal of the group head. | Switch the appliance off and let it cool down. Clean the rubber seal as instructed. | |||
| Espresso is too cold. | The cups were not pre-heated. | Rinse the cups with hot water. | ||
| Indicator lamp/does not light up during the brewing process. | Wait until the indicator lamp/lights up. | |||
| Coffee crema is slightly discoloured (coffee runs out fast). | The coffee grounds are too coarse or are not evenly spread. | Use the supplied tamper. | ||
| Too little coffee grounds in the filter insert. | Fill coffee grounds only to MAX marking in the filter insert. | |||
| Coffee crema is dark discoloured (coffee runs out slowly). | The coffee grounds are too fine or compressed too much. | Loosen the coffee grounds. Spread it evenly and only slightly compress with the tamper. | ||
| Too much coffee grounds in the filter insert. | Use less coffee grounds. Observe the MAX marking in the filter insert. | |||
| No crema on the espresso. | The espresso grounds are not suitable. | Change the brand, if necessary. | ||
| The milk does not froth. | The milk is not suitable. Use milk with at least 3.5% fat content. | |||
| The milk is not cold enough. Use refrigerated milk. | ||||
| The steam nozzle is dirty. Clean the steam nozzle as instructed. | ||||
Technical Data
Subject to technical changes without prior notice!
Model: PC-ES 1008This device has been tested according to all
Power supply: 230V ,50 Hzrelevant current CE guidelines, such as electro
Power consumption: 1000 W magnetic compatibility and low voltage directives,
Capacity: 1.5 Liter and has been constructed in accordance with the
Protection class: latest safety regulations.
Pressure: 15 bar
Net weight: approx.4.7 kg
Disposal - Meaning of the "Wheelie Bin" Symbol
Take care of our environment, do not dispose of electrical appliances via the household waste.
Dispose of obsolete or defective electrical appliances via municipal collection points.
Please help to avoid potential environmental and health impacts through improper waste disposal.
You contribute to recycling and other forms of utilization of old electric and electronic appliances.
Your municipality provides you with information about collecting points.
Spis tresci
BnKOpncTaHHa npH3NaeHHaM 88
YactHH, kIdoaIObca 88
Po3naKOByBaHHn npncTpo1 89
Elenentn KepyBaHHa 89
Ihctpykci 33actocybaHH8
Po3miueHHra 89
KhoPi (10/11/12) 89
PiEHaHHdo eNeKtpomepeksi 89
YbIMKHeHHBIMKHeHH 89
Ecknnyataia 90
PiD'EDHaHHa / BiD'EDHaHHa
Tpimaua fiJIbItra 90
Pepwe BnKOpncTaHH / Cnyck piINH 90
PnuroTyBaHHKaBn ecnpeco 91
PpuroTyBaHHKanyuHNo 92
YnueHHa 93
TolOBHn6JOKynpaBJIHHN i
rmyOBn yuInbHIOBauch 93
Ppnilaandra 93
BudaeHHaKuny 94
36epirahnra 94
UcyHenHHeCnpaBHOCTe 95
TexhiHni napameTpni 96
3araJIbHI Bka3IBKN 0do 6e3neKn
Ipepe npinHnTm B ekcnnyatauio zboro npinnaDy dyke yBaXHo uHTaTe IHctpykuo 3 ekcnnyatau ta 36epiraute ii pa3om 3 rapaHTiHm TaHOHOM, kacOBIM yekom Ta, no Mpi MOxNBOCTi, 3 KAPTOHNO KOp6koIO i BHyTpiaHbOIO yNAKOBOIO. Y pa3i, zo npinad 6yde nepedaHO TpeTIm oco6am, cnid nepedaBatn Ioro pa3o IHctpykuo 3 ekcnnyatauii.
BnKOpncTaIe npnaD BnKIOUHO B npuBaTHNX 1Jnx Ta 3a nepe6aueHm npn3HaueHHam.
Прилад He npn3haeHo Дя помисновогуВИКОРИСТАнHA.
He BnKOpncToBvIte NOro Ha ByIuCi. OBepiraTe NOro BiD CneKN, PnpMOrO COHAnHOrO ONpOMi
HIOBAHHa,BOJOrn(BXODHompa3iHeOnyckaI Te y piHy)Ta roctpux kyTIB.He KopncTyntecr npnilaDom 3BONOrmnypkam. JaKuo npnilad 3BOJoxNBCa a6o 3MOKpiB,HebiKnlaHOBNTarHITb WTeNCeJIbHy BUNKy.
BIMKHTb npnad Ta o6OB'3KOBO BNTaHITb BNky 3 wTeNCelbHOi PO3ETKN (TARHtB 3a WTe-kep, He 3a Ka6eNb), KOnn He KopncTyEcB npuJaOM, a6o MOHTyTe KOMnEKTyOci DeTaJI, a6o Ni dac YnueHHa 60 npn deFeKTax.
Heeknyatyntepnna6e3 orny.OboBRA3KOBO BmKHiTb npnlaD, KOJI Nn NOKndaTe npmiueHn. BntarHtB wTeNcIbHy BNky 3 WTeNcIbHOi po3eTKn.
PpnilaTa Ka6eIb KINBHeHnCniD peryIapHo 06TeXHTn Ha O3HaKn N0WkoJKeHb. Ppi BnAB- IeHHI N0WkoJKeHb PpnilaOm 3a6OpOHeNo KoPNCtYBaTncb.
He pemontynte npnad cami, ane 3bephiTbcra do aBtOpn3oBaHoro faxibz. IJra 3ano6irahn3arpo3i nowkoJKeHH KabeJIb JKNBLeHHcIa3amHHTn Ha eKBiBaJeHTHm BnKlHO BuPo6HNKOM, a60 haHoo cepBicHO cnyk6o a60 iHsoKbaJIqikOBaHOOC6OIO.
KopntyTeCBAKIOUHOOpIRHaJIbHIMNKOMIJIeKTyBaJIbHIMNDeTaJIaMNI.
3BepHITb yBary Ha HacTynHi "CneuiIbHI Bka-3IBKn 0do 6e3neKn".
CnmboBn B ciinhtpykci3 ekcnnyataa
Baxnbi Bka3iBKn Dna BaWo'i 6e3neKn CneuiNb-Ho BiMiuheHi.ДЯ 3anobirahNHa HeuacnX BnpaI-KIB Ta NookKeHb npuaNy o6OB'3KOBO npntpMyInTeCb uNx Bka3iBOK.
IONEPEIXEHHRA.
PonepeJxye npo 3arpo3n Ipn BaWoro 3dopoB' Ta Bka3yE Ha MOxJIINBI pN3IKN TpaBM.
△YBAGA.
Bka3ye Ha moKniBi 3arpo3n IJy npnilaIy a60 iHux npedMeTIB.
I P N M I T K A.
Budinie nikka3Ka Ta iHopMaIIO IJBaBac.
DITnTaHemiuHiOCo6N
-Дябзneкn cboix DiTeH He 3aIIuwaIte DoCTyHIMn nakYBaIbHi MaTepiAn (nlaactNKoBi naKeTn, KapToHHi Kopo6Kn, neHonJaCT ToIo).

NONEPEDXEHHRA
He 03B0JNe MaIIM dITaTncb i3 nnBkoIO. IcHyc 3arpo3a 3aDyxn!
- LcE npnad He npn3haueHm I nBnKOpncTaHn HJIoDbMn (BKNIOUaOuN dIte) 3 O6MeXeHnMn i3山 N 山 M n ,yTTeBnMn a6o pO3ymOBnMn 3di6HOCTaMn,HeoCTaTHIM DocBIDom Ta/a6o 3HaHHa - KpIM BnnaAdkIB,KON 3a HmN DoTJdae BiNoBidaIbHa 3a ix 6e3neky oc6a a6o BOHN OTPMaII IN Bka3iBKn UoDO BnKOpncTaHHn npnadaY.
-ДITЯМ He ДОЗВОЛЕН ГраТиСь 3 УМ прИпадOM. ПOTриБен Доглад 3a НИМ.
CneuiaIbHa iHcTpkykciJ 3 6e3neKn Dnla zboRo eJeKtpoPnpnaDy

PONEPEIXEHHJ.
He6e3neka OTPmHaHnOnikB!
TOnOBka rpynn, TpImauch pfIbTppa, napObe conno iPiDoH dIy qAwoK cnIbHO HarpIbaOTbcraPi dac po6oTN Bnpo6y.
- TpmaIte TpmaIc pfIbIpa InIe 3a pyKy.
He TopkaTecb roNoBHoro 6noka ynpabNHH npoboro conna i ndona dnyaoshok! Pepu HIX qHCTNTU ci YacTHN, daTe im OxonoHyTN.
He cnpaMOByTe cTpyMinb napHa ce6e a6o Ha iHux oc6. CTabTe emHicTB ni Napobe conno (6).

NONEPEDXEHH
IpebipTe, uY kOpnyc He nOtpanJaB OJORA. IChye pN3NK ypaXeHHa eNeKtpuHm CTpyMOM.

YBAGA.
- He BnKOpncToBvIe Bnpi6 6e3 BoDn.
3aINBaIte B cHicTb IJIa BOiN (3) IINe XOJIOHy BOy.

YBAGA.
-
BnKOpNCTOBuYTe TINbKn NITHy BOy. He BnKOpNCTOBuYTe Ra3OBAHy BOy (ra3OBAHy MiHepaIbHy BOy).
-
YneBnItbcra, 0i nd paoTnpMaay Tpa (18) HaidinHO 3akpInnen i npabnbo Ho po3TaObaHni, ockIbKn ueBupioe NiD TnCKOM.
He nepecybaite Bnip6 niD qac po6Ot.
BnKOpncTaHnHa 3a npn3HaueHHaM
Cey Bnpi6 npn3naeHn dny npiroTyBaHHa KaBn ecnpco i kanyuHo.
Ioro cpiBnKOpNCToBvBaTu y npuBaTHnx NOMeKhHx i noDi6Hnx Micyx:Ha cnjX6OBux KxHx y Mara3nHex, oicax Ta B aHaanoriuHnx poOoHx Micx.
Ioro He cnid BnKOpncToBvBaTn dJa TaKnx cinei:
- Ha cijbcjkorocnoapcbkx 06'ektax;
-ДЯгROCTeYROTEJAX,MOTeJAXTOJO;
y Miczex, kpi nponohyotb hiur i chiDaHok.
Pnucpii cnid BnkopncTOByBaTu nIwpe y cnoci6, onncAHn y ciin HcTpykui 3 ekcnnyatau. He cnid BnkopncTOByBaTu ue npncpii dJa KomepuiHnx ciinei.
Буд-яke iHwe BnKOpuctaHHBbKaCTbcra K BnKOpuctaHH He 3a npu3HaueHHm i MOxe npu3BeT N Do NpOkoJKeHH MaHa YH HabItb TpaBMvBaHn KOpuctyBaua.
Bnpo6HnK He Hece BiINoBIaIbHocTi 3a nouKO-dKeHHra KtJIncBHaCNIIDOK HnnpaBnIbHOro KopNCtYBaHH.
YactnHn, kki dodaotbcra
1 KaBovapka ecnpeco
13HIMHa emHiCTb IJRA BODI
13HIMHa napoBa Tpy6ka
1 Kpnuka napoBoro conna
1 Tpmaq pfIbItpa
1ΦinbTpHa 1aawky
1ΦIbTpHa2aWKn
1 CitcaTni nIDOn dIy kpanenb
1ПiДонДЯкpaneIb
1 Mipha loxxka / Temnep / Kliouc
Po3naKOByBaHHn npncTpoIO
- BnMItb nakyBaJIbHm MaTepiJ.
- 3HIMITb yBeCb nakyBaIbHn MaTepiA, TaKn I K IIaCTIKOBA IIIBKa, HAnOBHIOBaU, UHypu, IBNIMITb IIpcTpii i3 Kopo6Kn.
- IpeBipTe, Hn haBHy yci YacTHHn, Rki DOnaIOTbCra.
I I P N M I T K A.
Ha npictroo moke 6ytn nnil a60 3aannn Bnpo6nuyo npoccy. PekomeHdoBaHo nouCttn Bnpi6, k onncao H po3diin "HneHH".
ElenemEnKepyBaHHa
MaJIHOHOK A
1 BnctynIyBIDKpNbHaHHKpnuKn EmHocTi Iy BOIN
2 Kpnuka emhocti nra BOn
3 EMHICTbIy BOIN
4 Peryjatop noaui napi
5 NokaxukpiBnBOuN
6 NapoBe conJIO 3 KpuKIOI
7Пддондя краль
8 Biicik nna iindoHa nn kpanenb
9 Cituactn niooh Ira kpanenb
10 Khonka ON / OFF
11 KhoIka PUMP / STANDBY
12 Khonka STEAM / ESPRESSO
13 INdikatop cTaHy
14 INdkaTop HarpiBaHH
15 HarpiBaJIbHa pIITa / nIDOn dny aawok
16 Φиьтдя 1чшк
17Φinbtpdny2yaowk
18 TpimauФinbtpa
19Φikcatop Tpimmaa pibtpa
20 Mipha loxka / Temnep / KIIOU (1 enement, 3 cyHKui)
Ihctpykci3 3actocybaHHa
Po3miueHHra
BcTaHOBJIIOIte Bnpi6 Ha cTIky pIBHy nobepxHIO.
Yepe3 HarpiBaHH i BnXiI nap He BnKOpncToBnyTe Bpi6 niD HabicHMn waqkamn.
He cTaBTe Bnpi6 HAnTo 6n3bKO Do ra3OBoi a6o eNeKtpoPnTn, YN 6yDb-8kNx IHnx Dxkepe n Tenna.
KhoNkn (10/11/12)
Li KhoNk BNKOHyOTb ONcaH HxKye FyHKu, KOJI 3aΦIKCOBaH Ha MiCi aO BmKHeHi.
| Коньka | Наточуta | Вимкега |
| 10 | ON (Увимкино) | OFF (Bимкино) |
| 11 | PUMP (Пддачваня) | STANDBY (Очikваня) |
| 12 | STEAM (Прара) | ESPRESSO (Eспесо) |
Pi'dcHaHHdo eKeTpomepeksi
- IpepeBipTe, YI KINBHeHn BIDNOBIdaE XapaKTepnCTnKam Bnpo6y. XapaKTepnCTnKn 3a3HaueHi Ha Haini.
2.ПepeBipTe HanaTuBaHnK Honok! KhoNk (10/11/12) NOBHHi 6yTn BmMKeHni.
3.Пд'снайтka6eьЖИВпeнгЯdoHaJIeXHO BCTaHOBHeHoii 3a3eMNeHoiI HAcTiHHOIpo3eTKN 230B\~,50T.
YBIMKHeHH/BUMKHeHH
- ⅢO6 yBIMKHyTN Bnpi6, BCTaHOBiTb KhONky (10)В ПОLOXKeHЯ ON. 3acBiITnbCra iHdNKaTOP cTaHy ◎. Bnpi6 noUHe HarpiBaHHa. HarpiBaJIbHa ПЛNTA (15) HarpieTbcR.
- INДиКaTOp 3acBiITbCra,Як TiINbKn 6yde ДОСЯнHyTo HeO6xIДHоI TemNepaTpyn Дпя приroTuBaHHЯ.
I P N M I T K A.
Пид уас роботи виpopу iндикатор /БMнkaeTbCЯ i BmNkaeTbCЯ.Цe HOPmaJIbHo iВka3ye Ha Te, lo TempepaTypa KOHTPOJIHOETbCЯ iПДТРIMYeTbCЯ TepMOCTaTom.
Pi'd'cHaHHb/Bi'd'cHaHHr TpImaayiJIbTp
- Ⅲo6 npikpinTn TpImauch fIbtpa, Bi3bmitb pyky 3 niboro 60ky Bnpob6y (nBtbcmaN. B Ha cTOp 3). BCTaBte TPN HAnpaBnaUOci BknaAkn B 3aIIN6JIeHHa B rOIOBHOMy 6NoCi ynpabHInHHa 3a pyky notarHITb TpImauch fIbtpa npabOpuy DocepeHNH Bnpob6y.IpeBipTe, uN TpImauch fIbtpaHaDiinHO 3akpinNeHHu y 3aRn6JIeHHI rOIOBHO 6JOKa ynpabNIHH.
- Κιος Bīd'εδητή, πονερπίβτριμαύ φιλθρα πινόργ.
PONEPEJXEHHA.
He6e3neka otprmaHn onikiB!
Iicn npiroToyBaHHaMeTaneBi yactuHn Tpimaya pInbTp a i pInbTp 3aIIwauoTbcra rapaYMM.
Pepwe BnKOpncTahn / Cnyck piHn
△YBAGA.
IpeepnBnKOpncTaHHm Bnpoby a6o kUO Bnpi6 DoBn qac He BnKOpncTOByBaBCa, cnyctItb 3 HbOro pDInHy. Pid qac ZbOro npocecy He BnKOpncTOByte KaBy!
- Переipte налайтуваим Кнорok! Bci Кногк (10/11/12) NOBUNHHi 6yTN BIMKHeHi.
2.Пд' endан'te ka6eь xinBneHnЯ Do HanexHo BCTaHOBneHoi i 3a3emneHoi HactiHHoi po3eTKN 230B\~,50T. - IpebeipTe, nn nioOn dnn kpanelb (7) BCTaHOBNeHo y BiDcIK dnn niDoHa dnn kpanelb (8).
- CiiTuaCTn NiIOH IJNA Kpanelb (9) NOBInHeH NaKpNBaTN BiDcIK TAK, Uo6 CTpiKn 6yJN cnpraMOBaHI Do Kopnyca.
5.Пдимить кршky 3a Висту (1),цo6 habOBHTI EMHICTb ДЯ ВODI (3).
6. HanobHITb cMHCtB dIa BOu IIO no3Ha- uKIMAX uNcTOIO i CBIXOIO BOIOIO. 3akpnte KpiuKy.
7. BnmiTb TpImaU φinbTpa (18) i3 3arnn6neHHy roNoBHomy 6Iooi ynpabNInHn.
8. Κοδ yνικητιν Bπριδ, BCTaHOBiTb KhoNky (10) B nOLOXeHnON. 3acBITnbCg iHnKaTOp CtaHy (13). Bπρiδ noUHe HarpiBaHnH. HarpiBaJIbHa nnIra (15) HarpietbCg.
9. Повернл ha3OBhi napobe conno (6).пepe-biPte,ч napoba Tpy6ka npikpinneHa HanexHIM YHHOM.
10. BctaHObIT b iI napoBe cOnIO BiIDNOBHy cMHiCTb (TePMOcTIy / npu6n3Ho Ha 500 M).
11. NobepnItb peryIaTOp noaHi napn (4) B ha- nparnky no3HaKn+".
12. yBIMKHyTu nikayBaHHaTnCHt b KONky (11). P03noUHeTbcra nikayBaHHa
13. Bumknitb nikkauybaHHn icnToro, kBoda noUHe pIBHomipHo nOaBaTncb i3 napOBoro co- nna. Khonka (11) 6ynde nepe6yBatn B noNo- XeHHI STANDBY.
14. Nobephitb peryIaTOp noaui napu do kiHcy y Hanpymky n03HaUKN
15. NocTaBTe nopoXHIO EMHiCTb NiD rOJOBHm6NOKOM ynpabnHHa.
16. Μόb yBIMKHyTn πIDkaUyBaHHa, HATUCHITb KHONKY (11). Po3NoUHeTbcra Noaay BoDi. DaIte BHTeKTn Bci BODi 3 EMHOCTi dIy BoDi. KOnIeEMHICTb 6yde NopOxHra, BIMKHiTb πIDkaUyBaHHa.
PONPEJXEHHA.
He6e3neka OTPmHaHnOnikB!
Boda BCEpeuHi eMHOCTI rapya.
- Tenep npouec npirotoybaHHa 3aBepseHo. 3a-nOBHITb EMHICTb DnA BODn DO MaKcHMaJIbHO rO pIBHra (DIO nO3HaCkM MAX). Uo6 nouHCTnTn BVpi6 BCEpeDiHi, DbiCi NOBTOPIb OncaHI BnIe dII nyHKTI 10-16. IOTpi6Ho, uO6 JAKOMora 6iNb-We BODn npoiuNo uepe3 napoe conNo. Te- nep Bnpi6 roTOBm Do poBtN.
PnroTyBaHHKaBn ecnpco
- Переipte нааштуваимя конок! Bci конки (10/11/12) мантб-byн вимкни.
2.Пд' endан'te ka6eь xinbneHnЯ Do HanexHo BCTaHOBneHoi i 3a3emNeHoi HactiHHoi po3eTKN 230B\~,50T. - Κόb yBIMKHyTN Bnpi6, HATncHItb KhoNky ON/OFF. 3acBITnbC iHdNKaTOp cTaH. Bnpi6 noUHe HarpiBaHH. HarpiBaNbHa nIHTa (15) HarpiCTbcr.
IINPIMITKA.
HarpiBaIbHa pIITa BnKOpNCTOByEcTbcr dIpo3irpiBaHHraaIK (yaWok).
- IpebeipTe, nn nioOn dnn KpaneIb BCTaHOBJIeHo y BiDcIK dnn nioHa dnn KpaneIb.
- Ciiuaactn niDOn dIy KpaneIb NOBHeH HaKpmbaTn BiDcik TaK, 0o6 cTpiIKu 6yIn cnpmaBoHi do Kopnyca.
6.Пдимить кршky 3a Висту,цоб habOBHTI EMHICTb DnBODN. - 3aHnIe B EMHicTb DnB BOi nOtpi6hN O6'EM YnCToI CBIXO'BOD.N EMHCtB DnB BOi CnID HAnOBHIOBaTu TAK, uo6 pBeHb BOi 3HaxoDINBCr MIX N03HaUkAmN MIN i MAX. 3akpnTe KpNkKy.
- BnIMiTb TpImauch pfIbTpra 3 roJOBHOro 6Ioka ynpabInHH.
- Bn6epitb pfinbtp (16/17).BcTaBTe pfinbtp y TpImauch pfinbtpa.YneBHITbcra,io pfikcatop pfinbtpa He nepe6yBae y BepTnKaIbHOMy noJIOXKeHHi.
i PekomeHdaui InI ONTImaJIbHoro npri- roTyBaHHKaBn
9.1. Pnikpinitb Tpmau fIbtpa 3 pfIbTpom i6e3 kABn. Pnirotynte nepw yauKy, BnKOpncTOBvOuN TiJIbKn BOdy, uo6 BNpi6 Harpibcdo ONTImaJIbHOi pobooITemnpaTyni.
9.2. NocTaBTe YaShky 3 rapAoyo BOIOHO Ha HarpiBaIbHy PnITy.
9.3.Tenep npirotyte nepwe ecnpeco. NONEPEDXEHRA.Metanebi acTINH TpIMaHaΦIbTp aΦIbTp rapaqi.
- HanobhItb pfIbTp KaBOIO ecnpco.ДЯ HanOBHeHnBVKOpNCTOByte MIPHy loXky (20),ЯkadoaTbcra.3BaKaIte Ha no3Haay KMAX haΦIbTpI. PIBHomipHo po3KnaDiMb Kaby ecnpco i 3JIeKa NotncHITb Tempeom (20).NouchTe KpaI TpImaua pfIbTpA.
- Pnkpinitb Tpmau pfnbtpa do roIobHoro 6noka ynpabnnHa. NepeBipTe, uTpmau pfmbtra naiH0 3akpinneHny 6nozi.
- Kolni 6ynde doceHryTo noTpi6hOi temepatypn, 3acBITnbcI INdkaToP/。NocTaTe nonepedNo Harpity yawky (awkn) niI rnoBHNM 6IOKOM ynpabInHra ToHNO Ha Dba OTbOpn B cIyactomy nIDOnHi dny Kpanelb.
- HATnCHiTb KHONky PUMP. Tapya BOda 6yde noDaBaTncb uepe3 fInbTp.
IINPIMITKA.
- Léni pôçec He 3aKiHyεTbce aBTOMaTHHO!
-
YKso iHdkaTOp (14) BmKHeHO, BOda 6iNbwe He HarpiaCTbCra.3ynnHtB npiroToTyBaHHia BmKHiTb NiKauyBaHHa.3aYe KaITe, DOnOKn iHdkaTOp/He 3acBi-TntbCra 3HOBy. PpOobXTe npiroToYBaHHa ecnpeco.
-
Koln B yaushi (yaushkax) bye noTpi6Hm o6'em KaBn ecnpecO, 3ynnHtB npoec nprirotybaHn H, BmKHyBUn NiikayuBaHHa. BcTaHOBiTB KhoNky (11) B noLoKeHHa STANDBY.
-
3a6epitb yawky (yaWK).
IINPIMITKA.
Koxhoro pa3y nicra npirotoYbaHHra ecnpco 3HimaTe Tpmau pfIbTpa.Takm YnHOM BV npoobknte Tepmin npdaTHOCTI rymOBnx yilbHIOBaiv roNOBHOrO 6Joka ynpabInHHa.
- BnmiTb TpImauch pfInbTpra 3 roNoBHorO 6Ioka ynpabNHHa.
- CnpoxHItb pfInbTp i HAnOBHITb Noro 3HOBy, 06 npiroToyBaTn iHw yawky ecnpeco.
PONEPEJXEHHA.
MetaneBi yactuHn Tpumaua pfnbtpa i pfjltprapy.
- Knaunitb φikcatop φilbtpa Doropn (19).
Cnoonochitb emhictb IJRA BOH i nponyctitb Kpi3b roIOBHN 6IOK ynpabNHH NOBHy EMHICTb CBIXOIBOHN, UO6 ycHyTN 3aNNsKn HaKnny.
He BnKOpncToBvIe TIO BDOy IJNA npiroToYBaHHra ecnpco.
36epirannn
-Почисты Вириб,як описно.Даитпрпладю NOBHICTTO BUNCOXYTN.
- PekomeHDoBaHO 36epiratn npucpiBOpriHaJIbHiynaKOBci, kUO BIn HeBVKOpNCTOByBaTImeTbcS TpNBaIu Yac.
36epiraTe npictpiNo3a Mekamn DoCkHocti dTey cyxomy,do6pe npoBITpOBAhOMy Micci.
YcyHeHH HeCnpaBHOCTe
PnpcoeDnHeHne /OTCOeDnHeHne depkaTeIaФnIbTpTa 100
PepBoe nCnoB3OBAHne / cInB 100
PpuroToBnIeHne 3cnpecco 101
PpuroToBnIeHne KaIyUHNo 102
Ynctka 104
TolOBKa rpynnbI ne3HOBa npoklaJaKa ...104
Akceccyapbl 104
DekalbuuΦnkaua 105
Xpahene 105
YcTpaHeHHe HEnCnPaBHoTei 105
TexHnueckne daHHbIe 107
06uhe yka3aHnno TExnke 6e3oNaChOCTn
Ipeed hauanom 3Kcnpnyataun npnbopa BnmaTeNbHO npouHTaTe npnilaraemyu HNCTpyKNUo 3Kcnpnyataun u COxpaHNTe ee B HaedJHOM MeCTe, BMeCTe C rapaHTnHBIM TaIOHOM, KaccOBbIM YekOM N, NO BO3MOXHOCTN, KapTOHHO KoPobKOc ynaKOBouhBM MaTepnaJOM. Ecn daTe KOMy-1n60 nonoJIb3OBAtbcra npnbopom, o6ra3aTeNbHO daTe BnPnDaay DaHHUo INHCTpyKNUo IOKCNPnyataun.
-Поь3уNTecbпибopOMToIbKOчaCTHbIMobpa30mИПОнaЗнayeHnO.ПибopHeпрнa-3NaueHДЯКOMМерчecKOrOиСпОЛьЗOBaHnY. He nOь3yNTecbпибopOMПОOTkpblTbIM He6om.ПpeOxpanYeпибopOTжapbl,празMbIXCOJIHeHbIXJUyeBnAЖHOCTN(HINВKOEM
cnyae He norpykaTe erO B Body) n yapob 06 octpblte yrlbl. He npkacaTecb K npnbopy BnaXhbIMn pykam. Ecnn npnbop yBnaXHnncr INN HAMOK, TyT Jxe BblbTe BNILKy n3 po3eTKn.
- Iocne 3KcnpnyatauH, MoHTaKe npHaadJex-HocTe, uNCTke HnN pONOMKe np6Opa Bcerda BbIHMaIte BnIKy n3 po3eTK (TaNTE 3a BNKy, a He 3a Ka6enb).
He octabnIte BkIIOueHHbIe 3JIeKTpOpnp6Opbl 6e3 npncMoTpa. BbIXoJa n3 nomeueHna Bcerda BbIKIOuayTe np6op. BbIHbTe uTekep n3 po3ETKn. - Pn6bOp n Ka6eIb cTeBOrO nITaHnIa Heo6xoDnMo peryIpaHObaTb Ha HAIuHneCteIOB NOBpeKdEHH. Pn ObHApUkeHHN IOBpeXdEH Nl3OBaTbCnPn6bOpom 3anpe-
HnB Koem cnyae He pemontpyuTe npnbop camocToTebHo, a obpaaaiTec b TaKOM clyyae 3a NMOU K CneuaJIncTy, IMeIO- 1IeMy COOTBeTCTByUOUsI Donyck. I3 coo6paJxHn 6eOanachocTN, 3aMeHa CeTeBOrO uHypa Ha paBHO3NaHbI dOnyckaetc TOnbKO Yepe3 3aBOIN3rTOBHTeNb, Hauy cepBnCHyO MaCTepCKyU OIN COOTBeTCTByUOJeRO KBaInΦnIpoBaHHOrO cneuaJIncTa. - Icnoj3yIe ToJIbKO opuHnHaJIbHbIe 3aNactn.
- ToxayuCTa, co6IIOdaIte HnXeCJIeDyUOuIe "CneuaJIbHbIe yKa3aHnI NO TexHnke 6e3OnacHOCTN".
CnMbOJI npImeHЯeMble B daHHom pyKOBoDCTBe NOJb30BaTeIa
BaxHbIe peKOMeHdaUIN IJN o6cneueHnBaJeB 6e3oNaChOCTN 603HaueHbI NO OC6eHHOMy. O6r3aTeJIbHO cIeNyITe 3TIM peKOMeHdaUINM, YTO- 6bl IpeOTBpaTITb HeCuaCTHbI ClyuAin NIN NO-NOMKy n3DeJIIN:
IPEyPExKDEHNE:
Ipeynpejdaet o6 onacnoctn IJRA 3dopOBbI BO3MOXHOM pncke noNyehnra TpaBMbl.
BHIMAHNE:
Yka3bIbaet Ha BO3MOxHyO ONaCHOCTb DnIy I3-DeIINy INDpyrNX OKpykaIOxN INpeIMeTOB.
IPIIMEUAHNA:
JaetcoBtbiHΦopMaζnIO.
IeTN IINuHa HyKdaiOuHneC B nPiNCMOtpe
- Ⅰ3 coobpaXeHn 6e3oNaChOCTn dIy DeTeH ne octaBnIte IexKaTb ynaKOBky (IInaCTNKOBbIe MeuKn, KapToH, NeHONlaCT n T.d.) 6e3 npncMOtpa.
PENEYNPEXKDEHNE!
He no3BOJnTe DeTAM nrgatb c noJIaTnIeHOBoI pJeHKoI. OnacNoctb ydyu7b!
3TOT npnbop He npedHa3NaueH dJa noJb3OBaHnra JInCaMn (BkIIOUyAJeTee) C OrpaHnueHHblIM NpN3UneCKmN, CEHCOPHBIMu IIN yMCTBeHNbIMn cNoCObHOCTaMn INI JInCaMn, He IMeO-ImMn ONbTa N/INN Heo6XoDmBix 3HaHn. NcKIOUyeHHe COCTaBnAOT CInyau, KOrDa OHn HAXOJrTcN IOI npNCMOTPOM JInca, OTBETCTBEHHO 3a INx 6e30nacHOCTb, INI KOrDa OT 3TO-TO JInca NOJyHeHbI YKa3AHnRA NO NOJIb3OBaHnIO npnbopom.
Heo6xOIMO npncMaTpNaBt 3a DeTbMn, YTO-6bl y6eINTbcra B TOM, YTO OHN He nIgpaOT C npnbopom.
Oco6bIe yka3aHnI NO TexHnke 6e30- nachocTn dJa daHHoro yCTpOiCTBa
PENEYNPEXKDEHNE:Onacnoctb oxora!
TOnOBKa rpynnbl, depxataJIb fIbTpra, napOBoe conno n noDOn OH nlaue oueH cInbHO Ha- rpeBaOTcB BO Bpemr pa6Otbl yCTpoiCTBa.
- Бернштейдерхасть Фильстра Толбко за ручky.
He npikacaiTecb K roIobKe rpynnbl, napOBOMy cOIIIO N NOdOnHy dJa YauWeK! DaIte 3TNM KOMNoHENTaM OCTbITb Nepei TEM,KaK INX YNCTNTb.
He npabnIte ctpyo napa Ha ce6y nn Ha dpyrnx IIOe. NocTabbTe noJ napOBoe conno (6) kakyo-Jinbo EMKoCTb.
PPEyPPEXDEHNE:
Y6eIntecb, yTO BHyTpB KOpnyca He nonaJaet Bnara — pNCK yDapa əJIeKTpOTOKOM.
BHIMAHNE:
He nCIOJIb3yIte yCTpoIcTBO 6e3 BOIbl.
- HanonHnIte pe3epByap IJIa BOJbI (3) TOnbKO XoJODHO BDOJ.
- IcnoIb3yIe ToJIbKO NiITbeByIO BODy. He nCIOJIb3yIte Ra3nIpOBaHHyIO BODy (ra3nIpOBaHHyIO MNHepaJIbHyIO BODy).
- Y6eIITecb, yTO DePkaTeIb cHJIbTpTa (18) HaJExKHO 3aΦNkCnPOBaH Ha CBOEm MeCTe, TaK KaK 3TO npncnocO6neHne pa6oTaET noD daBHeHem.
He nepemeaTe yctpoiCTBO BO BpeMa eropaboTbl.
Ha3nayeHne
OHO He npedHa3HaueHo Iy INcNoIb3OBaHnI:
B CeJIbCKOXO3aICTBeHHbIX NOMEUeHnX;
- FOCTaMn OTeJIeN, MOTeJIeN IN DpyrNX yUpeJXeHNJx FOCTINHNUHOrO TUna;
B NaHCNOHaTAX.
Ero MoXHO IcNoIb3OBaTb TOIbKO CnOco6OM, OINCAHHbIM B DaHHOM pyKOBOCTBe. YcTpoIcTB0HeNb3r IcNoIb3OBaTb DnI KOMMepeCkNx CeJIeN.
IIO6oe npyroe nCnoJb3ObaHne cHTaETcNc- IIOb3ObaHnem He no Ha3HaueHnIO MOKeT npINBecTN K NOpYe NMUeCTBa INN DaXe K TpaBme.
Ipon3BOiTeJIb He Hecet OTBeTCTBHeHOctn 3a BO3MOxHbIyUepe6, KOTOpbIMoKeT 6bITb PnUHNHe B pe3yNbTaTe HEnpaBnBHO NcNoJb3OBAHNY yCTpoiCTBa.
KoMnJIneKT
1 3cnpecco MaunHa
1 CbemHa pe3epByap IJI BODJI
1Писоевпяемубkaдяnapa
1 Kpbuika napoBoro conna
1ДержateNBФиьтpa
1Фильтуюшинэлем ent 1-оуашкn
1Фильтуюший слем ent 2-оушкn
1 PeuetKa noDOna
1 POnDOn
11 Mepnay loxka / Tpam6obka / KIIOU
PacnaKobka yctpoiCtBa
- YdaJIInTe ynaKOBky ycTpoiCTBa.
- YdaIte BCE ynaKOBOHybI MaTePnAbl, TaKne KaK NOnN3TnJIeHOBa INeHKa, MaTePnAIn HAnONHtEnI, Ka6JIbHbIe CTrJxKn I Kopo6Kn.
- Y6eIntecb, yTO B Kopo6ke eCTb BCE KOMNOHeHTbl.
I IPIMMEUHNA:
Ha yctpoiCTBe BCE eSe MOyT OCTaBaTbcr MeI Kne YactuI N IblN, OCTaBwneCnOcNe IpoN3BOdCTBeHHoro npoCecca. PekomeHdyetcnoYnCTNTb yCTpOJCTBO, KaK OINcaHO B pa3deJe "UInCTka".
3nemteblynpablenna
PncyHOK A
1 YIko dIy OTKpbITnK KpbIuKn pe3epByapa IINBODbl
2 Kpbiuka pe3epByapa dIa BODbl
3 Pe3epByap JJIa BOJbI
4 Pyuka kontrpona napa
5 DaTuk yPOBn BOJIbI
6 NapoBoe conIoc KpbIuKoI
7 POnDOn
8 OtceK noDOnaHa
9 PeWetKa nOdoHa
10 Haxmmha KhoIka ON/OFF
11 Haximna Khoja PUMP/STANDBY
12 Haximna Khoja STEAM / ESPRESSO
13 INdkaTOp cTaTyca
14 INHdkaTop HarpeBaTeIe
15 NopDorpeBaIOUaIpaTnHa / npDoH yawkn
16 Φιλβτργιούμην 3πεμεΜητι 1-ση γαυκη
17Фильтуюший Злем ent 2-оуашки
18ДеркateЛьфиьтра
19 ΦικcaTορ φιπlbTpα
20 Mepna Joxka / Tpam6obka / KIOU (1 KOMnoHENT, 3 yHKun)
Hnctpykun
PacnoJoxeHne
- Пocтавыte устpoиctBO Ha yctочИВую И ровHyю NOBepxHOCtB.
B BnDy NpHmMaOuIeOcJkapa N nCnapeHn He nCNoB3yIte yCTpoiCTBO nOd HABecHBIMn shkaqamn.
He cTaBbTe yCTpoiCtBO H HenocpeIcTBeHHoH 6n3OCTn OT rAOBoN nnn 3NeKtpuYeCKoN nTbI nn KaKOrO-Nn6o DpyrOro NCTouHnKa TeNa.
HaKHMHbIe KhoNKn (10/11/12)
HaHbIe HaxmHbIe KHOKn, KOrDa OHn HaKaTbI INN OTXaTbI, BblNOJIHrOT CJeDyUOJIne 0yHKUN:
| Коньka Haxkata Otrkata | ||
| 10 ON (Вкп) OFF(Bыкн) | ||
| 11 | PUMP (Hacoc) | STANDBY (Декурны реким) |
| 12 | STEAM (Па) | ESPRESSO (Өсprenecco) |
IopKJIIOUeHne
- Y6eNTecb, yTO 3JIeKTPoNtAHnE cTe N COOTBeTCTByET CNeUΦnKauyn yCTpOInCTBa.CneUΦnKauaHaHeuataHa Ha Ta6JInKe.
2.Поберп,В КАКOM NOLOXeHn HaxOДТСЯнхIMHbIe KHONK!HaxIMHbIe KHONK(10/11/12)doJxHbI 6bITb OTxaTbI. - BCTaBbTe WTeNcEInb WHypa 3JIeKTPoNtAHnB INCpabHyIO n 3a3eMneHHyIO po3ETky 230 B~50 T.
BkJ/BbIKJ
- YctaHOBnTE HAXIMHHyO KHOJky (10) B ПОLOXKeHne ON, YTO6bI BKJIIOUHTb yCTpoiCTBO. 3aRopNTcR INDnKATOp COCToRHN. YCTpoiCTBO NaHcET HarpeBaTbcr. Pa3orpeetcR NODOrpeBaIoUaЯ ПlaCTuHa (15).
- KaK TOnbKO 6yDet DoCTnHyTa Heo6xOuMaTeMnepaTpa BapKn, 3aROpNTcN HnDnKaTOp
I I PIMEYAHNA: BoBpempa6oTbIyCTpoNcTBaJaMnOuKa HnDnKaTopa/6yDen3aRopatbcn I rachTyb.3ToHOpMaJIbHOeAJIbHeHne, NOKa3bIBaIOUee,yTO TempePaTypa peYJInpyETcNIOdEpxKNaETcTePMoCTaTOM.
- OTOXMITE KHONky (10) B NOJIOXeHne OFF, yTO-6bl BBIKNIOHTb yCTPOINCTBO.
Pa6ota
PnncoeHHeHne /OTcoeHHeHne depkaTeJIa 1pb
Bo3bMnte pyky Ha JneBoi CTopoHecyTPOICTBa, YTO6bl npncOeHNHTb DepxkATEnbФnIb-TPa (cm. pnc. B ha cTpaHnce 3). BcTaBbTe TpHnHaNPaBnHOUxvByrNpy6bnHeHra rOIOBKn rpynbl. NotAHNTe DepxkATEnbФnIbTPa C NOMOu bpo yPkn BnpaBO, Do cepeINbI yCTPOIcTBa. Y6eINTeCb, YTO DepxkATEnbФnIbTPa HAnEKeHO 3aΦnKcnpOBaH B rOIOBKe rpynnbl.
- IOTaHnTe DepeKaTeIb 0nIbTpBa BneBO, YTO6bl OTcoEduHnTb OT rOIOBKn rpynnbl.
PENEyPEXKDEHNE: Onachoctb oXora!
Iocne Bapkn MeTannueckne yactn depkatae n npbtpn npbtpyuoero 3JeMeHTa Oeyh Tropyue.
PepBoe nCnoB3OBAHne / cInB
BHIMAHNE: CnBaTe BDOy n3 yCTpOncTBA nepei nepBbIM nCNoJIb3OBaHHeM I NOcNe DOJrNx NepepbIOB. He nCnoJIb3yIte KoPeeyHyu rUy BO BpeMa 3tOro npouceca!
1.Поберпe,В КАКOM NOLOXeHин HaxOДТСЯ HAXIMHьe KHOKN! HAXIMHьe KHOKN(10/11/12)doJxHbI 6bITb OTKaTbI.
2. BCTaBbTe wTeNcEIn b Hypa 3JNeKtpOnnTaHnB INCnpaBHyIO n 3a3eMneHHyIO po3eTKy 230 B~50 T.
3. Y6eIITecb, YTO NOIOH (7) HaxoIITcHa CBOe MeCTe BOTCEKe NOIOHa (8).
4. PeiTeKa IoIOna (9) DoJxHa HaKpbIBaTb OTceK TaK, YTo6bl CTpeJIKN 6bln HAnpaBHeHb K KopnyCy yCTpoNCTBa.
5. Понимпг Крьшку 3a ушko (1),Чтоби нанонтб peЗерByap ДЯ ВОbl (3).
6. HanonHte pe3epByap uNcToi, CBeKeB ODoI do OTMeTKn MAX. ChOBA 3aKpOnTe KpbIuKy.
7.ИЗВЛЕКИТЕДерхаTeIbФИNbTpα(18)ИЗ roJIOBKN rpynnbl.
8. YctaHOBnTe HaxmHyIO KhONky (10) B noLoXeHne ON, yTO6bI BkJIOnHTb yCTpOiCTBO. 3aOpPITcR INDnKATOP COCToHnR (13). YCTpOiCTBO NaHcHr HArpeBaTbcr. Pa3Orpeetc rNoDrpeBaIoUaI pIacTnHa (15).
9. ПовернITE napoboe conno (6). Y6eHITecb, yTO Tpy6ka ДЯ па npicoeDHeHa DoJHKhBIM O6pa3OM.
10. NocTaBbTe Kakyo-ln6o emKocTb (JapoppoHyu / npimepHo 500 mI) noi napoBoe conNo.
11.Понhoeью NOBepHnte pyuKу KOHTpoJna napa (4)doOTMeTkn 4".
12. Haxmte KhoNky (11), YTO6bI BKNIOHHTb HAcOC. HayHeTcnaKaUka.
13. BbIKIIOHnTe HAcOC NocNe TORO KaK BODa paB-HomepHO NaHcHT BbIXoINt bN 3 NapOBOrO cONla.YcTaHOBInTe HaXIMHyO KhONKy (11) B noJIoXKeHne STANDBY.
14. Повернente руку контую па К OTMeTke "
- OnopoxHnTe emKocTb n yctaHOBnTe ee noI roJIOBkoI rpynnbl.
- HaxmTe KhoNky (11), yTo6bI BkIoUHTb Ha-coc. HauHET Teyb Boda. Bcra Boda doJxHa Bbl-Teyb n3 pe3epByapa. BbIKIOUHTe hAcoc, yTo-6bI onOpOxHnTb emKoCTb.
PPEyPExEHNE: Onachocb oxora! BodaBemKoCTnTopa.
17.Поцecc cInBa BObl OKOHueH.HaONHnTe pe3epByap dIЯ BObl Do OTMeTKn MAX.DBaXdI IOBTOPHTe DeIcTBn, ONICAHbIe B NyHKTax 10-16,yTO6bl OUnCTNb BHyTppeHHIOU qactb yCTpoINCTBa.IyCTb Upe3 napOBoe conJIo BBITEuyET 6OJIbWe BObl.TenepyCTPOINCTBO IOTOBK INCNoIb3OBAHNIO.
PnroTOBJIeHne 3cnpecco
- PpOBepbTe, B KaKOM NOJIOXeHn HaxOJaTcra HaxmHbIe KhONk! HaKmHbIe KhoNk (10/11/12)doJIxHbI 6bITb OTKaTbI.
- BCTaBbTe wTencelb shHypa 3JneKtpoNTaHnB INcnpaBHyIO n3a3eMJIeHHyIO po3eTKy 230 B~50 T.
- Haxmte KhoNky ON/OFF, yTo6bI BKIOuHTb ycTpoInCTBO. 3aOpNTcra INdIKaTOP COCTOHNr O. YcTpoInCTBO NaHcHt HarpeBaTbcra. Pa3o-rpeetcnoDorpeBaIoUaJnPiactHa (15).
I IINIOJIb3yIte NOoRpeBaOuSyIoo nlaCTnHy, UTO6bl NODOrPeTb YauKk(yauKk).
- Y6eIntecb, yTO nOIOH hAXoIITcHa CBOEM Mecte B OTCeKe nOIOHa.
- PeWeTka NOДОHa DOJIXHa HApbIbA Tb OTCek TaK, YTO6bl CTpeNkn 6blHn HAnpaBneHbI K KopnyCy yCTpoiCTBa.
6.ПонмITEКршky3aушko,HTobI HanoHnTbpe3epByapДЯBObl. -
HanonHnTe pe3epByap XeIaEMbIM KOINueCTBOM YNCTO, CBExeB BObl. YPOBeHb BObl DOJKeH HaxoINTcM MeKdy OTMeTKamN MIN MAX.CHOBa 3akpoTKe KpbIuKy.
8.ИЗВЛЕКИТЕДерЖаTeьфИльТраи3 ГлOBКИ ГуПпbl. -
BbIbePte fNbTpuyoUm 3JeMeHr (16/17). BcTaBbTe 3JeMeHr B DepxaTeIb fNbTpra. Y6eIITecb, yTO fNkCaTOp fNlbTpra He HaxoDITcB BePTUKaJIbHOM INoJKeHn.
PekomeHdaunIOnTImaJIbHOB BapKoΦe:
9.1. PnncoeHnnte depkatae b pfNbtpa c cnIbtpyUOuM 3JeMeHTOM 6e3 3epen KoPe. HanoHnTe nepByu yauKy TOnbKO BDo, YTObI pa3OrpeTb yCTpOcTBO do ONTMaJIbHOJ pa6Oyei TemnepaTypbl.
9.2. NocTaBbTe yawky c ropey Bdoi Ha noDorpeBaUoSyu PnactHy.
9.3.Tenepb npuroToBbTe CBOI nepBbIN 3cnpecco. PEPDyPPEKDEHNE:MeTaNn-ueckne yactN depkatae Ipnbtpa n IpnbtpuOuI 3IeMeENT OeyhB ropaue.
- HanonHnTe fNbtpuOuIe IeMeENT KoFeHoi ryuei. NcNoB3yIte MePhyIO loXkU (20), IMeHOuyocB KOMJIKeKTe. Co6IouaIte OTMeTky MAX fNbtpuOuero 3IeMeNTa. PabHomepHo pacnpedeJIte KoFeHnyo ryuy i CJeRka HAdaBITE BHN3 TpaM6OBky (20).IOnucHTte KpaJ depKaTeJIa FInIbTpa.
11.ПибоeДиHITe DePkaTeIbФИNbTpa K rOIOB-Ke rpynnbl.Y6eINTEcB,yTO DePkaTeIbФИNb-TPa ПибоeДиHEn K rOIOBKe rpynnbldoJnxHbIM o6pa30m. - KaK ToIbKO 6yIDeT DoCTnHHTa Heo6xOIMaTeMnepaTypa BapKn, 3aRopNTcN HnDnKaTOp /0. IocTaBte NODorpetyu YauKy (YauK) NOd rOIOBky rpynnbl npraMo Ha DBA OTBepCTna, KOTOpbl E Bbl BNDTE Ha peWetke NDoHa.
- HaxmTe KhoNky PUMP. Ypee3 qnIbTp NaHcHET nTn ropyra Boda.
I PIMMEUAHNIA:
- 3TOT npocecc He npeepaaaetcra ABtoma-tuyeckn!
I IPIIMEUYAHNIA:
-
Ecni nHdkaTop (14) norachet, Boda 6oIbIe He doCTaTOUHO ropuay. IpepeBnTe npOceCC BapKn N BbIKNoHTe HaCoc. PdoXnTe, POKa nHdkaTOp/He 3arOpNTc CHOba. Tenepb MoXHo npOdoJXnTB pNiroTOBJIeHne 3cnpecco.
-
OctaHOBInTe Ipouecc BapKn, BbIKIOUH NAcCoc, KOrDa B YauKke (YauKax) 6yDet XeJaE-Moe KOJIuYeCTBO 3cPipecco: yCTaHOBInTe KHOI-Ky (11) B NoLoXKeHne STANDBY.
- YsepnTe yauKy (yaun).
I IPIPIMEYAHNIA:
I3BneKaIte IepKaTeIb 0nIbTpRa KaJbIpa3 nocIe npiroTOBHeNHa 3cnpecco.TaKMOxHO pOoPiNb cPOK cnyX6bl pe3HOBoINpOKnaKn rOIOBKn rpyPibl.
16.ИЗВЛЕКИТЕДерхаTeIbФИЛБТраИЗΤΟЛОВКINурпbl.
17. Onopoxhnte n chOba haonHnte qnIbTp, T06bl 3abapntb eue odHy yauKy 3cnpecco.
PENEYNPEXKDEHNE:
Metanuueckne yactn depxate na n npbtpa n npbtpyuojoero 3nemehta oyeh ropeyne.
18.ПоднIMTeФИКсATOPФИЛьТра(19)ВВерх.
IpoToJKNHTe
fKcTOp fNbTp a
6oJIbWM nAebem
no HnPaBHeHIO K
fNtbpTyUOeMy
3JIEMHTy, NOBopauHbAra, B TO Xe Bpemr, DepeKaTeIb 0nIbTpa (CM. pnc.).
- BbICTyHrTe KoFeHryO rUsy I3 FInIbTpYIOSe- ro 3IeMeHTa. Pn Heo6XoDMOCt NcNoIb- 3yIte IooKy.CMOITe OCTABWneCraCTuCbI KOFe I3 FInIbTpYIOSeO 3IeMeHTa rOpYeB BOIOJ.
-
Пюверь Te уpoBeHb BODbl B pe3epByape neped nprirotOBJIeHnem CneIyUOSeYaIKN 3cnpecco. BblonHnte DeIcTBn, OINcaHHbIe B nyHKtax 9-16.
-
UTO6bIO OCTaHOBNTb IPOUeCC, BbIKIHOuHTe YCTPOnCTBO. YCTaHOBNTe KHOJky (10) B NOJKeHne OFF.
PnroTOBJIeHne KanyuHno
O6bIuHO kanyuHcOcTOnT Ha TpeTb Nx KoFe,Ha TpeTb n3 ropayero MOJOKa, Hn Ha TpeTb n3 BCneHeHHoro MOJOKa.
MOnOuHa neHa He DoJxHa 6bIb CnUkOM TBepDoi, UTo6bl ee MoXHo 6blIO φOpMnPoBaTb IoxKo. OHa DoJxHa 6blb CmTaHoo6pa3HO, HApIMep, TAKo KaK He NoJIHOCTbIO B36bITbIe CnIBKN B3KO TEKCTypbl.
ДлгпригOTOBЛЕняkanучИнToTakke noHaIO6aTc:
- 60nb7a, BbInyKna yAska (npimepno 180 m), B KOTOpO Bbl DeJaTe 3cnpecco;
He6oIbwoKyBwHnДЯBCpeHnBaHnC HocnKOM (Ha npimep,0,3 n);
He6oBbwaJkaponpOuHaemKocTb;
XOJIOHoe MOIOKO C COePxaHnem Xnpa, NO KpaHne Mepe, 3,5%.
YTo6bI npiroTOBnTb KaanyuHNo, Chaayana Hado CdeNaTb 3cnpecco. BbINOHNte DeiCTBna, OINcaHHbIe B nyHkTaX 1-16 pa3dena "PpiroTOBneHne 3cnpecco".
BcneHnte MoNOKO cNeDyUoUm o6pa30M:
IPEdUnpeXKeHNE:
Onachoctb o6BaPnBaHna!
BbipbBaIOuHcna nap moxet cTaTb npuHOn TpaBMbl.Bo Bpema pa3OgreBaHnra ropauHn nap / BOda MoXeT BbipbBaTbca n3 roJOBKn rpynnbln / nnnapoBoro conla!
-
Y6eIITecb, yTO pyUka KOHTpOJa napa (4) yCTaHOBJIeHa B IIOJoxKeHne" " , nepeI Tem, KaK aKTINBupOBaTb 0yHKUIO npa.
He hampabJnTe napoBoe conIHO Ha IIOJe.
Bcerda noctabnIte kakyo-nioe mKoctb no napOBoe conno (6). -
Y6eIntecb, yTO hAXIMHaJ KHOJa (11) HaxoDITcB IIOJoxeHm STANDBY.
-
ПовернITE napoboe conno (6). Ybeintecb, YTO trpy6ka ДЯпа уctaHOBNeHa DoJHKbIM obpa3om. ПоноctbIO hacaIte KpbIshky napoboro coIIa Ha napoboe conno.
- Пдстаьтke кую-лбо karponpoHy o emKoctb noД napOBoe conNo.
- HanonHte KyBun H anoNoBHy XoJOnHBIM MOJOKOM.
- YcTaHOBInTe HaxmHyIO KhONKy (12) B noIooXeHne STEAM. IdoXdnte, noka 3aIopNTc INHdkaTOp
- CnErKa nobOpauHbAitpe pyUky KOHTpOJna napa (4) B HAnpaBHeHn OTMeTK" KaXdbI pa3 nepei nCNoJIb3OBaHnEM fYHKuIN BCneHbAHn, YTO6bl cInTb o6pa3OBaBUncKoHNcHcT. YCTpoIcTB OToBO K NcNoJIb3OBaHnIO TOJbKO TOrda, KOrDa n3 Hero 6yDet BbIXoDITb nap.
- Пocтавы Te KyBUnH C MoJOKOM NOД napOBoe COJILO.
- Понимпе КУБИн ТАК, УТоби парове сpon lo НхODиОсь кak pa3 по NOВерхHOCTHO MOJOKa.
I PIPMEUAHNIA:
He pa3MeuTe napOBoe coNIO no ueHTpy KyBUnHa, OHO DoJNKHO 6bITb 6bnKe K BHyTpeHHei NobepxHocTN erO cTeHN. 3To nIoXeHne IMeET BaxHoe 3NaueHne dIa TOrO, UTO6bl MONOKO NOnyUIno BVxpeBOe DnBXeHne. PeKomeHdyetcra IcNoIb30BaTb HocIK B KaueCTBe HAnpaBJIauOSeI dJI na napOBoro coIIa.
- Мedlyенно NOBOPaUNBaIte pykky KOHTpOJI npa (4) B HAnpaBNeHn OTMeTKN", NOKa He 6ydeT yCTaHOBNeHo XeNaemoe KOnUYe- cTBO BbIXoJauero npa. JERka DBrraTe KYB- uIN BBepx n Bn3. NOBepHnTe pykky KOHTpoJI npa B HAnpaBNeHn OTMeTKN" , NocIe TORO, KaMOnOkO BCpeHnIOcB Do XeNaemoro obbema (npimepHo 50%
I PIMMEAHNIA:
- Yo6bl npoJOnKInb nOOrpeBaHne MOJOKa, BCTaBBte napOBoe cOJIIO KaK MOxHO rIy6xe B KYBUnH, K CaMOMy dHy. Y6eINTEcB, yTO MoJOKO He HaunHaet 3aknataB. B 3tOM cIyuae BcR neHa cnaTeT.
- Ecnn nHdNkatop (14) norachet BO BpemB CnneHbAHn, 3NaHT BODa CTana He DoCTaTOUHO TOpAeH. NObepHnte pyKy KOHTPOJI npa K OTMeTke". IdoXnTe, noka nHdNkATOp/He 3arOpNTcA CHOBA. Tepeb MoxHo npoDoJXnTB BCnneHbAHne MOJOKa.
10.уTO6bI ydaHtB nocJeHnne 6oJIbUne ny3bIpb- KN BO3dyxa, OCTOPOXHO CTyKHnTE KYBUnHOM C MOJOKOM NOCJIe BCHeHbAHnO NOBepxHOCTb cToJa (KaK ecNl 6bl Bbl HeMHORO JecTKO NOCTaBnIn erHa cTOn).Cnerka NOKpyTIne KyBShIN C MOJOKOM. 3To nOMoraet nepemeMaTb neHy nocJIe BCHeHbAHnA. Tenerb He TepaTe BpemEni. MeDJIeHHo BCHeHHeHoe MoJOKOB 3cnpcecco.
- Cnerka nokpyuBaIte KyBUnH C MOJOKOM, KOrda 6yTe HaINBaTb BCneHeHHoe MOJOKO B 3cnpcecco.
I PIMEACHNIA:
HeckoIbKIMNIOBKMnDINXeHnMaHnHa neHe MoXHO HapICOBaTb y3Opbl.
- Пocьnteпehу пошkom кakao Илкорицен no BKycy.
-
BAXHO: qnnte napooe conno cpa3y je nocne kaxdo ro ncoNb30BAnra! Pn 3akpbTIN pykN KOHTPOna npa, B TeueHne HeCKOJIbKnx CekynD o6pa3yeTcBAkyuM, KOTOp bIn BTARnBaET HeKOTOpoe KOJNUeCTBO MOnOKa BHytpb napOBoro conna. NocTabTe Japo-npOHyu EMKoCTb NOd napooe conno. PnOTKpoIte pykny KOHTPOna npa Ha KopOTKoe Bpemr, YTObblbInyCTNTb OCTATKN MOLOKa IN3 napOBoro conna. Ipotpnte napooe conno BnaxHOBETouhIO.
-
YctaHOBnTe HaXmHHyo KhoNky (12) B noJooXeHne ESPRESSO, yTo6bI BBIKIOHTb cyHKUIO npa.
- UTo6bIOCTaHOBnTb IpoueCC, BblKJIIOUHTe YcTPOIcTBO. YcTaHOBnTe HaxmHyIO KHOINKy (10) B noJoxHeNe OFF.
UcTka
PPEyPPEKDEHNE:
-Передчисков BCERДа OTCOEDINHЯITE yctpoiCTBOOTcTn3JIeKTPoNTaHnI JxDITe,POKA OHO NOLHOCTbIO OCTbIHET.
He norpykaTe yctpoNCTBO B BODY, TaK KaK 3TO MOKeT npNBecTN K ydApy 3JIeKTpOTOKOM IINI NOkApY.
BHIMAHNE:
He nCnoJb3yIte npoBOJOnHyU ueKyu nn KaKne-Jn6o dpyrue a6pa3NBhie HNCTpyMeHTbl.
He nCnoJb3yIe KaKne-Jn6o KnCNoTbI nn a6pa3nBhIe BeueCTBa.
- YnCTIte Kopnyc yctpoiCTBa cnerka BnaJxHOB BeToBIO 6e3 DoabNeHnM OIOUxxCpeDCTB.
TolOBKa rpynnbI np3nHOBa npokJaKa
IpoTpnte roNobky rpynnbI np3nHOByIO npOKnaKy BnaXHoB BeToosbIO. HanInuNe ocTaKN ydaJIaIYe MraKoH HeJIoHOBoI zetKoH. 3aTeM npOtpnte DeTaN MraKoB BeToosbIO.
Akecccyapbl
IOMOte depKataIb fIbTpap, fIbTppyoUne 3IeMeHTbl, peWetKy IODHOa, IODIOH, MepHyIO Joxky, pe3epByap dIra BODbl, Tpy6Ky napOBoro COIIa N KpbIuKy napOBoro CONla B TeNIOB Mblb-HoB OBe. Pn Heo6xOIMOCTH NcNoJIb3yIte MArKyIO HeJIOHOByIO UeTKy. IpONIoUNTe BCE YnCToB YoD. BItpnte Hacyxo BCE DetAIN MmRko BEToSbIO.
BHIMAHNE:
Tn deTaN HeIb3aMbITb B NocydomoeyHOMaunHe. Kap n arpeccNBhie MOUcne cpeCTBa Moryt CTaTB npuHOn NCKaXeHn OopMbIn ObecuBeuHaHn.
Pe3epeyapdna b0bbl
- OtkpoiTe KpbIuKy, YTO6bI n3BNeUpe3epByap dIra BoIb.I. BbITaHInTe pe3epByap DBym pyKaMn BBepx I HApJy. NocTaBbTe ero Ha MeTo IocJIe YNCTKN IN BbICyUWBAHnA.
I I PIMMEUAHNIA:
Pe3epByap IJRA BOdbI NMeET DBA KpHoka.
3açenTe KpOKn pe3epByapa IЯ Bɔdbl 3a Dba OTBepCTn yCTpoiCTBa.
Cnerka npnxMnte pe3epByap Inra BOdbi BHN3, YTO6bl OTKpbITb KnaanH.
Paposoconno
- YnCTInTe napOBoe conIIO, erO Tpy6ky N KpbIuKy cpa3y Jx e IocNe IcNoJIb3ObaHnry. 3acoxuHe OCTaTKM OJOKa IOTOM 6yDet Tpydno CUnIaTb.
IPEyPExKDEHNE:
Iapoboe conno ouenb ropee cpa3y nocne IcnoIb3OBAHnI!
- Chmnte KpbuKy. Bepntecb 3a KpyIbI o6oB BOKpyr KpbuKn. Cnerka nobepHnte ee, uTo6bl 6JIeYHTb CHrTne. NcNoJb3yIte BnaXHyIO BeToUb, UTo6bl B3rTb OdHOH pyKoI napOBoe conllo!
- IcnoIb3yIte KIOU (20), UTO6bI ydaJIITb MaJIeHbkyo Tpy6ky u3 napOBoro cOnna. Cm. pnc. C Ha cTpaHnue 3. NOBOPaUNBaIte KIOU no YaCoBOI cTpeJIke.
OCTaBbTe Tpy6ky N KpbIuKy Ha HeKOTOpoe BpeMBA TENIOMbIbHO B0e.Tak MoXHo 6yJeT IERKO ydaJIITb OCTaTKM MONOKa. - PpOtpnte napOBoe conIHO ha yCTpoiCTBe BlaXHoi BeToosbIO.
I I PIMMEUAHNIA:
HanoHnHe emKocTb ropueB BOo, yTo6bl ydaHtB 3acoXwne ocTaTk. NocTabTe emKocTb noI npOBbIM cOnlOM TaK, yTo6bl OHO 6blNo norpyxheO B Body.
YcTpaHHe HEnCnPaBHOCTeI
0.14 0.23 0.25 0.26
120 < x < 160
·
p
1
yaii i 1
Jaaill slalglallg jally Jalaal jia
i
yillil yLaxiuu puua 58
+ = 2
jS = jL
在 Rt ABN 中:
.B&Bs
3
a 1
y jai yjai jie jie jie jie jie jie jie jie jie jie jie jie jie jie jie jie jie jie jie jie jie jie jie jie jie jie jie
a
1
ON (10)
① all all jujj 1
j 1
.(15)
/
a ball
:
cui /jai jai aai cai g jia
25 all
jia jia (3Bj
p 1
jieaii
1. 1234567890
1g 2
gulw11 wjralg wjrally aiaaol 1 jz11 Jbi
"++ (4) jll kill iia 11
aill (11) 12
eall 1
jusolllolall Jgjjaaasallolbl.13
gill 11) jll bcil
STANDBY
- 15.14
Jai Jai Jai Jai Jai Jai Jai Jai Jai Jai Jai Jai Jai Jai Jai Jai Jai Jai Jai Jai Jai Jai Jai Jai Jai Jai Jai Jai Jai Jai Jai Jai Jai Jai Jai Jai Jai
yaaal (11) jll 16
olall ccl g no gdi olall al jil olall gdi
e 1
1.
iiisle 1
olall cie 1ol jaiil aiae no juii iuii 17
jll jll iia jie gaii olal jia jiall
plesu wj jie jie
grrn 1
1
(10/11/12)
Lolai cyio bila jia jai ball Jsi Jsi 2
50\~230
jolll ON/OFF cia 1e baiol .3
jglal jw
.(15)
:
()
jglgclg,olal jgs
Jnnnnnll
(180)
a1 = 2,an + 1 = n2 + n3 + ·s + _1n
g 2 g 1 g 1 g 1 g 1 g
.16 1
:Laasaaaaiyssi
1J 1
1 1
1
(11)Jzj
. STANDBY
j.(6).2
aiaai 1i jii iiaie brc J. Lai Jy
lalai
.3
Aiaia 2JyI yIyI yIyI 4
gssll (12) jzj zle bai 5
SSTMEAM
/心
(4)
i 1
sic baa coliaa jolj jolll
J
7
jzhi xià 1
Jai Jia 8.
| x1| = | x2| = | x_3|
:
- (14)
alol yaiol yolall jll 1jil.
0.3 1
- 50 JLL gao, 500
% 3.5
( 1 - x) + x + 5 = 10
11 (11) jill baiol:
STANDBY
()1.15
:
Jaa Jaa Jaa Jaa Jaa Jaa
aalalal alalalal alalal alal
.16
iic (4) i.
2 =
.
(6) 12 · 12 · 12 · 12 · 12 · 12 · 12 · 12 · 12 · 12 · 12 ·
Juaaill iIac aay sllig aiislu
(19)(204).18
all
.
(1)
.19
abai 1ii jai i bai 1i aai ai siui
aall yaiy jll yaiy gaa
[A = \left{ {1,2,3,4}\right} ]
Jac Jia olall cie oyolall guo 20
169 9 8
0.25C
jll bc biai. jglal cibly pa aylool .21
OFF 10
gii
15g 08g 2aLa 151 Jao jao aole gnnl 11 jn
a
a a a a a a a a a a a a a a a a a a

a 1234567890
aabal 12222222222222222222222222222222222222222222222222222222222222
Cai lai
aai aai gaoal gai aai gai jai lui
ele gai jai all aai log gai baiill aai gai baill
jai iia albcg jai ilia uoi gai oai
aeli jai olai jai piai ul, gie jay ai dol ay
alay cai laiall eahil pi. slll ci li
aali jai aai hai al jai y


jai jai