
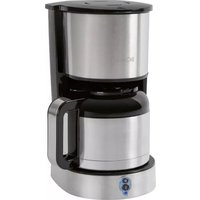
ES 184 CB - Coffee machine BOMANN - Free user manual and instructions
Find the device manual for free ES 184 CB BOMANN in PDF.

| Product type | Espresso machine |
| Brand | Bomann |
| Model | ES 184 CB |
| Pump pressure | 15 bars |
| Water tank capacity | 1.5 liters |
| Net weight | 3.1 kg |
| Power supply | 230 V~, 50 Hz |
| Functions | Espresso, Cappuccino, Steam |
| Cup warming plate | Yes |
| Automatic shut-off | Yes (after 40 minutes) |
| Indicator lights | Heating light, Status light |
| Control buttons | On/Off, Pump/Standby, Steam/Espresso |
| Included accessories | Filter holder, 2 filter baskets (1 and 2 cups), spoon/tamper/tool, steam nozzle with cover, drip tray, grid, cup rest insert piece |
| Cleaning | Removable parts hand washable, do not immerse the appliance in water |
| Descaling | Recommended regularly with a commercial product |
| Safety | Do not touch hot surfaces, do not direct steam towards yourself, automatic shut-off, child supervision |
| Repairability | Contact a qualified technician, do not repair yourself |
| Disposal | Do not throw in household waste, take to a collection point |
Frequently Asked Questions - ES 184 CB BOMANN
User questions about ES 184 CB BOMANN
0 question about this device. Answer the ones you know or ask your own.
Ask a new question about this device
Download the instructions for your Coffee machine in PDF format for free! Find your manual ES 184 CB - BOMANN and take your electronic device back in hand. On this page are published all the documents necessary for the use of your device. ES 184 CB by BOMANN.
USER MANUAL ES 184 CB BOMANN
Consommation: 1050 W
Thank you for choosing our product. We hope you will enjoy using the appliance.
Symbols in these Instructions for use
Important information for your safety is specially marked. It is essential to comply with these instructions in order to avoid accidents and prevent damage to the machine:
WARNING:
This warns you of dangers to your health and indicates possible injury risks.
CAUTION:
This refers to possible hazards to the machine or other objects.
NOTE: This highlights tips and information.
Contents
Overview of the Components 3
General Notes 50
Special safety information for this unit 50
Supplied parts. 52
Unpacking the appliance 52
Controls 52
Instructions 53
Placement 53
Insert for the warning plate/cup shelf (13).53
Push Buttons (8/9) 53
Electric Connection. 53
On/Off. 53
European regulations on energy saving. 53
Operation 53
Attach / Detach Filter Holder 53
Inserting the drip tray / drip tray grid. 53
First Use / Bleeding 53
Making Espresso 54
Making Cappuccino 54
Cleaning 55
Group Head And Rubber Seal. 55
Accessories. 55
Decalcification 56
Storage 56
Troubleshooting 56
Technical Data 57
Disposal 57
General Notes
Read the operating instructions carefully before putting the appliance into operation and keep the instructions including the warranty, the receipt and, if possible, the box with the internal packing. If you give this device to other people, please also pass on the operating instructions.
- The appliance is designed exclusively for private use and for the envisaged purpose. This appliance is not fit for commercial use.
- Do not use it outdoors. Keep it away from sources of heat, direct sunlight, humidity (never dip it into any liquid) and sharp edges. Do not use the appliance with wet hands. If the appliance is humid or wet, unplug it immediately.
- When cleaning or putting it away, switch off the appliance and always pull out the plug from the socket (pull the plug itself, not the lead) if the appliance is not being used and remove the attached accessories.
- Do not operate the machine without supervision. If you leave the room you should always turn the device off. Remove the plug from the socket.
- The device and the mains lead have to be checked regularly for signs of damage. If damage is found the device must not be used.
- Use only original spare parts.
- In order to ensure your children's safety, please keep all packaging (plastic bags, boxes, polystyrene etc.) out of their reach.
WARNING!
Do not allow small children to play with the foil. There is a danger of suffocation!
Special safety information for this unit
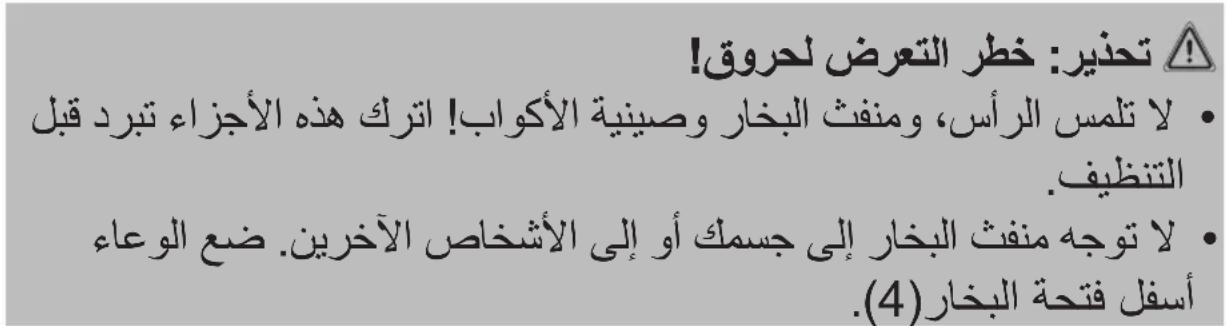
WARNING: Risk of burns!
Group head, filter holder, steam nozzle and cup tray get very hot during operation.
- Take hold of the filter holder only at the handle.
- Do not touch group head, steam nozzle and cup tray! Let these parts cool down before cleaning.

WARNING: Risk of burns!
- Do not point the steam jet towards yourself or other persons. Place a container under the steam nozzle (4).

WARNING:
Ensure that no humidity enters the casing. Risk of electric shock.

CAUTION:
- Fill the water tank (2) only with cold water.
-
Only use potable water. Do not use carbonated water (sparkling mineral water).
-
Ensure that the filter holder (16) is secure and properly locked during operation, since this appliance works under pressure.
- Use the appliance only on a level work surface.
- Only use the appliance when water is filled into the water container.
- Do not move the appliance when it is in operation.
- This appliance can be used by children aged from 8 years and above if they have been given supervision or instruction concerning the safe use of the appliance understand the hazards involved.
- Cleaning and maintenance by the user shall not be made by children unless they are older 8 years and supervised.
- Keep the appliance and its cord out of reach of children less than 8 years.
Children shall not play with the appliance. -
Appliances can be used by persons with reduced physical, sensory or mental capabilities or lack of experience and knowledge if they have been given supervision or instruction concerning use of the appliance in a safe way and if they understand the hazards involved.
-
Do not try to repair the appliance on your own. Always contact an authorized technician. To avoid the exposure to danger, always have a faulty cable be replaced only by the manufacturer, by our customer service or by a qualified person and with a cable of the same type.
- This appliance is intended to make espresso and cappuccino.
-
Only use the appliance in a dry, indoor area. It is intended for domestic use and similar areas of use such as e.g.
-
In staff kitchens in shops, offices and other commercial areas. It is not intended for use in farm accommodation or Bed & Breakfast establishments or by guests in hotels, motels and other accommodation facilities.

CAUTION:
The appliance must not be immersed in water for cleaning. Refer to the instructions provided in the chapter "Cleaning".
Supplied parts
1 Espresso machine
1 Removable water tank
1 Attachable steam pipe
1 Steam nozzle cover
1 Filter holder
1 1-cup filter insert
1 2-cup filter insert
1 Drip tray grid
1 Drip tray
1 Measuring spoon / tamper / spanner
1 Insert (cup shelf)
Unpacking the appliance
- Remove the packaging of the appliance.
- Remove all packaging material such as plastic film, filler material, cable ties and box packaging.
- Check that all the parts are in the box.
NOTE:
There may still be dust or production residues on the appliance. We recommend that you clean the appliance as described under "Cleaning".
Controls
Figure A
1 Water tank lid
2 Removable water tank
3 Steam control knob
4 Steam nozzle with cover
5 Drip tray compartment
6 Drip tray
7 Drip tray grid
8 push button (Pump/Standby)
9 push button (Steam/Espresso)
10 Heater indicator lamp
11 Status indicator lamp ①
12 On-/off button (ON/OFF)
13 Insert (Warming plate / cup tray)
14 Filter insert for 1 cup
15 Filter insert for 2 cups
16 Filter holder
17 Filter safeguard
18 Measuring spoon / tamper / spanner (1 part, 3 functions)
Instructions
Placement
- Place the appliance on a stable and level surface.
- Due to rising heat and vapours do not operate the appliance under wall cabinets.
- Do not place the appliance in close proximity to a gas or electric stove or any other heat source.
Insert for the warming plate/cup shelf (13)
Place the insert in the notch at the top of the appliance.
Push Buttons (8/9)
These push buttons have the following functions when locked in place or disengaged:
| Switch Engaged Disengaged | ||
| 8 | (Pump) | (Standby) |
| 9 | (Steam) (Express) | |
Electric Connection
- Ensure that your mains power corresponds with the specifications of the appliance. The specifications are printed on the type label.
- Check the push button settings! Push buttons (8/9) must be disengaged.
- Connect the mains cable to a properly installed and earthed wall outlet.
On/Off
- Press the on / off button (12) briefly to switch the appliance on. The appliance starts heating up. The warming plate (13) heats up.
- The Indicator lamp lights up as soon as the necessary brewing temperature is reached.
i NOTE:
The indicator lamp tums on and off during operation. This is normal and indicates that the temperature is thermostat-controlled and maintained.
- In order to switch the appliance off, press and hold the on / off button (12) for 4 seconds. Then disconnect the mains plug from the socket.
European regulations on energy saving
NOTE:
The European Directive 2009/125/EC (Ecodesign Directive) incorporates measurements for energy saving.
The following applies to coffee makers: The keep-warm period is limited to max. 40 minutes after which the appliance turns off automatically.
You benefit from better safety and lower energy consumption.
Operation

WARNING: Important!
Before use, always check the button settings! The buttons (8/9) must be in the off position, before connecting the appliance to a properly installed earthed socket!
Attach / Detach Filter Holder
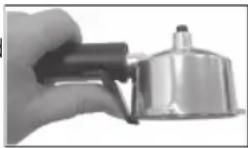
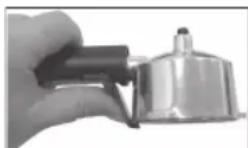
- Hold the handle at the left edge of the appliance to attach the filter holder (see Fig. B on page 3). Insert the three guide tabs in the group head recesses. With the handle pull the filter holder to the right hand side to the middle of the appliance. Ensure that the filter holder is well secured in the group head.
- Pull the filter holder to the left to detach from the group head.

WARNING: Danger of burns!
After brewing the metal parts of filter holder and filter insert are hot.
Inserting the drip tray / drip tray grid
- Slide the drip tray for the residual water (6) into the compartment (5).
- Place the drip tray grid (7) onto the compartment as a cover. The recessed edge must face the appliance housing.
First Use / Bleeding
CAUTION:
Bleed the appliance before first use and after a longer period of non-use. Do not use coffee grounds during this process!
- Make sure that the drip tray (6) and the drip tray grid (7) are inserted.
- Fill the water tank with clean, fresh water to the MAX marking. Close the lid again.
- Remove the filter holder (16) from the group head.
- Press the on/off button (12) briefly to switch the appliance on. The status indicator lamp (11) lights up. The appliance starts heating up. The warming plate (13) heats up.
- Swivel out the steam nozzle (4). Ensure that the steam pipe is properly attached.
- Place a suitable container (heat-resistant / approx. 500ml ) under the steam nozzle.
- Turn the steam control knob (3) all the way towards "W".
- Press push button (8) to turn on the pump. Pumping starts.
- Turn off the pump after water is evenly emitted from the steam nozzle. Push button (8) is in position.
- Close the steam control knob towards
- Empty the container and place it under the group head.
- Press push button (8) to turn on the pump. The water flow starts. Let all water from the water tank run through. Turn off the pump to empty the container.
WARNING: Danger of burns!
The water inside the container is hot.
- You have now finished the bleeding process. Fill the water tank to the MAX marking. Repeat points 6 through 12 twice to clean the appliance on the inside. Let more water flow through the steam nozzle. Now the appliance is ready to use.
Making Espresso
- Switch the appliance on. The status indicator lamp ① lights up. The appliance starts heating up. The warming plate (13) heats up.
NOTE:
- Use the warming plate to pre-heat your cup(s).
-
If you want to pre-heat the cup(s) more rapidly, rinse them with hot water.
-
Make sure that the drip tray (6) and the drip tray grid (7) are inserted.
- Fill the water tank with the desired amount of clean, fresh water. The water level must be between the MIN and MAX markings. Close the lid again.
- Select a filter insert (14/15). Place the insert in the filter holder. Ensure that the filter safeguard is not upright.
- Fill the filter insert with espresso grounds. Use the supplied measuring spoon (18). Observe the MAX marking in the filter insert. Spread the espresso grounds evenly and push down slightly with the tamper (18). Clean the edge of the filter holder.
- Attach the filter holder to the group head. Ensure that the filter holder is properly attached in the group head.
- The necessary brewing temperature is reached as soon as the indicator lamp lights up. Place your pre-heated cup(s) under the group head exactly on the two holes you can see in the drip tray grid.
- Press the push button to position. The hot water is forced through the filter.
i NOTE:
This process does not end automatically!
- Stop the brewing process by turning off the pump when the desired amount of espresso is in your cup(s): Press push button (8) to position.
- Remove the cup(s).
i NOTE:
Remove the filter holder every time after making.
espresso. In this way you extend the lifetime of the group head's rubber seal.
- Remove the filter holder from the group head.
- Empty and refill the filter to brew another cup of espresso:
WARNING:
Metal parts of filter holder and filter insert are hot.
a) Flap the filter safeguard (17) up. Push the filter safeguard with your thumb towards the filter insert while turning the filter holder around (see Fig.).
b) Tap the coffee grounds out of the filter insert. Use a spoon, if necessary. Rinse the remaining coffee grounds with hot water out of the filter insert.
- To prepare the next cup/cups of espresso, proceed as described above.
Making Cappuccino
Generally cappuccino consists of one-third coffee, one-third hot milk and one-third frothed milk.
The milk froth should not be firm enough to be shaped with a spoon. It should be creamy, such as not completely whipped cream, of a viscous texture.
For the preparation you need in addition
- a larger, bellied cup (approx. 180 ml), in which you make the espresso,
a small frothing jug with spout (e.g. 0.3 l), - a small, heat-resistant container,
- cold milk with at least 3.5% fat content.
To make cappuccino you first have to make the espresso.
Follow the instructions under "Making Espresso" points 1 through 11.
Froth the milk as follows:
WARNING: Danger of scalding!
Escaping steam can cause injuries. During the heating process hot steam/water can escape from group head and/or steam nozzle!
- Ensure that the steam control knob (3) is set to "ON" position before activating the steam function.
-
Do not direct the steam nozzle towards persons.
Always place a container under the steam nozzle (4). -
Ensure that push button (8) is in position.
- Swivel out the steam nozzle (4). Ensure that the steam pipe is properly attached. Attach the steam nozzle cover all the way on the steam nozzle.
- Place a heat-resistant container under the steam nozzle.
- Fill the jug half with cold milk.
- Press push button (9) to position. Wait until the indicator lamp glights up.
- Briefly open the steam control knob (3) towards "every time before using the frothing function to drain collected condensate. The appliance is ready to use if only steam escapes.
- Place your milk jug with the milk under the steam nozzle.
- Lift the jug so that the steam nozzle sits just under the milk surface.
i NOTE:
Do not place the steam nozzle in the centre of the jug but close to the inner wall. This position is important for the milk to get into whirling motion. We recommend using the spout as guide for the steam nozzle.
- Slowly open the steam control knob (3) towards "W" until the desired amount of steam is set. Slightly move the jug up and down. Close the steam control knob towards "R" after the milk has frothed to the desired volume (approx. 50% ).
i NOTE:
- To further heat up the milk insert the steam nozzle all the way to the bottom of the jug. Ensure that the milk does not start boiling. In this case the foam will collapse.
-
The water is no longer hot enough if the indicator lamp (10) turns off during frothing. Turn the steam control knob towards "Wait until the indicator lamp lights up again. Now continue frothing the milk.
-
To remove the last coarse air bubbles knock the milk jug after frothing carefully on the tabletop (as if you would set it down a bit hard). Swivel the milk jug slightly around. This helps to mix the foam after frothing. Now waste no time. Pour the frothed milk slowly into the espresso.
- Swivel the milk jug slightly around while pouring the frothed milk slowly into the espresso.
i NOTE:
- With a few artful movements you can draw designs into the foam.
-
Sprinkle cocoa powder or cinnamon to taste on the foam.
-
IMPORTANT: Clean the steam nozzle immediately after every use! When closing the steam control knob a vacuum is created within seconds, which draws some milk into the steam nozzle. Place your heat-resistant container under the steam nozzle. Open the steam control knob briefly for a shot of steam to flush milk residue out of the steam nozzle. Wipe the steam nozzle with a damp cloth.
- Press push button (9) to position to turn the steam function off.
Cleaning
WARNING:
- Before cleaning, always remove the mains plug and wait until the device has cooled down.
- Do not immerse the device in water. Otherwise this might result in an electric shock or fire.
- The steam nozzle is hot immediately after use!
CAUTION:
- Do not use a wire brush or any abrasive items.
-
Do not use any acidic or abrasive detergents.
-
Clean the casing with a slightly damp cloth without detergents.
Group Head and Rubber Seal
Wipe group head and rubber seal with a damp cloth. Use a soft nylon brush to remove stubborn residues. Dry with a soft cloth.
Accessories
Wash filter holder, filter inserts, drip tray grid, drip tray, measuring spoon, water tank, steam nozzle pipe and steam nozzle cover in warm sudsy water. Use a soft nylon brush, if necessary. Rinse with clean water. Dry all parts with a soft cloth.
CAUTION:
These parts are not dishwasher-safe. Heat and aggressive detergents can cause distortion and decolouration.
Water Tank
- Open the lid to remove the water tank. Pull the tank with both hands up and out. Replace the tank after cleaning and drying.
i NOTE:
The water tank has two hooks.
- Hook the water tank into the two eyelets of the appliance.
- Press the water tank slightly down for the valve to open.
Steam Nozzle
Clean steam nozzle, attached pipe and cover immediately after use. Dry milk residue is difficult to clean.
- Remove the cover. Use the small grip. Turn slightly for easy removal. Use a damp cloth to hold the steam nozzle with one hand!
- Use the spanner (18) to remove the small pipe from the steam nozzle. See Fig. C on page 3. Turn the spanner clockwise.
- Leave pipe and cover for some time in the warm sudsy water. In this way milk residue is easily removed.
- Wipe the steam nozzle on the appliance with a damp cloth.
i NOTE:
Fill a container with hot water to remove dry residue. Place the container under the steam nozzle, so that it is submerged.
5. After cleaning replace pipe and cover on the steam nozzle. Place a heat-resistant empty container under the steam nozzle. Operate the appliance as instructed under "Making Cappuccino" points 5 and 6. After cleaning the steam nozzle is again ready to use.
Decalcification
Scale deposits put the functionality of your appliance at risk. It is necessary to decalcify the appliance regularly. The intervals depend on use frequency and water hardness.
Decalcify with a commercial decalcifier for coffee machines.
- Dose as instructed on the packaging or on the instruction leaflet.
- Operate the appliance as instructed for making espresso until the tank is empty. Let the solution flow through the group head (without filter holder).
WARNING:
- Rinse the water tank and let one full tank fresh water flow through the group head to rinse out the decalcifier residues.
- Do not use this water for making espresso.
Storage
- Clean the appliance as instructed. Let the accessories dry completely.
We recommend that you keep the appliance in the original packaging if the appliance will be not used for long periods. - Always keep the appliance out of the reach of children in a dry, well ventilated place.
Troubleshooting
| Problem Possible cause Solution | ||
| The appliance does not function. | The appliance has no power supply. | Test the socket with another appliance. |
| Plug in the mains plug correctly. | ||
| Check the main circuit breaker. | ||
| Problem Possible cause Solution | ||
| The appliance does not func-tion. | The appliance has not been bled before first-time use. | Bleed the appliance as instructed under "First Use/Bleeding". |
| The appliance is faulty. | Contact our service center or a specialist. | |
| No coffee output. | Switch the appliance off! | |
| The water tank is empty. | Fill the water tank with fresh water. | |
| The water tank is not properly attached; the valve is not open. | Press the tank slightly down for the valve to open. | |
| The holes in the filter holder and the group head outlet are blocked. | Clean filter holder, filter and group head outlet. | |
| Air entrapped in the heating circuit. | Generate steam as in-structed under "Making Cappuccino". Open the steam control knob all the way towards "M". | |
| The coffee grounds are too fine or compressed too much. | Loosen the coffee grounds. Spread it evenly and only slightly compress with the tamper. | |
| Scale deposits in the appliance. | Decalcify the appliance as instructed. | |
| The pump is noisy. | Switch the appliance off. | |
| The water tank is empty. | Fill the water tank with fresh water. | |
| The water tank is not properly attached; the valve is not open. | Press the tank slightly down for the valve to open. | |
| Air entrapped in the water circuit. | Bleed the appliance as instructed under "First Use/Bleeding". | |
| Espresso escapes at the filter holder edge. | Stop the brewing process! | |
| The filter holder is not properly attached or is not enough closed. | Attach the filter holder properly as instructed under "Attach / Detach Filter Holder". | |
| Too much coffee grounds in the filter insert. | Remove excess coffee grounds. Observe the MAX marking in the filter insert. | |
| Coffee grounds residues on the rubber seal of the group head. | Switch the appliance off and let it cool down. Clean the rubber seal as instructed. | |
| Espresso is too cold. | The cups were not pre-heated. | Rinse the cups with hot water. |
| Indicator lamp does not light up during the brewing process. | Wait until the indicator lamp glights up. | |
| Coffee crema is slightly disco- loured (coffee runs out fast). | The coffee grounds are too coarse or are not evenly spread. | Use the supplied tamper. |
| Too little coffee grounds in the filter insert. | Fill coffee grounds only to MAX marking in the filter insert. | |
| Coffee crema is dark discoloured (coffee runs out slowly). | The coffee grounds are too fine or com- pressed too much. | Loosen the coffee grounds. Spread it evenly and only slightly compress with the tamper. |
| Too much coffee grounds in the filter insert. | Use less coffee grounds. Observe the MAX marking in the filter insert. | |
| No crema on the espresso. | The espresso grounds are not suitable. | Change the brand, if necessary. |
| The milk does not froth. | The milk is not suit- able. | Use milk with at least 3.5 % fat content. |
| The milk is not cold enough. | Use refrigerated milk. | |
| The steam nozzle is dirty. | Clean the steam nozzle as instructed. | |
| The appli- ance turns off automatically. | This is not a malfunction of the appliance. In order to comply with the Ecodesign Directive (2009/125/ EC), the appliance tums off automat- cally after max. 40 minutes after the brewing process has finished. | |
Technical Data
Model: ES 184 CB
Power supply: 230 V~, 50 Hz
Power consumption: 1050 W
Capacity: 1.5 Liter
Protection class:
Pressure: 15 bar
Net weight: approx. 3.1 kg
The right to make technical and design modifications in the course of continuous product development remains reserved.
This device has been tested according to all relevant current CE guidelines, such as electromagnetic compatibility and low voltage directives, and has been constructed in accordance with the latest safety regulations.
Disposal
Meaning of the "Wheelie Bin" Symbol
Take care of our environment, do not dispose of electrical appliances via the household waste.
Dispose of obsolete or defective electrical appliances via municipal collection points.
Please help to avoid potential environmental and health impacts through improper waste disposal.
You contribute to recycling and other forms of utilization of old electric and electronic appliances.
Your municipality provides you with information about collecting points.
Instrukcja obstugi
CTC Clatronic Sp. z o.o
YactHHn, kki doaHbca 80
Po3nakobvBaHH npncTroo 80
ElenemEn KepyBaHHa 80
Inchpykui 3actocybaHHa .80 Po3milleHHa .80
Bctabka nra harpibalbhoi pntn/ nioha nra ropnT (13) 80
Khoikn (8/9) 80
PiiEHaHnNo eIeKTpOmepeksi 80
YBIMKHeHHBIMKHeHH 80
Cbponecbki HOpM3 3aoaJxKeHnEeKtpoeHeprii...80
Ekcnnyataia 80
PiEHaHHB/ BID'EAHNNr TpMaaya pibtpa.81
BCTaHOBHeHHn iIIOHa dIg KpaneIb/ citYactoro nIOHO dIg KpaneIb. 81
Pepse BnKOpncTaHHa / Cnyck pdiHn 81
PpuroToyBaHHKaBn ecnpco 81
PnroTyaHnKaanyiHo 82
YnueHH 83
TOnOBHn6IokynpabInHHaIymOBn yuinbHOBa..83
Ppinaia 83
BudaneHHaKnny 83
36epirahna 84
UcyHeHH HeCnpaBHOCTeI 84
Texhihi napameTpni 85
3araJIbHi BiIDOMOCTi
Ipeed npinHraTm Beknnyatauio zuoro npinady dyxke yBXHXO uHTaTe IHCTpykuio 3 ekcnnyatauTa 36epiraTe ii pa3om 3 rapaHTiHM TaHOOM, KACOBIM YekOM Ta, no Mpi MOXJIBOcTI, 3 KapTOHHoKOPO6koIO i BHyTPIUHbOIO yNAKOBKO. Yo pia, zo npinad 6yde nepeado HO Tpeim ocobam, cnip nepedaBATNo rOpo pa3om 3 zuio IHCTpykuio 3 ekcnnyatauii.
BVKOpNCTaTe PnPnAd BnKJIOUHO B nPnBaTHnx ZJIrx Ta 3a nepeI6aueHm Pn3HaueHHM. PnPnAd He np3HaueHo DnA IpomncIOBOro BVKOpNCTaHHa.
He BnKOpNCTOBuYIte HOro Ha ByIuNi.ObepiraTe NOrO BiCneKn, npraMoro coHryHOrO onpOMiHOBaHHB, BOrO (BXoDNHomy pa3i He onyckaIte y pIDHy) Ta roctpnx KytIB.He KopnCTuyTEcra npnaDAM 3 BOIorIMn pykAm. RaKIo npnaIad 3BOJOnKINBCa a60 3MOKpiB, HeBIXKnAdHO BITrHiTb WTeNCeMbHy BNKiCy.
BumkhHb npnad Ta oobra3koBO BntTnHb BNky 3 wTeNceIbHOI po3ETKn (TnHtB 3a wTeKeP, He 3a Ka6eJIb), KOJI H e KopnctyTeCb npnadom, a6o MoHTyTe KOMnNeKtyOHi deTani, a6o nic uac uuienHH a6o npn dpekTax.
Heeknnyatyne npna6 6e3 ornly.Obobra3koBO BmKHb npna, KOJI BN NOKJaTe npMIuEHH.BTARHb wTeNCBHy BNky 3 wTeNCBHOi po3ETK.
- Ppnilad Ta Ka6eIb JxNlBHeHn CnIppeyIaRPho 06CTeKHTn Ha O3hAKn NIOxKOJKeHb. Pp INBraBHeHHi N0xKOJKeHb PpnilaDm 3a6OpOHeHO KOpNCTyBaTncb.
KopncTyTeCeBnKnIOuHO opriHaJIbHIMN KOMnIeKTyBaIbHIMN DeTaJIaMNI.
-Дябзneки cboixдITEн He 3aIIuaiTe DocTyNHIMn NakyBaJIbHi MaTepiAIn (ПлactNKOBi NaKeTn, KapTOHHi Kopo6Kn, NeHONnlaT ToIO).
PONEPENJXEHHRAI
He Do3B0JIe MaIMM DITM rpaTncb i3 PnIBKOIO. IcHye 3arpo3a 3aDyXn!
CneuaJIbHa iHcTpkyKciJ 3 6e3neKn dIaI cyboRo eIeKTPoPnpnaNy
ПОЕРДЖЕHHЯ. He6e3neka OTPmaнь onikiB!
TOnOBka rpynn, TpImauchiNbTpa, napOBe cOnNo i nIDOn dJa YauoK cnIbHo HarpBaIOTBcRn iD yac po6OTn BInpo6y.

ПОПЕДЖЕHHЯ. He6e3neka OTpIMaHnHa oniKIB!
TpmaTe TpMaU pfIbTpra Inue 3a pyky.
He TopkaItecB roIOBHOro 6Ioka ynpaBnIHn, napOBoro cOnla i pIDOna dIy aawok! Nepsh hIX qNCTHTN ci qactHn, daITe im OxOJIOHyTN.
He cnpymoByte ctpymiNb napn ha ce6e a6o ha iHux ocio. CTabTe emHiCTb nid napOBe conno (4).

PONEPEIXEHHJ.
IpeBipTe, u y Kopnyc He noTpanJaB OJora. IcHye pn3NK ypaKeHN H eJIeKTPnUHM CTPyMOM.

YBAGA.
3aIINBaIte B cMHiCTb dIy BoDn (2) IINe XoIoOnHy BoDy.
- BnKOpNCTOBuYTe TINbKn PINTHy BOy. He BnKOpNCTOBuYTe ra3OBaHy BOy (ra3OBaHy MInepaJIbHy BOy).
- YneBnItbcra, 10 niD yac po6OTn TpImauch pfIbTpa (16) hadiiHo 3a-KpinJIeHni i npabNtBHO pO3TaWOBAHNI, ockIbKn cei Bnpi6 npauoCPiD TnCKOM.
CTaBTe npnnaT iNbKn Ha pIBHy TBepdy NOBepxHIO.
KopncTyIeTcR npnAOM TiIbKn y pa3i HAnOBHeHNe EMHOCTi dIy BOI.
He nepecyBaIte npnilad nId yac Ioro po6OTn. -
LIM npnilaOM moKytb KOpNCTyBaTnCra DITN BIKOM BiD 8 pOKiB nID HargIaOM dopocnX a6o y pa3i hadaHnЯ nOaChHeB zOdo 6e3neuHoro KOpNCTyBaHHaPnilaOM Ta y pa3i po3ymiHHa MoKJInBOi He6e3neuHocti.
-Чишина Та Тхичne обслуговынгся рпсстpoю He NOВИНИ ВИКОнУВаТиСь ДITьМN, HabiTь якшо BOHи CTapшi 8 рokIB i nepe6byBAJOТь пД HaIGNЯДOM. -
TpimaiTe npicpti Ta noTo Ka6eJb XnBJIeHnI NO3a 30HOIO DOcK-HocTi dITEi, MoIoDUnx 8 pOKiB.
-ДiTи He NOBUNHHi rpaTnC8 3 npNCtpoEМ. - Ппладом можуь користуваим ся Люд 3 obмжениms Фi3nHIMN, р03у mobIM Na ChTTeBIMMOxINBOCTaM, a TaKoJ T,ЯКIM6paKyEdoCBiDy Ta 3HaHb, y pa3i 3diIcHeHHaTЯ 3a HmN a6O nICJI OTPMaHнЯ NOYcHb 7ODo 6e3neuHOrO KOPiStyBaHHaMnpiladom i y pa3i YCBiDOMpeHHa MOxINBOI He6e3neKn.
He pemontynte npnilad cami, aJe 3BepHITbCra Do aBTOPn3OBaHO raxibz. IJRA 3anobirahnraRgpo3i noWKoJKeHn Ka6eIb XINBJIeHNr cIiD 3amHHTn Ha eKBiBaJIeHTHn BnKJIIOUHO BnPO6HnKOM, a60 NaHO cepBicHOcIyX6OHO a6o IHsOHO KBaJIiΦIKOBaHO Oco6OIO. - Zei Bupi6 npn3NaueHn dI npnroTyBaHHa KaBn ecnpco i kanyuHO.
-
BИКОРИСТОВУЕПрINСТPIЕ ВСУХOMYПрIMIMISEHHI. BiN рпзHAчEHДЯ BИКОРИСТАHHЯВДOMaSHIX yMOBAX i 3a yMOB NOДi-6HNXdo TaKHX:
-
Ha cnyk6obnX kyxhY mara3nHax, ophiacTa iHnx KomepuiHnx 6'ektax.
Ipnctpii He npn3naeHnn IJy BnKOpncTahnB Micx po3miueHn HIOJe B ciNbcbkOMy rocnoapCTBi a6o B 3aKnadaX, 0o 3a-6e3neuytB HouibnTO Ta CHiHaHOK, KJIeHTamn roTeJIb, MOTeJIb Ta iHnx 3aknaDIB roTeIbHO TInny.
yBAGA.
He 3aHypoIe npicTpiy BODy, o6 noCHTn. YntaTe Bka3iBkn y po3di "UuueHHa".
YactHH, kio daotbcra
1 KaBoBapka ecnpeco
1 3HIMHa emHicTb DnB OBDn
1 3HIMHa napoBa Tpy6ka
1 Kpuioka napoboro coIIa
1 TpimauФinbtpa
1ΦIbTpHa 1uaky
1ΦinbtpHa2uawkn
1 CiiTuaCTNIiDIOH dIg kpanelb
1Плдондя кpaneь
1 Mipha loxka / Temnp / KnoH
1 BCTaKa (nIDOn dIra rOpHrT)
Po3naKOByBaHH npucTpoH
- Bmmitb nakybaIbn MaTepian.
- 3HIMITb yBecb nakyBaIbHn MaTeepian, TAKN JK IIaTIN KOBa IJIbKa, HAnOBHIOBaUi, UHypn, I BnIMITb npNCptpi i3 KOpO6Kn.
- PapeBipTe, nHaBHi yci YacTHnH, kIdoaIoTbcA.
I PIMITKA.
Ha npictroo Moke 6ytn nnil a60 3aillnkn Bnpo6HnHoro npocecy. PekomeHdoBaHO noHCTnTn Bnpi6, k ONcaHO B po3dini "HnueHHra".
Enementn KepyBaHHa
MaJIHOK A
1 Kpnuka emnocti nBovn
2 3HIMHa EMHICTb DnBODN
3 Perynatop noaui napu
4 NapoBe conIIO 3 KpIIkoIO
5 Bičik Дп niДиона Дп кpaneь
6Пдондякpaneь
7 Cittactni nIDOn dnn kpanelb
8 Khonka (niJaKahyBaHHpexKMM oikyBaHH)
9 Khonka (noa napu/ecnpco)
10 IndikaTop HarpiBaHH
11 INdkaTop cTaHny ①
12 KhoNka yBimKHeHHra/BIMKHeHHra (ON/OFF)
13 Bctabka (Harpibalbha nrrta / nIDOn dny aawok)
14ΦinbtpdIy1aawkn
15Φinbtpdny2aushok
16 TpimauФiNbTpa
17Φikcatop TpImaua φinbtpa
18 Mipha loxka / temnep / kIIOU (1 eIeMeHT, 3 cyHKuii)
Ihctpykui 33actocyBaHHa
Po3MiueHHra
BctaHOBJIIOIte Bnpi6 Na CTiKny pIBHy NOBepxHIO.
Yepe3 HarpiBaHH i Bxid napi He BnKOpncToByTe Bpi6 nIi Habichmmu wadkamn.
He cTabeBnip6HnTo 6n3bKO do ra3oBoi afo eneKtpoPnnTN, u6yD-kaNX iHux dKepeN TeIIa.
BcTabka nHa HarpibaIbHOi nnHn/niDOna dnnr ropHrT (13)
TomictitbCTabkyKahabkyyBepxhiuactnHnpctpO.
KhoNk (8/9)
LJI KHOIKN BUKOHYHTb OINCAHI HNXUe FyHKUJI, KOJN 3aΦiKCOBAH Ha MICJI a60 BMKHeHi.
PnirroTyBaHHKaanyuHc
3araIOM kanyuHIO cKnadaeTbC3 Tpbox pIBHX qactnKabN, MOJOKa i 3bntoro MOJOKa.
36nTe MoNko He NOBHHo 6yTu HaTTo rCyTM. BOHO NOBHHO 6yTu KpEMOnoDioHMM, Jk HApNkNaH He NobHiCTIO 36nTi BepuK, i3 B'ra3KO ToKcTyPOHO.
Kpim TOrO IaI npriroTyBaHnI DaDAtKOBO Ntpi6Hi:
- BeJnka shnpoka qaIka (np6n3Ho Ha 180 m), B kii 6yde npiroTOBaHO ecnPecO;
-HeBeIMKmIeHk i3 HocNKOM IJRA 36BaHHa (Ha0,3n);
HEBEJINKA TEPMOCTNIKA CMHICTb; - XOJIOHe MoIOKO KINPHICTHO MeHlue 3,5%.
Lio npirotoBAtn kanyiHo, cnePuy noTpi6Hno npirotoBAtn ecnpco. DToPmUyTeCb IHCTpyKuji, HabeJeHX y NyHKtax 1-11 po3iiny "PpirotoBaHHa KaBu ecnpco".
36nTe MOnOuHy NiHy OINCAHIM HINKYe NHOM.

ONEPEIXEHH. He6e3neka OTPMaHH onikib!
Napa, ilo BxOduTb, MoKe TpaBMyBaTn. Pid cac npoccy HarpiaHra pna/Boa moKe BxOduTn 3 roIOBHO6Ioka ynpabInHH i/a6o napoBoro conna!
- PeneBipTe, YH peryJrTOp npn (3) BCTaHOBNeHO B noIIOXKeHH " , nepu Hix AKTbByBaTu PhyHKUIO npn.
-
He cnprmoByte napobe coIIO B nnapmky oO6I.
3abxnd CTaTe EMHictb ni napoBe conno (4). -
NpepeBipTe, HKONka (8) nepe6yBaB e B noJIOXeHHi

2.Поверпьн ha3OBи napObe conIO (4).ПеpeBJPe,ч napOBa Tpy6ka npNKpInNeHa HanekHm YHOM.CiikkyIte,
Ioo6 KpiuKa napOBoro connla 3aBKn 6yNa Ha napOBomy conni.
- NocTabe TepMoCTiKy EmHcIb nIe napoBe conNo.
- HanobHITbIJIeNK HAnIOBnHy MoJIOKOM.
5.BctaHOBiBt bKnOky (9) B nOIOxKeHHa.3aueKaIte,doNOKn He 3acBITNbC rIHdkatop - Koxhoro pa3y nepeBnKOpNCtAHHm fynHKi3 3bBaHHn iHn dIy 3Ibny 3IbpaHoro KOHDeHCaTy Ha KopOTkn Yac BiKpnTe peryIaTOp nOaHi napn (3) B HnpanMky no-3HaKn "W". Bpi6 roTOBni Do BNKOpNCtAHH, k TInbKn 3'BAITbcra npa.
- NocTaBTe rIeK i3 MoJIOKOM nID napOBIM cONnOM.
- Po3tauIte rIeK TaK, Ioo6 napoBe cOnnO 3haxOduNocb npocTo HAD NOBepxHeO MoNoka.
I PUMITKAK.
He po3miuye napobe conno no ueHTpy rkea, a 6nK-ue do BHytpiHboi cInKn. Lc noonoxenna dae 3mory MOLOKY notpanNTy buxpoBny pux. PeKOMeHDoBaHO BVKOpNCTOByBatN HOCNK Jk HanpymHy napOBoro conna.
- Повьно Вдкрваitepernyларподач nanopn(3)Внанямky"”,donoknapa He 6yde npadabatncb yHeo6xidiNkIbKocTi.POBilno nidHimitb Ta onycitb rIeK.3akpnTe pernylator noDAci npa B HaprrMky"nicraToro,Як молoko 3i6'etbcrdo notpi6horo ob'emy (npnbni3Ho 50%
I P N I M I T K A.
- TTO, 06 MoKO i Haani Harpibanocb, BCTaBTe napoe coIIO ax Do HxHboi YactnH rke. CkiKyTe, 06 MoKO He NoaIo KNITN. B Takomy BinaKy NiHa 3pyHyetbcra.
JaKIO iINiKaTOp (10) BmMKNyBcN NiJ ac 36nBaHnNiH, BOa 6yde He IOCTaTHbO rapyHO. NOBepHITb peryIaTOp nOaHi napn Do KInz y HAnpMkyNo3NaHKn " 3aueKaHTe, DOnOKn IHnKaTOp He 3acBtITbcr 3HOBy. TOni npoDobKTe 36nBaHnMoIoka.
10.ДЯВIDaJIeHЯOCTAHIXBENIKHX6yNb6aJOK NOBITP3MOJOK O6epeXHO NocTyKaIte TJIeKOM NO CTOnI (Tak, H6n Bn CTaBtE NOro NiD TcCKOM BaN).NOKpyITb TJIeKOM NOINbHO NO KONY. Ye Donomarac 3MiWATn NiHy NICr36BaHHa.Tenep He BTPaayTe Yacy. NobInbHO HaJIInTe 3bTE MoJIOKO BecnPecO.
- 3aIbBaOuH 36nTe MoNOKo B ecnpco, nobInbHo po6Itb KpyroBi pyxn rIeKOM.
I P N I M I T K A.
3a donomoro 1eikibkox pyxIB MOXHa MaIOBaTn MaHOHKn B nHi.
3a 6kaHnHm nHy moKHa nocnnaTn KaKao a6o Kopuheo.
- BAXJIMBO. YnctbTe napoBe conno BiDpa3y nicra Kox-Horo BnKOpNCtAHH! 3aKnBaOnp perynTop noaHi npn, 3a DeiklbKa cekHyd BN CTBOpKeTe Bakyym, kNk 3aTarye
He3HaHy KJIbKICb MOJOKa B napobe conno. IocTaBTe TepMoCTiKy EMHicTb NiI napobe connlo. Ha KOpOTkn Yac BiDkPnIte peryIaTOp noaI npn, 106 cTpyMeHem napn
BdAaITn 3aIIuKm MoIoka 3 napoBOrO conna. IpopoTpirb napoBe coNIO BOIoroHO raHicpkOIO.
- Ⅲo6 BmKHytn cyHKuio napn, BCTaHOBITb KHONky (9) B NOIOXeHH
YnueHn
PONEPEIXKENHJ.
- Перацьпглм риладу сдд овязково втгп Внку i3 po3etkn i datn kabOBapci OCTNRHyTN.
3a6bopohjEtbc8 onyckatn npinapB B Ody. Lc moKe npn3BeCTN do eIektpuHoro ydapy a6o noxexi. - PapOBe coNlO Ⅲe rapaYe BiDpa3y nicIe BnKOpncTahHra!
YBATA.
3a6b0pHReTbCBAKOpNCtAHN DnOuHcHnDpoTHNX 10TOK a6o IHnx a6pa3NBHX MaTepiAnB.
3a6bopohraTbcBnKOpncTaHHiaKnx a6o abpa3nBnX MNoux 3ac06iB.
- UcTbTe KOpNyc 3JerKa BOnorO raHuyipkoHO 6e3 MInoux 3ac06iB.
TolOBHn6IOKynpaBnIHnI yMOBn yuJbHOBaY
BntnpaTe roNoBnH 6nok ynpabInHH i rymobn yuINbHOBaH BOIoroIO raHcipKOIO. IJI BAeHN H CTIKHX IIM BnKOpNCTOByte HeNIOHOBy uITky.BntpItb cyxIO raHcipKOIO.
Pnlaa
MnTe TpImaF pInbTpa, pInbTpN, ciTAACTn nIDOn dIg KpaneNB, nIDOn dIg KpaneNB, mIPHy IooKy, EMHICTb dIg BOi, Tpy6Ky i KpnuKy napOBoro cOnna y TeiPi Mmbln BOi. BnKopncTOBByTe HeINHOBOy uITky, kIIO e Notpe6a. CNoONCHtBuNCIO BOIO.BNTpIB yci aactHH cyxOIO raHipKOIO.
YBATA.
Li KOMHOENTHn He cnIg MNTB NTOcYOMNHi MaunHi. Te- I arpeCnBI HMIoHi 3acO6n npu3BeDyTb Do deOpMaJIi i BtpaTI KONbOpy.
EMHicmbdnoeod
- Bɪdʌkɒn'te Kpɪsʌkɑ, ɪəb 3hærɪn EMHict b Iŋa Bɔŋ. Iɒtərɪ- Hɪt b Broy EMHict b Oboma pykamɪ i Bmɪt b II. BctaHOBiT b EMHict b Ha Mɪcʒe, Nɒpeɪd hɒ BO nʊHCTNBʌn i BɪcʌyɪBʌnⅡ.
IIPNIMITKA.:
Emhictb DnBn Ma Mac Daayk.
2.3aenitbemHictb3aDbIneTJIHaBnpo6i
3. HatnichItb 3nerka emHicItb DnB BoDn, uO6 BiDkpTn Klananah.
Papoe conno
YnCTbTe napoBe conIIO, Tpy6ky i KpNIuKy BIDpa3y niCnBnKOpNCtAHH.Cyxi 3aJIINIKMOnOKa BaxKo BiDnCTNTN.
- 3HIMITb KpUkky. BnKOpNCTOByIte MaHehKy pykY. 3NeKa nOBepHITb, 06 3HrTn. 06 BTPMaTn napBe conllo oHIEIO pykoB, BnKOpNCTOByIte BOJry raHipKy!
- 3a donomoroIO KIIOVA (18) 3HIMITb MaJIeHbky Tpy6Ky 3 napOBOrO cOnIIa. DmBITbc MaJIHOcK Ha CTOp. 3. IobepTaIte KIIOU 3a rOJINHHIKOBIO CTPIIKOIO.
- 3aJIuIe Tpy6ky iKpUkHy HaJeKm Yac y TeNlMnblH BODi. TaKIM YINHom IeJWe ycHyTN 3aJIuIKM MOnIoka.
- BintypaiTe npoBe cnoHa Bnpo6i BOJIOIO raHicpKOIO.
ITPIMITKA.
HanobHITb EMHCTb IIN BODI rapaHO BOIOO, 06 yCyHyTN 3aCOxNII 3aNIuKIMONoka. BcTahOBt b EMHCtB nIDnapOBIM cONlOM TAK, 06 BOHO 3aHypnIOCb y EMHCtB.
5.ПicЯЧицEHнВБCTAHOBITb Tpy6kI kPnWkyHa napobe co nno.ПocTabe TepmoCTiKу npoXHIO EMHICTb nid napobe conno.YbIMKHITb Bnpi6,я BKa3aHO b po3di "PnpiroTuBaH Hny KanyuHIO",nyHKn 5 i 6.ПicЯчцEHн Napobe conno 3HOBy roTOBE Do BnKOpNCTaHH.
BudaeHHaKuny
Hakn 3anobirae Hanejhi npo6ti Bnp6y. Heo6xidno perynpno BndaTn Hakn. Yactota NmueHHB iD hakny 3anekntb Bd JoxpctKoCTi BODN i YactOTN BIKOPNCtAHH.
BuaIyTe HAKIN DOCTYHIM y npOaKy 3ac06m, npIaTHM dIy KABOBAPOK.
- BnKOpncTObyIte Do3yBaHHB BiIOBIOHO Do BkAzIBOK Ha nakyBaHHi YH IHCtpyKii.
- YbIMKHiB Bnip6 TaK, RaONcaHO dIg pnproTyBaHHe ecpeco, 3aIIINIBWcMHCtB npOxHbO. DaIte po3Hy BNTeKTH Kp3b group head (6e3 TpImaHa pInbTpa).

NONEPENXEHNA
CnooCHtB EMHCTb DnB Bodi nponyctitb Kpi3b rnoBHN 6nok ynpabHHNHO BNY EMHCTb CBKOI BoN, uO6yCyHyTN 3aNNKn HAKnny.
He BnKOpNCToBvIe 10 BoDy IaI nprirotyBaHn ecnPecO.
36epirahnna
ПочьтБЕВИб,ЯКОПИСАН.ДaITE npINaIIO NOBHCIO BINOxHITN.
- PeKoMeHDoBaHo 36epiratn npicTpiB opriHaJIbHiyNaKOBci, kIIO BIn HE BnKOpNCTOByBaTmEtbcr TpNbAINJac.
36epiraTe npicptpi no3a Mexamn doocknocti ditey cyxomy,do6pe npoBITPOBaHOMy Micui.
YcyHeHHH HeCnpaBHOcTei
BcTabKa dnn noDorpeBaIOUeN nlaCTnHb/NoDoHa 1aAs (13)
PomeCTIe BCTaBky B n3 B BepxHey qactn yctpoiCTBa.
HaxMHbIe KhoNk (8/9)
DaHHbHe HaKmHbHe KONKn, KOrDa OHn HaxaTb NIN OTKaTbI, BbINONHrHT CneDyUOuNe cyHKun:
PnirroTOBnHeHne 3cnpecco
- BkIIOHTe npI6Op. 3aOropTcN INHIMKATOP COCTOHNIA ① YcTPOINCTBO HAHTet HArpeBaTbcra. Pa3OrpeeTcN OOrpeBaIOUaA nnactnHa (13).
ITPIMEYAHNA:
IcnoIb3yIte noIorpeBaHOuIOIaCTINHy,HTo6bl noIorpeTb yaWKy (yaWKN).
- Ecnx xoTne 6bIcTpee npedBapntelbHo nOIOrpeTb YauKy (yaWKn), onoNOnCHTe ee (nx) ropAey BDOJ.
-
Y6eIITecb B TOM, YTO BCTaBHeH noDDOH (6) n peWetKa noDDHa (7).
-
HanoHHTe pe3epByap JKeJaembIM KOJInHeCTBOM YnCTOn, CBExeB BObl. YpOBeHb BObl DOJIKeH HAXOINTCM MEXyOTMeTKAMMIN MAX. CHOBa 3aKpoTe KpbIliKy.
- BbIbepTeФnIbtpyIOUmIaJIemEHT(14/15).BcTaBaTe 3JIeMeH T DEpKaTeIbФnIbTpA.Y6eIITec,yTOФИKCa-TopФnIbTpA He HaxOJNTcB B EptTKaJIbHOM NOJIOKeHIM.
- HanonHInTeФnIbTpryoUm 3JemENT KoPeHnOH ryuei. NcnoJIb3yIte MePhyIO JoxKy (18), IMeIoUyIOcB KOMnIkeTe. Co6JIouDAIte OTMeTKy MAX fNbTpYIOUero
3IeMeHTa. PaBHomepHo paCnpedeNITE KopeHyu ruy u CnErkA HndabNTe BHN3 TpaM6oBky (18).NoHcTne KpaepxatEny fNbTpa.
- PnncOeDnHInTe DepeKATEb FmNtpa K rOIOBKe rpynnbl. Y6eINTEcB, YTO DEpKATEb FmNtpa PnncOeDnHeN K rOIOBKe rpynnbl DoJKNbIM O6pa3OM.
- KaK TOnbKO 6yIeT DoCTnHyTa Heo6xOIMaR TemnepaTypaBapKn, 3aRopITcN HINkATOp. NocTabte NoDorpeTyUO uAiky (uaikn) NOd rONOBky rpynnbI nprMo Ha Dba OTBepCTNa, KOTOpbIE Bbl BNDITE Ha peWetke NDOHa.
8.YCTaHOBNTe KHOJky B IIOJIOKeHne. Ype3ΦnIbTp HauHET NITN TROPYARBOJa.
I PIMMEUHNA:
3TOT npoeeC He npekpaaaetcA bTOMaTHueckn!
9.OctaHOBITE npoecB BAPK, BbIKIOHNB HAcOC, KOrDa B 4aUke (uaKax) 6yIeT KeNaEMoe KOINueCTBO 3cInpecco: yCTaHOBITE KONky (8) B NIOXKeHne
10. Y6epeIte yauKu (uaKn).
I PIMEMEAHNIA:
N3BneKaIe DepeKaTeIb FnIbTpa KaJdbI pa3 nocne npriroTOBNeHn 3cPiPecco. TaK MoKHO npOpiINb CpOK cnyk6bl pe3HNOBo pOKnlaKn rOnOBKn rpynnbl.
- N3BnKeKIne depKxATEb fnnbtpa n3 roJIOBKn rpynnbl.
- Onopoxhnte n CHOBA hanoHnHTe pInbTp, YTO6bl 3aBapNTb eOe ONDy YaIky 3cnpecco.
PENyTPKDEHNE:
Metaannneckme qactn depkate n pfntpa n pfntbtpyooero 3IeMeNTa OchB roprue.
a) POnHnIMnte FmKcTOp
FmNbTpa (17) BBepx.
PpOToIKNHtE FmKcTOp
FmNbTpa 60JIbUIM
NaIbCem No HApBaJIeHIO
K FmNbTpyIOuEmy 3JMeHtY
BpeM, IepXkATEb FmNbTpa
b) BbCTyHTe KoPeHHyO rUyI u3 fNtpyoJero 3nemTe. Pn Heo6xOIMocTn nCnOJIb3yIte IooKky. CMOITe octabWInec aactuBi KoPe n3 fNtpyoJcero 3nemTea ropaueBdoi.
13.Дяпри�OTOBHЯСNeDyUошЧашКчБЕЗСпpecco BbINONHITe ONICAHьE BbIWe DeNCTBnI.
PnpiroTOBnHeNKe kanyuHNO
ObIyHOn KanyuHn COCToNt Ha TpeTb Nx KoPe, Ha TpeTb N3 TopaHrO MoLOKa, Ha TpeTb N3 BCHeEHHO MOLOKA.
MoOnuHa neHa He doJnxHa 6bItb CnMxKOM TBepDo, YTO6bl ee MoXHo 6bIIO fOpMnPoBaTb IoxKo. OHa DoJnxHa 6bITb CMeTaHoo6pa3HO, HapmEp, TAKO KAK He NoHocTbBO B36NTble CnBKn B3KO TEKCTypbl.
ДяnpiroTOBHeHЯKanyuHToTakKeNoHaOb8TaC:
- 60lbua, Bbinyka yauka (npimepno 180 m), B koto-poB Bbl deIaTe 3npecco;
- He6oBIOI KyBUnH IJI BcNeHbAHnC HocNKOM (Haep,0,3 n);
- He60JIb7aJXapOpPouHaIeMKoCTb;
- XOLOdHoe MOIOKO C COePkaHnEM Xnpa, NO KpaHne Mepe,3.5%.
TtO6bl pnproTOBnTB kanyuHcAchana Hado cIeNaTb 3cnpecco. BbINOHNte DeiCTBn, ONmcaHHbIe B nyHKtax 1-11 pa3dela "PpnproTOBHeHne 3cnpecco".
BcneHnTe moIOKo cIeIyHOuIM o6pa3OM:
PENEYIPPEXDEHNE:Onachocb6oBapuBaHnI!
BbipbBAHmncnap moKET cTb npuHHo TpaMbbl Bo Bpem pa3orpeBaHnro pRpynnap /Boa moKET BbipBaTbc n3 roNOBn rpynni /nnnpapOBoro conla!
- Y6eIntecb, yTO pyUka KOHTpOJI npa (3) yCTaHOBNe-Ha B NOIOXKeHne "x", NpeI TEM, KAK AKTINBnPOBaTbФyHKIIO npa.
-
He nappabla Te napoBoe conno Ha IIOeI.
Bcerda noctabnTe kakyoIb6o emkoctb noi napoboe conlo (4). -
Y6eIntecb, yTO HaxIMHnKHOIIka (8) HAXOITcB no-IOXKeHN
2.Повернite napoboe conno (4).Y6eintecb,yTO trpy6ka dnia npapa yctaHOBneHa DoJIHKbIM o6pa3OM.ПIoTHocTbH HacaIte KpbIuKy napoboro conna Ha napoboe conno.
3.Подставыкakуюлбожаронpoчную EMKocTB noД napoboe conno. - HanoJIHInTe KByuIN HAnOIOBHy XOnIOHbIM MoIOKOM.
5.YcTaHOBnTe HaXmMHyIO KHOIky (9) B noIOxKeHne. IdoJxDNTe, NOKa 3arOpITcN HndKATop - Cnerka nobopaunBaIte pyuky konhtpOJI npa (3) B HappaBHeHn OTMeKn KaxkDbI pa3 nepei NcNoIb3oBAHnEM cyHKUIN BCneHnBaHn, YTObI cNtB o6pa3OBaBUnCJ KOHeHCaT. UcToPcICTBO rOTOB K IcNoJIb3OBaHnIO TOIbKO ToIgA, KOrJa n3 Hero 6yDet BbIXOJNTb nap.
- IocTaBbTe KyBUnH C MoNOKOM NpI napOBoE cOnIO.
8.ПОДнIMMITE KByBmH TAK,чTOБы napOBoe coNlIO haxOДI-NOCb kak pa3 NOd NOBepxHOCTIO MOnIOKa.
ITPIMEYAHNA:
He pa3meaIte napOBoe conno no ueTpy KyBwina, OHO D0JXHO 6bTB 6JIHXe K BHYTpEHn NOBepxHOCTH erO CTENK. 3TO nIOXKeHne IMeET BaxHoe 3HaueHne dTTO, UTObMOJOKo NOnyHnBHXpeOBe DBIXKeHne. PekOMeHdyTeCnONb3ObaTb HOCNK B KaueCTBe HanpaBraHoUe nn NapOBoro conna.
I P E D U N P E X K D E H N E:
- Перацьов BCERda OTcoeINHЯITE yCTPOIcTBO OT cETN элкТрОПТаняи XXNTe, NOKA OHO NOJIHOCbIO OCTbIHET.
He norpykaite yctpoiCTBO B Body, TaK KaK 3TO MOKeT npNBecTu K ydapy 3JIeKTPOtOKOM nII NOxApy. - Паровoe соно оуень горяquee сра3у пося Использовая!
BHIMAHINE:
He nIIOb3yIte npoBOIoHHyU 电Tky IIN KaKeJIIn60 dpYrIe abpa3nBhIe INCTpyMeHTbl.
He nCnoB3yIe KaKeJIb6o KcNtBti NIN abpa3nBhIe BEUectBa.
YcHTIe KOpNyc yCtpoNCTBa CnEka BnJxHOB BToUbIO 63doabnHm MOUux CpeDCTB.
TOnOBka rpynnbI n pe3nHOBa npoKlaJaKa
PpTRe rONOBky npynbI np3HNOBHy npOKnAky BnJxHOBETOsbHO.HaINlUme OCTaTKy ydaJIyTe MmKoN HeINOHOBOO 3aTeM pToTpe DeTALMn MAnKO BeTOsbHO.
Akceccyapbi
POMOte depkateIb pfNbTpA, pfNbTppyUoIe 3nEmeHTbl peWETky PNOHO, NODOH, MEPHYIO NOKcy, pe3epByap dNBObl, Tpy6Ky napOBORO cONIIa IN KpbIshky napOBORO cONIIa B TEINNoMbInbHO BOe. Pn Heo6XoDMOCt NcONb3yTE
MRAKyIO HeHIOHOByU 电Tky. PpONoOuNTe BCE YnCToB BOOn. BbITPntE HAcyxo BCE DeTANI MRAKOB BetoBbI.
BHIMAHINE:
3Tn detaHn HeIb3MaITb B Nocydomoehn MaHInHe. XAp n arpeccNBhle MOIOuNE cpeCTBa MOrTy CTaTb npuHnOH nCKaKeHn foPmbl n ObecuBeHbAHn.
Pe3epeyap dna 80db1
- OtkpoIte KpbIuKy, YTO6bI N3BNeHb pe3epByap dIra BOIbI. BbITAHnTE pe3epByap DBymR pyKaMn BBepx n HApyKy. IocTAbTe erHa MeCTO pOCNE YNCTKN N BbICyUINBaHnA.
IIPIMEYAHNA:
Pe3epByap nIa BOdbI IMeET DBA KpIka.
- 3açennte KpIKN pe3epByapa dIЯ BODI 3a DBA OTBepCTnYyCTPoiCTBa.
- CnErKa npKmTe pe3epByap dIra BOdb I Bn3, YTo6bl OTKpbITb KnaHn.
Papoeo conno
HCTNTe napoBoe conNo,ero Tpy6ky N KpbIuKy cpa3y Je noCNE IcN0JIb3OBAHn. 3acoXIIne OCTaTKM MONOKa NOTOM 6yJET Tpydno CCHUATb.
- ChIMnTe KpbIuKy. Bepntecb 3a KpyrIbI o6oB Okpyr KpbIuKn. CJIeKa nobepHnTe ee, YTO6bl OJNEurTb CHRTme. IcNoJIb3yIte BnaXHyIO BetoUb, YTO6bl B3rTb OHOI pyKo npAOBoe conno!
- NcnoIb3yIte KIOUOY (18), YTO6bI ydANITb MaNEHbkyIO Tpy6Ky n3 napOBOrO cONJa. Cm. pnc. C Ha cTpaHnue 3. NOBOPaHbAIte KIOU No YacOBoi CTpeKe.
- OctabTe Tpy6ky N KpbIuKy Ha HeKOTOpoe BpEmr B TeTIOmMbIbHOB Oe.TaK MoXHo 6yJeT JIeTKO yDaNTb OCTaTKMOJOKa.
- Празрпге napовoe conno Ha yctpoiCtBe BnaXHoi BeTo-
ITPIMMEAHNA:
HanoJIHnTe EMKocTb TropyeB BDOJ, YTO6bl ydaIITb 3acoXuHne OCTaTKn. IocTaBbTe EMKocTb NOp napOBbIM COILOm TaK, YTO6bl OHO 6blIO nOprpyKeHo B BOy.
5.Поссе чИстки сССССССССССССССССССССССССССССССССССССССССССССССССССССССССССССССССССССССССССССССССССCSCSCSCSCSCSCSCSCSCSCSCSCSCSCSCSCSCSCSCSCSCSCSCSCSCSCSCSCSCSCSCSCSCSCSCSCSCSCSCSCSCSCSCSCSCSCSCSCSCSCSCSCSCSCSCSCSCSCSCSCSCSCSCSCSCSCSCSCSCSCSCSCSCSCSCSCSCSCSCSCSCSCSCSCSCSCSCSCSCSCSCSCSCSCSCSCSCSCSCS
Dekalbucnkaun
OTJIOKHeHn HKnHn NOpBepraIOT pNCKy FynHKUHOHaJIbHOCTb yCTpoiCTBa. Heo6xOIMo peryIaPno npOBoNTb DeKaIbCn- PkAUIO yCTpoiCTBa. INTePBaIbMekDy DeKaIbCnΦkAUIA M3aBNCrT OT TOR, KaK qACTO IVcONb3yeTCr YCTPOICTBO, I OT JKeCTKOCTN BObl.
PpOBOJITe DeKaIbUcHkAciuC nOMoUbIO IMeIoUxCBA npOJaKe DeKaIbUcHnUpyUOuX CpeDCTB DnKoPeBaPOK.
1.OTmePte Do3y B COOTBeTCTBm C yka3aHnMaHa ynaKOBKe INI JNCTKe C IHCTpykUmaMn.
2.Испοльзуге учрйстBO B COOTBeTCTBи C ИСТPyКДМИ
no пиротовлию зспесо, поka peЗерУap He CTaHET
nyctbIM.Пуст b pactbop TeuET Uepe3 roJOBKY pypпьi (Бe3
ДержателЯ Фильтура).
PENyTPEKeXDEHNE:
- PpOONoUHTe pe3epByap nIy BObln npOnyCTnTe Upe3 rONOBky rpynnbI OINH nONHbI pe3epByap NcTOn BObl, YTO6bl CMBITb OCTaTK DeKaJIbCnIpyUoIero paCTBopa.
He nIcnoJIb3yIte 3Tu BODI dI pyPiroTOBIIeHnIe 3cnpecco.
XpaHeHne
-
UCTNE yCTPOICTBO B COOTBETCTBIM C INHCTpyKUINMM. DaiTe akCECCyapam NIOHOCbTO BBICOXHYtB.
-
PekomehnyeTcXpaHnItb yctPoIcTBo B erO opRHaJIbHOyIaKOBKe,ecIN OHO He IcNOnb3yeTcDIIITeJIbHOe BPEM.
BcerIa xpaHnTe yctpoiCTBO B cyXOM, xopoIo BeHTINpPyEMOM MeCTe, HeIOCTyHOM IJa DeTei.
YcTpaHHeH HeNcnpaBHOte
olaloll o jaiy jia jia jia jia
a 5
2jLs jaii jai. jaiia jaiia jaijai jai
65blill"glil
a
1
j 11111111111111111
all jus 15
a a a a a a a a a a a a a a a a a a a a a
.0g
1
2
(2018年)
AED = AED = 3
aill 1i 1
(1)
#
Lolai jia gao cai zai all ayi. Cai kill lao, jie ai
aaii i 1
J 15
4
aJus juaie jai alln jao jao
AaBis
aia 1 aiaaa aaiia aaiia aaiia
aalalallalalal
julilol jusnil. ailllalabababall sllll, wll
auii iiaai bai jia jia aaii
C
[\text{d}\left( {a + b}\right) = {c}^{2} + {b}^{2}]
1
aill 1
:
all lc
jll jll q 0al oal 2
aalllgai jaiJauuallge gae bai.3
a_1 = 23,a_2 = - 43,b_2 = 43
aal jolal 100000000000000000000000000000000000000
1
All jyll Jywl dJy. yjll jaiil alldu. cblal jji 1
152
11 1 1 1 1 1 1 1 1 1 1 1 1 1
1JlI 1JLJI 1JLJI 1JLJI 1JLJI 1JLJI 1JLJI 1JLJI 1JLJI 1JLJI 1JLJI 1JLJI 1JLJI 1JLJI 1JLJI 1JLJI 1JLJI 1JLJI 1JLJI 1JLJI 1JLJI 1JLLI 1JLJI 1JLJI 1JLJI 1JLJI 1JLJI 1JLJI 1JLJI 1JLJI 1JLJI 1JLJI 1JLJI 1JLJI 1JLJI 1JLJI 1JLJI 1JLJI 1JLJI 1JLJI 1JLJI 1JL
(7) 1 MAX aIe g Bnll aal yaiy alal cie 2
Jusitj 12) Jusit jy/ jusit jy le biai .4
Jusitj. (11) aalal yaiol jzal .(13)
1olaljy j 54.5
J (500/8jJI Jle) 6
"10"olj3(3)JyIyIyIyIyIyIyIyIyIyIyIyIyIyIyIyIyIyIyIyIyIyIyIyIyIyIyIyIyIyIyIyIyIyIyIyIyIyIyIyIyIyIyIyIyIyIyIyIyIyIy
1.05 2.4.5 3.6.5 4.7.5 5.75 6·s
AisLw cie sll jzl olal
aLc 13
Jgll 126 jll max
jll J.
gaa
j 1 (13)
:abai
a (u) uSll uSill uSill uSill uSill uSll uSll uSll uSll uSll uSll uSll uSll uSll uSll uSll uSll uSll uSll uSll uSll uSll uSll uSll uSll uSll uSll uSll uSll uSll uSll uSll uSll uSll uSll uSll uSll uSll uSll
(7) 1234567890123456789012345678901234567890123456789012345678901234567890123456789012345678901234567890123456789
(9/8)
jai jai jai lele biaiallie ailllll lalil o
J 1 J 1 J 1 J 1 J 1 J 1 J 1 J 1 J 1 J 1 J 1 J 1 J 1 J 1 J 1 J 1 J 1 J 1 J 1 J 1 J 1 J 1 J 1 J 1 J 1 J 1 J 1 J 1 J 1 J 1 J 1 J 1 J 1 J 1 J
4
| ### | |
| ### | |
| ### | |
| ### | |
| ### | |
| ### | |
| ### | |
| ### | |
| ### | |
| ### | |
| ### | |
| ### | |
| ### | |
| ### | |
| ### | |
| ### | |
| ### | |
| ### | |
| ### | |
| ### | |
| ### |

jll 12n l. jill lalai gao (16) 11 n no 5i
. gbsbgl baj jgaii . slaljzll jic baj jgaii . Aii i jgi Jy . pJgai plas 8pJgai jn nn jbi jS . aaij ybjj gai jgeaiae
aaiiaai jblaii jn 8 1j 1j 1j 1j 1j 1j 1j 1j 1j
8 8 8 8 8 8 8 8 8 8 8 8 8 8 8 8 8 8 8 8 8 8 8 8 8 8 8 8 8 8 8 8 8 8 8 8 8 8 8 8 8 8 8 8 8 8 8 8 8 8
99
98
97
97
97
97
97
96
96
Lale Cilbarto
Lai Cai Jia Li Bai jie all Jia Jia Jia Jia Jia Jia Jia Jia Jia Jia Jia Jia Jia Jia Jia Jia Jia Jia Jia Jia Jia Jia Jia Jia Jia Jia Jia Jia Jia Jia Jia Jia Jia Jia Jia Jia Jia Jia Jia Jia Jia Jia Jia Jia Jia Jia Jia Jia Jia Jia JIA
y lae 2a aal jai yal al paa Jgall
j 1
1 1 1 1 1 1 1 1 1 1 1 1 1 1 1 1 1 1 1 1 1 1 1 1 1 1 1 1 1 1
J 1
12 (Jusgill 4uLg uaiuuiuuiu) lai 5y jyjll
J 1
y
e 1 1 1 1 1 1 1 1 1 1 1 1 1 1 1 1 1 1 1
()JalSgalljao (204
1
L
jieil plisily giaini j Jai liia i Jai ic
psssscls jga
Iie Ilaal laaiaeall cialgai all oiae lclde gian p
jgljgl jglgao
y
4 4
:
#
- 102
102
100
100
100
100
100
100 (13)
99 (9/8) - 99
- 99 1
99 1
99 1
99 8
oogoligjiaolzaoLclog
!:
iie 1
1
-
1
-
1
-
1
GARANTIEKARTE
warranty card · garantiekaart · carte de garantie · scheda di garanzia · tarjeta de garantia · cartao de garantia · garantikort · karta gwarancyjna · zaru.cnli list · karta jamsta · carte de garantie · FapaHcnoHHa KapTa · zaru.cnly list · garancijski list · garanciajegy · rapaHTINHmΦOpMynap · FapaHTnHBnTALOH
ES 184CB
24 Monate Garantie gemäß Garantierklarung 24 months warranty according to warranty declaration 24 maanden garantie volgens garantieverklaring 24 mois de garantie selon la déclaration de garantie 24 messi de garanzia seconde la dichiarazione di garanzia 24 meses de garantia de acordo con la déclaration de garantia 24 meses de garantia, de accordo com a déclaration de garantia 24 mandes garanti
1 henhold til garantibetingelsene 24 misesie gwarancji na podstawie owsiadczenia
gwarancjngo zaruka 24 mésicu podle prohläseni o zaruke 24 mjesećno jarmstvo
u skladu s jamstvenom declaraciom 24 luni garantie conform déclaratiei de garantie 24 meceta rapeanu b cbotbetcbrne c rapaanouhata dciklapaunu 24-mesačná
zaruka podla vyhlásenia o zaruke 24-mesečna garancija, skladn zo garancjsko izjavо 24 hönap garancia a garanciaféltetelekben leirtak szerint rapatrni Ha 24 mičuni
bvdonobidno za niho rapatntio - rapaHTN 24 mecna cornacho zabaneHbIM
rapaHTMHNIM npavamam
Kaufdatum, Handlsterpmel, Unterschied - date of purchase, dealer stamp, signature - aankoopdatum, dealerpmel, handtekening - date d'achat, tampon du concessionaire, signature - data del acquisto, timbo del rivendatore, firma - fecha de compa, sello del distribuidor, firma - data del compra, cambo do distribuidor, assinatura - kipadosdat, handforderhandsgesamter, signatur - data zakuq, pieciec szpradewczy, podisdat datum zakouneni, raztko prodjece, podisdat datum kapovine, zig trogova, potpis - data der achititez, stampilumfurnizuriulii, semnaturia - Dara ha noynkara, Tietar ha Itopaana, Npncie - datum niskuqu, peclita obchodniki/ predajcu, podisdat datum napka, zig trogova, podisdat vassaroi atuma, kereskedo belyegzjo alalas - datapnpobanha, nevata kipoana, mnic - Data npnoepcebei, Ilarnan npnoana, Npncie
BOMANN®
www.bomann.de
BOMANN®
C. Bomann GmbH
Internet: www.bomann.de


- Symbols in these Instructions for use
- WARNING:
- CAUTION:
- Contents
- General Notes
- WARNING!
- Special safety information for this unit
- WARNING: Risk of burns!
- Supplied parts
- Unpacking the appliance
- NOTE:
- Controls
- Figure A
- Instructions
- Placement
- Insert for the warming plate/cup shelf (13)
- Push Buttons (8/9)
- Electric Connection
- On/Off
- i NOTE:
- European regulations on energy saving
- Operation
- WARNING: Important!
- Attach / Detach Filter Holder
- WARNING: Danger of burns!
- Inserting the drip tray / drip tray grid
- First Use / Bleeding
- Making Espresso
- Making Cappuccino
- WARNING: Danger of scalding!
- Cleaning
- Group Head and Rubber Seal
- Accessories
- Water Tank
- Steam Nozzle
- Decalcification
- Storage
- Troubleshooting
- Technical Data
- Disposal
- Meaning of the "Wheelie Bin" Symbol
- Instrukcja obstugi
- 3araJIbHi BiIDOMOCTi
- CneuaJIbHa iHcTpkyKciJ 3 6e3neKn dIaI cyboRo eIeKTPoPnpnaNy
- ПОПЕДЖЕHHЯ. He6e3neka OTpIMaHnHa oniKIB!
- PONEPEIXEHHJ.
- YBAGA.
- YactHH, kio daotbcra
- Po3naKOByBaHH npucTpoH
- I PIMITKA.
- Enementn KepyBaHHa
- MaJIHOK A
- Ihctpykui 33actocyBaHHa
- Po3MiueHHra
- KhoNk (8/9)
- PnirroTyBaHHKaanyuHc
- ONEPEIXEHH. He6e3neka OTPMaHH onikib!
- I PUMITKAK.
- I P N I M I T K A.
- YnueHn
- PONEPEIXKENHJ.
- YBATA.
- TolOBHn6IOKynpaBnIHnI yMOBn yuJbHOBaY
- Pnlaa
- EMHicmbdnoeod
- IIPNIMITKA.:
- Papoe conno
- ITPIMITKA.
- BudaeHHaKuny
- NONEPENXEHNA
- 36epirahnna
- BcTabKa dnn noDorpeBaIOUeN nlaCTnHb/NoDoHa 1aAs (13)
- HaxMHbIe KhoNk (8/9)
- PnirroTOBnHeHne 3cnpecco
- ITPIMEYAHNA:
- I PIMMEUHNA:
- I PIMEMEAHNIA:
- PENyTPKDEHNE:
- PnpiroTOBnHeNKe kanyuHNO
- PENEYIPPEXDEHNE:Onachocb6oBapuBaHnI!
- I P E D U N P E X K D E H N E:
- BHIMAHINE:
- TOnOBka rpynnbI n pe3nHOBa npoKlaJaKa
- Akceccyapbi
- Pe3epeyap dna 80db1
- IIPIMEYAHNA:
- Papoeo conno
- ITPIMMEAHNA:
- Dekalbucnkaun
- PENyTPEKeXDEHNE:
- XpaHeHne
- 1
- AED = DE AED = 3
- #
- aalalallalalal
- C
- [\text{d}\left( {a + b}\right) = {c}^{2} + {b}^{2}]
- :
- a_1 = 23,a_2 = - 43,b_2 = 43
- → 2.4.5 → 3.6.5 → 4.7.5 → 5.75 → 6·s
- gaa
- :abai
- Lale Cilbarto
- L
- oogoligjiaolzaoLclog
- GARANTIEKARTE
- ES 184CB
- BOMANN®
Brand : BOMANN
Model : ES 184 CB
Category : Coffee machine