APS - Air purifier MEDISANA - Free user manual and instructions
Find the device manual for free APS MEDISANA in PDF.
User questions about APS MEDISANA
0 question about this device. Answer the ones you know or ask your own.
Ask a new question about this device
Download the instructions for your Air purifier in PDF format for free! Find your manual APS - MEDISANA and take your electronic device back in hand. On this page are published all the documents necessary for the use of your device. APS by MEDISANA.
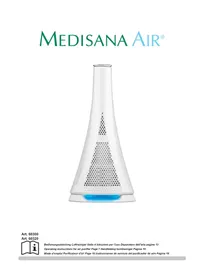
USER MANUAL APS MEDISANA
Please read carefully!
A line attentivement s.v.p!
Please fold out this page and leave it folded out for quick reference.
Air outlet
Control panel
3 Handle
4 Air inlet
5 LED indicator: appliance switched on
6 ON/OFF button
LED indicator: ionisation and UV light switched on
Ion and UV button
LED indicators: air flow low / medium / high
10 Air flow button
LED indicators: operating time 1 / 2 / 4 hrs
12 Operating time button
UV light
14 Contact bar, contact switch
15 High performance filter / active carbon filter
16 Electrostatic dust collector
Pre-filter
18 Front cover
1
1.1 Thank you very much
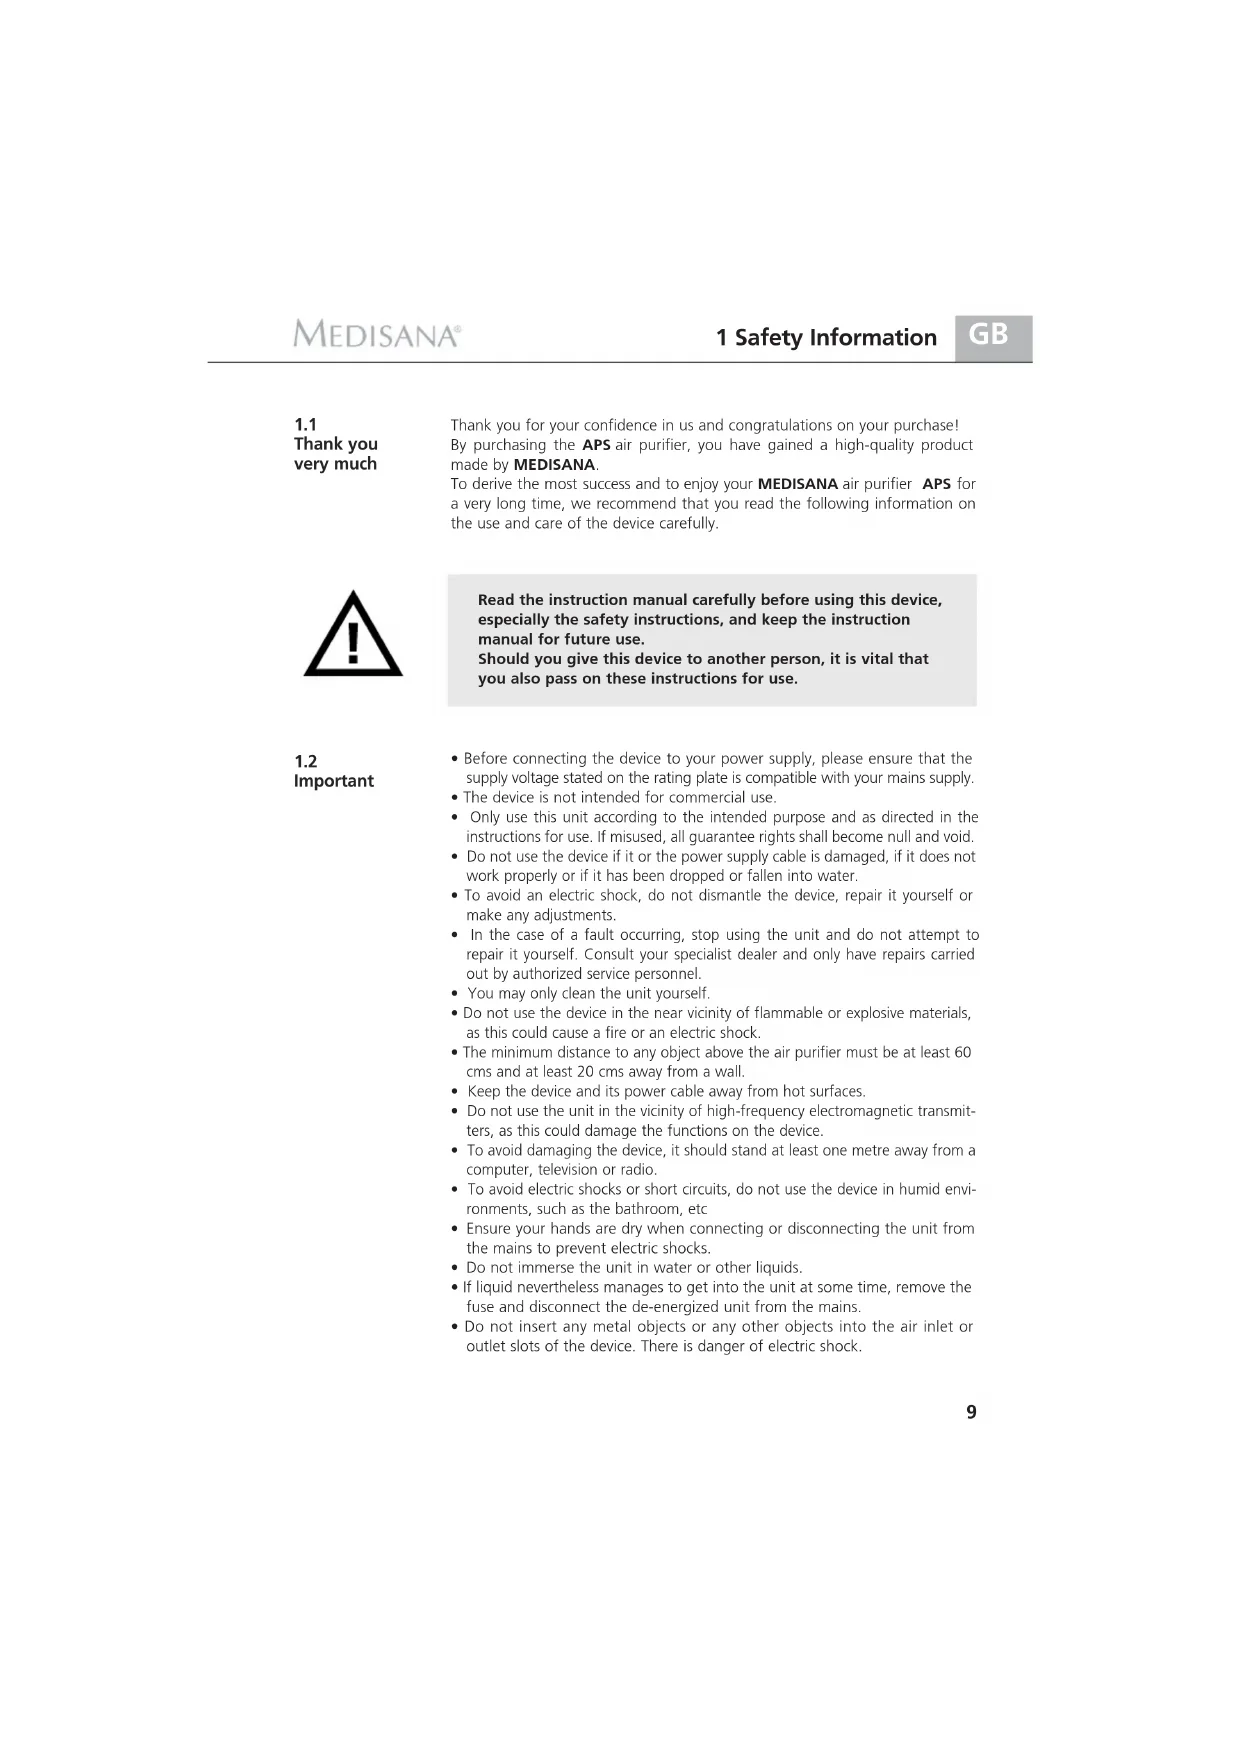
Thank you for your confidence in us and congratulations on your purchase! By purchasing the APS air purifier, you have gained a high-quality product made by MEDISANA.
To derive the most success and to enjoy your MEDISANA air purifier APS for a very long time, we recommend that you read the following information on the use and care of the device carefully.
Read the instruction manual carefully before using this device, especially the safety instructions, and keep the instruction manual for future use. Should you give this device to another person, it is vital that you also pass on these instructions for use.
1.2 Important
- Before connecting the device to your power supply, please ensure that the supply voltage stated on the rating plate is compatible with your mains supply.
The device is not intended for commercial use. - Only use this unit according to the intended purpose and as directed in the instructions for use. If misused, all guarantee rights shall become null and void.
- Do not use the device if it or the power supply cable is damaged, if it does not work properly or if it has been dropped or fallen into water.
- To avoid an electric shock, do not dismantle the device, repair it yourself or make any adjustments.
- In the case of a fault occurring, stop using the unit and do not attempt to repair it yourself. Consult your specialist dealer and only have repairs carried out by authorized service personnel.
- You may only clean the unit yourself.
- Do not use the device in the near vicinity of flammable or explosive materials, as this could cause a fire or an electric shock.
- The minimum distance to any object above the air purifier must be at least 60 cms and at least 20 cms away from a wall.
- Keep the device and its power cable away from hot surfaces.
- Do not use the unit in the vicinity of high-frequency electromagnetic transmitters, as this could damage the functions on the device.
- To avoid damaging the device, it should stand at least one metre away from a computer, television or radio.
- To avoid electric shocks or short circuits, do not use the device in humid environments, such as the bathroom, etc
- Ensure your hands are dry when connecting or disconnecting the unit from the mains to prevent electric shocks.
- Do not immerse the unit in water or other liquids.
- If liquid nevertheless manages to get into the unit at some time, remove the fuse and disconnect the de-energized unit from the mains.
- Do not insert any metal objects or any other objects into the air inlet or outlet slots of the device. There is danger of electric shock.
1.2 Important
- Keep the air inlet and outlet slots on the device free from dust and dirt.
- Never cover the unit up during operation and do not use it under cushions or blankets. This could cause a fire or other accidents.
- Switch off the device after use and disconnect it from the mains socket.
- Before cleaning the device, changing the filter, removing or attaching accessories make sure you always disconnect it from the main by pulling out the plug.
- Store the unit in a dry place.
- Consult your doctor if any health problems should arise whilst using the unit. In this case, stop using the unit immediately.
- Do not leave the unit unsupervised especially if used in the vicinity of children. Electrical appliances are not toys!
- People unable to operate the device due to their age or physical disability must be supervised when using it.
2.1 Items supplied and packaging
Please check first of all that the unit is complete. The following parts are included as standard:
1 Air Purifier APS
- 1 Operating instructions
The packaging can be reused or recycled. Please dispose properly of any packaging material no longer required. If you notice any transport damage during unpacking, please contact your dealer without delay.

To avoid risk of suffocation, keep packaging film away from children!
2.2 Special features of the air purifier APS
Rooms do not always have adequate air circulation. This then favours the build up of dust particles in the air and the development and spread of germs and unpleasant odours. The new air purifier APS can solve this problem and allows you to enjoy clean and fresh air in your home.
The HEPA high performance filter collects dust particles from the air in the room. It has an excellent dust collection rate of up to 99.97% . The electrostatic dust collector has a large capacity and is easy to clean. The UV technology helps to kill off germs and mould in the air. The latest ionisation technology enriches the air we breathe in our rooms with active oxygen. This removes dust and smoke and neutralises any unpleasant odours.
The device is electronically controlled and is particularly energy-saving. The device is designed for purifying the ambient air in closed rooms of up to approx. 25 square metres, such as bedrooms, living rooms and offices.
3.1
Operation
The device must stand at least 20 cms away from a wall. The top of the air purifier must also be free of any objects. There must always be a minimum of 60 cms between the top of the air purifier and another object above it. Keep computers, televisions and other sensitive electrical equipment at least one metre away. Keep the device out of reach of children. Place the device on an even, non-slippery surface.
ON/OFF button
- Insert the plug into a standard socket. Press the ON/OFF button 6. The device starts running. The LED 5 lights up. Press the ON/OFF button 6 again to switch off the device.
Air flow button 10
- The device has three options for the air flow. The higher the air flow selected, the more air flows through the filter. Press the air flow button to set the flow rate to low, medium or high. The LED displays the selected level.
Operating time button
- Press the operating time button 12 to set how long the air purifier should operate. You have 4 settings: 1, 2, 4 hours or continuous.
- Press the operating time button 12 again to select the duration. The LED 11 lights up according to the duration selected. If the LED does not light up, the timer is switched off and the device runs continuously.
Ions and UV button 8
- Press the ions and UV button 8 to switch the ionisation and UV light on and off. If the ionisation and UV light function is switched on, the LED 7 lights up.
3.2 Frequently asked questions
Filter
The efficiency of the active carbon/HEPA filter has greatly declined.
- The filter 15 is saturated with a large amount of dirt. Clean the filter as described in 4.1. If the dirt is too stubborn to remove, the filter must be replaced.
Electrostatic dust collector
The efficiency of the electrostatic filter has greatly declined.
- The electrical discharge wire or the electrical dust collector is dirty. Clean and maintain the collector.
- Is one of the electrical discharge wires loose or torn? Tighten it again or contact your dealer or service centre. Faulty wires must be removed and replaced.
The device does not switch on
- Is it plugged into the socket properly? Check the plug is properly connected.
- Was the device properly reassembled after cleaning? Check the standard functions of the device.
- The device does not work if the electrostatic dust collector 16 is not correctly fitted onto the 14 contacts or the front cover 18 is not fitted properly.
4.1 Cleaning and maintenance
- Switch off the device and disconnect the plug before cleaning.
It is advisable to clean and maintain the device every two to three months.
Removing the filter
- Removing the front cover: place your hand in the opening at the top on the front cover 18, pull the front cover out and take it off.
- Remove the electrostatic dust collector 16 with the pre-filter
- Remove the HEPA high performance filter by pulling out 15 at the catches on either side of the filter.
Cleaning the front cover
- Clean the front cover with clear, running water. If the front cover is heavily soiled, use a mild detergent to clean it. Rinse it thoroughly with clean water.
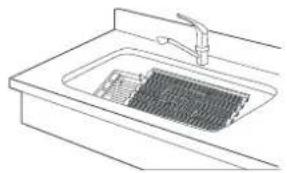
Cleaning the pre-filter
- Remove the pre-filter from the electrostatic dust collector by pushing the plastic clips out on both sides to disengage the electrostatic dust collector 16 from the pre-filter 17. Clean the pre-filter with clear, running water. If it is heavily soiled, use a mild detergent to clean it. Rinse it thoroughly with clean water.
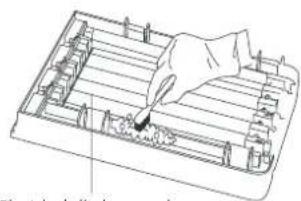
Cleaning and maintaining the electrostatic dust collector
- Use a mild detergent.
- For cleaning the dust collector, use a sponge scorer or a toothbrush.
- Use warm water below 40^
Electrostatic dust collector (on the back)
Electrical discharge wire (on the front)
- If the dirt is very difficult to remove, soften the collector with diluted detergent and use a toothbrush to clean it.
- Pay special attention not to damage any wires when cleaning the electrostatic dust collector. If an electric discharge wire is torn, the dust collector function cannot be used, or only partially used.
- Faulty wires must always be removed from the device. Otherwise this could result in a short circuit or flying sparks. It could also damage the circuit.
- Contact your dealer or the service centre if you require new electrical discharge wires.
- Do not use acidic or alkaloid detergents for cleaning. This leads to rust forming on the surface of the dust collector.
After cleaning, all parts of the device must be completely dry before they are used again. Otherwise this could result in an electric shock or malfunction. - If the electrostatic dust collector 16 is not fitted properly, it cannot be not be supplied with power.
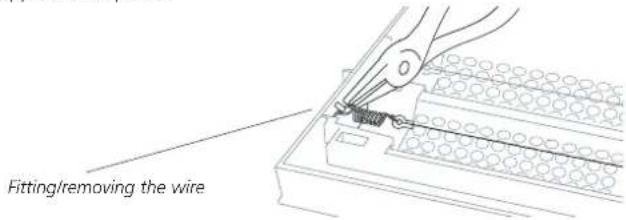
- Ensure the plastic casing of the electric discharge wire is in the correct position.
Plastic casing
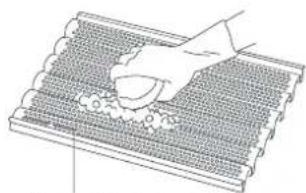
Cleaning and replacing the filter
- The filter 15 is able to collect large amounts of dust. Use a soft brush to clean it. Replace the filter when is it heavily soiled and unable to be cleaned properly. This should be after one year of use at the latest.
Replacing the UV lamp
- The efficiency of the UV lamp declines over time. Depending on how often it is used, the UV lamp needs to be replaced roughly once a year. Switch off the device and disconnect the plug from the mains socket. Make sure the device is completely disconnected from the power supply. Remove the UV lamp carefully from the holder.
- Insert a new UV lamp into the UV holder. Make sure it is in the correct position.
Assembling the device
- When all the parts are clean and dry, the device can be assembled. Proceed in the reverse order as in "Removing the filter".
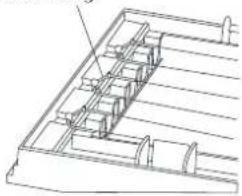
- Underneath the electrostatic dust collector 16 there are metal electrodes. Make sure they are in the correct position. Otherwise the device cannot be supplied with power.
- The device has two safety notches 14. Make sure the front cover is properly latched in. Otherwise the device cannot be supplied with power.
4.2 Disposal

This product must not be disposed together with the domestic waste. All users are obliged to hand in all electrical or electronic devices, regardless of whether or not they contain toxic substances, at a municipal or commercial collection point so that they can be disposed of in an environmentally acceptable manner. Consult your municipal authority or your dealer for information about disposal.
4.3
Specifications
Name and model : MEDISANA Air Purifier APS
Power supply: 220 - 240 V~/50 - 60 Hz
Power consumption : 45 W
Weight : approx. 3280 g
Storage conditions : clean and dy
Article no.: 54500
EAN-Number : 40 15588 54500 9
Special accessories
(optional, not included in items supplied)
Spare HEPA filter
Article no.: 54510
EAN-Number : 4015588 545108
Electrostatic dust collector
Article no.: 54511
EAN-Number : 40 15588 54511 5
Set of 3 spare wires for dust collector
Article no.: 54512
EAN-Number : 40 15588 54512 2
UV lamp
Article no.: 54513
EAN-Number : 4015588 545139

In accordance with our policy of continual product improvement, we reserve the right to technical and design changes without notice.
5.1 Warranty and repair terms
Please contact your dealer or the service centre in case of a claim under the warranty. If you have to send in the unit, please enclose a copy of your receipt and state what the defect is.
The following warranty terms apply:
- The warranty period for MEDISANA products is three years from date of purchase. In case of a warranty claim, the date of purchase has to be proven by means of the sales receipt or invoice.
- Defects in material or workmanship will be removed free of charge within the warranty period.
- Repairs under warranty do not extend the warranty period either for the unit or for the replacement parts.
- The following is excluded under the warranty:
a. All damage which has arisen due to improper treatment, e.g. non-observance of the user instructions.
b. All damage which is due to repairs or tampering by the customer or unauthorised third parties.
c. Damage which has arisen during transport from the manufacturer to the consumer or during transport to the service centre.
d. Accessories which are subject to normal wear and tear.
- Liability for direct or indirect consequential losses caused by the unit are excluded even if the damage to the unit is accepted as a warranty claim.
MEDISANA AG
Itterpark 7-9
40724 Hilden
Germany
Tel.: +49 (0) 2103 / 2007-60
Fax: +49 (0) 2103 / 2007-626
The service centre address is shown on the last page.
1.1
Merci!
La fornitura include:
City Business Centre 41 St.
Olav's Court Surrey Quays
London SE16 2XB
Tel.: +44/207-2378899
Fax: +44/207-252 22 99
eMail: info@medisana.co.uk
Internet: www.medisana.co.uk
F/NL/B/L
MEDISANA Benelux NV
Eureqiopark 18
6467 JE Kerkrade
Nederland
Tel.: +31/45-5280389
Fax: +31/45-5233518
eMail: info@medisana.nl
1
SANICO S.R.L.
Via G. Ferraris 31
20090 Cusago (MI)
Tel.: +39/02-90 39 00 38
Fax: +39/02-90 39 02 79
eMail: info@sanicare.it
Internet: www.sanicare.it
E
MEDISANA HEALTHCARE, S.L.