
DBS 5532 - Iron AEG - Free user manual and instructions
Find the device manual for free DBS 5532 AEG in PDF.
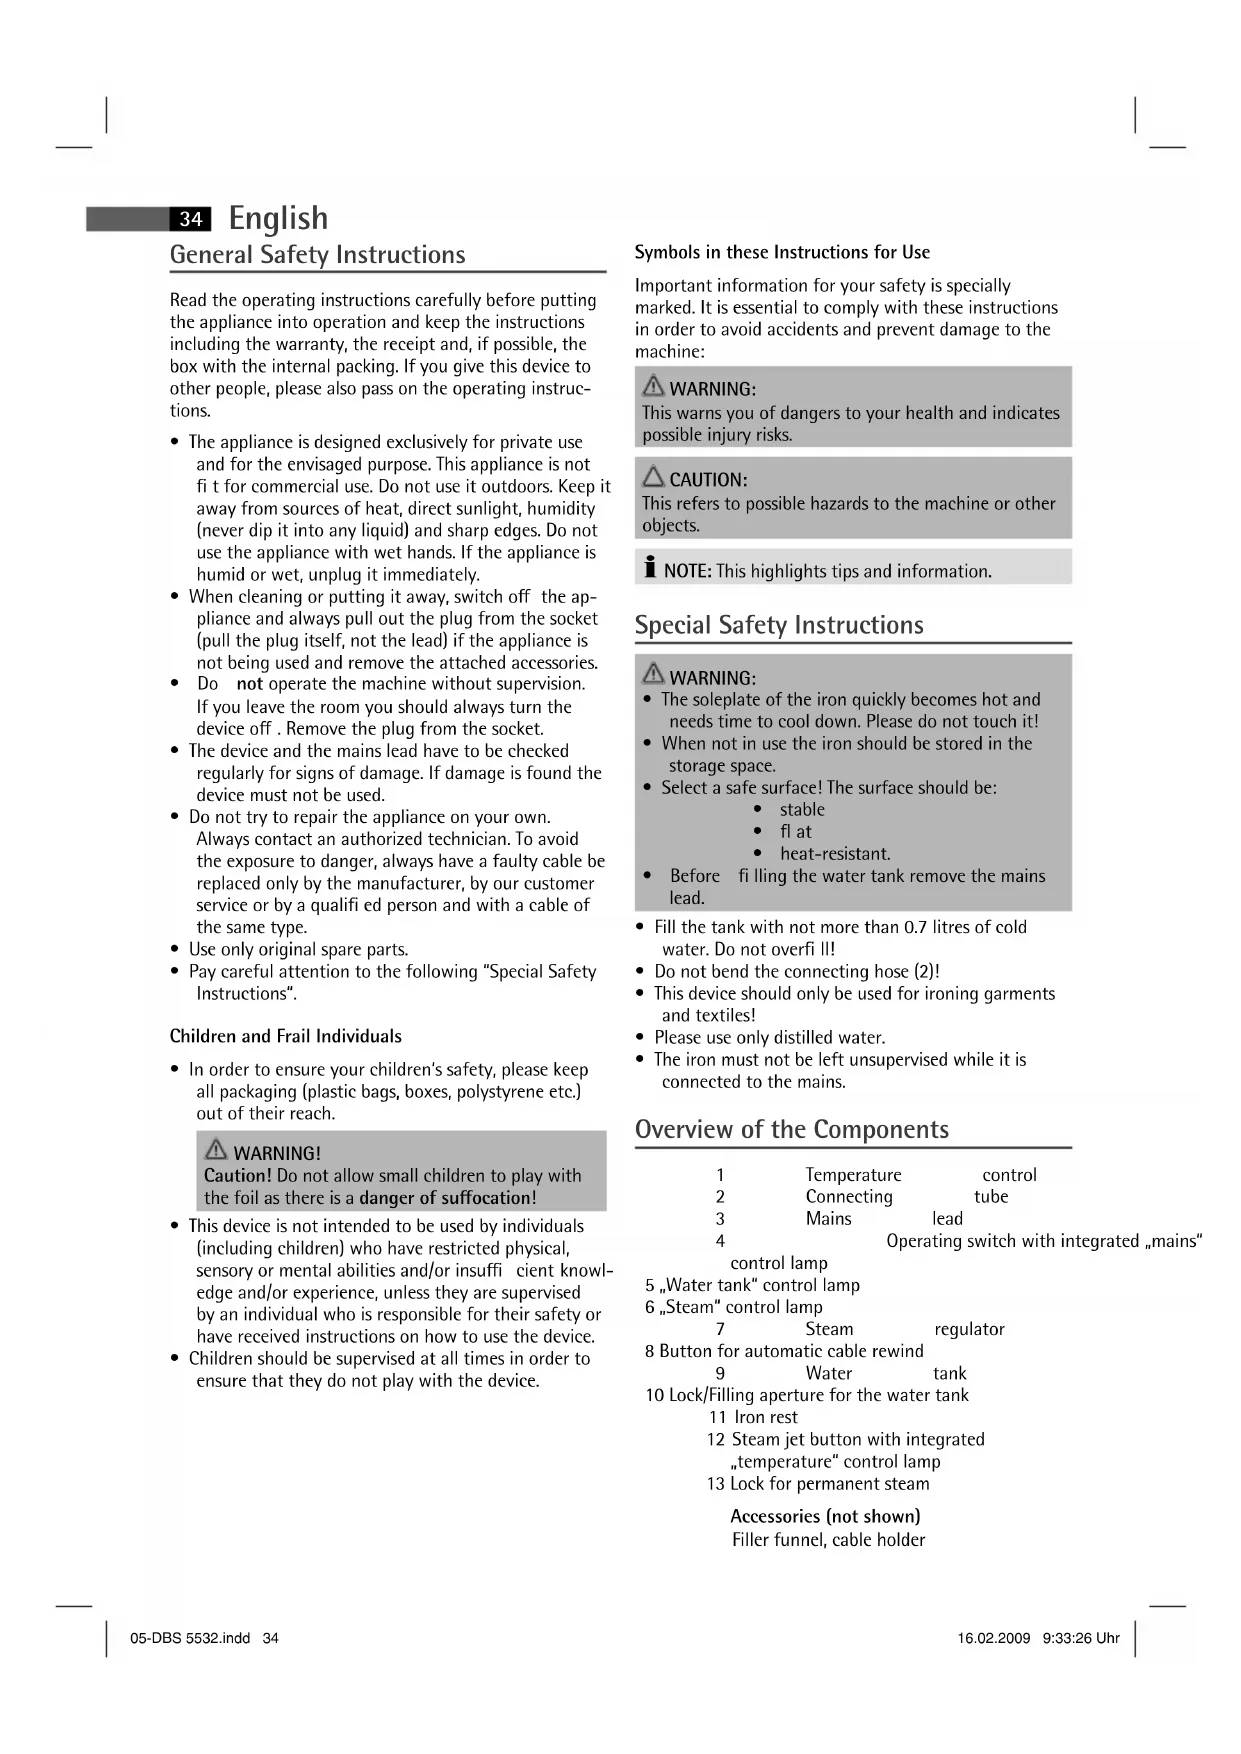
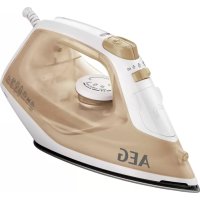
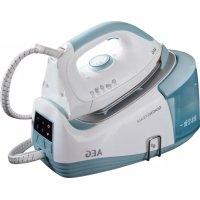
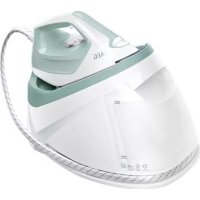
| Product type | Steam station iron |
| Brand | AEG |
| Model | DBS 5532 |
| Power supply | 230 V, 50 Hz |
| Total power | 2000 W |
| Steam pressure | 3.5 bar |
| Water tank capacity | 0.7 litre |
| Net weight | 3.3 kg |
| Temperature adjustment | Thermostat with Synthetic/Silk, Wool, Cotton/Linen positions |
| Steam functions | Steam ironing, vertical steam, steam jet, continuous steam lock |
| Steam regulator | Yes, to adjust steam flow |
| Indicator lights | Temperature (on iron), water tank (on base), steam ready (on base) |
| Cable winder | Yes, with storage button |
| Recommended water type | Distilled water only |
| Included accessories | Filling funnel, cable holder |
| Placement surface | Stable, flat, heat-resistant |
| Safety | Unplug before filling, do not leave unattended, do not touch hot soleplate |
| Care and cleaning | Clean soleplate with damp cloth; do not immerse; use distilled water to prevent scale |
| Warranty | See supplied warranty card |
Frequently Asked Questions - DBS 5532 AEG
Place the iron on its heat-resistant storage surface.
User questions about DBS 5532 AEG
0 question about this device. Answer the ones you know or ask your own.
Ask a new question about this device
Download the instructions for your Iron in PDF format for free! Find your manual DBS 5532 - AEG and take your electronic device back in hand. On this page are published all the documents necessary for the use of your device. DBS 5532 by AEG.
USER MANUAL DBS 5532 AEG
Overview of the Components.. Page 3
Instruction Manual. Page 34
Technical Data . Page 37
Język polski
Spis tres'ci
D-47906 Kempen/Germany
Zelfreiniging (self-cleaning)
Autonettoyage (Self-cleaning)
Consommation: 2000 W
Classe de protection:
Vapor vertical (Vertical Steam)
Autolimpieza (Self-Cleaning)
Steam na vertical (Vertical Steam)
Autolimpeza (Self-Cleaning)
Vapore verticale (Vertical Steam)
Autopulitura (Self-Cleaning)
General Safety Instructions
Read the operating instructions carefully before putting the appliance into operation and keep the instructions including the warranty, the receipt and, if possible, the box with the internal packing. If you give this device to other people, please also pass on the operating instructions.
- The appliance is designed exclusively for private use and for the envisaged purpose. This appliance is not fit for commercial use. Do not use it outdoors. Keep it away from sources of heat, direct sunlight, humidity (never dip it into any liquid) and sharp edges. Do not use the appliance with wet hands. If the appliance is humid or wet, unplug it immediately.
- When cleaning or putting it away, switch off the appliance and always pull out the plug from the socket (pull the plug itself, not the lead) if the appliance is not being used and remove the attached accessories.
- Do not operate the machine without supervision. If you leave the room you should always turn the device off. Remove the plug from the socket.
The device and the mains lead have to be checked regularly for signs of damage. If damage is found the device must not be used. - Do not try to repair the appliance on your own. Always contact an authorized technician. To avoid the exposure to danger, always have a faulty cable be replaced only by the manufacturer, by our customer service or by a qualified person and with a cable of the same type.
- Use only original spare parts.
- Pay careful attention to the following "Special Safety Instructions".
Children and Frail Individuals
In order to ensure your children's safety, please keep all packaging (plastic bags, boxes, polystyrene etc.) out of their reach.

WARNING!
Caution! Do not allow small children to play with the foil as there is a danger of suffocation!
- This device is not intended to be used by individuals (including children) who have restricted physical, sensory or mental abilities and/or insufficient knowledge and/or experience, unless they are supervised by an individual who is responsible for their safety or have received instructions on how to use the device.
Children should be supervised at all times in order to ensure that they do not play with the device.
Symbols in these Instructions for Use
Important information for your safety is specially marked. It is essential to comply with these instructions in order to avoid accidents and prevent damage to the machine:

WARNING:
This warns you of dangers to your health and indicates possible injury risks.

CAUTION:
This refers to possible hazards to the machine or other objects.

NOTE: This highlights tips and information.
Special Safety Instructions

WARNING:
- The soleplate of the iron quickly becomes hot and needs time to cool down. Please do not touch it!
- When not in use the iron should be stored in the storage space.
- Select a safe surface! The surface should be:
stable
- flat
heat-resistant.
-
Before -filling the water tank remove the mains lead.
-
Fill the tank with not more than 0.7 litres of cold water. Do not overfi ll!
- Do not bend the connecting hose (2)!
- This device should only be used for ironing garments and textiles!
- Please use only distilled water.
- The iron must not be left unsupervised while it is connected to the mains.
Overview of the Components
1
Temperature
control
2
Connecting
tube
3
Mains
lead
4
Operating switch with integrated „mains"
control lamp
- "Water tank" control lamp
6,Steam" control lamp
7
Steam
regulator
8 Button for automatic cable rewind
9
Water
tank
10 Lock/Filling aperture for the water tank
11 Iron rest
12 Steam jet button with integrated temperature control lamp
13 Lock for permanent steam
Accessories (not shown)
Filler funnel, cable holder
Instructions
Unpacking
- Remove any protective foils and stickers from the soleplate.
- Pull out the required length of cable.
CAUTION:
- Do not pull the mains lead past the red maximum mark.
- Under no circumstances should you pull the lead out to the end as this may damage the automatic cable rewind.
NOTE:
If the red mark is visible, pull the lead in a small amount with the help of the automatic cable rewind button (8). Hold the cable to avoid wrapping
- Use the cable holder to guide the connecting hose (2).
Electrical connection
- Make sure that the iron voltage (see name plate) and the line voltage match.
- The mains plug should only be inserted into a correctly installed 230V 50Hz socket with earthing contact.
Connected Wattage
The station has a total maximum wattage of 2000 W. With this connected load a separate supply line protected by a 16 A household circuit breaker is recommended.
CAUTION:OVERLOAD!
- If you use extension leads, these should have a cable cross-section of at least 1.5mm^2
- Do not use any multiple sockets, as this device is too powerful.
Temperature Control on the Iron (1)
The symbols on the control correspond to the following settings:
(Synthetics, silk) low temperature
Wool) medium temperature
Cotton, linen) highest temperature
Water Tank (9)
In order to fill the water tank by removing the seal (10).
- Please use the funnel supplied.
The tank volume is 0.7 litres.
- In order to prevent the contents of the tank from leaking, do not overfill the tank. In this way you will prevent any excess water from coming out of the soleplate.
- Then re-tighten the seal.
Water
Please use only distilled water. Do not fi II battery water, water from the clothes dryer and water containing additives (such as starch, perfume, softener or other chemicals) into the water reservoir. This could damage the iron due to residues forming in the steam chamber. These residues may cause impurities to the fabric when dropping out of the holes in the soleplate.
Operation
Before Initial Use
- Clean the ironing base with a slightly damp cloth.
- In order to remove all residues before initial use, please pass the iron a few times over an old clean cloth.
Ironing without steam
NOTE:
-
Sort out the garments according to their ironing temperatures.
Always set the temperature control to _·0^ before connecting the appliance to a power point, or before disconnecting it. -
Place the iron on the rest (11).
- Only connect the machine to a properly installed safety socket, 230V / 50Hz .
- Set the temperature on the temperature control (1). If you have sensitive items to iron, please begin with the lowest temperature.
i NOTE:
The control lamp (12) on the iron shows that it is heating up. As soon as the control lamp goes off the operating temperature has been reached. Now you can start ironing.
Always turn the temperature control to "0" after use and remove the mains plug (the control lamp in the handle goes off).
Steam Ironing

WARNING:
The iron expels a large quantity of hot steam. Danger of burns.
CAUTION:
When using the steam iron please ensure that the water tank is always filled to the required level. Operating the device without water will damage it.
English

CAUTION: INITIAL USE:
Please proceed as follows:
- The tank should only be filled up to the maximum mark. Do not overfi!
- If there is any residual water in the tank, we recommend that you do the following:
- Continue ironing with steam until the control lamp (5) shows that there is not enough water and no further steam comes out of the soleplate of the iron. Then fi II up the water tank as instructed (see under "How do I fi II in water during operation").
or: - Pour the residual water into a measuring cup and fi II it with distilled water up to the maximum mark of the tank (0.7 litres).
- Close the water tank.
- Connect the base station to a 230V / 50Hz socket with earthing contact.
- Turn the switch (4) on the base on.
- Set the desired temperature within the range ^ to.
- Please wait until the control lamp (6) on the base lights up.
- Now press the steam jet button (12) for at least 1 minute or use the bar (13) to lock the steam jet button in place.
NOTE:
- This time is needed for the steam to reach the iron.
-
Keep a cloth ready! During this phase water also comes out of the soleplate of the iron.
-
When only steam comes out without any water you can stop the procedure. Then press the steam jet button another 2-3 times without touching the clothes that are to be ironed.
-
After you have ironed an old but clean cloth a few times, your station is ready for use.
-
In order to regulate the steam quantity, please use the steam regulator (7).
- When ironing at low temperatures, please ensure that you do not use any steam. If the temperature is too low water may leak from the soleplate.
Vertical Steam
This can be used to produce a jet of steam in a vertical direction.
Hang your laundry on a clothes hanger and move the iron to approximately 2-3cm away.
How can I replenish the water during operation?
If the pressure falls during operation you can fill more water into the tank at the same time. Refi II with water before the tank is completely empty. The lamp (5) shows that there is not enough water.
If you have been using the permanent steam function, release the bar (13).
- Turn the switch (4) on the base off.

NOTE:
If there is still some residual pressure in the water tank, a safety lock prevents the water tank catch (10) from being opened.

WARNING:
The residual pressure first has to be relieved before the device can be safely opened.
- With the steam jet button (12) you can now release the residual steam pressure. If no more steam comes out of the soleplate, please remove the plug and release the water tank lock (10) carefully.

WARNING:
The steam is hot! There is a danger of scalding!
- Do not touch the hot iron!

NOTE:
If it is not yet possible to open the lock of the water tank the device needs a further 2 to 3 minutes to cool down. Then release the residual pressure again.
- Fill the tank with the help of the funnel. Do not overfi! Take care of water splashes that might come out of the boiler. In order to avoid water splashing out, the water should be fi lled into the funnel after the safety lock has been opened and the iron allowed to cool down for about 1 to 2 minutes.
- Close the water tank.
- Continue ironing.

NOTE:
Keep a cloth ready! At first water may also be expelled from the soleplate of the iron.

WARNING:
Never open the water tank lock while the device is being operated.
When you have fi nished
- Now you can start ironing. Always turn the temperature control to "0" after use and remove the mains plug (the control lamp in the handle goes off).
- Turn the switch (4) on the base off.
- Remove the mains plug from the socket.
- Keep the plug in your hand.
- Press the cable winding button (8) and guide the cable. Hold the cable to avoid wrapping.
- Allow the device to cool down before you put it away.
Self-Cleaning
Due to the large amount of heat produced and the pressure of the steam, residues that form in the soleplate are removed automatically.
Cleaning

AVISO:
Always remove the mains lead before cleaning!
- Wait until the machine has cooled down completely.
- Under no circumstances should you immerse the device in water for cleaning purposes. Otherwise this might result in an electric shock or fire.

CAUTION:
- Do not use a wire brush or any abrasive items.
-
Do not use any acidic or abrasive detergents.
-
Clean the casing with a slightly damp cloth.
- Clean the sole plate and the rest with a slightly damp cloth.
- Any residual water can remain in the water tank, but should be poured out if it has been in the tank for a prolonged period.
Troubleshooting
| Fault Possible Cause Remedy | ||
| Device does not work | Faulty mains socket | Try another socket |
| The device suddenly stops working during operation | Is the electric circuit overloaded? | Check the house fuse |
| During steam operation water is emitted from the soleplate of the iron. | The temperature regulator on the iron is set too low | Select a higher temperature |
| The required steam pressure has not yet built up | Wait until the control lamp (6) on the base lights upPress the steam jet button 2 to 3 times without touching your ironing | |
| There is too much water in the tank | Empty the tank and fi II in only the stated maximum amount of water.Please note the instructions above! | |
| Fault Possible Cause Remedy | ||
| When the iron is switched on again you hear loud noises in the water tank. | Since the last time the iron was used the tank seal has never been opened.A subpressure has built up. During heating ascending air bubbles burst inside the tank.This is a normal process. | Press the steam pressure button 2 to 3 times in order to equalise the pressure. |
| During operations team is emitted from the seal (10). | The device is broken. | Please contact our service department. |
Technical Data
Model: DBS5532
Power supply: 230 V, 50 Hz
Power consumption: 2000 W
Protection class: I
Maximum flling quantity of the water tank: .0.7 litres
Steam pressure 3.5 bar
Net weight: 3.3 kg
This device has been tested according to all relevant current CE guidelines, such as electromagnetic compatibility and low voltage directives, and has been constructed in accordance with the latest safety regulations.
Subject to technical changes without prior notice!

Meaning of the "Dustbin" Symbol
Protect our environment: do not dispose of electrical equipment in the domestic waste.
Please return any electrical equipment that you will no longer use to the collection points provided for their disposal.
This helps avoid the potential effect of incorrect disposal on the environment and human health.
This will contribute to the recycling and other forms of reutilisation of electrical and electronic equipment.
Information concerning where the equipment can be disposed of can be obtained from your local authority.
38 Jezyk polski
IpeepnepnHm3actocyBaHHM
OuHCTITbDnHue npackn BOIoroIO TKaHHIO.
LIO6BnAINTHnepeNepuMM3actocyBaHHM BcI 3abpyHHeHH, cIi npacyBatn CnoaTky CTapy NCHHy.
IpaCyBaHnHa6e3napi
BKA3IBKA:
-
BiDCOPTyTe 6iN3Hy 3a TnAmu TkaHHn Dna piHnx TEMNEpAtp npacyBaHH.
PerynTop temnepaTpy cnla3abKcnCTaBHTHa ^ npeed TmR KBCTaBHTuTEKeP B p03ETKn a6o BNTHHTN Ioro 3 p03ETKn. -
Bičtabte npackу ha ničtabky (11).
BknHcy Bnky Bpo3eK, 10 niKnOeHa HaneKHM YHOM i BiNOBiae TEXHiHM BmOram 230 B.50 T.
Yctahobitb Temnepatyp peryIaTOpom (1). Raio Bu npacCybaTMMeTe 6iIN3Hy, 00 yITNBA DO BnCOKOI Temnepatpyn, NoHHaTe 3 MImalbHOI Temnepatpyn.
BKA3IBKA:
KohtpoIbHa naMnOuKa (12) Ha npacci ciHani3ye, IIO pOboa TeMnepaTpya ue He doCgrrA BCTAHOBHeHO rpeyIHTOpom pIBH. KoIIPOBOaTeMnepaTpya DOcHryTa, NaMnOuKa noraca. Bu MoKeTe noHNATn npacyBAtn.
Picna 3akHHeHH npacyBaHH 3aBKn npeKnOaHTe peyIHTOp TEMepaTynp Ha,0' i BntRpyTe BnKy 3 po3eTkn (KOHTpOJIbHa NaMNoKa B pyKoHTi Noracac).
IpacyBaHHa 3 npao
3ACTEPEXEHHR!
IpaKa BpuObIe BeNky KInbKicTb rapHoi nap. IChye He63neKa onikB.
YBARGA:
KoBn BnpaioeTe BpeKmI npoBOrO npacyBaHnR, 3BeptaTe ybary Ha Te, uo6 emHcTb 3 BOIOIO 3aBXKn 6yna 3aONBHeHOIO DOCTaTHbIO KINbKiCtIO BOi. IpacyBaHnR 6e3 BOi WkIDNBE Dn npuJady.
YkpaIHcbka
53

YB4A: noaToK npaui:
PouHnHaTe npaioBAtn B TAKOMy nopRky:
3aONBHITb EMHICTb NO no3HaKmAKCMMy. He nepe6ijbWyTe KInbKiCTb BOn!
KuBcHMOCTi 3aIIuINnCBAOa, MPeKOMeHyEmo 3pOHTN HAcTynHe:
IpaTyTe TAK DOBRO 3 napOM, NOKHe 3acBITnBcKa KOHTpObHa NaMnOuKa (5), IIO CnHAni3ye HeCTaCy BOHN i 3 NiOoBn npack He 6yde BInB WnOdTu napa. 3anOBHtB EMHICTb BOIO TOK, Rk ce peKoMeHdyETCBa (INB. pozDin ,Akdoatn BOHN B EMHICTb NiD ac npacyBaHHa".
a6o:
3aIIuKBOI CNBUNTH B MPhy EMHICTb i 3aONBHITI IO PO3HaKN MAKCMMy My Ocary (0,7) DnCTINbOBAHO BOIO.
3aKpHte EMHICTb KpUHKIO.
Пдкючьба30ы CTaHIOdo po3eTKN 3axnCHMn KOHTaTmN 230B/50I.
BknHcyTb nepeMnKau (4) Ha 6a3oBi cTaHcii.
YctahOBit Tempeatpy,po notpiHa,peryIaTOpomB dianasaHbD
PiD0KdIb, NOKn Ha 6a3oBii CTaHcII 3acBITbc KOnTPObHa JAmNoUka (6).
HaTnchitb KnaBiw noaui npu (12) 0oHaMHeHIpnoTHROM 1 xBnHHn abo BnKOpncTaIe cToonop (13), 0o63abNOKyBatn KnaBiw noaui npu.
BKA3IBKA:
Ley qac e Heo6xHMM, 06 napa noTpannna do npackn.
PiDrtoYte TKAHNHy dIaBdaneHHa3nHkoBOI BOi! Ha nepwemy etani BOa bye noBnTncia 3OTbOpIB HA dHnui npackn.
KoHn i3 OTBopIB 6yIe BHXOJTH TIIbKn npa 6es BOHN, BN MoKeTe 3akInHT eTan nIdrotOBKn. Iicnla boro HATCHITb 1e 2-3 paN KnaBiw Nodaqi npn, He DToTOPkyOu npackoio 6inn3Hn.
PpOBeiB npacKO ue deKeINbKa pa3IB NO cTapiI qHCTI TKAHHI-i Baun npnAe rTOBm dIpaui.
-Дпретулбаннкькости napи Корпстун tecретулготорm(7).
AkuB npacye3 Hn8bkoTo Tempepatyo, BCTaHOBIIOte pexnm npaui 6e3 napH. AkuTo tempepatya 3aHaTO Hn8bKa DnI cyo ropeKIMy, TO BODa 3BnuAHO BNTiKa epees OTBOPN B nioWbPi npackn.
BepTKaIbHa noDaHa napH
Lei pejkm dae moKnBicb noDaBaTH npy B BeptHKaIbHomy Hanpami.
TTOA KBNOBICINOJAR HA NIIUKA, npoBeiB npackoi HbIDCTAHI 2-3 CM BID NOBepxhi.
AKn doaTH BOnB E MHiCTb nIac npacyBaHH?
Hkiu Tnck 3nkyebcniuc npacybaHH, Bm Mokke Te daT N B EMHICTb BOIN. IodabaHTe BOy B EMHICTb 3aBXDN Do TORO
MOMeHTy, NOKI BOJa He 3aKiHnIacr nobHicTIO. Ipo Hectauy BOi CnHani3ye lamnoqka (5).
AkuBn npauHOBaBn BpeKMI noCTIHHOI noaHi napi, cnip 036nokyBaTH 3acyBky (13).
BIMMKHtB nepemnkau (4) Ha Kopnyci npnilady.
BKA3IBKA:
Kkuo EMHCTb Mae octatoHH TnCK, To BiKpnTTKpnKn (10) 6noKyEbca FyHKuieo 6eaKeKn.
YBATA:
Ia 63neuHoro BIKKHTT KPMnKn CnId CnoaTKy HOpMaI3yBaTH NCH B EMHOCTi.
OctatoChn Tnck Bn MoKeTe HopMaI3yBAtn, HATNCKYOuN KnaBII noaChi nap (12).KOni i3 NiOoBn npack 6InbH He BnXODntb npapa, BnTnHITb BNkky 3 po3eKn i o6epexHo BiKpnTe KpNkUc EMHocTI 3 BOIO (10).
yBATA:
KpnuKaMaBnCOKyTeMnepaTypy.
06epexho:Bn mokeTe otpmaTOnikn!!
- He do topkyiTecra rapaHx qactn npackn!
BKA3IBKA:
KkuO KpuKa He BIDkPnBaCTbC,TO npacky cnId oxoIOuNTIe npOTROM 2-3 XBInH. Picra Ubo rpe pa3 HopMaJIi3yIte OCTaToHn TnCK.
3anOBHnTe EMHCTb 3a DONOMOIO NIKN.3a60pOHnEbCn nepeoBnTHn EMHCTb BOHO! 3BeptaIe yBary Ha BOAHI BpN3KN, IIO MOKyt NeTIi i3 EMHOCTI. IIN 3aNOBirAHn PO3bPn3KYBaHHo BOI CNi HANBaTHn II nICrB BiDkpyuBaHH KpiuKni i nepePBn B1-2 XBNHN DnOxOLOKeHH NOBILHO i 3a DONOMOIO NIKN.
3aKpHte EMHcTb.
IpoDObKyuTe npacyBaHHa
BKA3IBKA:
TpmaTe HArTOBi TkaHnHy Dna BuaIaJIeHHra 3aIIuKIB BOH! B nepMIM MOMENT BOa MoKe BxOaNTn 3 OTBOpIB dHnua npack.

YBATA:
3a6opohraTbCBIkPnBaTH KPNKy cMHO 3 BDOHO nIqac npacybaHH.
3aikinueHH npaui
Iicn3aikHcHH npaici CTabe peryTtOp temepatypn 3aBKnHa ^ (KoHTpOJIbHa JAMNOnKa Ha pyKOrTu npackn norache).
BnKlouHb nepemkau 4)Ha Kopnyci npuna.
BntarHtlt BnIky 3 pO3etkn.
TpimMaTe BnIky Bpyci.
HaTNCiHb KIaBII (8) DnI 3MOTyBaHHKa6eIIO npITPmMyIte Ka6eIb, IIO6 3a6e3neHTn HadiIHe i 6e3neue 3MOTyBaHH.
- PeneT TM NK CTaBnTH nPacKy Ha Micue, De BOHa 36epiraETbca, CNI D OCTyDHTN II NOBHCIO.
54 YkpaIHcbka
PoaHHJHMBJIeHH: 230B,50T
CnoKnBaHH noTyXHocTi: 2000 Bt
Tpyna eneKtpo63neuHocti
MaKcImaJIbHa KInbKiCTb BOIN B EMHOCTi: 0,7 nITpn
Tnck napn 3,56ap
Bara HETTO: 3,3 K
Ley npnaD 6yNo nepeBipeno 3riHNO Bcix BiINOBiHNx,
akryanbHnx DnpeKTHCB, HnpanknaI duOdo eNeKTpOMarHITHOi
CymichocTi Ta Hn3bKOBoLTHOI DnpeKTHBN, Ta 36yDOBaHO 3 a HOBITHMIO NOJXeHHMm TexHIK 6e3neKn.
3aIIuaeMo 3a co6oHO npaBO HaTexhiHi 3miH!
O6uzne yka3aHnA NO TEXHNKe 6e3oNaChOCTN
Ipeed hauanom 3Kcnpyaataun npbopa BHNMaTeIbHo npo- nHTaIe npnlaeraemyIO IHCTpykuuio NO 3Kcnpyaataunn COxpaHnTe ee B HAdEHHOM MceTe, BMeCe T rapaHTnHbIM TaHOHom, KACCobbIM YekOM N, PO BO3MOXHOCTN, KAPTOHNO Kopo6KOc C yNaKOBouhBM MaTePAnOM. Ecn daete KOMy-JnoBO nonOJ3OBaTcBpnpOpOM, O8raTeJIbHO daTe BnPndaHy daHHyo IHCTpykuuio NO 3Kcnpyaataunn.
Пользутесь пибором толькхостсимобраими no ha-3начehи. Пибор He npedha3нayeh Дя кOMМерсckoro Hcnoьзовин. He noьзутесь пиборom NOД OTkpBTiM He6om. Ппedoхаягte пибор OT karbpI,прмыx coJIHeHbIX IyueB,ВlaXHOCTHN (Hn B Koem Cnyuae He nOrgPyKaite erO B BODY) u yapOB o6 octpble yTbI. He npikacaiTeCb Kпибopy bIaJHHbIM pykam. EcIn npisbop yBaJxHnncr NIN HAOK, Tyt Jke BbHbTe BNIJKY n3 pO3ETK.
Iocne 3Kcnpnyatauun,MOHTaKe npHaJnEKeHOctTe,ueCTke HnnnoLOMKe np6opBaCerda BbHmMaTe BnKy n3 po3etKN (THNTE 3a BNky,a He 3a Ka6eJIb).
He octabnIe BkIIOUeHHbIe 3JIeKTPoPnp6Opbl 6e3 npICMOtpa.BixOgN 13 NOMEueHINB CcERda BBIKIOuHaTe np6Op.BbHbTe WTEKeP n03eTKI.
-ПиббориKa6eIb cTeBOrO nITaHnI Heo6xOJIMOp peryI Iaprno 6cneIOBaTb Ha HauNHe CJIeOB NOBpeKJEnHn. Ppi O6napyKeHnIOBpeKJEnHn POJIb3OBaTbCpIb6opOM 3aIpeuReTcR.
HnB KOem cnyae He pemOHpyuTe np6op camocToTcIbHO, a ObaPauAteCb B TaKOM clyaue 3a NOMOuK CneuaNCTy, HmEOUeMy COOTBeCTByUOuN DOnyck. H3 coo6paKeHn Be3onacHocTN, ZameHa CetEBORO UHypa Ha paBHO3NaHbI dONyCKaETCA ToJbKO uepe3 aBOIDn3rTOBtJIb, HAIy CEpBNCHyO MaCTepCKYIO HIN COOTBeCTByUOeRO KBaINHcNipOBaHHORO CneuaNCTa.
- Icnojbl3yIteToIbkoOpnHaJIbHbIe3aNactH.
- PtoKanyIcTa, co6JIIOaJTe HmKecJeIouHne, CneuaIbHbIe yKa3aHnI NO TEXHKe 6eONaCHOCTn.
TeTNIINaHynDaIOUncEeBnPHCMOTpe
- Ⅲ coo6paKeHn 6e3onacHOCTn IINI DeTe HcOCTaBnIte neKaTa yNakOBky (IIaTcIKOBbIe MeuKn, KaTOH, NeHO- nIaCTn T.D.) 6e3 npCMOTpa.

PENyPTPEKDEHNEI
He no3BOJnIeTe dETM nIpaTb c NOIIN3TNIEHOBOI PIIeHKO. OnaCHOCTb ydyuB!
3TOT np6op He npedHa3HaeH IIN NOIb3OBAHn IINaAMn (BKNHOaJeTei) C ORPAHueHHbIMn FNIuCeCKMn, CEHCOPHbIMN IIN yMCtBEHHbIMn CIOOC6HOCTAMn IIN IINaAMn, HE IMeOUsIMn ONbTA N/IN HEO6XODMbIX 3HaHN. NCKIOUHeHne COCTABJIHOT CUYaH, KOrJa OHI HAXOJATCR NOD pnpCMOTPOM IInca, OTBeTCTBEHHORo 3a IN 6e30NaCHOCTb, IIN KOrJa O T 3TOr OInyueHb IYkaAHHN NO NOnb3OBAHnIO np6opom.
Heo6xoJIMO npHcMaTpBaTa 3aJeTbMn, YTO6bIy6eINTbcB TOM, yTO OHN He HrpaKOT C pH6Opom.
CHMBOJIbI npHMeHReMbIe B DaHHOM pyKOBOcTBe NOJb30BaTeJI
BaKhIbe peKOMeHdaun IIN oEcbneueHHBaWae 6e3OnaCHOCTN Oo3HaueHbI NOOCoEHHomO.ObraTeNbHO CnEyIte 3TMpeKOMeHdaunM,HToBbI PneOTbpaTb HecuactHb CnyaHnnnoNtOMky N3dennr:

PTEUPTPEXHEHNE:
PpeDynpexJaetO6OnaChOCTn DIA 3dOpOBbH BO3MOXHOM pncke POnyuHn TpaBmbl.

BHVMAHME:
Yka3bIbaeHa Bo3MOKHyO OaCHOCTb IINH3DeNn IN dpynx OKpyKaIOxN INpeDMETOB.

PIMMEUAHNE:ДаET COBETbI INHΦOpaMuIcI.
CneuaHbHbIe yka3aHnI NO TexHnKe 6e30nacHOCTN

TPEIYTIPEJXJEHNE:
-
PiooIbBa yTHOra 6bICTpo HArpeBaetcN, YTO6bIOCTbITb, eH Tpe6yETc BpEMr. PioXaIyIcTa, He npKacaiTeCb K He!
CTaBte yTHOr TOnbKO Ha NoDctABKBy!
Bb6epHTe HaeKHOe MeTO dYcTaHOBKn np6opa! MeTo DOJXHO 6Itb: -
YCTOUIBbIM
POBhblIM
TEIIOCTOHNM -
PpeHnOJIHeHEm BOJHOrO 6aUka BbIKIOuAte yTOI n3 cETn.
-
HanoJIHnTe eMKoCTb MaKcMmaJIbHo 0,7IITpa XOnOJHO BObl. He nepenOIHaTte eMKoCTb!
- He nepereh6aaiTe coeDiHHteBHybI shnahr (2)!
- IlaIbte yTHOrO mToJIbKO OeJHKy I TeKCTnJIbHbIe H3dEINIA!
-ПпменгтToIbkoДИСТИПИРОВАнHyO BODY. - HeIb3aOcTbIaTb yTIOg 6e3 npHcMoTpa, ecnn OH BkNIOUey H B3JIeKTKPOCeTB.
O63op Detanen npnbopa
1
Perynatop
TemnepaTpybI
2
CoeHHnTeIbHbI
WanH
3 KaebIbcTeBOrIO nHTaHn
4
BbIKIOuHaTeIb co BCTpOeHHo KOnTPOhHO bETb
lbha lamnoyka,EMKoCTb DnB OBDa
6 KHTpOlbHnIaMIOUka,Iap
7
Perynatop
napa
8 KhoNkaHAMOTKKaBJIa
9 EMKOCtB dIIN BDOJI
10
Ipo6Ka/HaNoJIHnTeJIbHOe
OTBepCTHE
BOIDHO
6a4ka
11 NocTabkaIyIyIa
Pycckn
12 KhoNka BbIO Hoi lamnochKoT, TempepaTpa
13ФнкcatopДЯДIMTeHbHoro npa
PnHaJIeJXHOCTH (6e3 pucyNka)
HanoHntbHaB BOpOHka, DepeKaTeB KaBela
Yka3aHHK npMHeHHIO
Pacnakobka
- YdaJInte 3aIHTHyO ΦIbIy Hn KaIeIKN, ecN TaKOBblE HMeHOTcR, cpaoboyeNOBepxHOCTNYTOrA.
- BbTTAHTE KaBéNb Ha Heo6xOdMуO dInHy.

BHIMAHNE:
- BbTnBaIte KaBcIb CeTeBOrO NITaHINo MoKc. DnHbI,TOeTb Do KpaCHOn MapKnPOBKn
HnB KOem cnyae He BbITrHbAte Ka6eIb Do KOHca, TAK KAK OH MOKET NOBpeINtbcra.

PIMEYAHHE:
B clyae, ecn BnHa Ka paCha MapKnpOBka, HEMHOro IOITHHe KabeIb Pn NOMOu KNOHKn HAOTKn KaebJI (8). DepeNte KaebIb KpEnKO B pyKaX, YTo6bl npedotBpaTntb erO XnctaHne.
- Poinb3yIteScb depkaTelem Ka6eI dI KHTpOIpoBaHHO ro pacnooxehn coedHHTeBHoro IHaRa (2).
3neKtpocetb
- Y6eIITecb B TOM, yTO HAnpRKeHHe NITaHnYyTHoA (CMOTPN Ta6NkHy Ha He) COOTBETCTByET HAnpRKeHNo BAWei CETH.
BctabnTe cTeBoI WTeKeP IuMb B MOHTnpoBaHHyO cornacho npedncaHnM WtecenbHyO po3eKy 230 B\~ 50 rC 3aunTHbIM KOHTaKToM.
Notpe6JREMaM MOUHocTb
B obse CJoxHocn yctpoCTBO MOKET Ntpe6nTb Do 2000 BaTT. TaKyHO hArpy3ky peKOMeHNyTeTc NOKnIOuHaT bYepe3 OTdeIbHyO 3JIeKTPoPBOdKy, OCHAeHHyO ABTomaTOM OTKIOUeHEN Ha 3JeKTPoTOk 16 A n y cTpoCTBOM TOKOBN 3aunbl.

BHIMAHHE: IEPERPY3KA!
- Pn nOb3OBaHN yDnHnHTeNbHbIMn Ka6eAMn CnEInTe 3a TEM, YTO6bI NOpeyuHoe CEeHne Ka6eBn MOHHMmY15 MM2.
He noIb3yIteCb pa3BETBHTeHbIMn WTeNCelhBMn po3eTKAMn, TAK KAK 3OT Pn6Op NMeT CnHUKOM BbICOKYIO MOUHOCTb.
PeryIaTOp TEMpePaTyb B3neKtpoyThore(1)
Cnmbonbl, haxoJHneHa peryItope, COOTBeCTByHT CNeDyUOIM yCTaHOBkAM:
(CNHTeTnKa,JI)H3K4TeMnepaTypa
(WepcTb)cpedHraTeMnepaTypa
(x/6, něH) MačchmánlbHo BbICOKa TEmnepaTpya
Khoika BbIopoca npa co BCtpoeBqIHnH paeepayap (9)
- HANONHEHNAEMKOCIN DnBBOBbOTKpyNTe KpbIuKy (10).
- Ptojauynta, BocnoIb3yItecB npnlaeraemOBPOHkoN.
- Oëbëm émkoctu coctaBnT 0,7 nHTpa.
YTO6bI npedOTBpaNTb BbITEKAHNE BObI n3 pe3epByapa, He nepenolHHnE erO. TaKIM o6pa3OM npedOTBpaAaETcR BbITEKAHNE N3NIuHEn BObI Upe3 nOoWBy yTOra.
Kpenko 3akpynte npo6ky o6paTHO.
Boga
HcnoB3yIte TOnbKO DnCTnnnnpoBaHHyO BDOy. 3aPpeaaetc HAnBaTb B BOAHO B aOK BOY N3 OTONHTeBHON CNTeMb, CyINHBHX ABOTAMOB INN BOY C DOABKAMN (KAK KpaxMaJ apOMaTH3NPUOJIne CpeCTBa, pa3MnHTeNB INN dpyrNE XmNKaTb). I3dEInne MOKeT NCOpTnTBCR OT 3TO, TAK KAK B napOBKaMepe MOrYT Obpa3OBaTbCR OTIOKeHn. Kpome 3TOO 3TN OTIOKeHn MOrYT BbIITN Upee3 npOBBe OTBepCTn IN 3aPr3HtB 6JIbe.
06cnyxnbHne
Ipeep npimHeHem BnepBbIe
- PpOtpnTe nOoBv yTnOra cNerKa BlaJHNo TpAknKo.
YTO6bIydaNITb C Hero OCTaBUniece 3arpa3HeHn nporlaTBe napy pa3 KaKoe-HNoyDb CTapoe, YCTOE nonoTeHue.
TnajkeHne 6e3 npa

PIMEYAHHE:
Paccoptyte6eIbe no Tempeatype rnaKeHn.
KaKbIpa3,nepeBkIOUeHHeM INN BbIKIOUeHHeM yTOra n3 cTeN, nepeBOOHTe peryIaTOp TEMnepaTypbI B NOLOXHeH e,O".
- YCTAHOBInTe yTHOr Ha NoCDtABKy (11).
BCTaBbTe Bnky B 3a3eMneHHyO po3Ely C HAnpRHeHcetn230B,50Tq,yCTaHOBNEHHyBO COOTBeTcTBnC npedINCAHnMM. - BbCTaBbTe TEmnepaTpy Ha TePmOperyIaTope (1).EcnBam HADo NOrnaIaNb ODeKdy I3 YyBCTBnTeJIbHOJ TKAHN,HaHHaTe C CamOH NsKO TEmnpaTpbl.

DIPMMEYAHHE:
KohtpObnHnIaMna (12) yTOra yKa3bIaEt Ha CTeneHb npoecca HArpeBaHn. KaK TOnbKO OHa nOTyXHeT, paOohar Temnepatya DocTHHyTa.Tenepb MoKHO haHHaTb IaNITb.
IIO OKOHuaHn paObI cyTHorOM BCERda yCTaHaBnBaIte peYrIaTOp TEMpePaTypbI Ha,0" N BByTackNbaIte WTeNCeJIb I3 po3ETKn CETn (KOHTpOlbHar lamnOuKa b pyKe npn 3TOM tyxHeT).
TjaKeHne c npom

PTEJYTPEJKDEHNE:
H3 yItra BbIXOHT 60JIbIe KOJIueCTBO ropeyero npa. H3- 3a 3TOrO cyIecTByET OAnCHOCTb NOnyEHHN OXOROB.

BHIMAHHE:
PnIraKeHbncnapOMcIeIte3aTEM,YTO6bIBOHOHOpe3epByap6blBcerdaOCTaTOUHO3aONHeHBOIO.10JIb3OBaHne np6Opom 6e3 BObl HaHocHT np6Opy BpeJ.

BHIMAHHE:BBOIDB3KCIYYATALHIO:
ДяЗТО NOCTYNAITE CNEDEYUOUM OБРАСМ:
HanoHHTe EMKoCTb TOJbKO DO MAKcHMaJIbHOI OTMeTKn. He nepeINBaIte!
EcnB EMKOCTN OCTaTKn BObl, Mbl peKOMeHnyEM NOCTyNTb CNEdyUoUIM O6pa30m: TnaIbTe No napom TaK DoIro, Noka He 3arOpITcK KOHTpOBHa JAMNoUka (5), yka3bBaIOUaHa HHeIOCTaOuHOe KOnlueCTBO BObl N3 NIOOUBByyToRa 60bnBe He 6byET BbIXoINb Nap. 3aTeM 3aONIHnTE EMKoCTb CORNaCHO INCHpykUInn (CMOTPnTE 3aRtOBok ,KaK r 3aJIbAo BOy BO BpeM yTOXKN). HNN:
- BbIeTe, BcTpaXnBaYyHOr, OCTaTKN BOyB IMepHbIM cTaKaH N DoJeTe DnCTnJIIpOBAHHyO BOy DO MAKcMAmblHoN OTMeTKN EMKoCTN (0,7 nHTpa). 3akpoTe EMKoCTb Ira BOybl.
IoNDIOHHTeCTAHUNIO OCHOBAHNAKUTeNCBHOI pO3ETKe 230 B/50Tc3aunTHbIM KOHTAKTOM.
BkIIOHHTe BbIKHOATEnb (4) Ha 6a3e.
BbIepeHHyKHyTO TemnepaTyB npedax O.
-Подждente,нokaHaбаЗе He 3aRopITc KoHTpoJIbHЯлamnoчka(6).
HaHMMaTe Ha KHOIIky BbIbOpa napa (12) MHHMyM 1 MNHTy NIN BOCIOJIb3yIeTcB ΦHKcatOpOM (13), YTO6bl 3aΦIKCNPOBaTb KHOIIky BbIbOpa napa.

TIPIMEYAHNE:
3ToBpemHHeoXOIMOnDnTOrO,TO6bI np NOCTyINB yTHOr.
- Depknte HArToBe TpAnky! Ha nepBOM 3TaNe 3TOIpoceccaHa pa6Oey IOBepxHocTn yTOra 6yDet BbCTynatb Boda.
Kak toIbKO 6yET BvICTynatb TIOBko nap 6e3 BObl, MOHNO npePBATb 3OT npOceCC. Nocne 3TOrO HAKMITE eue 2-3 pa3a Ha KHOKNy NOaHnapa, He KacAcb npEHa3HaueHHOro dIra INaKeHb6JIb.
- Nocne toro, kak Bby nporla nte Heckonbko pa3 no ctapoi, Ho uctoTkain, Baia ctaHn rtoBa KaaboTe.
-ДЯТOrO,чTO6bI OTPERyINIOPOBaT KONUeCTBO napa,BOCNOJIb3yITeCbpeYnIaTOPOMnapa(7).
Ha Hn3kX TemnepaTpyax Heo6xOIMMo rnaHt b6e3 npa. ObIyHO,ecnn yTHOr HeIOCTaTOHOrpAHy,BO3MOKHO BbITEKaHHe BObl N3 NOOUBbl.
BepTnKaJIbHaN noJaA npa (Vertical Steam)
Jaet Bo3MOKHBIM DOnONHHTeBHyIO NOaHy npa B BepTNKaIbHOM NIOJKeHN.
IIOBecBe TnI 3TOBaIe6Ibe Ha IJIeUKN NIOBEdIte yIorHa pacCTOARHe np6I.2-3cm.
KakdoJnBaBbOByBnpoeccepa60tbyyTHora?
EcnBBO Bpempa60tI daBneHnepnapeynano,HeoXoHMO doNTb BOdB pe3epByap. OoanolnHre pe3epByap BOOdoToro,KaOH onopOKHTcAJamnoka(5) yka3bBaet Ha HeoCTatoHoe KOINueCTBO BObl.
EcnBbpaotanBpeKMeDnntelhoro npa,TO CHMNTe PHKcatop (13).
BbIKIOHmTe BbIKIOHATeJIb (4) Ha 6a3e.

IPIMMEYAHNE:
CnB6aK DnB BOnBIMTCrOCTaTOHNO DaBnH, TOTKpbTnTo KpbIuKn (10) 6IOKNpyTCr npdoXpaHTNbHbIM yCTPOICTBOM.

IPEDUNPEKDEHNE:
ДЯ OTKpbTINKpbIHKHHOxOJHMOCTpaBHTb OCTaTOHNO DAIBHH.
- Pn NOMOUI KNOHNI HNTEHCNBHO NOaH npa (12) CTpABITE OCTatoUHoe DaBHeHne B 6aue. EcHn n3 noDIOUBbl yTbHa 60JIbUe He NoCTyNaET nap, To BbTAuHTe WTeNCeIb n3 PO3eTK CEtN H OCToPOKHO OTKpoIte 3aKpyTKy pe3epByapa (10).

PDEyPENEXDEHNE:
- Topracyne Detani! Onachoctb nolyeHn oXorob!
- He do terbaitecbo ropey yioral!

INPMEYAHNE:
EcnKpbIka pe3epByapa dnn B0dbHe OTKpbIbAeTcH, daIte emy 2-3 MmHyTbOCTbITb. Nocne 3TOrO cTpaBnTe eue pa3 octatouHoe daBJIeHne napa.
HaonHnTe EMMoCTb npn noomou BOPOHKn. He nepeonHnTb! Beperntecb BOaHBx 6pbl3r, KOtOpbe MOyr CnyuHaNo 6pb3HyTB n3 KOTna. YTO6bI N36eKaTh 6pb3ROB BObl, HeoXoJMo Nocne OTKpbIBaHr KpbUKN C BEHTNIEM 6eONaCHOCTN H a3bI OXNAJDeHnA DInHO 1-2 MInHYb MeJeHHO 3aINBaT B0Dy B BOPOHky.
- 3akpoTe eMKoCTb DnB OBObl.
IpoDOnJkaIe rnaXeHbe.

ПОНМЕЧАНИЗ:
Diepnte HaroTOBe TpRnky!Ha nepBOM 3Tane 3Toro npoecca Ha paOoey NOBepxHocTH yIora MoKet TaXke BbICTynatb BOda.

IPEDUYPTEXDEHNE:
Hn B KOem Cnyae He OTKpbBaTe np6ky BoaHoro 6aKa BO BpMa pa6Obl.
OKOHuaHne pa6oTbi
IIO OKOHuaHn paObI cyTHorOM Bcerda yCTaHaBnBaIte peYrIaTOp TEMpePaTypbI Ha,0" N BblTaCKnBaIte UTeNCeIb I3 po3ETKn CETn (KOHTpOJIbHaJ lamNoUka B pyKe pN 3OM TyxHeT).
BbIKIOHTe BbIKIOATeJIb (4) Ha 6a3e.
BbIepHnTe WTeKepehHy pa3bEm n3 po3eTKn.
-ДернштBNИКУВpyke.
58 Pycckn
HaKMMTE Ha KONky (8) MexAHINMa CMaTHBaHnN I NOmAleHbKy NODaBaIte Ka6eJIb. DepeHtke Ka6eJIb KpEInKO Bpykax, YTO6bl PDEOTBpaNTb ETo XIECTaHne.
JaTe np60py nCTbTB, npexKe yem y6npaTb ero Ha MECTO.
CamoouHcTka (Self-Cleaning)
BlaorapnHbHomyJapnyIaBneHnnpapa,HaKnbl, KOTopar MoKet Oba3oBaTcB NIOoWBe yTOra,ydaJIReTCa CAMOCTORJIbHO.
UHCTKa
NPEyIpyEKDEHNE:
- Ppeq uCTKoB BcERda BbHMaTe BnIky n3 po3ETK!
JaTe 3eKtpnpb6pny nHIOCTbIO OCTbIb!
HnB KOem cnyae He OKyHaIe IINr YNCTKN np6Op B BOy.3To MOKeT 6bITb npuHOn 3JIeKTPueckoro yDapa nnnoKapa.
BHIMAHHE:
He nnoIb3yIe npOBOHbIe 1ETKn Hn DpyrneapanaoUne npEmTb.
He nCnoIb3yTe CnIbHbIe Hn IapanaHOuue YnCTaUne cpeDCTBa.
- PpOtpnTe KOpNc cyxO TpRnKoI.
- PpOtpnTe NOoBBy yTHOra H NOBepXHOCTb NODCTaBKn CnerKa BlaKHO TpAknO.
OCTaTKI BOJBI MOKHO OCTaBHTB B BOJAHOM 6aYKe, OJHOKO IN HE06XODIMO ydaTb, ECJI H E 6yDTe IONb3OBaTbCAYTOROM DITNTeNbHOE BPEMR.
YctpaHHe HEnCnpabHocTe
MbOCTaBnHem 3a C06oIpaBO Ha TeXnHuYeCKne H3MeHeHnI
GARANTIE-KARTE

- Język polski
- Spis tres'ci
- Autonettoyage (Self-cleaning)
- Vapor vertical (Vertical Steam)
- Steam na vertical (Vertical Steam)
- Autolimpeza (Self-Cleaning)
- Vapore verticale (Vertical Steam)
- General Safety Instructions
- Children and Frail Individuals
- WARNING!
- WARNING:
- CAUTION:
- Special Safety Instructions
- Overview of the Components
- Instructions
- Unpacking
- NOTE:
- Electrical connection
- Connected Wattage
- CAUTION:OVERLOAD!
- Temperature Control on the Iron (1)
- Water Tank (9)
- Water
- Operation
- Before Initial Use
- Ironing without steam
- i NOTE:
- Steam Ironing
- English
- CAUTION: INITIAL USE:
- Please proceed as follows:
- Vertical Steam
- When you have fi nished
- Self-Cleaning
- Cleaning
- AVISO:
- Troubleshooting
- Technical Data
- Meaning of the "Dustbin" Symbol
- Jezyk polski
- IpeepnepnHm3actocyBaHHM
- IpaCyBaHnHa6e3napi
- BKA3IBKA:
- IpacyBaHHa 3 npao
- 3ACTEPEXEHHR!
- YBARGA:
- YkpaIHcbka
- YB4A: noaToK npaui:
- BepTKaIbHa noDaHa napH
- AKn doaTH BOnB E MHiCTb nIac npacyBaHH?
- YBATA:
- Ia 63neuHoro BIKKHTT KPMnKn CnId CnoaTKy HOpMaI3yBaTH NCH B EMHOCTi.
- 3a6opohraTbCBIkPnBaTH KPNKy cMHO 3 BDOHO nIqac npacybaHH.
- 3aikinueHH npaui
- YkpaIHcbka
- O6uzne yka3aHnA NO TEXHNKe 6e3oNaChOCTN
- TeTNIINaHynDaIOUncEeBnPHCMOTpe
- PENyPTPEKDEHNEI
- CHMBOJIbI npHMeHReMbIe B DaHHOM pyKOBOcTBe NOJb30BaTeJI
- PTEUPTPEXHEHNE:
- BHVMAHME:
- CneuaHbHbIe yka3aHnI NO TexHnKe 6e30nacHOCTN
- TPEIYTIPEJXJEHNE:
- O63op Detanen npnbopa
- Pycckn
- PnHaJIeJXHOCTH (6e3 pucyNka)
- Yka3aHHK npMHeHHIO
- Pacnakobka
- BHIMAHNE:
- PIMEYAHHE:
- 3neKtpocetb
- Notpe6JREMaM MOUHocTb
- BHIMAHHE: IEPERPY3KA!
- PeryIaTOp TEMpePaTyb B3neKtpoyThore(1)
- Boga
- 06cnyxnbHne
- Ipeep npimHeHem BnepBbIe
- TnajkeHne 6e3 npa
- DIPMMEYAHHE:
- TjaKeHne c npom
- PTEJYTPEJKDEHNE:
- BHIMAHHE:
- BHIMAHHE:BBOIDB3KCIYYATALHIO:
- TIPIMEYAHNE:
- BepTnKaJIbHaN noJaA npa (Vertical Steam)
- IPIMMEYAHNE:
- IPEDUNPEKDEHNE:
- ДЯ OTKpbTINKpbIHKHHOxOJHMOCTpaBHTb OCTaTOHNO DAIBHH.
- PDEyPENEXDEHNE:
- INPMEYAHNE:
- ПОНМЕЧАНИЗ:
- IPEDUYPTEXDEHNE:
- Hn B KOem Cnyae He OTKpbBaTe np6ky BoaHoro 6aKa BO BpMa pa6Obl.
- OKOHuaHne pa6oTbi
- Pycckn
- CamoouHcTka (Self-Cleaning)
- UHCTKa
- NPEyIpyEKDEHNE:
- GARANTIE-KARTE
Brand : AEG
Model : DBS 5532
Category : Iron