
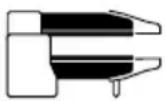
HD4431 - Fondue, raclette and wok appliance PHILIPS - Free user manual and instructions
Find the device manual for free HD4431 PHILIPS in PDF.
| Brand | Philips |
| Model | HD4431 |
| Product type | Fondue, raclette and wok appliance (contact grill) |
| Dimensions (L x W x H) | Approximately 40 x 30 x 20 cm (closed position) |
| Weight | Approximately 3.5 kg |
| Power supply | 220-240 V, 50/60 Hz |
| Power consumption | Approximately 2000 W |
| Plate material | Non-stick coating |
| Number of plates | 2 (top and bottom) |
| Removable plates | Yes, for easy cleaning |
| Thermostat | 5 positions (1-5) |
| Temperature indicator light | Yes |
| Main functions | Grilling, keep warm, rapid grilling, gratinating, defrosting |
| Use positions | Party grill (open), rapid grilling (closed with space), gratinating (horizontal plates), keep warm |
| Care and cleaning | Plates washable with warm soapy water; do not immerse the appliance |
| Safety | Do not use metal utensils; unplug before cleaning; keep out of reach of children |
| Power cord | Replacement by an authorized repairer mandatory |
| Included accessories | No specific accessories mentioned |
Frequently Asked Questions - HD4431 PHILIPS
User questions about HD4431 PHILIPS
0 question about this device. Answer the ones you know or ask your own.
Ask a new question about this device
Download the instructions for your Fondue, raclette and wok appliance in PDF format for free! Find your manual HD4431 - PHILIPS and take your electronic device back in hand. On this page are published all the documents necessary for the use of your device. HD4431 by PHILIPS.
USER MANUAL HD4431 PHILIPS
natural_image
Black and white photo of a grater with open pan, surrounded by fresh meat and condiments (no text or symbols visible)English Page 4
- Keep pages 3, 44 and 45 open when reading these operating instructions.
Français Page 7
English
Important
- Read the instructions for use well and study all the illustrations before using the appliance.
- Before connecting the appliance, check if the voltage indicated at the bottom side corresponds to the voltage in your home.
- Do not use metal kitchen utensils with this appliance.
Do not use aggressive and abrasive cleaning agents.
These can damage the non-stick coating on the grilling plates.
• Always unplug and allow the appliance to cool down before cleaning. - Never immerse the appliance in water. You can clean it with a damp cloth.
- For more thorough cleaning you can remove the grilling plates and wash them.
- Do not allow the mains lead to touch the hot grilling plates.
- Connect the appliance to an earthed mains outlet.
- Be careful when the plates are hot! Keep a watchful eye on children.
- Be careful: spatting of fat may occur when grilling fat meat or saucices. Prick some holes in the saucices before grilling.
- Food should not stick out of the grill while being grilled.
- If the mains cord of this appliance is damaged, it must only be replaced by Philips or their service representative, as special tools and/or parts are required.
General description (fig. 1 on page 3)
A Upper grilling plate
B Lower grilling plate
cHandle
D Plate fixing clip
E Temperature pilot lamp
F Temperature control
G Hinges (2 pivots: high and low)
H Drain
Support (flap-out)
Prior to first use
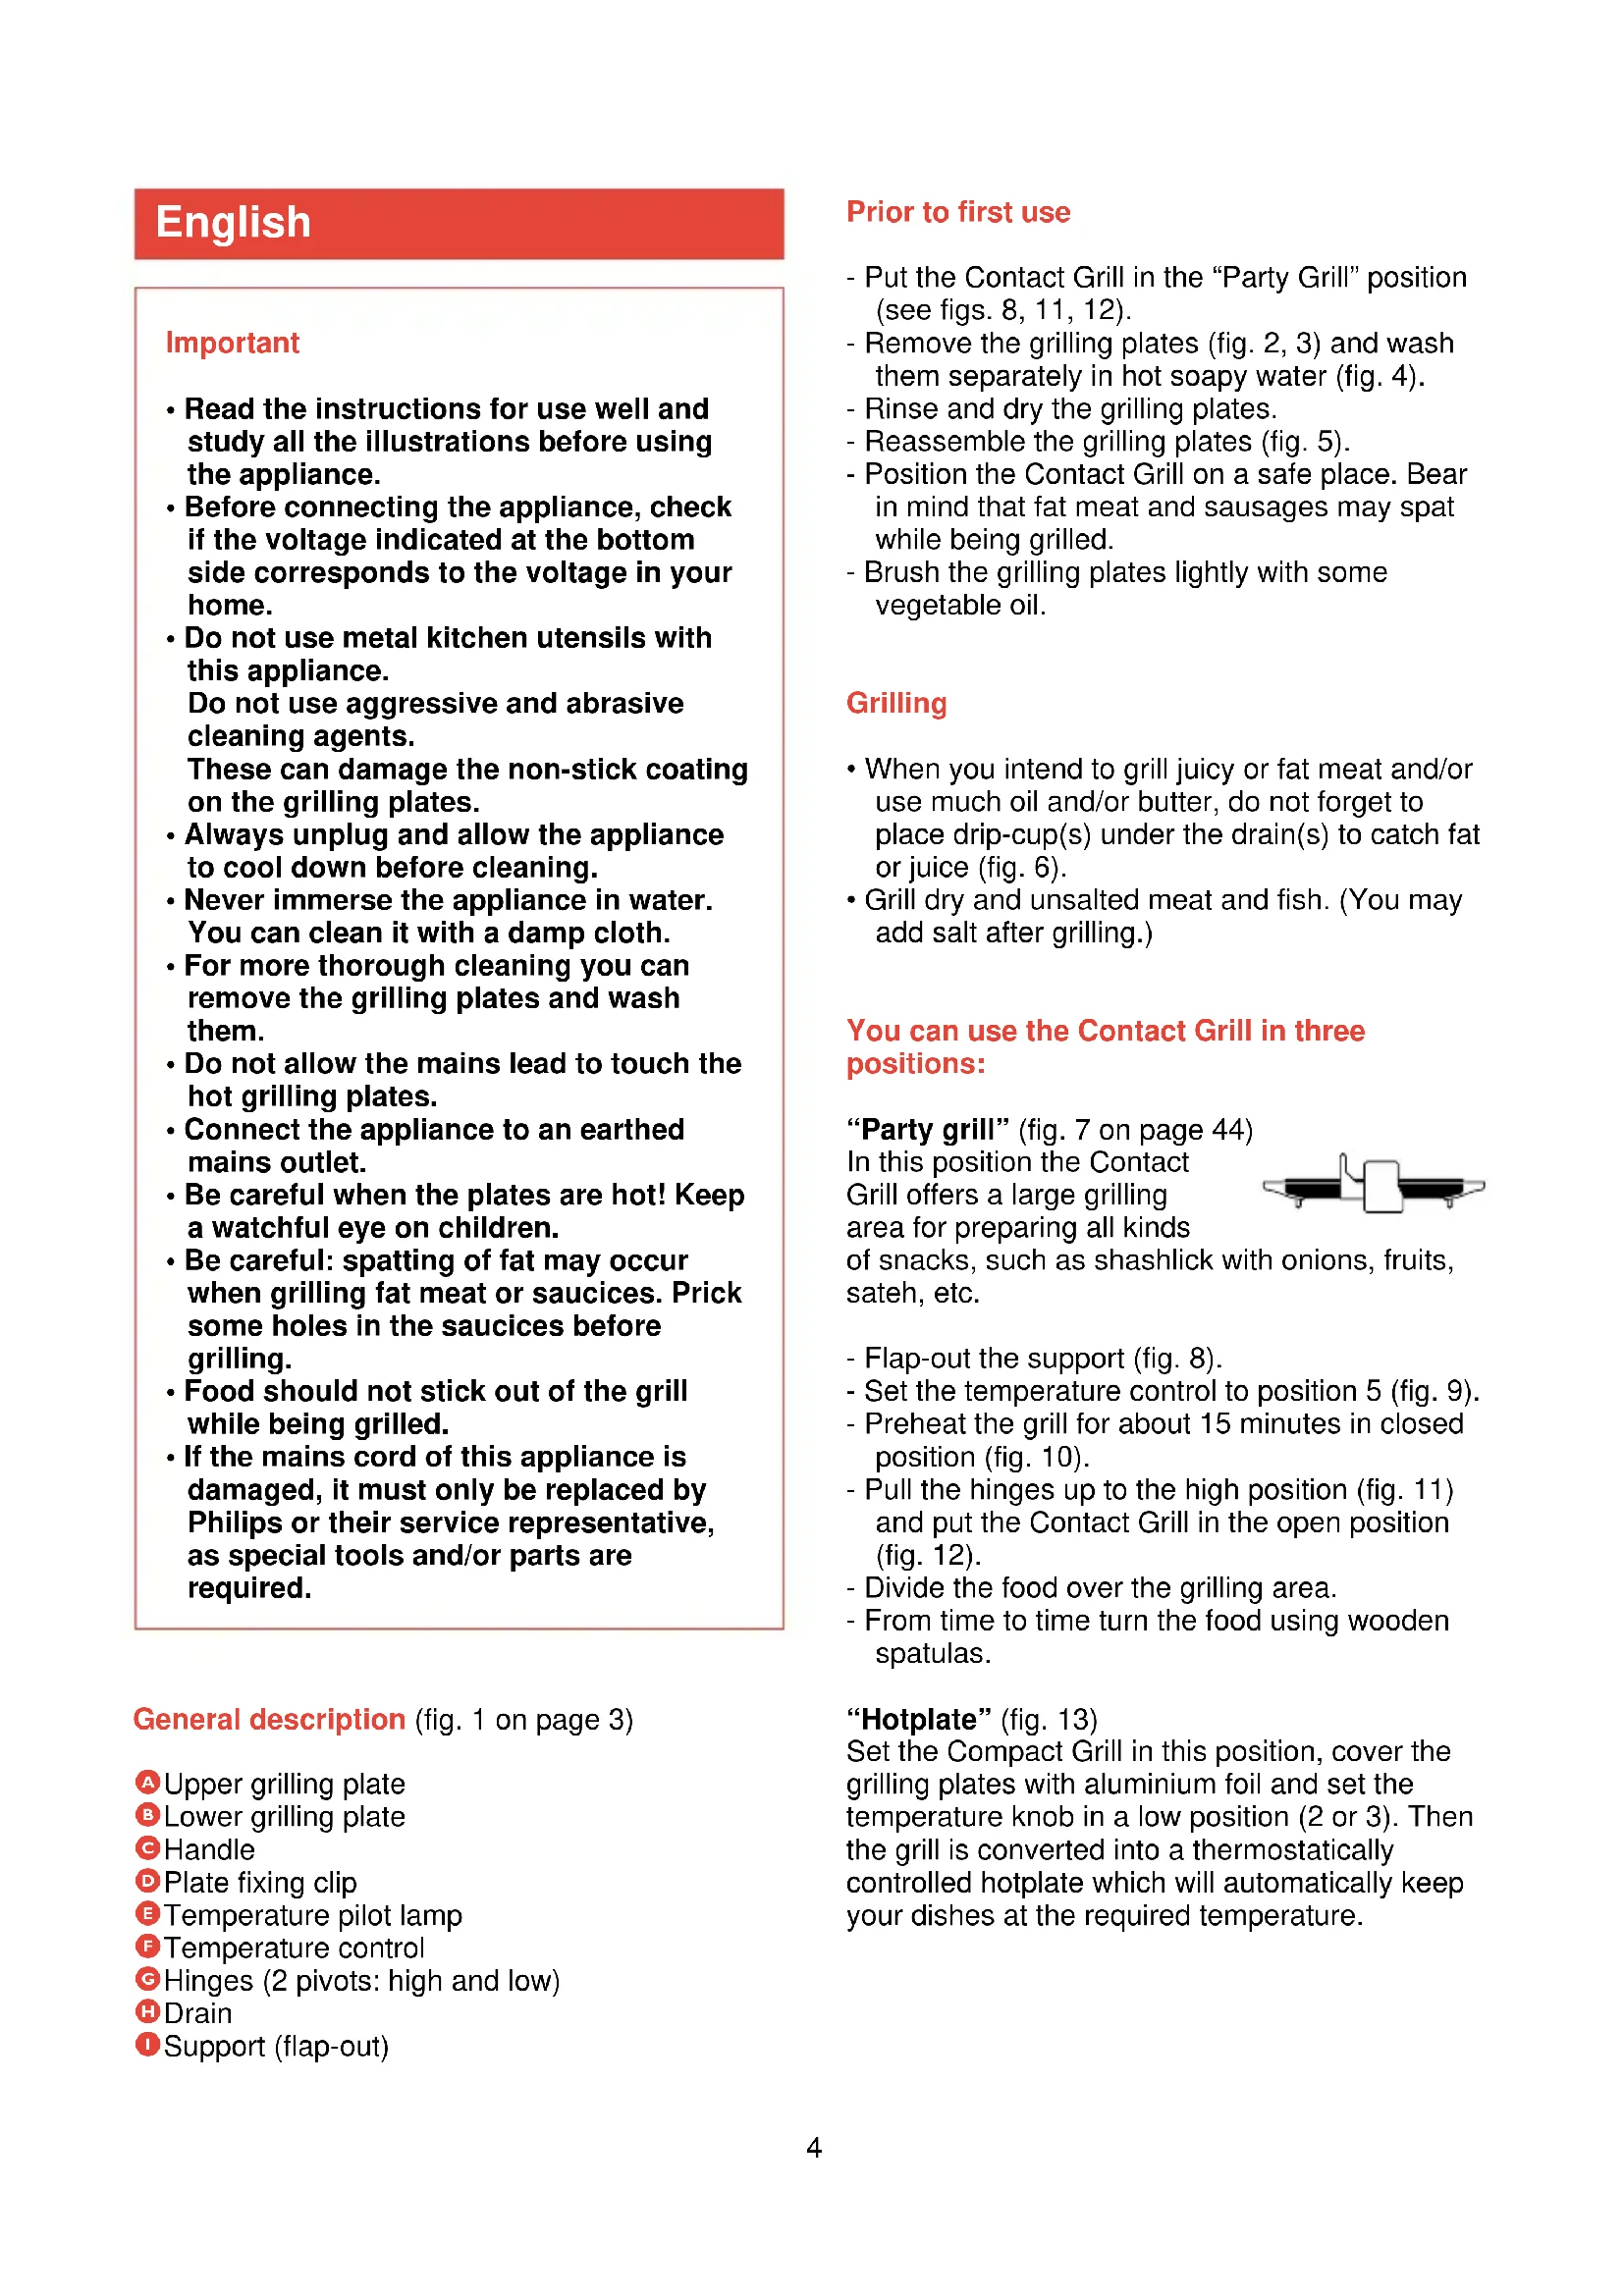
- Put the Contact Grill in the "Party Grill" position (see figs. 8, 11, 12).
- Remove the grilling plates (fig. 2, 3) and wash them separately in hot soapy water (fig. 4).
- Rinse and dry the grilling plates.
- Reassemble the grilling plates (fig. 5).
- Position the Contact Grill on a safe place. Bear in mind that fat meat and sausages may spat while being grilled.
- Brush the grilling plates lightly with some vegetable oil.
Grilling
- When you intend to grill juicy or fat meat and/or use much oil and/or butter, do not forget to place drip-cup(s) under the drain(s) to catch fat or juice (fig. 6).
- Grill dry and unsalted meat and fish. (You may add salt after grilling.)
You can use the Contact Grill in three positions:
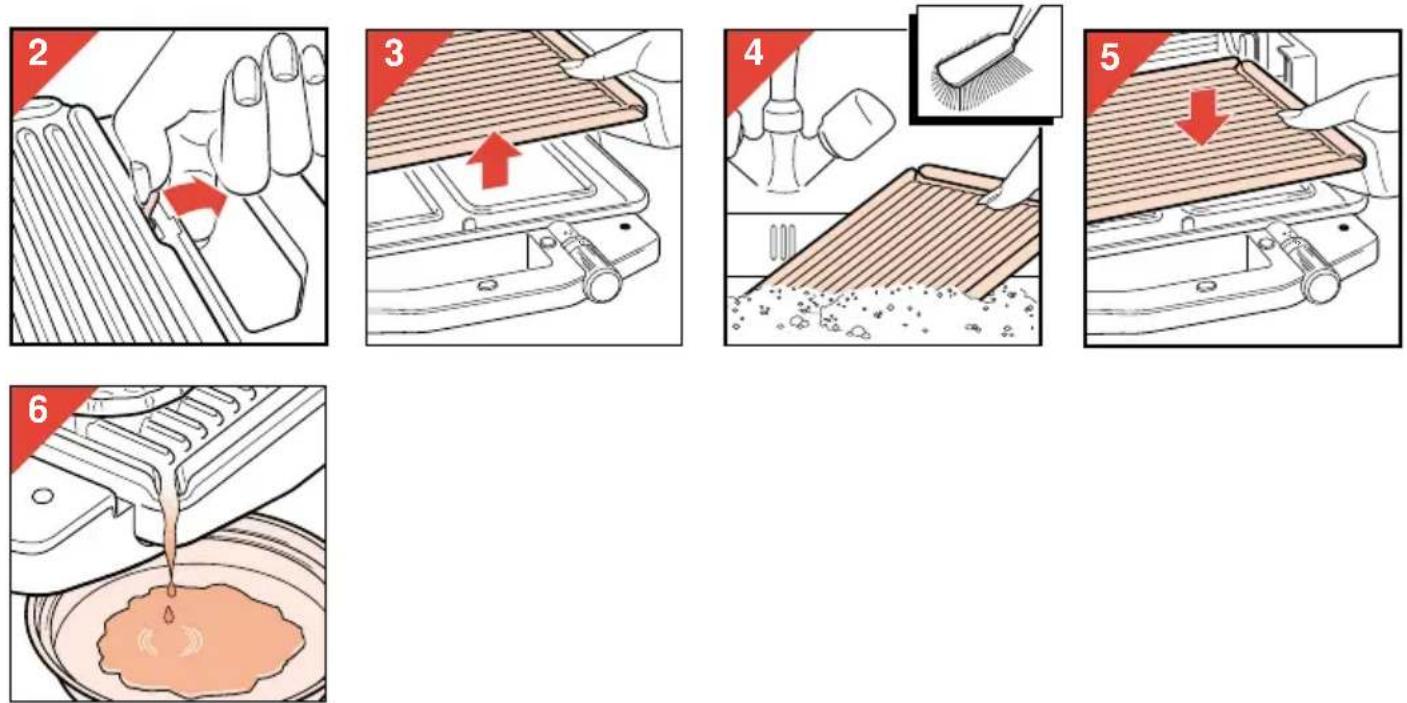
"Party grill" (fig. 7 on page 44)
In this position the Contact Grill offers a large grilling area for preparing all kinds
of snacks, such as shashlick with onions, fruits, sateh, etc.
- Flap-out the support (fig. 8).
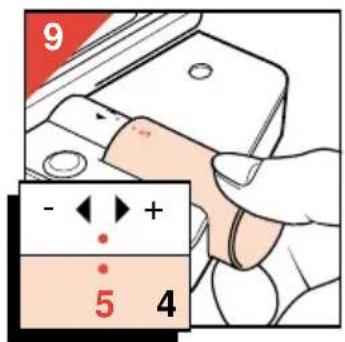
- Set the temperature control to position 5 (fig. 9).
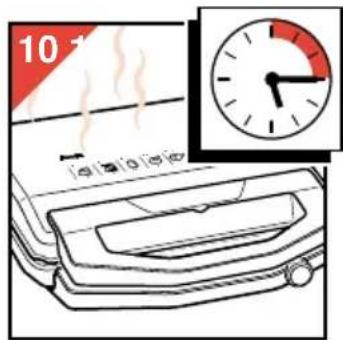
- Preheat the grill for about 15 minutes in closed position (fig. 10).
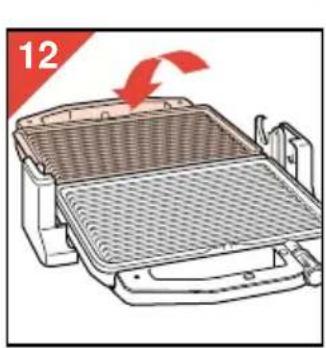
- Pull the hinges up to the high position (fig. 11) and put the Contact Grill in the open position (fig. 12).
- Divide the food over the grilling area.
- From time to time turn the food using wooden spatulas.
"Hotplate" (fig. 13)
Set the Compact Grill in this position, cover the grilling plates with aluminium foil and set the temperature knob in a low position (2 or 3). Then the grill is converted into a thermostatically controlled hotplate which will automatically keep your dishes at the required temperature.
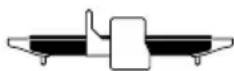
"Contact grill" (fig. 14)
This position is the best choice for intense grilling (rumpsteak, hamburger etc.), for toasting bread and for preparing tosti.
- Set the temperature control to position 4 or 5 (fig. 15).
- Preheat the grill for about 15 minutes in closed position (fig. 16).
- Open the grill half way (fig. 17).
- Put the food (meat, tosti's etc.) in the middle of the lower grilling plate (fig. 18).
- Lift the upper part a little and then close the grill (fig. 19).
The upper part of the grill is now resting on the food, which is heated from both sides equally strong.
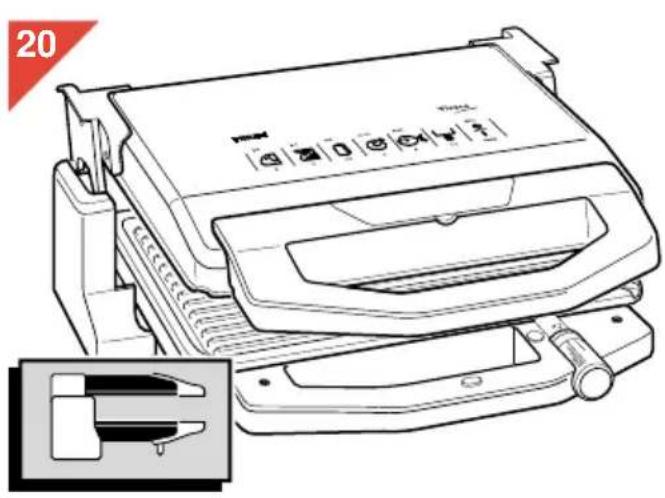
"Gratinating grill" (fig. 20)
This is the ideal position for simultaneous grilling and gratinating.
The position is also suited for all kinds of “open toast” with egg, tomato, paprica and/or onion rings covered with cheese.
- Set the temperature control to position 5 (fig. 21).
- Preheat the grill for about 15 minutes in closed position (fig. 22).
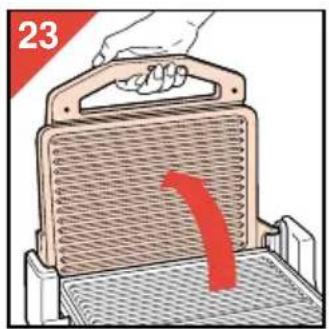
- Open the grill half way (fig. 23).
- Put the food in the middle of the lower grill plate (fig. 24).
- Pull the hinges up to the high position (fig. 25).
- Put the upper part horizontally (fig. 26).
Note: the upper grilling plate should not be in contact with the food!
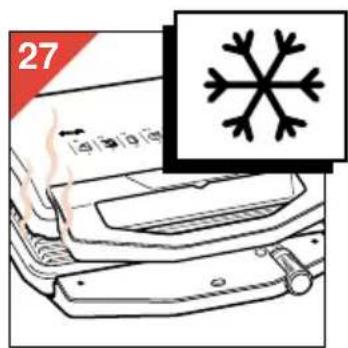
Frozen food (fig. 27)
This position can be also be used to defreeze frozen food.
Wrap the frozen food in aluminium foil.
Set the temperature control to a low position (2 or 3).
What temperature? How long? Which position?
In the table you can find a number of dishes to be prepared with the Contact Grill.
| Kind of food | Grill position | Grilling time(minutes) | Position of temperature knob | ||
| Fish (small pieces)German sausageHalf chickenHamburger (deep frozen, pre-baked)Lambs chopMeat with short grilling times (e.g. fillet steak, loin meat or entrecôte)Mix grill (small pieces)Open toastPine apple (slices)ShashlickToasted sandwich(tosti)TroutTurkey / chicken fillet(250 g) | ●●●●●●●●●●●●●●●●●●●●●●●●●●●●●●●●●●●●●●●●●●●●●●●●●●●●●●●●●●●●●●●●●●●●●●●●●●●●●●●●●●●●●●●●●●●●●●●●●●●●○●●●●●●●●●●●●●●●●●●●●●●●●●●●●●●●●●●●●●●●●●●●●●●●●●●●●●●●●●●●●●●●●●●●●●●●●●●●●●●●●●●●●●●●●●●●●●●●●●●● ●●●●●●●●●●●●●●●●●●●●●●●●●●●●●●●●●●●●●●●●●●●●●●●●●●●●●●●●●●●●●●●●●●●●●●●●●●●●●●●●●●●●●●●●●●●●●●●●●●●● | ●●●●●●●●●●●●●●●●●●●●●●●●●●●●●●●●●●●●●●●●●●●●●●●●●●●●●●●●●●●●●●●●●●●●●●●●●●●●●●●●●●●●●●●●●●●●●●●●●●○○○○○○○○○○○○○○○○○○○○○○○○○○○○○○○○○○○○○○○○○○○○○○○○○○○○○○○○○○○○○○○○○○○○○○○○○○○○○○○○○○○○○○○○○○○○○○○○○○○○ ○○○○○○○○○○○○○○○○○○○○○○○○○○○○○○○○○○○○○○○○○○○○○○○○○○○○○○○○○○○○○○○○○○○○○○○○○○○○○○○○○○○○○○○○○○○○○○○○○○○○ | |||
Indicated are the temperature to be set, how long the food should be grilled and the appropriate position of the grill.
The time for preheating is not included in the indicated grilling time.
During the process of grilling the temperature pilot lamp will illuminate from time to time. This means that the Contact Grill stabilizes the set grilling temperature. You can continue grilling.
The grilling times and temperatures can of course be adapted to your taste.
Furthermore, the settings depend on the kind of food (meat e.g.), its thickness and its original temperature.
See also the indications on your Contact Grill.
Tip:
When preparing sateh, chicken, porc and veal, first sear shortly at high temperature (5).
Then you may set the temperature control one position lower and do the food well.
For U.K. only:
Fitting a different plug
This appliance is fitted with a BS 1363 13 Amp. plug.
Should you need to replace the plug, connect the wires as follows:
Green/yellow wire to the Earth terminal ( ± ) of the new plug.
Brown wire to the Live (L) terminal of the new plug.
Blue wire to the Neutral (N) terminal of the new plug.
Always fit the same value of fuse as that originally supplied with your appliance.
Only use BS 1362 approved fuses.
As a guide only: Appliances under 700 W can have a 3 Amp. fuse (red) and all others should have a 13 Amp. fuse (brown).
When disposing of an old plug (particularly the moulded type which has been cut from the mains cord) always remove the fuse as the plug could be dangerous if ever inserted in a live socket.
Français
Important
natural_image
Technical line drawing of a heat exchanger or radiator component with internal grating and cooling fins, shown with a close-up inset (no text or symbols)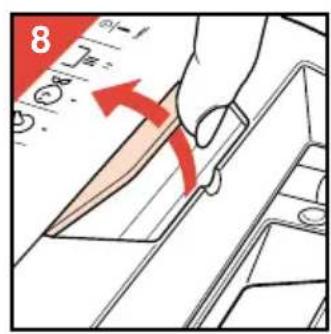
natural_image
Diagram of a car interior with a mesh tray and red directional arrow indicating motion (no text or symbols)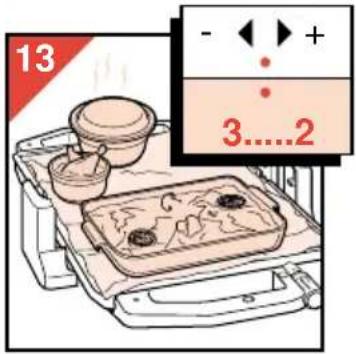

natural_image
Technical line drawing of a printer with a close-up inset showing internal components (no text or symbols)


natural_image
Illustration of a hand pressing down on a gridded metal tray with a red arrow indicating downward motion (no text or symbols)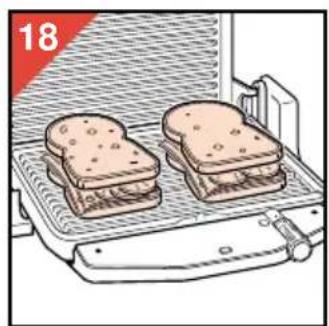
natural_image
Illustration of two sandwiches on a grater with a side panel, no text or symbols present![19 [ ] [ ] [ ] [ ]](/content/2026/02/384894/images/f713565a44cfb7ddb4ba0645854f6bb2a005089da26764ae7bb900c9f6956829.jpg)
natural_image
Line drawing of a printer with buttons and a close-up inset showing internal components (no text or symbols)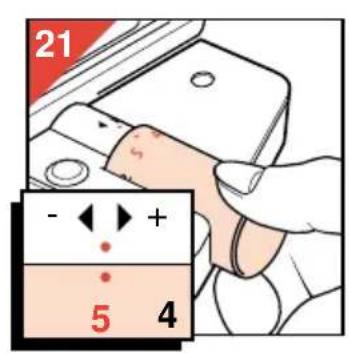

natural_image
Illustration of a hand holding a tray with a red arrow pointing downward on a mesh surface (no text or symbols)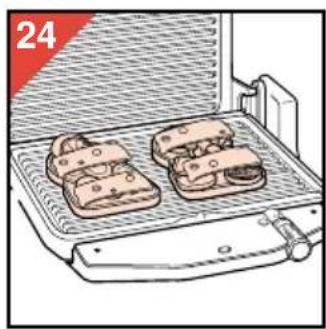
natural_image
Illustration of two sandwiches on a grater tray, one open and one closed, with no visible text or symbols.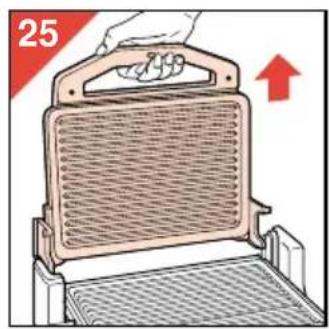
natural_image
Illustration of a gridded metal tray with a handle, showing a handle and a red upward arrow (no text or symbols)
natural_image
Abstract geometric pattern with diagonal lines forming a right angle (no text or symbols)
natural_image
Abstract geometric shape with diagonal lines forming a triangular frame (no text or symbols)


- English Page 4
- Français Page 7
- English
- Important
- General description (fig. 1 on page 3)
- Prior to first use
- Grilling
- You can use the Contact Grill in three positions:
- "Contact grill" (fig. 14)
- "Gratinating grill" (fig. 20)
- Frozen food (fig. 27)
- What temperature? How long? Which position?
- Tip:
- For U.K. only:
- Fitting a different plug
- Français
Brand : PHILIPS
Model : HD4431
Category : Fondue, raclette and wok appliance