ICM 3594 - Ice machine CLATRONIC - Free user manual and instructions
Find the device manual for free ICM 3594 CLATRONIC in PDF.

User questions about ICM 3594 CLATRONIC
0 question about this device. Answer the ones you know or ask your own.
Ask a new question about this device
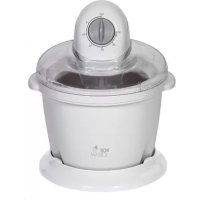
Download the instructions for your Ice machine in PDF format for free! Find your manual ICM 3594 - CLATRONIC and take your electronic device back in hand. On this page are published all the documents necessary for the use of your device. ICM 3594 by CLATRONIC.
USER MANUAL ICM 3594 CLATRONIC
Crème double (mind. 40% Fett) 150 ml
Zucker 50g
Erdbeereis
Crème double (mind. 40% Fett) 150 ml
Zucker 50g
Bananeneis
Crème double (mind. 40% Fett) 150 ml
Zucker 50g
Zitroneweis
Zitronensaat 50 ml
Milch 200 ml
Crème double (mind. 40% Fett) 150 ml
Zucker 80g
Reinigung
WARNING:
Power consumption: 18 W
Consommationelectrique:
Poids net : .envviron 3,0 kg
Peso netto: ca. 3,0 kg
Thank you for choosing our product. We hope you will enjoy using the appliance.
Symbols in these Instructions for Use
Important information for your safety is specially marked. It is essential to comply with these instructions in order to avoid accidents and prevent damage to the machine:
WARNING:
This warns you of dangers to your health and indicates possible injury risks.
CAUTION:
This refers to possible hazards to the machine or other objects.
i NOTE:
This highlights tips and information.
General Notes
Read the operating instructions carefully before putting the appliance into operation and keep the instructions including the warranty, the receipt and, if possible, the box with the internal packing. If you give this device to other people, please also pass on the operating instructions.
- The appliance is designed exclusively for private use and for the envisaged purpose. This appliance is not fit for commercial use.
- Do not use it outdoors. Keep it away from sources of heat, direct sunlight, humidity (never dip it into any liquid) and sharp edges. Do not use the appliance with wet hands. If the appliance is humid or wet, unplug it immediately.
- When cleaning or putting it away, switch off the appliance and always pull out the plug from the socket (pull the plug itself, not the lead) if the appliance is not being used and remove the attached accessories.
- Do not operate the machine without supervision. If you leave the room you should always turn the device off. Remove the plug from the socket.
- The device and the mains lead have to be checked regularly for signs of damage. If damage is found the device must not be used.
- Use only original spare parts.
- In order to ensure your children's safety, please keep all packaging (plastic bags, boxes, polystyrene etc.) out of their reach.

WARNING!
Don't let small children play with foils for danger of suffocation!
Special Safety Instructions for this Machine
WARNING:
- Always disconnect the appliance from the supply if it is left unattended and before assembling, disassembling or cleaning.
- Prior to replacing accessories or attachments that are moved during operation, the device must be shut off and separated from the mains.
- Do not repair the device by yourself. Please contact authorized personnel. In order to avoid hazards, a damaged mains cable must be replaced with an equivalent cable by the manufacturer, our customer service or any other qualified specialist.
- This device is suitable for use by children aged 8 years and above, if they have been given supervision or instructions regarding the safe use of the device and understand the hazards involved.

WARNING:
- Cleaning and user maintenance shall not be made by children, unless they are older than 8 years and supervised.
- Keep the appliance and its cord out of reach of children less than 8 years.
Children shall not play with the appliance. - Appliances can be used by persons with reduced physical, sensory or mental capabilities or lack of experience and knowledge if they have been given supervision or instruction concerning use of the appliance in a safe way and if they understand the hazards involved.
-
This device is not intended to be immersed in water during cleaning. Please observe the instructions that we have included in the chapter "Cleaning".
-
Do not touch any moving parts of the machine and always wait for it to stop.
- Do not remove the lid during operation.
Overview of the Components
1 On/off switch
2 Motor housing
3 Lid with filler hole
4 Stirring attachment
5 Bowl
6 Mounting ring
7 Housing
8 Outlet unit
9 Foot
Page 5
A Lower shaft
B Blades
C Wing screw
D Stirring attachment (frame)
Unpacking the appliance
- Remove the appliance from its packaging.
-
Remove all packaging material such as plastic films, filler material, cable ties and cardboard packaging.
-
Check the content for any missing parts.
iNOTE:
There may be dust and production residue on the appliance. We recommend cleaning the appliance as described under "Cleaning".
Assembly of the appliance
Familiarize yourself with the assembly of the appliance before making ice cream for the first time. Please refer to the pictures on pages 3 and 4.
- Fig. A: Place the motor housing into the recess of the lid and let it lock into place.
- Fig. B: Attach the assembled stirring attachment to the bottom of the motor housing. Before doing so, check the correct assembly of the stirring attachment (see "Cleaning Stirring attachment").
-
Fig. C: Place the housing onto the foot, if you have disconnected these components previously.
-
Fig. D: Attach the outlet unit to the bottom of the housing. Hold the outlet with the lever positioned on the right side. Turn the unit through 45^ . It must click into place and the lever must be in the middle position.
Tip: Looking into the housing from above will facilitate the assembly of the appliance. - Make sure the sealing ring on the outlet of the bowl is positioned properly.
Fig. E: Put the mounting ring on a table. Place the bowl in the ring. Use the guiding lugs inside the ring as well as the recessed track on the outside of the bowl. Move the ring to the upper edge of the bowl. Hold the ring and at the same time turn the bowl anti-clockwise. The guiding lugs of the ring must lock into the upper recesses of the bowl. - Fig. F: Place the bowl into the housing. Make sure the outer guiding lug of the mounting ring locks into the groove on the rear housing. Gently press down the bowl in order to securely connect it to the outlet unit.
- Fig. G: Place the assembled unit (fig. B: lid with motor housing and stirring attachment) on the bowl. The mains cable is located on the rear. Lock the lid by turning it clockwise until tight.
Preparations
- Check the bowl for any damage. Do not use the bowl if leaking. Leaking cooling agent is not poisonous, but a leaking bowl will affect the result of the ice cream making process.
- Attach the mounting ring to the bowl as described above (fig. E).
- Put the bowl into the freezer for at least 12 hours. The freezer or freezer compartment should maintain a temperature of at least - 18^ .
NOTE:
The bowl must be dry.
- Make sure the bowl stands upright. The cooling agent inside the bowl must settle evenly.
- If the freezer compartment is not high enough, remove the mounting ring.
-
Prepare an ice cream mixture. Ideal amount: approx. 600 - 700 ml.
-
Sugar must have dissolved completely.
- When making ice cream with fruits, only use soft, seedless fruits that are mashed (pureed). You may also add fruit juice.
- If you wish to add pieces of fruits, nuts, brittle or alcohol, only add these ingredients to the finished ice cream. Let the stirring tool stir a few more times.
NOTE:
Alcohol impairs the freezing process.
- Put the ice cream mixture into the fridge until starting the ice cream making process. Having a temperature of less than +10^ will shorten the time of the ice cream making.
Instructions for use
- The appliance must be assembled completely and switched on before filling the ice cream mixture into the bowl. That prevents the ice cream mixture from freezing to the inner walls of the bowl.
The outlet unit must be closed. (Lever up) - Do not overfill the bowl! Ideal amount: approx. 600 - 700 ml. The volume of the ice cream will increase during the freezing process.
- Do not insert any objects such as fingers, spoons or similar into the filler hole while the appliance is operating.
- Preparation time varies, depending on:
the recipe,
the ambient temperature,
- the temperature of the ice cream mixture.
- Do not leave the appliance unattended during operation. Constantly check the consistency of the ice cream mixture in order not to miss the time slot for soft ice cream.
- An ice cream cone can only work during a certain time slot. The ice cream must not be too runny or viscous either.
- Do not interrupt the stirring process, even when dispensing the first ice cream cone.
IMPORTANT: Turn off the appliance immediately if
the ice cream becomes viscous,
- the stirring attachment slows down or does not turn any more,
hearing loud motor noise.
In such cases, proceed as follows:
- Remove the stirring attachment from the ice cream in order for it not to freeze.
- Remove the ice cream from the bowl using a silicone or wooden spoon. Do not use any metal spoons in order not to scratch the coating inside the bowl.
- Do not use the outlet unit.
- Let the motor cool down.
Using the appliance
WARNING: Risk of burning from cold!
- If possible, hold the chilled bowl only on the mounting ring.
-
If you have not installed the mounting ring earlier, protect your hands e.g. with a dishtowel when taking the bowl from the freezer.
-
Remove the chilled bowl from the freezer. Assemble the appliance as described under "Assembly of the appliance".
- Close the outlet valve: Position the lever upwards.
- Place a bowl underneath the outlet.
4. Connection to the mains:
- Before plugging in the appliance, check if the mains voltage matches. Refer to the rating label for the specifications of the appliance.
-
Connect the appliance to a certified wall socket only.
-
Turn the appliance on using the on/off switch (ON position).
- Fill the chilled ice cream mixture through the filler hole into the bowl.
- Draw a sample after approx. 10 - 15 minutes. In order to do so, press down the lever of the outlet unit.
- Once the ice cream has reached the consistency for soft ice cream, draw the cones without any delay. Leave the appliance turned on while doing so.
- When the ice cream becomes too viscous to be drawn through the outlet unit, turn off the appliance (OFF position). Disconnect the plug from the wall socket.
- Unlock the lid turning it anti-clockwise. Remove the lid. Depending on the consistency of the ice cream, the stirring attachment will come out together with the lid. If the stirring attachment remains stuck inside the ice cream, pull it out.
- Remove the remaining ice cream from the bowl using a silicone or wooden spoon.
After use
- Store ready-made ice cream that you want to eat later in the freezer.
- Do not freeze ice cream once thawed.
- Clean the appliance after each use as described under "Cleaning".
Recipes
- When making the ice cream mixture, please refer to chapter "Preparations—point 4".
-
Quantities provided in the recipes are for reference only. Adjust individual mixtures as desired.
-
Using whipping cream instead of double cream will affect the ratio of ingredients. In such a case, use more whipping cream and less milk.
Refer to other recipe books or the internet for more recipes.
Vanilla ice cream
Vanilla extracts 10 g
Milk 250 ml
Double cream (min. 40% fat content) 150 ml
Sugar 50 g
Strawberry ice cream
Strawberries (fresh and pureed) 200 g
Milk 200 ml
Double cream (min. 40% fat content) 150 ml
Sugar 50 g
Banana ice cream
Bananas (ripe and mashed) 150 g
Milk 300 ml
Double cream (min. 40% fat content) 150 ml
Sugar 50 g
Lemon ice cream
Lemon juice 50 ml
Milk 200 ml
Double cream (min. 40% fat content) 150 ml
Sugar 80 g
Cleaning

WARNING:
- Before cleaning always disconnect from mains power supply.
- Under no circumstances should you immerse the device in water for cleaning purposes. Otherwise this might result in an electric shock or fire.

CAUTION:
- Do not use a wire brush or any abrasive items.
- Do not use any acidic or abrasive detergents.
- None of the parts are dishwasher-safe.
Stirring attachment
Remove the stirring attachment from the motor housing. Refer to the pictures on page 5 for disassembling its component parts.
- Move the ring on the upper shaft upwards.
- a) Carefully press the lower shaft out of the clasp. b) Pull out the lower shaft.
- Loosen the wing screw by holding the stirring attachment and turning the screw anti-clockwise.
- Pull out the wing screw.
- When clean and dry, assemble the stirring attachment in reverse order.
Motor housing
- Remove the motor housing from the lid. In order to do so, simultaneously press the two clips located on the bottom of the motor housing.
- Wipe the motor housing with a moist cloth only.
Accessories
- Clean all other parts by hand in soapy water.
- Wait for all parts to be dry before reassembling the device!
Storage
- Clean the device as described. Let the accessories dry completely.
- We recommend that you store the device in its original packaging when it is not to be used for a longer period.
- Always store the device at a well ventilated and dry place outside the reach of children.
Troubleshooting
| Problem Possible | cause Solution | |
| Appliance not functioning. | Appliance without power supply. | Test the wall socket using another appliance. |
| Connect the mains plug properly. | ||
| Check the mains fuse. | ||
| Overheat protection: Motor too hot. | 1. Disconnect the mains plug.2. Remove the stirring attachment from the ice cream.3. Let the appliance cool down before next use. | |
| Appliance defective. | Contact your dealer or another expert. | |
| Loud noise from the motor. | Motor is overloaded. | 1. Turn off the appliance.2. Disconnect the mains plug.3. Remove the stirring attachment from the ice cream.4. Let the appliance cool down before next use. |
| Liquid draining next to the outlet unit. | Bowl not properly inserted. | Stop the ice cream making process. Check the assembly of the appliance. |
| Sealing ring not attached to the outlet of the bowl. | ||
| Outlet unit not installed properly. |
Noise development
The workplace-related emission value is less than 70 dB(A).
Technical Data
Model: ICM 3594
Power supply: 220-240 V~, 50 Hz
Power consumption: 18 W
Protection class:
Net weight: approx. 3.0 kg
The right to make technical and design modifications in the course of continuous product development remains reserved.
This device complies with all current CE directives, such as electromagnetic compatibility and low voltage directive and is manufactured according to the latest safety regulations.
Disposal
Meaning of the "Wheelie Bin" Symbol
Take care of our environment, do not dispose of electrical appliances via the household waste.
Dispose of obsolete or defective electrical appliances via municipal collection points.
Please help to avoid potential environmental and health impacts through improper waste disposal.
You contribute to recycling and other forms of utilization of old electric and electronic appliances.
Your municipality provides you with information about collecting points.
Instrukcja obstugi
CTC Clatronic Sp. 20.0
A HnKhi Bn
B JionatKu
CknadaHn npnilady
IpeT Tm, yNepWe BuroTOBnT MOpO3nBO,O3HaOMTeCb iNopAxDOMCKlaDAnHn npnAdy. NIB.pCcyHKn Ha CTOp.3 4.
- Puc. A: BcTaBte N 3aΦiKcyIe KOpNc DnRyHa y rHizdi KpUkM.
- Pnc.B:ПпкріntiB 3i6paHу nepemiiuBaIbHy npuctabKуdo HxkHbO'чactnHKnopnyCy dBrihya.NpeedzimnepebiTe,чnpaBnIbHo cknadeHOp nepemiiuBaIbHy npuctabKy (dNv.IyHKT "UuIeHHa" "PepemiuBaIbHa npuctabKa").
3.Pnc.C:BcTaHOBITb KOpNyc B OCHOBy, KaIO paHIiue ci DetaiJI 6yIIO po3'EdHaHO.
4.Pnc.D:3akpinitb BnixiDnHn6Iok y HnxHiyacTnHi KopnyCy.YtpmMyTe Bnixi3a BaxiJIb,po3TaUObaHn npabOpuy. IOBepHtB 6Iok Ha 45^ .Bih MaC cTaN Ha Mice,a BaxiJIb MaE 6ytN BcepeHbomy NIOJKeHHI.
Nopada: PpnaI neIe cKnactn, kkuO nBNTncHa Koprnc 3ropn.
- NepekoHaTecra, yuuiJIbHIOBaJIbHe KINbIe Ha BIXOJI 3 uasi po3TaUoBAHO npaBnJIbHO.
Pnc.E:IOKnAdiMbontaxHe KInbue Ha CTIN. NocTaBte 3cepeHnKilbpu KaHaBKn Ha 30BHiUHNI NOBepxHi YaSi. IpeecyHbTe KInbue Ha BepxHKn KpaYaSi. PnITpMHyOu H KInbue, NOBepHbTcAuy 3a npOTn rOHNHHKOBI cTpiKN. HAnpMHI RnHKn KInbua MaHOb 3aFikCyBaTncb y BepxHix ycynax YaSi.
6.Pnc.F:BCTaTe Yauy B Kopnyc.IpekeohaiTecra,io Bepxhi HaprrHMn RaWOK MOHTaxHoro KInbca Ctae y KaHaBky No3aY KoPnycy. TpOx npITNCiB YAu,ioh HadiHo 3akpiINTu II B BuXIDHomy 6Noui. - Pnc. G: BcTaHOBiB Ha YauSy cKnaDeHn 6bok (pnc B: KpnUka 3 Kopnycom DmRyHa Ta nepeMiyBaIbHoIO npCtABKOIO). KaBeJIb JKNBHeHMae 6ytN po3TaIWOaHO 33aY. 3aΦikCyTe KpnUky, NOBepHyBUn II 3a roDInHHKOBOIO CTrPINKO IO yNopy.
PiIroTobka do po6oTu
1.ПepeBipTe,и Hema y uaSi nouKoJxHb.Якоуаш npotikae,He kopnctyItec HeIOXoIoareHT He OtpuyH N, ane npotikahNHa uai BnInBaTmE Ha pe3yIbTaT nprirotyBaHH MOp03NuBa.
2. BctaHObitb Ha yawy moHTaxKHe KInbue, kONcHo paHIIe (pnc.E).
3.BCTABTe yawy B MOp03NBHnIIO npHaNmHI Ha 12 roHN. Mop03BnIa Ym MOp03JIbHe BiDJIeHnHa Ma e NiITpIMyBaTN TEMNEpaTpy He BnIe HIX - 18^
IIPNIMITKA:
- YaaJMaE 6yTn cyxOIO.
- PtepeKoHaIeTcA, 10 Qa7a CToITb BepTKaJIbHO. PIBeHb XoIooaReHTy BCEpeDInHi QaWi MaE 6ytN OHaKOBIM.
-
KKIO BWCOTA MOpO3NtBHO' KAmepn HeNoCTaTHA, 3HIMITb MOHTaxHE KiNbIe.
-
PnirroTyIe cymiu dIa MOpO3NbA. ONTmAlbHa KInbKicTb CTAHOBNTb npi6Jln3Ho 600 - 700 mI.
Liykop Mae NOBHCIOPO3HINTHCA
-Дяприroтувань морозиBa 3 Фрктами ВИКОРИСТОВУITE ЛИWE M'ЯКI ФркТи 6e3 HAcIHн, рo3iM'ЯТIdo CTaHу Пиpe.МоЖHa ВИКОРИСТОВВaTи TAKOXФркТOBи CIK.
- Popi3ahi Ha kyocu KfpyKTH, ropixn, rpnIbIyK u CnIPT MOxHa DOnaBaTn IIme Do rTOBOrO MOpO3NBA. IicJzBOro MoxHa 3aKeKaTH, NOKM MiuaJIka 3pO6NtB ue KInbKa o6epTIB.
I P N I M I T K A:
CnnpT npeuokdojae 3aemep3aHHIO.
- NocTaBc CmIu DnI MOpO3NBA XoJOnDInbHNK, NOKMopO3NBO He NoUHe 3aYCaTn. PpI TemnepaTypi HK-ue HIX + 10°C MOpO3NBO roTyBaTMMeTBcA UINDuIe.
Ihctpykci3 ekcnnyataa
-Перш fix 3aIINBaTn cymiu ДЯММОP03NBA B aUsy,пилад Ma6 6yTu NOBHCtIO CKNaTeHo.ToDi cyMiU He npIMep3aTmme 3cepeDHH Do CTIHOK YAWI.
BuxiHn6nKmae6yTu3akpnto(Baxinb y BepxHbomy noJoxKeHHI).
He nepenOBHIOIte yaW! ONTImaJIbHa KJIbKICtB cyMiWi cTAHOIBT np6n3Ho 600-700 mI. O6'EM MOpO3NBA B npoeci 3amopoxyBaHH 36IbHITbcra.
Пд ус роботи прпаду Н Вставлг Te B 3aINBн OТбipжODHI npedmetи,ЯK-OT пальцI, loKKy TToIO.
- Yac npiroToyBaHHMoKe 3MiHOBaTcR B 3aJIeXHoCTi BiD TaKINx YHHNKIB:
- peuentypn;
-Довковишьтtemпераразун; - TÉMIpePaTpyn cymiùi ДЯМ OPO3иBa.
He 3aIiuaIte npnna 6e3 hargny nid cac po6oTn. IocTIHNO KOHTPOJIIOte KOHCNCTeHcIIO cymiu, uO6 He nporabNTN MOMENT FOTOBHOCTI MOpO3INBa.
Kohyc Mop03nBa MoKe YTBOpNTnCra NIIe npOTrOM neBHoro npomikky uacy. Mop03nBO He Mae 6yTu Hi HAdTo pIDke, Hi HADTO B'3Ke.
He nepenBaTe nepemuiyBaHnHaBt b niD yac BuaH i nepuoro KOhyCa MOpO3NuBA.
BAKJIINBO: HeraiHo BmKHiTb npnla, JaKuO:
MPO3NBOCTaHEB'RAKIM
- nepemiiybaJIbHa npIcTaBka cIOBIbHHTbcr 3ynHHTbc;
- DBNIyH CINbHo WMyIMTME.
Y Taknx BnnaKkax BkoHaiTe Hactynhi dii:
BnmiTb nepemiluyanbHy npncTaBky 3 Mopo3nBa, l06 BOHa TAm He 3aMep3Ja.
BnKnaIbMbopo3nBO 3aui CnIKoHOBOO u DepeB'HOIO loXkoHO.He KopncTyTecra MetaneBmIM loXkamu,io6 He nouKOAnTH BHytpiHc NOKpTTra aai.

BAKJINBO:
- He KopructyTecB BuxiDnHm6JIIOKOM.
-ДаиTe DBnHy OXONoHyTN.
KopncTyBaHH npnlaDom

PONEPENXEHH: Pn3nk 6mOpoxeHHa!
KJIbIe.
- RaHIO MOHTaXHe KINbue He BCTaHOBNeHO, NiD Yac BNIMaHHaU3 MOpO3NBIuI 3axNcITb pyKN, HApnPKNaD,pyuHNKOM.
- Bmmitb oxonolkeHny aUy 3 MOpO3nBnUci. CknapItb npuIaI, kOnicaHo B rJabi "CknadaHn npunady".
2.3akpiTe BxixiHn KnaanH, nHbBn BaxiNb. -
Po3auyIte yauy nD BxOdom.
4.ПлдклоченндМереки: -
Pērpùn HIX BKNHQUaTNI pπuIaD y Mepexy, nepeBipTe, nH aŋpyra mepexi Biɪnɒbiæ NOrO xapaKtepcntkam. XapaKtepcntkni npɪnáNy hABeDiHa nacnpTHi Tablnuci.
-
Bклочаite npiJaI JINIe B ceTpNcikOBaHy cTINHy po3eTKy.
-
YbIMKHTb npnad BmMkaHem (nepeBIBuN Ioro B nonoXeHHa ON).
- 3aIInTe oxoJoxKeHy cyMiu y aUy dIy MOpO3nBa Upe3 3aINBnO Tbip.
- Bi3bmitb np6y uepe3 10-15 xBnH, HATNCHyBm Baxijb BuxiDHoro 6Joka.
- KOn MOpO3NBO H6yde KOHcNCTeHJI M'KOro MOpO3NBA, HeraHNO NOHTb BnDaBAtu KOHyCn. Ii Daac BnDaHi 3aJIMtB npnna yBIMKHeHM.
- KOnM MOpO3NBO CTaHe HAcTIbKn B'3KMM, 10I NOro He MoXHa 6yDe BuaBaTn Ype3 BxIXHm 6JIOK, BmMKHITb npnaad (IpeBIBuIN BmIKaY y IIOXeHHA OFF). BmIMtB BNkY 3i CTIHHOI pO3ETKn.
- Po36nokyIte KpniuKy, NOBepHyBUn II npOTn rOdnHnKOBoi CTPIKN. 3HIMITb KpniuKy. 3aJIeXHO BID KOHCnCTeHcII MOpO3NBA, nepemuiyBaIbHa npICTabKa MOKe BWInr pa3OM i3 KpniuKIO. RaIoo nepemuiyBaIbHa npICTabKa 3aINuHTbcB MOpO3NBI, BNTaHIb II.
- BnIMiB peuTy MOpO3nBa 3 Yaui CnIkoHOBOU Yn DepeB'raHOJIOKkoHO.
Iicna BnKOpncTaHHa
- POKnJaIbTb MOpO3NBo,ЯKe xOChTe 3"icTu niiHilue,y MOpO3NJIbHy KaMepy.
- He 3amopoxyTe MOp03nBO nICr TOrO, rK BOHO BiTaHe.
- Picna Koxhoro KopictyBaHH Ounchitb npnad, kOnca-Ho y rnaBi "UueneHH".
Peuertn
ДпгпргуваньсушдлмогориВвИКОнTeN. "Плг�товka do po60tn 4 rIaBn".
Kilbokci, habeHcIb peeTax, e nIiue doBikOBMM. MoxHa cKaIaTn iDnBiyalbHi peeNtpy 3a BnaCHM 6axaHHaM.
- RaKIO BVKOPNCTOBYBaTN 3AmICtB BepWKIB NOBBIHOI XINPHOCTI BepWKI DnA 36NBaHHr (3BNUHoi JxNPHOCIT), 3MIHTbCnIBBiHDNoHEHH KOMNoEHrTb. Y TAKOMy pa3i 36JIbUItb KInbKiCTb BepWKIB DnA 36NBaHHr i 3MeHsITb KInbKiCTb MONoka.
- BinepeentBMOxHa3HnB KyHapHX KHRax YI B iTepHeti.
BaHINbHe MOpO3nBO
EkctpaKt BaHJI 10r
Monoko 250Mn
Подви Вершк (хинсь He Meнше hK. 40%) 150 mN
Llykop 50r
TnyHnHe MOp03NBO
Tnynna (cbixa, po3mra Ta npohe) 200r
MoJIOKO 200M
Yka3bIbaet Ha BO3MOKHyHO ONaCHOCTb IJIa N3dEINr IN dpynx OKpyKaIOUcIX npeDMeTOB.

PIMEYAHIA:
JaetcoBtbnHnHOpMaunIO.
06uhe 3ameyauHn
IpeepHaayanom 3KcNpyaTuqn npu6opa BHNMaTeNbHO npOyHtAte Ppunlaraemyo HNCTpykUIO NO 3KcNpyaTuqn IN COxpaHHTe ee B HaedexHom MeCTe, BMeCTe C rapaHTmHbIM TaHOHOM, KaccOBbIM YekOM N, NO BO3MOXHOCTN, KAPTOHHo KOp6KOc C yNAKOuyHbIM MaepnaON. Ecn Daete KOMynboNoonbl
30BaTbCpnpobom,6B3aTeIbHDo daIte BnpiDau DaHHyIO IHCTpyKUIO no 3KcIpyatau.
Пльзутесь пибором тольк частьимобраимип ha3haehnIO. Пибор He прдha3haeHдЯ кOMMepueCKORO ИСПОЛьЗOBAHЯ.
He noIb3yInTeB npInbOp mIO OTKpbITbIM He6OM. PpeOxpanaIte npInbOp OT Xapbl, pIpaMbIX cOnHeuHbIX Lyuei, BnaxHOCTN (Hn B KOEM cNyuae He nIpykaIte ero B BOdy) uYapOB 06 octpIbe yrbl. He npKacaiTeC k npInbOp ByAnXHbIM pykAMn. Ecnn npInbOp yBaJAXHNICn HnHAMOK, TyT Je BbINbTe BNkny nOzETKn.
- Pocne 3KcnpnyatauM,MOHTaKe npHaadJeXHocTe, UCTKe INI NIOLOME pN6Opa Bcerda BbHMaTe BnIKy n3 po3ETKn (TJHNTe 3a BNkY, a He 3a KaBeJIb).
He octabJnTe BKNIOUeHHbIe 3JIeKToPnp6Opbl6e3 npncMoTpa.BbIXOJaN3 NOMEuEHNr BCeTaBbIKNoaTe np6Op.BbInbTe uTeKepeN3 po3eTKn.
-ПибориКабелсeteBOrOпИТанЯ Heo6xOДmOp peryIЯрнообсpeIoBaT haHaIIuHne cIeIob nobpeKdEHH.Пи obHapUkeHnN nobpeXdEHH noJIb3OBaTcR npi6pom 3aIpeScaTcR.
- IcnoJb3yIte ToJIbKO opIMHaJIbHbIe 3aIpaCTN.
- I3 coobpaekhen 6e3oanachoctn dny deTeH He octabIyte Jexatb ynakOBky (PnactNKOBbie MeuK, KapTOH, neHONpACT n T.d.) 6e3 npncmOTpa.

PIEDYIPPEXDEHNEI
HeNo3BOJnIeTeTmIrpaTbCNONI3TNNEHOBONJIeHKO. Onachoctb ydysb!
Oco6bIe yka3aHnI NO TexHnke 6e3OpacHTn DnI 3TOrO yCTpOiCTBa

PPEyPPEXDEHNE:
Bcerda otknioaTe yctpoCTBO n3 cetn, KOrda C HIM HNKTO He pa6otaet, a TaKxe nepei NaHApom pa36opKn, c6OpKn uNCTKn.
- Перацьд заменов BCNOMORAteьньх рпсncocobни и наcaдок, КOTOPье Врацадяв Врмя pa6OTы Heo6xOДМО BbIKIQUaTь ппбори ВьIDергИВаТь Шур ИЗ рОЗЕТКИ.
He nbitatec b camocToTeIbHO OTPeMOHTnpoBaTb yCTpoiCTBO. O6paTntecb K aBtOpn3OBAHHOMy npopeccnoHaIy. Bo n36exaHne onaCHOCTM MeHrTb NOBpeJdeHHbI Ka6eIb Ha aHaJIOnuHbIdoJxHnPON3BOdntel, Haua KIneHTcKa cLyX6a IIN JIO6oIpyroKBaIINΦnCupoBaHHbI CneuaJIInCT.
I PEPdUYPEXKDEHNE:
- Данhoe устюгов может Исторьатая DeТьмн CTapше 8 leт под писмOTРOM, Или спл OН ПОЛУЧИП Иструкши NO 6e3opachon YKcPnyatauyn ystpoCTBa N OCO3HaHT BCE CONyTCTByUOJIne pNCKI.
OuNTka N TexHnueckoe 6cbnyKbHaHne He DoJIxHbI IpON3BO-DITbcr DeTbMn B Bo3paCTe Do 8 JeT n 6e3 npncMOtpa. - PacnojaraTe npnbopa n ceTeBOi shHyp BHe doCraemocTn deTei MnaDwe 8 let.
3anpeaetcndetm nrgatb c daHHbIM yCTpOiCTBOM. - UcTpoIcTBa MOryt 6bITb NcNoJIb3OBAHbI JIOdBMN C OrpaHnueHbIMN cIN3nueCKIMN yMCTBeHHbIMN cNOcO6HOCTaMn, a TaKKe He IMeHouJne ONbITa pa6OTbI, TOnbKO nOД npNCmOTpOM nIn nOcNe pONyEHN HcTpykTaXa NO 6e3oNaChOH 3KcNpyatauN yCTPOIcTBa, ecn 3TN JIOdN OCO3HaOT BCE pNCKN, CBraHHbIe C daHHbIM np6Opom.
- Bo Время чистки заширается поружкать пибор в Bodу. Прочьа собладаъ Инструкци, кOTOPье пивовятсь в pa3дел "Чистka".
He npikacaiTecb K DvKyuMcJ DeTaIy M yCTpoiCTBa, BceIa XnTe, Noka OHN PONHOCTbIO He OCTaHOBraTc.
He chnmaite KpbIuKy BO Bpempa6Otby yCTpoNTcBa.
063op detanei np6opa
1 BbIKIOHATeIN BKN/BbIKN
2 Kopnyc DnurataTeMa
3 KpbIuka cΦnIbTpauIOHHbIM OTBepCTnEM
4 HacaKaДЯперemeшваня
5 Pe3epByap
6 MoTHaXHOe KOJIbIcO
7 Kopnyc
8БлOK bIxOda
9IoDCTaBka
Ctp. 5
A HnKnBn Bn
B Jionactn
C BapaUKOBbI BnHT
D HacdaKa dIy nepemEwBHaHn (paMaKa)
PacnaKOBka yCTpoNCTBa
1.ИЗБЕКТЕУСТЮСТВОИЗEROУNASKOBKN.
2. YdaNTe BCE ynaKOBOHbIe MaTePnAJIbI, TaKne KaK PnactIKOBaR nHeHKa, HAnONHITeIN, CkpyTKN KApTOHHaY naKOBka.
3. Y6eIITcB HAniHm BCEx KOMTOHeHTOB.
ITPIMMEAHNIA:
Ha yctpoiCTBe MOrTy 6bItb NbIb N OcTaKN pOn3BOJCTBeH Horo npOecca. PeKoMeHnyETc NaHCTNb yCtpoiCTBO, KaK OnncaHO B rJaBe "HcTka".
C6opka ycTpoiCtBa
O3HaKOMbTeCb C COCTaBbIMN YactaM N yCTpoiCTBa nepeI TEM, KAK DeJaTb MOpoxeHoe B nepBbI pa3. CM. pncyHKn Ha cTp. 3 n 4.
1.Pnc.A:yctaHOBnTE KOpNc DnBraTeJbByyIeHnHa KpbIuKe TAK, YTO6bI OH 3aUeJIHKHyIcRa HcBOeM MecTe.
2.Pnc.B: npncoeHNHTe co6paHHyHO Hacady nIpeMeWuBaHnK HIXKHe YactN KopnyCa DBrIaTeJI. Ipeed Tem, KaK 3TO DeNaTb, y6eINTEcB, 7TO HacAdKa dIy NepemeWuBaHnK CO6pHa npabInbHo (CM."UcTKa HacAdKa dIy nepeMeWuBaHnR).
3.Pnc.C:3akpenITE KOpNc yCtpoCTBa Ha Noctabke, cn 3TN KOMIOHEHbI 6bln pa3beDInHeHbI pahee.
4.Pnc.D:npncoeINHtE 6nOK BbIXOa K HnKHeJ aacti Kopnyca. Depxnte 6nOK BbIXoJa TaK, YTO6bl pblAkoK 6blI paCIOIOXKe CnpABoi CTOpOHb.I NobepHnTe 6nOK Ha 45^ OHdoJIKeH 3aUeIKHyTbcra Ha cBOeM MecTe,a pbIaXoK OJKeH HaxOINbCBApeHne N03uHN.
Cobet:ecn CMOTpeb Ha KOpNyc yCTpoiCTBa CBepxy,3TO 06nerHT npoueeCC cbopkn.
5.Y6eNTecb,HTO yIIOTHTeJIbHOE KOJIbO Ha BbIXOe. 1aAINyCTaHOBNeHO DOnJXHbIM O6pa3OM.
Pnc.E:NOJIOXNTME MOHTaXHHe KOJIbIc Ho CTOn. IocTAbBTe YauHa KONbIc. NcNoJIb3yIne HapnabJIouUe BbICTynbl BHyTpN KOJIbCa, a TaKKe yrIy6NeHnC HApYKHOCTopoHbI YaShn.CDbINbTe KOJIbIc K BepxHemy KpaIu YaShn. YdepXINBAK OJIbIc, NOBepHIne, B To Xe Camoe BpeMn, YaShy npOTnB YacOBOn CtpeKN. HanpABJIouUme BbICTynbl KOJIbIa DOnJXbI 3aUeJIkHytbcra B BepxHnx yrrny6NeHnax YaShn.
6.Pnc.F:noCTabBte YaWb KOpnyc.Y6eHntecb,yTO BHeHn HnPaBnIoum BbICTy moTAtxHoro KOJIbca 3aueKHyIcBa Na3y Ha TbIbHO CTopoHE. CJIerKa npN KMTe YaWb Bn3, YTO6bl OHa CoEdHHnAcb C 6NOKOM BbIXOda.
7.Pnc.G:ycTaHOBnTEco6paHHbIb6nOK(Pnc.B:KpbIuKa c KOpnycom DBIrataTeN HacaKnO JnnapeMeuBaHnHa) Ha Yauy. UHyp 3JIeKtpOniTahnPaCnIOJKe H TBInbHoJ YaCTn. 3aPnKcpyTKe KpbIuKy, NOBepHyB ee no YacOBo CTpeJIke do ynpa.
PnroTOBHeHna
- Поберьтей счу на habичne nobpeхден. He nCnoIb3yTe cawy, ecn OHa npotekaet. BbITEkaIOuNIMxIaIaReHT He yBIIeTcRA IOBNTbIM, ODAHKO npOTEKAIOUЯча NOBIIeRt Ha pe3yIbTaT npOcecca npiroTOBNeHmMOPOXKeHOrO.
2.ПибоeHINHTe MOHTaKHOE KOJIbO K YaIe KaK OINcAHO BblIe (Pnc.E).
3.ПocTаБТeЧaшуВМор03иьнК,ИОCTaБТe eeTam,Кak MInHmym,Ha12acOB.Mopo3иьнКИIMopo3иьнЯ KaMepaДоЛЖыПОДержINBaTb TempePaTpy,пО КрайHe Mepe,- 18^
ITPIMEYAHNA:
- Uaawa donnKha 6bItb cyxoi.
- y6eHITecb, qTO qaHa CTOnT BePTKaNbHo. Xla-dareHT BHyTpN qAaN DOnJKeH 6bIb paCnpedeJeH paBHOMepHO.
- EcnM MOpO3NJIbHaKamepa He DoCTaTOHOb BbICoka, CHIMNTe MOHTaXHoe KOJIbIcIO.
4.Пи���TOBbTe CmEcBДЯ MopoJKeHOrO.ОпТIMaJIbHoe KOJIINuCteBO:ПичмepHO 600-700 mI.
CaxapdoJnKeH6bIbnoHocTbOpaCTBOpEN.
- Pn nprirotOBHeHm MOpOxHeORo C ppykTAMN, INcnoIb3yIe ToJIbKO MAnKne 4pykTbI 6e3 KocToueK, KOtOpBle nepemecuIN B OndHopOdyu Maccy (nope). MoXHO TaKke Do6aBnTb ppykTOBOrO coka.
- EcIn BxOHTe Do6aBnTb KycOuKn FpyKTOB, opEXOB, WOKoJaI INI aIKOrONb, Do6aBnIte 3TN INHpeDInEHTb TOJIbKO K rOTOBOMy MOpOKeHOMy. CneJyEt eIe HeCKoBko pa3 nepMeWaaTb CmEc b C nOMoUbHO HacAnI dIra nepMeuBaHnI.
ITPIMMEAHNIA:
Aikoronb yxudwaetpocecc 3amopaxibaHna.
-ДержпссмсьдгМОPOJOHOrBМОPO3NJBHOI KaMepe,нoka He NaHHeTe ПpoCEc ПИROTOBJIeHnI MOPOJOHOrTo.TemepaTypa MeHee +10^ cokpaTIT BpEMЯПИROTOBJIeHnI MOPOJOHOr.
Yka3aHnno NcNoJb3OBAHnIO
- YcTpoIcTBO DOnJxHO 6bITb NoJIHocTbIO CObpaHO IN BKJIQUeHO Do TORO, KaK HAnONIHrTaYaUy CMeCbIO dIa I MOpOXeHO.3To npEoTbPaNT pIIMep3aHne CMeCN dIa I MOpOXeHO K CTehkAm YaUIn N3HyTpN.
- ENoK BbIXOda JOnJKeH 6bITb 3aKpbIT. (PbIuaXoK B BepxHem NoIOXeHN)
He npenonHnTe yau!OnTmAbHoe KOJIueCTBO: npimepHO 600-700 m.Bo Bpem3aMeP3aHnO6bEM MOpoxeHOrO yBeJInHTcra. -
He BCtABTnIe KaKHe-JIbO ObEkeTbI, TaKHe KaN paNbUcbl, JIOxKn I T.I. BO BXoHoe OTBepCTne BO BpeM paBoTbI yCTpoNCTBa.
Bpem npiroTOBnHm MOpOKeHOro BapbnpyET n 3aBNCIT OT: -
peceNTa,
- Okpykaiouei TemnepaTpybl,
- TEmnepaTpybI CmecnДЯ MOpoxKeHOrO.
He octabIyTe yCTpoIcTbO 6e3 npncMoTpa, KOrda OHO pa6oTaet. NocToHHo npOBepaTe KOHCnCTeHcNIO Cmecn IIN MOpoxEHO, YTObI He npOnyCTNb MOMHT BpeMeH, KOrda OHO cTAHet MRAKIM.
MopoKeHoe MoKeT CoXpaHaTB foPMy TOnbKO B TeeHne onpeJeHeHHoro BpEmHn. MopoKeHoe He DoJIckHO 6bITb CNIuKOM XnuDkIM INI, HAObOpOT, CNIuKOM BR3KIM.
He npepbIbaIte npOeess npemeunBaHna, daKe npBbdahe nepBoi npCmMopoxeHoro.
BAXHO: HemeJeHNo BbIKIOaHTe yCTpoIcTBO, ecn
MopoxKeHoe CtaHOBNTcR B3KIM
HacaKaIJIpeMeuBaHn3aMeJraTcNIO BO-06ue He npOBopaUbaeTc,
CbIeH TpOMKmUyDnVrataTna.
Btaknx cnyaaycnepyet:
- ChTb HacaIky IJIpepeMeIuBaHry, YTO6bl OHa He 3aMep3Ja B MOpOKeHOM.
- YdaNTe MOpOxHoe H3 YaIIN C NOMOuBHO CNIMKHOBOH IIN DepeBraHHo JIOXKn. He NCnONb3yNTE MeTaJIINueCKHe JIOXKn, YTObBi HE NOBpeDHTb NOKpbITNe C BHYTpEH He CTopoHbI YaIIN.
He nCnoB3yIte 6nok BbIXoJa.
-Даite DBURAteHIO OCTbIb.
NcnoB3OBaHne ycTpoIcTBA
I PEPDyIPEJKDEHNE: Pnck oKora ot xonoda!
- P0 Bo3MOxHOCHTN, DepeKNTe DepeKNTe OXnAKeHHyU 4a7y ToJIbKO 3a MOHTaXHoe KOJIbO.
-
EcIn BbI He ycTaHOBnMoHTaXHoe KOJIbOHa Ha aWpy paHee, 3aUITte CBOu pyKn, HApPIMep, KxOHbIM NOIOTehcEm, KOrDa 6yDeTe BbIHMaTb 4aWy N3 MOpO3INbHOJ KAMepbl.
-
13BnKeNte OxJaxDeHHyUaUy n3 MOpO3nIbHOn KaMepbl. C6ePnte yctpoiCTBO kak OtnCaHO B rIabe "C6opKa yctpoiCTBa".
- 3akpoTe BbIyckHoi KJIanaH: yCTaHOBInTe pbIaJOK B B BepxHee nOIOKeHne.
- NocTaBbTe YaSy nOy BbInyckHoi Klanah.
4. Podknoyehne 3JIeKtpoNTaHnA:
-Перед Tem,КAK NOДКЛHOUATb yCTpoIcTBO K cETN 3JIeK- TpOITAHnIy, y6eIITecb, YTO napaMeTpbl 3JIeKTPoCetN COOTBETCTBYIOT Tpe6OBaHnIY M. ПОСМТРITE CNEIu- INФИKAUIO yCTpoIcTBA,yka3aHHyIO B TabINHKe Ha erO KOpnyce.
-ПодкнчаиTe yCtroiCTBO TOnbKВИСправНЯ HabTeHHoHpo3eTke.
5.BKIOHTe yCTPOCTBO C NOMOUIBbIKIOUaTeIN BKN/ BbIKN (NOJIOXHeHne ON).
6. HanonHnnte yauSy CmecbIO dIy MopoXeHoro Upe3 BxOJHOe OTBepCTne.
7. BbIpyckaIte np6HyIO npuHIO kKaJdbIe 10-15 MNHyT. TTo6bI cIeNaTb 3TO, HaxIMaIte pbUaKoK Ha 6IoKe BbIXOJa.
- KOrda MOpoxKeHoe IOCTINHT KOHCnCTeHcIM MRAKOROMopoxKeHoro, BbInyckaIte NOpCIM MOpoxKeHoro 6e3 KaKoJNl60 3aepxKn. Korda BbI 6yTe DeNaTb 3To, OCTabBeYcTPOCTBO BKJIIOUHeHHbIM.
- EcIN MOpOKeHoe CTANO CINUKOM B3KIM, YTO6bI BByTNuYepe3 BByNUCKHO KNAH, BbIKNIOHTe YCTPOCTBO (No-NOXHeNE OFF).BbIDepHnTe WTeNCelb N3 p03eKn.
- Pa36nokpyneKpbIky, noBepHyB ee npOTNB acoBOI cTpeIKN.CHIMNTe KpbIky.B 3aBNCMOCTN OT KOHCNUCTEN MOpOxHeHO, HacaJkДЯпрemeUBAHn MOKeT 6bIT N3BNeEuHa BMeCTe C KpbIkoE.CmHacaJka OCTaIacb yBa3WeB MOpOxHeOM, BbIDepHnTe ee.
- YdaIaIte OCTaTKMOPoJeHO r3 qaIIN C NOMOJIbH CNIJKHOBOI INI DEpeBraHHIOJXKN.
Iocne nCnoJIb3OBAHn
MopoxKeHoe, KOToPoe BbI cO6nPaTeCb CBeCTb N03Hee, CNeDuYt XpaHHTB MOpO3NlBHO KAmpe.
- He 3amopaknBaIte MopoxeHoe, eCNI OHO pactaIIIO.
- Ynctnte yctpoCTBO nocLe kaxdoIOnb3OBAHnA, KaONcaHO B IaBe "Ynctka".
PeuertbI
- PnnpnroTOBJIeHm CMEcI JnMopoxKeHOrO, CM. rnaBy "PnroTOBJIeHn--yHKT 4".
KoJIuHecBa,yKa3aHHbIe BpeCenTax,daHbI ToJIbKO KaPeKOMeHdaUIN.KoppeKTIpyTe COCTAB CMEcE N O CBOEmy BKycy. - NcNoJIb3OBAHnE rCyIbIX CInBOK IJIY B36uBaHnR BMeCTO DBOHbIX CINBOK 6yDET BnIaTb Ha COOTHOUeHne INHpeDHeTOB. B TAKOM cIyae NcNoJIb3yIte 60JIbSe rCybIX CINBOK IJIY B36uBaHnR IMHeIe MOJoka.
Cm. npyrnKe KyinHapNbe KnHn nn MaTePnaBb B nHTepHeTe dnnoncka dpyrnx peeentOB.
BaHnJIbHoE MOpOKeHoe
3KCTpaTbBaHn1 10r
MoJIOKO 250M
I P E D U N P E X D E H N E:
-Перед чinctков BCeгда Вынмайтесеув Вилky ИЗ розетки.
- Hn npi kaKx o6ctOaTeIbCTBax He norgykaIte ycTpoIcTBO B BODy, YTO6bl IOuHcTITb eI. 3To MoXeT pINBeCTN K yIapy 3JIekTpOTOKOM IIN IoXapy.
BHIMAHINE:
He nCnoB3yIte npBOIoHHyIO ueKU nn Dpynne a6pa3nBhIe INCTpyMeHTbl.
He nCnoJIb3yIte KNCnOThbIe IIN a6pa3NHBIe MOIOUne cpeCTBa.
HnKakne neta Hne noDxOaT dna MbITbB Nocydomo-eHNO MaunHe.
Iotpe6nraemar moHocb: 18BT
Knacc 3aunTbI:
Bec HeTTo: npImepHo 3,0 K
CoxpaHEno npaBO Ha texHNueckn I KOHcTpyKlIOHHbIe N3-MeHeHnB pAMkAx npOdoJkaIOUeIcA pa3paOToN npOdykTa.
DaHHoe yCTpoIcTB COOTBETCTByeT BCEM TeKUIM DnpeKTHiBAM CE, TAKIM KAK 3JNEKTpOMaHTHnaC OBMECTMOCb N Hn3KOE HAnpJxKeHne; OHO IPOIN3BeDEHO B COOTBETCTBN C HOBeuIMN INpaBnAmN TexHKn 6e3OnaCHOCTN.
ii
ICM 3594
50 240-220
18 1
1
3.0 1
y j 1
Lilipidol jasall
a gill jia a jg jil 111
a aaiiie 1
021 100dall gie abbbal lal
glaolglbsil
jgall 1
Jklll lal,dlly plll. cblll ncl jll e jil .
Jgl gdlll Cn gld Jgall d ygd
Aaia aaeaae
1
Jy j 10000000000000000000000000000000000000000000000000000000000
Aauii Aaiis elui i jil uui ulu j puiy 1 . Aaiis j auaa ciaia 1 puiy 1.
gagall gall gall gall gall gall gall gall gall gall gall gall gall gall gall gall gall gall gall gall gall gall gall gall gall gall gall gall gall gall gall gall gall gall gall gall gall gall gall gall gall gall gall gall gall gall gall gall gall gall gall
111 15g jge 111
S ACD = S COD + S DCE - S CDE
alas jydln cai gai ydlsl
Jaaal 1e clusg g
y
j jywl l a aol o 1000
xlll 1
a1 = 23,a2 = - 43,a3 = - 53,a4 = 63
S OBC = S COD + S_ BOC
jglal
1524 1000000000000000000000000000000000000000
y 1
Juelejilie jie glablaiae aiai Jilai
4.4.11 0
gill 1e jll l 5 jy. yll o 2jll e gll j
"Jglls jiljnl jil Jaii
12
Jall Jalee 3
gss 4
pIaIgaiyIgaiyIgaiyIgaiyIgaiy
J 1
jia la jia jia jia jia jia
()Jjill Jjill Cieo 1y jll Jj.5
. "ON"
aill 61 2008 5 6
Jb 15-10
S ACD = S COD + S_ DCE
Jaa jaii aaiil gaiin Jai 8
a
alilipaii i"jaiii jai
Jds no 4nss s y 1s jy 8y 9
Jusll (j) jll Jzall
Jalal jao jao Jai (OFF"
(ASgoo) jolil no ailll iagwqall aacll 451 gill
iSall
j j 1
a
aalalal 1
.
:abaa
Jssll Jssll
10+
y
1
b1s 0e gll Sla Jia aai jai jai jai jai
a
e 1
()
700-600: aalal aal 1e 5la
aie aiee
aL a 1 1
"Jilll 1
Lae
aai
aai jaiy
aill s yu 1y jil yi
Aaia jia 15s y s Jy
1 1
JyS yS bgy Sd 1e g 1


jglz11 1sji
Jaaee
43 2111111111
A. a1 + a2 + a3 + a4 + ·s + a_10 = 76 (A) A. B. C. D. E.
CJIO JGLL 0jally jaoaiy jaii jaii jaii jaii jaii jaii jaii jaii jaii jaii jaii jaii jaii jaii jaii jaii jaii jaii jaii jaii jaii jaii jaii jaii jaii jaii jaii jaii jaii jaii jaii jaii jaii jaii
Jy 1
"("jll 1
aJae aee 15) pall cull: (C) Jaiil .3
1.
C. 10000000000000000000000000000000000000000000000000000
aill 1. jyll yall 1e 2gall gll jll pdd
45
Jusu
jss jdaac Jgol jcuall jbill:
g cgl j 20 gll j 15 .5
e g j. s i aial g u jil eia (E)
aaii jie 80g gaiy gill gll aai
j0 jll jall 2gall jll
gaiiall alal .eclgln aieaill aiall gaiiaaii
J 1
e gll yglal yglal gll gll gll gll
gill jao jie 60f: (F) 601.6
aal llll 2g jall gill jll a
J 1
Cue 10111111111111111111111111111111111
()
yjie 25 jolal j o jydu Jn o jll j
Aaie Psal ay j all aell
Clligall aale jbi
Jusuul / Jusuul 1
2
aill anie 3
4
5
( x + 1) ( y - 1) = 0
7
8
9
5a
a#A
B
C
() D
i
Aige jn jll 1
aagaaaiiiaaiial jiaiaiiil aiaaiis Jji 2
5 3
2g 2g 2g 2g 2g 2g 2g 2g 2g 2g
:abla
jgllll jglil
"iiisill, iisall
y. jia a 12
jai y jai jai jai jai jai jai jai jai jai jai jai jai jai jai jai jai jai jai jai jai jai jai jai jai jai jai jai jai jai jai jai jai jai jai jai jai jai jai jai jai jai jai jai jai jai jai jai jai jai jai jali yjali yjali yjali yjali yjali yjali yjali yjali yjali yjali yjali yjali yjali yjali yjali yjali yjali yjali yjali yjali yjali yjali yjali yjali yjali yjali yjali yjali yjali yjali yjali yjali yjali yjalli yjali yjali yjali yjali yjali yjali yjali yjali yjali yjali yjali yjali yjali yjali yjali yjali yjali yjali yjali yjali yjali yjali yjali yjali yjali yjali yjali yjali yjali yjali yjali yjali yjali
L
jaiyuiy jaii liia i jaiie
pssssucljga
Ileblallllauaiiaolllclgaleallnlae cliclcgeaagaa
10000000000000000000000000000000000000000000000000000000000000000
:
A
:abai
Aolc Cilbysla
Lai 1000000000000000000000000000000000000000000000000000000000000000
jglg jglg aalil aolll lai
:
GARANTIEKARTE
warranty card · garantiekaart · carte de garantie · scheda di garanzia · tarjeta de garantia · cartao de garantia · garantiokt · karta gwarancyjna · zaru.cni list · karta jamstva · carte de garantie · fapaunnoHa KapTa · zaruyn list · garancijski list · garanciajegy · rapaHTHnHOpMnyr · fapaHTnHbI tanoH ·
ICM 3594
24 Monate Garantie gemäß Garantieerklarung - 24 months warranty according to warranty declaration - 24 maanden garantie volgens garantieverklaring - 24 mois de garantie selon la déclaration de garantie - 24 mesi de garancia seconde la dichiarazione di garanzia - 24 meses de garantia de acordo con la déclaracion de garantia - 24 meses de garantia, de acordo con a déclaration de garantia - 24 manedors garanti i henhold tel garantietingelsene - 24 misesige gwarancj na podstawie owiadzcnia gwarancynego - zaruka 24 mEscu podle prohlaseo zaruke - 24 mesecno jamstvo u skladu s jamstvenom declaracionj - 24 luni garantie conform declaratie de garantie - 24 mecua rapaunuB b coteBCTTae C rapaunuHnHATA ceknapauu - 24-mesaCnza zaruka podle vhylasiena o zaruke - 24-mesecna garancija, skladnOZ garancjsko izavo - 24 honap garancia a garanciafeletetekken leirtak szerint - rapaunrHa 24 micruI IINIOHIO ZA npo raptanio - raptanri 24 mecua cornacocho ZAHENHHM raptanHHHMnpabnAm - 24 s
Kaufdatum, Handlertempel, Unterschied - date of purchase, dealer stamp, signature - aankoopdatum, dealerstempel, handeltexigen - date d'achat, tampon du concessionaire, signature - data de acquistio, umbre del rivenditore,irma - fecha de compra, selle del distribuidor,irma - data de comora, carinbo do distribuidor, assinatura - kapsdata, forhandierstempel, signatur - data zakupu, piecec spredawyed, podipsi datum zakupenl, razhiko projecej, podips - datum kupovine, Big trovca, potipis - data de achijle, stampia fumzeridur, semmatura - Da na noxynkra, T\vetae na Ipo\n\nOchodnika/ predejcu, podips - datum nukupa, Big trovca, potipis - vasiarai datumu, kneskedb belyegoe,\alalras - data npdo\n\n

CATHRONIC INTERNATIONAL GMBH
www.clatronic.com
CTC
CATRONICINTERNATIONAL GMBH
Internet: http://www.clatronic.de