MADTA20BT - Hi-fi system MADISON - Free user manual and instructions
Find the device manual for free MADTA20BT MADISON in PDF.



User questions about MADTA20BT MADISON
0 question about this device. Answer the ones you know or ask your own.
Ask a new question about this device
Download the instructions for your Hi-fi system in PDF format for free! Find your manual MADTA20BT - MADISON and take your electronic device back in hand. On this page are published all the documents necessary for the use of your device. MADTA20BT by MADISON.
USER MANUAL MADTA20BT MADISON
natural_image
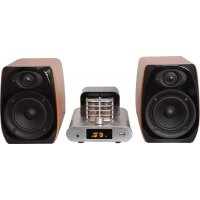
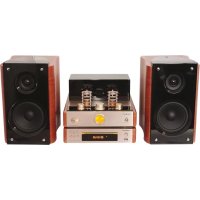
Three red audio speakers with black acoustic dividers and a central electronic device (no visible text or symbols)Ref.: MAD-TA20BT
INSTRUCTION MANUAL
MANUEL D'UTILISATION
BEDIENUNGSANLEITUNG
MANUAL DE UTILIZARE
MANUAL DE INSTRUÇÕES
NAVODILA ZA UPORABO
Imported from China by
LOTRONIC SA
Avenue Zénobe Gramme 9
B-1480 Saintes
text_image
GBImportant Safety Precautions :
Congratulations on your purchase and thank you for choosing our audio system. To achieve the utmost in enjoyment and performance from your new system and in order to become familiar with its features, please read this manual carefully before operation. This will ensure years of faithful, trouble free performance and listening pleasure.
Important Notes :
- These safety and operating instructions should be retained for future reference.
- This appliance must not be exposed to dripping or splashing liquids. No objects filled with liquids, such as vases or glasses should be placed on or near this appliance.
- Avoid installing this unit in locations such as :
- Places exposed to direct sunlight or close to heat radiating appliances such as electric heaters.
- On top of other stereo equipment that radiate a lot of heat.
- Enclosed spaces which block ventilation or overly dusty places.
- Places subject to constant vibration.
o Humid or moist places.
- No naked flame sources such as lit candles should be placed on or near the unit.
- Before turning on the power for the first time, make sure the power cord is properly installed, and fully uncoiled.
- For safety reasons, do not remove any covers or screws or attempt to gain access to the inside of the product for any reason. Doing so will expose you to dangerous voltage, and will void your warranty immediately.
• Refer any servicing to qualified and properly authorized service personnel.
• There are no user serviceable parts anywhere inside this unit.
- Where the MAINS plug or an appliance coupler is used as the disconnect device, the disconnect device shall remain readily operable;
- Batteries (battery pack or batteries installed) shall not be exposed to excessive heat such as sunshine, fire or the like.
text_image
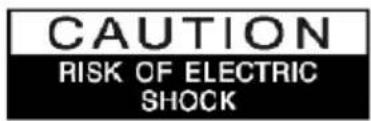
CAUTION RISK OF ELECTRIC SHOCK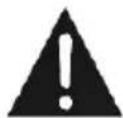
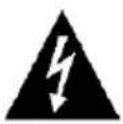
CAUTION : TO REDUCE THE RISK OF ELECTRIC SHOCK DO NOT REMOVE COVER OR BACK. NO USER SERVICEABLE PARTS INSIDE, REFER SERVICING TO QUALIFIED SERVICE PERSONNEL.
DANGEROUS VOLTAGE :
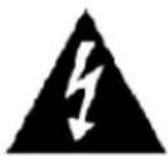
Dangerous Voltages, that may be of sufficient magnitude to constitute a risk of electric shock to persons is present within this product's enclosure.
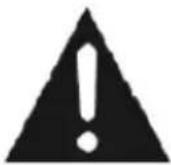
ATTENTION :
The owner's manual contains important operating and maintenance instructions, for your safety, it is necessary to refer to the manual.
WARNING : TO PREVENT FIRE OR SHOCK HAZARD, DO NOT EXPOSE THIS APPLIANCE TO DRIPPING OR SPLASHING.
NOTE : This unit will become warm when used for a long period of time. This is normal and does not indicate a problem with the unit.

This product is compliant with CE-LVD directive : EN60065
GENERAL PRECAUTIONS :
Some Do's and Don'ts on the safe use of this electrical appliance :
This equipment has been designed and manufactured to meet international safety standards, but like any electrical equipment care must be taken if you are to obtain the best results and safety is to be assured.
DO read the operating instruction before you attempt to use the equipment.
DO ensure that all electrical connections (including the mains plug, extension leads and enter-connections between the pieces of equipment) are properly made and in accordance with the manufacturer's instructions.
DO switch off and remove the mains plug before making or changing any connections to this unit.
DO consult your dealer if you are ever in doubt about the installation, operating or safety of your equipment.
DON'T remove any fixed cover as this may expose you to dangerous and potentially deadly voltages.
DON'T overheat the unit which can cause damage and shorten the life of the equipment.
DON'T allow electrical equipment to be exposed to dripping or splashing, or objects filled with liquids, such as vases, to be placed on the equipment.
DON'T place hot objects or naked flame sources such as lit candles or nightlights on, or close to equipment. High temperatures can melt plastic and lead to fires.
DON'T listen at very high volume. Doing so can permanently damage your hearing.
DON'T leave equipment switched on when it is unattended. Switch off using the switch on the equipment.
DON'T continue to operate the equipment if you are in any doubt about if it's working normally or if it's damaged in any way. Switch it off and remove the mains plug and consult your dealer immediately.
ESD Remark: In case of malfunction due to electrostatic discharge, simply reset the system by disconnecting the mains power from the wall outlet for a period of 5 minutes. Reconnect to the mains power to resume normal operation.
NOTE : Do not open any covers and do not attempt to repair this system in any way yourself. Qualified personnel must carry out repair work.
Package Contents :
- CD Player Unit
- Tube amplifier
- 2 speaker boxes
- Remote Control
- 2 x AA Batteries
- FM Antenna
- RCA Audio Cable
- Users Guide
CD Player Front Panel Overview:
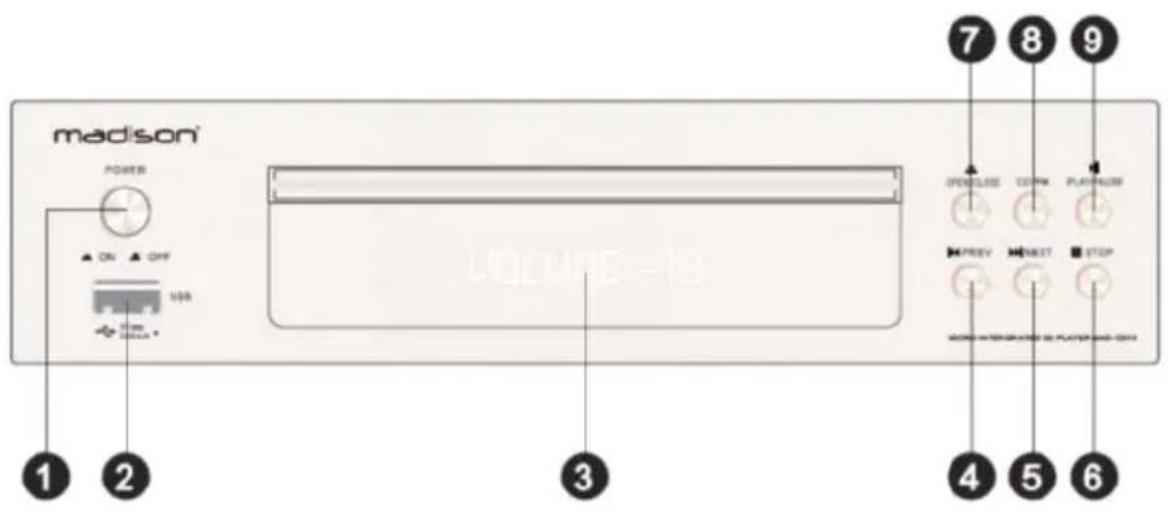
text_image
madison POWER ON OFF USB USB 1 2 3 4 5 6 OPEN/LINE CERNA PLAY/AUSE PREV NEXT STOP AUTO INTERCONNECTED FOR POWER-AUSE| Control | Function |
| 1 | ON/OFF |
| 2 | USB Input for MP3 & WMA Audio File Playback |
| 3 | LED Display |
| 4 | Previous Track Select |
| 5 | Next Track Select |
| 6 | Stop Current Track |
| 7 | CD Disc Door Open/Close |
| 8 | CD/USB Input Select |
| 9 | Play/pause |
CD Component Rear Panel Overview :
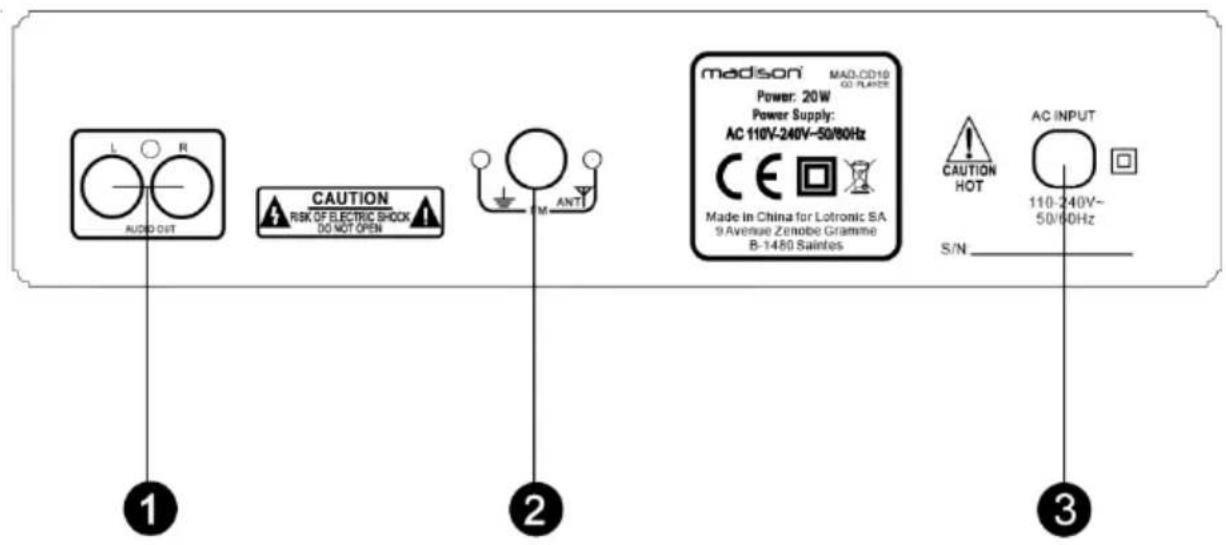
text_image
L O R AUDIO-DOT CAUTION RISK OF ELECTRIC SHOCK DO NOT OPEN M ANT madison MAQ-CD10 Power: 20W Power Supply: AC 110V-240V-50/60Hz CE Made in China for Lotronic SA 9 Avenue Zenope Gramme B-1480 Saintes CAUTION HOT S/N AC INPUT 110-240V~ 50/60Hz ① ② ③| Control | Function |
| 1 | L/R Analogue Audio Output (RCA) |
| 2 | FM Radio Antenna |
| 3 | AC Power Input |
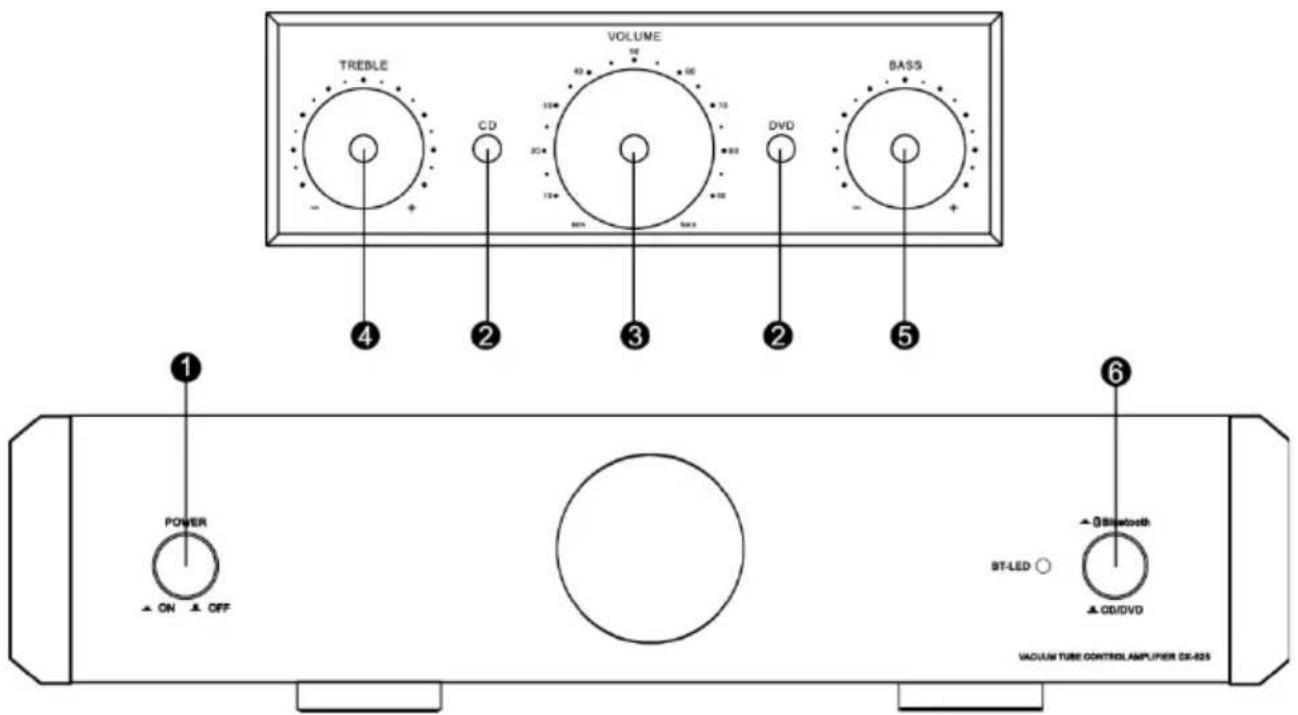
Tube Amplifier Front Panel Overview:
text_image
TRESLE CD VOLUME DVD BASS ④ ② ③ ② ⑤ ① POWER ON OFF ST-LED ○ ▲ dBIblatooth ▲ CD/DVD VACUUM TUBE CONTROLAMPUER DX-0251 Amplifier Power Button
4 Treble control
② Audio toggle switch
5 Bass control
③ Volume control
⑥ Input switch
text_image
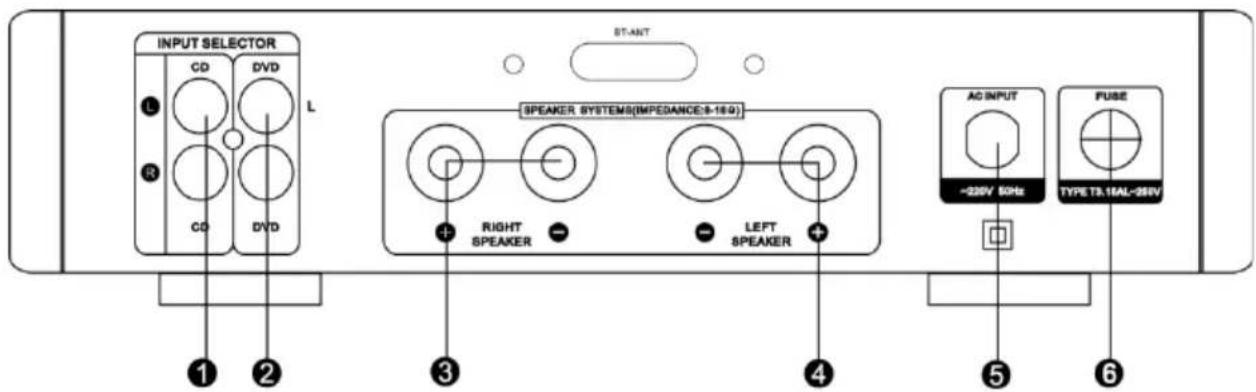
INPUT SELECTOR CD DVD L R CD DVD ST-ANT SPEAKER SYSTEMS(IMPEDANCE)8-18:0 RIGHT SPEAKER LEFT SPEAKER AG INPUT ~225V 50Hz TYPE TA.16AL-26HV ① ② ③ ④ ⑤ ⑥① CD audio input
4 Left amp output
② DVD audo input
③ Right amp output
6 Fuse
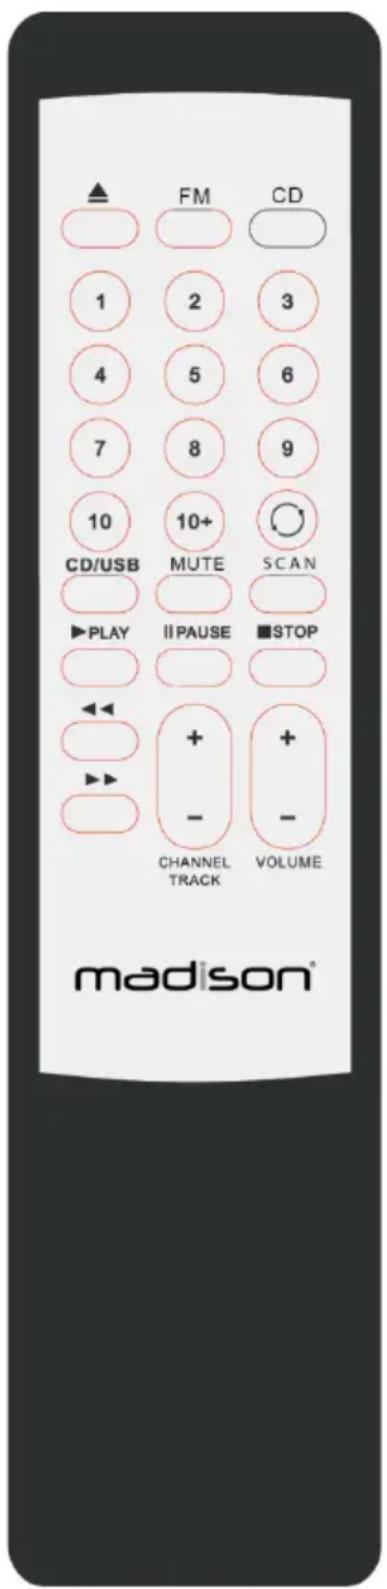
Remote Control Function :
| Control | Function |
| ▲ OPEN/CLOSE | Operates the CD tray to open and close |
| SCAN | To scan FM station and automatic save |
| CD/USB | To select CD or USB input |
| CD | To select CD mode |
| FM | To select FM tuner mode |
| NUMERIC BUTTONS 1-9 | To directly select a song press number keys 1-9 or to select radio station presets 1-9 |
| NUMERIC BUTTON 10+ | If a song selection exceeds track 10, you can select by pressing 10+ key |
| <</>> | To fast forward or rewind whilst playing a track CD mode, or to scan frequencies up or down whilst in FM mode |
| ▶/||/■ | To play, pause or stop tracks whilst in CD mode |
| MUTE | The MUTE button will eliminate any output sound from the system whilst in any mode. To cancel, press the button again |
| VOLUME +/- | To adjust the master volume in all modes |
| CHANNEL or TRACK +/- | To select the next or previous station preset whilst in FM radio mode, or to select the next or previous track whilst in CD mode / USB mode |
| Repeat | To select one song or whole disc repeat press again to cancel repeat |
text_image
▲ FM CD 1 2 3 4 5 6 7 8 9 10 10+ CD/USB MUTE SCAN ▶PLAY II PAUSE ■STOP ▶◀ + - CHANNEL TRACK VOLUME madi son®Rear Panel Connections :
flowchart
graph TD
    A["DVD Player"] -->|Audio Input| B["2.0Amplifier Output"]
    B --> C["Right Speaker"]
    C --> D["Left Speaker"]
    D --> E["AC Power Cable"]
    E --> F["FM Antenna"]
    F --> G["AC Power Cable"]
    H["INPUT SELECTOR"] --> I["DOLBY amplifier"]
    I --> J["Right Channel"]
    J --> K["Left Channel"]
    K --> L["AC Power Cable"]
    M["DATA"] --> N["DC"]
    O["DA"] --> P["DC"]
    Q["DC"] --> R["DC"]
    S["DC"] --> T["DC"]
    U["DC"] --> V["DC"]
    W["DC"] --> X["DC"]
    Y["DC"] --> Z["DC"]
    AA["DC"] --> AB["DC"]
    AC["DC"] --> AD["DC"]
    AE["DC"] --> AF["DC"]
    AG["DC"] --> AH["DC"]
    AI["DC"] --> AJ["DC"]
    AK["DC"] --> AL["DC"]
    AM["DC"] --> AN["DC"]
    AO["DC"] --> AP["DC"]
    AQ["DC"] --> AR["DC"]
    AS["DC"] --> AT["DC"]
    AU["DC"] --> AV["DC"]
    AW["DC"] --> AX["DC"]
    AY["Audio Input"] --> AZ["R.L Audio Output"]
    AZ --> BA["Dolby amplifier"]
    BA --> BB["Right Channel"]
    BB --> BC["Left Channel"]
Basic Operation :
Remote Control :
- Ensure you have correctly installed AA batteries into your remote control.
- For the remote to be fully functional it must be pointed directly at the micro system and we within a range of 7 meters.
- In some instances the remotes function may be affected by other electronics high frequency or signal interference.
- If the remote control is not going to be used for long periods of time, remove the batteries to avoid battery leakage and subsequent damage your remote control.
- The remote control should not be stored in dusty, humid or moist conditions, in direct sunlight or other extreme environments.
Playing a CD:
The CD play in this system is capable of playing 12cm and 8cm Compact Discs. This CD player is not compatible with DVD/DVD-R/DVD-RW/DVD Audio/DVD Rom or SACD.
The playable audio file types are:
- CD Audio
- MP3 Audio :
o MPEG 1 & 2, audio layer 3 file - File extension : MP3
○ Transfer Bit Rate : 8kbps \~ 320 kbps
- WMA Audio :
- Windows media File
- File extension : WMA
○ Transfer Bit Rate : 8kbps \~ 320 kbps
○ Incompatible file types created in Windows Media Player 9 or later or not compatible :
■ WMA Professional
■ WMA Lossless
■ WMA Voice
Basic operation steps :
- Press ON on the remote control to turn the system on.
- Press the INPUT button repeatedly until 'CD' appears on the front panel display.
- Press the Eject button (▲) on the remote control or front panel to open the CD tray.
- Place a disc into the CD tray with its printed side facing up, and press the Eject button ( ) again to close the CD tray.
To play a Compact Disc :
- Press the Play button (▶) on the remote control or front panel and the CD will begin playing from track 1 of the disc.
To pause playback :
- Press the Play/Pause button (▶) on the remote control or front panel and the CD will pause.
- Press the Play/Pause (▶) again to resume playback or the disc for the same position from where it was paused.
To stop playback :
- Press the Stop button (■) on the remote control or front panel and the CD will stop. Pressing the Play button (▶) will resume playback from the beginning (track1) of the disc.
To play a desired track:
- During playback, press the CHANNEL/TRACK + or – button on the remote control to select the desired track.
- Press one of the numeric buttons (1\~9) on the remote control to directly access your desired track.
To select particular part of a track:
- During playback, press and hold the FWD button (▶▶) or RWD button (◀◀) on the remote control to scan the current track to the desired part.
LISTENING TO THE AM/FM RADIO :
The FM radio in this system operated on the following frequency ranges :
Basic operation steps :
- Press STANBY/ON on the remote control to turn the system on.
- Press the INPUT button repeatedly until a radio station frequency appears on the front panel display.
Tuning the Radio :
There are 3 tuning modes for both AM and FM modes.
Full Automatic Tune :
- Whilst in radio mode, press the 'AUTO' button on the remote control, the system will automatically search for and save presets for all strong station frequencies found.
Semi Automatic Tune :
- Whilst in radio mode, press and hold the « << » or « >> » button on the remote control or front panel and the radio will scan to the nearest strong station frequency in whichever direction you selected.
Manual Tune :
- Whilst in radio mode, press the « << » or « >> » button on the remote control or front panel and the radio frequency will change by 1 step at a time. Press the « << » or « >> » button until you find your desired frequency.
Saving Radio Presets :
- Once you have found your desired radio station frequency, you can save the station in one of 10 stations presets. Do this by pressing the « SAVE » button on the remote control, then find your desired preset number by pressing the « CHANNEL/TRACK » button on the remote control.
PLAYING THE USB INPUT:
This system can play audio files stored on a flash memory USB stick which is formatted to FAT32 file system, and with a capacity no larger than 16GB.
The playable audio file types are:
- MP3 Audio :
o MPEG 1 & 2, audio layer 3 files
- File extension : .MP3
○ Transfer Bit Rate : 8kbps \~ 320kbps
- WMA Audio :
- Windows media file
- File extension : .WMA
○ Transfer Bit Rate : 8kbps \~ 320kbps
○ Incompatible file types created in Windows Media Player 9 or later are not compatibles :
■ WMA Professional
■ WMA Lossless
■ WMA Voice
Basic operation steps :
- Press STANDBY/ON on the remote control to turn the system on.
- While in any input mode, insert a compatible USB flash memory drive into the USB input on the front panel of the CD Player section. To select USB playback mode, press the USB input on the remote control or front panel.
To play an audio track:
- Press the Play button (▶) on the remote control or front panel and the CD will begin playing from track 1 of the USB stick.
To pause playback :
- Press the Play/Pause button (▶) on the remote control or front panel and the track will pause.
- Press the Play/Pause (▶) again to resume playback of the track for the same position from where it was paused.
To stop Playback :
- Press the Stop button (■) on the remote control or front panel and the track will stop. Pressing the Play button (▶) will resume playback from the beginning (track1) of the USB stick.
To play a desired track:
- During playback, press the Backward/Forward skip button (◀◀ / ▶◀) on the front panel, or Channel+/ Channel- buttons on the remote control.
- Press one of the numeric buttons (1 \~ 9) on the remote control to directly access your desired track.
To select a particular part of a track:
- During playback, press and hold the FWD button (▶▶) or RWD button (◀◀) on the remote control to scan the current track to the desired part.
To remove the USB memory stick:
- Press the Stop button (■) on the remote control or front panel and the track will stop. Then it is safe to remove the USB stick from the front panel USB input.
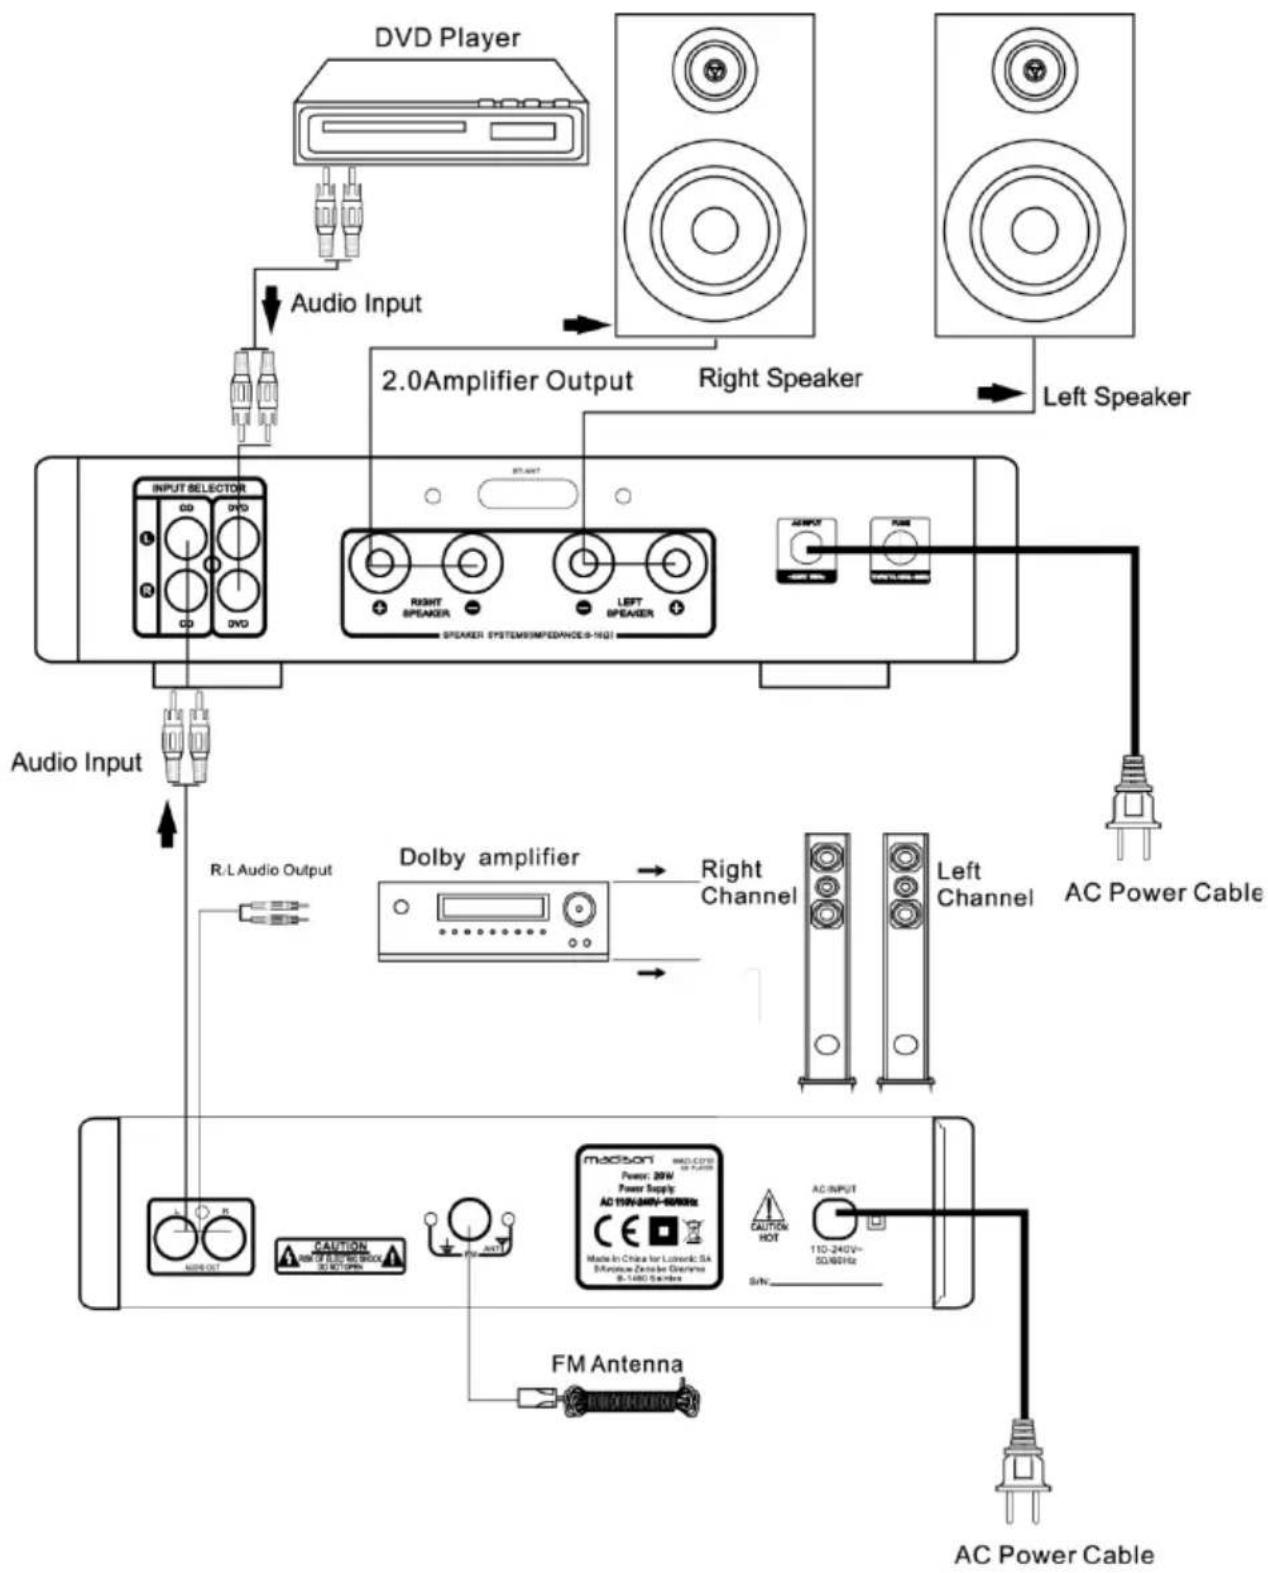
Connecting to an external Amplifier or Receiver from the Line Out :
This system has a L/R stereo RCA line output on the rear panel of the CD player section. It is compatible with the line input RCA jacks on any common home amplifier or receiver sound system.
Basic operation steps :
- Connect a pair of RCA stereo cables from the line input jacks of your home audio amplifier or receiver to the red and white « LINE OUT » jacks on the rear panel of the CD player section of this system.
- You can now select either the CD player or USB Inputs as your desired output source only, however the volume will now be controlled by your external home amplifier or receiver. Follow your manufacturer's instructions for further information on the use of this setup.
TUBE POWER AMPLIFIER
Playing a Bluetooth device
This system can connect to a Bluetooth compatible device such as a smartphone or portable music player and play wirelessly audio tracks that are stored in your smartphone or music player.
Basic operation steps :
- Press STANDBY/ON on the front panel to turn the system on.
- Set the input switch to BLUETOOTH. The BT LED is now flashing.
- Enable the Bluetooth connection on your spartphone or player and search for new devices.
- Select MAD-TA20BT in the list of found devices.
- If your smartphone or portable music player prompts you for a pairing code, enter 0000.
Playback control
The remote can control following functions:
• Volume up/down
- Next/previous track
- Play/pause
- Mute
Notes:
If pairing fails the first time, turn off your system and back on. Then follow the procedure from the beginning of this section.
If you are unable to reconnect to a previously connected device, remove or erase the MAD-TA20BT from the list of paired devices from your smartphone and follow the instructions of 'Pairing a new device'.
Troubleshooting Guide :
| PROBLEM | POSSIBLE CAUSE | REMEDY |
| Remote Control : | ||
| Remote Control not working | Batteries are exhaustedThe remote control is too far away from the main system, controlling angle is too large, or there is an obstacle in between. | Replace with new batteriesOperate the remote within the recommended operative range. |
| CD Player Section : | ||
| No Sound | There is no disc.The disc is not loaded with the printed side up.It is in pause mode.The disc is dirty or scratched. | Load a disc.Load it with the printed side up.Cancel the pause mode.Clean it or load another disc. |
| Skipping sound or track | The disc is dirty or scratched. | Clean it or load another disc. |
| FM Radio : | ||
| Not receiving stations | The antenna is disconnected.The broadcast frequency is not set properly | Connect the antenna.Set the broadcast frequency properly |
| Not receiving the | An incorrect station | Memorize the correct |
| preset station | frequency has been memorized.The preset memory was cleared because the AC input cord has been disconnected for more than a few days. | station frequency.Memorize the station again. |
| Interference | Noise related to the influence of an electric appliance.Noise related to a nearby TV set. | Turn off unnecessary nearby appliances.Install the system further away from the TV set. |
| USB Input : | ||
| No tracks available to play | No files are on the USB stick.The USB stick is not formatted using FAT32 file system.The files on the USB stick are not MP3 audio format. | Add files to the USB stick.Reformat the USB stick using FAT32 file system.Add MP3 audio files to the USB stick. |
Specifications :
| ITEM | SPECIFICATIONS |
| Description : | CD Player |
| Power Requirements : | AC 110-240V/ 50/60 HZ 10W |
| Tuner Frequency Range : | FM : 87-108MHz |
| Signal to Noise Ratio : | >85dB |
| Main Channel (1KHz) : | 20Hz-20KHz+2dB |
| Dimensions : | MAIN UNIT : 200 x 295 x 140 mm |
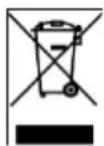
Electric products must not be put into household waste. Please bring them to a recycling centre. Ask your local authorities or your dealer about the way to proceed.
text_image
FTo play an audio track :
text_image
Warning symbols: a lightning bolt inside a triangle and an exclamation mark below it.EC Declaration of Conformity
Hereby we,
LOTRONIC SA
Avenue Zénobe Gramme, 9
1480 SAINTES
Belgique
+32.2.390.91.91
Certify and declare under our sole responsibility that the following product:

Trade name:
Product name:
TUBE AMPLIFIER WITH BLUETOOTH
Type or model:
MAD-TA10BT / MAD-TA15BT / MAD-TA20BT
Conforms to the essential requirements of the:
LVD directive 2006/95/CE and RTTE directive 1999/5/EC
Based on the following specifications applied:
Safety : EN60065:2002 + A1:2006 + A11:2008 + A2:2010 + A12:2011
Place and date of issue: Saintes (Belgium), on 08/10/2015
AKBAR Guive
Technical Manager
LOTRONIC SA Av. Zenobe Gramme 9 1480 Saintes - Belgium Tel. +32.2.390.91.91 Fax +32.2.390.93.19 info@lotronic.net www.lotronic.com
LOTRONIC
International

CE
Directive LVD 2005/95/CE - Directive R&TTE 1999/5/CE
Responsible technique
LOTRONIC SA Av. Zenobe Gramme 9 1480 Saintes - Belgium Tel. +32.2.390.91.91 Fax +32.2.390.93.19 info@lotronic.net www.lotronic.com