2311 - Hi-fi system ELTA - Free user manual and instructions
Find the device manual for free 2311 ELTA in PDF.
User questions about 2311 ELTA
0 question about this device. Answer the ones you know or ask your own.
Ask a new question about this device
Download the instructions for your Hi-fi system in PDF format for free! Find your manual 2311 - ELTA and take your electronic device back in hand. On this page are published all the documents necessary for the use of your device. 2311 by ELTA.
USER MANUAL 2311 ELTA
natural_image
Black and white photo of a portable electronic device with two speakers and a digital display (no visible text or symbols)DESIGN STEREO MUSIC- CENTER MIT CD/MP3/WMA- PLAYER UND USB- ANSCHLUSS
DESIGN STEREO MUSIC-CENTER WITH GB CD/MP3/WMA-PLAYER UND USB-PORT
CENTRE MUSICAL DESIGN STEREO AVEC Ⓡ LECTEUR CD/MP3/WMA ET PORT USB
FORMATERVEZETT SZTEREÓ MINI HIFI, CD/MP3/WMA-LEJÁTSZÓVAL ÉS USB-CSATLAKOZÓVAL
STEREO MUSIC CENTER CON LETTORE ① CD/MP3/WMA E PORTA USB
SENSOR-Fenster des Receivers
Anmerkungen:
Before using the player, please ensure that the local AC voltage is suitable for this unit.
Disc types Audio  | Disc size 12CM/8CM | CD discPlayback time 74min/20min max. |
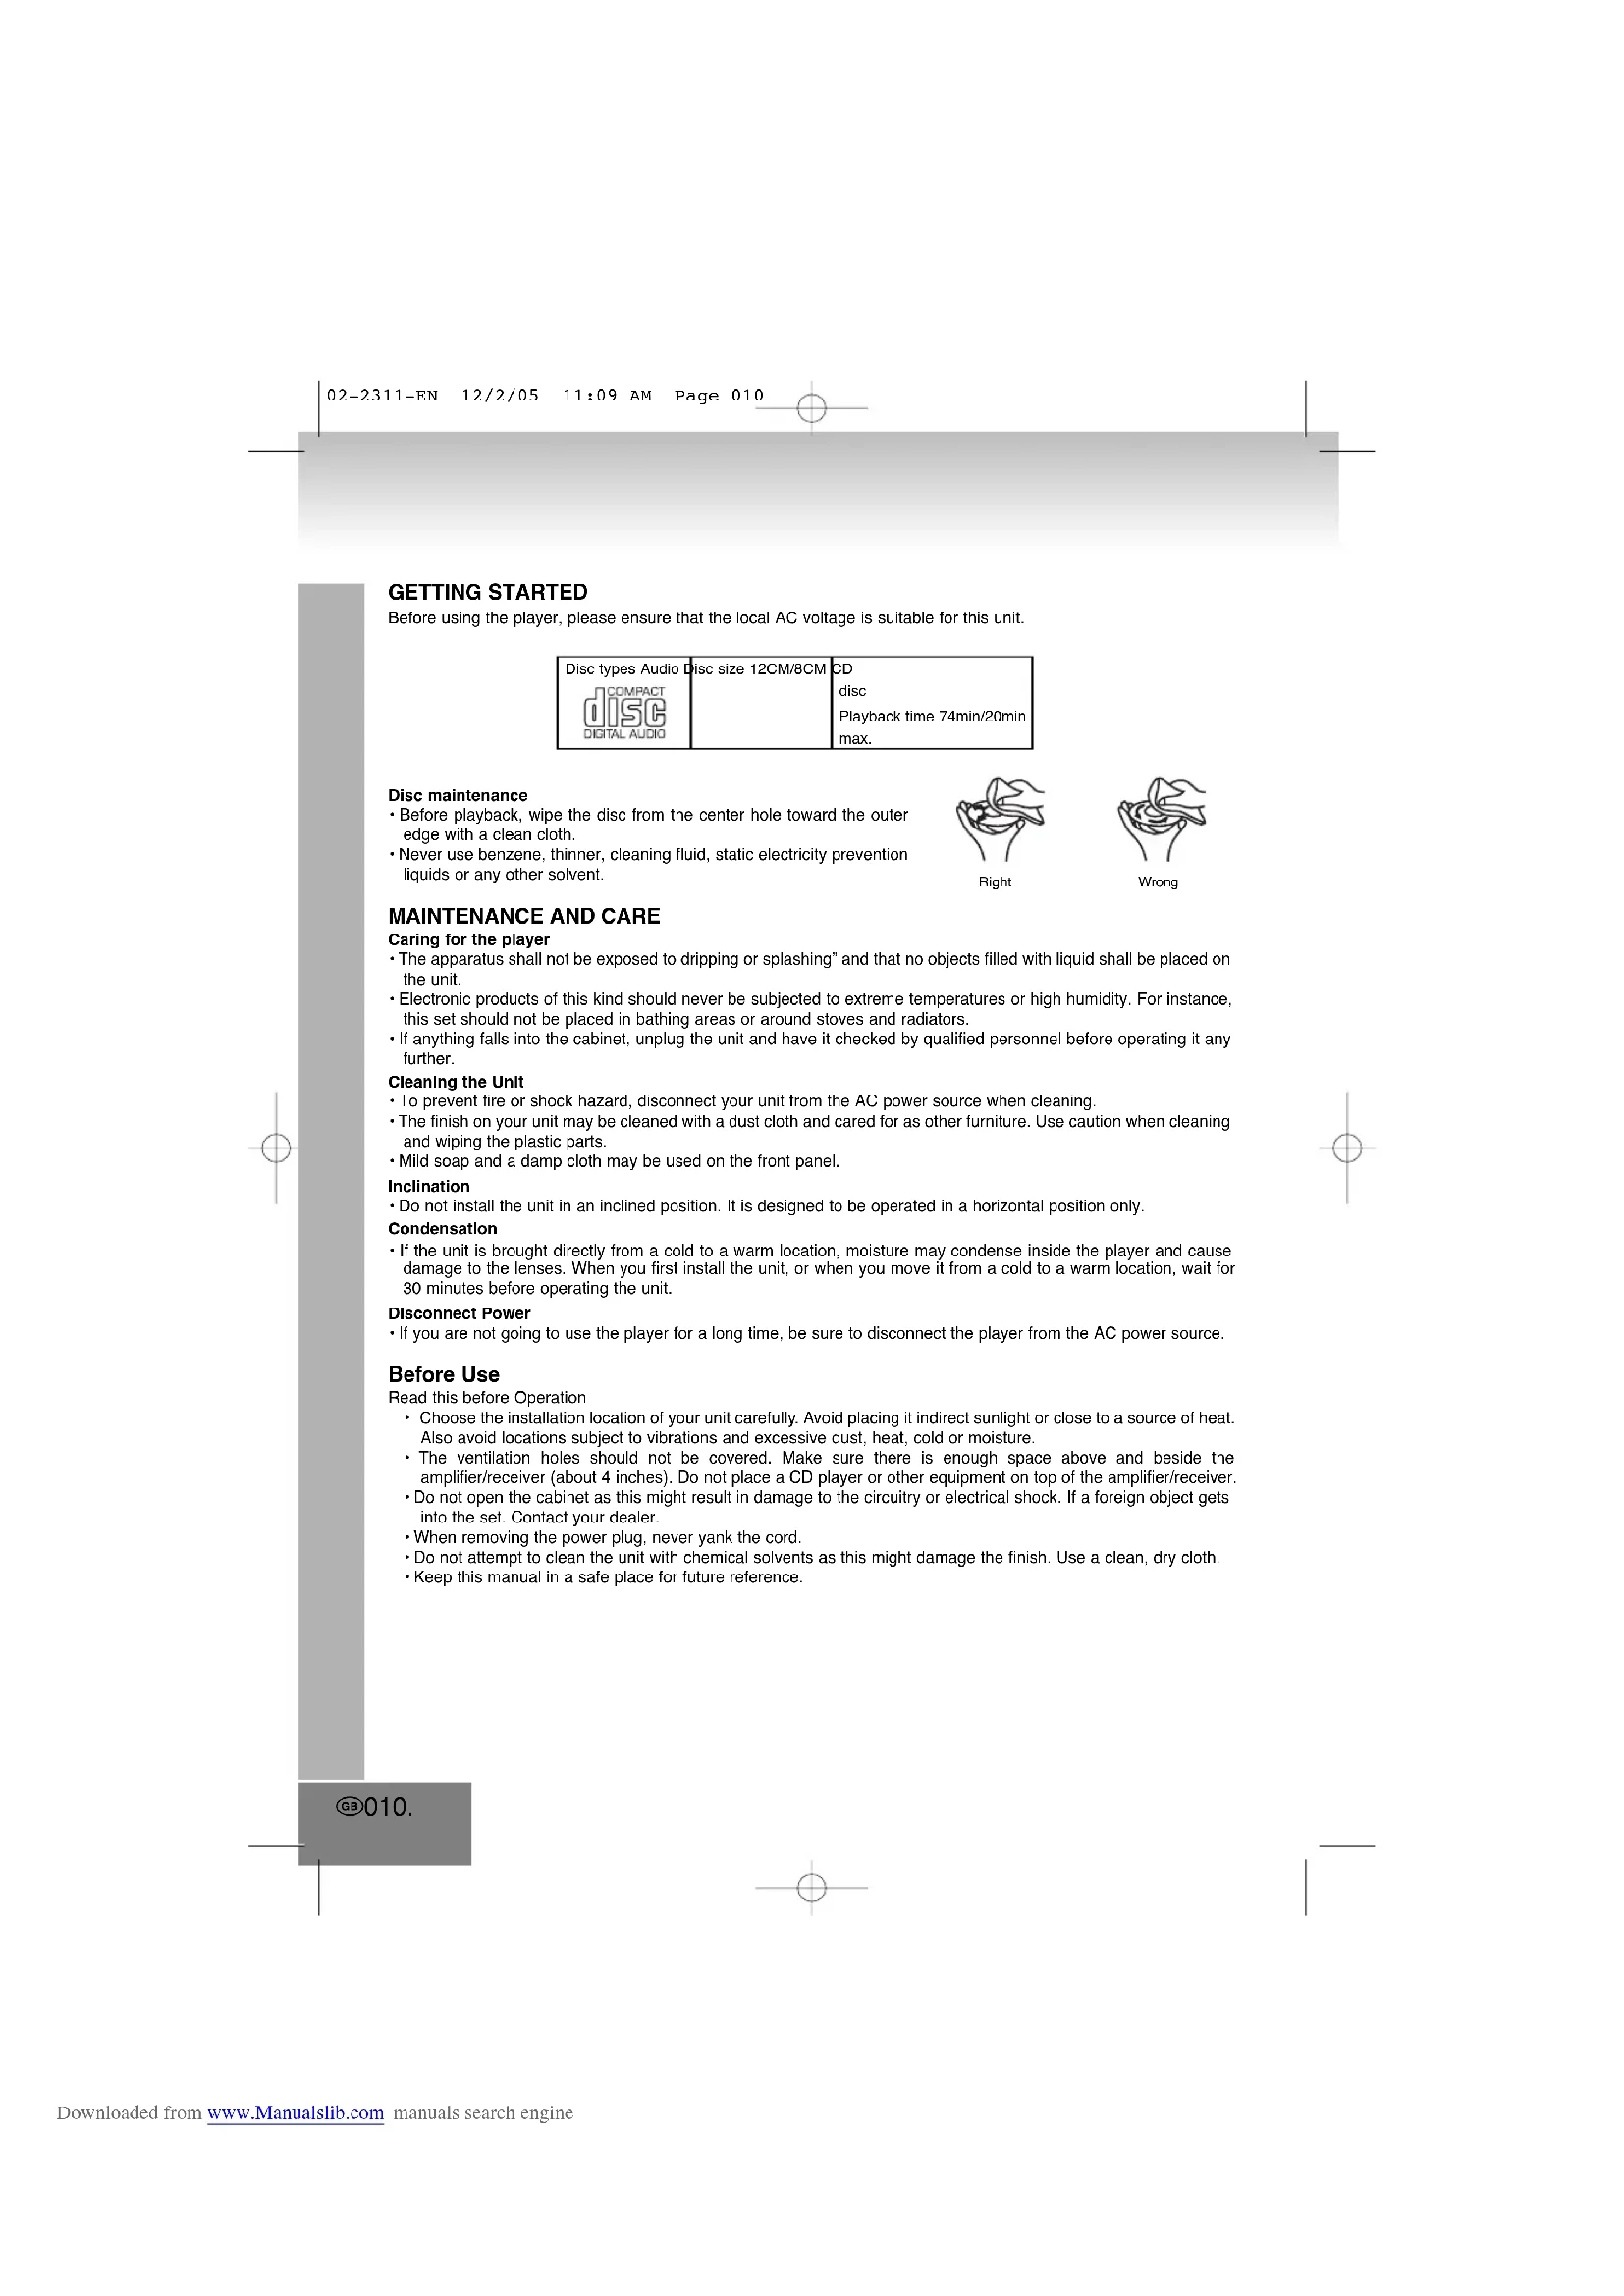
Disc maintenance
- Before playback, wipe the disc from the center hole toward the outer edge with a clean cloth.
- Never use benzene, thinner, cleaning fluid, static electricity prevention liquids or any other solvent.

Right

Wrong
MAINTENANCE AND CARE
Caring for the player
- The apparatus shall not be exposed to dripping or splashing" and that no objects filled with liquid shall be placed on the unit.
- Electronic products of this kind should never be subjected to extreme temperatures or high humidity. For instance, this set should not be placed in bathing areas or around stoves and radiators.
- If anything falls into the cabinet, unplug the unit and have it checked by qualified personnel before operating it any further.
Cleaning the Unit
• To prevent fire or shock hazard, disconnect your unit from the AC power source when cleaning.
- The finish on your unit may be cleaned with a dust cloth and cared for as other furniture. Use caution when cleaning and wiping the plastic parts.
- Mild soap and a damp cloth may be used on the front panel.
Inclination
- Do not install the unit in an inclined position. It is designed to be operated in a horizontal position only.
Condensation
- If the unit is brought directly from a cold to a warm location, moisture may condense inside the player and cause damage to the lenses. When you first install the unit, or when you move it from a cold to a warm location, wait for 30 minutes before operating the unit.
Disconnect Power
- If you are not going to use the player for a long time, be sure to disconnect the player from the AC power source.
Before Use
Read this before Operation
- Choose the installation location of your unit carefully. Avoid placing it indirect sunlight or close to a source of heat. Also avoid locations subject to vibrations and excessive dust, heat, cold or moisture.
- The ventilation holes should not be covered. Make sure there is enough space above and beside the amplifier/receiver (about 4 inches). Do not place a CD player or other equipment on top of the amplifier/receiver.
- Do not open the cabinet as this might result in damage to the circuitry or electrical shock. If a foreign object gets into the set. Contact your dealer.
- When removing the power plug, never yank the cord.
- Do not attempt to clean the unit with chemical solvents as this might damage the finish. Use a clean, dry cloth.
- Keep this manual in a safe place for future reference.
GB010.

The triangular symbol with the lightning Bolt warns the user to the presence of dangerous non-isolated voltage on the inside of this device which may cause an electric shock.
WARNING
DANGER OF A HAZARDOUS ELECTRIC SHOCK, DO NOT OPEN
WARNING: TO REDUCE THE RISK OF AN ELECTRIC SHOCK, DO NOT REMOVE THE FRONT OR BACK COVER. INSIDE THE UNIT, THERE ARE NO PARTS THAT CAN BE REPAIRED OR ADJUSTED BY THE USER. PLEASE REFER TO QUALIFIED TECHNICIANS.

The triangular symbol with the exclamation highlights important points of which the user should refer to the manual regarding maintenance and repair.
WARNING: TO PREVENT FIRE OR SHOCK HAZARD, DO NOT EXPOSE THIS APPLIANCE TO DRIPPING OR SPLASHING.
Note:
This unit will become warm when used for a long period of time. This is normal and does not indicate a problem with the unit.
This CD player includes micro-processors which may malfunction as a result of external electrical interference or noise. If the CD player is not working properly, disconnect the power source and then reconnect it.
SENSOR window of the receiver
Note:
- Even if the remote control unit is operated within the effective range, remote control operation may be impossible if there are any obstacles between the unit and the remote control.
- If the remote control unit is operated near other appliances which generate infrared rays, or if other remote control devices using infrared rays are used near the unit, it may operate incorrectly.
Precautions concerning batteries
- Be sure to insert the batteries with correct positive "+" and negative "-" polarities.
- Use batteries of the same type. Never use different types of batteries together.
- When the remote control unit is not to be used for a long time (more than a month), remove the batteries from the remote control unit to prevent them from leaking. If they leak, wipe away the liquid inside the battery compartment and replace the batteries and never dispose of old batteries by throwing them in a fire.
Battery Installation
- Remove the battery compartment cover.
- Insert two "AAA" dry batteries.
- Make sure that the batteries are inserted with their positive "+" and negative "-" poles positioned correctly.
- Close the cover until it clicks.
- If the distance required between the remote control unit and main unit decreases, the batteries are exhausted. In this case replace the batteries with new ones.
Main Unit Battery Backup
- Remove the battery compartment cover.
- Insert one "Cell" dry battery.
Make sure that the batteries are inserted with their positive "+" and Negative "-" poles positioned correctly. - Close the cover until it "Clicks".
BEFORE CONNECTION
Caution
Turn off the power of all the equipment before making connections.
Read instructions of each component you intend to use with this unit.
Be sure to insert each plug securely. To prevent hum and noise, do not bundle the connection cords with power cord of speaker cord.
Connection
Positioning of the Speakers
The positioning of speakers differs according to the size and acoustics of the listening room. While actually listening to a program source, try various speaker positions to determine which layout provides the best surround effect. Place the speakers connected to "L" to your left, and "R" to your right.
Speaker Connections
Caution
To avoid damaging the speakers with sudden high level signal, be sure to switch the power off before connecting the speakers.
- Speaker Jacks
Connect the SPEAKER PLUGS to the SPEAKER JACKS located on the rear of the unit.
• Wie How to Connect
RIGHT SPEAKER PLUG: Red jack.
LEFT SPEAKER PLUG: White jack.
SPEAKER
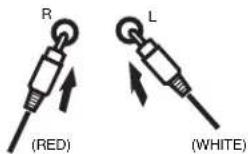
- Plug Right Speaker Cable to Red Speaker Input.
- Plug Left Speaker Cable to White Speaker Input.
Operating CD
- Switch to "CD/MP3/WMA" mode, unit will turn "ON" automatically.
2 Press "OPEN" button to open CD door ("-" and present time appears on display).
- Place the disc with label facing up on the disc tray.
- Hold the disc without touching either of its surface position with printed title side facing up, align it with the guides and place it in its proper position.
-
Close the CD door unit it "Clicks" (Total track number in Disc on display).
-
Press "PLAY" button Disc play automatically.
-
Stopping play
Press "STOP" button once to stop play.
If you press the "PLAY" button again, play starts automatically from first track.
Skip and Searching
Next or Back Button:
Press these buttons to go to the previous / next track.
Repeat
The repeat functions that you can enjoy are dependent on the disc types played.
CD: All tracks repeat, single track repeat and given.
1. Press "MODE" key once.
2. LCD will display "REP" = repeat of 1 track.
3. Press "MODE" key again to repeat all.
4. Press "MODE" key again to random mode.
5. Press "MODE" key again to normal playback.
GB012.
CD Memory
Up to 20 tracks can be programmed for disc play in any order.
Before use, be sure to press "STOP" button.
-
Set "CD/MP3/WMA" mode.
-
Press the "PROGRAM" button, the display will show "P01", moreover, it will indicate program no. and digits for track no.
-
Select a desired track by using the skip buttons.
-
Press the "PROGRAM" button again to confirm desire track into program.
-
Repeat step 2 and 3 to enter additional memories into the program.
-
When ALL the desired tracks have programmed. Press "PLAY/PAUSE" button to play the disc in the order you have
programmed.
- Press "STOP" button twice to terminal program play.
Radio Operation
-
Set the function selector to "RADIO" position.
-
Select desire Band (Radio frequency Digit will appear on display).
-
Adjust radio frequent to your desire station by using the tuner control.
-
Adjust Volume Control for volume level.
FM / FM-Stereo Reception
- Set to FM mode position for "MONO" reception.
- Set to "FM-ST" position for "FM-Stereo" reception. The Stereo indicator light up to show "FM Stereo" mode.
Clock
To adjust Clock setting, make sure unit are in CD Function.
- Press "SET" button on unit back.
(DO NOT RELEASE "SET" BUTTON DURING TIME SETTING)
-
Press "HOR" button to set Hour.
-
Press "MIN" button to set Minute
-
Release all button to confirm setting.
- Confirmed setting will appear on display.
Operating MP3/WMA
-
Switch to "CD/MP3/WMA" mode, unit will turn "ON" automatically.
-
Press "OPEN" button to open CD door ("-" and present time appears on display).
- Place the disc with label facing up on the disc tray.
- Hold the disc without touching either of its surface position with printed title side facing up, align it with the guides and place it in its proper position.
-
Close the CD door unit it "Clicks" (Total track number in Disc on display).
-
Press "PLAY" button Disc play automatically.
-
Stopping play
Press "STOP" button once to stop play.
- If you press the "PLAY" button again, play starts automatically from first track.
Skip and Searching
Next or Back Bu
Press these buttons to go to the previous / next track.
Repeat
The repeat functions that you can enjoy are dependent on the disc types played.
CD: All tracks repeat, single track repeat and given.
-
Press "MODE" key once.
-
LCD will display "REP" = repeat of 1 track.
-
Press "MODE" key again to repeat all.
-
Press "MODE" key again to repeat album.
-
Press "MODE" key again to random mode
-
Press "MODE" key again to normal playback.
MP3/WMA Memory
Up to 20 tracks can be programmed for disc play in any order.
Before use, be sure to press "STOP" button.
-
Set "CD/MP3/WMA" mode.
-
Press the "PROGRAM" button, the display will show "P01", moreover, it will indicate program no. and digits for track no.
-
Select a desired track by using the skip buttons.
-
Press the "PROGRAM" button again to confirm desire track into program.
-
Repeat step 2 and 3 to enter additional memories into the program.
-
When ALL the desired tracks have programmed. Press "PLAY/PAUSE" button to play the disc in the order you have
programmed.
- Press "STOP" button twice to terminal program play.
Operating USB
-
Switch to "USB" mode, unit will turn "ON" automatically.
-
Plug a USB mass storage device (e.g. memory stick) into the USB connector.
-
Press "PLAY" button Disc titles will play automatically.
-
Stopping play
Press "STOP" button once to stop play.
- If you press the "PLAY" button again, play starts automatically from first track.
Skip and Searching
Next or Back Button
Press these buttons to go to the previous / next track.
Repeat
The repeat functions that you can enjoy are dependent on the disc types played.
CD: All tracks repeat, single track repeat and given.
-
Press "MODE" key once.
-
LCD will display "REP" = repeat of 1 track.
-
Press "MODE" key again to repeat all.
-
Press "MODE" key again to repeat album.
-
Press "MODE" key again to random mode. 5
-
Press "MODE" key again to normal playback.
USB Memory
Up to 20 tracks can be programmed for disc play in any order.
Before use, be sure to press "STOP" button.
-
Set "USB" mode.
-
Press the "PROGRAM" button, the display will show "P01", moreover, it will indicate program no. and digits for track no.
-
Select a desired track by using the skip buttons.
-
Press the "PROGRAM" button again to confirm desire track into program.
-
Repeat step 2 and 3 to enter additional memories into the program.
-
When ALL the desired tracks have programmed. Press "PLAY/PAUSE" button to play the disc in the order you have
programmed.
- Press "STOP" button twice to terminal program play.
MORE INFORMATION


Beware of small pieces and batteries, do not swallow them. It may be hazardous to your health and lead into suffocation. Please, Make sure to keep small devices and batteries out of the reach of children.
Important advice regarding hearing protection
Caution:
You care for your hearing, and so do we.
Therefore, use caution while using this appliance.
Our recommendation: Avoid high volumes.
Children should be supervised while using headphones; make sure that the appliance is not set to high volume.
Caution!
High volumes may cause irreparable damage to children's ears.

NEVER let allow anyone, especially children, to put objects into the holes, slots or openings on this devise. This may lead into death due to electric shock. The device must only be opened by a qualified assistant.

Only use the appliance for its intended purpose.
This device may only be used in housings and business premises.

Please keep this instruction manual for further reference.

Instructions on environment protection
Do not dispose of this product in the usual household garbage at the end of its life cycle; hand it over at a collection point for the recycling of electrical and electronic appliances. The symbol on the product, the instructions for use or the packing will inform about the methods for disposal.
The materials are recyclable as mentioned in its marking. By recycling, material recycling or other forms of re-utilization of old appliances, you are making an important contribution to protect our environment. Please inquire at the community administration for the authorized disposal location.

Do not obstruct the ventilation of the device. Make sure, that no curtains, newspapers, furniture or any other type of object are blocking the ventilation system of the apparatus. The ventilation system must be clear of objects at all times! Overheating may lead into serious damage of the device and reduce its performance and lifespan.

Heat and warmth
Do not expose the appliance to direct sunlight. Make sure that the appliance is not subject to direct heat sources such as heaters or open fire. Make sure that the ventilation slots of the appliance are not covered.

Moisture and cleaning
This appliance is not waterproof! Do not immerse player in water. Do not allow player to come in contact with water. If water gets inside the player it may cause serious damage. Do not use cleaning agents that contain alcohol, ammoniac, benzene or abrasives as these could damage the player. For cleaning, use a soft, moistened cloth.
MODEL 2311
CENTRE MUSICAL DESIGN STEREO AVEC LECTEUR
RISQUE D'ELECTROCUTION. NE PAS OUVRIR
ATTENTION: AFIN DE REDUIRE LES RISQUES D'ELECTROCUTION, NE PAS RETIRER LE COUVERCLE (OU LE DOS). AUCUNE PIECE A L'INTERIEUR N'EST UTILE AU CONSOMMATEUR. POUR UN DEPANNAGE, SE REFERER AU PERSONNEL QUALIFIE.

Notre recommandations: Evitez les volumes forts.
text_image
R (ROJA) L (BLANCA)Botones Next o Back:
Botones Next o Back:
Botones Next o Back:
SENSOR janela do receptor
Nota:
Przyciski Next i Back:
Przyciski Next i Back:
Przyciski Next i Back:
DODATKOWE INFORMACJE

DOPLŇUJÍCÍ INFORMACE