
SC 1133 - Steam cleaner Kärcher - Free user manual and instructions
Find the device manual for free SC 1133 Kärcher in PDF.
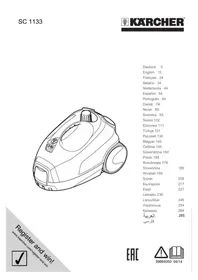


| Product Type | Steam Cleaner |
| Brand | Kärcher |
| Model | SC 1133 |
| Voltage | 220-240 V ~ 50/60 Hz |
| Heating Power | 1500 W |
| Ironing Power | 750 W |
| Max. Operating Pressure | 0.32 MPa |
| Heating Time | 8 minutes |
| Continuous Steam Output | 40 g/min |
| Maximum Steam Output | 100 g/min |
| Boiler Capacity | 1.0 L |
| Length | 380 mm |
| Width | 254 mm |
| Height | 260 mm |
| Weight (without accessories) | 2.9 kg |
| Protection Class | IP X4 |
| Accessories Included | Steam pistol, pinpoint jet nozzle, round brush, manual nozzle, microfiber cover, 2 extension tubes, floor nozzle, floor cloth, textile care nozzle, window squeegee |
| Main Functions | Steam cleaning, steam ironing (iron optional), refreshing textiles, window cleaning |
| Maintenance | Rinse boiler every 10 fills, descale according to water hardness, wash cloths at 60°C |
| Safety | Pressure switch, safety thermostat, safety lock, child lock on steam selector |
| Spare Parts | Use exclusively Kärcher parts, list at end of manual |
Frequently Asked Questions - SC 1133 Kärcher
User questions about SC 1133 Kärcher
0 question about this device. Answer the ones you know or ask your own.
Ask a new question about this device
Download the instructions for your Steam cleaner in PDF format for free! Find your manual SC 1133 - Kärcher and take your electronic device back in hand. On this page are published all the documents necessary for the use of your device. SC 1133 by Kärcher.
USER MANUAL SC 1133 Kärcher
Description of the Appliance. EN . . . 7
Quick Reference EN 7
Operation. EN 8
How to Use the Accessories. EN...9
Maintenance and care. EN 11
Troubleshooting. EN 12
Technical specifications. . EN . 13
General information
Dear Customer,

Please read and comply with these original instructions prior to the initial
operation of your appliance and store them for later use or subsequent owners.
Proper use
Use the steam cleaner only for private households.
The appliance is intended to be used with steam and can be used with the appropriate accessories as described in these operating instructions. You will not need any detergent.
Please adhere to the safety instructions.
Symbols in the operating instructions
Danger
Immediate danger that can cause severe injury or even death.
Warning
Possible hazardous situation that could lead to severe injury or even death.
Caution
Possible hazardous situation that could lead to mild injury to persons or damage to property.
Symbols on the machine

Steam
CAUTION - Danger of scalding
Environmental protection

The packaging material can be recycled. Please do not place the packaging in the ordinary refuse for disposal, but arrange for the proper recycling.
into the ordinary refuse for disposal, but arrange for the proper recycling.
Old appliances contain valuable materials that can be recycled. Please arrange for the proper recycling of old appliances. Please dispose your old appliances using appropriate collection systems.
Notes about the ingredients (REACH)
You will find current information about the ingredients at:
www.kaercher.com/REACH
Scope of delivery
The scope of delivery of your appliance is illustrated on the packaging. Check the contents of the appliance for completeness when unpacking.
In the event of missing accessories or any transport damage, please contact your dealer.
Warranty
The warranty terms published by the relevant sales company are applicable in each country. We will repair potential failures of your appliance within the warranty period free of charge, provided that such failure is caused by faulty material or defects in manufacturing. In the event of a warranty claim please contact your dealer or the nearest authorized Customer Service centre. Please submit the proof of purchase.
(See address on the reverse)
Safety instructions
Danger
The appliance may not be used in areas where a risk of explosion is present. If the appliance is used in hazardous areas the corresponding safety provisions must be observed. Never use the appliance in pools containing water. The device should not be used to clean electrical appliances such as oven, exhaust, micro-wave, televisions, lamps, hair-dryer, electrical heating systems, etc. Check the faultless condition of the appliance and the accessories before using it. Otherwise, the appliance must not be used. Please check in particular the power cord, the safety lock, and the steam hose. If the power cord is damaged, please arrange immediately for the exchange by an authorized customer service or a skilled electrician. Please arrange for the immediate exchange of a damaged steam hose. You may only use a steam hose that is recommended by the manufacturer (see spare parts list for the order number). - Never touch the mains plug and the socket with wet hands. - Never use the appliance to clean objects containing hazardous substances (e.g. asbestos). - Never touch the steam jet from a short distance with your hands and never direct the steam jet to persons or animals (risk of scalds).
Warning
The appliance may only be connected to an electrical supply which has been installed in accordance with IEC 60364. The appliance may only be connected to alternating current. The voltage must correspond with the type plate on the appliance. In wet rooms, e.g. bathrooms, connect the appliance to sockets with a series connected RCD adapter.
Unsuitable extension cables can be hazardous. Only use a splashproof extension cable with a minimum cross-section of 3 x 1 mm². The connection between the power cord and the extension cable must not lie in water. If couplings of the power cord or extension cable are replaced, the splash protection and the mechanical tightness must be ensured. The operator must use the appliance correctly. When working with the appliance, he must consider the local conditions and pay due care and attention to other persons, in particular children, who are nearby. This appliance can be used by children aged from 8 years and above and persons with reduced physical, sensory or mental capabilities or lack of experience and knowledge if they have been given supervision or instruction concerning use of the appliance in a safe way and understand the hazards involved. Children shall not play with the appliance. Cleaning and user maintenance shall not be made by children without supervision. Never leave the appliance unattended when it is in operation. ■ Be very careful while cleaning tiled walls with sockets.
Caution
Make sure that the power cable or extension cables are not damaged by running over, pinching, dragging or similar. Protect the power cable from heat, oil, and sharp edges. - Never fill solvents, solvent-containing liquids or undiluted acids (e.g. detergents, benzene, paint thinner, and acetone) into the water reservoir as these substances affect the materials used on the appliance. The appliance must provide a stable ground. Use and store the unit only in accordance with the specifications in the description and/or figure. The steam switch must not be locked during operation. - Protect the appliance from rain. Do not store outside.
Safety Devices
Caution
Safety devices protect the user and must not be modified or bypassed.
Pressure controller
The pressure controller keeps the boiler pressure during operation as constant as possible. The heating is turned off if the maximum operating pressure of 4 bar is reached in the boiler and is reactivated in case of a pressure drop in the boiler due to steam tapping.
Safety thermostat
The safety thermostat turns off the appliance if the pressure controller fails and the appliance overheats in case of a malfunction.
Please contact your local KARCHER customer service to arrange for the reset of the safety thermostat.
Safety lock
The safety lock seals the boiler against the steam pressure that builds up in the boiler. If the pressure controller is defective and the steam pressure in the boiler rises, a pressure control valve in the safety lock opens, and steam is emitted through the lock to the outside.
Please contact your local KARCHER customer service before you put the appliance into operation again.
Description of the Appliance
These operating instructions describe the maximum equipment. Depending on the model, there are differences in the scopes of delivery (see packaging).
Illustrations on fold-out page!
A1 Appliance connector with cover A2 Indicator lamp (green) - line voltage is on A3 Indicator lamp - heater (ORANGE) A4 Switch - ON A5 Switch - OFF A6 Safety cap A7 Holder for accessories A8 Storage holder for floor nozzle A9 Mains cable with mains plug A10 Running wheels (2 ea.) A11 Steering roller
B1 Steam gun B2 Unlocking button B3 Selector switch for the steam volume (with child protection) B4 Steam lever B5 Steam hose B6 Steam plug C1 Detail nozzle C2 Round brush D1 Hand nozzle D2 Terry cloth cover E1 Extension tubes (two tubes) E2 Unlocking button F1 Floor nozzle F2 Retaining clip F3 Terry floor cloth G1 Textile care nozzle H1 Window wiper
Option
(not included in delivery)
I1 Steam pressure iron I2 Upper steam button I3 Indicator lamp - heater (ORANGE) I4 Lower steam button I5 Steam lock I6 Temperature controller I7 Steam plug
Quick Reference
Illustrations on Page 2
1 Unscrew the safety lock and fill the steam cleaner with a max. of 1 litre of water. 2 Screw in safety cap. 3 Insert the steam plug into the appliance connector. 4 Insert the mains plug into a socket.
Press the ON switch to turn on the appliance.
Both indicator lamps must illuminate.
5 Wait until the orange indicator lamp goes out. 6 Connect the accessories to the steam gun. The steam cleaner is ready to use.
Operation
Attaching the Accessories
→ Illustration A
Insert steering roller and transport wheels and lock them.
→ Open the cover of the appliance socket. Tightly insert the steam plug into the appliance connector. The plug must click into place audibly.
To disconnect: Press the cover of the appliance connector down and disconnect the steam plug from the appliance connector.
Illustration
Connect the required accessories (see Chapter "How to use the accessories") to the steam gun. Insert the open end of the accessory on the steam gun and push onto the steam gun until the unlocking button of the steam gun locks into place.
Illustration D
Use the extension tubes if necessary. To do so, connect one or both extension tubes to the steam gun. Insert the required accessories on the free end of the extension tube.
Removing the Accessories
Danger
Hot water may drip out of the accessory parts while you are detaching them! Never detach accessory parts while steam streams out - risk of scalding!
→ Move the selector switch for the steam volume back (steam lever locked). Illustration
To detach the accessory parts, press the unlocking button and pull the items apart.
Fill up with water
Note: If you always use usual commercial distilled water it is not necessary to descale the boiler.
Caution
Do not use condensation water from the drier! Do not fill in detergents or other additives!
Remove the safety cap from the device. Completely empty the steam boiler to remove existing water (see fig.
Fill the boiler with a maximum of 1 liter of fresh tap water. Note: You can cut down the heating-up time by using warm water. Screw the safety cap back onto the device.
Turning on the Appliance
Place the unit securely on a firm surface.
Caution
The appliance must not be carried during cleaning.
Insert the mains plug into a socket. Press the ON switch to turn on the appliance. Both indicator lamps must illuminate.
Caution
Do not turn the appliance on without water in the boiler. Otherwise, the appliance may overheat (see Help with faults).
The orange indicator lamp goes out after approximately 8 minutes.
The steam cleaner is ready to use.
Adjusting the Steam Quantity
Use the selector switch for the steam volume to regulate the discharged steam. The selector switch has three positions:

Maximum steam volume

Reduced steam volume

No steam - child protection. Note: In this lever position, the steam lever cannot be used.
Set the selector switch to the required steam volume. While operating the steam switch, always direct the steam gun at a separate piece of cloth until the steam is emitted evenly.
Note: The heating of the steam cleaner is turned on at regular intervals during operation of the appliance in order to maintain the pressure in the boiler at a constant level. When the heating is turned on, the orange indicator lamp (heater) lights up.
Refilling Water
Water needs to be filled into the boiler if the steam volume decreases during work and no more steam is emitted in the end.
Note: The safety lock cannot be opened as long as slight pressure remains in the boiler.
Push the steam switch until steam discharge stops. Now, the boiler of the appliance is unpressurized. Press the OFF switch to turn off the appliance. Disconnect the mains plug from the socket. Remove the safety cap from the device.
Danger
A residual amount of steam may be emitted when you open the safety lock. Be careful when opening the safety lock; there is a risk of scalding. Fill the boiler with a maximum of 1 liter of fresh tap water.
Danger
If the boiler is hot, there is a risk of scalding as the water may splash back during the filling process! Do not fill any detergents or other additives into the boiler!
Screw the safety cap back onto the device. Insert the mains plug into a socket. Press the ON switch to turn on the appliance. The orange indicator lamp goes out after approximately 8 minutes.
The steam cleaner is ready to use.
Turning Off the Appliance
Press the OFF switch to turn off the appliance. Disconnect the mains plug from the socket. Press the cover of the appliance connector to the bottom and disconnect the steam plug from the appliance connector.
Storing the Appliance
Illustration F
- Put the extension pipes into the large accessory compartments.
- Insert the manual nozzle and detail nozzle onto each extension pipe.
- Put the round brush into the medium accessory compartments.
- Hook the floor nozzle into the parking position.
- Wrap the steam hose around the extension pipes and insert the steam pistol into the floor nozzle.
How to Use the Accessories
Important application instructions
Cleaning floor surfaces
It is recommended to sweep or vacuum the floor prior to using the steam cleaner. This way, the floor is already cleared of dirt/loose particles prior to the wet cleaning.
Refreshing textiles
Prior to treatment with the steam cleaner, always check the reaction of the textiles in an inconspicuous location: Steam at first, then let dry and then check for colour or shape changes.
Cleaning of Coated or Lacquered Surfaces When cleaning painted or plastic-coated surfaces, as found on kitchen and living room furniture, doors, parquet; wax, furniture polish, plastic surfaces or paint can come loose or stains can be created. When cleaning these surfaces, briefly steam a cloth and wipe the surfaces with it.
Caution
Never direct the steam jet at glued edges as the edge band may loosen. Do not use the steam cleaner on unsealed wooden or parquet floors.
Cleaning of Glass
In case of low outside temperatures, especially in the winter, warm up the window pane by slightly steaming the entire glass surface.
This will prevent tensions on the surface which might lead to glass breakage.
Then clean the window surface with the hand nozzle and attachment. Use a squeezegee to remove the water or wipe the surfaces dry.
Caution
Do not direct steam onto the sealed locations of the window frame to prevent damage.
Steam gun
You can use the steam gun without any additional accessories, e.g.:
to remove odours and wrinkles from hanging clothes by steaming them at a distance of 10 to 20 cm to remove dust from plants. Here, keep a distance of 20 - 40 cm - for moist dusting, by briefly steaming the cloth and wiping the furniture with it.
Detail nozzle
The closer this nozzle is to the contaminated area, the higher the cleaning effect, as the temperature and the steam are highest at the nozzle output. Especially suited for cleaning difficult access locations, joints, fittings, drains, sinks, toilets, blinds and heaters.
Heavy lime scale can be drenched in vinegar prior to steam-cleaning. Let the vinegar penetrate for about 5 minutes.
Round brush
The round brush can be installed onto the detail nozzle as an accessory. Attached brushes can therefore be used to remove heavy soiling.
Caution
Not suited for the cleaning of sensitive surfaces.
Illustration C
Attach the round brush to the detail nozzle.
Hand nozzle
Pull the terry cloth cover over the hand nozzle. Especially well-suited for small washable areas, shower stalls and mirrors.
Floor nozzle
Suited for all washable walls and floor coverings, e.g. stone floors, tiles and PVC floors.
Work slowly on very dirty surfaces to allow the steam to act on the dirt for a longer period of time.
Note: Detergent residue or care emulsions that are still present on the surfaces to be cleaned, can lead to smears when steam cleaned. However, these will disappear with repeated cleaning procedures.
Illustration
Attach the floor cloth to the floor nozzle.
1 Fold the floor cloth the long way and place the floor nozzle on top of it. 2 Open holding clamps. 3 Place the cloth ends into the openings. 4 Close the holding clamps.
Caution
Do not insert fingers between the clamps.
Parking the floor nozzle
Illustration H
During work breaks, hook the floor nozzle into the parking holder.
Textile care nozzle
To freshen up hanging textiles, such as jackets or curtains, by means of two functions:
- Defleecing garment using the thread lifter.
- Vaporizing and dewrinkling of textiles (also eliminates odours).
If you actuate the steam switch, steam is emitted. Direct the first burst of steam at a separate piece of cloth until the steam is emitted evenly.
Window wiper
Application:
- Windows, mirrors, glass surfaces on showers
- Other smooth surfaces
Perform a fat-dissolving basic cleaning using the hand nozzle and a terry cloth cover before using the window wiper. Apply steam to the glass surface from a distance of approximately 20 cm until the surface is moistened evenly. Then strip the glass surface in straight lines from the top to the bottom using the rubber lip of the window wiper. Wipe the rubber lip and the bottom edge of the window dry after each strip.
Steam iron
Danger
The steam pressure iron must not be used if it has been dropped, shows visible signs of damage, or if it leaks. The steam pressure iron is hot, and so is the steam jet! Point out to other people the possible risk of being scalded or burnt. Never direct the steam jet at people or animals (risk of scalding). Do not touch any electrical leads or combustible objects with the hot steam pressure iron.
Warning
The steam pressure iron and its connecting cable must be kept out of reach of children under the age of 8 during the heating and cooling down periods. The steam pressure iron must be used and placed on a stable surface.
Note: We recommend using the Kärcher ironing table with active steam extraction (2.884-933.0). This ironing table has been designed to match your new steam cleaner. It facilitates and, thus, accelerates the ironing process substantially. In any case, you should use an ironing table which is covered with a mesh-type underlay allowing the steam to pass through.
Tightly insert the steam plug of the iron into the appliance connector. The plug must click into place audibly. Make sure that there is fresh tap water in the boiler of the steam cleaner. Start up the steam cleaner according to the description. Wait until the steam cleaner is ready to use.
Steam ironing
All fabrics can be steam ironed. Delicate imprints or fabrics should be ironed on the reverse or according to the manufacturer's specifications.
Note: For these sensitive textiles, we recommend using the KÄRCHER non-stick ironing sole BE 6006 (Order no. 2.860-142.0).
Adjust the temperature control of the steam iron within the notched range (MAX).
As soon as the indicator lamp of the heater of the iron switches off, you can start ironing. Note: The sole plate must be hot to prevent the steam from condensing on the sole plate and dripping onto the garment to be ironed. Use the top or bottom steam switch.
- Steaming at intervals: Press the steam switch. Steam will be emitted while the switch is pressed.
- Continuous steaming: Pull the latch for the steam switch toward the rear until it locks in. Steam will escape continuously. To unlock, push the lock forward.
Direct the first burst of steam at the start of the ironing process or after ironing breaks at a separate piece of cloth until the steam is emitted evenly. You can hold the iron in an upright position to apply steam to curtains, dresses, etc.
Dry ironing
Note: Even if you iron without steam, there must be water in the boiler.
Adjust the temperature of the iron according to the garment you want to iron.
| • Synthetics |
| • Wool, silk |
| • Cotton, linen |
Note: Please observe the ironing and washing instructions in your garment.
As soon as the indicator lamp of the heater of the iron switches off, you can start ironing.
Maintenance and care
Danger
Always disconnect the mains plug and allow the steam cleaner to cool down before performing any maintenance work.
Rinsing the boiler
Rinse the steam cleaner boiler at the latest after 10 boiler fillings.
Fill the boiler with water and shake it strongly. This dissolves lime scaling residing on the boiler bottom. Empty water out.
Descaling the boiler
Note: If you always use usual commercial distilled water it is not necessary to descale the boiler.
As limescale builds up on the boiler walls, we recommend descaling the boiler at the following intervals (RF = reservoir fillings):
| Degree of hardness ° dH mmol/l RF | ||
| I soft 0-7 0-1,3 55 | ||
| II medium 7-14 1,3-2,5 45 | ||
| III hard 14-21 2,5-3,8 35 | ||
| IV very hard | >21 | >3,8 25 |
Note: Please contact your local water authority or water supply company to inquire about the hardness of your water.
Disconnect the mains plug from the socket. Allow the device to cool down. Remove the safety cap from the device. Completely empty the steam boiler to remove existing water (see fig.
Warning
Only use products approved by KÄRCHER to avoid any damage to the appliance.
Use the KÄRCHER decalcifier sticks (order no. 6.295-206) to decalcify the water. Please follow the dosing instructions on the packaging when using the decalcifying solution.
Caution
Use caution when filling and emptying the steam cleaner. The descaling solution can have an aggressive effect on delicate surfaces.
Pour the descaling solution into the boiler and allow it to react for approximately 8 hours.
Warning
Do not screw the safety lock on the appliance during the descaling process.
Do not use the steam cleaner as long as there is descaling agent in the boiler.
Completely empty the descaling solution after 8 hours. A small amount of the solution will remain in the boiler. Therefore, rinse the boiler two to three times with cold water to remove any residues of the descaler. Completely empty the steam boiler to remove existing water (see fig.
Care of the Accessories
Note: The floor cloth and the terry cloth cover have been pre-washed and can be used immediately for working with the steam cleaner.
You can wash dirty floorcloths and terry cloth covers in the washing machine at 60°C. Do not use a liquid softener as this would affect the ability of the cloths to pick up dirt. You may tumble dry the cloths.
Troubleshooting
Often, failures have simple causes and you can do the troubleshooting yourself using the following overview. If you are in doubt or if the failure is not listed here, please contact the authorized customer service.
Danger
Always disconnect the mains plug and allow the steam cleaner to cool down before performing any maintenance work.
Repair works may only be performed by the authorized customer service.
Long heating-up time
Steam boiler is decalcified
→ Descale the steam boiler.
No steam
No water in the steam boiler.
→ Turn off the appliance. See "Refilling Water" Page 9.
Steam lever cannot be pressed anymore
Steam switch is secured with the lock / childproof lock.
→ Move the selector switch for the steam volume to the front.
After breaks during ironing, water drops will come out of the steam pressure iron.
During longer breaks from ironing, the steam in the steam line can condense.
Direct the first burst of steam at a separate piece of cloth.
Steam iron "spits out" water!
Set the thermostat to level ... Rinse or decalcify the boiler of the steam cleaner.
High water output
Steam chamber too full
Press the steam gun until less water is emitted.
Steam boiler is decalcified
Descale the steam boiler.
Spare parts
Use only original KÄRCHER spare parts. You will find a list of spare parts at the end of these operating instructions.
Technical specifications
Electrical connection
Voltage 220-240
V
1~50/60 Hz
Protection class IP X4
Protective class I
Performance data
Heating output 1500 W
Heating output steam iron 750 W
Operating pressure max. 0.32 MPa
Heating time 8 minutes
Steam volume
Continuous steaming 40 g/min
Steam push max. 100 g/min
Dimensions
Boiler capacity 1.0 L
Length 380 mm
Width 254 mm
Height 260 mm
Weight (without accessories) 2.9 kg
Subject to technical modifications!
Table of contents
General instructions. EN .5
www.kaercher.com/REACH
www.kaercher.com/REACH
Scope of delivery
www.kaercher.com/REACH
Scope of delivery
No water in reservoir.
www.kaercher.com/REACH
www.kaercher.com/REACH
www.kaercher.com/REACH
Scope of delivery
Troubleshooting. NO. 13
Technical data NO.14
General notes
Dear customer,
www.kaercher.com/REACH
Scope of delivery
www.kaercher.com/REACH
Delivery
www.kaercher.com/REACH
Packaging
The product's packaging is shown on the packaging. Check the contents against the list.
If accessories are missing or have been damaged during transport, please contact your dealer.
Warranty
www.kaercher.com/REACH
Scope of delivery
Heater performance 1500 W
Heater performance Iron 750 W
Maximum operating pressure 0.32 MPa
Heating time 8 minutes
Steam quantity
Continuous steam spray 40 g/min
Steam boost max. 100 g/min
Dimensions
Steam boiler 1.0
Length 380 mm
Width 254 mm
Height 260 mm
Weight (excluding accessories) 2.9 kg
Use of accessories RU..10
Care and maintenance RU 13
Troubleshooting RU..14
Technical data RU 14
General instructions
Dear customer!
Before using your appliance for the first time, read this original instruction manual carefully. After that, act accordingly and keep it for future use by the next owner.
Intended use
Use the appliance for steam cleaning exclusively in the household.
The appliance is intended for steam cleaning. Cleaning can be carried out with the appropriate accessories described in the instruction manual. Detergents are not required. Follow the safety instructions.
Symbols in the instruction manual
Danger
Immediate danger that leads to severe injuries or death.
Warning
Danger of potentially dangerous situation that can lead to severe injuries or death.
Attention!
Danger of potentially dangerous situation that can lead to minor injuries or material damage.
Symbols on the device

Attention - danger of electric shock
Environmental protection
Packaging materials are recyclable. Therefore, do not dispose of the packaging with household waste, but take it to one of the collection points for recyclable materials.
Old devices contain valuable recyclable materials that must be taken to collection points for recyclable materials. Therefore, dispose of old devices through appropriate waste collection systems.
Instructions for use of components (REACH)
Current information on components is available on the website at the following address:
www.kaercher.com/REACH
Scope of delivery
The scope of delivery is indicated on the packaging. When unpacking the device, check the scope of delivery.
If accessories are missing or damage occurred during transport, notify the trading organization that sold the device.
(Address indicated on the back)
In each country, the warranty conditions issued by the authorized sales organization of our products in that country apply. We will repair any possible malfunctions of the device free of charge during the warranty period, if the cause is due to material defects or manufacturing errors. In the event of a claim during the warranty period, please contact the trade organization that sold you the device or the nearest authorized customer service center.
Safety devices
Attention!
Safety devices serve to protect the user. Modifying safety devices or disregarding them is not permitted.
Pressure regulator
The pressure regulator keeps the pressure in the steam boiler as constant as possible during operation. When the
maximum permissible pressure in the steam boiler is reached, the heating is switched off and switched on again when the pressure in the boiler drops as a result of steam removal.
Safety thermostat
In case the pressure regulator fails and the device overheats, the safety thermostat switches off the device. To replace the safety thermostat, please contact the authorized customer service center of KARCHER.
Safety fuse
The safety fuse protects the boiler from overpressure. In case of malfunction of the pressure regulator and the occurrence of excessive pressure in the boiler, the safety valve in the safety fuse opens and steam escapes through the fuse to the outside.
Before putting the device back into operation, contact the authorized customer service center of KARCHER.
Device description
This operating manual contains a description of the device with the maximum equipment. The equipment varies depending on the model (see packaging).
A1 Socket of the appliance with cover A2 Control lamp (green) - indicates presence of mains voltage A3 Control lamp - "Heating" (orange) A4 Switch "ON" A5 Switch "OFF" A6 Fuse
A7 Steam regulator A8 Steam hose attachment for iron A9 Power cord with plug A10 Working wheels (2 pcs) A11 Guide rail
B1 Steam iron B2 Unlock button B3 Steam quantity selector (with automatic shut-off)
B4 Steam supply handle B5 Steam supply hose B6 Steam supply hose
C1 Nozzle for cleaning C2 Round brush D1 Iron handle D2 Terry cloth cover
E1 Extension tubes (2 pcs) E2 Unlock button
F1 Nozzle for ironing F2 Clamp F3 Fabric for ironing G1 Nozzle for cleaning with textile insert H1 Attachment for window cleaning
Parameter
(Not included in delivery)
I1 Ironing angle adjustment under pressure I2 Steam switch (lower) I3 Control lamp - "Heating" (orange) I4 Steam switch (upper) I5 Steam switch lock I6 Temperature regulator I7 Steam hose
Brief instructions
→ See appliance illustrations on page 2
1 Unscrew the fuse and fill the appliance with distilled water of no more than 1 liter. 2 Screw the fuse back on. 3 Insert the steam hose plug into the appliance socket. 4 Insert the power plug into the electrical outlet.
Press the "ON" switch to turn on the appliance.
The water tank should not be filled with more than 1 liter of water.
Danger
When the appliance is in operation, there is a danger of scalding, as steam may spray out during filling! It is forbidden to add water, cleaning agents, or other additives!
Screw the filler cap back on tightly. Insert the power plug into the electrical outlet. Press the "On" switch to turn on the appliance. After about 8 minutes, the orange control lamp "Heating" will go out. The steam cleaner is ready for use.
Switching off the appliance
Press the "Off" switch to turn off the appliance. Pull the power plug out of the socket. Press the release button on the appliance and pull the plug out of the appliance.
Storing the appliance
Figure
Insert the extension hose into the large accessory holder. - Place the hand nozzle and the jet nozzle on the extension hose. Insert the round brush into the medium accessory holder. Insert the nozzle for the parking position. - Wrap the steam hose around the extension hoses and place the pistol hose in the nozzle for the floor.
Using accessories
Important instructions for use
Cleaning the floor surface
Before using the device, it is recommended to vacuum or sweep the floor. This way, the floor can be freed from dirt/loose particles before wet cleaning.
Refreshing textile items
Before treating with the steam cleaner, always check the colorfastness of textile items to steam. First, treat the item with steam, then let it dry, and finally check the colorfastness or any deformation.
Cleaning surfaces with coatings and varnished surfaces
When cleaning varnished surfaces or surfaces with a coating, for example, kitchen furniture and apartment furniture, doors, parquet, varnish, furniture polish, artificial coating or paint, they may dissolve or stains may appear on them. To carry out cleaning, slightly dampen a napkin and then wipe the listed surfaces.
Attention!
Do not direct steam at glued edges, as the covering may peel off. Do not use the device for cleaning wooden or glued floors without a coating.
Cleaning the steam cleaner
At low outside temperatures, first of all, warm up the window glass. Thanks to this, you will be able to easily treat the entire surface of the glass with steam. In this way, you will avoid surface tension that can lead to glass breakage.
Then the window surface must be wiped using a hand sprayer and a napkin. Water drops should be removed using the nozzle for windows or wipe the surface dry.
Attention!
Do not direct steam at the sealed areas near the window frame to prevent damage to it.
Steam iron
The steam iron can be used without accessories, for example, for:
- Removing creases and wrinkles on hanging items of clothing when treating from a distance of 10-20 cm.
- Removing dust from plants. Maintain a distance of 20-40 cm.
- Moistening upholstery fabric. Quickly treat the fabric with steam and wipe the furniture with it.
Fine jet nozzle
The higher the place, the higher the efficiency, since the highest temperature and output are ensured at the outlet of the nozzle.
Especially suitable for cleaning hard-to-reach places, joints, fittings, drains, sinks, toilets, and heating radiators. Strong limescale deposits can be removed by spraying with vinegar or lemon acid, letting it act for 5 minutes, and then cleaning with steam.
Round brush
The round brush can be installed on the nozzle of the fine jet as an accessory. Thanks to cleaning with the brush, it is possible to remove stubborn dirt more easily.
Attention!
Not intended for cleaning varnished surfaces.
Figure
→ Switch off the appliance. → See "Filling with water" page 9.
Steam lever cannot be pressed
The steam lever is locked by the child lock / protection against accidental activation. → Move the steam quantity switch to the forward position.
After pauses in ironing, water drips from the soleplate.
During longer pauses in the ironing process, steam may condense in the steam pipe. → Direct the first steam jet onto a cloth.
Attention, spitting water!
→ Set the temperature regulator to the ... position. → Clean the boiler with the descaling device or remove scale from it.
High water output
NapoboK KOTeJ CJnUkOM NOHbI
→ Press the steam pistol trigger until a little water comes out.
Scale has formed in the steam boiler.
→ Remove the scale from the steam boiler.
Spare parts
Use only original spare parts from KARCHER. A description of spare parts can be found in the operating instructions.
Technical data
Electrical parameters
Voltage 220-240 V 1~50/60 Hz
Protection class
Protection class
Performance data
Heating power 1500 W
Heating power 750 W
Max. operating pressure 0.32 MPa
Steam quantity
Heating time 40 g/min
Max. steam pressure 100 g/min
Dimensions
Boiler 1.0
Length 380 mm
Width 254 mm
Height 260 mm
Weight without accessories 2.9 kg
Manufacturer reserves the right to make technical changes.
Table of contents
www.kaercher.com/REACH
Scope of delivery
www.kaercher.com/REACH
Scope of delivery
www.kaercher.com/REACH
Scope of delivery
Dear customer,
www.kaercher.com/REACH
Items delivered
Continuous steam output 40 g/min
Steam burst max. 100 g/min
Dimensions
Boiler 1.0 l
Length 380 mm
Width 254 mm
Height 260 mm
www.kaercher.com/REACH
Scope of delivery
www.kaercher.com/REACH
Scope of delivery
The contents of your device's delivery are shown on the packaging. Before removing the device from the packaging, check that the contents are complete.
If accessories are missing or have been damaged during transport, please inform your dealer.
Warranty
In each country, the warranty conditions issued by our responsible distribution organization apply. We will rectify any faults on the device during the warranty period free of charge, provided the cause is a material or manufacturing defect. In the event of a warranty claim, please contact your dealer or the nearest authorized service center with your proof of purchase.
(You will find the address on the back)
Safety notes
Danger
Operation in areas at risk of explosion is prohibited. ■ When using the device in hazardous areas, the relevant safety regulations must be observed. Do not use the device in pools containing water. The device must not be used for cleaning electrical appliances and devices such as conventional and microwave ovens, extractor hoods, televisions, lamps, hair dryers, electric heaters, and similar. Before use, check that the device and accessories are in proper condition. If the condition is not perfect, they must not be used. In particular, check the power supply cable, safety lock, and steam hose. Have a damaged power supply cable replaced immediately by an authorized service center/electrician. Replace a damaged steam hose immediately. Only use a steam hose recommended by the manufacturer (catalog number see spare parts list). Never touch the mains plug and socket with wet hands. Do not clean objects containing substances harmful to health (e.g., asbestos) with steam. Never touch the steam jet at close range with your hand or direct it at people or animals (risk of burns).
Warning
The device may only be connected to an electrical connection installed by an electrician in accordance with IEC 60364. Connect the device only to alternating current. The voltage must match the rating plate on the device. In damp rooms, such as a bathroom, connect the device to sockets with a pre-connected residual current device (RCD). Unsuitable extension cables can be dangerous. Only use extension cables protected against water spray with a diameter of at least 3× 1mm2
The connection between the power cable and the extension cable must not lie in water. When replacing connections on the power supply or product cable, protection against splashing and mechanical strength must be ensured. The user must use the device in accordance with its intended purpose. They must take local conditions into account and, when working with the device, be careful of people in the vicinity. Children over 8 years of age and persons with reduced physical, sensory, or mental capabilities, or with limited experience and knowledge, may use this device only under supervision or if they have been instructed on how to use the device safely and understand the associated hazards. Children must not play with the device. Children must not perform maintenance and cleaning tasks without supervision. Never leave the device unattended while it is operating. Be careful when cleaning tiled walls with sockets.
Caution
Make sure that the mains or extension cable is not destroyed or damaged by stepping on it, crushing it, pulling it, or similar. Protect the mains cable from heat, oil, and sharp edges. Never pour solvents, liquids containing solvents, or undiluted acids (e.g., cleaning agents, gasoline, thinners, and acetone) into the water tank, as they can corrode the materials used in the device. The device must have a stable base. Use and store the device only as described or shown! Do not tighten the steam lever during operation. Protect the device from rain. Never store it outdoors.
Safety elements
Caution
The safety elements serve to protect the user and must not be modified or bypassed.
Pressure regulator
The pressure regulator maintains as consistent a pressure as possible in the boiler during operation. Heating is switched off when the maximum working pressure in the boiler is reached and switched on again when the pressure in the boiler drops due to steam consumption.
Safety thermostat
If the pressure regulator fails and the device overheats, the safety thermostat will switch off the device. For replacement of the safety thermostat, contact the responsible KARCHER service department.
Safety lock
The safety lock closes the boiler against excessive pressure increase. If the pressure regulator is defective and overpressure occurs in the boiler, the overpressure valve in the safety lock opens and steam escapes through the lock.
Before restarting the device, contact the responsible Karcher service department.
Device description
This operating manual describes the maximum equipment. Depending on the model, there may be differences in the scope of delivery (see packaging).
See figures on the fold-out page!
A1 Socket with cover A2 Indicator (green) - mains voltage present A3 Orange heater indicator A4 On switch A5 Off switch A6 Safety cap A7 Crevice nozzle holder A8 Floor nozzle storage holder A9 Power cord with plug A10 Wheels (2 pieces) A11 Steering caster B1 Steam gun B2 Unlock button
B3 Steam quantity selector switch (with child lock) B4 Steam lever B5 Steam hose B6 Steam connector C1 Narrow nozzle C2 Round brush D1 Hand nozzle D2 Terry cloth cover E1 Extension tubes (2 pieces) E2 Unlock button F1 Floor nozzle F2 Clamp F3 Floor cloth G1 Textile care nozzle H1 Window squeegee
Optional
(not included in delivery)
11 Steam iron under pressure 12 Lower steam switch 13 Orange heater indicator 14 Upper steam switch 15 Steam switch lock 16 Temperature regulator 17 Steam connector
Brief instructions
→ See figures on page 2
1 Unscrew the safety cap and pour a maximum of 1 liter of water into the steam cleaner. 2 Screw the safety cap back on. 3 Insert the steam connector into the device socket. 4 Plug the power plug into the socket. Press the on switch to turn on the device. Both indicators must light up. 5 Wait until the orange indicator light goes out. 6 Attach the accessory to the steam gun. The steam cleaner is ready for use.
Operation
Mounting accessories
Figure A
www.kaercher.com/REACH
Before transporting the device, please contact your dealer.
Transport
All countries in the EU have warranty conditions that are fulfilled by our authorized distributor. Any damage to your device will be repaired free of charge within the warranty period, if it concerns a defect in materials or manufacturing. In the warranty case, contact the distributor or the nearest authorized service, presenting the warranty card.
(Addresses and phone numbers on the last page)
Safety instructions
Danger
It is forbidden to work in potentially explosive atmospheres. When working with the device in dangerous zones, all safety measures must be observed. The device must not be used in bathtubs, showers, or basins containing water. The device must not be used for cleaning electric appliances, irons, kitchen absorbers, microwave ovens, televisions, lamps, dryers, electric heaters, etc. Before using the device and its accessories, they must be checked for proper condition. If the device is not in perfect condition, its use is prohibited. Check the power cord, the plug, and the steam hose regularly. If the power cord is damaged, it must be replaced immediately by an authorized service or specialist - electrician. If the steam hose is damaged, it must be replaced immediately. The hose is only available from the manufacturer's authorized steam hose (see part numbers in the spare parts list). Never touch the plug and the socket with wet hands. Do not inhale dust or particles that may contain hazardous substances (e.g., asbestos). The steam jet must not be directed at people or animals from close range or aimed at them (there is a risk of burns).
Warning
The device may only be connected to an electrical socket that has been installed by an electrician in accordance with IEC 60364. The device's service life depends on the current flow. The voltage must correspond to the voltage indicated on the device's rating plate.
When placing the device, e.g. in a bathroom, ensure that the device is connected to a socket with protective earth contact. It is dangerous to use extension cords. Use only extension cords with a minimum cross-section of 3x1 mm². The connection between the plug and the extension cord must not come into contact with water. When installing the device, the connection or extension cord must be protected from water splashes and mechanical damage. The user must use the device according to the instructions. They must comply with local regulations and be careful when working with the device. This device can be used by children aged 8 and above and by persons with reduced physical, sensory or mental capabilities or lack of experience and knowledge, if they are supervised or have been given instructions on the safe use of the device and the associated dangers. Children must not play with the device. Cleaning and maintenance by the user must not be carried out by children without supervision. During operation, the device must not be left unattended. Be careful when cleaning walls with sockets with contacts.
Caution
The device's cable or extension cord must not be bent, kinked, pulled, or otherwise damaged. Keep the cable away from heat, oil, and sharp edges. Never immerse the device in water or other liquids, and never use it near bathtubs, showers, or swimming pools. Do not use the device with wet hands or on wet surfaces.
The device must be placed on a stable surface. Operate or store the device only as described in the instructions. Do not block the ventilation openings during operation. Protect the device from moisture. Do not store it outdoors.
Safety devices
Caution
The safety devices serve to protect the user and must not be modified or bypassed.
Pressure regulator
During operation, the pressure regulator maintains the maximum constant pressure in the boiler. When the maximum working pressure is reached, the heating is switched off, and when the pressure in the boiler drops due to steam extraction, it switches on again.
Safety thermostat
If the pressure regulator fails, the safety thermostat switches off the device. To reset the safety thermostat, contact the KÄRCHER service department.
Safety valve
The safety valve protects the boiler against overpressure. If the pressure regulator is defective and overpressure occurs, the safety valve opens and releases the overpressure.
Before starting the device, contact the KÄRCHER service department.
Description of the device
The instructions for use describe the maximum equipment. The scope of delivery may vary depending on the model (including the same).
-> See the diagrams on the corresponding page!
A1 Contact of the device with the cable A2 Control lamp (green) - indicates the presence of voltage A3 Control lamp - heating (orange) A4 Switch - on A5 Switch - off A6 Front cover A7 Handle for carrying A8 Parking stand for the lower position A9 Cable holder with plug A10 Cold rollers (2 pcs.) A11 Water tank B1 Spray gun B2 Button for locking B3 Switch for selecting the amount of steam (with protection for the child) B4 Steam lever B5 Spray nozzle B6 Spray gun with nozzle C1 Steam hose C2 Steam nozzle D1 Steam hose D2 Pressure cover E1 Steam nozzle (2 pcs.) E2 Button for locking F1 Steam hose F2 Locking bracket F3 Steam nozzle G1 Textile hose H1 Adapter for accessories
Optional
(Not included in the scope of delivery)
11 Steam hose with steam nozzle 12 Steam switch for steam (down) 13 Control lamp - heating (orange) 14 Steam switch for steam (up) 15 Locking of the steam switch for steam 16 Thermostat 17 Spray gun with nozzle
Brief instructions
-> See the illustrations on page 2
1 Unfold the front cover and fill the spray gun with max. 1 liter of water. 2 Close the front cover. 3 The spray gun must be placed in the contact device. 4 Turn on the device.
Press the button - on, to turn on the device.
The control lamp must light up.
5 Wait until the orange control lamp goes out. 6 The spray gun can be connected to the spray gun.
The spray gun device is ready for operation.
Operation
Mounting of accessories
→ Figure A
Place the steam iron on the transport cart and secure it.
→ Open the cap on the water tank. → Insert the steam iron into the water tank. When doing this, the click of the iron should be heard.
To remove: press the cap on the water tank down and pull the steam iron out of the tank.
→ Figure B
Attach the necessary accessories (see chapter "Using the accessories") to the steam iron. For the currently open opening, the accessory is placed on the
steam iron and turned until the locking button of the steam iron engages.
→ Figure C
If necessary, use the extension hoses. For now, connect the extension hose to the steam iron. Place the required accessory on the free end of the extension hose.
Adjusting the amount of steam
The amount of steam emitted is adjusted with the steam quantity selector. The selector has three positions:

Maximum amount of steam

Minimum amount of steam

No steam - child safety
Note: In this position, the steam function cannot be activated.
The appliance has been designed for the required amount of steam. For the steam to be released evenly, first point the steam nozzle away from any surface until the steam is released evenly.
Note: Heating of the steam appliance is indicated by the orange control lamp - heating.
Filling with water
It is necessary to check the water level in the boiler if during operation the amount of steam decreases and stops coming out evenly.
Note: The safety cap cannot be opened while the appliance is hot or still under pressure.
Press the steam button until steam stops coming out. The boiler of the appliance is now without pressure. → Press the ON/OFF button to switch off the appliance. → Remove the plug from the socket. → The safety cap can be unscrewed from the appliance.
Danger
When opening the safety cap, a large amount of steam may escape. Open the safety cap carefully; there is a risk of scalding.
Pour a maximum of 1 liter of tap water into the boiler.
Danger
When the boiler is hot, there is a risk of scalding, as the water may splash back when filling! Do not add detergents or other additives!
The safety cap must be screwed back on properly. Insert the plug into the socket. → Press the ON/OFF button to switch on the appliance. → Wait until the orange control lamp goes out - heating. The steam appliance is ready for operation.
Switching off the appliance
Press the ON/OFF button to switch off the appliance. → Remove the plug from the socket. → Press the button on the socket of the appliance and pull out the steam nozzle from the socket.
Storing the appliance
→ Figure
- Place the appliance in the correct position for connection.
- Place the hose and the hose nozzle in the correct position.
- Place the nozzle in the middle position for connection. Insert the plug into the parking position. Wind the cord around the correct position and place the nozzle in the parking position.
Use of the accessories
Important instructions for use
Cleaning the floor surfaces
It is recommended to vacuum before using the steam mop to remove dust. This way, before wet cleaning, the surfaces are freed from dust/dirt particles.
Ironing textiles
Before treating with the steam mop, check the resistance of the textile fabrics in a hidden place: first steam, then let it dry and check for changes in color and shape.
Cleaning surfaces with coating or varnish
When cleaning varnished or coated surfaces, such as kitchen and steel furniture, doors, parquet, wax, furniture varnish, artificial coating or tiles, stains may form. When cleaning these surfaces, use a dry cloth and wipe the surfaces with it.
Attention
Do not point the steam at green plants, as they may be damaged. Do not use the device for cleaning unsealed wooden floors or laminate.
Cleaning glass
At low ambient temperatures, fill the glass with lukewarm water before spraying the glass surface. This will relieve surface tension that could cause the glass to crack.
First clean the surface of the glass with a cloth. To remove water, use a squeegee or wipe the surface dry.
Caution
Do not point the spray at the sealed areas of the glass frame, so as not to damage them.
Spray gun
You can use the spray gun without accessories, for example:
To remove stubborn dirt from surfaces, spray them from a distance of 10-20 cm. To clean dust from flowers, keep a distance of 20-40 cm. For gentle dusting, briefly spray the air and then wipe the furniture with a cloth.
Jet nozzle
The closer the jet is to the surface, the higher the cleaning effect, as the water temperature is highest at the nozzle outlet. Especially practical for cleaning hard-to-reach places, such as corners, fittings, channels, sinks, toilets, ovens, or radiators. Before cleaning, spray the surface with detergent and let it work for a few minutes, then clean it.
Brush nozzle
The brush nozzle can be mounted as an accessory to the jet nozzle. Thanks to the brushes, stubborn dirt can be easily removed.
Caution
Not suitable for cleaning delicate surfaces.
→ Figure
Attach the brush nozzle to the jet nozzle.
The surface of the nozzle is hot. Be careful not to touch the surface, especially during operation.
Nozzle
For cleaning the nozzle, use a soft cloth or brush. Do not use abrasive cleaners or solvents. Clean the surface regularly to ensure proper operation.
Note: Keep away from cleaning agents or solvents that may damage the surface. During cleaning, they may cause discoloration or damage.
→ Figure G
Close the nozzle cap for storage.
1. Press the cap down until it clicks into place. 2. Open the locking clips. 3. Insert the cap into the opening. 4. Close the locking clips.
Warning
Do not place your fingers between the clips.
Parking the sprayer
→ Figure H
Before starting work, hang the sprayer on the parking hook.
Text nozzle (I1)
Use:
The appliance is intended for ironing textiles, e.g. with the steam ironing function:
-Ironing with steam. Ironing with water spray on the textile material (moistening).
When the steam function is activated, the steam is released first from the upper part, so that the iron is evenly filled with steam.
Spray nozzle
Use:
- Spray, ironed surfaces of the ironing board - other smooth surfaces
→Pre-spray the laundry with the spray nozzle. Then iron the main ironing for removing wrinkles with the steam function and with the ironing board. →Iron the ironed surfaces evenly from a distance of about 20 cm. →With the spray nozzle, perform ironing movements over the ironing board surface. After each ironing movement, wipe with a cloth and lift the iron.
Iron
Safety
The steam iron must not be used if it has been dropped, if there are visible damages or if it is leaking. The steam iron and its cord are dangerous! Pay attention to other possible dangers from steam. Never point the steam jet at people or animals (danger of burns). With the steam iron, do not touch electrical cables or flammable objects.
△Warning
The ironing or cooling iron and its accessories and cables must be kept out of reach of children under 8 years. The steam iron must be used and placed on a stable surface.
Note: We recommend using the KARCHER ironing board with active steam extraction (2.884-933.0). This ironing board is optimally matched to your device. It accelerates and significantly simplifies the ironing process. In case of doubt, use an ironing board with steam permeability, a solid base.
→Place the steam ironing device well on the contact device. When doing so, it must be fixed on the iron. →Make sure that the steam ironing device has clean water from the water supply. →The steam ironing device is protected in accordance with the description. →Pull out the plug until the steam ironing device is ready for operation.
Steam ironing
The textiles must be ironed on the steam setting. Ironing and steaming of textiles must be done from the reverse side according to the manufacturer's instructions.
Note: For optimal ironing results, we recommend using the KARCHER BE 6006 ironing board (order no. 2.860-142.0).
Set the temperature regulator on the iron to the marked range (***/MAX). The control lamp for ironing lights up; you can start ironing.
Note: The ironing board must be heat-resistant to prevent damage from steam and to avoid dripping on the floor.
Steam burst function for vertical steam or horizontal steam.
- Steam burst at intervals: Press the steam burst button. Steam comes out as long as the button is pressed.
- Continuous steam: Slide the steam burst button forward until it locks. Steam comes out continuously. To unlock, press it forward again. For the first steam emission at the start of ironing or after a pause in ironing, direct the steam at a cloth until it comes out evenly. For treating fabrics, etc., you can hold the iron vertically.
Dry ironing
Note: For dry ironing, the water tank must be empty.
Set the temperature regulator on the iron according to the type of fabric.
www.kaercher.com/REACH
Mounting kit
Mounting additional equipment
Drawing A
www.kaercher.com/REACH
Mounting kit
www.kaercher.com/REACH
Scope of delivery
General notes. UK...5
Safety instructions UK...6
Description of the device UK...7
Operating instructions UK...8
Operation UK...8
Use of the device UK...10
Maintenance and care
Troubleshooting UK.13
General instructions
Dear customer!

Before first use of the device, read
the original operating instructions, act in accordance with them and keep them for further use or for the next owner.
Proper use
Use the device only for its intended purpose in the household.
The device is intended for ironing. Ironing can be carried out with the use of the appropriate attachment, described in the operating instructions. Other means are not necessary. Follow the safety instructions.
Symbols in the manual
Danger!
Indicates an imminent dangerous situation that will lead to serious injury or death.
Warning
Indicates a potentially dangerous situation that may lead to serious injury or death.
Caution!
In the event of a dangerous situation that could lead to minor injuries or material damage.
Symbols on the device

Pair
WARNING - Risk of injury!
Protection of the environment

Packaging materials can be recycled for reuse.
Please do not dispose of packaging materials with household waste; dispose of them for recycling.

Old devices contain valuable materials that can be
reused. Therefore,
please dispose of old devices using special collection systems for waste.
Instructions for use of components (REACH)
Current information on components is available on the website at: www.kaercher.com/REACH
Scope of delivery
The scope of delivery is indicated on the packaging. Check the contents when unpacking the device.
In case of missing accessories or transport damage, please contact the sales organization that sold the device.
Tapaantia
YKOxHnI KpaHnI DIOb yMOBn rapaHTi, HaDaHOI BiIDNOBIDHOO φipMOHO-npoDaUcEm. HenolaKn Bpo60ti npucTPOu MN ycBaEMo 6e3PNaTHo npotrOM TepMHy dII rapaHTi, RAKso BOHn BnKlnKaHI 6pakOM MaTepiany uN NOMNKAMN BnROTOBNeHHa. Y BnPaKy UnHHocTi rapaHTi 3BepITbCra DO npoDaBca YN B HaBnXnAaABTopn3OBaHm cepBicHni CeHTp 3 DokymeHTaJIbHm NiTBePdKeHHaM NOKyn.
(Adpecn nB. Ha 3Bopoti)
IpaBnla 6e3neKn
06epeXHo!
Poboma y eubyxohe6e3neuHx ymoaX He do380nembcra. Ipu bukopucmaHH npucmpo 8 Hebe3neuHux 3ohax cnid dompumyamuc a idnoeiHux npaeun mexhiku 6e3neku. Eknyamaia npucmpo 6aceuHi, uO Micmmb body, 3a6oponeHa. Ppucmpiu He moXHa buKOpucmoeyamu dna yUeHnE eKeKmpuHux npucmpoie, HappuKaad, dyxOboK, bumxHux Habisie, MikpoxBunBoux neeu, meeXiOpie, Jamn, fHeie, eKeKmpuHux obipieaie mouo. Ipepe bukopucmaHHm nepeepme cnpaBnmb npucmpo ma npunalexHocme. Kaoo o6naDHaHH 3haxodimbcy y Hebe3doaHHOMy cmaHi, u0zo He moXHa buKOpucmoByamu. Oocbluo pemelbHo nepeepme Kaebb MepexHo2o XueNeHH, 3anobixHy npobky ma unahn noadaqui napu. UWKoOKeHu Ka6eNb MepexHo2O KU6JIeHnI NOuHEn 6yMu HeaUHO 3AmHeHu yNoBHOaXeHOcIyKbOIO cepEicHO2O 0cCny2OeyBaHH/φaxiueM- eJekmpukom. Uwkodxehu wnaHa noda npu ndrae Heaui 3amH. Do3bOJembc EukopucmaHH minbku wnaHie nodaip npu, peKoMeHDoBaHX bupobHukom (Home pIra 3amoJIeHNr duB.y cnuCKy 3anachux yacmuH). Hikou He mopkaumecb MepexHo2o umekepy ma po3emku BOLOUMi pykAmu. He yucmum npo npedmemu, oO micmpeoBuHu, wkiDnbi dna 3doopoe (HanpuKnaad, a3becm). YxodHomy pa3i He mopkaumecc cmpymennapu pyko0 3 6nuzko i edmaH ma He HappaBnaume ii Ha IIOdeu ma meapun (He6e3neKa onikie npoio).
△Nonepedxehn
The device must be installed in accordance with the electrical installation rules, and the installation must be carried out by an electrician in accordance with IEC 60364. The device must be installed according to the current regulations. The voltage must correspond to the data indicated on the device's rating plate. In all rooms, for example, in wet rooms, connect the device only to sockets with a protective contact switch type FI. Improper use must be avoided. Use only splash-proof connection cables with a cross-section of at least 3x1 mm². The connection cable and extension cable must not be laid in water. When replacing fuses or on the connection cable or extension cable, splash-proof mechanical protection must be ensured. The user must use the device in accordance with the instructions. They must take into account the local conditions and pay attention to third parties while working with the device. This device may be used by children aged 8 and above and by persons with reduced physical, sensory or mental capabilities, or lack of experience and knowledge, if they are supervised or have been instructed on the safe use of the device and understand the resulting dangers. Children must not play with the device. Cleaning and user maintenance must not be performed by children without supervision. The device must not be operated without supervision. Safety when cleaning individual parts with electrical sockets.
Make sure that the connection cable or extension cable cannot be damaged by being stepped on, crushed, or subjected to other mechanical stress. Protect the connection cable from heat, oil, and sharp edges. Never use extension cords, devices containing extension cords, or uncapped acids (e.g., battery acid, acids, cleaning agents, or solvents) and do not immerse them in water, as they can aggressively affect the materials used in the device. ■ The device must be placed on a stable surface. Operate and store the device in accordance with the description and instructions! During operation, do not allow the steam supply to be blocked. Protect the device from moisture. Do not store it outdoors.
Device protection
The device protection serves to protect the user. The use of protective devices other than those intended is not permitted.
Pressure regulator
The pressure regulator maintains the maximum permissible pressure in the reservoir during operation. Heating switches off when the maximum working pressure in the reservoir is reached, and when the pressure in the reservoir drops due to steam withdrawal, heating switches on again.
Safety thermostat
If the regulator fails and the pressure continues to rise, the device switches off via the safety thermostat. Contact the KARCHER customer service department to ensure the safety thermostats are properly installed.
Fuse
The safety plug closes the steam boiler reservoir. In case the pressure regulator is damaged and excessive pressure builds up in the reservoir, the safety plug opens to release steam.
Please contact the repair service of the KARCHER company's customer service department.
Description of the device
This operating manual describes the device with the maximum equipment. The equipment varies depending on the model (see markings).
Illustrations on the fold-out page!
A1 Mains socket with cover A2 Control lamp (green) - mains voltage present A3 Control lamp - "Heating" (orange) A4 Switch "On" A5 Switch "Off" A6 Safety plug A7 Accessory holder A8 Parking bracket for accessories A9 Mains cable with mains plug A10 Working wheels (2 pieces) A11 Steering roller B1 Steam nozzle B2 Unlock button B3 Steam quantity selector (with child lock) B4 Steam lever B5 Steam hose B6 Steam trigger C1 Spot nozzle C2 Round brush D1 Hand nozzle D2 Cover made of fleece E1 Extension tubes (2 pieces) E2 Unlock button F1 Floor nozzle F2 Catch F3 Cloth for floor cleaning G1 Nozzle for cleaning textiles H1 Attachment for cleaning
Description
(Not included in delivery)
I1 Iron for pressing with steam I2 Steam button (lower) I3 Control lamp - "Heating" (orange) I4 Steam button (upper) I5 Locking button for steam I6 Temperature regulator I7 Steam trigger
Operating manual
→See illustrations on page 2
1 Unscrew the safety plug and fill the steam cleaner reservoir with water, no more than 1 liter. 2 Screw the safety plug back on. 3 Insert the steam plug into the socket of the device. 4 Insert the mains plug into the mains socket. Press the "On" switch to switch on the device. Both control lamps light up. 5 Wait until the orange control lamp goes out. 6 Attach the accessory to the steam nozzle. The steam separator is ready for operation.
Operation
Install the device
Small
Install and secure the rollers and transport wheels.
Open the socket cover of the device. The plug must be inserted into the socket of the device with the housing. In this case, the plug must be secured with a click.
Removal: Press the socket cover of the device down and pull the plug out of the device socket.
Small
Remove the necessary attachments from the steam iron and attach them to the steam iron as needed, so that the steam iron is secured.
→ Small
If necessary, use the filling hoses. Connect one or two filling hoses to the steam iron. Attach the necessary attachments to the free end of the filling hose.
Removing attachments
Danger!
When removing attachments from the device, hot water may escape! Do not remove attachments while steam is being emitted - risk of burns!
→ Turn the steam control to the off position (no steam) small.
To remove attachments, press the release button and detach the parts one by one.
Filling
Note: if using standard distilled water, there is no need to empty the reservoir.
yes!
Use condensed milk for business!
Do not add other means or other additives!
→ Drain the safety valve from the device. → When the device is fully switched on, it is in the presence (see figure). The valve should not be more than 1 liter of water outlet.
Note: Using hot water speeds up the filling process.
Screw the safety valve back on tightly.
Device operation
→ The device must be installed on a stable base.
yeaaa!
Carrying the device during operation is prohibited.
Insert the plug into the socket of the device. → Press the "On" button to switch on the device. The control lamp lights up.
yeaaa!
Switch on the device only when there is water in the tank. Otherwise, you may damage the device (see section "Troubleshooting").
→ Approximately after 8 minutes, the control lamp "Heating" goes out. The steam separator is ready for operation.
Steam quantity regulator
With the help of the steam quantity regulator, the amount of steam that is supplied is regulated. The regulator has the following positions:

Maximum amount of steam

Limited amount of steam

No steam (protection against activation). Note: The appliance is ready for operation only when the steam is not needed.
Set the steam regulator to the required amount of steam. Press the steam button, while directing the steam nozzle at the fabric, until the steam is released evenly.
Note: When the appliance is heated, the soleplate may emit steam during use. The heating indicator lamp "Heating" will light up.
Filling with water
You can add water to the tank when the amount of steam decreases during operation and the appliance is not working.
Note: The filling opening is not covered while the appliance is heating up.
Press the steam button until steam is released. Now the appliance is ready for use. Press the "ON/OFF" button to turn off the appliance. Unplug the power cord from the outlet. Open the filling opening of the appliance.
Caution!
When opening the filling opening, residual steam may escape. Open the filling opening carefully to avoid burns.
Fill the tank with no more than 1 liter of distilled water.
Caution!
When the appliance is heated, there is a risk of burns because water may splash during filling! Do not add any substances or additives to the water!
Close the filling opening tightly. Plug the power cord into the outlet. Press the "ON/OFF" button to turn on the appliance. After about 8 minutes, the heating indicator lamp "Heating" will go out. The steam separator is ready for operation.
Press the "ON" button to turn on the device. Insert the plug into the socket. Press the socket cover of the device down and insert the power plug into the socket.
Storage of the device
Small
Insert the flexible hose into the holder for large accessories. Attach the nozzle and the nozzle for the steam jet to the flexible hose. Insert the round brush into the holder for medium accessories. Insert the nozzle into the parking bracket. Wrap the steam hose around the flexible hoses and place the steam pistol in the nozzle for the floor.
Using the device
Important instructions for use
Select the surface to be treated
Before using the device for steaming, it is recommended to vacuum or wipe the floor. In this way, you can remove loose/unattached particles before carrying out wet cleaning.
Cleaning textile products
Before treating with the device for steaming, check the resistance of textile products to steam. First, treat a small area, then inspect it and, finally, check the resistance of the fabric and the presence of deformations.
Cleaning surfaces with coatings and varnished surfaces
On varnished surfaces or surfaces with coatings, for example, kitchen furniture and furniture for apartments, doors, parquet, wax, furniture polish, varnish coatings or paint may become dull or stains may appear on them. To clean them, slightly dampen a cloth and then wipe the listed surfaces with it.
Do not direct steam at glued edges, as the cladding may peel off. Do not use the device for steaming untreated wooden or parquet floors.
At high temperatures, pressure, humidity, and drafts, cleaning may be difficult. Thanks to this, you will be able to easily remove dirt from the entire surface of the glass. In this way, you can avoid surface tension that can lead to glass cracking.
Clean the glass surface with a hand brush and a cloth. To remove dirt, use a scraper for glass or a dry cloth to wipe the surface.
Do not spray on electrical parts or the appliance itself to avoid damage.
Steam gun
The steam gun can be used without accessories, for example:
- Removing odors and stains on vertical objects when treating from a distance of 10-20 cm. Removing dirt from fabrics. Maintain a distance of 20-40 cm. For delicate fabrics. Treat the fabric with steam and wipe with a cloth.
Nozzle for precise jet
The more concentrated the dirt, the higher the cleaning effect, because the steam temperature and output are ensured at the nozzle outlet. It is especially suitable for cleaning hard-to-reach places, glass, fittings, drains, sinks, toilets, showers, or radiators. Before cleaning with steam, spray the surface with water or lemon acid, wait 5 minutes, and then treat with steam.
Round brush
The round brush can be installed on the nozzle of the steam gun. Thanks to cleaning with this brush, you can easily remove stubborn dirt.
Not intended for cleaning delicate surfaces.
→ Manual
Attach the round brush to the short stream nozzle.
Brush nozzle
Press the brush nozzle onto the gun until it clicks into place. Particularly suitable for small surfaces that are difficult to access, such as cabinet doors and mirrors.
Floor nozzle
Suitable for all smooth wall and floor coverings, such as tiles, stone floors, plaster and parquet. On heavily soiled surfaces, work slowly to increase the cleaning duration.
Note: Residues of cleaning agents that remain on the surface being cleaned may foam when the steam is applied, and these can be removed with
multi-stage cleaning.
Small nozzle
Close the steam lever for the small nozzle and the round brush.
1 Place the small nozzle over the steam lever and insert the round brush into it. 2 Open the catches. 3 Insert the cloth into the opening. 4 Close the catches.
Caution!
Do not insert fingers between the catches.
Parking the floor nozzle
Small nozzle
During work breaks, insert the floor nozzle into the parking bracket.
Conno dna ouuueHHa TeKCTNIO (I1)
3actocyBaHHa:
Дя OCBIXeHHЯ TeKCTnIIO, IIO BNCITb, HapnknaπiJxak a6o rapdHn, 3a DOnOMOrO IO DBOX yHKci:
OuHnHn npedmetib OJry 3a DOnOMOrOIO nIDHrTTHHTOK. -Прогаювання ta po3rnaJxeHHЯ TeKCTnIIO (Takox BuaJaE 3anaxN).
Y pa3i npBBeHnB B dIO BaxKeI NOaCi napu BxOHTb npa. 3aBXdN cNoaTky cnpaMOByTe HacaKHy Ha TKAHNHy, NOKn npa He 6yde BxODITn pIBHomipHo.
HacaKa dna MmTTB BIKOH
3aTocyBaHHa:
-BiKaHa,Дзеркалa -CKnIyUoBiKa6iH -iHwI rnaKni nobepxHi
→Передпершим очшиеним 3a ДОПOMORoю HacaДКИ ДЯ MNTТя BiKOH npOBeДITb OCHOВHE КИРОЗИнHe Oчшиения 3a ДОПOMORoю рЧHOrO conla Ta NOKPITTЯ 3 eNoHxky. PibHomipHo 6p0biT npoO cknany noBepxHIO Ha BiDcTaHI npu6n3HO 20 cm. →ПрOTPIb cKЯну NOBepxHIO 3a ДОПOMOROу ГМОВоI ГБКи BIKOHHO COnIIa CMyra 3a CMyROIO,pyXaIOUncb 3BepxY BHN3.ПICЯ KOKHOI CMyxKKN ПpoTnpaTe HAcyxo ГМОВу ГБКу Ta HIXKHIO qaCTInHy BIKHa rAnHypKOIO.
Ppaca
△ObepeKHo!
3a6opohembckopucmybamucn npacko dna npacyeaHna pOIO niD muckom nicna II naIDHH, 3a HaeHocmi RHex 306HiuHix O3HaK NowkoDkeHH a6o HezepMemuH02 pe3epuyapy. Tapya npacka dny npacyeaHna npo nid muckom i zapyuu cmpymnb nap! Ppoinphiopmyamuihux ocio npo moxniuey Hebe3neky oniky. He cnpmaoyama npoebucmpymnb Ha IIOdeu abo mbaupn (Hebe3neka onikie npro). Hmopkamuczapraquo npacko0eekmpuunx dpomie abo zoipouux npedmemie.
△Nonepedxehn
Iid yac HaepiBaHHa 60 oxonodKyaBnna npacka dnn npacyeaHnnapo nId muckom imepexHuwyp noBuHni 3haxodumucra 3a Mexamu docxHocmi dimeu monodwe 8 pokie. Ipoobimb npacybaHna cmiukiu noeepxhi. Picnpaobomu He 3a6yaeume eumukamu npacky.
Ppumimka: Mu peKOMeHoycMo BukOpucmoyeamu cmin dny npacyeaHnna bupo6huuemea komnaii KARCHER 3 akmueHUM biOcMOKmyeAHnnapu. (2.884-933.0). LcE cmin dny npacyeaHnna onmmalbHo nixodum do npudbaHOZo BamnpucmpoIO.BIN 3NaUHO nonezummbma npuweudwumb npouec npacyeaHnna. Bapmo oob'3koBO buKOpucmoyeamu anadunbHu cmin 3 napo npohkaioyOrpamacmoIO ochoeIO.
→ Before inserting the plug into the socket, make sure that the plug is properly inserted into the socket. Make sure that the device is turned off before inserting the plug. → The steam generator should be used in accordance with the instructions. → Wait until the device is ready for operation.
Ironing with steam
All fabrics can be ironed with steam. Delicate fabrics or printed materials should be ironed from the reverse side or according to the manufacturer's instructions.
Tip: For ironing delicate fabrics, it is recommended to use the anti-scale cartridge KARCHER BE 6006 (order no. 2.860-142.0).
Set the steam temperature regulator to the marked area (***/MAX). → Ironing can be started immediately after the control indicator for iron heating goes out. Note: The iron should be held horizontally so that water does not condense on the ironing board and does not drip onto the ironed fabric.
→ Press the upper or lower steam buttons. Steam interval: Press the steam button. Steam comes out as long as the button is pressed.
- Steam duration:
Lock the steam button to the rear for continuous steam. Steam comes out in a continuous stream. To stop, move the lock to the front position.
→ Before starting to iron or after a pause, direct the steam onto a cloth until the steam comes out evenly. → For vertical steaming, you can hold the iron vertically.
Dry ironing
Note: When dry ironing, water must also be in the tank.
Set the iron temperature regulator according to the material.
Synthetics
Cotton, linen
Tip: Pay attention to the ironing and care instructions on the garment.
The device can be switched on immediately after the heating control indicator lights up.
Maintenance and servicing
Warning!
Maintenance work may only be carried out when the device is disconnected from the power supply and has cooled down.
Cleaning the reservoir
Clean the steam separator reservoir at least every 10th time the reservoir is filled.
Fill the reservoir with water and shake it vigorously. Due to the movement of the water, limescale deposits on the bottom of the reservoir are loosened. Then pour out the water.
Removing limescale from the reservoir
Note: If you use distilled water regularly, there is no need to remove limescale from the reservoir. If limescale has formed on the walls of the reservoir, it is recommended to remove it at the following intervals (depending on the frequency of filling the reservoir with water):
No water flows through the boiler
Switch off the device. → "Filling with water".
The steam button cannot be pressed
There are hazardous materials inside. The contents and their packaging must be disposed of as hazardous waste.
There are hazardous materials in the batteries. Contact
Used batteries and old devices must be disposed of separately from household waste.
Regulations for hazardous substances (REACH)
You will find information on the substances contained in the product on the following website:
www.kaercher.com/REACH
Warranty
The warranty conditions issued by our responsible sales company apply in each country. We will rectify potential malfunctions free of charge within the warranty period, provided that such malfunction is caused by a material or manufacturing defect. In the event of a warranty claim, please contact your dealer or the nearest authorized customer service center.
Please dispose of the device in accordance with the applicable regulations.
The following spare parts are available:
Example: 30190
3 Disposed of 0 Disposed of version 1 Disposed of opening 9 Disposed of additional equipment 0 Disposed of year, serial number
The last digit of the serial number 30190 is 09/(2)013, which indicates the year of manufacture.
Spare parts included in the scope of delivery
You will benefit from this warranty. Please note that the warranty does not cover parts subject to wear and tear or consumables.
If certain parts are missing or if there are any malfunctions during operation, please contact the dealer from whom you purchased the device.
(Provided upon request)
Safety instructions
△ Kayin
Kapbiny kayni bap jepnepde naudanaHyra mbiubim canbiHaDbI. Kayinmi aumakma 6yubimdoi KOndaHy Ke3iHde muicmi kayinci3diK epexeIepin cakmay kaxem. Cyblbapxy3y bacceuHihde annapammbi kondaanhaHbi3. New, acxha copfblwbl, warbH monkbihbI neu, meedudap, qeh, 3neKmp Kb3dbipfbwbl cuKmbI 3neKmpni acnanmapdbI ma3anay yuiH 6yubIMdbI kOndaH6aHbI3. I NaudanaHy andbihda 6yubIM MeH Xa6dbikmapdbIH dypbicmbfbiH meKcepH3. Eeep Kbl3Memi oudaiau 6oImaca, kondahyra mbiubim caNbHaDbI. 3neKmp mokka Kocy
Ka6eIepiH, Kayinc3diK KaIIaKwacbIH XaHe 6y bepy wnaIcih epeKwe meKcepydeH omKi3iHi3.
B3bnn KaH K6eepin depeymypde ocbl XyMbicmap ywiH pyKcambl6ap apHaubI MaMaHdap apKbInblaybcmbipmbn anybiHbi3 muic. Bv3bInbn KaIraH KOrapbl KbIcBIMObl 6y 6epy wnaHicin depey mypde aybcmbpln anybiHbi3 muic. BvBIM wbrapyybi mapanbiHah pyKcam emiinaen rana 6y 6epy wnaHici KondaHbinybl muic. KabebawacbI MeH 3neKmp po3emkacbIH ewkaaah bInraDbI KOJMeH ycmamaHbI He mypmeHi3. KypambHda kayinmi 3ammapbl 6ap 6yubIMdapdb6ymeH ma3aJamaHbI3 (MbicaJI, mackeHdip). KakbIH apaJIbIKmaH 6y aftbIHbHa KOJIbIHbI3dbI muiz3beHiz3 XHe OHbl adamdap Hemece Kahyapnapra kapau 6aftbimmamaHbI3 (bcmbk 6ydbH Kyudipy kayni 6ap).
△CaKaMaHdbipy
BiyubimdbmeK 3neKmpwihIIEC 60364 cmahdapmbiHa caukec KOHdbipraH 3neKmp poemKacbiHa Kocyra 6oana. 5yubimobmeKKaHaaybcnablmokka KocbHb3.ToKkepyi6yubIMhInmypi 6eniciHdezi Kepceminaen Kepheyine caukec bonybl muic. blranda6emenepe,mbicnbl, baHa 6eMeepiHe,6yubmbl aphaBfI kayinci3diK axbipambin- KockblwbiMeH poemkara koc muic. Kapamcbi3 3neKmpnik y3apmy Kaebbdepin Kondany Kayinmi 6onybIMyMKH. 3apmkbiw pemihde mek cy 6ypkiHdiineh caKaummbIH KeMHDe 3x 1 MM2 KeIDeHeH Kumalbl 3neKmpnik Kaebbdi naDaanHbIbI3. 3neKmp awacbI MeH y3apmKblu Xanfaybl cyda xamnay kepek. 3neKmp mokka Kocy ka6eni Hemece y3apmkbIwmaIg KaIray MyfmaIapbIH aIIMacmbipy Ke3iHde 6ypkiHdiDeh caKmaIybiH XHe
MexaHukalbIK bepikmikmi KaMmaMaCbI3 emy kaxem.
■ NaudanaHywbl 6yubIMdbI HbicaHbHa 6aunahbcmbI KOndaHy kepeK. 6yubIMMeH Kymbic icmey Ke3iHde xepziniikmi epeKweiikmepze Ha3ap aydapybl KepeK, KaKBHDa KypaeH adamdapdbI eckepyikkem. BvIbIMboIcuKabIK,ceHcOpblk Hemece aBnEci wekmenyi 6ap adamdap (ocbnapdbIH iwiHde bana nap da) mapanbHaH, Hemece KepeKmi BIm He mexipubeci BonmaFaH adamdap mapanbHaH KOndaHbaybI na3bIM, aOcbnap apHaUbI daubHdaJraH He OKbmbraH MAmadap mapanbHaH baBnay acMbHaDa 6oBn Hemece onapra ocbl MAMaHAp mapanbHaH 6yubIMMeH JyMbIC icmey macini Kepcemilin, anbikmanblbBepinzeHde KOndaHyblMymKiH. ByubIMMeH ouHayra Konl bepmey ywiH, 6yubIM XaHbIHdaTbI 6baIapdbI bakbnan omby pa3bIM. Bananap KypbInfBihmekepeceKmepdi6aKaIaybHda maanaaybiKeHe naDaHaHybIMyMkiH. ByubimdbI eukawah KocynbI KyuiHde Kaandbyra 6oMaudbi. 3neKmp po3emkanaapbI 6ap kaqpeIbdi Ka6bipranapboI ma3aay Ke3iHde Kayinci3dkmi caKaMaHbI3.
CaKmbiHKyckaybl
Electrical cables and devices must be protected from damage, cutting, breaking, and other similar impacts. Electrical cables must be protected from heat, mechanical damage, and short circuits. The water reservoir must be protected from frost, and the connected water fittings (e.g., hoses, connections, valves) must be protected from frost, otherwise, they may be damaged.
Materials may be damaged.
The device must be protected from frost and stored in a dry place. Do not store the device near solvents or spray cans! If the device is frozen, it cannot be used. Protect the device from frost. It cannot be stored outdoors.
Safety devices
Safety instructions
The purpose of the safety devices is to protect the user from injury and to prevent damage to the device or its improper use.
Thermostat
The thermostat is the most important safety device in the boiler. If the boiler temperature exceeds the maximum permissible value, the heating element switches off; if the temperature drops, it switches on again.
Safety thermostat
If the thermostat fails and the device overheats, the safety thermostat switches off the device. To reset the safety thermostat, contact the KARCHER service department.
Safety valve of this boiler
The safety valve of this boiler is located opposite the boiler's heating element. If the thermostat fails and the boiler temperature becomes too high, the safety valve opens and releases steam through the valve opening.
If the device is damaged, contact the KARCHER service department.
Device description
This operating manual contains important information. Please read the instructions carefully before starting the device (see the figure).
→ Check the spare parts!
A1 Turn on the power outlet. A2 Pressure switch (red) - open. A3 Pressure switch (yellow) - close. A4 Safety valve - open. A5 Safety valve - close. A6 This boiler is not equipped with a safety valve. A7 Check the installation of the boiler. A8 Handle for adjusting the water supply. A9 Connect the power cable. A10 Discs (2 pcs). A11 Power cord. B1 This device. B2 Safety valve. B3 The device is not intended for use by children. B4 This device is equipped with a thermostat. B5 This device is equipped with a power cord. B6 This device. C1 The device must be cleaned. C2 Do not immerse in water. D1 Clean the device. D2 Do not use abrasive materials. E1 Spare parts (2 pcs). E2 Safety valve. F1 The device is equipped with a power cord. F2 Switch. F3 Do not touch. G1 Care instructions for textile products. H1 The device is equipped with a power cord. On/off switch (together with the device). 11 This is a spare part.
12 This safety valve (red). 13 Pressure switch (yellow) - close. 14 This safety valve (black). 15 This safety valve is equipped with a switch. 16 Temperature regulator. 17 This device.
Short instructions
See the spare parts list.
1 This boiler is not equipped with a safety valve. 1. Before use, read these instructions carefully. 2. Do not operate without a safety valve. 3. Do not plug this device into a power outlet. 4. Do not connect the power cord to a power outlet.
To remove the safety valve, unscrew it.
The pressure switch must be adjusted.
5. Close the yellow pressure switch. 6. Do not press the buttons on this device.
This device is not suitable for use.
Operation
Installation of necessary parts
See figure
Do not operate the device without the thermostat.
→ Turn on the power outlet. → Do not plug this device into a power outlet. The device must be installed by a qualified technician.
Warning: Before connecting the electrical outlet, make sure the device is turned off and the plug is disconnected.
Figure
The cable clamps (marked "cable clamps") must be installed. To do this, place the cable clamp opening onto the installation, then secure it by tightening the screw (C2) on the installation.
Figure
The cable must be routed through the strain relief. To do this, insert one or two strain reliefs into the installation. Then place the cable clamps onto the strain relief.
Cable routing
Caution
When replacing the fuses, use only cold water! Do not replace fuses while the device is hot or under load, as there is a risk of electric shock!
Use only the specified fuse type - replace with the same type and rating (see the label on the device). Figure
To replace the fuses, first disconnect the device from the power supply, then remove the fuse holder.
Water connection
Note: When using water from a public supply, the water pressure must be at least 0.1 MPa.
Safety instructions
Do not use water from a condensation drain!
Do not use corrosive or abrasive cleaning agents!
→ BybIMHaN Kayinci3dk KaJnakwacbIH 6ypan WbIfapbIHbI3. → Ka3aHdafbI cydbIH 6apJbIfbIH ToJIbIFbIMeH Terin TactaHbI3 (CypeTke KapaHbI3 I).
Ka3aHra eH KEN dereHne 1 NITp Ta3a Ky6bIp Cybln KyNbiHbl3. Hyckay: bcmbik cy kblbihy yaKbimbiH a3aumadbl. → 6yibimfaraKayinci3dkKaannakwacbIH Hblfb3 6ypan Xa6bihb3.
БунбIMдь eшipy
→ EYbIMdbI TypaKTbINbIFbIH KaMTaMacbI3 eTeTIn 6eTKe KOybHbI3.
CaKmbiK HycKaybl
Ta3anay 6oubIHwa Kymbicmap Kypaizy Ke3iHde 6yubIMdbI macyra 6oImauDbI.
→ ΘneKtp aWacbIH 3JIeKTp po3eTkacbHa caJIbIHbI3. → BvibIMdbI Kocy ywiH AxbipaTkbl - Kocy 6acbI3.
BaKbIay WAmbIHbIH ekeyi De Jxahy KaKeT.
CaKmbiK Hycckaybl
БуubIMObI Ka3aHda cy 6oJraH Ke3de raHa Kocyra 6oJaobI. Œumnece 6yubIM waMadaH mblc KbI3bIn Kemyi MymKih («Keedepainep 6oJraHda KemeK any KapaHbI3»). → Kbl3fblnt capbl TycTI 6aKblay IaMbI cEHReHre DeiH KyTih3. By ta3anaftbIw Kymblicka daibH.
By mənsepiH peTtey
Keepno3nuaJIbI 6y WbIfbcIHbIHaxbipaTbIN - KockbluHbIH KEMeIMeH WbIFbIN KaTKaH 6ydbIH MJIwepi peTTenei.
Keenn03nucnbl aXbipatbIN-KOCKblTbIH yu n03nucnb6oana:
BydBiH eH KeI MeIWepi
BydbIH KbickapTbIJFaH MeIwepi
Bycb3-6anaapdbin KocybinaH Kopray
Instruction: The axis of the device must be perpendicular to the surface of the condenser.
The condenser must be cleaned with a soft cloth. → If the device is not working, check the axis, if it is bent, straighten it,
and then attach it to any surface.
Instruction: This heating element must be installed in the condenser, in the hole provided for it, for the operation of the device. During this, the indicator light (red) should be on - red.
Cydbieceelen Kyo
During operation, this element heats up, and when it is turned off, the water in the condenser should be checked.
Instruction: The safety valve must be inside the condenser, even if it is small, it must be present.
→ If the device does not work, check the device's power supply. If it is not working, there is no power in the condenser. → To check the power, press the power button. → Disconnect the power plug from the power outlet. → Remove the safety valve from the device.
Kayin
When the safety valve is open, the device's elements may be damaged. Close the safety valve, there is a risk of water leakage.
Pour at least 1 liter of clean water into the condenser.
Kayin
When the condenser is hot, there is a risk of water leakage, and if water is spilled, it may cause a short circuit. Do not use abrasive materials or other tools!
→ Remove the safety valve from the device. → Disconnect the power plug from the power outlet. → To turn off the device, press the power button. → The red indicator light should be on. This is the end of the instructions.
Connect the device to the mains. → Insert the plug into an electrical socket. → Before connecting the device to the mains, check that the mains voltage matches the device's rated voltage.
→ Figure
- Do not use the device with wet hands. Do not touch the plug or the device with wet hands.
- For children and persons with reduced physical, sensory or mental capabilities, use the device under supervision.
- Use the device only for its intended purpose.
- Do not use the device with a damaged cord or plug, and do not use it if it has been dropped or damaged.
Cleaning and maintenance
Cleaning instructions
Cleaning the device
Before cleaning, unplug the device and let it cool down. Do not immerse the device in water or any other liquid.
Descaling
Before descaling, unplug the device and let it cool down. Then, descale the device according to the instructions.
Clean the device with a soft, damp cloth.
If the surface is not cleaned, the paint may peel off when applying new paint over old paint. Before painting, the surface must be dry, free of dust, grease, and old paint residues. During painting, the material should be stirred and the surface should be smooth.
Safety instructions
Do not apply paint to wet surfaces; it may cause peeling. If paint has been spilled, clean it up immediately with a cloth or appropriate solvent.
Cleaning the sprayer
During regular use, clean the nozzle, hose, and gun thoroughly with water. Check for any damage or deformation of the nozzle. Then clean the hose with a brush and water. To avoid clogging, use a suitable brush or wipe the surface.
Safety instructions
Do not point the spray gun at people or animals; always keep it away from them.
This leaflet
If you have any questions about this leaflet, please contact:
- For inserting pipes and fittings, they should be inserted 10-20 cm deep.
- For inserting the shaft, keep a distance of 20-40 cm.
- For inserting the shaft, use this tool with a free hand and wipe it with a cloth.
Point of the needle
The cleaning section should be performed with the needle point facing upward. The temperature and humidity should be high. Clean all parts, hoses, fittings, valves, and heating elements with a brush. Before cleaning, rinse with water or a mild detergent, let it sit for 5 minutes, then clean with a brush and rinse.
Cylindrical brush
The device is designed to be used with the recommended type of fuel. When using the device, it is necessary to follow the instructions for use.
Safety instructions
Before starting work, read the instructions carefully.
Figure
Install the device correctly.
Device
Pull the device out of the packaging and remove all packaging materials. If the device is not used, it is recommended to store it in a dry place, away from children and animals.
Intended use
The device is suitable for all types of fuel or for new types of fuel. It is recommended for use with gas, liquid fuels, and new types of fuel. For best results, use the device as intended.
Safety: If the device is used in the presence of children or persons with reduced physical, sensory, or mental capabilities, or lack of experience and knowledge, they should be supervised and instructed in the safe use of the device.
Figure
Attach the device to the intended use.
1 Attach the device to the intended use and secure it. 2 Do not use force. 3 The device should be used in accordance with the instructions. 4 Do not use the device if it is damaged.
Safety instructions
Keep the device away from children and animals.
Forsunka for caring for textile products
Use:
For refreshing hanging textile products, e.g., jackets or tops, using two functions:
- Removing lint and pills from clothing items with the device's lint remover.
- Treating textile products with steam and removing wrinkles (also removes odors).
When pressing the button, steam comes out. Always point the nozzle at the fabric first until steam comes out evenly.
Rakel
Instructions:
For best results, use the Rakel with a steam iron or steamer. Place the Rakel on the fabric and move it slowly, pressing lightly. For best results, hold the Rakel about 20 cm away from the fabric. Move the Rakel slowly over the fabric, pressing the steam button. If the fabric is delicate, use the Rakel with a gentle touch.
Iron
Steam
If this device is used, do not let children or pets near it. This device can be used by people with reduced physical, sensory or mental capabilities or lack of experience and knowledge if they have been given supervision or instruction concerning use of the appliance in a safe way and understand the hazards involved. Children shall not play with the appliance.
Before using the device, read the operating instructions carefully.
Commissioning
For commissioning and removal of the cable, only use the accessories supplied with the device or those listed in the operating instructions. Use the device only as intended and follow the instructions. Note: We recommend using the original KARCHER accessories (order no. 2.884-933.0). These accessories are optimally matched to your device. Using them ensures successful operation. If you have any questions or problems, please contact our customer service.
Plug the device into a properly installed electrical outlet. The plug must be inserted until it stops. Check that the water supply is clean and has sufficient water pressure. Do not use the device if the water supply is contaminated. Turn off the device if it is not in use.
Operation
The device is equipped with a safety switch. It must be switched on before use, and it must be switched off after use or in case of an emergency.
Note: For this device, use only the KARCHER BE 6006 brush (order no. 2.860-142.0).
Set the temperature regulator (MAX) within the indicated range. The device can be started only after the temperature has been set.
Note: The device must be operated only with the brush attached, and the brush must be placed on the surface to be cleaned before starting the device.
This device must not be used by children or persons with reduced physical, sensory or mental capabilities, or lack of experience and knowledge, unless they have been given supervision or instruction concerning use of the appliance in a safe way and understand the hazards involved. Children must not play with the appliance. Cleaning and user maintenance must not be performed by children without supervision.
Dry operation
Note: During dry operation, there must be water in the tank.
Set the temperature regulator to the desired level before starting the device.
| •СиHTeТИКа |
| •Жун,ЖiБЕК |
| •MaKТa,ЗblFbIP |
Note: Refer to the wiring diagram for the device's electrical connections.
The device can be started only after the temperature has been set.
Safety instructions
Caution
The technical data and information provided in this manual were current at the time of printing. We reserve the right to make changes without prior notice.
Filling the boiler
The boiler can be filled with up to 10 liters of water.
Fill the boiler only with water. If the boiler is not filled with water, it may be damaged. → Fill with water.
Draining the boiler
Note: If you use distilled water, the boiler's scale buildup is minimal. Scale may still form in the boiler, so we recommend descaling at regular intervals (see: Descaling the boiler).
| Су катылыfilms dH моль /л | KF | ||
| I жимсak 0-7 0-1,3 55 | |||
| II optаша 7-14 1,3-2,5 45 | |||
| III кермек 14-21 2,5-3,8 35 | |||
| IV acа кермек >21 >3,8 | 25 | ||
Note: The water hardness can be checked with test strips available from your local water utility or municipal works.
→ Disconnect the appliance from the power outlet. → Let the appliance cool down. → Pull the safety cap off. Drain the water from the boiler completely (see figure I).
Descaling
To ensure the appliance functions properly, use only original KÄRCHER accessories.
→ For descaling, use only KÄRCHER descaling tablets (order no. 6.295-206). When using descaling tablets, follow the instructions provided with them.
Safety instructions
Be careful when filling and emptying. Hot steam can escape from the openings.
After the salt has dissolved, pour it into the cauldron and leave it for 8 hours.
Cleaning
When cleaning the pan, do not remove the protective coating. Use this method only if there is a lot of dirt in the cauldron.
After 8 hours, pour out the dissolved salt solution. Rinse the cauldron with clean water, then pour out all the water and dry it (see Figure I).
Storing the dishes
Note: Before first use, wash the dishes and utensils with warm water and mild detergent, then dry them.
Wash the dishes and utensils made of wood and plastic at a temperature of 60°C in the dishwasher. When washing dishes, do not use abrasive cleaners or harsh detergents. Dry the dishes in a drying rack.
If you need help
If you have any questions or problems, please contact the service center or the store where you purchased the product.
Warning
Any technical maintenance or repair should only be carried out by qualified personnel. Do not attempt to repair the device yourself.
Use only original spare parts for repairs. Using non-original parts may void the warranty.
Short circuit protection
This cauldron is not suitable for induction cooktops.
→ Removing the cauldron from the heat
By xok
By ka3aHbIHda 6y xok.
→ BvHbIMdbI icTeH WbIfapbIHb3. →KapaHbI3 „CydbI eceen KyHO" BcT 10.
By bepydIn deHrein peTteriin bacy MymkiH emec.
CaKaTaHDbIprBbIuNeH / 6aIaIapDbH Kocbln Xi6epyiHeN KoprayMeH Xa6bln KaIdbI. KoNnO3nUraJIbI 6y WbIFbIHbIH KockbIbIH aJdBiHfbl N03nUraFa OPhaTbIHbI3.
Ytikteyderi y3iicTeH Kein6y KbicbIMblytiriHeh cy TaMdbIapbl WbIfyblMYMKIn.
Erep y3iictep y3aKa co3bInca, 6y KybipbIHdaftby KOHDeHcaunHaHbI. → BydbiH 6ipihwi afbIHbH 6eJek MaTara 6aftTaHbI3.
By Kbcibmbi yTiri cydbi "Tykipei!"
→ TemnepaTypa peTteriuiH …fa3acbHa KOJIbIHbI3. By Ta3aJnafblbIHHbIH Ka3aHbIH Waihbl3 HeMece KaKtbl KeTpiHi3.
Cydbln 6niK wblfbybl
By Ka3aHbI TbIM ToNbl.
By nictoletHe kiukeHe cy uBikKaHwa 6acbHbI3.
By ka3aHbIHda TaT naIda 6oJdbl.
Ka3aHHaH TaTbI KeTipy
KocankbI 6eKeTep
Technical data KARCHER mowers. The mowers are supplied with the cutting deck installed.
Technical data
Electrical connection
Voltage 220-240 V 1~50/60 Hz
Cutting width 8 minutes
Water connection
Water flow rate 40 g/min
Water pressure max. 100 g/min
Dimensions
Water tank 1.0 l
Length 380 mm
Width 254 mm
Height 260 mm
Weight 2.9 kg Without accessories
Technical changes reserved!
a
jlll jieo lc baiall j
/
Jbla
JwJ: clo
lllulllolal
d 2a //
JgUSSSsOoAeKlIg>
jgl
∴ 0.2g ≥ s
.()
JKAERCHER
j 是 y = y1
golpddawl aJyJy
J) KARCHER JJI

55 1,3-0 7 -0 a
45 2,5-1,3 14-7 aBwGoo II
35 3,8-2,5 21-14
KARCHER 6006BE
.(2.860142,0/1/ρ)
.(MAX/)J#
S11 2y
ooI/1cJy
Therefore, the area of triangle OBC equals the area of triangle COD plus the area of triangle BOC.


__SUPPIMER__

Therefore m : x = 1 or 3x + 4y + 1 = 0
E
·
J 1000
02
1
y/0o 1y/lay/
j>yI xcJooI oJsw Jc pK>lp
.
jgeYl j
auiiae jyeg y
a/b+c/1 a/sac c/1 jgey/la> jg> y
a 1
J
Jueuy Jueuy 2eoo b
1,2,3 , 4,5,6
Jgcky> Laaoc yj

c0g> g y/ jyjuey
j0y1 oJ> a> gai jia 49a y
∴ ( 1 + k) + ... + ( k + 1) + 1 = ( k + 1) ( k + 2) 2
1A
aJg-()Jgss 2A
(J)aJ 3A
Jz 4A
J 5A
Jy 6A
7A
a 11
J 9A
J 1
10A
a>g o 11A
1B
2B
aLw g 2)JlJ aS J sJ>1 JJ 3B (JabJlaJ
jLJI 4B
5B
6B
1C
o 2C
1D
g/ aio slga cll jj slo wlg gia g/ aio slgo xc agizo axilw slgo aeezo u c jol>1), y/ w iog, n jgnguww g aoiauall slgaill lgeoi paa jge//
auii j0j1 1c jge//gogj
10g y/ aui jzj g/ jlg>ll Jueu pa
aal jgagjglgJgJgJlaJe!
JwIcWJLjUJIeO Cyyy.
jJg jIb0y/oo jIg2//la>
a>gia//sloy/ aijjoo
100
The device is designed for use in accordance with the instructions in this manual.
Please read this manual carefully before using the device.
Keep this manual for future reference.
If you have any questions, please contact our customer service.
The device should be used only for its intended purpose.
Do not use the device in a manner that could cause damage or injury. Follow all safety instructions.
This device complies with all applicable standards.
The manufacturer is not liable for any damage caused by misuse.
For technical support, visit our website or call our hotline.
Keep the device away from water and moisture.
Do not disassemble the device.
Use only the supplied accessories.
Model number: 152W/9, 122W/102G, 242A/19, 18X>G
The device is designed for indoor use only.
1 1
1g>// 20 g>// 2g>// g>// g> // g> // 2c g>ga// g>la// 2c g>la//
aaiia
oIgJgJgJgJgJgJgJgJgJgJgJgJgJgJgJgJgJgJgJgJgJgJgJgJgJgJgJgJgJgJgJgJgJgJgJgJgJgJgJgJgJgJgJgJgJgJgJgJgJgJg
ggo 100000000000000000000000000000000000000000000000000000000000000000000000
Igaiu w p y Iy
JgJgJgJgJgJgJgJgJgJgJgJgJgJgJgJgJgJgJgJgJgJgJgJgJgJgJgJgJgJgJgJgJgJgJgJgJgJgJgJgJgJgJgJgJgJgJgJgJgJgJ
laai
JI JI IJI IJI IJI IJI IJI IJI IJI IJI IJI IJI IJI IJI IJI IJI IJI IJI IJI IJI IJI IJI IJI IJI IJI IJI IJI IJI IJI IJI IJI IJI IJI IJI IJI IJI IJI IJI IJI IJI IJI IJI IJI IJI IJI IJI IJI IJI IJI IJI IJI IJI IJ
aLwJlJdLwJ
Jb
aole
JaaJI sjjc
JjI JJJJ 100 JlJgJgJgJgJgJgJgJgJgJgJgJgJgJgJgJgJgJgJgJgJgJgJgJgJgJgJgJgJgJgJgJgJgJgJgJgJgJgJgJgJgJgJgJgJgJgJgJgJgJgJ
xWylaJeU
| RF | \( {}^{ \circ } \) dH | \( {}^{ \circ } \) | |
| 55 | 1,3-0 | 7 -0 | 1 |
| 45 | 2,5-1,3 | 14-7 | 2 |
| 35 | 3,8-2,5 | 21-14 | 3 |
| 25 | 3,8< | 21< | 4 |
Therefore, 2x - 2φ + π/2 = 2x - π/6 + 2kπ.
Therefore, it exactly satisfies r
()
KARCHER
bc = 1
100 100
J 1
∴ 200 即 1,∴ c < 1,8
∴ 1.1k = 0 00( a i + b j)
j 12 j 12 j 12 j 12 j 12 j 12 j 12 j 12 j 12 j 12 j 12 j 12 j 12 j 12 j 12 j 12 j 12 j 12 j 12 j 12 j 12 j 12 j 12 j 12 j 12 j 12
iis
0

(MAX/…)
1J 2
15
j 1 j 1
(g)
245 0dawol jzj y jy jy g j
45 012003
BE 6006 KARCHER
(Order # 2.860-142.0).
PVC
2020 2020 2020 2020 2020 2020 2020 2020 2020 2020

Therefore, the area of triangle OBC equals the area of triangle OBC, which is half times CD times 4, i.e., CD.
1
2021
Therefore, the area of triangle OBC equals the area of triangle AOB plus the area of triangle BOC.
Therefore, p1 = 90% = 1/2, p2 = 90% = 1/3, p3 = 90% = 1/4.
Therefore, the area of triangle OBC equals the area of triangle COD plus the area of triangle BOC.
2010 15
.5jio
a
40 20
4
14
j j
j 1 j 1 j 1 j 1 j 1 j 1 j
J 1
1 1 1 1 1 1 1 1 1 1 1 1 1 1 1 1 1 1 1 1
j 1
5 25
2.15 2
2
a
1 1
2.4a 2.5
#
Cunuiuilia uibcbuaus 15
G

jLg jj1j1j
j
()
F
5 1
∴ 22 - 1 > - 1 > - 1 > 0
jL jL jL jL jL jL jL
2.402 1j jg 3
a
∴ S ΔOBC = S ΔCOD + SΔBOC
- Since a4 = a1 + 3d, therefore a4 = 3
Therefore a1 = 2, an+1 = an/2 + an/3 + ... + a1/n
ON
8 8
Therefore, m = 3/11
Og C
OFF
Therefore, the area of triangle OBC equals the area of triangle ABC plus the area of triangle BOC.
Therefore, the area of triangle OBC is 1/2 * CO * BC = 1/2 * CD * 5.
2g 1
(20 1
1 1
Therefore, angle OBC = 60° + 30° = 120°.
Therefore, sin α = b/a
←
(20
1.202 1.3.202 5.202 5.202 5.202 5.202 5.202
<
B
1
Therefore, the area of triangle APQ equals the area of triangle AQP plus the area of triangle PQR.
←
ON
20
bi
j 1000000000000000000000000000000000000000000
iis 1000
8
Therefore, the area of triangle BCD equals the area of triangle COD plus the area of triangle BDO minus the area of triangle BOC.
Therefore, the area of the solvent is
y
wJy JyLoSgR.
Joo (joo)
SΔLAC = 1/2 · AC · BC = 1/2 × CD × AB
a
A
←
1Jgai goo 2Jg Jiai slo 2g S
yS jI J 10
1
20
4j0d
j 1 j 1
B
Therefore, the area of triangle ACD equals the area of triangle COD plus the area of triangle DCE minus the area of triangle CDE.
__SUPPIMER__
10
Therefore, 11 × 5 = 12800
i
Therefore, the area of triangle OBC is 1/2 · CO · BC = 1/2 × CD × 5
Therefore, a_i = 1/2 (a_{i-1} + a_{i-2})
1 1
bi
jg jai jbj 45 10 b20 w 1/6
10000000000000000000000000000000000000000000
1
- i5jolaiu1 (s1/2, slo juiu)olk uoi jolok
Sjxuolo Su
1jg 0y jy jy
Sodleibb g yjLlo glo
oaijli jgljgol
o(i)(y)(j)
i 1
∴ S ΔOBC = S ΔCOD + SΔBOC
1j j 15
joloo jkJg jdo JaoLdo
∴ 11/1 < 1/2
http://www.kaercher.com/dealersearch
71364 Winnenden (Germany)
Tel.: +49 7195 14-0
Fax: +49 7195 14-2212
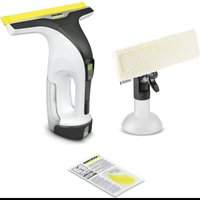
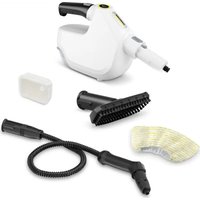
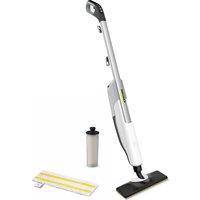
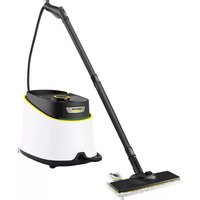
- GENERAL INFORMATION
- DEAR CUSTOMER
- PROPER USE
- SYMBOLS IN THE OPERATING INSTRUCTIONS
- DANGER
- WARNING
- CAUTION
- SYMBOLS ON THE MACHINE
- STEAM
- ENVIRONMENTAL PROTECTION
- NOTES ABOUT THE INGREDIENTS (REACH)
- SCOPE OF DELIVERY
- WARRANTY
- SAFETY INSTRUCTIONS
- SAFETY DEVICES
- PRESSURE CONTROLLER
- SAFETY THERMOSTAT
- SAFETY LOCK
- DESCRIPTION OF THE APPLIANCE
- ILLUSTRATIONS ON FOLD-OUT PAGE
- OPTION
- QUICK REFERENCE
- ILLUSTRATIONS ON PAGE
- OPERATION
- ATTACHING THE ACCESSORIES
- REMOVING THE ACCESSORIES
- FILL UP WITH WATER
- TURNING ON THE APPLIANCE
- ADJUSTING THE STEAM QUANTITY
- REFILLING WATER
- TURNING OFF THE APPLIANCE
- STORING THE APPLIANCE
- ILLUSTRATION F
- HOW TO USE THE ACCESSORIES
- IMPORTANT APPLICATION INSTRUCTIONS
- CLEANING FLOOR SURFACES
- REFRESHING TEXTILES
- CLEANING OF GLASS
- STEAM GUN
- DETAIL NOZZLE
- ROUND BRUSH
- HAND NOZZLE
- FLOOR NOZZLE
- PARKING THE FLOOR NOZZLE
- TEXTILE CARE NOZZLE
- WINDOW WIPER
- APPLICATION
- STEAM IRON
- STEAM IRONING
- DRY IRONING
- MAINTENANCE AND CARE
- RINSING THE BOILER
- DESCALING THE BOILER
- CARE OF THE ACCESSORIES
- TROUBLESHOOTING
- LONG HEATING-UP TIME
- STEAM BOILER IS DECALCIFIED
- NO STEAM
- NO WATER IN THE STEAM BOILER
- STEAM LEVER CANNOT BE PRESSED ANYMORE
- AFTER BREAKS DURING IRONING, WATER DROPS WILL COME OUT OF THE STEAM PRESSURE IRON
- STEAM IRON "SPITS OUT" WATER
- HIGH WATER OUTPUT
- STEAM CHAMBER TOO FULL
- SPARE PARTS
- TECHNICAL SPECIFICATIONS
- ELECTRICAL CONNECTION
- PERFORMANCE DATA
- DIMENSIONS
- TABLE OF CONTENTS
- NO WATER IN RESERVOIR
- GENERAL NOTES
- DELIVERY
- PACKAGING
- GENERAL INSTRUCTIONS
- INTENDED USE
- SYMBOLS IN THE INSTRUCTION MANUAL
- ATTENTION
- SYMBOLS ON THE DEVICE
- INSTRUCTIONS FOR USE OF COMPONENTS (REACH)
- PRESSURE REGULATOR
- SAFETY FUSE
- DEVICE DESCRIPTION
- PARAMETER
- BRIEF INSTRUCTIONS
- SWITCHING OFF THE APPLIANCE
- FIGURE
- USING ACCESSORIES
- IMPORTANT INSTRUCTIONS FOR USE
- CLEANING THE FLOOR SURFACE
- REFRESHING TEXTILE ITEMS
- CLEANING SURFACES WITH COATINGS AND VARNISHED SURFACES
- CLEANING THE STEAM CLEANER
- FINE JET NOZZLE
- STEAM LEVER CANNOT BE PRESSED
- AFTER PAUSES IN IRONING, WATER DRIPS FROM THE SOLEPLATE
- ATTENTION, SPITTING WATER
- NAPOBOK KOTEJ CJNUKOM NOHBI
- SCALE HAS FORMED IN THE STEAM BOILER
- TECHNICAL DATA
- ELECTRICAL PARAMETERS
- ITEMS DELIVERED
- SAFETY NOTES
- SAFETY ELEMENTS
- SEE FIGURES ON THE FOLD-OUT PAGE
- OPTIONAL
- → SEE FIGURES ON PAGE
- MOUNTING ACCESSORIES
- FIGURE A
- TRANSPORT
- SAFETY VALVE
- DESCRIPTION OF THE DEVICE
- SEE THE DIAGRAMS ON THE CORRESPONDING PAGE
- SEE THE ILLUSTRATIONS ON PAGE
- MOUNTING OF ACCESSORIES
- → FIGURE A
- → FIGURE B
- → FIGURE C
- ADJUSTING THE AMOUNT OF STEAM
- FILLING WITH WATER
- → FIGURE
- USE OF THE ACCESSORIES
- CLEANING THE FLOOR SURFACES
- IRONING TEXTILES
- CLEANING SURFACES WITH COATING OR VARNISH
- CLEANING GLASS
- SPRAY GUN
- JET NOZZLE
- BRUSH NOZZLE
- NOZZLE
- TEXT NOZZLE (I1)
- USE
- SPRAY NOZZLE
- IRON
- SAFETY
- △WARNING
- MOUNTING KIT
- MOUNTING ADDITIONAL EQUIPMENT
- SYMBOLS IN THE MANUAL
- PAIR
- PROTECTION OF THE ENVIRONMENT
- TAPAANTIA
- IPABNLA 6E3NEKN
- EPEXHO
- △NONEPEDXEHN
- DEVICE PROTECTION
- FUSE
- ILLUSTRATIONS ON THE FOLD-OUT PAGE
- DESCRIPTION
- OPERATING MANUAL
- →SEE ILLUSTRATIONS ON PAGE
- INSTALL THE DEVICE
- SMALL
- → SMALL
- REMOVING ATTACHMENTS
- FILLING
- YES
- DEVICE OPERATION
- YEAAA
- STEAM QUANTITY REGULATOR
- STORAGE OF THE DEVICE
- USING THE DEVICE
- SELECT THE SURFACE TO BE TREATED
- CLEANING TEXTILE PRODUCTS
- NOZZLE FOR PRECISE JET
- CONNO DNA OUUUEHHA TEKCTNIO (I1)
- ACTOCYBAHHA
- HACAKA DNA MMTTB BIKOH
- ATOCYBAHHA
- PPACA
- △OBEPEKHO
- IRONING WITH STEAM
- STEAM DURATION
- MAINTENANCE AND SERVICING
- CLEANING THE RESERVOIR
- REMOVING LIMESCALE FROM THE RESERVOIR
- NO WATER FLOWS THROUGH THE BOILER
- THE STEAM BUTTON CANNOT BE PRESSED
- REGULATIONS FOR HAZARDOUS SUBSTANCES (REACH)
- WWW.KAERCHER.COM/REACH
- SPARE PARTS INCLUDED IN THE SCOPE OF DELIVERY
- △ KAYIN
- △CAKAMAHDBIPY
- CAKMBIHKYCKAYBL
- THERMOSTAT
- SAFETY VALVE OF THIS BOILER
- → CHECK THE SPARE PARTS
- SHORT INSTRUCTIONS
- SEE THE SPARE PARTS LIST
- INSTALLATION OF NECESSARY PARTS
- SEE FIGURE
- CABLE ROUTING
- WATER CONNECTION
- БУНБIMДЬ EШIPY
- CAKMBIK HYCKAYBL
- CAKMBIK HYCCKAYBL
- BY MƏNSEPIH PETTEY
- BYDBIH EH KEI MEIWEPI
- CYDBIECEELEN KYO
- KAYIN
- CLEANING AND MAINTENANCE
- CLEANING INSTRUCTIONS
- CLEANING THE DEVICE
- DESCALING
- CLEAN THE DEVICE WITH A SOFT, DAMP CLOTH
- CLEANING THE SPRAYER
- THIS LEAFLET
- POINT OF THE NEEDLE
- CYLINDRICAL BRUSH
- DEVICE
- FORSUNKA FOR CARING FOR TEXTILE PRODUCTS
- RAKEL
- INSTRUCTIONS
- COMMISSIONING
- DRY OPERATION
- FILLING THE BOILER
- DRAINING THE BOILER
- CLEANING
- STORING THE DISHES
- IF YOU NEED HELP
- SHORT CIRCUIT PROTECTION
- THIS CAULDRON IS NOT SUITABLE FOR INDUCTION COOKTOPS
- BY XOK
- BY KA3AHBIHDA 6Y XOK
- BY BEPYDIN DEHREIN PETTERIIN BACY MYMKIH EMEC
- YTIKTEYDERI Y3IICTEH KEIN6Y KBICBIMBLYTIRIHEH CY TAMDBIAPBL WBIFYBLMYMKIN
- BY KBCIBMBI YTIRI CYDBI "TYKIPEI
- CYDBLN 6NIK WBLFBYBL
- BY KA3AHBI TBIM TONBL
- BY KA3AHBIHDA TAT NAIDA 6OJDBL
- KOCANKBI 6EKETEP
- A
- THEREFORE, THE AREA OF TRIANGLE OBC EQUALS THE AREA OF TRIANGLE COD PLUS THE AREA OF TRIANGLE BOC
- JGEYL J
- AAIIA
- IGAIU W P Y IY
- LAAI
- ALWJLJDLWJ
- AOLE
- J J
- G
- J
- OG C
- (
- SΔLAC = 1/2 · AC · BC = 1/2 × CD × AB
Brand : Kärcher
Model : SC 1133
Category : Steam cleaner