
SRC 4324 CD - Radio AEG - Free user manual and instructions
Find the device manual for free SRC 4324 CD AEG in PDF.
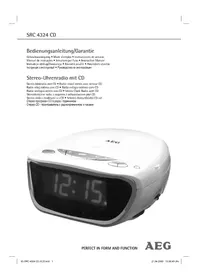


| Product type | Clock radio with CD player |
| Brand | AEG |
| Model | SRC 4324 CD |
| Color | Black (estimation) |
| Net weight | 1.11 kg |
| Power supply | 220-240 V, 50 Hz, 14 W |
| Protection class | II |
| Backup battery | 9V (type 6LR61, not included) |
| FM radio | 88.0 - 108.0 MHz |
| AM radio | 540 - 1600 kHz |
| CD player | Audio CD, does not play MP3 |
| Radio functions | Manual tuning, telescopic FM antenna, AM ferrite antenna |
| Alarm functions | 2 independent alarms, wake-up by radio, CD or buzzer, snooze (6 min), sleep timer (SLEEP) |
| Display | LED, brightness adjustment (DIMMER) |
| CD functions | Play, pause, skip, search, repeat (1 track / all), random play, track programming |
| AUX input | 3.5 mm jack socket for external devices |
| Volume | Rotary control |
| Cleaning | Soft, slightly damp cloth, no additives |
| Safety | Class 1 laser, do not expose to water, repairs by professional only |
Frequently Asked Questions - SRC 4324 CD AEG
User questions about SRC 4324 CD AEG
0 question about this device. Answer the ones you know or ask your own.
Ask a new question about this device
Download the instructions for your Radio in PDF format for free! Find your manual SRC 4324 CD - AEG and take your electronic device back in hand. On this page are published all the documents necessary for the use of your device. SRC 4324 CD by AEG.
USER MANUAL SRC 4324 CD AEG
Polish
Table of contents
PRODUCT TO IEC 60825
LASER CLASS 1
ACCORDING TO IEC 60825
FM = FM, medium wave = AM (Mono)
11 PLAY/PAUSE button (Play/Pause)
16 French
21 Antenna cable (FM)
Frequency range: ....FM 88.0 ~ 108.0 MHz ..MW / AM 540 ~ 1600 kHz
General Safety Instructions
Read the operating instructions carefully before putting the appliance into operation and keep the instructions including the warranty, the receipt and, if possible, the box with the internal packing. If you give this device to other people, please also pass on the operating instructions.
- To avoid the risk of fire or electric shock, do not expose the device to rain or moisture. Consequently, do not use the device near water—for example, near a bathtub, swimming pool, or in a damp cellar.
- Use the device only for its intended purpose.
- Only connect the device to a properly installed power outlet. Ensure that the specified voltage matches the voltage of the outlet.
- When using an external power supply, pay attention to correct polarity and voltage. Always insert batteries in the correct direction.
- Assemble the device so that the ventilation openings are not covered.
- Never open the device housing. Incorrect repairs can pose a significant risk to the user. If the device is damaged, especially the power cord, do not operate it any longer; have it repaired by a qualified expert. Regularly check the power cord for damage.
- For safety reasons, a broken or damaged power cord may only be replaced by an equivalent cord from the manufacturer, our customer service department, or a similarly qualified person.
- If the device is not used for an extended period, unplug it from the outlet or remove the batteries.
The following symbols may appear on the device and have these meanings:

The lightning symbol warns the user of parts inside the device that carry dangerously high voltage.

The exclamation mark symbol alerts the user to important operating or maintenance instructions in the accompanying documentation.

Devices bearing this symbol use a "Class 1 laser" for reading CDs. Built-in safety switches are designed to prevent exposure to dangerous laser light, which is invisible to the human eye, when the CD compartment is opened.
Under no circumstances should these safety switches be bypassed or tampered with, as this could result in exposure to laser light.
Children and Frail Individuals
- To ensure your children's safety, keep all packaging (plastic bags, boxes, polystyrene, etc.) out of their reach.
WARNING!
Caution! Do not allow small children to play with the foil as there is a danger of suffocation!
- This device is not intended to be used by individuals (including children) who have restricted physical, sensory or mental abilities and/or insufficient knowledge and/or experience, unless they are supervised by an individual who is responsible for their safety or have received instructions on how to use the device. Children should be supervised at all times in order to ensure that they do not play with the device.
Symbols in these Instructions for Use
Important information for your safety is specially marked. It is essential to comply with these instructions in order to avoid accidents and prevent damage to the machine:
WARNING:
This warns you of dangers to your health and indicates possible injury risks.
CAUTION:
This refers to possible hazards to the machine or other objects.
NOTE: This highlights tips and information.
Special safety information
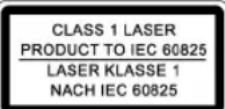
This device works with a class 1 laser.
Overview of the Components
| 1 | CD | compartment |
| 2 | Battery | compartment |
| 3 | VOLUME (volume control) | |
| 4 | Tab for opening the CD compartment | |
| 5 | Function selector switch | |
| (BUZZER / AM / FM / CD) | ||
| 6 | TUNING | control |
| 7 | POWER / ALARM OFF button | |
| 8 | PROGRAM / STORE button (memory) | |
| 9 | CD DISPLAY button | |
| 10 | PLAY MODE button (repeat/random) | |
| 11 | PLAY/PAUSE button | |
| 12 | SKIP▶I / HOUR button (forward search) | |
| 13 | Function key (SNOOZE) | |
| 14 | SKIP I▼/ MINUTE button (reverse search) | |
| 15 | STOP / CLOCK ADJ. button | |
| 16 | ALARM 2 button | |
| 17 | Function key for delayed switch-off (SLEEP) | |
| 18 | ALARM 1 button | |
| 19 | DIMMER ON/OFF switch | |
| 20 | AUX IN connection | |
36 English
21 Throw-out aerial (FM) 22 AC Mains connection
23 LED display
24 SLEEP control lamp 25 LED for activated alarm function (ALARM 2) 26 Frequency display, Station scale 27 LED for activated alarm function (ALARM 1) 28 RANDOM control lamp 29 PROGRAM control lamp 30 REPEAT control lamp 31 POWER control lamp 32 PM control lamp
Start-up of the device/introduction
- Please read the operating instructions carefully before using the device for the first time!
- Select a suitable location for the device, such as a dry, flat, non-slip surface on which it is easy to operate the machine.
- Ensure that the device is sufficiently ventilated!
- Remove the protective film from the display if it is still present.
Power Supply
- Insert the plug into a properly installed 230 V, 50 Hz power socket.
- Ensure that the voltage is the same as that indicated on the model identification plate.
Setting the Time (in standby mode (OFF))
- Press the STOP / CLOCK ADJ. button (15). The time begins to flash.
- Press the SKIP ▸ / HOUR button (12) in order to set the hours. Keep the button pressed down until the desired hour is reached.
- Press the SKIP I/ MINUTE button (14) in order to set the minutes. Keep the button pressed down until the desired minutes are reached.
- Press the STOP / CLOCK ADJ. button again in order to store the time.
NOTE:
- With the STOP / CLOCK ADJ. button you can choose between the 12-hour and 24-hour display mode. To do this, keep the STOP / CLOCK ADJ. button pressed down until 12H or 24H appears briefly in the display.
- In the case of the 12-hour display, the PM indicator lamp lights up (PM = afternoon/evening).
Inserting the batteries (not supplied)
If there is a power cut or the mains plug has been removed from the power socket, the settings will be retained if the power reserve batteries are inserted.
- Open the battery compartment (2) inside the CD compartment.
- Connect a 9V E compound battery to the supply connection. Please ensure the correct polarity.
- Close the battery compartment again.
- If the device is not used for a prolonged period of time, please take the batteries out in order to prevent leakage of battery acid.
CAUTION:
Batteries are not to be disposed of together with domestic wastes. Dispose of the used batteries at the relevant collection bin or at your dealer's.
WARNING:
Do not expose the batteries to high temperatures or direct sunlight. Never throw batteries into the fire. There is a danger of explosion!
Transport Safety Device, CD Compartment
- Open the CD compartment (1) by pulling the lid upwards by the tab (4).
- Before operating the machine for the first time, remove the transport safety device from the CD player if it is still in place.
Volume
The desired volume can be set using the VOLUME / regulator (3).
Display Brightness
With the DIMMER ON/OFF button (19) you can select the brightness of your display.
Switching the Device on/off (7)
Switch the device to standby mode with the POWER / ALARM OFF button. If this button is pressed once more, the device switches on again.
AUX IN socket
To connect analogue replay devices. Via this socket you can also hear the sound of other playback devices such as MP3 players, CD players etc. through the loudspeakers.
- Please connect the external device with a 3.5 mm stereo jack plug to the AUX IN socket (20).
- Turn the device on by the POWER / ALARM OFF button (7). The device switches automatically to AUX IN operation. The radio or CD sound is switched off.
- Through the loudspeakers you can hear the playback of the sound from the external device; with the VOLUME control (3) you can change the volume. The CD buttons do not have any function.
- For the remaining procedure please see the operating instructions of the external sound source.
NOTE:
Adjust the volume of the external device to a comfortable level.
Listening to the Radio
- Turn the device on by the POWER / ALARM OFF button (7).
- Use the function selector switch (5) to choose the desired frequency band.
VHF = FM, Medium wave = AM (Mono)
- Tune in the desired station with the station adjustment knob TUNING (6).
- If reception is too weak, change the position of the dipole antenna in order to improve the reception.
- An aerial is integrated into the device for the reception of AM stations. The machine can be aligned to the station by turning it. In this frequency band programs are transmitted in "mono" only.
Alarm function
Setting of the Alarm (24 h)
It is possible to set up to two alarm times as follows:
- Press the ALARM 1 button (18). The alarm time that is currently set flashes in the display and the ALARM 1 indicator lamp lights up. The first alarm time is active.
- Then keep the SKIP ▶ / HOUR and SKIP I MINUTE buttons (7/6) pressed to set the desired alarm time.
NOTE:
After approx. 5 seconds the numbers stop flashing and the time currently displayed is automatically stored.
In order to set the second alarm time press the ALARM 2 button (16). Proceed as described above in order to set the second alarm time.
Deactivating the Alarm Time
Press the ALARM 1 or ALARM 2 button to deactivate the alarm time. The indicator lamp ALARM 1 or ALARM 2 goes off.
Radio alarm
After you have set the alarm time and selected a radio station, turn the device off by the POWER / ALARM OFF button (7).
NOTE:
As soon as the alarm time is reached, the radio is switched on. The selected radio station plays at the set volume.
Buzzer alarm
- If you do not wish to be woken up by the radio, turn the function selector switch (5) to BUZZER. Instead of the radio, the buzzer goes off when the alarm time is reached.
Waking up to a CD
- In order to be woken up by an inserted CD, move the function selector switch to the "CD" position. Ensure that the CD is correctly inserted in the CD compartment.
- As soon as the set alarm time is reached the CD player switches on automatically. Playback is started at the set volume.
Turning off the Alarm
Press the POWER / ALARM OFF button (7) in order to switch off the alarm.
Automatic Alarm Interval
The automatically set alarm function can be shut off for approximately 6 minutes with the SNOOZE key (13). The ALARM 1 or ALARM 2 indicator lamp flashes.
Delayed Switch-off (SLEEP Button (17))
Here you can set the time after which the device switches to standby. You can choose between 90 min., 60 min., 30 min. and 15 min. Press the SLEEP button repeatedly until the desired length of time is shown in the display. The SLEEP indicator lamp lights up. After the time that has been entered has elapsed the device switches off automatically.
The switch-off time can be reset afterwards by pressing the SLEEP button (17) again.
This function can be cancelled with the POWER / ALARM OFF key (7).
Playing CDs
This is how you play a CD
- Turn the device on by the POWER / ALARM OFF button (7). Turn the function selector switch (5) to the "CD" position.
- Open the CD compartment (1) by pulling the lid upwards by the tab (4).
- Insert an audio CD with the printed side facing upwards on to the central cone so that the CD clicks into place and then close the lid of the CD compartment.
- "--" appears in the display followed by the number of tracks. Press the PLAY/PAUSE button (11) in order to play the CD.
- Playback begins automatically with the first track on the CD. The current time is shown in the display.
- In order to remove a CD, please press the STOP / CLOCK ADJ. key (15), open the CD compartment and lift the CD out carefully.
Always keep the CD deck closed.
38 English
NOTE:
If a disc is incorrectly inserted - or no disc has been inserted - the symbol "-" and the word "no" appear in the display. - Playback of CDs produced by the user cannot be guaranteed due to the large variety of software and CD media available. - Please note these instructions for playing back CDs and CDRs in MP3 format! The device is not able to play back MP3 files. The CD begins to turn, but the sound cannot be heard.
Description of the CD Buttons
PLAY/PAUSE (11)
You can briefly interrupt and resume playback using this button. The current piece of music flashes in the display. Pressing again continues playback.
SKIP▶I/HOUR/SKIPI MINUTE(12/14)
With SKIP▶I/HOUR you can jump to the next or previous track etc.
- If the button is kept pressed down, the machine starts to search through the tracks.
The SKIP I MINUTE button can be used as follows:
Press once = This starts the current track again from the beginning.
Press twice = This jumps back to the previous track.
Press three times = This plays the song before etc. If the button is kept pressed down, the machine starts to search through the tracks.
STOP / CLOCK ADJ. (15)
The CD stops.
PLAY MODE (10)
Press once = (The REPEAT indicator lamp flashes) the current track is repeated continuously.
Press twice = (The REPEAT indicator lamp lights up) the whole CD is played continuously.
Press three times = (The RANDOM indicator lamp lights up) All tracks are played back in random order.
Press four times = all functions are cancelled. The normal play mode is resumed.
CD DISPLAY (9)
Press the CD DISPLAY button in order to briefly show the current CD track during CD playback. Then the current time is shown again.
Programmed Play
This can be used to program any desired sequence of tracks.
- Press the STOP / CLOCK ADJ. key (15).
- Press the PROGRAM / STORE key (8). The PROGRAM indicator lamp begins to flash. P01 (station preset) appears briefly in the display, followed by a flashing "00". Use the SKIP▶I/HOUR/SKIP I<MINUTE buttons (14/12) to select the desired track and then press the PROGRAM / STORE button again. The display changes to memory slot P02.
- Select the next track with the SKIP▶I / HOUR / SKIP I▶/ MINUTE key and press the PROGRAM / STORE key again. Repeat the procedure until all the desired tracks are selected.
- Press the PLAY/PAUSE key (11). The playback starts. The first track number selected appears briefly in the display and the PROGRAM indicator lamp lights up. Press this button to pause briefly the playback.
- Press once the STOP / CLOCK ADJ. key to stop the playback while retaining the program. The PROGRAM indicator lamp goes off.
- To resume the playback of the program press first the PROGRAM / STORE key once and then the PLAY/ PAUSE key.
- In order to delete the programme, first press the PROG button in stop mode and then the STOP / CLOCK ADJ. button.
To resume the playback of the program press first the PROGRAM / STORE key once and then the PLAY/PAUSE key. In order to delete the programme, first press the PROG button in stop mode and then the STOP / CLOCK ADJ. button.
It is also possible to combine the programmed tracks with the REPEAT function. After you have programmed and started the device, please press the PLAY MODE button (10) up to three times and then you can use the functions as described under "PLAY MODE".
Cleaning and Maintenance
Always remove the mains plug before cleaning the machine. - Any marks on the surface can be wiped off with a slightly damp cloth without any additives.
Troubleshooting
| Symptoms Course Solution | ||
| CD can not be played back. | CD is not inserted or inserted incorrectly. | Ensure that the disc is inserted with the label facing upwards. |
| CD jumps during playback. | Check the disc for fingersprints, dirt or scratches. | Check the disc for fingersprints, dirt or scratches. |
Technical Data
Model: SRC 4324 CD
Power supply: 220-240 V, 50 Hz
Battery power reserve: 9 V-Block
Power consumption: 14 W
Protection class: II
Net weight: 1.11 kg
Radio section:
Frequency ranges: VHF / FM 88.0 ~ 108.0 MHz
This device has been tested according to all relevant current CE guidelines, such as electromagnetic compatibility and low voltage directives, and has been constructed in accordance with the latest safety regulations.
Subject to technical changes without prior notice!

Meaning of the "Dustbin" Symbol
Protect our environment: do not dispose of electrical equipment in the domestic waste.
Please return any electrical equipment that you will no longer use to the collection points provided for their disposal.
This helps avoid the potential effects of incorrect disposal on the environment and human health.
This will contribute to the recycling and other forms of reutilisation of electrical and electronic equipment.
Information concerning where the equipment can be disposed of can be obtained from your local authority.
PRODUCT TO IEC 60825
LASER KLASSE 1
NACHIEC60825
In this device
PRODUCT TO IEC 60825
LASER KLASSE 1
NACHIEC60825
This appliance operates
with a class 1 laser.
PLAY MODE button (play/stop)
STOP button (in case of emergency)
11 PLAY/PAUSE button (play/pause)
12
Forward button
13 Function button (SNOOZE)
14
(Batteries are not included in the delivery)
Buttons Buttons Buttons Buttons Buttons
- Open the battery compartment cover (2) in the direction for the disc compartment. 2. Insert the battery 9V, observing the correct polarity.
- Close the compartment cover.
- If you do not use the device for a long time, remove the battery to avoid leakage of acid.
Turn on the device / Enter
Read the operating instructions carefully before using the device! To install the device, choose a flat place. The surface must be dry, level, and non-slip, on which you can comfortably use the device. - Make sure the device has sufficient ventilation! - If there is a protective film on the device, remove it.
Power supply
Plug the power cord into a properly grounded electrical outlet with parameters 230V, 50Hz. Make sure the mains voltage matches the data on the technical data plate of the device.
Setting the clock (Standby (OFF))
- Press the STOP / CLOCK ADJ. button (15). The clock display will start flashing.
- Press the SKIP ▶ / HOUR button (12) to set the hour. Keep the button pressed until you set the desired hour.
- To set the minutes, press the SKIP ▶ / MINUTE button (14). Keep the button pressed until you set the desired minute.
- Press the STOP / CLOCK ADJ. button again to save the time of day in memory.

NOTE:
Batteries must not be disposed of with household waste. Please take empty batteries to special collection points for hazardous waste or return them to the store where you purchased the device.

WARNING:
Do not expose batteries to high temperatures or direct sunlight. Strictly do not throw batteries into fire - there is a risk of explosion!
Protective cover for transporting CD programs
Open the CD compartment (1) by lifting the lid (4) upwards. - Before switching on the device, insert the protective cover for transporting CD programs.
Sound power
You can adjust the volume using the VOLUME control (3).
Display brightness
Using the DIMMER ON/OFF regulator (19), you can adjust the display brightness.
Switching the device on/off (7)
To switch the device to standby mode, press the POWER/ALARM OFF button. If you press the button again, the device will turn on again.
58 Ukrainian
AUX IN jack
For connecting external audio players. Through this jack, you can listen to the sound of other audio players through the speakers, play MP3 programs, play compact discs CD, and others.
1. Connect the audio player using a stereo 3.5 mm jack to the AUX IN jack (20). 2. Turn on the device by pressing the POWER / ALARM OFF button (7). The device will automatically switch to AUX IN mode. The sound of the radio or compact disc will be turned off. 3. Through the speakers, you can listen to the reproduced sound from the connected device; you can also adjust the volume using the VOLUME control (3). The CD buttons will not function in this case. 4. You can find more instructions in the operating instructions for the device you are connecting.
NOTE:
Set the volume control to a low level before connecting the device to avoid sudden loud sounds.
Listening to the radio
- Turn on the device by pressing the POWER/ALARM OFF button (7).
- Using the function selector (5), select the radio frequency band you want.
UKW = FM, Serendnixbuni = AM (Mono)
- Set the distance to the radio station you want to listen to.
- If the reception is weak, change the position of the antenna to one where reception is better. 5. For the FM band, an antenna is integrated in the device. You can rotate the device around its axis and thus find the optimal radio reception. In this band, transmission is only in mono sound.
Alarm clock function
Setting the alarm time (24 h)
You have the ability to turn on the alarm signal at two different times. To do this, follow these steps:
Press the ALARM 1 button (18). On the next display, the currently set alarm time will flash, and the ALARM 1 indicator light will be on. The first alarm time is activated. Press and hold the SKIP + HOUR or SKIP + MINUTE buttons to set the alarm time as needed.
NOTE:
After approximately 5 seconds of flashing, the current set time will be automatically saved.
To set a second alarm time, press the ALARM 2 button (16). Repeat the operation described above to set the second alarm time.
Deactivating the alarm function
To deactivate the alarm function, press the ALARM 1 or ALARM 2 button. The ALARM 1 or ALARM 2 indicator light will go out.
Radio alarm clock
After setting the alarm time and the radio station, turn on the device with the POWER/ALARM OFF button (7).

NOTE:
When the set time is reached, the radio alarm will turn on. The radio station and volume will be as set by you.
Alarm clock - timer
If you do not want it, it will beep to remind you. To switch the alarm signal, use the function switch (5) to the BUZZER position. The alarm signal will beep at the set time.
Alarm - CD program
To enable the alarm function with a programmed CD, as described in the manual, set the function switch to the "CD" position. Check that the CD is correctly placed. When the alarm is activated, the programmed CD will play automatically. The sound will be as set previously.
Turning off the alarm signal
Press the POWER / ALARM OFF button (7) to turn off the alarm signal.
Automatic alarm function with intervals
The automatic alarm function can be temporarily turned off by pressing the SNOOZE button (13) for an interval of approximately 6 minutes. The ALARM 1 or ALARM 2 indicator light will flash.
Turning off after a time interval (SLEEP button (17))
You can set this function to turn off the device after a certain time interval, putting it into standby mode. You can choose intervals of 90 minutes, 60 minutes, 30 minutes, and 15 minutes. Press the SLEEP button (17) repeatedly until the desired time interval appears on the display. The SLEEP indicator light will light up. The device will turn off automatically after the set time interval.
The turn-off time can be changed by pressing the SLEEP button (17) again.
The function can be turned off by pressing the POWER / ALARM OFF button (7).
Programming a Compact Disc (CD)
In this way you can program a CD.
- Turn on the device by pressing the POWER / ALARM OFF button (7). Set the function switch (5) to the "CD" position.
- Press the OPEN/CLOSE button (1) to load the disc, then press the PLAY/PAUSE button (4) to start playback. Place the disc with the label facing up. The disc has a mechanical contact with the player; do not touch the disc surface. Close the disc cover.
- The display shows the track number and the elapsed playing time of the track, as recorded on the disc. Press the PLAY/PAUSE button (11) to pause the disc playback.
- Playback of the disc resumes automatically from the first track on the disc. The current time will be shown on the display.
- To remove the CD from the player, press the STOP/CLOCK ADJ button (15), open the CD compartment cover, and carefully remove the disc.
Keep the CD compartment cover closed to prevent dust from entering.
NOTE:
If the disc was not loaded properly or the disc is defective, the display will show "--" and "no" (no). Due to the large number of formats of compact discs and other software products, playback of all formats cannot be guaranteed. Please pay attention to the label when recording CD-Rs or CD-RWs in MP3 format! This player is not designed for playing discs in MP3 format. The disc may spin, but playback may not be possible.
Description of CD buttons
PLAY/PAUSE (11)
Press to start playback for a short time and then pause it. The display shows the name of the current track. Pressing this button again resumes playback from the point where it was stopped.
SKIP▶I/HOUR/SKIPI/ MINUTE(12/14)
Using SKIP I/HOUR, you can skip to the next track or to any of the following tracks.
If you press and hold the button, the player will search through the tracks.
You can use the SKIP I MINUTE button as follows:
1 press: skips to the beginning of the current track. 2 presses: skips to the previous track. 3 presses: skips to the track before the previous one, and so on. If you press and hold this button, the player will search through individual tracks.
STOP / CLOCK ADJ. (15)
Service instructions
- Before cleaning, unplug the device from the socket and the external power supply. The device surface can be wiped with a slightly damp cloth, without using abrasive agents.
Troubleshooting
Rated voltage: 220-240 V, 50 Hz
Battery backup: 9 V block
Electrical safety class: II
Power consumption: II
Net weight: 1.11 kg
Radio: Frequency range: UKW/FM 88.0-108.0 MHz, LW/AM 540-1600 kHz
This device has been tested and complies with all relevant current EU directives, including the Electromagnetic Compatibility Directive and the Low Voltage Directive, and has been built in accordance with the latest safety standards.
We reserve the right to make technical modifications.
General safety instructions
Before using the device, carefully read the operating instructions. Keep them in a safe place, together with the warranty card, cash receipt and, if possible, the cardboard box with packaging material. If you give the device to someone else, be sure to also pass on these operating instructions.
- To prevent the risk of fire or electric shock, do not operate electrical appliances in damp or wet places. Do not use electrical appliances in the immediate vicinity of water (e.g., in a bathroom, swimming pool, or on a wet floor). Use the appliance only for its intended purpose. Plug the appliance only into sockets that are installed in accordance with all regulations. Make sure that the mains voltage matches the voltage rating of the appliance. If an external power supply is used, pay attention to its output voltage and polarity, and insert the batteries correctly. Place the appliance so that the ventilation openings are not blocked. Never open the appliance. Professional repair poses a great danger to the user. If the appliance is defective, especially if the power cord is damaged, do not switch it on again, but have it repaired by a qualified specialist. Regularly check the power cord for damage. To prevent accidents, a defective power cord may only be replaced by an equivalent one from the manufacturer, our customer service, or a qualified specialist.
- If this equipment is not used, disconnect it from the network and remove the batteries.
These labels may be on the housing and draw your attention to the following:

The lightning symbol indicates that parts of the electrical conductor are under a dangerous, high voltage.

The exclamation mark symbol draws your attention to important notes in the accompanying documents regarding the use and maintenance of the electrical device.

Electrical devices with this symbol are equipped with a Class 1 laser that is used for reading compact discs. During the opening of the compact disc tray, built-in protective devices prevent the laser beam, which is invisible and dangerous to the human eye, from reaching the user.
It is forbidden to disconnect or tamper with these protective switches under any circumstances, as this could create a risk of exposure to the laser beam.
These devices are intended for household use only.
- For safety reasons, do not leave packaging (plastic bags, cardboard, foam parts, etc.) within reach of children without supervision.

WARNINGS
Do not allow children to play with the power cord. Risk of suffocation!
This device is not intended for use by persons (including children) with reduced physical, sensory, or mental capabilities, or by persons lacking experience and knowledge, unless they are under the supervision of a person responsible for their safety or have received instructions on how to use the device. It is necessary to supervise children to ensure they do not play with the device.
Symbols used in this user manual
Important recommendations for ensuring safety are marked specially. You must follow these recommendations to prevent accidents and damage to the device:

WARNING:
Warning indicates a potential hazard that could result in injury.

BHIMAHNE:
Yka3bIbaeHa BO3MOKHyO OaCHOCTb IIN H3DeJIIN IN dpyInx OKpyKaIOUX INpeDMETOB.

IPMHMeyAHHE:JaetcoBtBuHINHΦopMaHIO.
CneuaNbHbIe yka3aHnno 6e3oNaCHOCTN
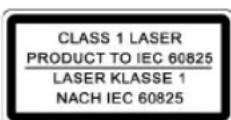
JaHHoe H3dEne OCHaSeHo JIa3epHbIM MoyJEm KnaCca 1.
O63op Detanei npnbopa
1
OTCEK
CD
2
OTCEK
6atapeek
3 VOLUME (pepynatopt rpoMkoctn)
JIeNEcTOKIINOTKpbBaHnOTeKa CD
11 Khonka PLAY/PAUSE (Bocnpoun3BedeHne/Tay3a)
12
1/H@R (Bnepe)
13 Function of the SNOOZE button
14
Do not throw batteries into household trash.
Please take used batteries to a
special collection point or a store.

WARNING:
Do not expose batteries to strong heat or direct
sunlight. Never throw batteries into fire.
There is a danger of explosion!
Preparation for switching on/entering
(reserve mode/standby (OFF))
- Press the STOP / CLOCK ADJ. button (15). The time indicator will start flashing. Press the SKIP I/HOUR button (12) to set the hour display. Hold it down until the desired hour display is set. To set the minute display, press the SKIP1/ MINUTE button (14). Hold it down until the desired minute display is set.
- Press the STOP / CLOCK ADJ. button once more to save the time in memory.
Transport packaging for CD player
- Open the CD compartment (1) by lifting the lid upward using the petal (4).
- Before use, remove the transport packaging from the player, if any.
Volume adjustment
Using the VOLUME regulator (3), set the desired volume.
Display brightness
Using the DIMMER ON/OFF button (19), adjust the display brightness.
Turning the device on/off (7)
Switch on using the POWER/ALARM OFF button in standby mode. If you press this button again, the music center will turn on.
AUX IN jack
Through this jack, you can listen to audio from other playback devices, such as MP3 players, CD players, etc.
- Connect the external device to the AUX IN jack (20) using a stereo cable with a 3.5 mm plug.
- Turn on the device using the POWER/ALARM OFF button (7). The device automatically switches to AUX IN mode. Radio or CD sound is turned off.
- Through the speakers, you can hear audio playback from the external device. Using the VOLUME regulator (3), you can adjust the volume. The CD button does not work.
- For further actions, read the instructions for the external audio source.
NOTE:
Adjust the volume of the external device to a level that suits your hearing.
Listening to the radio
- Turn on the device using the POWER / ALARM OFF button (7).
- Using the function switch (5), select the desired waveband.
UKV = FM, medium waves = AM (mono)
- Tune the station using the "TUNING" control (6).
- If the reception is too weak, to improve reception, change the position of the antenna. 5. Radio reception in the MW (AM) band: a built-in antenna is used. Rotating the device changes its position; tune to the radio station. In this band, radio stations transmit only in "MONO" mode.
Alarm clock
Programming the alarm clock (24 hours)
It is possible to program the alarm clock for two alarm times. To do this, proceed as follows:
Press the ALARM 1 key (18). The display will start flashing the current alarm time and the ALARM 1 indicator lamp will light up. The time of the first alarm is programmed. Then hold down the SKIP I/HOUR or SKIP I/MINUTE button (7/6) to select the alarm time.
NOTE:
After about 5 seconds, the digits will stop flashing and the current time display will be automatically saved.
To set the second alarm time, press the ALARM 2 key (16). Then proceed as described above to set the second alarm time.
During the alarm time, the alarm will sound.
Press the ALARM 1 or ALARM 2 key to turn off the alarm signal. The control lamp ALARM 1 or ALARM 2 will go out.
Alarm with radio
After you have set the alarm time and selected the desired radio station, turn off the device by pressing the POWER/ALARM OFF key (7).
NOTE:
As soon as the alarm time is reached, the radio will turn on and tune to the preset radio station with the preset volume.
Alarm with buzzer
- If you want to wake up to a beep, set the function switch (5) to the BUZZER position. As soon as the alarm time is reached, a beep will sound instead of the radio.
Alarm with CD player
To wake up to music from a CD inserted in advance, set the function switch to the "CD" position. Check that the CD is correctly inserted in the compartment. As soon as the alarm is triggered, the CD player will turn on automatically. The recording from the disc will be played at the preset volume.
Canceling the alarm signal
To turn off the alarm signal, press the POWER/ALARM OFF key (7).
Alarm with automatic interval
By pressing the SNOOZE key (13), you can postpone the alarm for 6 minutes. The control lamp ALARM 1 or ALARM 2 will flash.
Turning off with delay (SLEEP key (17))
You can set how long the device stays in standby mode before turning off. You can choose between 90 min., 60 min., 30 min., and 15 min. Press the SLEEP button until the desired time appears on the display. The SLEEP indicator light will be on. After the set time, the device turns off automatically.
The turn-off time can be changed later by pressing the SLEEP button again (17).
Pressing the "POWER / ALARM OFF" button (7) cancels this mode.
64 Russian
CD Playback
How to play a CD
- Turn on the device using the POWER/ALARM OFF button (7). Set the FUNCTION switch (5) to the CD position.
- Open the CD compartment (1) by lifting the lid by the tab (4). 3. Insert the CD into the compartment, label side up, onto the center spindle, and close the compartment lid.
- The display will show "--" and then the number of tracks. Press the PLAY/PAUSE button (11) to start playback of the CD.
- Playback starts automatically from the first track of the CD. The current time of day is shown on the display.
- To eject the CD, press the STOP / CLOCK ADJ. button (15), open the CD compartment, and carefully remove the disc.
Power consumption: 14 watts
Protection class: II
Net weight: 1.11 kg
Radio frequency:
Frequency range: YKB / FM 88.0 ~ 108.0 MHz
SW/AM 540~1600 kHz
This device has passed all necessary and current checks, prescribed by directive CE, for electromagnetic compatibility and compliance with low-voltage requirements. It was also designed and built taking into account the latest safety technology requirements.
We reserve the right to make technical changes!
WARRANTY CARD


- POLISH
- TABLE OF CONTENTS
- FRENCH
- GENERAL SAFETY INSTRUCTIONS
- CHILDREN AND FRAIL INDIVIDUALS
- WARNING
- SYMBOLS IN THESE INSTRUCTIONS FOR USE
- CAUTION
- SPECIAL SAFETY INFORMATION
- OVERVIEW OF THE COMPONENTS
- ENGLISH
- START-UP OF THE DEVICE/INTRODUCTION
- POWER SUPPLY
- SETTING THE TIME (IN STANDBY MODE (OFF))
- NOTE
- INSERTING THE BATTERIES (NOT SUPPLIED)
- TRANSPORT SAFETY DEVICE, CD COMPARTMENT
- VOLUME
- DISPLAY BRIGHTNESS
- SWITCHING THE DEVICE ON/OFF (7)
- AUX IN SOCKET
- LISTENING TO THE RADIO
- ALARM FUNCTION
- SETTING OF THE ALARM (24 H)
- DEACTIVATING THE ALARM TIME
- RADIO ALARM
- BUZZER ALARM
- TURNING OFF THE ALARM
- AUTOMATIC ALARM INTERVAL
- DELAYED SWITCH-OFF (SLEEP BUTTON (17))
- PLAYING CDS
- THIS IS HOW YOU PLAY A CD
- DESCRIPTION OF THE CD BUTTONS
- PLAY/PAUSE (11)
- SKIP▶I/HOUR/SKIPI MINUTE(12/14)
- PLAY MODE (10)
- CD DISPLAY (9)
- PROGRAMMED PLAY
- CLEANING AND MAINTENANCE
- TECHNICAL DATA
- MEANING OF THE "DUSTBIN" SYMBOL
- TURN ON THE DEVICE / ENTER
- SETTING THE CLOCK (STANDBY (OFF))
- PROTECTIVE COVER FOR TRANSPORTING CD PROGRAMS
- SOUND POWER
- UKRAINIAN
- AUX IN JACK
- ALARM CLOCK FUNCTION
- SETTING THE ALARM TIME (24 H)
- DEACTIVATING THE ALARM FUNCTION
- RADIO ALARM CLOCK
- ALARM CLOCK - TIMER
- ALARM - CD PROGRAM
- TURNING OFF THE ALARM SIGNAL
- AUTOMATIC ALARM FUNCTION WITH INTERVALS
- TURNING OFF AFTER A TIME INTERVAL (SLEEP BUTTON (17))
- PROGRAMMING A COMPACT DISC (CD)
- IN THIS WAY YOU CAN PROGRAM A CD
- DESCRIPTION OF CD BUTTONS
- SKIP▶I/HOUR/SKIPI/ MINUTE(12/14)
- STOP / CLOCK ADJ. (15)
- SERVICE INSTRUCTIONS
- TROUBLESHOOTING
- THESE DEVICES ARE INTENDED FOR HOUSEHOLD USE ONLY
- WARNINGS
- SYMBOLS USED IN THIS USER MANUAL
- BHIMAHNE
- CNEUANBHBIE YKA3AHNNO 6E3ONACHOCTN
- O63OP DETANEI NPNBOPA
- PREPARATION FOR SWITCHING ON/ENTERING
- (RESERVE MODE/STANDBY (OFF))
- TRANSPORT PACKAGING FOR CD PLAYER
- VOLUME ADJUSTMENT
- TURNING THE DEVICE ON/OFF (7)
- ALARM CLOCK
- PROGRAMMING THE ALARM CLOCK (24 HOURS)
- DURING THE ALARM TIME, THE ALARM WILL SOUND
- ALARM WITH RADIO
- ALARM WITH BUZZER
- ALARM WITH CD PLAYER
- CANCELING THE ALARM SIGNAL
- ALARM WITH AUTOMATIC INTERVAL
- TURNING OFF WITH DELAY (SLEEP KEY (17))
- RUSSIAN
- CD PLAYBACK
- HOW TO PLAY A CD
- WARRANTY CARD
Brand : AEG
Model : SRC 4324 CD
Category : Radio