ORC 100 - Radio OK - Free user manual and instructions
Find the device manual for free ORC 100 OK in PDF.
User questions about ORC 100 OK
0 question about this device. Answer the ones you know or ask your own.
Ask a new question about this device
Download the instructions for your Radio in PDF format for free! Find your manual ORC 100 - OK and take your electronic device back in hand. On this page are published all the documents necessary for the use of your device. ORC 100 by OK.
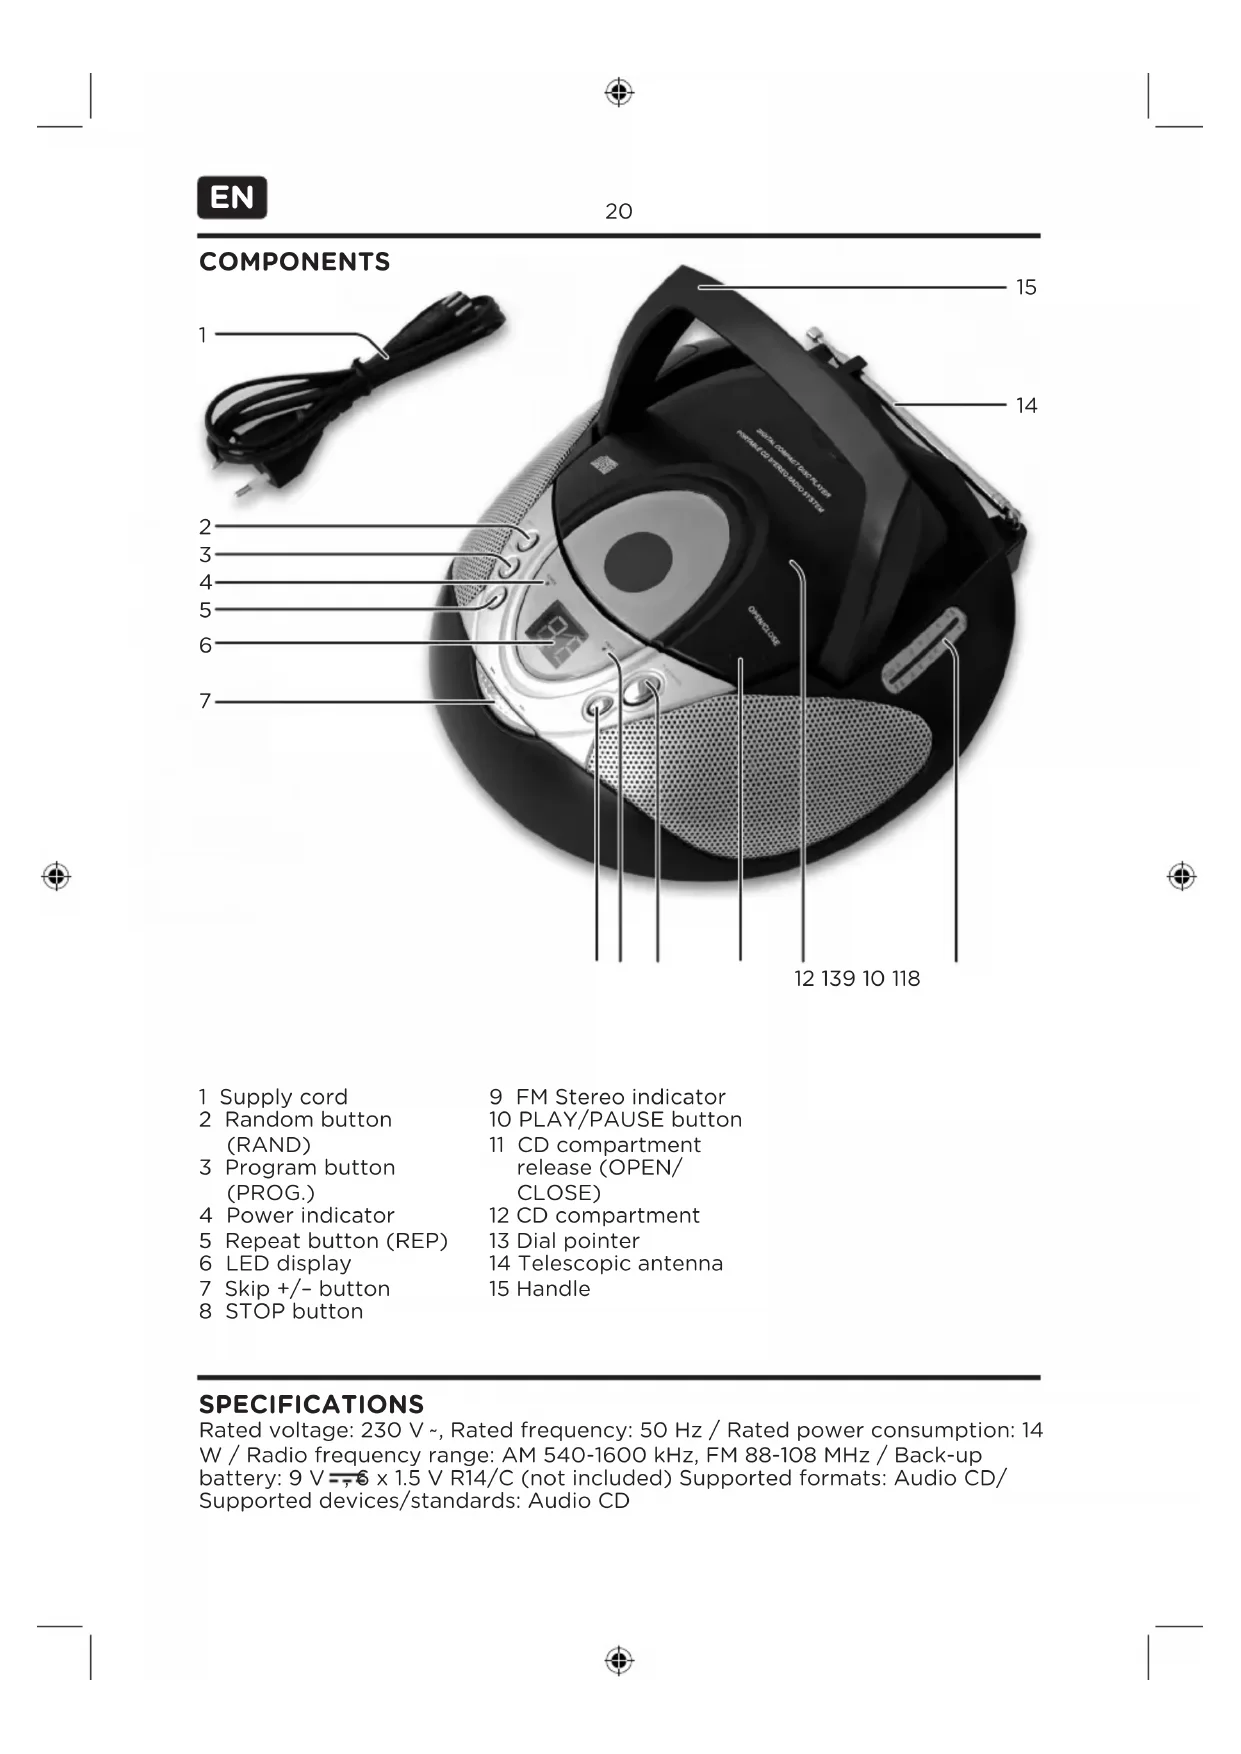
USER MANUAL ORC 100 OK
natural_image
Close-up of a black electronic device with a USB port and cable connector (no visible text or symbols)1
natural_image
Close-up of a white electrical outlet with a black cable inserted, showing a plug inserted into the socket (no text or symbols visible)2 oder
natural_image
Top-down view of a black circular device with ventilation grilles and a white arrow pointing to a component (no text or symbols visible)1
natural_image
Top-down view of a black circular device with visible internal components and ventilation grilles (no text or symbols)2
natural_image
Top-down view of a black plastic appliance with multiple batteries placed on its side (no visible text or symbols)3
text_image
FM ST. FM AM TUN2
text_image
FM ST. 1 FM AM TUN4
natural_image
Close-up of a white electronic device with digital display and control buttons (no visible text or symbols)PLAY/PAUSE
natural_image
Close-up of a car's front panel showing the 'CROSS-CLOSE' button and a mesh grille (no readable text or symbols beyond label)2
natural_image
Close-up of a mechanical device with a highlighted component and arrow indicating motion (no text or symbols visible)3
CD-Fach schließen.
natural_image
Close-up of a modern CD or DVD device with a digital display showing the number 12 (no visible text or symbols beyond the display)4
natural_image
Close-up of a modern electronic device with control knobs and a central display (no visible text or symbols)5
natural_image
Close-up of a digital CD or DVD device with no visible text or symbols on its face or body.7
natural_image
Close-up of a digital CD or DVD device with a digital display showing 12, no visible text or symbols on the device itself.8
natural_image
Close-up of a CD or DVD player with a digital display showing 0.1, no visible text or symbols on the device itself.1
natural_image
Close-up of a car's head and neck with two white arrows pointing to the lower section (no text or symbols visible)2
natural_image
Close-up of a digital CD or DVD device with a dial and control buttons (no visible text or symbols)3
natural_image
Close-up of a car's front bumper with digital display and two arrows pointing to the lens (no text or symbols visible)4
natural_image
Close-up of a digital CD or DVD player with a digital display showing 8.0, no visible text or symbols on the device itself.5
natural_image
Digital CD or DVD device with a digital display showing 12, no visible text or symbols on the device itself.6
natural_image
Close-up of a CD or DVD player with a digital display showing 12 o'clock (no visible text or symbols beyond the display)
natural_image
Close-up of a CD or DVD player with control buttons and a central display (no visible text or symbols)natural_image
Close-up of a CD or DVD player with control buttons and a digital display (no visible text or symbols)natural_image
Close-up of a black electronic device with ventilation slots and a USB cable inserted (no visible text or symbols)1
natural_image
Close-up of a white electrical outlet with a black cable inserted, showing a circular socket and an arrow pointing to it (no text or symbols visible)2
ñ
natural_image
Top-down view of a black circular device with a white arrow pointing to a panel, no visible text or symbols on the device itself.1
natural_image
Top-down view of a black circular device with visible internal components and mounting brackets (no text or symbols)2
natural_image
Top-down view of a black plastic appliance with multiple cylindrical batteries on its back (no visible text or symbols)3
text_image
FM ST. FM AM TUN2
text_image
FM ST. 1 FM AM TUNI4
natural_image
Close-up of a white electronic device with digital display and control buttons (no visible text or symbols)PLAY/PAUSE
natural_image
Close-up of a car's front grille and dashboard with a 'CROSS-CLOSE' label pointing to the grille (no other text or symbols visible)2
natural_image
Close-up of a CD or DVD disc with a white arrow pointing to its lid (no visible text or symbols)3
Κλείστε τη θύρα CD.
natural_image
Digital CD or DVD device with a digital display showing 12, no visible text or symbols on the device itself.4
natural_image
Close-up of a modern electronic device with control knobs and a central display (no visible text or symbols)5
natural_image
Close-up of a digital CD or DVD device with no visible text or symbols on its face (pure graphical)7
natural_image
Digital CD or DVD device with a digital display showing 12, no visible text or symbols on the device itself.8
natural_image
Close-up of a digital CD or DVD device with control buttons and an arrow pointing to the left side (no visible text or symbols)1
natural_image
Close-up of a car's rear window and dashboard area with two white arrows pointing to the highlights (no text or symbols visible)2
natural_image
Close-up of a digital CD or DVD player with a dial and control buttons (no visible text or symbols)3
natural_image
Close-up of a car's front bumper with digital display and two arrows pointing to the area (no text or symbols visible)4
natural_image
Close-up of a CD or DVD player with a digital display showing the number 8, no visible text or symbols on the device itself.5
natural_image
Digital CD or DVD device with a digital display showing 12, no visible text or symbols on the device itself.6
TYXAIA ANAPARAΓΩΓH CD
natural_image
Close-up of a digital CD or DVD device with a digital display showing the number 12, no visible text or symbols on the device itself.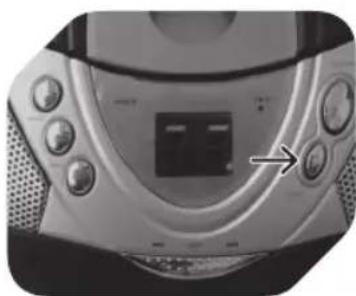
natural_image
Close-up of a CD or DVD player's front panel with buttons and a central display (no visible text or symbols)natural_image
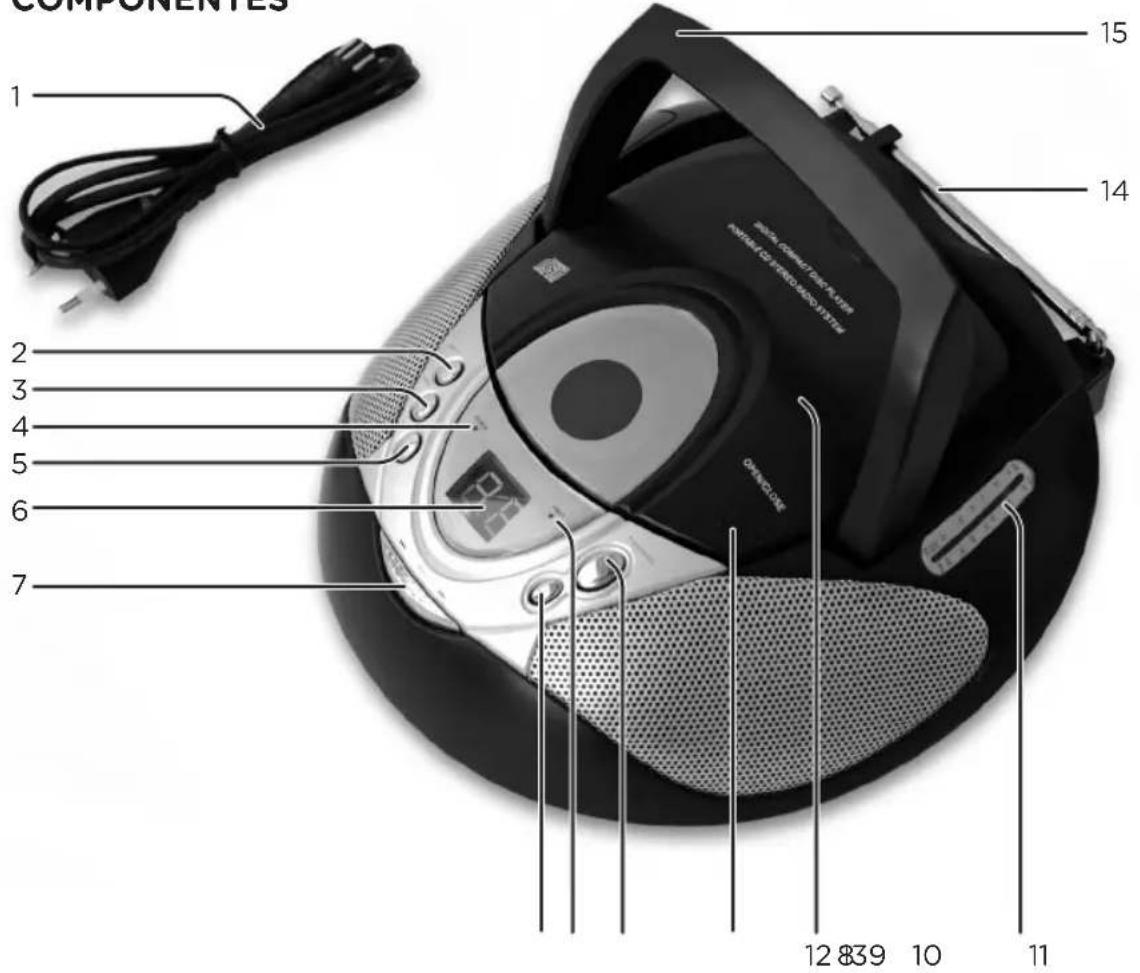
Close-up of a CD or DVD player with control buttons and a digital display (no visible text or symbols)9 FM Stereo indicator
10 PLAY/PAUSE button
11 CD compartment release (OPEN/CLOSE)
12 CD compartment
13 Dial pointer
14 Telescopic antenna
15 Handle
SPECIFICATIONS
Rated voltage: 230 V\~, Rated frequency: 50 Hz / Rated power consumption: 14 W / Radio frequency range: AM 540-1600 kHz, FM 88-108 MHz / Back-up battery: 9 V-, 6 x 1.5 V R14/C (not included) Supported formats: Audio CD/ Supported devices/standards: Audio CD

text_image
16 17 1918 20 2116 Tuning knob
17 Band selector (FM ST./FM/AM)
18 AC inlet
19 Volume control (MIN/MAX)
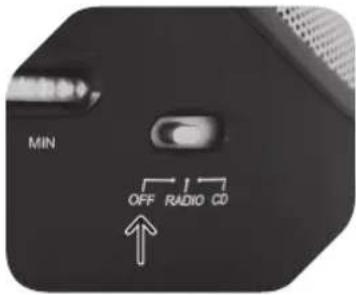
20 Function selector (OFF/RADIO/CD)
21 Battery compartment
BEFORE FIRST TIME USE
Carefully read this user manual in order to avoid damage or injuries due to incorrect use. Pay particular attention to safety instructions. Keep for future reference and pass it on to further users.
Carefully remove all packaging and check if appliance is complete and undamaged. In case of damage, do not use the appliance.
IMPORTANT: Before first time use, remove the protective sheet from the disc compartment.
INTENDED USE
This appliance is only intended for audio entertainment. Only use according to these instructions. Improper use is dangerous and will void any warranty claim. For household use only. Do not use outdoors.
EN

22
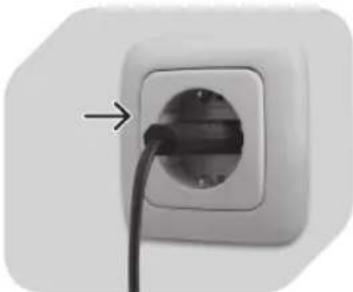
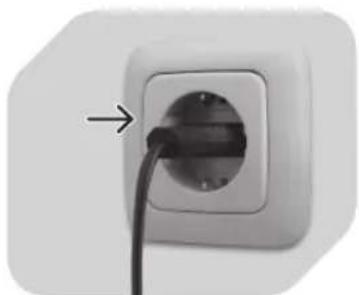
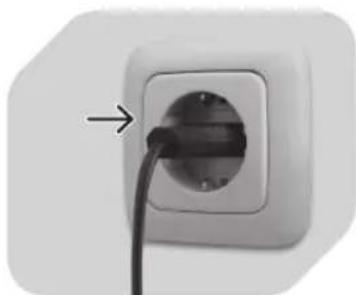
POWER SUPPLY
natural_image
Close-up of a black electronic device with ventilation slots and a USB port, no visible text or symbols1
natural_image
Close-up of a wall-mounted electrical outlet with a cable inserted, showing no text or symbols.2
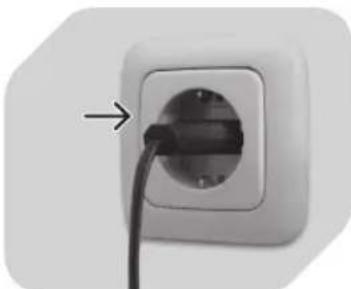
or
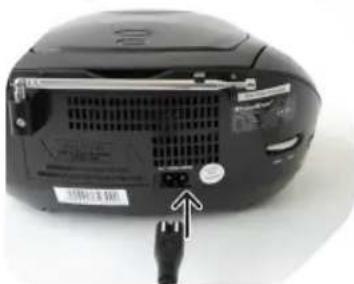
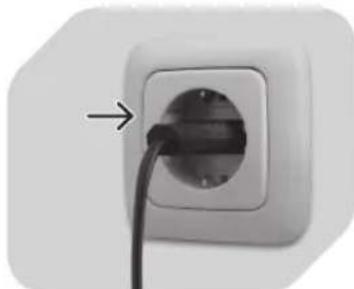
Plug the AC power cord into the AC inlet on the back of the unit.
Plug the unit in.
natural_image
Top-down view of a black circular robotic vacuum cleaner with a white arrow pointing to its side panel (no text or symbols visible)1

natural_image
Top-down view of a black circular device with ventilation grilles and a small labeled component (no visible text or symbols)2
natural_image
Top-down view of a black robotic device with multiple cylindrical batteries placed inside (no visible text or symbols)3
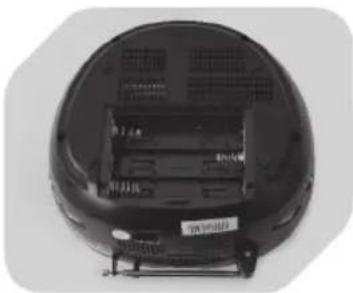
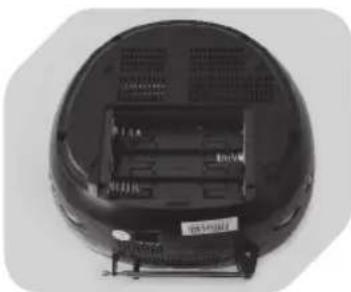
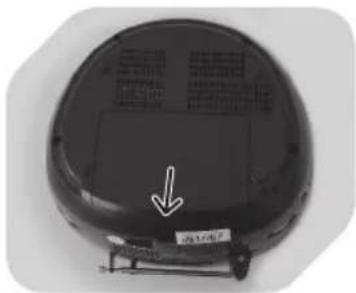
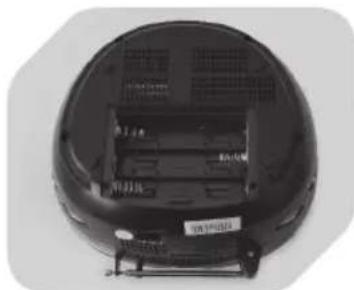
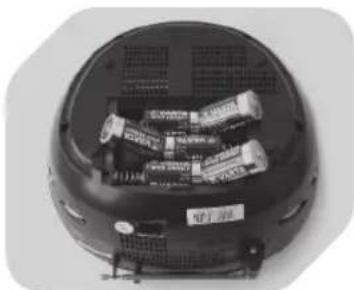
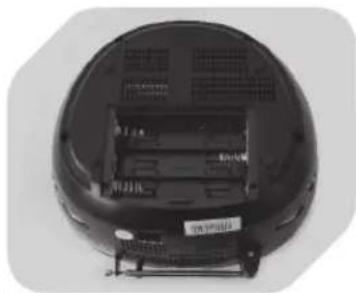
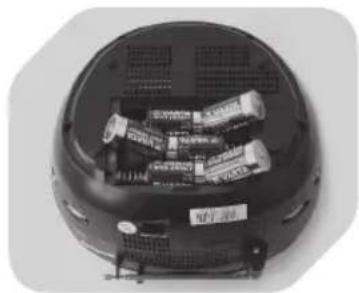
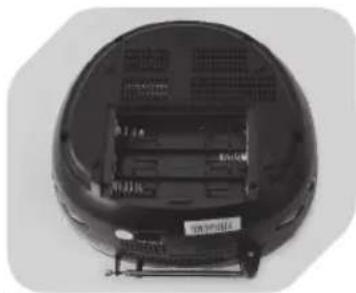
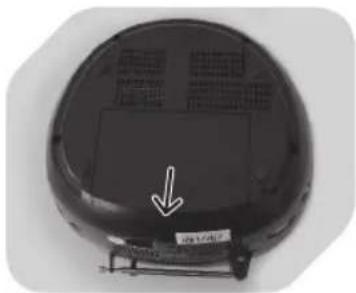
Remove battery compartment door.
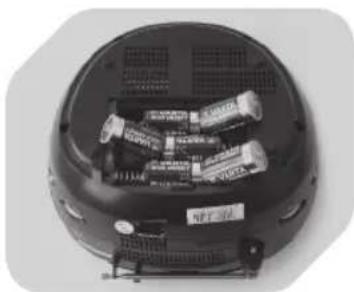
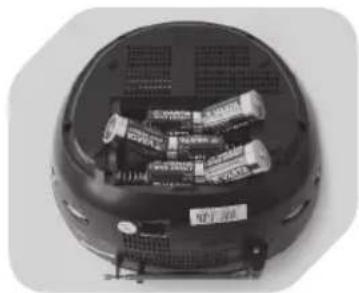
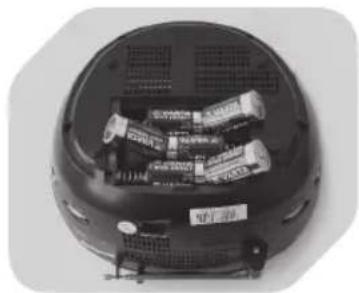
Insert 6x R14/C batteries (not included) into battery compartment.
Observe + and - markings.
NOTE
The batteries are not included; please refer to the safety instructions • provided by the battery manufacturer.
Always turn function switch to OFF position before plugging/unplugging • the appliance or inserting/removing batteries.
When using batteries, unplug the appliance from the mains.
When not using appliance for a long time, remove batteries in order to avoid • leakage.
DISPOSAL
Do not dispose of this appliance as municipal waste. Return it to a designated collection point for the recycling of electrical and electronic equipment. Contact your retailer or local authorities for more information. Do not dispose of batteries as household waste. Return waste batteries to your retailer or specialist shop.
RADIO OPERATION

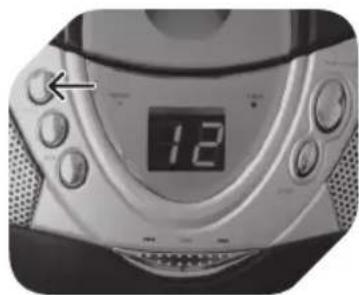
text_image
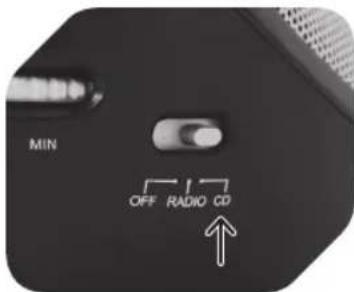
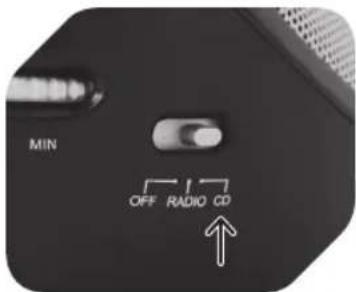
MIN OFF RADIO CD1
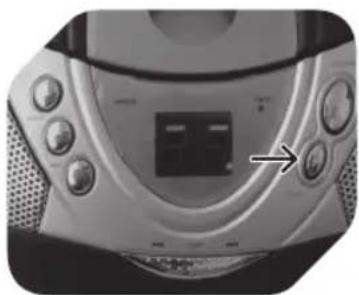
Set function selector to RADIO mode; POWER indicator lights up.
text_image
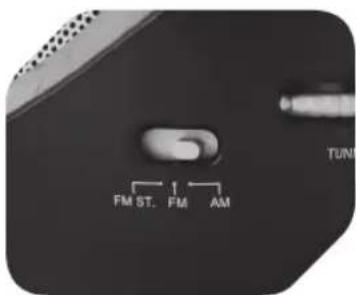
FM ST. FM AM TUN2
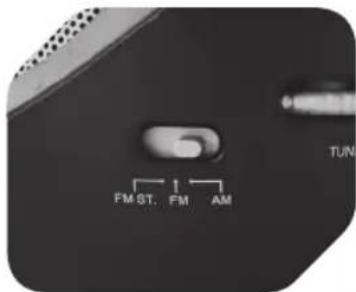
Select desired band (AM/FM) by using the band selector.
text_image
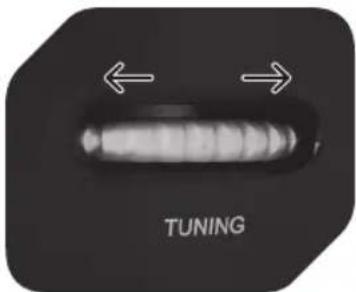
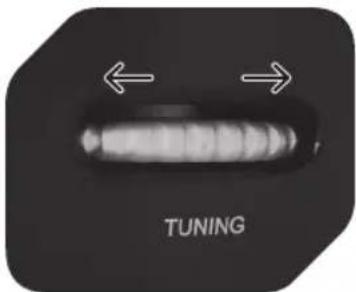
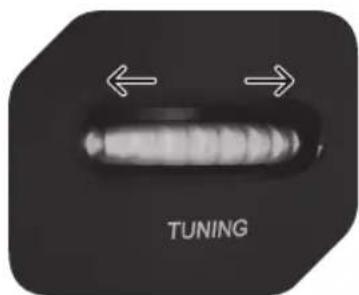
TUNING3
Use TUNING control to select desired radio station.
text_image
FM ST. 1 FM AM TUN4
Select FM for MONO reception. Select FM ST. for FM STEREO reception; the stereo indicator lights up.

text_image
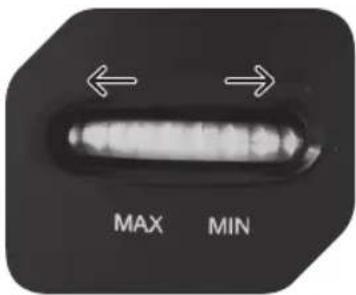
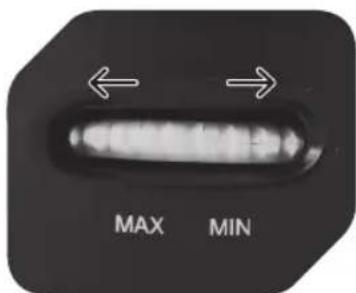
MAX MIN5
Adjust volume control (MIN/MAX) to desired level.
NOTE
For better FM • reception, fully extend and redirect the antenna at the back. For better AM • reception, reposition the radio.
natural_image
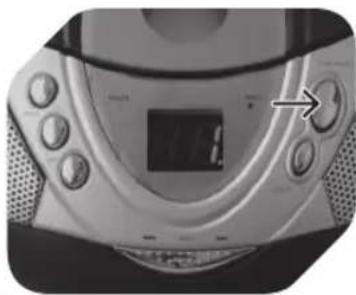
Close-up of a white electronic device with digital display and control buttons (no visible text or symbols)PLAY/PAUSE
Press to start CD playback.
Press again to pause CD playback.
Press again to resume playback.
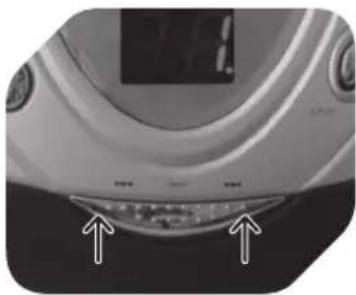
SKIP
Press to go to previous or next track.
Press and hold during playback to fast-forward or rewind.
STOP
Press to stop CD operation.
EN
24
CD PLAYBACK
text_image
MIN OFF RADIO CD1
Set function selector to CD mode.
text_image
ONCLOCK2
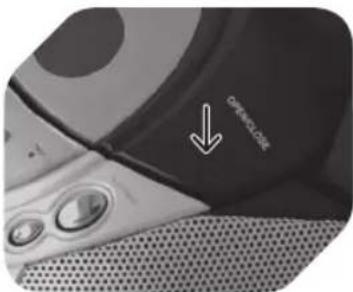
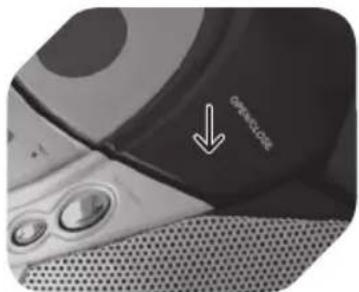
Open CD door by pressing OPEN/CLOSE and insert a CD disc with label facing up.
natural_image
Close-up of a black and silver electronic device with a white arrow pointing to a component (no visible text or symbols)3
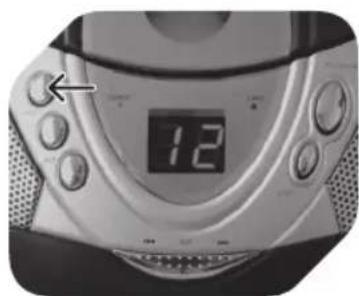
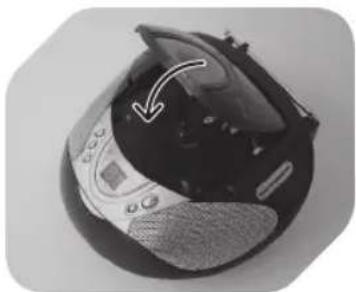
Close CD door.
natural_image
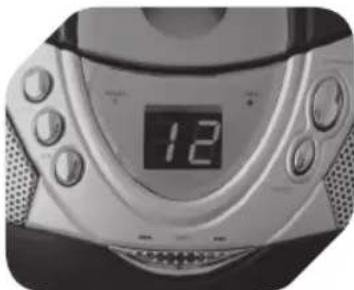
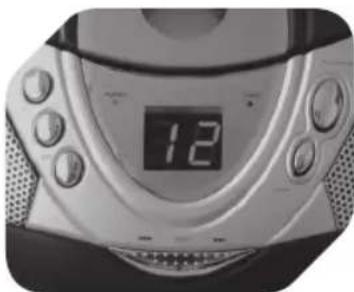
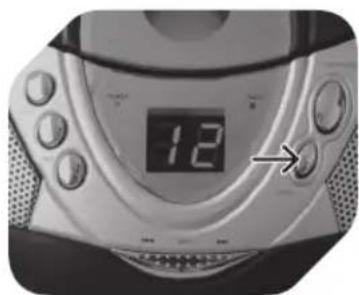
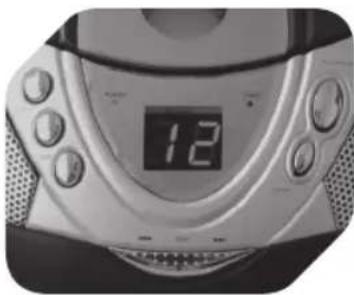
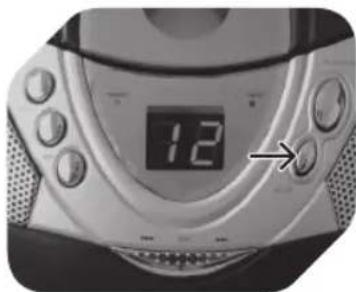
Close-up of a modern digital CD or DVD device with a digital display showing 12 (no visible text or symbols on the device body)4
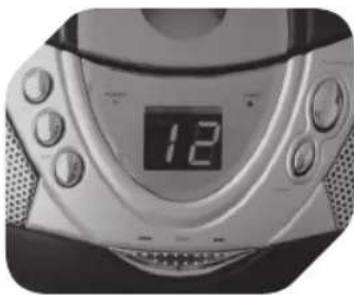
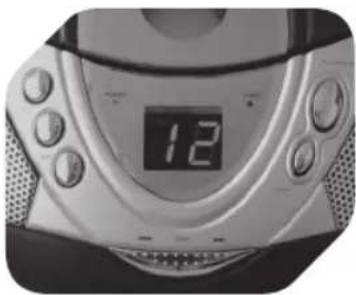
Focus search is performed when disc is inside. Total number of tracks is read and shown on the display.
natural_image
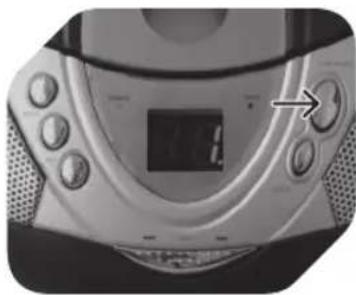
Close-up of a modern electronic device with control buttons and a central display (no visible text or symbols)5
Press PLAY/PAUSE to start playback (playback indicator lights up).
text_image
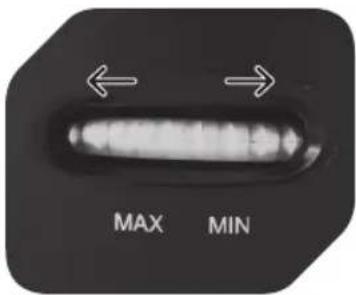
MAX MIN6
Adjust volume control (MIN/MAX) to desired level.
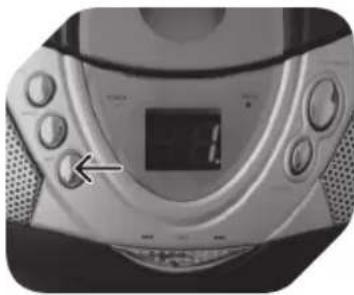
natural_image
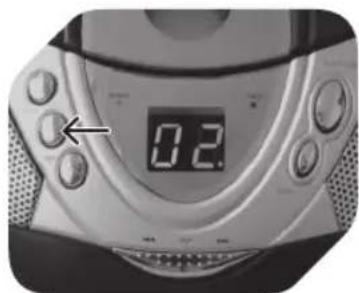
Close-up of a digital CD or DVD player with a digital display showing 0.2, no visible text or symbols on the device itself.7
Press PLAY/PAUSE to temporarily stop playback; current track number will be flashing.
natural_image
Digital CD or DVD device with a digital display showing 12, no visible text or symbols on the device itself.8
Press STOP when finished (display showing total number of tracks).
NOTE
If no disc is inserted, the display will show no.
CD PROGRAM PLAYBACK
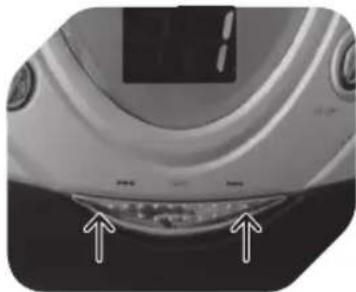
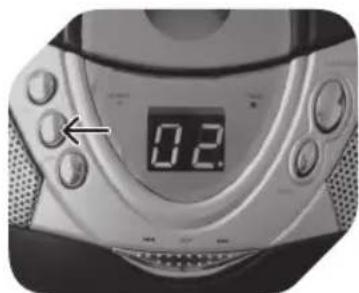
Make sure to press STOP button before using program function.
natural_image
Close-up of a digital CD or DVD device with a dial and control buttons (no visible text or symbols)1
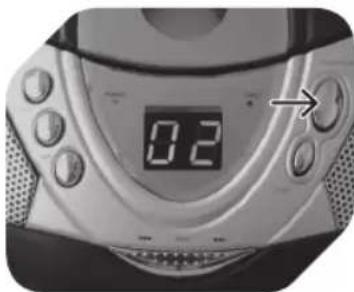
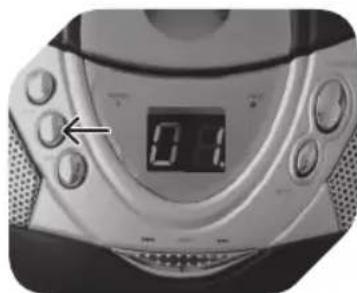
Press PROG button; 01. will be flashing in the display.
natural_image
Close-up of a car's rear bumper with two arrows pointing to the side (no visible text or symbols)2
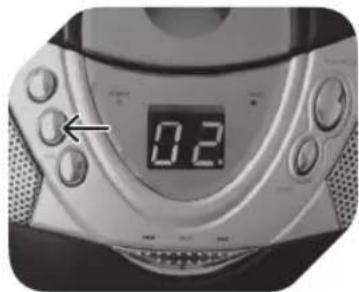
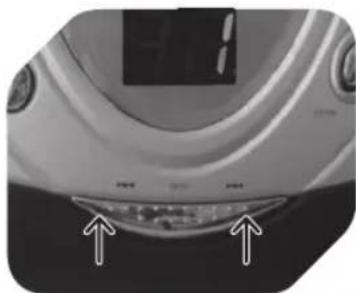
Press SKIP to select desired track.
natural_image
Close-up of a digital CD or DVD device with a dial and control buttons (no visible text or symbols)3
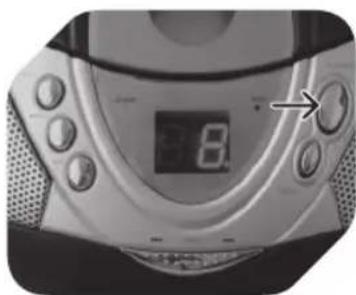
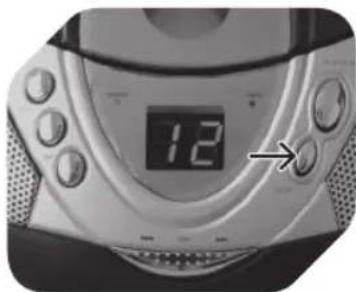
Press PROGRAM again to store desired track into program memory.
natural_image
Close-up of a car's front bumper with two arrows pointing to the lower side (no visible text or symbols)4
Repeat step 2 and 3 to program additional tracks.
natural_image
Close-up of a digital CD or DVD with a digital display showing 8.0, no visible text or symbols on the device itself.5
After programming all desired tracks, press PLAY/PAUSE to play selected tracks in programmed order (program indicator is flashing).
natural_image
Close-up of a digital CD or DVD device with a dial and control buttons (no visible text or symbols)6
Press STOP once to finish playback. Press STOP second time to cancel program playback (program indicator goes off).
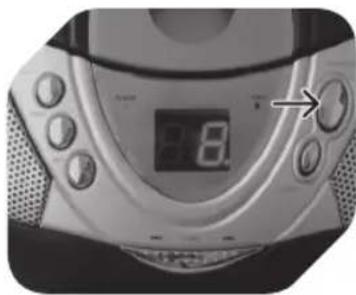
CD RANDOM PLAYBACK
natural_image
Close-up of a digital CD or DVD device with an arrow pointing to the front panel (no visible text or symbols on the device body)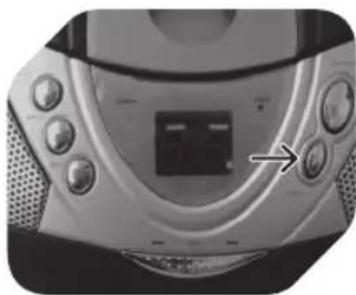
natural_image
Close-up of a CD or DVD player's front panel with buttons and a central display (no visible text or symbols)Before or during CD playback, press RAND once to select and play a track randomly. Press STOP to stop and cancel random playback.
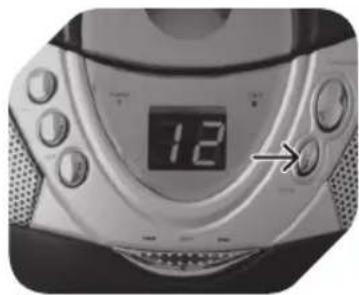
CD PLAYBACK MODES
natural_image
Close-up of a CD or DVD player with control knobs and a digital display (no visible text or symbols)Before or during CD playback, press REP repeatedly to switch repeat mode as follows:
REPEAT 1 TRACK (repeat indicator flashing)

REPEAT ALL TRACKS (repeat indicator steadily on)

NORMAL PLAYBACK (repeat indicator off)
TURNING APPLIANCE OFF
text_image
MIN OFF RADIO CDAfter radio or CD operation, slide function selector to OFF position to turn off the appliance. The appliance remains connected to the power supply, unless appliance is unplugged or batteries are removed.
CD MAINTENANCE
A small amount of dust or scratches will usually not have an impact • on the quality of a disc. The discs should, however, be treated with care.
Protect your compact discs from dust and scratches.
Store your compact discs in their covers when not in use.
To maintain the original quality of sound, you should occasionally wipe your compact discs with a soft cloth, from the centre to the edge (not with circular movements). Never use gasoline or other solvents.
Only hold a compact disc by its edges!

CLEANING AND CARE
Before cleaning, unplug the supply cord. Allow the appliance to cool down • completely.
Clean appliance with a dry and soft cloth.
NOTE
Only use CD compact discs with digital audio signals.
The making of unauthorized copies of copyright-protected material, including computer programs, files, broadcasts and sound recordings, may be an infringement of copyrights and constitute a criminal offence under your national law. This equipment should not be used for such purposes. The information on the compact disc is read by a laser through an optical lens (do not touch). If you take the appliance from a cold to a warm room, moisture may condense on the lens, and the playback may be hampered. In this case leave the appliance for one hour at room temperature before use. Take the disc out of the appliance. Should the problem persist, have the appliance checked by qualified personnel.


ES
28
COMPONENTES
text_image
COMPONENTS 1 2 3 4 5 6 7 15 14 POWER cord 12 839 10 11Cable de 1.
alimentación
Reproducción 2.
aleatoria (RAND)
natural_image
Close-up of a black electronic device with ventilation slots and a USB cable inserted (no visible text or symbols)1
natural_image
Close-up of a white electrical outlet with a black cable inserted, showing an arrow pointing to the outlet (no text or symbols visible)2
0
natural_image
Top-down view of a black circular device with a white arrow pointing to a screen (no visible text or symbols)1
natural_image
Top-down view of a black circular device with visible internal components and ventilation grilles (no text or symbols)2
natural_image
Top-down view of a black plastic appliance with multiple cylindrical batteries on its back (no visible text or symbols)3
text_image
FM ST. FM AM TUN2
text_image
FM ST. 1 FM AM TUN4
natural_image
Close-up of a white electronic device with digital display and control buttons (no visible text or symbols)PLAY/PAUSE
natural_image
Close-up of a black and silver electronic device with a white arrow pointing to a component (no visible text or symbols)natural_image
Close-up of a modern digital CD or DVD device with a digital display showing 12 o'clock (no visible text or symbols beyond the display)natural_image
Close-up of a modern electronic device with control knobs and a digital display (no visible text or symbols)natural_image
Close-up of a digital CD or DVD player with a digital display showing 0.2, no visible text or symbols on the device itself.natural_image
Digital CD or DVD device with a digital display showing 12, no visible text or symbols on the device itself.natural_image
Close-up of a digital CD or DVD device with a dial and control buttons (no visible text or symbols)1
natural_image
Close-up of a car's rear bumper with two arrows pointing to the side (no visible text or symbols)2
natural_image
Digital CD or DVD player with analog dial and control buttons (no visible text or symbols)3
natural_image
Close-up of a car's rear window and dashboard area with two white arrows pointing to the highlights (no text or symbols visible)4
natural_image
Close-up of a digital CD or DVD player with a digital display showing 8.0, no visible text or symbols on the device itself.5
natural_image
Digital CD or DVD player with a digital display showing 12, no visible text or symbols on the device itself.6
natural_image
Close-up of a digital CD or DVD device with an arrow pointing to the left side (no visible text or symbols on the device body)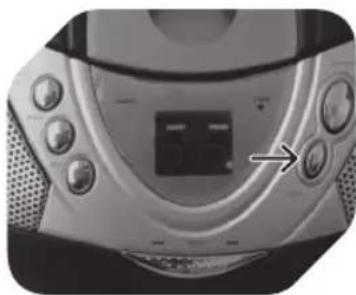
natural_image
Close-up of a CD or DVD player with control knobs and a digital display (no visible text or symbols)natural_image
Close-up of a CD or DVD player with control buttons and a digital display (no visible text or symbols)Bouton programme 3. (PROG.)
natural_image
Close-up of a black electronic device with a USB port and cable connector (no visible text or symbols)1

natural_image
Close-up of a white electrical outlet with a black cable inserted, showing a plug inserted into the socket (no text or symbols visible)2
ou
natural_image
Top-down view of a black circular device with ventilation grilles and a white arrow pointing to a component (no text or symbols visible)1

natural_image
Top-down view of a black circular device with visible internal components and ventilation grilles (no text or symbols)2

natural_image
Top-down view of a black plastic appliance with multiple batteries placed on its side (no visible text or symbols)3
text_image
FM ST. FM AM TUN2
text_image
FM ST. 1 FM AM TUN4
natural_image
Close-up of a white electronic device with digital display and control buttons (no visible text or symbols)PLAY/PAUSE
natural_image
Close-up of a black and silver electronic device with a white arrow pointing to a component (no visible text or symbols)3
natural_image
Close-up of a silver CD or DVD with a digital display showing 12 o'clock (no visible text or symbols beyond the display)4
natural_image
Close-up of a modern electronic device with a digital display and control buttons (no visible text or symbols)5
natural_image
Digital CD or DVD player with a digital display showing 0.2, no visible text or symbols on the device itself.7
natural_image
Digital CD or DVD player with a digital display showing 12, no visible text or symbols on the device itself.8
natural_image
Close-up of a digital CD or DVD device with control buttons and an arrow pointing to the left side (no visible text or symbols)1
natural_image
Close-up of a car's front bumper with two arrows pointing to the lower lip area (no text or symbols visible)2
natural_image
Close-up of a digital CD or DVD device with a dial and control buttons (no visible text or symbols)3
natural_image
Close-up of a car's front bumper with digital display and two arrows pointing to the lower lip (no text or symbols visible)4
natural_image
Close-up of a CD or DVD player with a digital display showing 8.0, no visible text or symbols on the device itself.5
natural_image
Close-up of a digital CD or DVD device with a dial and control buttons (no visible text or symbols)6
natural_image
Close-up of a digital CD or radio device with an arrow pointing to the left side (no visible text or symbols on the device body)
natural_image
Close-up of a CD or DVD player with control buttons and a central display (no visible text or symbols)natural_image
Close-up of a CD or DVD player with control buttons and a digital display (no visible text or symbols)natural_image
Close-up of a black electronic device with a USB cable inserted, showing ventilation and ports (no readable text or symbols)1

natural_image
Close-up of a white electrical outlet with a black plug inserted, showing no text or symbols.2 vagy
natural_image
Top-down view of a black circular device with a white arrow pointing to a panel, no visible text or symbols.1
natural_image
Top-down view of a black circular device with visible internal components and mounting brackets (no text or symbols)2
natural_image
Top-down view of a black plastic helmet with multiple batteries placed on its side (no visible text or symbols)3
text_image
FM ST. FM AM TUN2
text_image
FM ST. 1 FM AM TUNI4
natural_image
Close-up of a digital washing machine with control buttons and a digital display (no visible text or symbols)PLAY/PAUSE
natural_image
Close-up of a car's front panel showing the 'CROSS-CLOSE' logo and a white arrow pointing to it, with no visible text or symbols beyond the label.2
natural_image
Close-up of a black and white electronic device with a curved arrow pointing to a component (no visible text or symbols)3
natural_image
Close-up of a modern digital CD or DVD device with a digital display showing the number 12 (no visible text or symbols on the device body)4
natural_image
Close-up of a modern electronic device with control knobs and a digital display (no visible text or symbols)5
natural_image
Close-up of a digital CD or DVD device with a digital display showing 0.2, no visible text or symbols on the device itself.7
natural_image
Digital CD or DVD device with a digital display showing 12, no visible text or symbols on the device itself.8
natural_image
Close-up of a CD or DVD player with digital display and control buttons (no visible text or symbols)1
natural_image
Close-up of a car's head and neck area with two white arrows pointing to the lower section (no text or symbols visible)2
natural_image
Close-up of a digital CD or DVD player with a dial and control buttons (no visible text or symbols)3
natural_image
Close-up of a car's front bumper with digital display and two arrows pointing to the lower lip (no text or symbols visible)4
natural_image
Close-up of a digital CD or DVD player with a digital display showing 8 seconds, no visible text or symbols on the device itself.5
natural_image
Digital CD or DVD device with a digital display showing 12, no visible text or symbols on the device itself.6
natural_image
Close-up of a digital CD or DVD device with a digital display showing 12, no visible text or symbols on the device itself.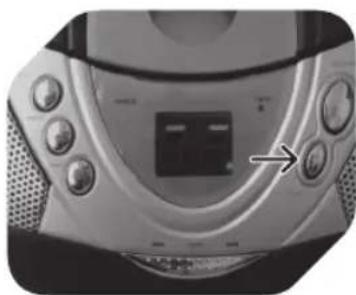
natural_image
Close-up of a CD or DVD player's front panel with control buttons and a central display (no visible text or symbols)natural_image
Close-up of a CD or DVD player with control knobs and a digital display (no visible text or symbols)natural_image
Close-up of a black electronic device with a USB cable inserted, showing ventilation grille and ports (no visible text or symbols)1

natural_image
Close-up of a white electrical outlet with a black plug inserted, showing an arrow pointing to the plug (no text or symbols visible)2 oppure
natural_image
Top-down view of a black circular device with a white arrow pointing to a panel, no visible text or symbols on the device itself.1

natural_image
Top-down view of a black circular device with ventilation grilles and a small labeled component (no visible text or symbols)2
natural_image
Top-down view of a black plastic robot head with multiple cylindrical batteries placed on its back (no visible text or symbols)3
Osservare le marcature + e -.
AvvERTENZA
text_image
FM ST. 1 FM AM TUN2
text_image
FM ST. 1 FM AM TUN4
natural_image
Close-up of a white electronic device with digital display and control buttons (no visible text or symbols)PLAY/PAUSE
natural_image
Close-up of a car interior showing a door with 'OPEN-CLOCK' label and a white arrow pointing to the door (no other text or symbols)2
natural_image
Close-up of a black circular electronic device with a lid and internal components, no visible text or symbols.3
natural_image
Close-up of a silver CD or DVD with a digital display showing the number 12 (no visible text or symbols beyond the display)4
natural_image
Close-up of a CD or DVD player with control buttons and a digital display (no visible text or symbols)5
natural_image
Close-up of a digital CD or DVD device with no visible text or symbols on its face or body.7
natural_image
Close-up of a digital CD or DVD player with a digital display showing 12, no visible text or symbols on the device itself.8
natural_image
Close-up of a digital CD or DVD device with control buttons and an arrow pointing to the left side (no visible text or symbols)1
natural_image
Close-up of a car's rear bumper with two arrows pointing to the front and side (no text or symbols visible)2
natural_image
Close-up of a digital CD or DVD device with a dial and control buttons (no visible text or symbols)3
natural_image
Close-up of a car's front bumper with digital display and two arrows pointing to the lower lip (no text or symbols visible)4
natural_image
Close-up of a CD or DVD player with a digital clock showing 8.0, no visible text or symbols on the device surface.5
natural_image
Close-up of a digital CD or DVD device with a digital display showing 12, no visible text or symbols on the device itself.6
natural_image
Close-up of a digital CD or DVD device with an arrow pointing to the front panel (no visible text or symbols on the device body)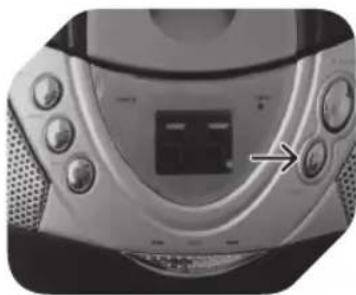
natural_image
Close-up of a CD or DVD player's front panel with buttons and a central display (no visible text or symbols)natural_image
Close-up of a CD or DVD player with control knobs and a digital display (no visible text or symbols)FM Stereo-indicator9.
PLAY/PAUSE-knop10.
natural_image
Back view of a black electronic device with ventilation slots and a USB cable inserted (no visible text or symbols)1
natural_image
Close-up of a white electrical outlet with a black cable inserted, showing a circular socket and an arrow pointing to the outlet (no text or symbols visible)2
of
natural_image
Top-down view of a black circular device with ventilation grilles and a white arrow pointing to a component (no visible text or symbols)1

natural_image
Top-down view of a black circular device with visible internal components and mounting brackets (no text or symbols)2

natural_image
Top-down view of a black plastic helmet with multiple batteries placed on its cover (no visible text or symbols)3
text_image
FM ST. FM AM TUN2
text_image
FM ST. 1 FM AM TUNI4
natural_image
Close-up of a white electronic device with digital display and control buttons, no visible text or symbolsPLAY/PAUSE
natural_image
Close-up of a black and white electronic device with a paper airplane, showing internal components and a digital display (no text or symbols visible)3
Sluit de CD-klep.

natural_image
Close-up of a modern digital CD or radio device with a digital display showing 12 o'clock (no visible text or symbols beyond the display)4
natural_image
Close-up of a CD or DVD player with control buttons and a digital display (no visible text or symbols)5
natural_image
Close-up of a digital CD or DVD head with a digital display showing 0.2, no visible text or symbols beyond the display.7
natural_image
Digital CD or DVD device with a digital display showing 12, no visible text or symbols on the device itself.8
natural_image
Close-up of a digital CD or DVD device with a clock face and control buttons (no visible text or symbols)1
natural_image
Close-up of a car's rear bumper with two white arrows pointing to the front and side (no text or symbols visible)2
natural_image
Close-up of a digital CD or DVD device with a dial and control buttons (no visible text or symbols)3
natural_image
Close-up of a car's front bumper with two arrows pointing to the lower lip area (no text or symbols visible)4
natural_image
Close-up of a digital CD or DVD with a digital display showing 8 seconds, no visible text or symbols on the device itself.5
natural_image
Close-up of a digital CD or DVD device with a dial and control buttons (no visible text or symbols)6
natural_image
Close-up of a digital CD or DVD device with an arrow pointing to the front panel (no visible text or symbols on the device body)
natural_image
Close-up of a CD or DVD player's front panel with buttons and a central display (no visible text or symbols)natural_image
Close-up of a CD or DVD player with control buttons and a digital display (no visible text or symbols)natural_image
Close-up of a black electronic device with a USB cable inserted, showing ventilation grille and ports (no visible text or symbols)1
natural_image
Close-up of a white electrical outlet with a black cable inserted, showing a circular socket and an arrow pointing to the outlet (no text or symbols visible)2 albo
natural_image
Top-down view of a black circular device with a white arrow pointing to a panel, no visible text or symbols on the device itself.1
natural_image
Top-down view of a black circular device with visible internal components and mounting brackets (no text or symbols)2
natural_image
Top-down view of a black plastic robot head with multiple batteries placed on its back (no visible text or symbols)3
text_image
FM ST. FM AM TUN2
text_image
FM ST. 1 FM AM TUN4
natural_image
Close-up of a white electronic device with digital display and control buttons, no visible text or symbolsPLAY/PAUSE
natural_image
Close-up of a black and white helmet with a curved arrow pointing to the lid area (no text or symbols visible)3
natural_image
Close-up of a digital CD or DVD device with a digital display showing the number 12 (no visible text or symbols beyond the display)4
natural_image
Close-up of a modern electronic device with a digital display and control buttons (no visible text or symbols)5
natural_image
Close-up of a CD or DVD player with a digital display showing 0.2, no visible text or symbols on the device itself.7
natural_image
Close-up of a digital CD or DVD player with a digital display showing 12, no visible text or symbols on the device itself.8
natural_image
Close-up of a digital CD or DVD device with a digital display showing 0.1, no visible text or symbols on the device itself.1
natural_image
Close-up of a car's rear bumper with two arrows pointing to the front and side (no visible text or symbols)2
natural_image
Close-up of a digital CD or DVD device with a dial and control buttons (no visible text or symbols)3
natural_image
Close-up of a car's head and neck area with arrows pointing to the lower portion (no visible text or symbols)4
natural_image
Close-up of a digital CD or DVD with a digital display showing 8 seconds, no visible text or symbols on the device itself.5
natural_image
Digital CD or DVD device with a digital display showing 12, no visible text or symbols on the device itself.6
natural_image
Close-up of a digital CD or DVD device with an arrow pointing to the front panel (no visible text or symbols on the device body)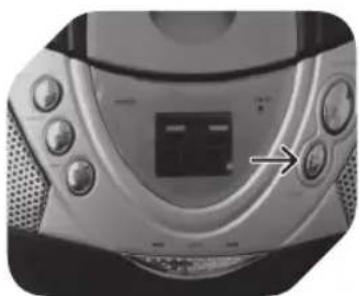
natural_image
Close-up of a CD or DVD player's front panel showing buttons and a central display (no visible text or symbols)natural_image
Close-up of a CD or DVD player with control buttons and a digital display (no visible text or symbols)natural_image
Close-up of a black electronic device with ventilation slots and a USB cable connector (no visible text or symbols)1

natural_image
Close-up of a wall-mounted electrical outlet with a cable inserted, showing a black arrow pointing to the cable (no text or symbols visible)2
ou
natural_image
Top-down view of a black circular device with a white arrow pointing to a panel, no visible text or symbols on the device itself.1

natural_image
Top-down view of a black circular device with visible internal components and mounting brackets (no text or symbols)2
natural_image
Top-down view of a black plastic robot head with multiple batteries placed on its back (no visible text or symbols)3
text_image
FM ST. FM AM TUN2
Seleccione a banda desejada (AM/FM) utilizando o seletor de banda.
text_image
TUNING3
text_image
FM ST. 1 FM AM TUN4
natural_image
Close-up of a white electronic device with digital display and control buttons (no visible text or symbols)PLAY/PAUSE
text_image
ORSS-CLOSE2
natural_image
Top-down view of a mechanical device with a highlighted component and arrow indicating motion (no text or symbols visible)3
Fecha a tampa do compartimento de CD

natural_image
Close-up of a silver CD or DVD with a digital display showing the number 12 (no visible text or symbols beyond the display)4
natural_image
Close-up of a modern electronic device with a digital display and control buttons (no visible text or symbols)5
natural_image
Close-up of a digital CD or DVD device with a digital display showing 0.2, no visible text or symbols on the device itself.7
natural_image
Close-up of a digital CD or DVD device with a digital display showing 12, no visible text or symbols on the device itself.8
natural_image
Close-up of a digital CD or DVD device with a clock face and control buttons (no visible text or symbols)1
natural_image
Close-up of a car's rear bumper with two arrows pointing to the front and side (no visible text or symbols)2
natural_image
Close-up of a digital CD or DVD device with a dial and control buttons (no visible text or symbols)3
natural_image
Close-up of a car's front bumper with two arrows pointing to the lower lip area (no text or symbols visible)4
natural_image
Close-up of a digital CD or DVD player with a digital display showing 8 seconds, no visible text or symbols on the device itself.5
natural_image
Close-up of a digital CD or DVD device with a dial and control buttons (no visible text or symbols)6
natural_image
Close-up of a digital CD or DVD device with an arrow pointing to the front panel (no visible text or symbols on the device body)
natural_image
Close-up of a CD or DVD player's front panel with buttons and a central display (no visible text or symbols)natural_image
Close-up of a CD or DVD player with control knobs and a digital display (no visible text or symbols)natural_image
Close-up of a black electronic device with ventilation slots and a USB cable connector (no visible text or symbols)1
natural_image
Close-up of a white electrical outlet with a black cable inserted, showing a circular socket and an arrow pointing to the outlet (no text or symbols visible)2 или
natural_image
Top-down view of a black robotic vacuum cleaner with a white arrow pointing to its side panel (no text or symbols visible)1
natural_image
Top-down view of a black circular device with ventilation grilles and a small connector (no visible text or symbols)2
natural_image
Top-down view of a black plastic appliance with multiple cylindrical batteries on its back (no visible text or symbols)3
text_image
FM ST. FM AM TUN2
text_image
FM ST. 1 FM AM TUN4
natural_image
Close-up of a white electronic device with digital display and control buttons (no visible text or symbols)PLAY/PAUSE
natural_image
Close-up of a car interior showing dashboard and grille (no visible text or symbols)2

natural_image
Top-down view of a black and silver electronic device with a curved arrow pointing to its lid (no visible text or symbols)3
natural_image
Close-up of a modern digital CD or DVD device with a digital display showing 12 o'clock (no visible text or symbols beyond the display)4
natural_image
Close-up of a modern electronic device with control knobs and a digital display (no visible text or symbols)5
text_image
MAX MIN6
natural_image
Close-up of a digital CD or DVD device with a digital display showing 0.2, no visible text or symbols on the device itself.7
natural_image
Close-up of a digital CD or DVD device with a digital display showing 12, no visible text or symbols on the device itself.8
ПРИМЕЧАНИЕ
natural_image
Close-up of a digital CD or DVD device with a hand pointing to the left side (no visible text or symbols)1
natural_image
Close-up of a car's rear bumper with two white arrows pointing to the lower lip (no text or symbols visible)2
natural_image
Close-up of a digital CD or DVD device with a dial and control buttons (no visible text or symbols)3
natural_image
Close-up of a car's front bumper with digital display and two white arrows pointing to the lower lip area (no text or symbols visible)4
natural_image
Close-up of a digital CD or DVD player with a digital display showing 8.0, no visible text or symbols on the device itself.5
natural_image
Close-up of a digital CD or DVD device with a digital display showing 12, no visible text or symbols on the device itself.6
natural_image
Close-up of a CD or DVD player with a digital display showing 12 o'clock (no visible text or symbols beyond the display)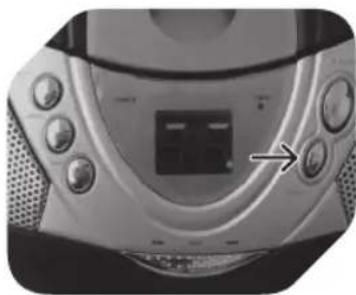
natural_image
Close-up of a CD or DVD player with control buttons and a central display (no visible text or symbols)natural_image
Close-up of a CD or DVD player with control knobs and a digital display (no visible text or symbols)natural_image
Close-up of a black electronic device with a USB port and a black connector, no visible text or symbols.1
natural_image
Close-up of a white electrical outlet with a black plug inserted, showing an arrow pointing to the plug (no text or symbols visible)2 eller
natural_image
Top-down view of a black circular device with a white arrow pointing to a screen and a small label on the side (no readable text or symbols)1
Ta bort luckan till batterifacket.
natural_image
Top-down view of a black circular device with visible internal components and ventilation grilles (no text or symbols)2
natural_image
Top-down view of a black plastic appliance with multiple cylindrical batteries on its back (no visible text or symbols)3
text_image
FM ST. FM AM TUN2
text_image
FM ST. FM AM4
natural_image
Close-up of a white electronic device with digital display and control buttons (no visible text or symbols)PLAY/PAUSE
natural_image
Close-up of a car interior showing a door and textured surface with a white arrow pointing to the door (no text or symbols visible)2
natural_image
Close-up of a black and silver electronic device with a white arrow pointing to a component (no visible text or symbols)3
Stäng CD-luckan.
natural_image
Close-up of a modern electronic device with a digital display showing the number 12 (no visible text or symbols beyond the display)4
natural_image
Close-up of a CD or DVD player with control buttons and a digital display (no visible text or symbols)5
natural_image
Close-up of a digital CD or DVD device with a digital display showing 0.2, no visible text or symbols on the device itself.7
natural_image
Close-up of a digital CD or DVD player with a digital display showing 12, no visible text or symbols on the device itself.8
natural_image
Close-up of a digital CD or DVD device with control knobs and a digital display showing 0.1 (no visible text or symbols)1
natural_image
Close-up of a car's rear bumper with two arrows pointing to the lens area (no text or symbols visible)2
natural_image
Close-up of a digital CD or DVD device with a dial and control buttons (no visible text or symbols)3
natural_image
Close-up of a car's rear bumper with two arrows pointing to the area (no visible text or symbols)4
natural_image
Close-up of a CD or DVD player with a digital display showing 8.0, no visible text or symbols on the device itself.5
natural_image
Digital CD or DVD device with a digital display showing 12, no visible text or symbols on the device itself.6
natural_image
Close-up of a digital CD or DVD device with a dial and control buttons (no visible text or symbols)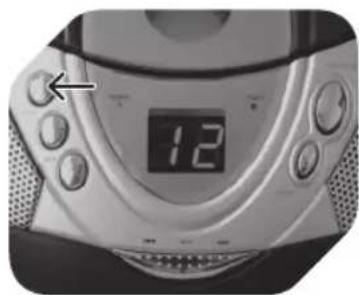
natural_image
Close-up of a digital CD or DVD device with a dial and control buttons (no visible text or symbols)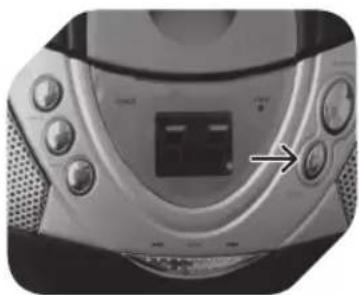
natural_image
Close-up of a CD or DVD player's front panel with buttons and a central display (no visible text or symbols)
natural_image
Close-up of a CD or DVD player's front panel showing buttons and a central display (no visible text or symbols)natural_image
Close-up of a CD or DVD player with control knobs and a digital display (no visible text or symbols)natural_image
Close-up of a black electronic device with a USB port and a black connector, no visible text or symbols.1

natural_image
Close-up of a white electrical outlet with a black plug inserted, showing an arrow pointing to the plug (no text or symbols visible)2 veya
natural_image
Top-down view of a black circular device with a white arrow pointing to a screen and a small label on the side (no readable text or symbols)1

natural_image
Top-down view of a black circular device with visible internal components and ventilation grilles (no text or symbols)2
natural_image
Top-down view of a black plastic appliance with multiple cylindrical batteries on its back (no visible text or symbols)3
text_image
FM ST. FM AM TUN2
text_image
FM ST. 1 FM AM TUN4
natural_image
Close-up of a white electronic device with digital display and control buttons, no visible text or symbolsPLAY/PAUSE
natural_image
Close-up of a black and white helmet with a white arrow pointing to the lid area (no text or symbols visible)3
natural_image
Digital CD or DVD device with a digital display showing the number 12 (no visible text or symbols beyond the display)4
natural_image
Close-up of a modern electronic device with control knobs and a central display (no visible text or symbols)5
natural_image
Close-up of a digital CD or DVD device with a digital display showing 0.2, no visible text or symbols on the device itself.7
natural_image
Close-up of a digital CD or DVD device with a dial and control buttons (no visible text or symbols)8
natural_image
Close-up of a modern digital CD or DVD device with control buttons and a digital display showing 0.11 (no readable text or symbols beyond the display)1
natural_image
Close-up of a car's rear bumper with two arrows pointing to the area (no visible text or symbols)2
natural_image
Close-up of a digital CD or DVD device with a dial and control buttons (no visible text or symbols)3
natural_image
Close-up of a car's rear bumper with two arrows pointing to the highlights (no text or symbols visible)4
natural_image
Close-up of a digital CD or DVD with a digital display showing 8.0, no visible text or symbols on the device itself.5
natural_image
Close-up of a digital CD or DVD player with a digital display showing the number 12, no visible text or symbols on the device itself.6
natural_image
Close-up of a digital CD or DVD device with an analog clock showing 12, no visible text or symbols on the device itself.
natural_image
Close-up of a silver portable electronic device with control knobs and a central display (no visible text or symbols)natural_image
Close-up of a CD or DVD player with control buttons and a digital display (no visible text or symbols)natural_image
Close-up of a black electronic device with a USB port and cable connector (no visible text or symbols)1

natural_image
Close-up of a white electrical outlet with a black cable inserted, showing a circular socket and an arrow pointing to the outlet (no text or symbols visible)2
或
将AC电源线插入设备背部的AC入口。
插上设备。
natural_image
Top-down view of a black circular device with a white arrow pointing to a display panel (no text or symbols visible)1

natural_image
Top-down view of a black circular device with ventilation grilles and a small labeled component (no visible text or symbols)2
natural_image
Top-down view of a black plastic appliance with multiple batteries placed on its side (no visible text or symbols)3
拆开电池盒门。
text_image
FM ST. FM AM TUN2
text_image
TUNING3
text_image
FM ST. 1 FM AM TUNI4
text_image
MAX MIN5
说明
natural_image
Close-up of a white electronic device with digital display and control buttons (no visible text or symbols)PLAY/PAUSE
按压以开始CD重放。
再次按压以暂停CD重放。
再次按压以恢复重放。
SKIP
按压至前一曲或后一曲。
在重放期间按压并握住可以快进或卷带。
STOP
按压以停止CD操作。
ZH
CD重放
text_image
MIN OFF RADIO CD1
设置功能选择器至CD模式。
natural_image
Close-up of a car door panel with a white arrow pointing to the door (no text or symbols visible)2
natural_image
Close-up of a black and silver electronic device with a white arrow pointing to its lid (no visible text or symbols)3
关闭CD门。
natural_image
Close-up of a modern electronic device with a digital display showing the number 12 (no visible text or symbols beyond the display)4
natural_image
Close-up of a CD or DVD player with control buttons and a digital display (no visible text or symbols)5
natural_image
Close-up of a digital CD or DVD player with a digital display showing 0.2, no visible text or symbols on the device itself.7
natural_image
Close-up of a digital CD or DVD device with a digital display showing the number 12, no visible text or symbols on the device itself.8
natural_image
Close-up of a digital CD or DVD device with control buttons and an arrow pointing to the left side (no visible text or symbols)1
natural_image
Close-up of a car's rear bumper with two arrows pointing to the highlights (no text or symbols visible)2
按压 SKIP 以选择理想的歌曲。
natural_image
Close-up of a digital CD or DVD device with a dial and control buttons (no visible text or symbols)3
natural_image
Close-up of a car's side profile showing the front wheel and dashboard (no text or symbols visible)4
重复第2和3步至节目的其它歌曲。

natural_image
Close-up of a CD or DVD player with a digital display showing 8.0, no visible text or symbols on the device itself.5
natural_image
Close-up of a digital CD or DVD device with a dial and control buttons (no visible text or symbols)6
natural_image
Close-up of a digital CD or DVD device with a digital display showing 12, no visible text or symbols on the device itself.