
RD8520 - Radio AudioSonic - Free user manual and instructions
Find the device manual for free RD8520 AudioSonic in PDF.
| Product Type | Internet Radio / FM / Multimedia with 2.4-inch Color TFT Display |
| Brand | AudioSonic |
| Model | RD8520 |
| Power Supply | DC power adapter (included); Batteries for remote control |
| Network Connectivity | Wi-Fi 802.11b/g/n; UPnP; DLNA |
| Radio Reception | FM (87.5 – 108 MHz); Internet Radio |
| Audio Inputs / Outputs | 3.5mm auxiliary input (Aux In); 3.5mm line output (Line Out) |
| Main Functions | Internet Radio, FM, UPnP multimedia center, alarms (3 independent), sleep timer, equalizer (7 modes), weather, stock info, my mediaU |
| Station Memory | Up to 250 favorites (Internet); 20 FM presets |
| Display | 2.4-inch TFT display; adjustable backlight |
| Menu Languages | English, German, Spanish, French, Portuguese, Italian |
| Maintenance and Cleaning | Unplug before cleaning; use a soft, dry cloth (slightly damp if very dirty); do not use solvents |
| Safety | Protect from moisture, dust, and shocks; use only the supplied adapter; avoid prolonged listening at high volume with headphones |
| Spare Parts / Repairability | Parts available at service.tristar.eu; do not open the device yourself |
| Warranty | 24 months, upon presentation of proof of purchase |
| Environmental Considerations | Do not dispose of with household waste; take to a WEEE recycling center |
Frequently Asked Questions - RD8520 AudioSonic
User questions about RD8520 AudioSonic
0 question about this device. Answer the ones you know or ask your own.
Ask a new question about this device
Download the instructions for your Radio in PDF format for free! Find your manual RD8520 - AudioSonic and take your electronic device back in hand. On this page are published all the documents necessary for the use of your device. RD8520 by AudioSonic.
USER MANUAL RD8520 AudioSonic
- Do not drop the device and do not expose it to liquid, moisture or humidity. These might lead to damage to the device.
If the device is moved from a cold environment into a warmer one, let it adapt to the new temperature before turning it on. Otherwise, it might lead to condensation and cause malfunctions in the device. - Do not use the device in a dusty environment as dust can damage the interior electronic components and lead to malfunctions in the device.
- Protect the device from strong vibrations and place it on stable surfaces. Do not attempt to disassemble the device.
- Only use the power adaptor delivered with the device. The socket outlet should be installed near the device and should be easily accessible. Never touch the power plug with wet hands and never pull on the power cable when pulling the plug out of the power socket.
- Make sure the electrical voltage specified on the device and its power plug is corresponding to the voltage of the power socket. Incorrect voltage will destroy the device. The normal functioning may be disturbed by strong electro-magnetic interference. If so, simply reset the product to resume normal operation by following the instruction manual. If the radio could not resume, please use it in other location.
- If the device is not used for a long period of time, disconnect it from the power supply by unplugging the power plug. This to avoid the risk of fire. It is not recommended to listen to the device with a headphone via LINE OUT. In case you use a headphone, always reduce the volume before put on the headphones. After
the headphones are positioned properly, increase the volume to the desired level. It is not recommended to use headphone with the device through the 3.5mm audio out socket. In case of using the headphones, be reminded that excessive sound pressure or volumes from headphones or earphones can lead to damage to your hearing. Always adjust the volume to a pleasant, not too loud level. If you have adjusted the volume of the headphone to be too loud and that for an extended period, it can damage your hearing.
- Always power off the device when you are cleaning it. Never use any harsh or strong solvents to clean the device since these may damage the surface of the device. Dry, soft cloth is appropriate, however, if the device is extremely dirty it may be wiped off with a slightly moist cloth. Make sure the device is dried off after cleaning if you have to dispose the device in the future, note that it should not be disposed with household waste. Bring it to a collection point for the recycling of electrical devices. Consult your local authority or retailer for recycling advice.

AudioSonic
Instruction Manual
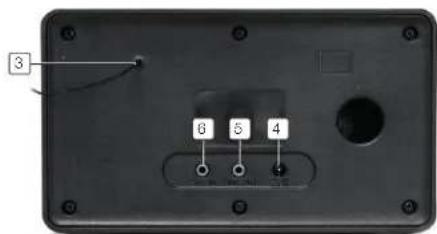
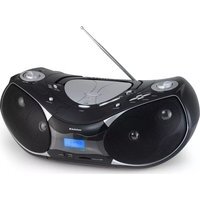
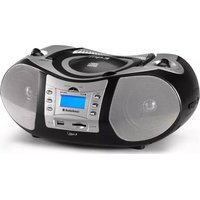
APPEARANCE AND PARTS DESCRIPTION
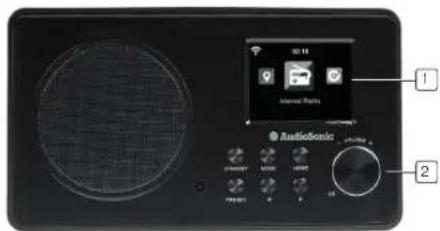
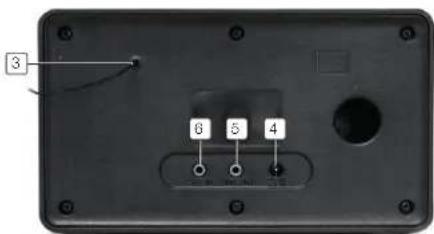
1.24TFTScreen Display
2. Buttons and Reel Control the OS operations
3. Antenna Enhance FM reception
- DC IN Power supply
5.Aux in
3.5 mm aux in jack - Line out 3.5mm line out jack
GETTING STARTED
The packaging box contains the following items:
Main unit
Remote Control
Power adaptor
-User Manual
Connect the power adaptor to the back of the device and plug into power socket. Connect the adapter plug at the back of the device. Remember to pull out the clear plastic tab from the battery compartment before using the remote.
NETWORK REQUIREMENTS
Before using the device, the following requirements are needed:
- A broadband connection in combination with a wired/wireless access point, router or similar network device.
The network device needs to support WiFi (802.11b/g/n) wireless connection.
- For streaming local media: a PC or smart phone with a network connection. This network has to be the same one as the device is connected with.
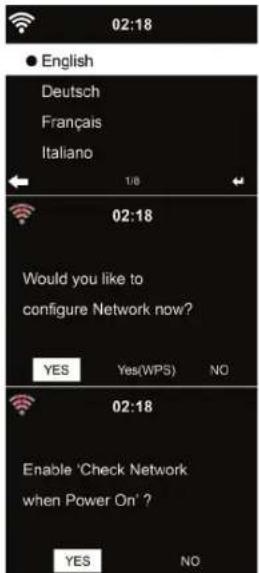
- When you operate the radio for the first time, the system will ask you to set Language and Network Configurations.
- You may setup the network connection immediately, or set it later.
- Press the standby button to enter standby mode. The time, date and any active alarm times display on the screen.
-
If you have setup a network connection, and use the device again within the network, the device will automatically make the connection. In case you desire to change the network, enter the configuration menu (Push the mode button until you enter configuration mode) to setup the corresponding connection.
-
Use the volume knob to select numbers/letters.
- Once you are on the letter you want, press > to move to the next entry. When you have finished input, press the volume knob to confirm. You may press < to move to previous entry.
DEVICE FUNCTIONS OVERVIEW
Main Menu
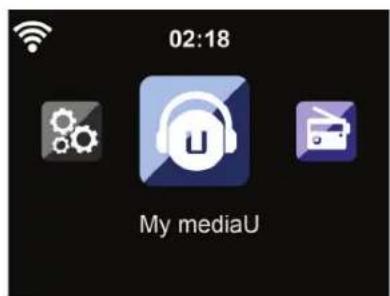
Under the main menu, you can Select the following modes: My mediaU (if it is enabled), Internet Radio, Media Center, FM, Aux In, Information Center, Configuration.

AudioSonic
Instruction Manual
Configuration

02:18

Manage my mediaU

Network

Date&Time

Alarm
Manage my mediaU
- When it is enabled, My mediaU will exist on the main menu.
If various media account exist in the device, Select the default login account in hrc.
Network

02:18
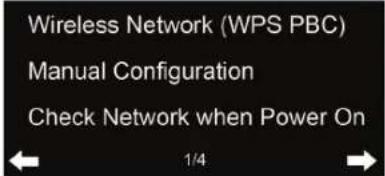
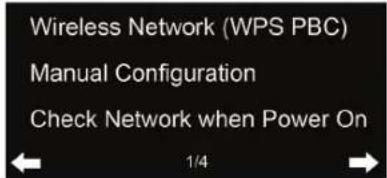
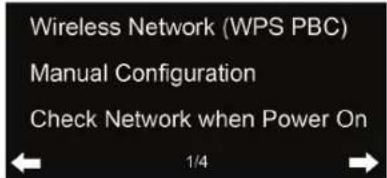
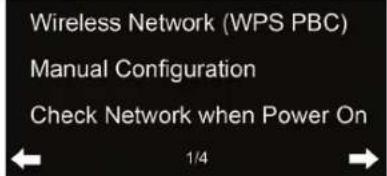
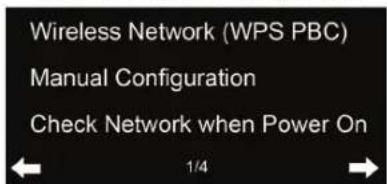
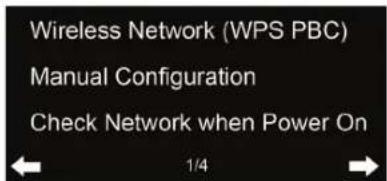
Wireless Network Configuration
Wireless Network (WPS PBC)
Manual Configuration
Check Network when Power On

1/4
Wireless Network Configuration
The unit will automatically scan for available networks.

02:18
Connecting to network ...

Select your access point.

02:18

Derek.AP

HSPAWireless

MAhome

polartesting
1/10
Enter WEP or WPA code to connect to your wireless network.
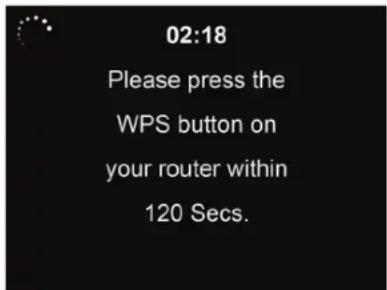
Wireless Network (WPS PBC)
If you are using a router with WPS/QSS button, you may set up the network connection simply via WPS function. Enter it and go to press the WPS/QSS button on your router within 120 seconds. The connection between the router and Music Link will then be configured automatically.
Manual Configuration
You can choose DHPC (which IP assigned automatically) or manually input IP address for wireless network connection.
When you Select manual setting for wired connection, the followings have to be entered:
SSID (the name of Access Point);
IP Address:
- Subnet Mask:
- Default Gat
Preferred DNS Server:
Alternate DNS Server.
You may choose (Manage) specific network if you have setup more than one network connection within an area.
Check Network when Power On.
When you enable this function, the system will automatically search the available AP. If the wireless network connection is not existed or failed, the icon at the top left corner will have a cross on it.
Date & Time
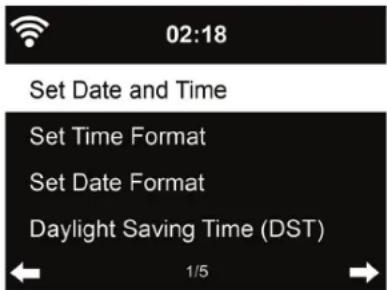
- Setup the date and time; set time format display as 12 Hour or 24 Hour; set date format in the positions of YY (year), MM (month) and DD (day) -YY/MM/DD, DD/MM/YY or MM/DD/YY.
- Turn on/off the Daylight Saving Time (DST).
- With a wireless network connected, GMT (+00:00) time is a time reference of time setting. Add or deduce the hour according to your time zone when you set the time.
Alarm

02:18
Alarm1(Turn Off)
Alarm2(Turn Off)
NAP Alarm (Turn Off)
Alarm Volume

1/4
- There are three independent alarms - 2 alarms of an absolute time setting (Alarm 1 and Alarm 2) and 1 alarm for a relative time setting (Alarm NAP). Press Alarm on the remote control to enter this menu directly.
- The first two alarms are similar to the normal alarm. Turn on the radio, then set the time and set it alarms every day, once or every specific day of the week. Choose Sound to set the sound to Beep, Melody or Radio.
Note that the alarm source is from the preset Internet radio station if the Alarm Sound is set to be Radio. It can only set one same IR/FM station for Alarm 1 and Alarm 2. When it reaches the alarm time, the unit connects to the - Internet if the default network is available. Therefore there may be some short delay for the radio alarm to go of.
- If no network is connection in one minute, the alarm will change to Melody automatically.
- After Alarm NAP is set, it will go off once in 5/10/20/30/60/90/120 minutes depending on which choice you have set. You may choose Alarm Volume to configure the volume of the alarms.
- When the alarm(s) is/are set, there will be a clock icon at the top of the display.
The clock icon with alarm time will also clearly display on the standby mode screen.
- During the alarm you can enter the snooze mode by pressing snooze. The alarm will go of again in 5 minutes. Press other keys to stop the alarm.
Language
Select the OSD language: English, German, Spanish, French, Portuguese, Italian
Dimmer
Configure the brightness of the backlight on the display.
- Select Standby to set the brightness of backlight in standby mode, and select Active to set the brightness in operation mode.
- Choose Dimmer Timer to set the duration of the radio backlight when you are not controlling it.
Power Management
- Configure to go to standby mode automatically when in the menu or/and without Wifi signal.
- Choose the power management timer (5/15/30mins) to set the duration of the radio to switch standby mode automatically when you are not controlling it.
- Choose "Turn off" to ignore the power management function.
Sleep Timer
Turn off or set the sleep time of 15/30/60/90/120/150/180 minutes. Once the time is set, there will be a bed icon with remaining minutes at the top right corner and device will go to standby in the chosen time-period. Press Sleep on the remote control as a shortcut of this function.
Buffer
Configure the buffer time of the music playback, 2/4/8 seconds.
Weather
- The device is able to display current weather information in the standby mode.
Turn on Standby Display and set the temperature unit (°C or °F) to get the weather displayed in the standby mode. - When it is turned on, the current time and the current weather will display in alternative 10 seconds.
FM
Choose Mono/Stereo and select the FM broadcast band (87.5 - 108.0 MHz).
Local Radio Setup
-
There is a shortcut Local Radio under Internet Radio so that you can easily go to the station list based on your location.
-
You may use Manual Setup to pick your location, or let the system Auto Detect your current location. The system detects the location according to the IP address of your connected network.
-
Press Local Station to enter this local radio list directly.
Playback Setup
Select the playback mode of media center - Off (no repeat or shuffle), Repeat all, Repeat one, or Shuffle.
DLNA Setup
Default device name for DLNA is device. You may rename it for DLNA setup on the PC or mobile.
Equaliser
- Default equalizer is Flat, you may change it to Normal, Flat, Jazz, Rock, Movie, Classical, Pop, or News.
- Press EQ on the remote control to swap among the EQ mode for shortcut.
Resume When Power On
The system is programmed to resume internet radio playback if you were listening to internet radio or media center before switching off the unit. If you choose to turn this setting off, the system will remain in the main menu when switching on the unit.
Software Update
Update software. If there is an updated software version on the server, the system will notify you when you return to the main menu.
Reset
- Restore the default settings.
- After the device is reset, the system will move to the Language setting menu. And it will automatically turn to Network setting menu once the OSD language is selected.
My mediaU
Display and playback your own mediaU station list on the mediaU server. Set your account first.
To activate your own station list, follow the steps below:
- Access http://www.mediyou.net/;
- Join my mediaU membership;
- Login to the website;
- Enter the wireless MAC addresses of device to the mediaU website. This information can be obtained in Information Center > System information > Wireless Info;
If it is successfully configured, you are able to save and view your own medialU station playlist(s).Username and password are not required to enter to device.
- If there are different accounts stored in device, you can choose the one you currently use under Configuration menu.
On the website, you may save stations to Favourite Station, set Favourite Location/ Genre and My Local City, or add stations manually. The stations can be viewed from My MediaJU mode on device.
Internet Radio
When playback has started, the bit rate and the format of the station will display on the now playing screen.
My Favourite
- List of favourite preset stations. The list supports 250 favourite entries including station and folder.
- During the station playing screen, press and hold Preset on the remote control to save the station as my favourite. You may replace the previous saved station to the new one.
If the selected station has been saved, you cannot save it again. - The saved stations are shown under this menu. You may also press Preset to enter the saved station list.
Under the preset station list, move to your station, press Select to listen.

AudioSonic
Instruction Manual
Radio Station/Music
The stations are categorized into Global Top 20, Genre and Country/Location. Australia, Canada, United Kingdom and the USA.
- Enter to continue the subcategories and choose the station to listen to.
- For each station, press Select to play directly. You may press > to enter its submenu – you can Add to Favourite, Auto Scan, Play or Use as Alarm Sound (if you chose internet as alarm sound in alarm configuration).
- Press Info to view the display information of the playing station.
History
- A list of stations previously listened to. It can save up to 10 history stations.
- For each station, press Select to play directly. You may press > to enter its submenu – you can Add to Favourite, Auto Scan, Play or Use as Alarm Sound.
Add new radio station
The added stations will be stored in My Favourite. Note that the maximum character of the station name is 250.
MEDIA CENTER
UPnP
- If you have set up shared media, you should see the shared media from UPnP.
- If you have more than one computer sharing media, the alternatives are listed. SELECT the shared media you want to play.
- Press | < < / > > | on the remote control to play previous/next music track,press > || to stop or play.
- Press Info to view the display information of the playing track. Tips: The radio can only read the track with the file name less than 40 characters. And the characters should be in European language. If you encounter failure of reading the track under UPnP mode, you may try to rename the file. However, if the track is still unable to play, you can try converting the file to different formats.
My Playlist
You can create a playlist of favourite music from UPnP. When playing the music, press and hold Select to save it into My Playlist.
Clear My Playlist
You can remove all the saved music under My Playlist.
FM
- FM radio mode receives analogue radio from the FM band. Press < / > to search FM station. The frequency display starts to run up as device scans the FM band. It stops when it has received a station.
- You may press < / > on the remote control to tune station manually. Each step moves 0.05MHz.
- Press and hold the PRESET on the remote control to save the station.
- You can save up to 20 stations. Press PRESET, then press < / > on the remote control to choose the saved station. Alternatively, you can let the system scan ALL stations for you by pressing OK, The searched stations will automatically be stored in preset station list.
AUX IN
Aux in mode plays audio from an external source such as an MP3 player.
To play audio with Aux in mode:
- Turn the volume low on both device and, if adjustable, the audio source device.
- Connect the external audio source to the Aux in 3.5mm stereo socket.
- Either press MODE until the display shows AUX IN or select AUX in under Main menu.
- Adjust the volume of device (and, if necessary, the audio source device) as required.
INFORMATION CENTER
Weather Information
- There are weather information and forecasts for 2000 cities. Select the country and then the city for the weather details. Press < / > to see the weather forecasts.
- It is possible to display the weather information on the standby mode. On the weather information page, press Select to set the city to be displayed in the standby mode.
Financial Service
View the stock index from around the world.
System Information
Check out the version of the system, and the details of connected network. The information includes MAC address which you are required to fill in with registration of my mediaU membership.
TROUBLESHOOTING
| Problem Solution | |
| The device does not switch on. | Check if the power adaptor is connected properly. The device may malfunction when used in areas with strong radio interference. The device will work properly again once there is no more interference. |
| No sound. • Turn on the sound as it may be muted • Increase the volume. | |
| No network connection can be established. | Check the WLAN function. Try to set an IP address at the device. Activate the DHCP function on the router and make the connection again at the device. A firewall is activated on the network - set the respective program in such a way that access is possible. Reboot the unit to try again. |
| WLAN connection cannot be established. | Check the availability of WLAN network on the access point. Place the device closer to the router. Make sure the WEP/WPA password is correct. |
| Problem Solution | |
| No station is found. Check the network as well as the access point and firewall.The station may not be available currently, try it again later or select another station.The link of the station is changed or the station no longer transmits - ask the provider for information.The link of a manually added station is not correct, make sure it is correct and re-enter if needed. | |
| Noise in FM mode. Check/move the FM antenna.Move the radio. | |
| Alarm does not work. Switch on the alarm.When there is no sound, refer to the solutions of "No sound".The source of alarm was set to a station but there is no network connection. Change the source of alarm or reconfigure the connection. | |
| Unable to do DLNA streaming. Check the connection of the network, both devices need to be in the same network; and test if the network is in good condition.Make sure the settings on your device are correct. | |
| System freezes suddenly. The radio is overloaded, reboot the unit.The device may malfunction when used in areas with strong radio interference. The device will work properly again once there is no more interference. |
GUARANTEE
- This product is guaranteed for 24 months granted. Your warranty is valid if the product is used in accordance to the instructions and for the purpose for which it was created. In addition, the original purchase (invoice, sales slip or receipt) is to be submitted with the date of purchase, the name of the retailer and the item number of the product.
For the detailed warranty conditions, please refer to our service website: www.service.tristar.cu

GUIDELINES FOR PROTECTION OF THE ENVIRONMENT
This appliance should not be put into the domestic garbage at the end of its durability, but must be offered at a central point for the recycling of electric and electronic domestic appliances. This symbol on the appliance, instruction manual and packaging puts your attention to this important issue. The materials used in this appliance can be recycled. By recycling of used domestic appliances you contribute an important push to the protection of our environment. Ask your local authorities for information regarding the point of recollection.
SUPPORT
You can find all available information and spare parts at service.tristar.eul
VEILIGHEIDSWAARSCHUWINGEN
OVERZICT APPARAATFUNCTIES
Wireless Network Configuration
Draadloze Netwerkconfiguration
Wireless Network Configuration
CENTRE D'INFORMATIONS
Infos meteor
Wireless Network Configuration
Wireless Network Configuration
NAP Alarm (Turn Off)
Alarm Volume

1/4

Wireless Network Configuration
WYGLAD I OPIS CZESCI

Wireless Network Configuration
CENTRUM INFORMACYJNE
Rete wireless (WPS PBC)
Wireless Network Configuration
Wireless Network (WPS PBC)
Manual Configuration
Check Network when Power On

1/4

Wireless Network (WPS PBC)
NAP Alarm (Turn Off)
Alarm Volume

14
Add new radio station
- De tillagda stationema sparas i My Favourite. Notera att maximal antal tecken for stationismnet ar 250.
MEDIA CENTER
UPnP
Wireless Network Configuration
Wireless Network (WPS PBC)
Manual Configuration
Check Network when Power On

1/4
Konfiguración bezdrotovej siete
- AudioSonic
- APPEARANCE AND PARTS DESCRIPTION
- GETTING STARTED
- NETWORK REQUIREMENTS
- DEVICE FUNCTIONS OVERVIEW
- Configuration
- Manage my mediaU
- Network
- Wireless Network Configuration
- Wireless Network (WPS PBC)
- Manual Configuration
- When you Select manual setting for wired connection, the followings have to be entered:
- Check Network when Power On.
- Date & Time
- Alarm
- Language
- Dimmer
- Power Management
- Sleep Timer
- Buffer
- Weather
- FM
- Local Radio Setup
- Playback Setup
- DLNA Setup
- Equaliser
- Resume When Power On
- Software Update
- Reset
- My mediaU
- Internet Radio
- My Favourite
- Radio Station/Music
- History
- Add new radio station
- MEDIA CENTER
- UPnP
- My Playlist
- Clear My Playlist
- AUX IN
- INFORMATION CENTER
- Weather Information
- Financial Service
- System Information
- GUARANTEE
- GUIDELINES FOR PROTECTION OF THE ENVIRONMENT
- SUPPORT
- VEILIGHEIDSWAARSCHUWINGEN
- OVERZICT APPARAATFUNCTIES
- Draadloze Netwerkconfiguration
- CENTRE D'INFORMATIONS
- Infos meteor
- NAP Alarm (Turn Off)
- Alarm Volume
- WYGLAD I OPIS CZESCI
- CENTRUM INFORMACYJNE
- Rete wireless (WPS PBC)
- Konfiguración bezdrotovej siete
Brand : AudioSonic
Model : RD8520
Category : Radio