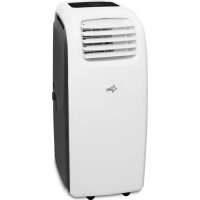
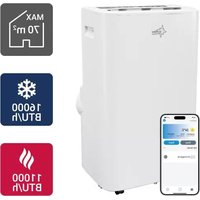
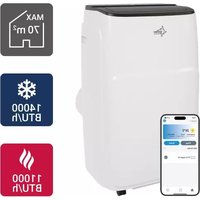
USER MANUAL Klimatronic Transform 9000 SUNTEC
© 2020 KLIMATRONIC® TRANSFORM Eco R290
Safety Precautions
This appliance can be used by children aged from 8 years and above and persons with reduced physical, sensory and mental capabilities or lack of experience and knowledge if they have been given supervision or instruction concerning use of the appliance in a safe way and understand the hazards involved. Cleaning and user maintenance shall not be made by children without supervision. Children of less than 3 years should be kept away unless continuously supervised.
Children aged from 3 years and less than 8 years shall only switch on/off the appliance provided that it has been placed or installed in its intended normal operating position and they have been given supervision or instruction concerning use of the appliance in a safe way and understand the hazards involved. Children aged from 3 years and less than 8 years shall not plug in, regulate and clean the appliance or perform user maintenance.
- Only use the unit in the household and for it's designed purpose.
- Before connecting the unit to the power supply, check that the indicated voltage corresponds with your home's voltage. Connect the unit to a properly grounded electrical outlet (220-240V, 50 Hz).
- The unit may not be connected to a defective outlet. Please make sure before using that the unit has been properly installed.
- The unit may not be used near
○ sources of fire or other heat sources
○ areas where oil is likely to splash
○ areas exposed to direct sunlight
o baths, a laundry, showers or swimming pools
- Never insert objects or your fingers into the air vents. Take special care regarding children.
- Always turn off the unit and remove the plug from the power outlet when you do not use the unit for a longer time, clean it, in case of malfunctions or when moving it. Always move the unit slowly.
- Do not operate or stop the unit by inserting or pulling out the power plug. Risk of electric shock and fire!
- Never cover the unit. Risk of fire!
- Please refrain from further usage if the power cord, power plug or the unit are damaged and contact your seller.
- Only operate the unit on a flat and stable surface.
- Never leave the unit unattended.
- Do not attempt to repair, disassemble or change the unit by yourself.
- The usage of accessories other than those of SUNTEC may cause harm.
- Never immerse the unit, cable and plug into water or other liquids to avoid electric shocks.
- Do not use a multiple socket.
- Do not use the unit in case of strange sounds, smells or smoke.
- Do not use extension leads.
- Do not put objects on top of the unit.
- Make sure that air inlet and outlet are never blocked.
- Improper use may damage the unit.
- Always empty the watertank before moving the unit.
- Never touch the power plug with wet hands.
- Suntec Wellness GmbH assumes no responsibility
for damage caused by improper use or noncompliance with the operating instructions.
- Do not drop the remote control.
- Do not expose the remote control to direct sunlight.
- The remote control should be placed about 1 meter or more away from TV or other electrical units.
- Never use the unit in an explosive or corrosive atmosphere.
Important. This portable local air conditioner must always be stored and transported in an upright position. In case of doubt, let the unit rest for at least 24 hours before starting it.
Technical Data
| MODEL | TRANSFORM
9.000 | TRANSFORM
10.500 | TRANSFORM
12.000 | TRANSFORM
14.000 |
| VOLT | 220-240V ~ 50Hz | 220-240V ~ 50Hz | 220-240V ~ 50Hz | 220-240V ~ 50Hz |
| POWER CONSUMPTION (W)
(Wb24 /Db35) | 2500W | 3000W | 3500W | 3800W |
| POWER CONSUMPTION (W)
COOLING | 1000W | 1149W | 1345W | 1538W |
| HEATING
(EN60335) | 1070W | 1217W | 1391W | 1520W |
| COOLING CAPACITY | 2500W | 3000W | 3500W | 3800W |
| HEATING CAPACITY
(Wb24 / Db35) | 2400W | 2500W | 3000W | 3200W |
| DEHUMIDIFICATION
CAPACITY (30, RH80%) | 50,4L/day | 50,4L/day | 60L/day | 72L/day |
| NOISE | 65dB | 65dB | 65dB | 65dB |
| AIR CIRCULATION [m³/h] | 400 | 420 | 450 | 450 |
| COOLING AGENT | R290 | R290 | R290 | R290 |
| REMOTE CONTROL | INCLUSIVE | INCLUSIVE | INCLUSIVE | INCLUSIVE |
| TIME SWITCH | 0-24 H | 0-24 H | 0-24 H | 0-24 H |
| DIMENSIONS (mm)
WXDXH | 320x580x770 | 320x580x770 | 320x580x770 | 320x580x770 |
| NET WEIGHT | 33,3kg | 33,6kg | 34,5kg | 34,6kg |
Packing list
| Components | Description | Amount |
| Main component portable | local air conditioner | 1 |
| Exhaust hose adapter | Exhaust hose | 1 |
| Window kit | | 1 |
| Remote controls | | 1 |
| Drainage hose | | 1 |
Place the unit in the correct upright position before unpacking. Cut the packing straps and lift the carton up. Hold the unit by the handles and lift it away from the packaging material. Install the exhaust hose prior to operation, see "exhaust hose installation".
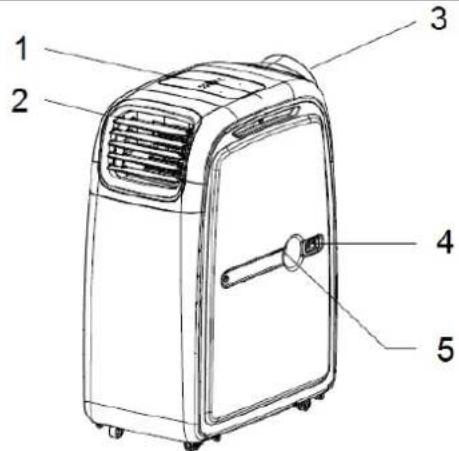
Parts description
-
Control panel
-
Drainage hole
-
Air outlet
6.Filter
-
Exhaust hose connection
-
Air inlet for cold air
-
Comfort S Control Kit connection
-
Air inlet for hot air
Exhaust hose installation
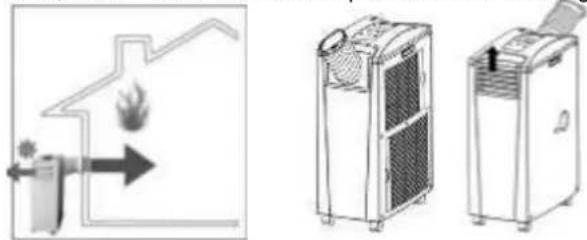
- Place the unit on a flat surface near a power socket, but at least 50cm between the filter side and other objects. Keep the exhaust hose straight. For optimal functionality, do not pull the exhaust hose longer than 40cm to ensure that the warm air inside the exhaust hose can leave the room quickly (see pic.1).
- Connect the exhaust hose adapter with one end of the exhaust hose by turning and fix the other end at the unit's exhaust hose connection, also by turning.
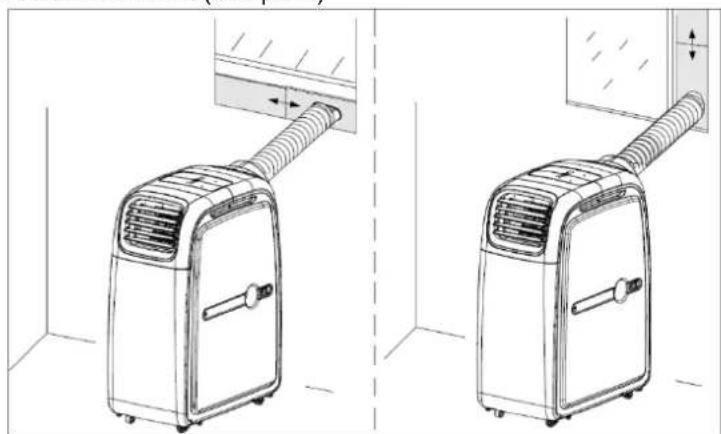
Depending on your type of window, insert the window kit horizontally or vertically into your window. Lead the exhaust hose through the hole at the window kit (see pic.2)
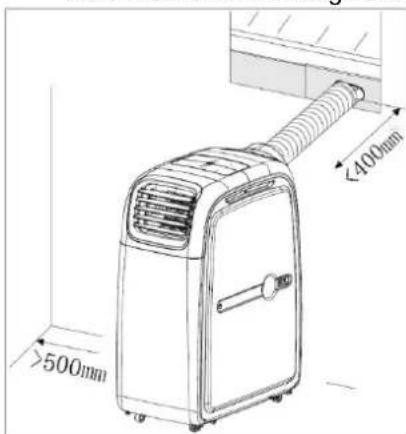
Pic. 1
Operation
After switching on or switching over, the fan runs. The compressor and cooling capacity start as soon as the set temperature in cooling mode is lower than the room temperature. During heating mode the compressor and heating capacity start as soon as the set temperature is higher than the room temperature.
- To not damage the compressor, wait at least 3,5 minutes before turning on the unit.
- Operating voltage: 220-240V\~, 50Hz
Control panel:
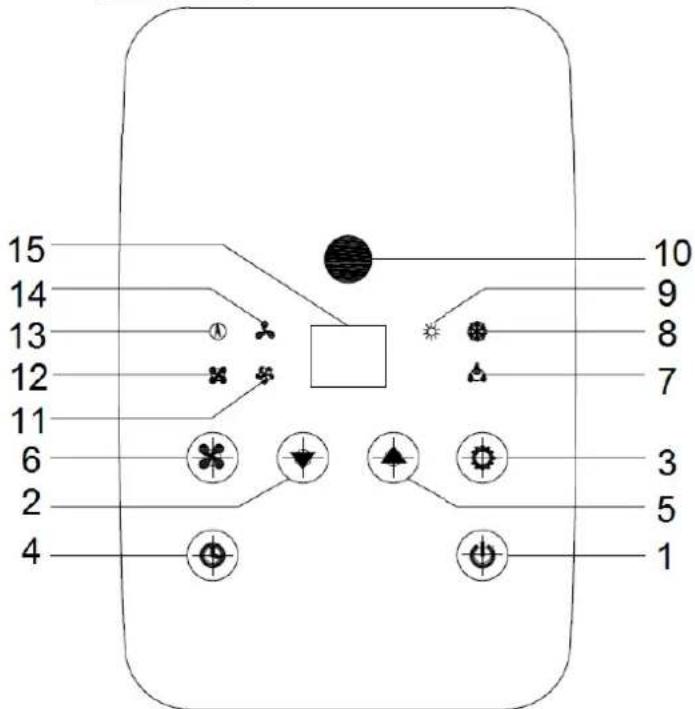
- On/Off (Power)
- Temperature - ( DOWN )
- Operation mode (MODE)
- Timer("TIMER")
- Temperature+ (nUPu)
- Ventilation speed ("SPEED")
Indicating lights operation modes:
- Dehumidification
- Cooling
- Heating
- Signal receiver remote control
Indicating light ventilation speeds:
- Medium
- High
- Auto mode
- Low (Low Mode)
-
LED-display
-
Remote control:
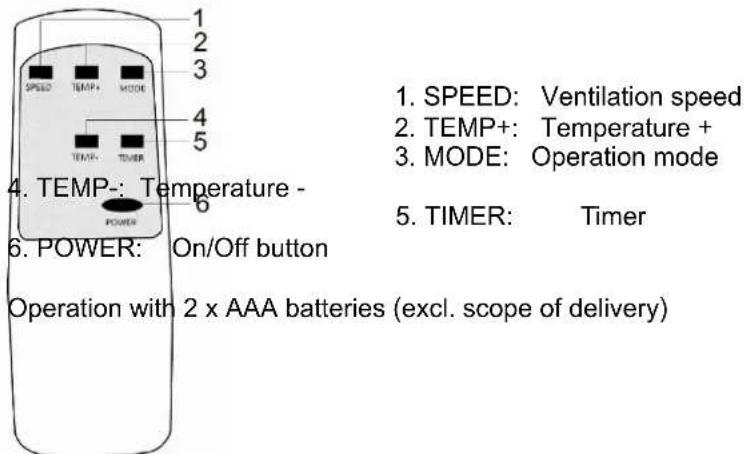
Environmental temperature for cooling function: 18°C - 35°C
Environmental temperature for heating function: 15°C - 25°C
-
Make sure that the exhaust hose is installed properly before operation, then plug in the unit, but do not use a multiple socket. Press "POWER" to turn on the unit. When pressing the button again, the unit will enter the standby mode.
-
LED display:
The LED display indicates the set temperature in ° C or the set timer. Possible error codes are also shown on the LED display.
Operation mode cooling:
- When the refrigeration function is carried out, the exhaust hose should be placed outside the window so that the hot air can be discharged.
Press "MODE" until the indicating light for cooling lights up.
Press the buttons "UP" und "DOWN" to adjust the desired room temperature between 17°C and 30°C .
For optimal cooling, make sure that curtains are closed to avoid direct sunlight entering the room. Ensure that the unit is not placed near heat sources.
Operation mode heating:
Press "MODE" until the indicating light for heating lights up.
Press the buttons "UP" und "DOWN" to adjust the desired room temperature between 15°C and 25°C .
Press the button "SPEED" to adjust the ventilation speed between low, medium, high and auto mode. The according speed levels are indicated by the indicating lights at the control panel. At the lowest ventilation level, the unit is operating in "Low Mode" with a reduced noise level.
o Note: During dehumidifying function the ventilation speed cannot be adjusted and stays at low speed.
- Timer for turning on the unit:
Press "TIMER" while the unit is in standby mode and set the desired time at which the unit shall turn on by using the buttons "UP" and "DOWN" between 0 and 24 hours.
- Select the required function (cooling, heating, dehumification) and set the required temperature.
- When the set time has expired, the unit starts automatically.
If you press "POWER" before the time has expired, the time programming is deleted and the unit switches back on.
- Timer for turning off the unit:
Press "TIMER" while the unit is operating and set the desired time at which the unit shall turn off by using the buttons "UP" and "DOWN" between 0 and 24 hours.
After the flashing of the number of hours on the LED has stopped, you can select the required function (cooling, heating, dehumification) and the required temperature.
- When the set time has expired, the unit turns off automatically.
If you press "POWER" before the time has expired, the time programming is deleted and the unit turns off.
Operation mode dehumidifying:
o Close all doors and windows during this operation mode to ensure no additional humidity will enter the room. The exhaust hose will not be required in this mode.
Press "MODE" until the according indicating light lights up. The display shows "dH".
The ventilation speed is set as "LOW" automatically.
Water tank:
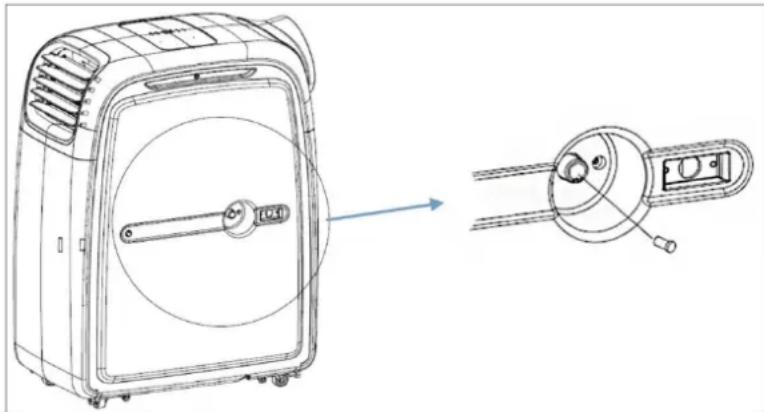
When the water tank is full the codes E2 in operation modes dehumidifying and cooling and E4 in operation mode heating will be shown at the LED display. The compressor stops working. Remove the plug from the drainage hole and let the water drain with a drain hose. (see pic.3). Close the drainage hole with the plug. The corresponding code will disappear and the unit will operate again.
Pic. 3
Automatic evaporation and drainage of condensed water:
The machine can automatically evaporate condensing water and drain out of the exhaust hose. Please ensure that the plug is installed properly during operation mode cooling. In operation modes heating and dehumidifying the plug needs to be removed. Install a drain hose to drain the water (continuous drainage).
Additional notes cooling mode
We recommend starting the unit early in the morning on warm days to get a cool room.
This unit has a self-evaporation function for condensation water, so that it is normally not necessary to empty the water tank in cooling mode. The drainage hose need not be connected. Please make sure that the outlet is closed with the rubber cap during operation.
(This does not apply in the case of high air humidity. If the unit operates in cooling mode for a longer period and especially at a time of year with high air humidity, the condensation tank may be full. Error code "E2" will remind you to empty the water. In such a case, empty the water tank via the condensation water outlet. If continuous high air humidity is likely, it is recommended to drain the condensation continuously via the drainage hose.)
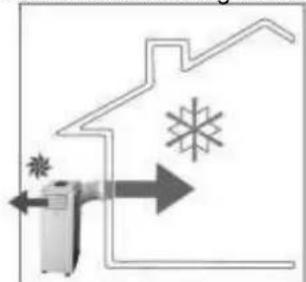
The TRANSFORM unit stands in the room to be cooled.
Connect the air hose and the air outlet grid to the TRANSFORM unit as displayed in the illustration; the air hose connection piece and air outlet grid need to be exchanged.
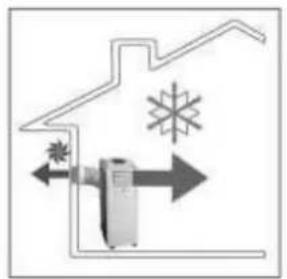
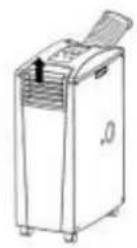
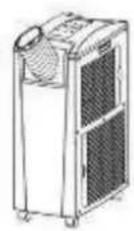
The warm extract air must be emitted from the room via the air hose. This can be executed e.g. via a tilted window, a door or wall aperture. Make sure that no warm outside air can enter the room. For effective cooling, we recommend our selection of various accessories which reduce or prevent entry of warm air into the room.
Set the function to "COOLING". Set the target temperature using the temperature control. The settable temperature range is between 17°C and 30°C target temperature. The TRANSFORM unit must only be used in an ambient temperature of maximum 35°C .
The unit is outside the room to be cooled.
Connect the air hose and the air outlet grid to the unit as displayed in the illustration; the air hose connection piece and air outlet grid need to be exchanged.
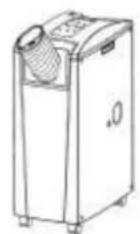
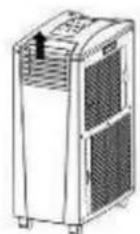
Place the unit in the shade if possible and in a cool place in order to increase efficiency and to avoid overheating. At an ambient temperature of over 35°C , the unit may deactivate. If this occurs continuously, we recommend you temporarily use the INDOOR OPERATION of the unit. We recommend that a drainage hose for condensation water be connected.
Set the function to "COOLING". The settable temperature range is between 17°C and 30°C . This can be set using the temperature control.
The air with high oxygen content cooled by the unit is led into the room via the air hose. This can be executed e.g. via a tilted window, a door or wall aperture. Make sure that no warm outside air can enter the room. We recommend that a drainage hose for condensation water be connected. For effective cooling, we recommend our selection of various accessories which reduce or prevent entry of warm air into the room, or via the remote control.
Using the "Comfort Control-S Kit" (see segment accessories) you can also control the unit from inside using the remote control.
Additional notes heating mode
On cold days it is recommendable to start the unit early in order to get a warm room.
For the heating function and to improve the heating effect and avoid lower temperatures (lower than 15°C ) we recommend you remove the rubber plug from the condensation water outlet and allow the condensation water to leak out of the unit using the drainage hose. However, the drainage hose does not have to be connected in the heating mode. Please make sure that the condensation water outlet is closed with the rubber cap during operation. In such a case, proceed analogously to the emptying of the water tank in the cooling function.
- The heating function of the unit must not be operated at a room temperature of more than 25°C or less than 15°C . The unit can also be operated with heating function, if the outside temperature is lower than 15°C . However, you must then ensure that the unit is operated inside and the room temperature is at least 15°C .
The unit is in the room to be heated.
Connect the air hose and the air outlet grid to the unit as displayed in the illustration; the air hose
connection piece and air outlet grid need to be exchanged.
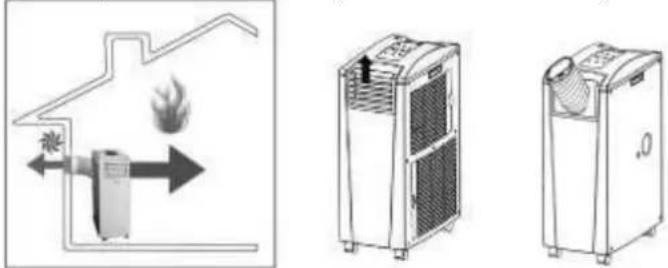
The cold extract air has to be led out of the room via the air hose. This can be executed e.g. via a tilted window, a door or wall aperture. Make sure that no cold outside air can enter the room. For effective heating, we recommend our selection of various accessories which reduce or prevent entry of cold air into the room.
Set the function to Heating". The settable temperature range is between 15°C and 25°C target temperature. You can set this using the temperature control.
The unit is outside the room to be heated. Outdoor operation is ideal for the transition period in which outside temperatures do no fall below 7°C . (If the outside temperature should however fall below 7°C continuously, we recommend indoor operation). Connect the air hose and the air outlet grid to the unit as displayed in the illustration, the air hose connection piece and air outlet grid need to be exchanged.
Set the function to "Heating". The settable temperature range is between 15°C and 25°C target temperature. You can set this using the temperature control.
The air with high oxygen content heated by the unit is fed into the room via the air hose. This can be executed e.g. via a tilted window, a door or wall aperture. Make sure that no cold outside air can enter the room. For effective heating, we recommend our selection of various accessories which reduce or prevent entry of cold air into the room.
Using the "Comfort Control-S Kit" (see segment accessories) you can also control the unit from inside using the remote control.
Cleaning
Always disconnect the appliance from the power outlet and let it cool before cleaning. Never immerse the appliance in water to prevent electric shocks.
- Wipe over the exterior of the appliance with a soft wet cloth and neutral detergent and then wipe dry with a dry cloth.
- Do not use gasoline or other chemicals to clean the unit.
- Clean the dust filter once every two weeks. To do so, pull out the dust filter at the unit's side with the help of the dust filter handle (see pic.4). Clean the dust filter with neutral detergent and about 40°C water. Rinse off any detergent, then let it air-dry before inserting it back into the unit.
Dust filter handle
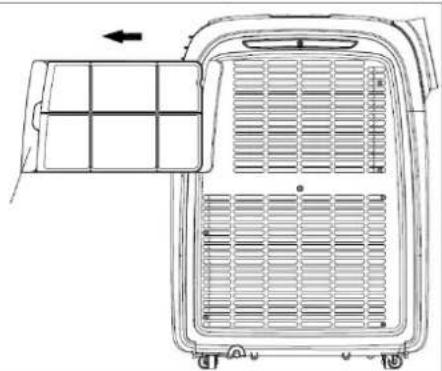
Pic. 4
If you do not use the unit for a longer time, empty the water tank completely (see segment "water tank"). Make sure that the unit is disconnected from the power supply and that it is clean. Keep the unit covered
Trouble shooting
| Problem | To check/Causes | Actions |
| 1. Unit is not starting. | Does the power supply have electricity? | Make sure to use a functioning power socket. |
| Did you plug it in? | Plug the unit in. |
| 2. It's not cool enough. | Are the doors and windows closed? | Close all doors and windows. The most effective and saving way of cooling is to not let any heat enter the room. |
| Are there heat sources in the room? | Remove the heat sources if possible. |
| Is the exhaust hose installed and not blocked? | Install the exhaust hose and make sure that the hose is clean and not blocked by any objects. |
| Did you set the ventilation speed? | Set the speed higher. |
| 3. Unit is too loud. | Is the ground even and flat? | Place the unit on an even and flat surface. |
| The sound comes from the flowing of the refrigerant inside the unit. | None, this sound is normal. |
| 4. The unit restarts frequently. | Is the voltage normal? | Determine if the voltage is maintained at rated voltage. |
| Is the exhaust hose curved? | Straighten the exhaust hose. |
| 5. The unit is not cooling/heating. | Did you let the unit rest at least 24 hours after moving it? | The unit must be placed upright for at least 24 hours after every transport. Otherwise the compressor may be damaged and there is no capacity. |
| 6. There's a smell coming from the unit when operating. | Production-related cause or incorrect storage of the device, e.g. in dusty places. | Odour can develop during initial start-up after a long period of non-use due to storage in unsuitable areas (e.g. dusty places). Let the device run for half a day. The smell disappears after a while. If there's intense smell, ventilate the room. |
| 7. How to increase the efficiency? | External circumstances exist which imay impact the efficiency of the unit. Room insulation, use of wall/window adapters, ratio of window space (solar radiation), operation of electrical units in the room, presence of several persons in the room. | You can increase the efficiency by adjusting the described factors accordingly. |
| 8. E0 Code | Room temperature sensor is not working. | Let the sensor be replaced. The unit can also work without a new sensor. |
| 9. E2/E4 Code | Water tank is full. | Empty the water tank. |
| 10. E3 Code | Coil sensor is not working. | Let the sensor be replaced. The unit can also work without a new sensor. |
Spare parts and accessories supply (fast convenient supply)
You can obtain spare parts and accessories for your TRANSFORM R290 unit from your local dealer.
And at our website
| Name EAN | Description | Drawing |
| Air-Block Klima-Sail 4250058312099 | Sail which can be used for all types of windows and doors. As for an external fly screen, it is fixed with Velcro and operated via a zip. The window or door can be closed at any time. | |
| Air-Extension-Kit 4250058312105 | A World First with which you can air-condition almost every corner of your house, and it doesn't matter where the local air conditioner is located. You can extend the extract air hose by 5 meters via a special propeller. | |
| TF Comfort-S Control Kit 4250058312037 | Sensor-controlled adapter for a wall or window boring with air lamellas, integrated operating panel and a LCD remote control for convenient and automatic control of the TRANSFORM in outdoor operation. | |
| Drainage-Kit 17/18d 4250058315120 | Drainage hose 4 rubber stoppers | |
| Transform Component-Kit 15 SR
4250058314925 | Exhaust hose
Exhaust hose adapter for the unit
Exhaust hose end adapter
Window kit
Drainage hose | |
| Remote Control Transform
Eco
4250058314963 | Remote control | |
ERP regulation
This high-quality single-channel portable air conditioning unit is in accordance with the rules and regulations of the European Union, in particular the new ERP Regulation 626/2011 to a "local air conditioner."
Refrigerant
(CE) N 842/2006: This local air conditioner contains the refrigerant R290. The amount of refrigerant is less than 1kg, and is in a closed cooling circuit. The coolant does have zero ozone depletion potential, but is a so-called greenhouse gases under the Kyoto Protocol and may thus contribute to global warming, if it is released to the atmosphere. Therefore, only trained technicians with refrigerant certificate make a filling or emptying. Your local Suntec air conditioner does not have to use if used properly and undamaged coolant circuit can be refilled with refrigerant.
TRANSFORM 9.000 Eco R290: R290, GWP: 3, 160g = 0,00048t CO2e
TRANSFORM 10.500 Eco R290: R290, GWP: 3, 220g = 0,00066t CO2e
TRANSFORM 12.000 Eco R290: R290, GWP: 3, 215g = 0,000645t CO2e
TRANSFORM 14.000 Eco R290: R290, GWP: 3, 235g = 0,000705t CO2e
In case of complaint
- You can claim the device within 24 months from date of purchase (receipt).
- A free replacement or repair will be excluded from prior improper product handling.
Defects in wear parts, consumables, as well as cleaning, maintenance or replacement of said parts are therefore with costs.
If you want to make a complaint, please bring the entire device in its original packaging and with proof of purchase to your dealer. For a timely and convenient service register, visit our website www.suntec-wellness.de and learn more.
- Without a proof of purchase, generally there will be no repair or replacement.
- In the event that the complaint case is analogous to our terms of service, all defects of the device or its accessories due to material or manufacturing defects will be eliminated by repair or, at our discretion, replacing the unit.
- The damage of accessories does not automatically lead to a free exchange of the whole device. In these cases, please contact your dealer. Glass breakage, or breakage of plastic parts are always to charge.
The dealer or repair service can perform the repair after the expiration of warranty against charge.
Note concerning protection of environment
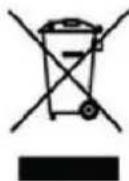
This product must not be disposed of via normal household waste after its service life, but must be taken to a collection station for the recycling of electrical and electronic devices. The symbol on the product, the operating instructions or the packaging indicates such disposal procedures. The materials are recyclable in accordance with their respective symbols. By means of re-use, material recycling or any other form of recycling old appliances you are making an important contribution to the protection of our environment.
Please ask your local council where your nearest disposal station is located.
As part of our extended producer responsibility, this product is indicated in accordance to the European Directive 2012/19/EU on Waste Electrical and Electronic Equipment (WEEE). The aim is to avoid, reduce, and environmentally friendly disposal of electronic waste. Please help actively to protect the environment and dispose electronic waste through local collection points. The packaging and this manual can be recycled.
The device meets the essential health and safety requirements of the European Union. The EC declaration of conformity is the basis for CE marking this unit. With publication of this manual supersedes all previous their validity. SUNTEC, SUNTEC Wellness, KLIKATRONIC and the Sun-Logo are registered trademarks. © 2020/01 SUNTEC WELLNESS GMBH. Liability is excluded for all printing errors and omissions.
© 2020 KLIMATRONIC® TRANSFORM Eco R290
SUNTEC WELLNESS GMBH / HOLZSTRASSE 2 / 40 221 DUSSELDORF / GERMANY
Précautions de suture
KOELEN IN INDOOR-WERKING
KOELEN IN OUTDOOR-WERKING
TOPENÍ V REŽIMU OUTDOOR
For this appliance we assure 24 months warranty.
During the 24 months warranty we guarantee to repair your appliance free of charge or to provide your seller the spare parts free of charge if the appliance fails to work due to production failure.
Other claims are excluded from this warranty. We will not be liable for any defects caused by acts of nature, improper use, negligence of the instruction manual, damage from continuous use and damages during transportation.
This warranty card is only applicable with the according invoice.
In case of service please bring your purchased product to your seller.
Product name:
Serial number:
Name of buyer:
Date of purchase:
Stamp and signature of seller:
Manufacturer:
Suntec Wellness GmbH
Holzstraße 2
40221 Dusseldorf
Germany