PS 300 EQPlus - Scie FESTOOL - Free user manual and instructions
Find the device manual for free PS 300 EQPlus FESTOOL in PDF.
Download the instructions for your Scie in PDF format for free! Find your manual PS 300 EQPlus - FESTOOL and take your electronic device back in hand. On this page are published all the documents necessary for the use of your device. PS 300 EQPlus by FESTOOL.
USER MANUAL PS 300 EQPlus FESTOOL
Original operating manual 11
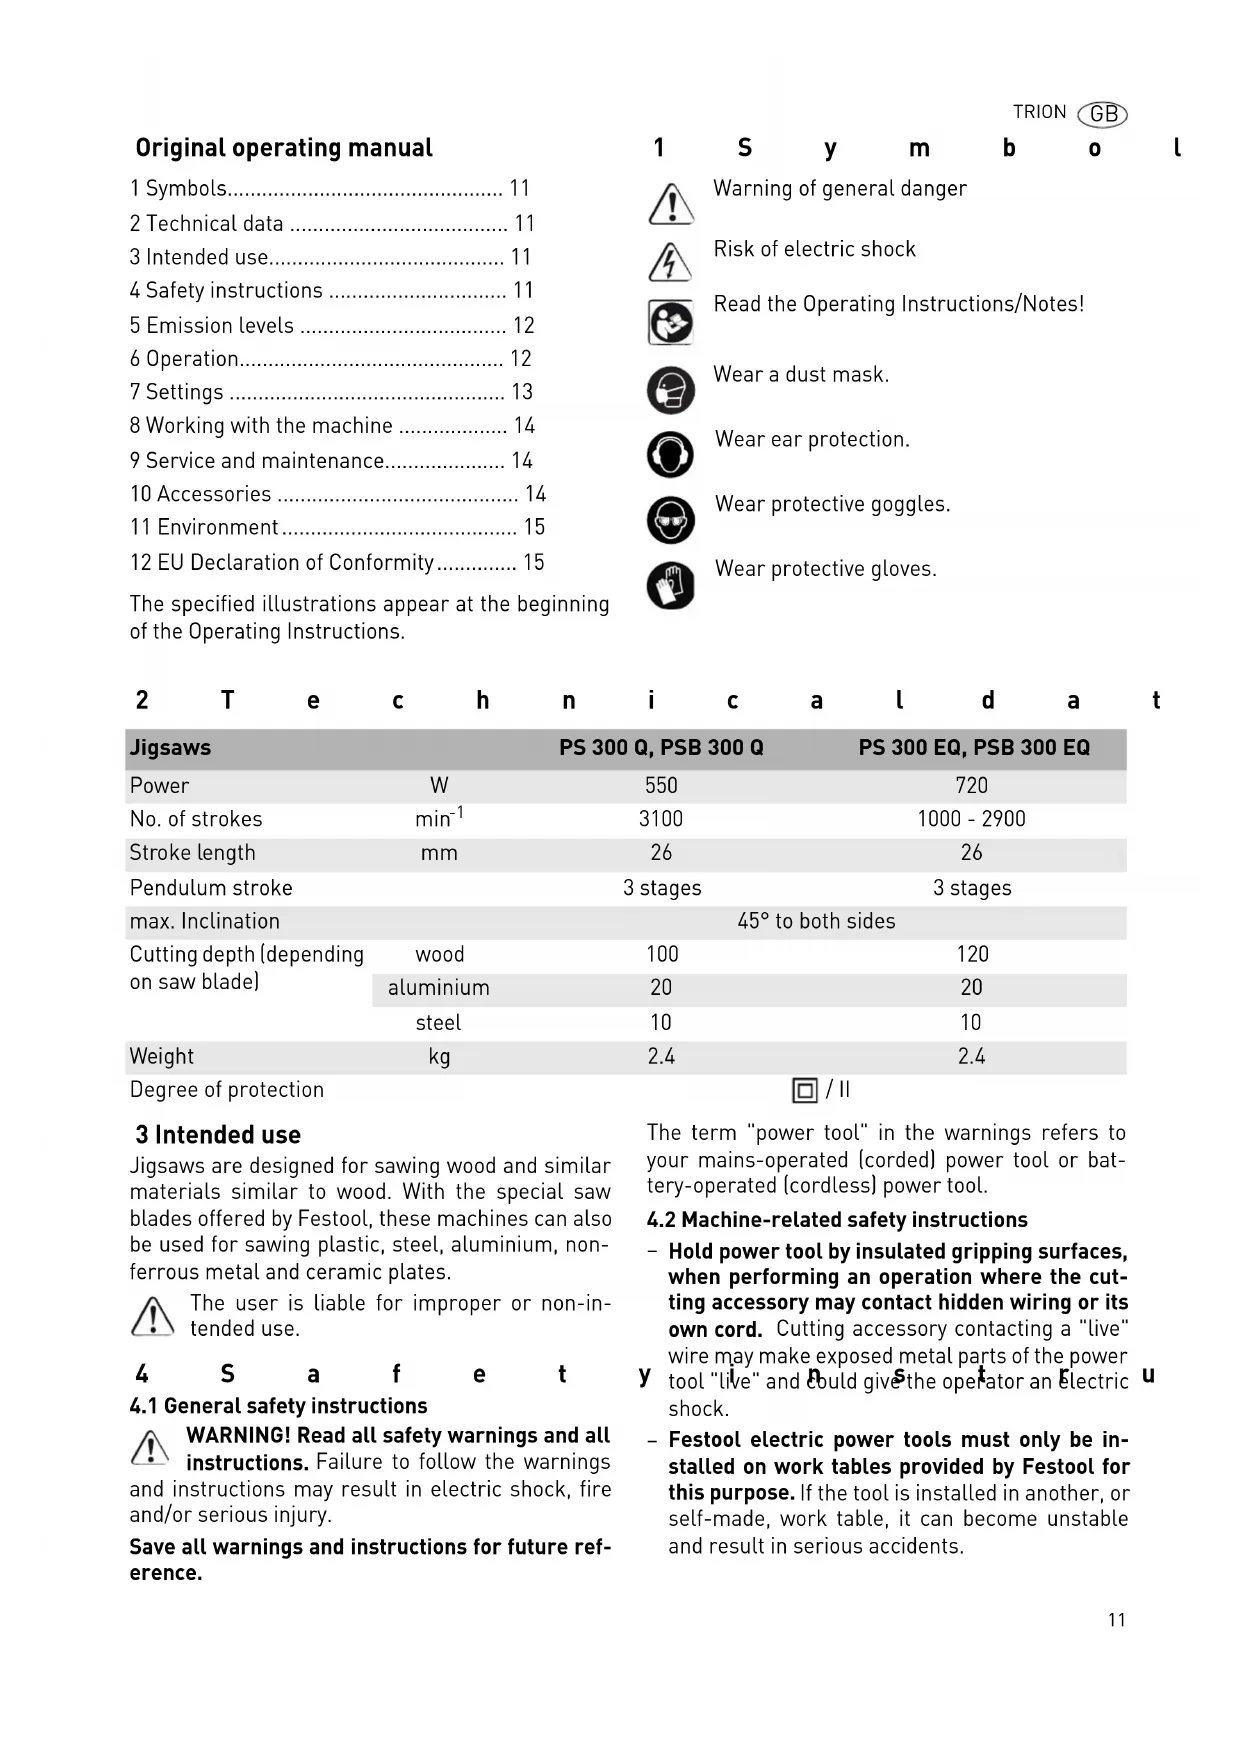
GB Original operating manual
The specified illustrations appear at the beginning
of the Operating Instructions.
Jigsaws are designed for sawing wood and similar
materials similar to wood. With the special saw
blades offered by Festool, these machines can also
be used for sawing plastic, steel, aluminium, non-
ferrous metal and ceramic plates.
The user is liable for improper or non-in-
4Safety instructions
4.1 General safety instructions
WARNING! Read all safety warnings and all
Failure to follow the warnings
and instructions may result in electric shock, fire
and/or serious injury.
Save all warnings and instructions for future ref-
The term "power tool" in the warnings refers to
your mains-operated (corded) power tool or bat-
tery-operated (cordless) power tool.
4.2 Machine-related safety instructions
Hold power tool by insulated gripping surfaces,
when performing an operation where the cut-
ting accessory may contact hidden wiring or its
Cutting accessory contacting a "live"
wire may make exposed metal parts of the power
tool "live" and could give the operator an electric
Festool electric power tools must only be in-
stalled on work tables provided by Festool for
If the tool is installed in another, or
self-made, work table, it can become unstable
and result in serious accidents.
8 Working with the machine 14
9 Service and maintenance 14
12 EU Declaration of Conformity 15
Warning of general danger
Risk of electric shock
Read the Operating Instructions/Notes!
Wear ear protection.
Pendulum stroke 3 stages 3 stages
max. Inclination 45° to both sides
Cutting depth (depending
Wait until the power tool stops completely until
The tool can become entangled
and lead to a loss of control of the power tool.
– Deformed or cracked saw blades and saw blades
with blunt or broken cutting edges must not be
– Always place the pendulum jigsaw on the work-
piece with the saw blade running.
– Wear suitable protection such as ear protection,
safety goggles, a dust mask for work which gen-
erates dust, and protective gloves when working
with raw materials and when changing tools.
– Always secure the workpiece in such a manner
that it cannot move while being sawed.
– Always connect the machine to a dust extractor
when work involves dust generation.
– Check the plug and the cable regularly and
should either become damaged, have them re-
placed by an authorised after-sales service
The following precautions are to be taken
when processing metals for safety reasons:
–Pre-connect a residual current circuit-
– Connect the machine to a suitable dust extractor.
– Clean tool regularly of dust accumulations in the
The typical values determined in accordance with
Vibration emission value a
(vector sum for three
directions) and uncertainty K measured in accor-
dance with EN 60745:
The specified emissions values (vibration, noise)
– are used to compare machines.
– They are also used for making preliminary esti-
mates regarding vibration and noise loads during
– They represent the primary applications of the
Increase possible for other applications, with other
insertion tools or if not maintained adequately. Take
note of idling and downtimes of machine!
Sound-power level L WA
Sound-power level L WA
Measuring uncertainty allow-
K = 3 dB CAUTION Operating noise
WARNING Unauthorised voltage or frequency!
The mains voltage and the frequency of the pow-
tions on the machine's name plate.
In North America, only Festool machines with
the voltage specifications 120 V/60 Hz may be
PS 300 EQ, PSB 300 EQTRION
GB Connecting and detaching the mains power cable
PS 300 Q, PS 300 EQ The power tool has a slide switch to switch the tool
on and off (I = ON, 0 = OFF).
PSB 300 Q, PSB 300 EQ The power tool have a push button switch
switch the tool on and off.
can be engaged to operate
in continuous mode. Press the switch again to re-
Remove fitted saw blade.
Insert new saw blade up to the stop in the saw
7.2 Adjusting three saw blade guide
The pendulum jigsaws have an additional hard
immediately above the workpiece
for a better guidance of the saw blade.
until the jaws almost rest against the saw blade.
The saw blade should still be able to be
7.3 Fitting the splinterguard
The splinterguard allows cuts with splinter-free
edges, even on the exit side of the saw blade.
With the tool switched off, fit the splinterguard
up to the saw blade,
switch the jigsaw on,
with the tool running, push the splinterguard in
until the splinterguard is flush with the front
edge of the base runner. Thereby the splinter-
The splinterguard must lie close to the saw
blade on both sides to ensure its reliable opera-
tion. Thus, a new splinterguard should be fitted
every time the saw blade is changed to ensure
7.4 Fitting the chip guard
The chip guard prevents chips from flying off and
improves the efficiency of the chip extractor.
Insert the chip guard
runner and chuck lever,
push back the chip guard with a slight pressure
until it catches in place.
Jigsaws can be connected to a dust extractor (hose
When working with suction units, always use a
splinterguard in order to prevent the suction
channels becoming blocked.
Insert the extractor adapter into the rear hole of
the base runner in so that the hook
to remove the extractor
7.6 Adjusting the base runner
The base runner can be swivelled to both sides by
up to 45° for bevel cuts.
Remove chip guard and splinterguard,
release locking screw
push base runner approx. 5 mm forwards,
set desired inclination according to the scale
tighten locking screw
The base runner can be moved back for sawing
Remove chip guard and splinterguard,
release locking screw
WARNING Risk of injury, electric shock
Always pull the mains plug out of the socket be-
fore performing any type of work on the ma-
WARNING Risk of injury, electric shock
Always pull the mains plug out of the socket be-
fore performing any type of work on the ma-
Dust can be hazardous to health. Always work
with a dust extractor.
Always read applicable national regulations be-
push base runner to rear position so that the
tighten locking screw
7.7 Adjusting the pendulum stroke
In order to process different materials with an opti-
mum feed movement the pendulum jigsaws have
an adjustable pendulum stroke. Select the desired
setting with the pendulum stroke switch
setting 0 = pendulum stroke off
setting 3 = maximum pendulum stroke
7.8 Adjusting the number of strokes
PSB 300 EQ You can regulate the number of strokes steplessly
between 1000 and 2900 min
. This enables you to optimise the
cutting speed to suit the material.
8 Working with the machine
8.1 Free hand according to the scribe mark
The triangular shape of the splinterguard
shows the cutting line of the saw blade and thus fa-
cilitates cutting to a scribe mark.
8.2 Plunge cutting without pilot drilling
The base runner must be in the front position for
plunge cuts in timber materials (basic setting, see
Place saw on the front edge of the runner.
Set saw to maximum no. of strokes and pendu-
lum stroke setting 3 and start the plunge cut
into the workpiece (Figure
9 Service and maintenance
Damaged safety devices and components must be
repaired or replaced in a recognised specialist
workshop, unless otherwise indicated in the oper-
To ensure constant air circulation, always keep the
cooling air openings in the motor housing clean and
The order numbers of the accessories and tools can
be found in the Festool catalogue or on the Internet
under "www.festool.com".
10.1 Festool guide system FS The use of the Festool guide system FS (Figure
)facilitates the production of straight and precise
cuts, particularly with material thicknesses up to
20 mm. The jigsaw is hereby placed in a guide stop
order no. 490031) and guided along the guide
rail in this. The guide stop has two adjustable limit
for a setting free from play. Use only
crossed saw-blades when utilising the guide stop.
We recommend Festool saw blade S 75/4 FSG.
Use the parallel guide (order no. 490119) to guide
the jigsaw parallel to the workpiece edge. The par-
allel guide can be fitted on both sides of the base
onto the base runner
through the clamping
clip from the side to the desired position,
Recommended settings of the pendulum
Hard and soft wood,chip board, wood
Wood core plywood, plywood, plastics 1 - 2
Aluminium, NF metals 0 - 2
Recommended number of strokes (adjusting
Hard and soft wood, wood core plywood,
Wood fibre boards 4 - 6
Ceramic, aluminium, NF metals 3 - 5
WARNING Risk of injury
Always secure the workpiece in such a manner
that it cannot move while being machined.
WARNING Risk of injury, electric shock
Always disconnect the mains plug from the
socket before performing maintenance work on
All maintenance and repair work which requires
the motor housing to be opened must only be
carried out by an authorised service workshop.TRION
The circle cutter (order no. 490118) can be used to
produce circular cuts with a diameter between 120
and 720 mm. The circle cutter can be fitted on both
sides of the base runner:
onto the base runner
through the clamping
clip from the side to the desired position,
in the rear bore hole of the
10.4 Festool CMS By fitting the jigsaws in the Festool Systems CMS
you end up with a semi-stationary bench-mounted
saw for profile cuts. Further information can be
fond in the CMS brochure.
10.5 Saw blades, other accessories
In order to saw different materials quickly and
cleanly, Festool offers saw blades for all applica-
tions that are specially designed for your Festool
Do not throw the power tool in your household
waste! Dispose of machines, accessories and pack-
aging at an environmentally responsible recycling
centre. Observe the valid national regulations.
European Directive 2002/96/EC stipulates
that used electric power tools must be collected
separately and disposed of at an environmentally
responsible recycling centre.
www.fest ool.com/reach
12 EU Declaration of Conformity
We declare under sole responsibility that this prod-
uct complies with the following directives and stan-
Head of Research, Development and Technical
(I = PÄÄLLE, 0 = POIS).
Vibrationsemission a
4.3 Metallbearbeiding